JVC KD-R841BT Manuel D'instructions
Table des Matières
Les langues disponibles
Les langues disponibles
Liens rapides
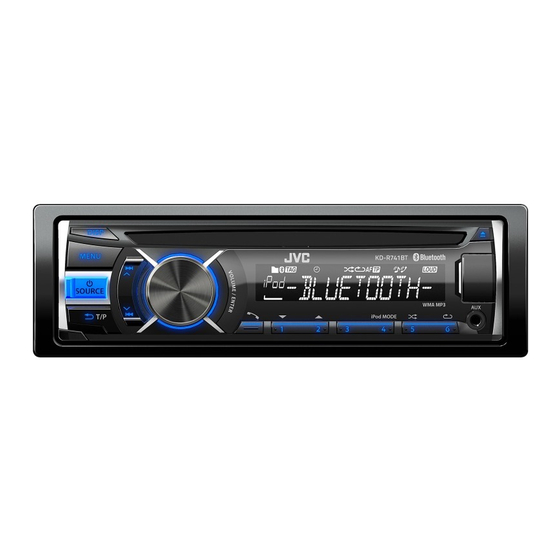
KD-R841BT / KD-R741BT
CD RECEIVER
INSTRUCTION MANUAL
RÉCEPTEUR CD
MANUEL D'INSTRUCTIONS
Please read all instructions carefully before operation to obtain the
best possible performance from the unit.
Veuillez lires les instructions attentivement avant d'utiliser l'appareil
afin d'obtenir les meilleures performances possibles de l'appareil.
ENGLISH
FRANÇAIS
GET0929-001A [E/EN/EU]
Chapitres
Table des Matières
Dépannage

Manuels Connexes pour JVC KD-R841BT


Sommaire des Matières pour JVC KD-R841BT
- Page 1 ENGLISH FRANÇAIS KD-R841BT / KD-R741BT CD RECEIVER Please read all instructions carefully before operation to obtain the best possible performance from the unit. INSTRUCTION MANUAL Veuillez lires les instructions attentivement avant d’utiliser l’appareil RÉCEPTEUR CD afin d’obtenir les meilleures performances possibles de l’appareil.
- Page 2 The marking of products using lasers Information on Disposal of Old Electrical and Electronic Equipment and The label is attached to the chassis/case and says that the component uses laser Batteries (applicable for EU countries that have adopted separate waste beams that have been classified as Class 1.
- Page 22 ÉCLAIRAGE • Si une erreur de disque se produit à cause de la condensation sur l’objectif laser, éjectez le disque et attendez que (KD-R841BT uniquement) l’humidité s’évapore. • La classe USB est indiquée sur l’appareil principal. Pour le voir, détachez la façade. (KD-R741BT uniquement) BLUETOOTH®...
-
Page 23: Fonctionnement De Base
(Doit être acheté séparément) Bouton de volume Attachez (tournez/appuyez) Fente d’insertion Fenêtre d’affichage Capteur de télécommande KD-R841BT (Ne l’exposez Pas à la lumière directe du soleil.) Détachez KD-R741BT Retirez la feuille d’isolant lors Comment réinitialiser de la première utilisation. Comment remplacer la pile Vos ajustements préréglés sont... -
Page 24: Prise En Main
Tournez le bouton de volume pour choisir [DEMO OFF], puis 2 Choisissez la zone pour le réglage. appuyez sur le bouton. KD-R841BT: BTN ZONE 1/ 2/ 3 / DISP ZONE / VOL ZONE (➜ 8) Appuyez sur MENU pour quitter. KD-R741BT: BUTTON ZONE / DISP ZONE 3 Réglez le niveau de luminosité... -
Page 25: Radio
RADIO Mise en service de l’attente de réception TA “ST” s’allume lors de Disponible uniquement pour les stations FM Radio Data System. la réception d’une émission FM stéréo avec Appuyez sur G T/P. un signal suffisamment L’appareil commute temporairement sur l’annonce d’informations routières (TA) (s’il fort. -
Page 26: Aux
RADIO Défaut: XX Utilisation d’un lecteur audio portable MONO S’affiche uniquement quand la source est FM. Connectez un lecteur audio portable (en vente dans le MONO ON: Améliore la réception FM mais l’effet stéréo sera perdu. ; MONO OFF: Annulation. commerce). -
Page 27: Cd / Usb / Ipod
Câble USB à partir de l’arrière de l’appareil (KD-R841BT uniquement) • iPod ou fichier JVC Playlist Creator (JPC) / JVC Music Control (JMC)* Sélectionnez le fichier souhaité à partir de la liste (PLAYLISTS, ARTISTS, ALBUMS, La source change sur USB FRONT, USB REAR ou... - Page 28 ÉCLAIRAGE CD / USB / iPod (KD-R841BT uniquement) Recherche de caractère (KD-R841BT uniquement) Si vous avez beaucoup de dossiers ou de plages/ fichiers, vous pouvez faire une recherche parmi eux rapidement à partir du premier caractère (A à Z, 0 à 9 et OTHERS).
-
Page 29: Bluetooth
Maintenez pressé L SOURCE pour mettre l’appareil sous tension. (non fourni). Cherchez et sélectionnez “JVC UNIT” sur le périphérique Bluetooth. “BT PAIRING” clignote sur l’affichage. • Pour certains périphériques Bluetooth, il se peut que vous ayez besoin d’entrer le code PIN Panneau arrière... - Page 30 Faire • Cet ajustement n’affecte pas le volume des autres sources. Réception d’un KD-R841BT: Appuyez sur le bouton de volume. (Zone verte) appel KD-R741BT: Appuyez sur ou sur le bouton de volume. Appuyez sur 1 ∞ / 2 5 pendant un appel.
- Page 31 RING COLOR KD-R841BT: 2 Tournez le bouton de volume pour choisir un numéro de téléphone, puis COLOR 01 — COLOR 29 (COLOR 06): La zone d’affichage change sur la appuyez sur le bouton pour appeler.
- Page 32 Stockage d’un contact en mémoire “PIN IS 0000” défile sur l’affichage. Vous pouvez mémoriser un maximum de 6 contacts. Cherchez et sélectionnez “JVC UNIT” sur le périphérique Bluetooth avant Appuyez sur 3 minutes. Tournez le bouton de volume pour choisir [RECENT CALL], [PHONEBOOK] ou Effectuez (A), (B) ou (C) en fonction de ce qui apparaît sur l’affichage.
- Page 33 : Affiche le nom de périphérique du téléphone/ l’arrière/vers l’avant la RM-RK52). audio/application. ; MY BT NAME: Affiche le nom de l’appareil (JVC UNIT). ; MY ADDRESS: Affiche l’adresse de cet appareil. ; BT VERSION: Affiche la version Bluetooth de cet appareil. Lecture répétée Appuyez répétitivement sur la...
-
Page 34: Réglages Audio
–06 à +06 (00) réglé sur [ON]. Q1.0/ Q1.25/ Q1.5/ Q2.0 (Q1.0) KD-R841BT: Vous pouvez accéder à cet élément directement après accéder au MIDDLE Fréquence: 0.5/ 1.0/ 1.5/ 2.5 kHz Défaut: (1.0 kHz) menu de réglage. Niveau: –06 à +06 (00) Si vous utilisez un système à... -
Page 35: Plus D'informations
KD-R741BT: 65 025 fichiers, 255 dossiers (255 fichiers par dossier y • Fichiers reproductibles: • JVC Playlist Creator et JVC Music Control, sont disponibles à partir des compris les dossiers sans fichiers pris en charge), et 8 hiérarchies. - Extensions de fichier: MP3 (.mp3), WMA (.wma), WAV (.wav)* sites web suivants: <http://www3.jvckenwood.com/english/car/... -
Page 36: Guide De Dépannage
GUIDE DE DÉPANNAGE Symptôme Remède Symptôme Remède “PAIRING FULL” apparaît. Le nombre de périphériques enregistrées a atteint la limite. Essayez de nouveau Le son ne peut pas être entendu. • Ajustez le volume sur le niveau optimum. après avoir supprimé un périphérique inutile. •... -
Page 37: Spécifications
(approx.) Sensibilité/Sélectivité 20 μV/40 dB 50 μV/— Taille du panneau KD-R841BT: 188 mm × 59 mm × 10 mm (approx.) KD-R741BT: 188 mm × 59 mm × 13 mm Système de détection du signal Capteur optique sans contact (laser semi-... - Page 38 Installation de l’appareil (montage encastré) Avertissement • L’appareil peut uniquement être utilisé avec une alimentation de 12 V CC, à masse négative. • Déconnectez la borne négative de la batterie avant le câblage et le montage. • Ne connectez pas le fil de batterie (jaune) et le fil d’allumage (rouge) au châssis de la voiture ou au fil de masse (noir) pour éviter les courts-circuits.
- Page 39 Connexions Fil de télécommande Liste des pièces pour Cordon de signal KD-R841BT KD-R741BT Le fil bleu/blanc du (non fournie) l’installation (non fournie) faisceau de fils D Sortie avant A Façade Sortie arrière/caisson de Sortie arrière/caisson de grave Amplificateur grave MIC (prise d’entrée microphone) (➜ 9) ( ×1 )
- Page 40 KD-R841BT/ KD-R741BT atitinka pagrindinius JVC KENWOOD declara que este KD-R841BT/ aux exigences essentielles et aux autres S tem JVC KENWOOD izjavlja, da je ta Direktyvos 1999/5/EB reikalavimus ir kitas KD-R741BT está conforme com os requisitos dispositions de la directive 1999/5/CE qui lui essenciais e outras disposições da Directiva...