Publicité

Les langues disponibles
  • FR

Les langues disponibles

  • FRANÇAIS, page 1

Liens rapides

MANUAL DE INSTRUCCIONES - MANUALE DI ISTRUZIONI
MANUAL DE INSTRUÇÕES - INSTRUKCJA OBSŁUGI
Chargeur / démarreur au plomb - Lood-zuuracculader/starter
Arranque/cargador de batería de ácido-plomo
Caricatore/dispositivo di avviamento per batteria al piombo-acido
Carregador/acumulador de arranque de bateria de chumbo-ácido
Prostownik / urządzenie rozruchowe do akumulatorów kwasowo-ołowiowych
FR: 1-6
NL: 7-12
PT: 31-36
PL: 37-42
MODE D'EMPLOI - GEBRUIKSAANWIJZING
INSTRUCTION MANUAL
Lead Acid battery charger/starter
Modèle : 2223453 / NO6764
DE: 13-18
GB: 43-49
ES: 19-24
IT: 25-30

Publicité

Table des Matières
loading

Sommaire des Matières pour NORAUTO 2223453

  • Page 1 Arranque/cargador de batería de ácido-plomo Caricatore/dispositivo di avviamento per batteria al piombo-acido Carregador/acumulador de arranque de bateria de chumbo-ácido Prostownik / urządzenie rozruchowe do akumulatorów kwasowo-ołowiowych Lead Acid battery charger/starter Modèle : 2223453 / NO6764 FR: 1-6 NL: 7-12 DE: 13-18 ES: 19-24...
  • Page 2: Consignes De Sécurité Importantes

    Pour usage à l’intérieur uniquement Conformité aux normes de sécurité appropriées Appareil de Classe I. Lire et comprendre en totalité la notice avant la mise en route ou toute opération d’entretien sur le mainteneur de charge Ne pas jeter les appareils électriques avec les déchets ménagers Porter obligatoirement une protection anti-bruit pour diminuer le niveau sonore CONSIGNES DE SÉCURITÉ...
  • Page 3: Préparation Pour La Charge

    PRÉPARATION POUR LA CHARGE Déterminez la tension de la batterie en vous référant au manuel du propriétaire de la voiture. S’il est nécessaire de retirer la batterie du véhicule pour la charger ou pour nettoyer les bornes, retirez toujours la borne mise à...
  • Page 4: Spécifications

    Connectez la pince de la borne POSITIVE (ROUGE) du chargeur à la borne POSITIVE (POS, P, +) de la batterie. Connectez la pince de la borne NÉGATIVE (NOIRE) du chargeur à la borne NÉGATIVE (NOIRE, N, -) de la batterie. Poussez la pince vers l’arrière et vers l’avant pour réaliser une bonne connexion.
  • Page 5: Préparation De La Charge / Du Démarrage

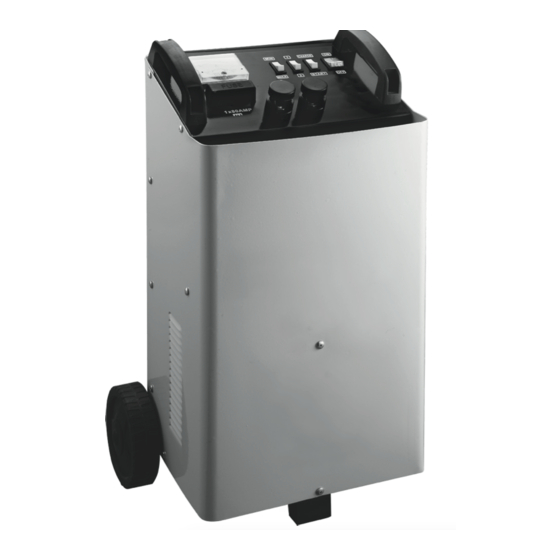
    PRÉPARATION DE LA CHARGE / DU DÉMARRAGE Bien que le chargeur/démarreur ait été assemblé en usine, un assemblage final sera nécessaire. NUMÉRO DE PIÈCE Essieu 3 vis 4 bagues de sécurité 2 moyeux 2 roues Support Posez le chargeur avec précaution. Alignez le pied avec les trois trous de dessous À...
  • Page 6: Procédure De Charge

    Capacité du moteur < 1 300 cc 5 - 15 Ah 15 - 30 Ah 35 - 45 Ah 60 - 110 Ah > 1 300 cc 45 - 65 Ah 45 - 65 Ah 60 - 110 Ah Diesel 60 - 90 Ah 60 - 90 Ah 60 - 110 Ah...
  • Page 7: Guide De Dépannage

    PROCÉDURE DE DÉMARRAGE Le démarrage du moteur nécessite une grande quantité de courant ce qui permet de chauffer les composants à l’intérieur. Les cycles de mise en marche/arrêt de ce produit DOIVENT être respectés. Le moteur qui nécessite un démarrage doit être en bon état mécanique, car un démarrage prolongé n’est pas possible. Lorsque vous essayez de mettre en marche des véhicules équipés de batteries de grande capacité...
  • Page 8: Belangrijke Veiligheidsinstructies

    Uitsluitend voor binnengebruik Conformiteit aan de gepaste veiligheidsnormen Apparaat van Klasse I. De handleiding lezen en begrijpen voor het opstarten of elke onderhoudsverrichting aan de acculader Elektrische apparaten niet weggooien bij het huishoudelijk afval Verplicht een gehoorbescherming te dragen om het geluidsniveau te verminderen BELANGRIJKE VEILIGHEIDSINSTRUCTIES WAARSCHUWING! Explosieve gassen.
  • Page 9 VOORBEREIDEN OM OP TE LADEN Raadpleeg de gebruikshandleiding van de auto om de spanning van de accu te bepalen. Als de accu uit het voertuig moet worden gehaald om te kunnen opladen of om de accuklemmen te reinigen, verwijder dan altijd eerst de massaklem van de accu.
  • Page 10: Specificaties

    Sluit de POSITIEVE (RODE) klem van de oplader aan op de POSITIEVE (POS, P, +) accupool. Sluit de NEGATIEVE (zwarte) klem van de oplader aan op de NEGATIEVE (ZWART, N, -) accupool. Draai de klem heen en weer om een goede verbinding te maken.
  • Page 11 HET OPLADEN/STARTEN VOORBEREIDEN Hoewel de oplader/starter in de fabriek is samengesteld, zal enige eindmontage nodig zijn. ONDERDEEL NR. NAAM Schroeven x 3 Borgringen x 4 Naven x 2 Wielen x 2 Steun Leg de oplader voorzichtig neer. Lijn de voet uit met de drie gaten aan de onderkant Gebruik een nr.2 kruiskopschroevendraaier.
  • Page 12 Capaciteit van de motor <1300 cc 5 - 15 Ah 15 - 30 Ah 35 - 45 Ah 60 - 110 Ah >1300 cc 45 - 65 Ah 45 - 65 Ah 60 - 110 Ah Diesel 60 - 90 Ah 60 - 90 Ah 60 - 110 Ah OPLAADPROCEDURE...
  • Page 13: Problemen Oplossen

    PROCEDURE VOOR HET STARTEN Het starten van de motor vereist een grote hoeveelheid stroom en zal de componenten binnenin verwarmen. Aan/uit-cycli van het starten van dit product MOETEN worden gevolgd. De motor die moet worden gestart, moet in een goede mechanische staat zijn, omdat lang starten niet mogelijk is. Wanneer er geprobeerd wordt om voertuigen te starten die zijn uitgerust met accu’s met grote capaciteit of in een extreem klimaat (koud), moet de accu ongeveer 15 minuten worden opgeladen om te voorkomen dat het apparaat een te hoge ampèrage krijgt en de netvoeding onderbreekt.
  • Page 14: Wichtige Sicherheitshinweise

    Nur zur Verwendung in Innenräumen geeignet. Konform mit den angemessenen Sicherheitsstandards Gerät der Klasse I. Lesen Sie die gesamte Bedienungsanleitung durch und verstehen Sie sie, bevor Sie das Gerät in Betrieb nehmen oder Wartungsarbeiten daran durchführen. Entsorgen Sie elektrische Geräte nicht mit dem Hausmüll. Das Tragen eines Lärmschutzes ist obligatorisch, um den Lärmpegel zu senken.
  • Page 15: Ladevorgang Vorbereiten

    LADEVORGANG VORBEREITEN Bestimmen Sie die Batteriespannung anhand der Bedienungsanleitung des Fahrzeugs. 10. Entfernen Sie die Batterie wenn nötig aus dem Fahrzeug, um sie zu laden oder die Pole zu reinigen. Entfernen Sie immer zuerst den geerdeten Batteriepol. Stellen Sie sicher, dass alle Fahrzeugzubehörteile deaktiviert sind, um einen elektrischen Schlag zu vermeiden.
  • Page 16: Technische Daten

    ANMERKUNG: Batterien von Wasserfahrzeugen (Booten) müssen entfernt und an Land aufgeladen werden (das Aufladen an Bord erfordert eine spezielle Ausrüstung, die für den Einsatz auf See ausgelegt ist). WARNUNG: Wenn Sie die Batterie wieder einbauen, befestigen Sie zuerst die Erdungsklemme. Überprüfen Sie die Polarität der Batteriepole.
  • Page 17 SICHERUNG 1 X 80 A Empfohlene Akkukapazität MAX. MIN. LADEVORGANG/INBETRIEBNAHME VORBEREITEN Obwohl das Batterieladegerät/der Batteriestarter werkseitig montiert wurde, ist eine Endmontage erforderlich. NUMMER BEZEICHNUNG Achse 3 Schrauben 4 Sicherheitsringe 2 Naben 2 Räder Stütze Platzieren Sie das Batterieladegerät sorgfältig. Richten Sie die Stütze an den drei Löchern an der Unterseite des Geräts aus. Befestigen Sie die Stütze mit den 3 Schrauben anhand eines Kreuzschlitzschraubendrehers (Nr.
  • Page 18 Beispiele für normale Kapazitätswerte von Fahrzeugbatterien (nur zur Referenz): Hubraum < 1300 ccm (cm3) 5 - 15 Ah 15 - 30 Ah 35 - 45 Ah 60 - 110 Ah > 1300 ccm (cm3) 45 - 65 Ah 45 - 65 Ah 60 - 110 Ah Diesel 60 - 90 Ah...
  • Page 19: Entsorgung

    WARNUNG! Überprüfen Sie die Polaritätsverbindung doppelt, bevor Sie fortfahren. Falsche Einstellung von 24 V für eine 12V-Batterie führt zu Schäden. STARTVORGANG Das Starten des Motors erfordert eine große Strommenge, die die Komponenten im Inneren erwärmt. Die Ein-/Ausschaltzyklen dieses Produkts MÜSSEN respektiert werden. Der Motor, der gestartet werden muss, muss in gutem mechanischem Zustand sein, da ein längeres Starten nicht möglich ist.
  • Page 20: Instrucciones De Seguridad Importantes

    Solo para uso en interior Conforme a las normas de seguridad Aparato Clase I Leer el manual en su totalidad antes de utilizar el aparato o de realizar una operación de mantenimiento de carga No tirar los aparatos eléctricos con los residuos orgánicos Uso obligatorio de protección para los oídos para disminuir el nivel de ruido INSTRUCCIONES DE SEGURIDAD IMPORTANTES ¡ADVERTENCIA! Gases explosivos.
  • Page 21 PREPARAR LA CARGA Determine el voltaje de la batería consultando el manual de usuario del coche. Si fuese necesario extraer la batería del vehículo para cargarla, o para limpiar los terminales, retire siempre primero la toma de tierra de la batería. Asegúrese de que todas los accesorios del vehículo estén apagados, para no causar un arco eléctrico.
  • Page 22 Conecte la pinza POSITIVA (ROJO) del cargador al borne POSITIVO (POS, P, +) de la batería. Conecte la pinza NEGATIVA (NEGRA) al borne NEGATIVO (NEGRO, N, -) de la batería. Mueva la pinza de un lado a otro para hacer una buena conexión.
  • Page 23 PREPARAR LA CARGA/ARRANQUE Aunque el cargador/arranque ha sido ensamblado en fábrica, requerirá de algún ajuste final. Nº de la PIEZA NOMBRE 3 Tornillos 4 Anillos de seguridad 2 Bujes 2 Ruedas Soporte Tienda con cuidado el cargador. Alinee la base con los tres agujeros de la parte inferior Use un destornillador de estrella del número 2.
  • Page 24: Procedimiento De Carga

    Capacidad de motor <1300 cc 5 - 15 Ah 15 - 30 Ah 35 - 45 Ah 60 - 110 Ah >1300 cc 45 - 65 Ah 45 - 65 Ah 60 - 110 Ah Diésel 60 - 90 Ah 60 - 90 Ah 60 - 110 Ah PROCEDIMIENTO DE CARGA...
  • Page 25: Procedimiento De Arranque

    PROCEDIMIENTO DE ARRANQUE El arranque con giro del motor requiere de una gran cantidad de corriente y por ello se calentarán los componentes del interior. Deben respetarse los ciclos de giro/parada del motor de este producto. El motor que requiere de arranque debe estar en buenas condiciones mecánicas, ya que no es posible un giro del motor prolongado.
  • Page 26: Importanti Istruzioni Di Sicurezza

    Soltanto per uso all’interno Conformità alle norme di sicurezza appropriate Apparecchio di Classe I. Leggere e comprendere totalmente le istruzioni prima della messa in funzione o qualsiasi operazione di mantenitore di carica Non smaltire gli apparecchi elettrici con i rifiuti casalinghi Indossare obbligatoriamente una protezione anti-rumore per diminuire il livello sonoro IMPORTANTI ISTRUZIONI DI SICUREZZA ATTENZIONE! Gas esplosivi.
  • Page 27 PREPARAZIONE AL CARICAMENTO Identificare il voltaggio della batteria facendo riferimento a quanto riportato sul manuale del veicolo rilasciato dal produttore. Qualora si ravvisi la necessità di estrarre la batteria dal veicolo per la ricarica o di pulire i terminali, rimuovere sempre per prima cosa il terminale di messa a terra della batteria.
  • Page 28 Collegare il connettore POSITIVO (ROSSO) del caricatore al polo POSITIVO (POS, P, +) della batteria. Collegare il connettore NEGATIVO (NERO) del caricatore al polo NEGATIVO (NERO, N, -) della batteria. Far oscillare il connettore avanti e indietro per una buona connessione. AVVERTENZA: Non posizionarsi di fronte alla batteria quando si effettua la connessione finale.
  • Page 29: Preparare La Ricarica E L'avviamento

    PREPARARE LA RICARICA E L’AVVIAMENTO Sebbene il caricatore/dispositivo di avviamento sia stato assemblato nello stabilimento di produzione, potrebbe essere richiesto qualche intervento di assemblaggio. PARTE n. NOME Assale 3 viti 4 anelli di sicurezza 2 mozzi 2 ruote Supporto Posizionare con attenzione il caricatore. Allineare il piede posizionando in basso i tre fori Utilizzando un cacciavite a croce n.
  • Page 30: Procedura Di Ricarica

    Esempi di tipici rate di amperaggio per batterie di automobili (da intendersi solo a titolo puramente indicativo) Capacità del motore <1300 cc 5 – 15 Ah 15 – 30 Ah 35 – 45 Ah 60 – 110 Ah >1300 cc 45 –...
  • Page 31: Procedura Di Avvio

    Impostare scorrettamente la funzione 24 V per una batteria di 12 V potrebbe danneggiare la batteria stessa. PROCEDURA DI AVVIO L’avvio del motore richiede molta corrente e ciò potrebbe comportare il surriscaldamento delle componenti interne. DEVONO essere eseguiti cicli di accensione e spegnimento dell’unità per la messa in moto. Il motore che necessita l’avviamento deve trovarsi in buone condizioni meccaniche dal momento che non è...
  • Page 32: Instruções De Segurança Importantes

    Apenas para uso interior Cumpre as normas de segurança adequadas Aparelho de Classe I. Leia e compreenda completamente este manual de instruções antes de começar a utilizar o aparelho ou proceder a qualquer operação de manutenção nele Não deite fora aparelhos eléctricos com o lixo doméstico Deve usar uma proteção auditiva para reduzir o nível sonoro INSTRUÇÕES DE SEGURANÇA IMPORTANTES AVISO! Gases explosivos.
  • Page 33 PREPARAÇÃO PARA O CARREGAMENTO Determine a tensão da bateria consultando o manual do proprietário do automóvel. Se for necessário remover a bateria do veículo para proceder ao carregamento, ou para limpar os terminais, remova sempre em primeiro lugar o terminal com ligação à terra. Certifique-se de que retira todos os acessórios do veículo para não provocar um arco.
  • Page 34: Especificações

    Ligue a pinça POSITIVA (VERMELHA) do carregador ao terminal POSITIVO (POS, P, +) da bateria. Ligue a pinça NEGATIVA (PRETA) do carregador ao terminal NEGATIVO (PRETO, N, -) da bateria. Agite a pinça para a frente e para trás para garantir uma boa ligação. ATENÇÃO: Não olhe de frente a bateria quando realizar a ligação final.
  • Page 35 PREPARAÇÃO PARA O CARREGAMENTO/ARRANQUE Embora o carregador tenha sido montado na fábrica, será necessária uma montagem final. N.º da PEÇA NOME Eixo Parafusos x 3 Anel de Retenção x 4 Casquilhos x 2 Roda x 2 Suporte Pouse cuidadosamente o carregador. Alinhe o pé...
  • Page 36: Procedimento De Carregamento

    Capacidade do motor <1300 cc 5 - 15 Ah 15 - 30 Ah 35 - 45 Ah 60 - 110 Ah >1300 cc 45 - 65 Ah 45 - 65 Ah 60 - 110 Ah Diesel 60 - 90 Ah 60 - 90 Ah 60 - 110 Ah PROCEDIMENTO DE CARREGAMENTO...
  • Page 37: Procedimento De Arranque

    PROCEDIMENTO DE ARRANQUE O arranque do motor exige uma grande quantidade de corrente e, consequentemente, ocorrerá o aquecimento dos componentes internos. É OBRIGATÓRIO seguir ciclos de ligar/desligar o arranque deste produto. O motor que exige um arranque deve estar em boas condições mecânicas, pois não é possível um arranque prolongado. Ao tentar efetuar o arranque de veículos equipados com baterias de grande capacidade ou em climas rigorosos (frio), será...
  • Page 38 Do użytku tylko w pomieszczeniach. Zgodny z wymaganymi normami bezpieczeństwa Urządzenie Klasy I. Należy w całości przeczytać i zrozumieć instrukcję przed uruchomieniem urządzenia lub wykonaniem jakichkolwiek czynności konserwacyjnych. Nie należy wyrzucać urządzeń elektrycznych wraz z odpadami komunalnymi. Obowiązkowo stosuj ochronę słuchu ISTOTNE UWAGI DOTYCZĄCE BEZPIECZEŃSTWA UWAGA! Gazy wybuchowe.
  • Page 39: Przygotowanie Do Ładowania

    PRZYGOTOWANIE DO ŁADOWANIA Ustal wymagane napięcie znamionowe akumulatora, sprawdzając dane w instrukcji obsługi samochodu. Jeśli zachodzi konieczność wyjęcia akumulatora z pojazdu na czas ładowania lub czyszczenia końcówek biegunowych, pamiętaj, aby zawsze jako pierwszą odłączać uziemioną końcówkę biegunową akumulatora. Aby uniknąć zwarcia, upewnij się, że wszystkie urządzenia w pojeździe są...
  • Page 40: Dane Techniczne

    Podłącz DODATNI (CZERWONY) zacisk prostownika do DODATNIEJ (POS, P, +) końcówki biegunowej akumulatora. Podłącz UJEMNY (CZARNY) zacisk prostownika do UJEMNEJ (CZARNEJ, N, -) końcówki biegunowej akumulatora. Poruszaj zaciskiem do przodu i do tyłu, aby zapewnić dobre połączenie. UWAGA: Wykonując ostatnie połączenie nie stój twarzą do akumulatora. Podłącz przewód zasilający prądu przemiennego do źródła zasilania 220 V.
  • Page 41 PRZYGOTOWANIE DO ŁADOWANIA/ROZRUCHU Chociaż prostownik / urządzenie rozruchowe zostało zmontowane przez producenta, konieczne jest przeprowadzenie kilku dodatkowych czynności montażowych. Nr CZĘŚCI NAZWA Oś Śruby × 3 Pierścień Seegera × 4 Piasty × 2 Kółka × 2 Podpórka Ostrożnie ustaw prostownik. Dopasuj otwory w podstawie podpórki do trzech otworów na spodzie prostownika.
  • Page 42: Procedura Ładowania

    Pojemność silnika <1300 cm³ 5–15 Ah 15–30 Ah 35–45 Ah 60–110 Ah >1300 cm³ 45–65 Ah 45–65 Ah 60–110 Ah Silniki Diesla 60–90 Ah 60–90 Ah 60–110 Ah PROCEDURA ŁADOWANIA (Dotyczy wyłącznie akumulatorów „obsługowych”) Akumulatory „obsługowe” posiadają zatyczki, umożliwiające dostęp do komór zawierających ogniwa i elektrolit. Aby akumulator działał...
  • Page 43: Rozwiązywanie Problemów

    PROCEDURA ROZRUCHU Rozruch silnika wymaga dużej wartości natężenia, co prowadzi do rozgrzania części wewnętrznych. Należy bezwzględnie przestrzegać cykli włączania/wyłączania funkcji rozruchu niniejszego urządzenia. Silnik, który będzie uruchamiany musi być w dobrym stanie mechanicznym, gdyż przedłużony rozruch nie jest możliwy. Podczas rozruchu pojazdów posiadających akumulatory dużej pojemności lub podczas rozruchu w trudnych warunkach atmosferycznych (niska temperatura) konieczne będzie ładowanie akumulatora przez około 15 minut, aby uniknąć...
  • Page 44: Important Safety Instructions

    For indoor use only Complies with appropriate safety standards Appliance of Class I Fully read and understand this instruction manual before starting to use the appliance or proceeding to any maintenance operation on it Ne pas jeter les appareils électriques avec lesdéchets ménagers It is mandatory to wear noise-reducing ear protection during operation to limit the noise level IMPORTANT SAFETY INSTRUCTIONS...
  • Page 45: Preparing To Charge

    PREPARING TO CHARGE Determine voltage of battery by referring to car owner’s manual. If it is necessary to remove battery from vehicle to charge, or to clean terminals, always remove grounded terminal from battery first. Make sure all accessories in the vehicle are off, so as not to cause an arc. Clean battery terminals.
  • Page 46 Connect POSITIVE (RED) charger clip to POSITIVE (POS, P, +) post battery. Connect NEGTIVE (BLACK) charger clip to NEGTIVE (BLACK, N, -) post battery. Rock clip back and forth to make good connection. WARNING: Do not face battery when making final connection. Plug charger AC cord into a 220 volt main supply.
  • Page 47: Application Guide

    PREPARING THE CHARGING/STARTING Although the charger/starter has been assembled in the factory, some final assembly will be required. PART No. NAME Axle Screws x 3 Cirlip x 4 Hubsx2 Wheelx2 Stand Carefully lay the charger down. Line up the foot with the three holes on he underneath With a No.2 cross slot screw driver.
  • Page 48: Charging Procedure

    Engine Capacity <1300cc 5 - 15Ah 15 - 30Ah 35 - 45Ah 60 - 110Ah >1300cc 45 - 65Ah 45 - 65Ah 60 - 110Ah Diesel 60 - 90Ah 60 - 90Ah 60 - 110Ah CHARGING PROCEDURE (For maintenance type battery only) Maintenance batteries have caps to access the chambers containing the plates and the electrolyte.
  • Page 49: Starting Procedure

    STARTING PROCEDURE Engine Cranking requires a large amount of current and as such will heat the components inside. On/off cycles of cranking of this product MUST be followed. The engine that requires starting must be in a good mechanical condition as pro-longed cranking is not possible. When attempting to crank vehicles equipped with large capacity batteries or in severe climates (cold) it will be necessary to charge the battery for approximately 15 minutes to avoid the appliance drawing excess amperage and tripping the mains supply.
  • Page 50 Noroto España SAU Centre Comercial Alban Carretera de Ademuz km 2,9 46100 BURJASSOT Norauto Italia SPA Corso Savona 85/10024 MONCALIERI Norauto Portugal LDA Av. dos Cavaleiros, n°49 Alfragide 2794-057 CARNAXIDE Norauto Polska Sp z o.o., ul. Jubilerska 10, 04-190 Warszawa www.norauto.com www.atu.eu...

Ce manuel est également adapté pour:

No6764

Table des Matières