Table des Matières
Publicité
Les langues disponibles
Les langues disponibles
Liens rapides
Benvenuto nell'era dell'elettrico!
Complimenti per aver scelto un approccio alla mobilità più sostenibile: pochi consumi, grandi risparmi e aria più
respirabile, oltre che autonomia garantita; per fare bene a se stessi, agli altri e al pianeta.
Complimenti per aver deciso di abbracciare un nuovo stile di vita e un pensare innovativo: sfruttare una tecnologia
d'avanguardia come quella elettrica ha solo risvolti positivi.
Con l'acquisto di Askoll eS
godere di un mezzo che concentra il meglio di funzionalità, design e tecnologia Askoll, azienda che vanta
un'esperienza trentennale nella progettazione e fabbricazione di motori elettrici.
Questo manuale è stato preparato per consentirLe di apprezzarne a pieno le qualità. Contiene informazioni,
avvertenze e consigli riguardo il corretto utilizzo e manutenzione del suo nuovo veicolo.
E' importante leggerlo in ogni sua parte prima di mettersi alla guida del mezzo per la prima volta. Scoprirà oltretutto
particolari e caratteristiche che contribuiranno a convincerla della Sua ottima scelta.
La presente pubblicazione è da ritenersi parte integrante del veicolo. In caso di vendita del mezzo deve essere
consegnata al nuovo proprietario.
La costante evoluzione nella progettazione, a garanzia dello standard di sicurezza e qualità dei veicoli Askoll, può comportare il fatto che alcune informazioni
riportate all'interno del presente Libretto Uso e Manutenzione possano essere divergenti dal veicolo in suo possesso. Siamo certi che comprenderà, quindi, che i dati,
le figure e le descrizioni qui riportati non possono costituire fondamento per qualsivoglia rivendicazione.
eS_Rev02_IT.indb i
eS_Rev02_IT.indb i
, eS
25Km/h, eS
, eS
25Km/h, eS
1
1
2
2
EVOlution, eS
o eS
EVOlution potrà finalmente
2
3
3
IT
IT
IT
IT
IT
15/07/2020 16:22:03
15/07/2020 16:22:03
Publicité
Chapitres
Table des Matières

Manuels Connexes pour Askoll eS1


Sommaire des Matières pour Askoll eS1
- Page 1 La costante evoluzione nella progettazione, a garanzia dello standard di sicurezza e qualità dei veicoli Askoll, può comportare il fatto che alcune informazioni riportate all’interno del presente Libretto Uso e Manutenzione possano essere divergenti dal veicolo in suo possesso. Siamo certi che comprenderà, quindi, che i dati, le figure e le descrizioni qui riportati non possono costituire fondamento per qualsivoglia rivendicazione.
-
Page 2: Table Des Matières
INDICE INDICE INFORMAZIONI GENERALI SIMBOLOGIA INFORMAZIONI IMPORTANTI PER LA SICUREZZA IDENTIFICAZIONE COMANDI E STRUMENTI VISTA GENERALE DELLO SCOOTER - eS 25Km/h LATO SINISTRO - eS 25Km/h LATO DESTRO - eS 25Km/h LATO SINISTRO - eS 25Km/h LATO DESTRO LATO SINISTRO LATO DESTRO EVOlution - eS EVOlution LATO SINISTRO... - Page 3 INDICE GRUPPO COMANDI SINISTRO Leva comando freno posteriore Leva freno posteriore con funzione combinata (solo eS e eS EVOlution) Selettore modalità rigenerazione energia Commutatore lampeggiatori Pulsante clacson GRUPPO COMANDI DESTRO Leva comando freno anteriore Comando acceleratore Selettore accensione faro abbagliante (solo eS - eS EVOlution) Selettore modalità...
- Page 4 Selezione modalità di guida (eS - eS EVOlution) Selezione modalità rigenerazione energia SELEZIONE FUNZIONI DISPLAY Modalità visualizzazione dati contachilometri Regolazione della funzione orologio BLUETOOTH (solo eS EVOlution - eS EVOlution) ® Connettività Applicazione “ASKOLL DRIVE SMART” eS_Rev02_IT.indb iv eS_Rev02_IT.indb iv 15/07/2020 16:22:15 15/07/2020 16:22:15...
- Page 5 INDICE SELLA Apertura sella Gancio portaborse SOSTA DELLO SCOOTER BATTERIA E RICARICA BATTERIE Gestione della batteria nel primo utilizzo dello scooter Smaltimento delle batterie esauste CARICABATTERIE RICARICA DELLE BATTERIE RICARICA CON BATTERIA A BORDO Bloccaggio della sella in posizione rialzata per il passaggio del cavo RICARICA CON CARICA BATTERIE FUORI BORDO REGOLAZIONI E MANUTENZIONE PERIODICA REGOLAZIONI...
- Page 6 INDICE PROCEDURE DI MANUTENZIONE ORDINARIA PNEUMATICI CONTROLLO DEL LIVELLO DEL LIQUIDO FRENO ANTERIORE CONTROLLO DEL LIVELLO DEL LIQUIDO FRENO POSTERIORE (solo eS EVOlution - eS EVOlution) SOSTITUZIONE LAMPADINA FARO ANTERIORE (eS - eS 25Km/h - eS - eS 25Km/h - eS EVOlution) FARO ANTERIORE (eS - eS...
-
Page 7: Informazioni Generali
INFORMAZIONI GENERALI SIMBOLOGIA All’interno del manuale sono richiamate informazioni particolarmente importanti sulle quali è necessario soffermarsi con più attenzione. Ogni segnale è costituito da un diverso simbolo per rendere evidente il contenuto del testo che lo segue e per facilitare la collocazione degli argomenti nelle diverse aree. Questo simbolo indica situazioni di particolare pericolo che, se non evitate, possono ATTENZIONE causare morte o lesioni gravi. -
Page 8: Informazioni Importanti Per La Sicurezza
INFORMAZIONI GENERALI INFORMAZIONI IMPORTANTI PER LA SICUREZZA E’ di fondamentale importanza per Voi conoscere lo scooter elettrico: leggete e ATTENZIONE comprendete questo manuale prima del primo utilizzo. Questo manuale operativo è parte integrante dello scooter, conservatelo per futura ATTENZIONE consultazione. In caso di vendita deve essere consegnato al proprietario successivo. Lo scooter non è... -
Page 9: Identificazione
Le matricole di identificazione vengono stampigliate sul telaio, sul carter motore e nel vano batteria. Vanno sempre indicate nelle richieste di parti di ricambio. E’ consigliabile verificare la corrispondenza delle matricole del veicolo con quelle riportate sui documenti dello stesso. ASKOLL EVA S.R.L. dB(A) - - - min (-- kW) -
Page 10: Comandi E Strumenti
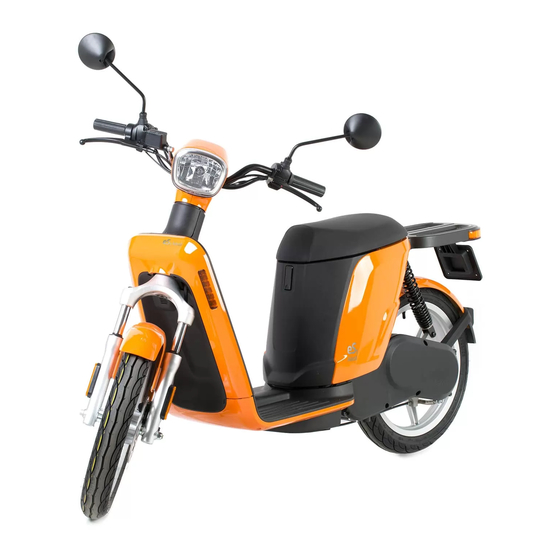
COMANDI E STRUMENTI VISTA GENERALE DELLO SCOOTER - eS 25Km/h LATO SINISTRO - eS 25Km/h LATO DESTRO A. Specchietto retrovisore H. Gancio sella B. Gruppo ottico anteriore I. Gruppo ottico posteriore C. Indicatore di direzione J. Portatarga D. Catarifrangente anteriore sx K. -
Page 11: Es 2 - Es 2 25Km/H Lato Sinistro
COMANDI E STRUMENTI VISTA GENERALE DELLO SCOOTER - eS 25Km/h LATO SINISTRO - eS 25Km/h LATO DESTRO A. Specchietto retrovisore I. Gruppo ottico posteriore B. Gruppo ottico anteriore J. Portatarga C. Indicatore di direzione K. Catarifrangente posteriore D. Catarifrangente anteriore sx L. -
Page 12: Lato Sinistro
COMANDI E STRUMENTI VISTA GENERALE DELLO SCOOTER LATO SINISTRO LATO DESTRO A. Specchietto retrovisore I. Gruppo ottico posteriore B. Gruppo ottico anteriore J. Portatarga C. Indicatore di direzione K. Catarifrangente posteriore D. Catarifrangente anteriore sx L. Motore E. Cavalletto M. Catarifrangente anteriore dx F. -
Page 13: Es 2 Evolution - Es 3 Evolution Lato Sinistro
COMANDI E STRUMENTI VISTA GENERALE DELLO SCOOTER EVOlution - eS EVOlution LATO SINISTRO EVOlution - eS EVOlution LATO DESTRO A. Specchietto retrovisore I. Gruppo ottico posteriore B. Gruppo ottico anteriore J. Portatarga C. Indicatore di direzione K. Catarifrangente posteriore D. Catarifrangente anteriore sx L. -
Page 14: Plancia (Es 1 - Es 1 25Km/H - Es 2 - Es 2 25Km/H)
COMANDI E STRUMENTI POSIZIONE COMANDI E STRUMENTI PLANCIA (eS - eS 25Km/h - eS - eS 25Km/h) Km/h Km/trip PWR ECO SELECT A. Strumentazione F. Selettore modalità di guida (solo per eS - eS B. Commutatore a chiave G. Pulsante avviamento motore C. -
Page 15: Leva Comando Freno Posteriore
COMANDI E STRUMENTI POSIZIONE COMANDI E STRUMENTI PLANCIA (eS EVOlution) A. Strumentazione F. Selettore modalità di guida B. Commutatore a chiave G. Pulsante avviamento motore C. Selettore modalità rigenerazione energia H. Comando acceleratore D. Commutatore lampeggiatori I. Leva comando freno anteriore E. - Page 16 COMANDI E STRUMENTI POSIZIONE COMANDI E STRUMENTI PLANCIA (eS Km/h Km/trip PWR ECO SELECT A. Strumentazione G. Pulsante avviamento motore B. Commutatore a chiave H. Comando acceleratore C. Selettore modalità rigenerazione energia I. Leva comando freno anteriore D. Commutatore lampeggiatori J.
- Page 17 COMANDI E STRUMENTI POSIZIONE COMANDI E STRUMENTI PLANCIA (eS EVOlution) A. Strumentazione G. Pulsante avviamento motore B. Commutatore a chiave H. Comando acceleratore C. Selettore modalità rigenerazione energia I. Leva comando freno anteriore D. Commutatore lampeggiatori J. Leva comando freno combinato E.
-
Page 18: Gruppo Comandi Sinistro
COMANDI E STRUMENTI GRUPPO COMANDI SINISTRO - eS 25Km/h - eS - eS 25Km/h Leva comando freno posteriore La leva del freno posteriore (a disco per eS EVOlution e eS EVOlution, a tamburo per tutti gli altri modelli) è posta sulla parte sinistra del manubrio. Leva freno posteriore con funzione combinata EVO - eS (solo eS... -
Page 19: Commutatore Lampeggiatori
COMANDI E STRUMENTI Commutatore lampeggiatori - eS 25Km/h - eS - eS 25Km/h - eS Spostare la levetta verso sinistra per azionare i lampeggiatori di sinistra. Spostare la levetta verso destra per azionare i lampeggiatori di destra. Premere il pulsante al centro della levetta per spegnere i lampeggiatori. -
Page 20: Gruppo Comandi Destro
COMANDI E STRUMENTI GRUPPO COMANDI DESTRO Leva comando freno anteriore La leva del freno a disco anteriore è posta sulla parte destra del manubrio. Comando acceleratore - eS 25Km/h - eS - eS 25Km/h - eS La velocità dello scooter viene regolata ruotando la manopola. -
Page 21: Selettore Accensione Faro Abbagliante
COMANDI E STRUMENTI Selettore accensione faro abbagliante - eS (solo eS - eS EVOlution) Utilizzando il selettore è possibile attivare la luce abbagliante. Selettore modalità di guida - eS - eS - eS 25Km/h - eS 25Km/h (solo eS - eS - eS EVOlution - eS - eS... -
Page 22: Commutatore A Chiave
COMANDI E STRUMENTI COMMUTATORE A CHIAVE Il commutatore a chiave abilita o disabilita il sistema ed il bloccasterzo. Lo scooter viene fornito di una chiave principale e di un suo duplicato che possono essere utilizzati sia per azionare il commutatore a chiave, sia per l’apertura della sella. -
Page 23: Strumentazione
COMANDI E STRUMENTI STRUMENTAZIONE - eS 25Km/h - eS - eS 25Km/h EVO - eS Km/h Km/h Km/trip Km/trip PWR ECO PWR ECO SELECT SELECT A. Spie luminose B. Tachimetro C. Display digitale D. Comandi display eS_Rev02_IT.indb 17 eS_Rev02_IT.indb 17 15/07/2020 16:22:47 15/07/2020 16:22:47... -
Page 24: Spie Luminose
COMANDI E STRUMENTI SPIE LUMINOSE - eS 25Km/h - eS - eS 25Km/h - eS E. Indicatore di abilitazione motore F. Indicatore alta temperatura G. Indicatore problema grave H. Indicatore lampeggiatori in funzione I. Indicatore luci in funzione EVO - eS J. - Page 25 COMANDI E STRUMENTI Indicatore alta temperatura La spia dell’indicatore di alta temperatura è di colore ambra, si accende e rimane fissa per indicare un’allarme di sovratemperatura. Sul display si può leggere il codice di allarme relativo. Per la descrizione dell’allarme relativo al codice visualizzato fare riferimento al capitolo “CODICI DI ERRORE”.
- Page 26 COMANDI E STRUMENTI Indicatore lampeggiatori in funzione La spia dei lampeggiatori è di colore verde, si accende e lampeggia per indicare l’inserimento dell’indicatore di direzione destro o sinistro, si spegne disinserendo i lampeggiatori. Indicatore luci in funzione La spia accensione luci è di colore verde, si accende all’abilitazione del motore.
- Page 27 COMANDI E STRUMENTI TACHIMETRO (eS - eS 25Km/h - eS - eS 25Km/h) Il tachimetro indica la velocità corrente. Il valore appare in chilometri orari (km/h) ed in miglia Km/h orarie (mph). TACHIMETRO (eS Il tachimetro indica la velocità corrente. Il valore appare in chilometri orari (km/h) ed in miglia Km/h orarie (mph).
-
Page 28: Pulsanti Settaggio Menu
COMANDI E STRUMENTI TACHIMETRO (eS EVOlution - eS EVOlution) Il tachimetro indica la velocità corrente. Il valore appare in chilometri orari (km/h). PULSANTI SETTAGGIO MENU’ - eS 25Km/h - eS - eS 25Km/h - eS I pulsanti SELECT e SET devono essere utilizzati per: SELECT •... -
Page 29: Display Digitale
COMANDI E STRUMENTI DISPLAY DIGITALE - eS 25Km/h - eS - eS 25Km/h - eS Km/trip Tramite il display digitale è possibile avere tutte le PWR ECO informazioni sullo stato del veicolo, più precisamente: • presenza delle batteria nei vani A e B, •... - Page 30 COMANDI E STRUMENTI Spia manutenzione La spia di manutenzione può accendersi da sola od in combinazione con la spia indicatore di problema grave. In caso si accenda è consigliabile recarsi presso un Rivenditore autorizzato per il controllo e la soluzione del problema.
-
Page 31: Controlli Prima Della Partenza
CONTROLLI PRIMA DELLA PARTENZA Prima di utilizzare lo scooter è sempre buona norma effettuare alcuni controlli: • verificare lo stato di carica delle batterie, • verificare il funzionamento del fanale anteriore, del fanale posteriore, degli indicatori di direzione e della luce porta targa, •... - Page 32 Evitare partenze effettuate con il cavalletto centrale abbassato: quando la ruota posteriore prende contatto con il terreno non deve girare per evitare una partenza AVVERTENZA brusca. Su strade disconnesse, in caso di pioggia, neve o su strada scivolosa è necessario ridurre la velocità...
- Page 33 OPERAZIONI PER LA MESSA IN MARCIA Inserimento e disinserimento del bloccasterzo Per inserire il bloccasterzo ruotare il manubrio verso sinistra sino a fine corsa. Premere la chiave verso l’interno e ruotare in senso antiorario; contemporaneamente ruotare leggermente il manubrio in senso orario fino allo scatto della chiave sul simbolo del lucchetto;...
- Page 34 Abilitazione motore - eS - eS - eS 25Km/h - eS 25Km/h Per poter essere avviato il motore deve essere abilitato. Per abilitare il motore, inserire la chiave nel commutatore e portarla su , quindi premere il pulsante di abilitazione motore per 3 secondi, la spia di messa in moto si accende.
- Page 35 Selezione modalità di guida (eS - eS - eS EVOlution) - eS - eS Utilizzando il commutatore è possibile selezionare tre modalità di guida differenti: Modalità ECONOMY Velocità massima: 32 Km/h. Compare l’icona ECO sul display. Modalità NORMAL Velocità massima: 37 Km/h.
- Page 36 Selezione modalità di guida (eS - eS EVOlution) - eS Utilizzando il commutatore è possibile selezionare tre modalità di guida differenti: Modalità ECONOMY Modalità NORMAL Queste modalità vengono utilizzate minimizzare i consumi. Modalità POWER Velocità massima: 67 Km/h Compare l’icona PWR sul display Autonomia 96 Km secondo normativa 168/2013 EC.
- Page 37 Selezione modalità rigenerazione energia - eS 25Km/h - eS - eS 25Km/h - eS In fase di decelerazione dello scooter la batteria può essere ricaricata automaticamente attivando la modalità rigenerazione energia. Utilizzare il commutatore a due posizioni per attivare o disattivare la modalità...
-
Page 38: Selezione Funzioni Display
SELEZIONE FUNZIONI DISPLAY - eS 25Km/h - eS - eS 25Km/h - eS Modalità visualizzazione dati contachilometri All’accensione, tutte le spie del display resteranno Km/trip accese per qualche secondo. PWR ECO Premere SELECT cambiare parametro visualizzato sul display: Chilometraggio totale percorso. Il parametro non è... - Page 39 Regolazione della funzione orologio - eS 25Km/h - eS - eS 25Km/h - eS • Premere e tenere premuto il pulsante SELECT per circa 2 secondi: i due digit corrispondenti all’ora Km/trip cominceranno a lampeggiare. • Premere ripetutamente SELECT per impostare l’ora corretta.
-
Page 40: Bluetooth
Bluetooth SIG, Inc. e qualsiasi ® utilizzo di tali marchi da parte di ASKOLL EVA è concesso su licenza. Altri marchi e nomi commerciali appartengono ai rispettivi proprietari. Con la presente, Askoll EVA S.p.A., Via industria 30, 36031 Dueville (VI) Italia, dichiara che l’apparecchiatura radio HWE213 è... -
Page 41: Apertura Sella
SELLA - eS 25Km/h EVO - eS Apertura sella - eS 25Km/h - eS La serratura per l’apertura della sella è posta sotto il fianco sinistro della sella per i modelli eS EVOlution e eS EVOlution, mentre si trova nella parte posteriore sinistra del veicolo per tutti gli altri modelli. -
Page 42: Sosta Dello Scooter
SOSTA DELLO SCOOTER Per lo stazionamento utilizzare il cavalletto. Abbassare il cavalletto con il piede fino all’apertura completa e contemporaneamente aiutarsi sollevando manualmente lo scooter, afferrandolo con la mano destra al portapacchi e accompagnandolo sino al completo appoggio dello scooter. AVVERTENZA Spingendo in avanti lo scooter il cavalletto torna automaticamente nella posizione di... -
Page 43: Batteria E Ricarica 37 It
BATTERIA E RICARICA BATTERIE I veicoli eS , eS 25Km/h e eS EVOlution di primo equipaggiamento sono forniti con due batterie agli ioni di litio. I modelli eS e eS 25Km/h sono forniti con una batteria di serie mentre la seconda è fornita come optional (mod. - Page 44 BATTERIA E RICARICA Se lo scooter permane con motore spento per un lungo periodo in ambiente con temperature basse (tra 0 °C e +10 °C) i tempi di ricarica possono risultare più lunghi. In caso di prolungato inutilizzo dello scooter, le batterie devono essere ricaricate almeno una volta ogni due mesi.
- Page 45 BATTERIA E RICARICA Non usare questa batteria per scopi diversi da quelli indicati. L’utilizzo per scopi diversi da quello previsto può dare origine a cortocircuiti all’interno della batteria ATTENZIONE che potrebbe incendiarsi. Pericolo d’incendio • Non smontare o rompere la batteria •...
-
Page 46: Smaltimento Delle Batterie Esauste 40 It
BATTERIA E RICARICA Smaltimento delle batterie esauste Alla fine della vita utile, un pacco batteria contenente accumulatori al litio deve essere smaltito secondo le Norme Vigenti e non può essere gettato come semplice rifiuto. La Direttiva Europea per questo tipo di rifiuti stabilisce che gli Stati aderenti a tale convenzione si impegnino ad adottare “misure appropriate”... -
Page 47: Caricabatterie
BATTERIA E RICARICA CARICABATTERIE L’operazione di carica delle batterie avviene utilizzando lo specifico caricabatteria in dotazione (MOD. TVC202). Il caricabatterie risulta attivato solo quando connesso alla rete elettrica con l’apposito cavo e al veicolo o a una batteria tramite la presa. Una volta connesso lampeggeranno tutti i led per qualche secondo, per poi indicare la carica residua della batteria in base ai led accesi. - Page 48 BATTERIA E RICARICA Il caricabatterie non è destinato ad essere utilizzato da persone le cui capacità fisiche, sensoriali, o mentali siano ridotte, oppure con mancanza di esperienza o di conoscenza, a meno che esse abbiano potuto beneficiare, attraverso l’intermediazione di una persona responsabile della loro sicurezza, di una sorveglianza o di istruzioni ATTENZIONE riguardanti l’uso del caricabatterie stesso.
-
Page 49: Ricarica Delle Batterie
BATTERIA E RICARICA RICARICA DELLE BATTERIE - eS 25Km/h - eS - eS 25Km/h - eS Il livello di carica delle batterie è visibile a sinistra sul display digitale del veicolo. Sul display l’icona A Km/trip indica la carica della batteria alloggiata nel vano A, l’icona B indica la carica della batteria alloggiata nel vano B. - Page 50 BATTERIA E RICARICA RICARICA CON BATTERIA A BORDO Per la ricarica con batteria a bordo procedere come segue: Disabilitare il sistema. Sollevare la sella, controllare che il caricabatterie sia collegato all’apposita presa e che le batterie siano correttamente inserite nei vani e collegate ai connettori, estrarre il cavo a molla del carica batterie dotato di spina.
-
Page 51: Bloccaggio Della Sella In Posizione Rialzata Per Il Passaggio Del Cavo
BATTERIA E RICARICA Bloccaggio della sella in posizione rialzata per il passaggio del cavo Nel corso delle operazioni di ricarica con batteria a bordo è possibile chiudere la sella utilizzando la sua serratura mantenendo comunque un’apertura sufficiente per il passaggio del cavo di ricarica. Ciò... - Page 52 BATTERIA E RICARICA Chiudere la sella mantenendo premuto il meccanismo. La sella è bloccata in posizione rialzata per permettere il passaggio del cavo di ricarica. Aprendo la serratura con la chiave e sollevando la sella, il meccanismo tornerà automaticamente nella posizione originale.
-
Page 53: Ricarica Con Carica Batterie Fuori Bordo
BATTERIA E RICARICA RICARICA CON CARICA BATTERIE FUORI BORDO Il caricabatterie può essere estratto per consentire la ricarica di una batteria lasciando allo scooter la possibilità di circolare solo con l’altra. Scollegare il cavo della batteria premendo sulle due alette laterali del connettore per estrarlo. Estrarre la batteria dall’alloggiamento utilizzando per il sollevamento l’apposita maniglia. - Page 54 BATTERIA E RICARICA Scollegare il connettore del cavo del caricabatterie dalla sua presa, per estrarlo premere le due alette poste ai lati. Rimuovere il caricabatteria dal suo alloggio assieme ai suoi due cavi. Durante la rimozione del carica batterie si raccomanda di maneggiarlo con cura per ATTENZIONE evitare di farselo cadere addosso o a terra.
- Page 55 BATTERIA E RICARICA Posizionare batteria e caricabatteria su un piano stabile. Collegare prima il cavo del caricabatterie alla presa della batteria, posta sotto lo sportellino a molla. La spina è inserita correttamente nella presa quando è udibile un ”click”. Quindi collegare il caricabatterie alla rete elettrica. Selezionare la modalità...
- Page 56 BATTERIA E RICARICA Riposizionare la batteria nel suo vano reggendola dalla maniglia e ricollegare il cavo del veicolo con connettore alla presa sotto lo sportellino a molla sulla batteria, inserire il connettore fino a sentire un “click” e controllare che sia ben assicurata. Poi collocare la spina del cavo a molla a fianco del carica batteria e riavvolgere il cavo sopra la batteria.
-
Page 57: Regolazioni E Manutenzione Periodica
REGOLAZIONI E MANUTENZIONE PERIODICA REGOLAZIONI - eS 25Km/h - eS - eS 25Km/h EVO - eS - eS SPECCHIETTI RETROVISORI Sui lati destro e sinistro del manubrio sono montati i due specchietti retrovisori la cui regolazione è possibile ruotando manualmente lo stelo fino a portare lo specchietto nella posizione desiderata. -
Page 58: Freno A Disco Anteriore
REGOLAZIONI E MANUTENZIONE PERIODICA FRENO A DISCO ANTERIORE - eS 25Km/h - eS - eS 25Km/h - eS L’usura del disco e delle pastiglie viene compensata automaticamente, quindi effetto funzionamento del freno e non richiede registrazioni. Se viene riscontrata un’eccessiva corsa e la leva si avvicina troppo alla manopola azionando il freno potrebbe significare la presenza di aria nel circuito o il funzionamento irregolare del freno stesso. -
Page 59: Freno Posteriore A Tamburo
REGOLAZIONI E MANUTENZIONE PERIODICA FRENO POSTERIORE A TAMBURO - eS 25Km/h - eS - eS 25Km/h) Per regolare l’azione del freno posteriore agire sul dado come illustrato in figura. Avvitando il dado, il gioco libero della leva di comando diminuisce e l’azione frenante aumenta. Viceversa, svitando il dado il gioco libero della leva di comando aumenta e l’azione frenante diminuisce. -
Page 60: Freno Posteriore A Disco
REGOLAZIONI E MANUTENZIONE PERIODICA FRENO POSTERIORE A DISCO EVOlution - eS EVOlution) L’usura del disco e delle pastiglie viene compensata automaticamente, quindi effetto funzionamento del freno e non richiede registrazioni. Se viene riscontrata un’eccessiva corsa e la leva si avvicina troppo alla manopola azionando il freno potrebbe significare la presenza di aria nel circuito o il funzionamento irregolare del freno stesso. -
Page 61: Procedure Di Manutenzione Ordinaria Pneumatici
REGOLAZIONI E MANUTENZIONE PERIODICA PROCEDURE DI MANUTENZIONE ORDINARIA PNEUMATICI Il veicolo è equipaggiato con pneumatici tubeless. Controllare regolarmente la pressione degli pneumatici ed adeguarla, se necessario, prima di mettersi in viaggio. - eS 25Km/h Pressione pneumatico anteriore 2 bar. Pressione pneumatico posteriore 2,5 bar. -
Page 62: Controllo Del Livello Del Liquido Freno Anteriore
REGOLAZIONI E MANUTENZIONE PERIODICA CONTROLLO DEL LIVELLO DEL LIQUIDO FRENO ANTERIORE Il serbatoio del liquido freno anteriore è dotato di oblò di ispezione per controllare il livello del liquido contenuto all’interno del serbatoio. Se il livello del liquido freno risulta scarso o insufficiente, NON rabboccare mai il serbatoio ma controllare lo stato di usura delle pastiglie e del disco freno e verificare l’eventuale presenza di perdite del... -
Page 63: Controllo Del Livello Del Liquido Freno Posteriore
REGOLAZIONI E MANUTENZIONE PERIODICA CONTROLLO DEL LIVELLO DEL LIQUIDO FRENO POSTERIORE (solo eS EVOlution - eS EVOlution) Il serbatoio del liquido freno posteriore è dotato di oblò di ispezione per controllare il livello del liquido contenuto all’interno del serbatoio. Se il livello del liquido freno risulta scarso o insufficiente, NON rabboccare mai il serbatoio ma controllare lo stato di usura delle pastiglie e del disco freno e verificare l’eventuale presenza di perdite del... -
Page 64: Sostituzione Lampadina Faro Anteriore
REGOLAZIONI E MANUTENZIONE PERIODICA SOSTITUZIONE LAMPADINA FARO ANTERIORE - eS 25Km/h - eS - eS 25Km/h - eS - eS 25Km/h - eS - eS 25Km/h - eS EVOlution) Per la sostituzione della lampadina tipo H8 35W del faro anteriore procedere nel seguente modo, utilizzando la chiave TORX T 20 fornita come accessorio e collocata sotto la sella rimuovere le 2 viti laterali sotto al faro: rimuovere prima il semi guscio sinistro poi quello... -
Page 65: Faro Anteriore
REGOLAZIONI E MANUTENZIONE PERIODICA scollegare il connettore, ruotare il portalampada in - eS 25Km/h - eS 25Km/h senso antiorario ed estrarlo. - eS 25Km/h - eS - eS 25Km/h - eS Sostituire lampada e portalampada con uno nuovo. FARO ANTERIORE (eS - eS EVOlution) - eS... -
Page 66: Gruppo Ottico Posteriore E Indicatori Di Direzione
REGOLAZIONI E MANUTENZIONE PERIODICA GRUPPO OTTICO POSTERIORE E INDICATORI DI DIREZIONE Il gruppo ottico posteriore, gli indicatori di direzione anteriori e posteriori e la luce porta targa sono dotati di luci led e sono integrati nella struttura del veicolo. Per la loro sostituzione rivolgersi ad un punto di assistenza autorizzato. -
Page 67: Tabella Riepilogativa Procedure Di Manutenzione Ordinaria
Usura pastiglie freno anteriore Usura pastiglie freno posteriore Usura ganasce freno posteriore Cinghie trasmissione Dadi, bulloni, dispositivi di fissaggio Cavalletto Cuscinetti sterzo Tranne “puntamento faro” tutti i controlli vanno effettuati da Personale qualificato ASKOLL. eS_Rev02_IT.indb 61 eS_Rev02_IT.indb 61 15/07/2020 16:23:35 15/07/2020 16:23:35... -
Page 68: Pulizia Del Veicolo
REGOLAZIONI E MANUTENZIONE PERIODICA PULIZIA DEL VEICOLO Per evitare l’insorgere di ossidazioni, lavare lo scooter ogni volta che viene utilizzato in particolari condizioni atmosferiche o stradali, come strade cosparse di sale o prodotti antighiaccio nel periodo invernale, condizioni di inquinamento atmosferico come città, zone industriali, zone ad alta salinità od umidità, nell’atmosfera come zone marittime. -
Page 69: Inattivita' Del Veicolo
REGOLAZIONI E MANUTENZIONE PERIODICA INATTIVITA’ DEL VEICOLO In preparazione di un lungo periodo di inattività è consigliabile: • effettuare una pulizia generale dello scooter, • operare il rimessaggio in luogo coperto, • stazionare lo scooter sul cavalletto per evitare che le ruote restino a contatto con il terreno nella stessa posizione, •... -
Page 70: Codici Di Errore
CODICI DI ERRORE CODICI DI ERRORE - eS 25Km/h EVO - eS - eS 25Km/h - eS Guasto al sistema di comunicazione: vengono rilevati dei problemi di comunicazione tra le unità intelligenti del veicolo. Si consiglia di portare il mezzo presso officina autorizzata. -
Page 71: Codici Di Errore
CODICI DI ERRORE - eS 25Km/h EVO - eS - eS 25Km/h - eS Guasto Batteria B: il sistema rileva un guasto al pacco batteria B. Si consiglia di portare la batteria presso officina autorizzata. Sovratemperatura batterie: il sistema rileva una temperatura eccessiva della batteria per cui inibisce l’erogazione di potenza al veicolo. - Page 72 CODICI DI ERRORE - eS 25Km/h EVO - eS - eS 25Km/h - eS Malfunzionamento indicatori di direzione: il sistema rileva la rottura o il malfunzionamento degli indicatori di direzione. Verificarne il funzionamento e sostituirli presso un’autofficina autorizzata. Malfunzionamento fanale posteriore e luce targa: il sistema rileva la rottura o il malfunzionamento del fanale posteriore e luce targa.
-
Page 73: Dati Tecnici
DATI TECNICI DIMENSIONI DELLO SCOOTER eS_Rev02_IT.indb 67 eS_Rev02_IT.indb 67 15/07/2020 16:23:45 15/07/2020 16:23:45... -
Page 74: Dati Motore
DATI TECNICI MODELLO 25Km/h / eS 25Km/h / eS DATI MOTORE Modello Brushless permanent magnet sinusoidal motor Tipo motore EME 200 EME 201 Tensione di esercizio 54 V Potenza MAX 1,5 KW 1,4 KW 3 KW 1,4 KW 3 KW elettronicamente elettronicamente elettronicamente... -
Page 75: Dati Veicolo
DATI TECNICI MODELLO 25Km/h / eS 25Km/h / eS DATI VEICOLO Lunghezza 1830 mm / 2015 mm (modelli EVO) Larghezza 726 mm Interasse 1245 mm Altezza attacchi specchietti 1036 mm Pressione pneumatico anteriore 2 bar Pressione pneumatico posteriore 2,5 bar 2,8 bar Peso in ordine di marcia 72 Kg... -
Page 76: Dati Gruppo Ottico Posteriore
DATI TECNICI MODELLO 25Km/h / eS 25Km/h / eS DATI GRUPPO OTTICO POSTERIORE Fanale posteriore Luce stop Indicatori di direzione Luce targa eS_Rev02_IT.indb 70 eS_Rev02_IT.indb 70 15/07/2020 16:23:46 15/07/2020 16:23:46... -
Page 77: Dichiarazione Di Conformità (Doc) Ue
Dichiarazione di conformità (DoC) UE Dichiarazione di conformità (DoC) UE La sottoscritta azienda Nome azienda: Askoll EVA S.p.A. Indirizzo: Via industria 30, 36031 Dueville (VI), Italia Dichiara sotto la propria esclusiva responsabilità che il seguente prodotto: Apparecchio / Prodotto: Caricabatterie per scooter elettrico... - Page 78 NOTE eS_Rev02_IT.indb 72 eS_Rev02_IT.indb 72 15/07/2020 16:23:47 15/07/2020 16:23:47...
- Page 79 être remise au nouveau propriétaire. L’ é volution constante de la conception, aux fins de garantir les standards de sécurité et la qualité des véhicules Askoll, peut entraîner le fait que certaines informations contenues dans ce manuel d’utilisation et d’ e ntretien peuvent être divergentes de celles qui concernent le véhicule en votre possession. Nous sommes convaincus que vous comprendrez par conséquent que les données, les figures et les descriptions ci-dessous ne peuvent pas être un motif de réclamation.
- Page 80 INDEX INDEX INFORMATIONS GÉNÉRALES SYMBOLOGIE INFORMATIONS IMPORTANTES SUR LA SÉCURITÉ IDENTIFICATION COMMANDES ET INSTRUMENTS VUE GÉNÉRALE DU SCOOTER - eS 25Km/h CÔTÉ GAUCHE - eS 25Km/h CÔTÉ DROIT - eS 25Km/h CÔTÉ GAUCHE - eS 25Km/h CÔTÉ DROIT CÔTÉ GAUCHE CÔTÉ...
- Page 81 INDEX GROUPE COMMANDES GAUCHE Levier de frein arrière Levier de frein arrière avec fonction combinée (eS - eS EVOlution uniquement) Sélecteur du mode régénération d’énergie Commutateur clignotants Bouton klaxon GROUPE COMMANDES DROITE Levier de frein avant Commande accélérateur Sélecteur d’allumage du feu de route (eS - eS EVOlution uniquement) Sélecteur de mode de conduite (eS...
- Page 82 Sélection du mode régénération d’énergie SÉLECTION FONCTIONS AFFICHEUR Mode d’affichage des données du compteur kilométrique Réglage de la fonction horloge BLUETOOTH (uniquement eS EVOlution - eS EVOlution) ® Connectivité Application “ASKOLL DRIVE SMART” eS_Rev02_FR.indb iv eS_Rev02_FR.indb iv 15/07/2020 16:26:29 15/07/2020 16:26:29...
- Page 83 INDEX SELLE Ouverture de la selle Crochet porte-bagages STATIONNEMENT DU SCOOTER BATTERIE ET RECHARGE BATTERIES Gestion de la batterie lors de la première utilisation du scooter Élimination des batteries épuisées CHARGEUR DE BATTERIES RECHARGE DE LA BATTERIE RECHARGE AVEC BATTERIE À BORD Verrouillage de la selle en position relevée pour le passage du câble RECHARGE AVEC CHARGEUR BATTERIES DÉPOSÉ...
- Page 84 INDEX PROCÉDURES D’ENTRETIEN COURANT PNEUS VERIFICATION DU NIVEAU DU LIQUIDE DE FREIN AVANT VÉRIFICATION DU NIVEAU DU LIQUIDE DU FREIN ARRIÈRE (eS EVOlution - eS EVOlution uniquement) REMPLACEMENT AMPOULE PHARE AVANT (eS - eS 25Km/h - eS - eS 25Km/h - eS EVOlution) PHARE AVANT (eS - eS...
-
Page 85: Informations Générales
INFORMATIONS GÉNÉRALES SYMBOLOGIE Le manuel contient des informations particulièrement importantes qui méritent une lecture approfondie. Chaque signal se compose d’un symbole différent pour mettre en évidence le contenu du texte et pour faciliter le repérage des thèmes regardant chaque section. Ce symbole indique des situations particulièrement dangereuses qui, non résolues, ATTENTION risquent d'entraîner la mort ou des blessures graves. -
Page 86: Informations Importantes Sur La Sécurité
INFORMATIONS GÉNÉRALES INFORMATIONS IMPORTANTES SUR LA SÉCURITÉ Il est impératif de connaître le scooter électrique : lire et comprendre ce manuel ATTENTION avant la première utilisation. Ce manuel fait partie du scooter, conservez-le pour toute consultation ultérieure. En ATTENTION cas de vente il doit être remis au propriétaire suivant. Le scooter n'est pas prévu pour être utilisé... -
Page 87: Identification
Les numéros d’identification sont apposés sur le châssis, sur le carter du moteur et dans le compartiment à batterie. Ils doivent toujours être indiqués dans les demandes de pièces de rechange. Il est conseillé de vérifier la correspondance des numéros du véhicule et des numéros indiqués sur les documents. ASKOLL EVA S.R.L. dB(A) - - -... -
Page 88: Commandes Et Instruments
COMMANDES ET INSTRUMENTS VUE GÉNÉRALE DU SCOOTER - eS 25Km/h CÔTÉ GAUCHE - eS 25Km/h CÔTÉ DROIT A. Rétroviseur H. Crochet selle B. Groupe optique avant I. Groupe optique arrière C. Clignotant J. Porte-plaque D. Catadioptre avant gche K. Catadioptre arrière E. -
Page 89: Es 2 - Es 2 25Km/H Côté Gauche
COMMANDES ET INSTRUMENTS VUE GÉNÉRALE DU SCOOTER - eS 25Km/h CÔTÉ GAUCHE - eS 25Km/h CÔTÉ DROIT A. Rétroviseur I. Groupe optique arrière B. Groupe optique avant J. Porte-plaque C. Clignotant K. Catadioptre arrière D. Catadioptre avant gche L. Moteur E. -
Page 90: Vue Générale Du Scooter Côté Gauche
COMMANDES ET INSTRUMENTS VUE GÉNÉRALE DU SCOOTER CÔTÉ GAUCHE CÔTÉ DROIT A. Rétroviseur I. Groupe optique arrière B. Groupe optique avant J. Porte-plaque C. Clignotant K. Catadioptre arrière D. Catadioptre avant gche L. Moteur E. Béquille M. Catadioptre avant dte F. -
Page 91: Vue Générale Du Scooter Evolution Côté Gauche
COMMANDES ET INSTRUMENTS VUE GÉNÉRALE DU SCOOTER EVOlution - eS EVOlution CÔTÉ GAUCHE EVOlution - eS EVOlution CÔTÉ DROIT A. Rétroviseur I. Groupe optique arrière B. Groupe optique avant J. Porte-plaque C. Clignotant K. Catadioptre arrière D. Catadioptre avant gche L. -
Page 92: Position Commandes Et Instruments
COMMANDES ET INSTRUMENTS POSITION COMMANDES ET INSTRUMENTS TABLEAU DE BORD (eS - eS 25Km/h - eS - eS 25Km/h) Km/h Km/trip PWR ECO SELECT A. Instruments F. Sélecteur de mode de conduite B. Commutateur à clé - eS uniquement) C. Sélecteur du mode régénération d’énergie G. -
Page 93: Tableau De Bord
COMMANDES ET INSTRUMENTS POSITION COMMANDES ET INSTRUMENTS TABLEAU DE BORD (eS EVOlution) A. Instruments F. Sélecteur de mode de conduite B. Commutateur à clé G. Bouton de démarrage du moteur C. Sélecteur du mode régénération d’énergie H. Commande accélérateur D. Commutateur clignotants I. - Page 94 COMMANDES ET INSTRUMENTS POSITION COMMANDES ET INSTRUMENTS TABLEAU DE BORD (eS Km/h Km/trip PWR ECO SELECT A. Instruments G. Bouton de démarrage du moteur B. Commutateur à clé H. Commande accélérateur C. Sélecteur du mode régénération d’énergie I. Levier de frein avant D.
- Page 95 COMMANDES ET INSTRUMENTS POSITION COMMANDES ET INSTRUMENTS TABLEAU DE BORD (eS EVOlution) A. Instruments G. Bouton de démarrage du moteur B. Commutateur à clé H. Commande accélérateur C. Sélecteur du mode régénération d’énergie I. Levier de frein avant D. Commutateur clignotants J.
-
Page 96: Groupe Commandes Gauche
COMMANDES ET INSTRUMENTS GROUPE COMMANDES GAUCHE - eS 25Km/h - eS - eS 25Km/h Levier de frein arrière Le levier de frein arrière (à disque pour eS EVOlution et eS EVOlution, à tambour pour tous les autres modèles) est placé à gauche sur le guidon. Levier de frein arrière avec fonction combinée EVO - eS - eS... -
Page 97: Commutateur Clignotants
COMMANDES ET INSTRUMENTS Commutateur clignotants - eS 25Km/h - eS - eS 25Km/h - eS Déplacer la manette vers la gauche pour activer les clignotants gauche. Déplacer la manette vers la droite pour activer les clignotants droite. Placer la manette au centre pour éteindre les clignotants. -
Page 98: Groupe Commandes Droite
COMMANDES ET INSTRUMENTS GROUPE COMMANDES DROITE Levier de frein avant Le levier du frein à disque avant est situé sur la droite du guidon. Commande accélérateur - eS 25Km/h - eS - eS 25Km/h - eS La vitesse du scooter est réglée en tournant la poignée. -
Page 99: Sélecteur D'allumage Du Feu De Route
COMMANDES ET INSTRUMENTS Sélecteur d’allumage du feu de route - eS - eS EVOlution uniquement) En utilisant le sélecteur il est possible d’activer le feu de route. Sélecteur de mode de conduite - eS - eS - eS 25Km/h - eS 25Km/h - eS - eS... -
Page 100: Commutateur À Clé
COMMANDES ET INSTRUMENTS COMMUTATEUR À CLÉ Le commutateur à clé active ou désactive le système et le verrouillage de la direction. Le scooter est muni d’une clé principale et d’un duplicata qui peut être utilisé pour actionner le commutateur à clé et l’ouverture de la selle. Conserver le duplicata séparément de la clé... - Page 101 COMMANDES ET INSTRUMENTS INSTRUMENTS - eS 25Km/h - eS - eS 25Km/h EVO - eS Km/h Km/h Km/trip Km/trip PWR ECO PWR ECO SELECT SELECT A. Voyants lumineux B. Tachymètre C. Afficheur numérique D. Commandes afficheur eS_Rev02_FR.indb 17 eS_Rev02_FR.indb 17 15/07/2020 16:27:00 15/07/2020 16:27:00...
-
Page 102: Voyants Lumineux
COMMANDES ET INSTRUMENTS VOYANTS LUMINEUX - eS 25Km/h - eS - eS 25Km/h - eS E. Indicateur d’activation du moteur F. Indicateur de température élevée G. Indicateur de problème grave H. Indicateur de clignotants en fonction I. Indicateur de feux allumés EVO - eS J. - Page 103 COMMANDES ET INSTRUMENTS Indicateur de température élevée Le témoin lumineux de température élevée, de couleur ambre, s’allume et reste fixe pour indiquer une alarme de température élevée. L’écran affiche le code d’alarme correspondant. Pour la description de l’alarme correspondante au code affiché, consulter le chapitre «...
- Page 104 COMMANDES ET INSTRUMENTS Indicateur de clignotants en fonction Le voyant des clignotants, vert, s’allume et clignote pour indiquer l’activation du clignotant gauche ou droite, et s’éteint en désactivant les clignotants. Indicateur de feux allumés Le voyant d’allumage des feux, vert, s’allume au démarrage du moteur.
- Page 105 COMMANDES ET INSTRUMENTS TACHYMÈTRE (eS - eS 25Km/h - eS - eS 25Km/h) Le compteur de vitesse indique la vitesse actuelle. La valeur apparaît en kilomètres/heure (km / h) et Km/h miles/heure (mph). TACHYMÈTRE (eS Le compteur de vitesse indique la vitesse actuelle. La valeur apparaît en kilomètres/heure (km / h) et Km/h miles/heure (mph).
-
Page 106: Boutons Réglage Menu
COMMANDES ET INSTRUMENTS TACHYMÈTRE (eS EVOlution - eS EVOlution) Le compteur de vitesse indique la vitesse actuelle. La valeur apparaît en kilomètres/heure (km/h). BOUTONS RÉGLAGE MENU - eS 25Km/h - eS - eS 25Km/h - eS Les boutons SELECT et SET doivent être utilisés pour : SELECT •... -
Page 107: Afficheur Numérique
COMMANDES ET INSTRUMENTS AFFICHEUR NUMÉRIQUE - eS 25Km/h - eS - eS 25Km/h - eS Km/trip Via l’affichage numérique, vous pouvez avoir toutes PWR ECO les informations sur l’état du véhicule, à savoir : • présence de la batterie dans les compartiments A et B, •... - Page 108 COMMANDES ET INSTRUMENTS Voyant d’entretien Le voyant d’entretien peut s’allumer seul ou en combinaison avec le voyant indicateur de problème grave. Si le voyant s’allume rendez-vous dans un atelier conventionné pour le contrôle et la résolution du problème. eS_Rev02_FR.indb 24 eS_Rev02_FR.indb 24 15/07/2020 16:27:09 15/07/2020 16:27:09...
-
Page 109: Utilisation
UTILISATION AVANT LE DÉPART Avant d’utiliser le scooter, effectuer les contrôles ci-dessous : • état de charge de la batterie, • fonctionnement du phare avant, du feu arrière, des clignotants et du feu de plaque d’immatriculation, • fonctionnement des freins avant et arrière, •... - Page 110 UTILISATION Éviter les départs avec la béquille centrale baissée : lorsque la roue arrière entre en AVERTISSEMENT contact avec le sol, elle ne doit pas tourner pour éviter un démarrage brutal. Sur les routes instables, en cas de pluie, de neige ou de surface glissante, réduire la vitesse et augmenter la distance de sécurité...
-
Page 111: Opérations Pour Le Démarrage
UTILISATION OPÉRATIONS POUR LE DÉMARRAGE Engager et désengager le verrou de direction Pour engager le verrou de direction, tourner le guidon vers la gauche jusqu’à ce qu’il se bloque. Appuyer la clé vers l’intérieur et tourner dans le sens anti-horaire ; tourner simultanément le guidon légèrement vers la droite jusqu’au déclic de la clé... - Page 112 UTILISATION Activation du moteur - eS - eS - eS 25Km/h - eS 25Km/h Pour démarrer le moteur doit être activé. Pour activer le moteur, insérer la clé dans le contacteur et la mettre sur , puis appuyer sur le bouton d’activation du moteur pendant 3 secondes, le voyant de démarrage s’allume.
- Page 113 UTILISATION Sélecteur du mode de conduite (eS - eS - eS EVO) - eS - eS Le commutateur permet de sélectionner trois modes de conduite différents : Mode ECONOMY Vitesse maximum : 32 Km/h. Affichage de l’icône ECO sur l’écran. Mode NORMAL Vitesse maximum : 37 Km/h.
- Page 114 UTILISATION Sélecteur du mode de conduite (eS - eS EVOlution) - eS Le commutateur permet de sélectionner trois modes de conduite différents : Mode ECONOMY Mode NORMAL mode utilisé pour réduire consommations. Mode POWER Vitesse maximum : 67 Km/h. L’icône PWR s’affiche sur l’écran Autonomie 96 Km selon les normes 168/2013 EC.
- Page 115 UTILISATION Sélection du mode régénération d’énergie - eS 25Km/h - eS - eS 25Km/h - eS En phase de décélération du scooter la batterie peut être rechargée automatiquement en activant le mode régénération d’énergie. Utiliser le commutateur à deux positions pour activer ou désactiver le mode régénération d’énergie : En poussant le bouton vers le haut le mode régénération d’énergie est activé, en...
-
Page 116: Sélection Fonctions Afficheur
UTILISATION SÉLECTION FONCTIONS AFFICHEUR - eS 25Km/h - eS - eS 25Km/h - eS Mode d’affichage des données du compteur kilométrique Km/trip À la mise sous tension, tous les voyants de l’écran PWR ECO restent allumés pendant quelques secondes. Appuyer sur SELECT pour changer le paramètre affiché... - Page 117 UTILISATION Réglage de la fonction horloge - eS 25Km/h - eS - eS 25Km/h - eS • Appuyer maintenir enfoncé bouton SELECT pendant 2 secondes : les deux chiffres Km/trip correspondant à l’heure commencent à clignoter. • Appuyer plusieurs fois sur SELECT pour régler l’heure correcte.
-
Page 118: Bluetooth
à Bluetooth SIG, Inc. ® et toute utilisation de ces marques par ASKOLL EVA est soumise à une licence. Les autres marques et noms commerciaux appartiennent à leurs propriétaires respectifs. Par la présente, Askoll EVA S.p.A., Via industria 30, 36031 Dueville (VI) Italie, déclare que l’appareil radio HWE213 est conforme à... -
Page 119: Ouverture De La Selle
UTILISATION SELLE - eS 25Km/h EVO - eS - eS 25Km/h - eS Ouverture de la selle La serrure de la selle est placée sous le côté gauche de la selle pour les modèles eS EVOlution et eS EVOlution, et dans la partie arrière gauche du véhicule pour tous les autres modèles. -
Page 120: Stationnement Du Scooter
UTILISATION STATIONNEMENT DU SCOOTER Pour le stationnement utiliser la béquille. Abaissez la béquille avec votre pied jusqu’à ce que l’ouverture soit complète, tout en soulevant le scooter manuellement, en le saisissant avec la main droite derrière le porte-bagage et en l’accompagnant jusqu’à ce que le scooter soit complètement appuyé. -
Page 121: Batteries
BATTERIE ET RECHARGE BATTERIES Les véhicules eS , eS 25Km/h et eS EVOlution en équipement d’origine sont livrés avec deux batteries ions-lithium. Les modèles eS et eS 25Km/h sont équipés d’une batterie de série, la seconde est en option (mod. batteries TVC102). Les modèles eS EVOlution sont équipés de deux batteries de série (mod. - Page 122 BATTERIE ET RECHARGE Si le scooter reste avec le moteur éteint pendant une longue période à basse température ambiante (entre 0 °C et +10°C), le temps de recharge peut être plus long. En cas d’inutilisation prolongée du scooter, les batteries doivent être rechargées au moins une fois tous les deux mois.
- Page 123 BATTERIE ET RECHARGE Ne pas utiliser cette batterie à d'autres fins que celles indiquées. L'utilisation à des fins autres que prévues peut entraîner des courts-circuits à l'intérieur de la batterie ATTENTION qui pourrait prendre feu. Risque d'incendie • Ne pas démonter ou casser la batterie •...
- Page 124 BATTERIE ET RECHARGE Élimination des batteries épuisées À la fin de sa vie utile, un bloc-batterie contenant des accumulateurs au lithium doit être éliminé conformément à la réglementation en vigueur et ne peut être éliminé comme un simple déchet. La directive européenne pour ce type de déchets établit que les États adhérant à...
-
Page 125: Chargeur De Batteries
BATTERIE ET RECHARGE CHARGEUR DE BATTERIES La recharge de la batterie se fait en utilisant le chargeur spécifique fourni (MOD. TVC202). Le chargeur est activé uniquement s’il est connecté au réseau électrique avec le câble approprié et au véhicule ou à une batterie par l’intermédiaire de la prise. - Page 126 BATTERIE ET RECHARGE Le chargeur n'est pas prévu pour être utilisé par des personnes dont les capacités physiques, sensorielles ou mentales sont altérées, ou manquant d'expérience ou de connaissances, sauf si elles font l'objet, par l'intermédiaire d'une personne responsable de leur sécurité, d'une supervision ou d'instructions relatives à ATTENTION l'utilisation du chargeur.
-
Page 127: Recharge De La Batterie
BATTERIE ET RECHARGE RECHARGE DE LA BATTERIE - eS 25Km/h - eS - eS 25Km/h - eS Le niveau de charge des batteries est visible sur la gauche de l’écran numérique du véhicule. Sur Km/trip l’afficheur l’icône A indique la charge de la batterie du compartiment A, l’icône B indique la charge de la batterie du compartiment B. - Page 128 BATTERIE ET RECHARGE RECHARGE AVEC BATTERIE À BORD Pour la recharge avec la batterie à bord, procéder comme suit : Désactiver le système. Soulever la selle, assurez-vous que le chargeur est branché à la prise et que les batteries sont correctement insérées dans les compartiments et reliées aux connecteurs, extraire le câble à...
-
Page 129: Verrouillage De La Selle En Position Relevée Pour Le Passage Du Câble
BATTERIE ET RECHARGE Verrouillage de la selle en position relevée pour le passage du câble Pendant les opérations de recharge avec la batterie à bord, il est possible de fermer la selle en utilisant sa serrure tout en maintenant une ouverture suffisante pour le passage du câble de charge. - Page 130 BATTERIE ET RECHARGE Fermer la selle en maintenant le mécanisme appuyé. La selle est bloquée dans une position relevée pour permettre le passage du câble de recharge. En ouvrant la serrure avec la clé et en soulevant la selle, le mécanisme reviendra immédiatement à sa position initiale.
-
Page 131: Recharge Avec Chargeur Batteries Déposé
BATTERIE ET RECHARGE RECHARGE AVEC CHARGEUR BATTERIES DÉPOSÉ Le chargeur peut être extrait pour permettre la charge d’une batterie en laissant au scooter la possibilité de circuler uniquement avec l’autre batterie. Débrancher le câble de la batterie en appuyant sur les deux pattes latérales du connecteur pour le retirer. - Page 132 BATTERIE ET RECHARGE Débrancher le connecteur du câble du chargeur de la prise, pour l’extraire appuyer sur les deux pattes sur les côtés. Retirer le chargeur de son support avec ses deux câbles. Lors du retrait du chargeur de batterie il est recommandé de le manipuler avec soin ATTENTION pour éviter de le faire tomber sur soi ou sur le sol.
- Page 133 BATTERIE ET RECHARGE Placer la batterie et le chargeur sur une surface stable. Tout d’abord connecter le câble du chargeur à la prise de la batterie, placée sous le volet à ressort. La fiche est correctement insérée dans la prise quand un « clic »...
- Page 134 BATTERIE ET RECHARGE Remettre en place la batterie dans son compartiment en la tenant par la poignée, puis rebrancher le câble du véhicule avec connecteur à la prise sous le volet à ressort sur la batterie, insérer le connecteur jusqu’à entendre un «...
-
Page 135: Réglages Et Entretien Périodique
RÉGLAGES ET ENTRETIEN PÉRIODIQUE RÉGLAGES - eS 25Km/h - eS - eS 25Km/h EVO - eS - eS RÉTROVISEURS Les côtés droit et gauche du guidon sont équipés deux rétroviseurs réglables actionnant manuellement leur tige jusqu’à atteindre la position souhaitée. PHARE AVANT Il est possible de régler la hauteur du faisceau du phare avant en tournant la vis de réglage sous le... -
Page 136: Frein À Disque Avant
RÉGLAGES ET ENTRETIEN PÉRIODIQUE FREIN À DISQUE AVANT - eS 25Km/h - eS - eS 25Km/h - eS L’usure disque plaquettes automatiquement compensée, de sorte qu’il n’a pas d’effet sur le fonctionnement du frein et ne nécessite pas de réglages Si la course est excessive, et si le levier est trop près de la poignée en actionnant le frein, cela pourrait signifier la présence d’air dans le circuit ou un... -
Page 137: Frein Arrière À Tambour
RÉGLAGES ET ENTRETIEN PÉRIODIQUE FREIN ARRIÈRE À TAMBOUR - eS 25Km/h - eS - eS 25Km/h) Pour régler l’action du frein arrière agir sur l’écrou, comme illustré sur la figure. En vissant l’écrou, le jeu libre du levier de commande diminue et l’action de freinage augmente. -
Page 138: Frein Arrière À Disque Avec Fonction Combinée
RÉGLAGES ET ENTRETIEN PÉRIODIQUE FREIN ARRIÈRE À DISQUE EVOlution - eS EVOlution) L’usure disque plaquettes automatiquement compensée, de sorte qu’il n’a pas d’effet sur le fonctionnement du frein et ne nécessite pas de réglages Si la course est excessive, et si le levier est trop près de la poignée en actionnant le frein, cela pourrait signifier la présence d’air dans le circuit ou un dysfonctionnement du frein lui-même. -
Page 139: Procédures D'entretien Courant Pneus
RÉGLAGES ET ENTRETIEN PÉRIODIQUE PROCÉDURES D’ENTRETIEN COURANT PNEUS Le véhicule est équipé de pneus tubeless. Vérifier régulièrement la pression des pneus et l’ajuster, si nécessaire, avant de commencer votre trajet. - eS 25Km/h Pression pneumatique avant 2 bar. Pression pneumatique arrière 2,5 bar. -
Page 140: Verification Du Niveau Du Liquide De Frein Avant
RÉGLAGES ET ENTRETIEN PÉRIODIQUE VERIFICATION DU NIVEAU DU LIQUIDE DE FREIN AVANT Le réservoir de liquide de frein avant est équipé de regards d’inspection pour le contrôle du niveau de liquide dans le réservoir. Si le niveau de liquide de frein est faible ou insuffisant, NE PAS remplir le réservoir, mais vérifier l’état d’usure des plaquettes et du disque, et vérifier la présence de fuites éventuelles dans le circuit de freinage. -
Page 141: Vérification Du Niveau Du Liquide Du Frein Arrière
RÉGLAGES ET ENTRETIEN PÉRIODIQUE VÉRIFICATION DU NIVEAU DU LIQUIDE DU FREIN ARRIÈRE (eS EVOlution - eS EVOlution uniquement) Le réservoir de liquide de frein avant est équipé de regards d’inspection pour le contrôle du niveau de liquide dans le réservoir. Si le niveau de liquide de frein est faible ou insuffisant, NE PAS remplir le réservoir, mais vérifier l’état d’usure des plaquettes et du disque, et vérifier la présence de... -
Page 142: Remplacement Ampoule Phare Avant
RÉGLAGES ET ENTRETIEN PÉRIODIQUE REMPLACEMENT AMPOULE PHARE AVANT - eS 25Km/h - eS - eS 25Km/h - eS - eS 25Km/h - eS - eS 25Km/h - eS EVOlution) Pour remplacer l’ampoule de type H8 35W du phare avant, procéder comme suit, en utilisant la clé TORX T 20 fournie comme accessoire et placée sous la selle retirer les 2 vis latérales sous le phare: retirer d’abord les demi-coques à... -
Page 143: Es 3 Evolution)
RÉGLAGES ET ENTRETIEN PÉRIODIQUE débrancher le connecteur, tourner la douille dans un - eS 25Km/h - eS 25Km/h sens antihoraire et retirez-la. - eS 25Km/h - eS - eS 25Km/h - eS Remplacer l’ampoule et sa douille. PHARE AVANT (eS - eS EVOlution) - eS... -
Page 144: Groupe Optique Arrière Et Clignotants
RÉGLAGES ET ENTRETIEN PÉRIODIQUE GROUPE OPTIQUE ARRIÈRE ET CLIGNOTANTS Le groupe optique arrière, les clignotants avant et arrière et le feu de la plaque d’immatriculation sont équipés de LED et sont intégrés dans la structure du véhicule. Pour remplacement contacter atelierconventionné. -
Page 145: Tableau Récapitulatif Des Procédures D'entretien Courant
Usure mâchoires frein arrière Courroies de transmission Écrous, boulons, disposi- tifs de fixation Béquille Roulements de direction Excepté l’« orientation du phare » tous les contrôles doivent être confiés à un personnel qualifié ASKOLL. eS_Rev02_FR.indb 61 eS_Rev02_FR.indb 61 15/07/2020 16:27:51 15/07/2020 16:27:51... -
Page 146: Propreté Du Véhicule
RÉGLAGES ET ENTRETIEN PÉRIODIQUE PROPRETÉ DU VÉHICULE Pour éviter l’oxydation, laver le scooter chaque fois qu’il est utilisé dans des conditions météo ou routières extrêmes, telles que les routes salées ou recouvertes de produits antigel en hiver, des conditions de pollution de l’air typiques des villes, zones industrielles, zones de forte salinité... -
Page 147: Véhicule Remisé
RÉGLAGES ET ENTRETIEN PÉRIODIQUE VÉHICULE REMISÉ En vue d’une longue période d’inactivité, il est conseillé : • d’effectuer un nettoyage général du scooter, • de le ranger dans un lieu couvert • de stationner le scooter sur la béquille pour éviter que les roues restent en contact avec le sol dans la même position, •... -
Page 148: Codes D'erreur
CODES D’ERREUR CODES D’ERREUR - eS 25Km/h EVO - eS - eS 25Km/h - eS Panne du système de communication : des problèmes de communication entre les modules intelligents du véhicule sont détectés. Apporter votre véhicule à un atelier conventionné. Panne de l’onduleur : le système détecte une défaillance de l’onduleur. -
Page 149: Codes D'erreur
CODES D’ERREUR - eS 25Km/h EVO - eS - eS 25Km/h - eS Panne de la batterie B : le système détecte une anomalie dans le bloc batterie B. Apporter la batterie dans un atelier conventionné. Échauffement batterie : le système détecte une température excessive de la batterie et réduit le niveau d’énergie fournie au moteur. - Page 150 CODES D’ERREUR - eS 25Km/h EVO - eS - eS 25Km/h - eS Dysfonctionnement des clignotants : le système détecte une rupture ou un dysfonctionnement des clignotants . Vérifier le fonctionnement et les faire remplacer par un atelier conventionné. Dysfonctionnement feu arrière et feu de plaque d’immatriculation : le système détecte la rupture ou un dysfonctionnement du feu arrière et du feu de la plaque d’immatriculation.
-
Page 151: Caractéristiques Techniques
CARACTÉRISTIQUES TECHNIQUES DIMENSIONS DU SCOOTER eS_Rev02_FR.indb 67 eS_Rev02_FR.indb 67 15/07/2020 16:28:02 15/07/2020 16:28:02... -
Page 152: Caractéristiques Du Moteur
CARACTÉRISTIQUES TECHNIQUES MODÈLE 25Km/h / eS 25Km/h / eS CARACTÉRISTIQUES DU MOTEUR Modèle Brushless permanent magnet sinusoidal motor Type moteur EME 200 EME 201 Tension de fonctionnement 54 V Puissance MAX 1,5 KW 1,4 KW 3 KW 1,4 KW 3 KW limitée limitée limitée... -
Page 153: Caractéristiques Du Véhicule
CARACTÉRISTIQUES TECHNIQUES MODÈLE 25Km/h / eS 25Km/h / eS CARACTÉRISTIQUES DU VÉHICULE Longueur 1830 mm / 2015 mm (modèles EVO) Largeur 726 mm Entr'axe 1245 mm Hauteur fixation rétroviseurs 1036 mm Pression pneumatique avant 2 bar Pression pneumatique arrière 2,5 bar 2,8 bar Poids en ordre de marche 72 Kg... -
Page 154: Caractéristiques Groupe Optique Arrière
CARACTÉRISTIQUES TECHNIQUES MODÈLE 25Km/h / eS 25Km/h / eS CARACTÉRISTIQUES GROUPE OPTIQUE ARRIÈRE Feu arrière Feu stop Clignotants Feu de plaque eS_Rev02_FR.indb 70 eS_Rev02_FR.indb 70 15/07/2020 16:28:02 15/07/2020 16:28:02... -
Page 155: Déclaration De Conformité Ue (Ddc)
Déclaration de conformité UE (DdC) Déclaration de conformité UE (DdC) Nous Nom de l'entreprise : Askoll EVA S.p.A. Adresse : Via industria 30, 36031 Dueville (VI) Italie Déclarons sous notre propre responsabilité que le produit suivant : Appareil / Produit : Chargeur de batterie E-Scooter Modèle :... -
Page 156: Remarques
REMARQUES eS_Rev02_FR.indb 72 eS_Rev02_FR.indb 72 15/07/2020 16:28:03 15/07/2020 16:28:03... - Page 157 Dada la constante evolución de los productos Askoll en términos de seguridad y prestaciones, es posible que algunos contenidos de este Manual de uso y mantenimiento no reflejen exactamente las características de su vehículo. Por tal motivo, los datos, las figuras y las descripciones aquí consignados no podrán justificar ningún tipo de reclamación.
- Page 158 ÍNDICE ÍNDICE INFORMACIÓN GENERAL SÍMBOLOS INFORMACIÓN IMPORTANTE DE SEGURIDAD IDENTIFICACIÓN MANDOS E INSTRUMENTOS VISTA GENERAL DEL SCOOTER - eS 25Km/h LADO IZQUIERDO - eS 25Km/h LADO DERECHO - eS 25Km/h LADO IZQUIERDO - eS 25Km/h LADO DERECHO LADO IZQUIERDO LADO DERECHO EVOlution - eS EVOlution LADO IZQUIERDO EVOlution - eS...
- Page 159 ÍNDICE GRUPO DE MANDOS IZQUIERDO Maneta de mando del freno trasero Maneta del freno trasero con función combinada (solo eS - eS EVOlution) Selector del modo de regeneración de energía Conmutador de los intermitentes Botón del claxon GRUPO DE MANDOS DERECHO Palanca de mando del freno delantero Mando del acelerador Selector de encendido del faro de carretera (solo eS...
- Page 160 - eS EVOlution) Selección del modo de regeneración de energía AJUSTES EN LA PANTALLA Visualización del cuentakilómetros Ajuste del reloj BLUETOOTH (solo eS EVOlution - eS EVOlution) ® Conectividad Aplicación ASKOLL DRIVE SMART eS_Rev02_ES.indb iv eS_Rev02_ES.indb iv 15/07/2020 17:01:51 15/07/2020 17:01:51...
- Page 161 ÍNDICE SILLÍN Apertura del sillín Gancho portabolsas ESTACIONAMIENTO DEL SCOOTER BATERÍA Y RECARGA BATERÍAS Preparación de la batería en el primer uso del scooter Eliminación de las baterías agotadas CARGADOR DE BATERÍAS CARGA DE LAS BATERÍAS CARGA CON LA BATERÍA MONTADA Bloqueo del sillín en posición elevada para que pase el cable CARGA CON LA BATERÍA DESMONTADA AJUSTES Y MANTENIMIENTO PERIÓDICO...
- Page 162 ÍNDICE OPERACIONES DE MANTENIMIENTO ORDINARIO NEUMÁTICOS CONTROL DEL NIVEL DE LÍQUIDO DEL FRENO DELANTERO CONTROL DEL NIVEL DE LÍQUIDO DEL FRENO TRASERO (solo eS EVOlution - eS EVOlution) CAMBIO DE LA BOMBILLA DEL FARO DELANTERO (eS - eS 25Km/h - eS - eS 25Km/h - eS EVOlution)
-
Page 163: Información General
INFORMACIÓN GENERAL SÍMBOLOS En el manual se destacan algunas informaciones de particular importancia que exigen una lectura más detenida. Para ello se utilizan distintos símbolos, que llaman la atención sobre el texto que los acompaña y facilitan la ubicación de los temas en las distintas secciones. Este símbolo indica situaciones de peligro que, si no se evitan, pueden causar PRECAUCIÓN lesiones graves o muerte. -
Page 164: Información Importante De Seguridad
INFORMACIÓN GENERAL INFORMACIÓN IMPORTANTE DE SEGURIDAD El conocimiento del scooter eléctrico es una condición fundamental: lea y asimile PRECAUCIÓN este manual antes del primer uso. Este manual de uso es parte integrante del scooter, consérvelo para futuras PRECAUCIÓN consultas. En caso de venta, entréguelo al nuevo propietario. El scooter no debe ser utilizado por personas con capacidades físicas, sensoriales o mentales disminuidas, o que no tengan los conocimientos y la experiencia PRECAUCIÓN... -
Page 165: Identificación
Indique siempre estos datos en los pedidos de recambios. Se aconseja verificar que los datos de identificación indicados en el vehículo coincidan con los que figuran en los documentos respectivos. ASKOLL EVA S.R.L. dB(A) - - - min (-- kW) -
Page 166: Mandos E Instrumentos
MANDOS E INSTRUMENTOS VISTA GENERAL DEL SCOOTER - eS 25Km/h LADO IZQUIERDO - eS 25Km/h LADO DERECHO A. Espejo retrovisor H. Gancho del sillín B. Grupo óptico delantero I. Grupo óptico trasero C. Intermitente de dirección J. Portamatrícula D. Catadióptrico delantero izquierdo K. -
Page 167: Es 2 - Es 2 25Km/H Lado Izquierdo
MANDOS E INSTRUMENTOS VISTA GENERAL DEL SCOOTER - eS 25Km/h LADO IZQUIERDO - eS 25Km/h LADO DERECHO A. Espejo retrovisor I. Grupo óptico trasero B. Grupo óptico delantero J. Portamatrícula C. Intermitente de dirección K. Catadióptrico trasero D. Catadióptrico delantero izquierdo L. -
Page 168: Lado Izquierdo
MANDOS E INSTRUMENTOS VISTA GENERAL DEL SCOOTER LADO IZQUIERDO LADO DERECHO A. Espejo retrovisor I. Grupo óptico trasero B. Grupo óptico delantero J. Portamatrícula C. Intermitente de dirección K. Catadióptrico trasero D. Catadióptrico delantero izquierdo L. Motor E. Caballete M. Catadióptrico delantero derecho F. -
Page 169: Es 2 Evolution - Es 3 Evolution Lado Izquierdo
MANDOS E INSTRUMENTOS VISTA GENERAL DEL SCOOTER EVOlution - eS EVOlution LADO IZQUIERDO EVOlution - eS EVOlution LADO DERECHO A. Espejo retrovisor I. Grupo óptico trasero B. Grupo óptico delantero J. Portamatrícula C. Intermitente de dirección K. Catadióptrico trasero D. Catadióptrico delantero izquierdo L. -
Page 170: Posición De Los Mandos E Instrumentos
MANDOS E INSTRUMENTOS POSICIÓN DE LOS MANDOS E INSTRUMENTOS TABLERO (eS - eS 25Km/h - eS - eS 25Km/h) Km/h Km/trip PWR ECO SELECT A. Instrumentos F. Selector del modo de conducción (solo eS - eS B. Conmutador con llave G. -
Page 171: Evolution)
MANDOS E INSTRUMENTOS POSICIÓN DE LOS MANDOS E INSTRUMENTOS TABLERO (eS EVOlution) A. Instrumentos F. Selector del modo de conducción B. Conmutador con llave G. Botón de arranque del motor C. Selector del modo de regeneración de energía H. Mando del acelerador D. - Page 172 MANDOS E INSTRUMENTOS POSICIÓN DE LOS MANDOS E INSTRUMENTOS TABLERO (eS Km/h Km/trip PWR ECO SELECT A. Instrumentos G. Botón de arranque del motor B. Conmutador con llave H. Mando del acelerador C. Selector del modo de regeneración de energía I.
- Page 173 MANDOS E INSTRUMENTOS POSICIÓN DE LOS MANDOS E INSTRUMENTOS TABLERO (eS EVOlution) A. Instrumentos G. Botón de arranque del motor B. Conmutador con llave H. Mando del acelerador C. Selector del modo de regeneración de energía I. Palanca de mando del freno delantero D.
-
Page 174: Grupo De Mandos Izquierdo 12 Es
MANDOS E INSTRUMENTOS GRUPO DE MANDOS IZQUIERDO - eS 25Km/h - eS - eS 25Km/h Maneta de mando del freno trasero La maneta del freno trasero (de disco en eS EVOlution y eS EVOlution, de tambor en los otros modelos) se encuentra en la parte izquierda del manillar. -
Page 175: Conmutador De Los Intermitentes
MANDOS E INSTRUMENTOS Conmutador de los intermitentes - eS 25Km/h - eS - eS 25Km/h - eS Desplace el cursor hacia la izquierda para accionar los intermitentes izquierdos. Desplace el cursor hacia la derecha para accionar los intermitentes derechos. Sitúe el cursor en el centro para apagar los intermitentes. -
Page 176: Grupo De Mandos Derecho
MANDOS E INSTRUMENTOS GRUPO DE MANDOS DERECHO Palanca de mando del freno delantero La palanca del freno de disco delantero se encuentra en la parte derecha del manillar. Mando del acelerador - eS 25Km/h - eS - eS 25Km/h - eS La velocidad del scooter se regula girando la empuñadura. -
Page 177: Selector De Encendido Del Faro De Carretera
MANDOS E INSTRUMENTOS Selector de encendido del faro de carretera - eS (solo eS - eS EVOlution) Permite encender y apagar la luz de carretera. Selector del modo de conducción - eS - eS - eS 25Km/h - eS 25Km/h (solo eS - eS - eS... -
Page 178: Conmutador Con Llave
MANDOS E INSTRUMENTOS CONMUTADOR CON LLAVE El conmutador con llave habilita o deshabilita el sistema y el bloqueo de la dirección. El scooter se suministra con una llave principal y un duplicado, que accionan el conmutador y la apertura del sillín. Se aconseja guardar el duplicado separado de la llave principal. - Page 179 MANDOS E INSTRUMENTOS INSTRUMENTOS - eS 25Km/h - eS - eS 25Km/h EVO - eS Km/h Km/h Km/trip Km/trip PWR ECO PWR ECO SELECT SELECT A. Testigos luminosos B. Velocímetro C. Pantalla digital D. Mandos de la pantalla eS_Rev02_ES.indb 17 eS_Rev02_ES.indb 17 15/07/2020 17:02:21 15/07/2020 17:02:21...
-
Page 180: Testigos Luminosos
MANDOS E INSTRUMENTOS TESTIGOS LUMINOSOS - eS 25Km/h - eS - eS 25Km/h - eS E. Indicador de habilitación del motor F. Indicador de alta temperatura G. Indicador de problema grave H. Indicador de intermitentes activados I. Indicador de luces encendidas EVO - eS J. - Page 181 MANDOS E INSTRUMENTOS Indicador de alta temperatura Testigo de color ámbar, se enciende y permanece con luz fija para indicar una alarma de sobretemperatura. En la pantalla aparece el código de alarma correspondiente. Para la descripción de la alarma relativa al código visualizado, consulte el capítulo “CÓDIGOS DE ERROR”.
-
Page 182: Indicador De Luces Encendidas
MANDOS E INSTRUMENTOS Indicador de intermitentes activados Testigo de color verde, parpadea para indicar la activación de los intermitentes derechos o izquierdos; se apaga cuando se desactivan los intermitentes. Indicador de luces encendidas Testigo de color verde, se enciende cuando se habilita el motor. - Page 183 MANDOS E INSTRUMENTOS VELOCÍMETRO (eS - eS 25Km/h - eS - eS 25Km/h) Indica la velocidad actual. El valor aparece en kilómetros hora (km/h) o millas Km/h hora (mph). VELOCÍMETRO (eS Indica la velocidad actual. El valor aparece en kilómetros hora (km/h) o millas Km/h hora (mph).
-
Page 184: Botones De Ajuste Del Menú
MANDOS E INSTRUMENTOS VELOCÍMETRO (eS EVOlution - eS EVOlution) Indica la velocidad actual. El valor aparece en kilómetros hora (km/h). BOTONES DE AJUSTE DEL MENÚ - eS 25Km/h - eS - eS 25Km/h - eS Los botones SELECT y SET se utilizan para: SELECT •... -
Page 185: Pantalla Digital
MANDOS E INSTRUMENTOS PANTALLA DIGITAL - eS 25Km/h - eS - eS 25Km/h - eS Km/trip La pantalla digital muestra todas las informaciones PWR ECO sobre el estado del vehículo, a saber: • presencia de las baterías en los compartimentos A y B, •... - Page 186 MANDOS E INSTRUMENTOS Testigo de mantenimiento El testigo de mantenimiento se puede encender solo o junto con el testigo de problema grave. Si se enciende, es aconsejable acudir a un concesionario para el control y la solución del problema. eS_Rev02_ES.indb 24 eS_Rev02_ES.indb 24 15/07/2020 17:02:31 15/07/2020 17:02:31...
-
Page 187: Controles Antes De Arrancar
CONTROLES ANTES DE ARRANCAR Se recomienda hacer los siguientes controles antes de utilizar el scooter: • observar el estado de carga de las baterías, • verificar el funcionamiento de los faros delantero y trasero, de los intermitentes y de la luz de la matrícula, •... - Page 188 No arranque con el caballete central bajado: cuando la rueda trasera toca el suelo, ADVERTENCIA no debe estar girando porque podría generar un impulso brusco. En calzadas irregulares o resbaladizas, o en caso de lluvia o nieve, reduzca la velocidad, aumente la distancia de seguridad respecto a otros vehículos y conduzca ADVERTENCIA con prudencia.
- Page 189 OPERACIONES PUESTA MARCHA Bloqueo y desbloqueo de la dirección Para bloquear la dirección, gire el manillar hacia la izquierda hasta el tope. Presione la llave hacia dentro y gírela hacia la izquierda; al mismo tiempo, gire ligeramente el manillar hacia la derecha hasta que la llave se encaje en el símbolo del candado: el bloqueo de la dirección queda activado y se puede extraer la llave.
- Page 190 Habilitación del motor - eS - eS - eS 25Km/h - eS 25Km/h Para arrancar, el motor tiene que estar habilitado. Para habilitar el motor, introduzca la llave en el conmutador, gírela a la posición y presione el botón de habilitación del motor durante 3 segundos. El testigo de puesta en marcha se enciende.
- Page 191 Selección del modo de conducción (eS - eS - eS EVO) - eS - eS El conmutador permite seleccionar tres modos de conducción: Modo ECONOMY Velocidad máxima: 32 km/h En la pantalla aparece el icono ECO. Modo NORMAL Velocidad máxima: 37 km/h No aparece ningún icono en la pantalla.
- Page 192 Selección del modo de conducción - eS - eS EVOlution) El conmutador permite seleccionar tres modos de conducción: Modo ECONOMY Modo NORMAL Estas modalidades se utilizan para minimizar los consumos. Modo POWER Velocidad máxima: 67 km/h En la pantalla aparece el icono PWR Autonomía 96 km según el reglamento 168/2013 (UE).
- Page 193 Selección del modo de regeneración de energía - eS 25Km/h - eS - eS 25Km/h - eS Si está activado el modo de regeneración de la energía, cuando el scooter desacelera, la batería se carga automáticamente. Utilice el conmutador de dos posiciones para activar o desactivar el modo de regeneración de energía: Si el botón se presiona hacia arriba, se activa la regeneración de energía y aumenta...
-
Page 194: Ajustes En La Pantalla
AJUSTES EN LA PANTALLA - eS 25Km/h - eS - eS 25Km/h - eS Visualización del cuentakilómetros Al encendido, todos los testigos de la pantalla se Km/trip encienden durante algunos segundos. PWR ECO Pulse SELECT para cambiar el parámetro que aparece en la pantalla: Kilometraje total recorrido. - Page 195 Ajuste del reloj - eS 25Km/h - eS - eS 25Km/h - eS • Mantenga presionado el botón SELECT durante 2 segundos: los dos dígitos de la hora comienzan a Km/trip parpadear. • Presione repetidamente SELECT para ajustar la hora. •...
-
Page 196: Bluetooth
ASKOLL EVA autoriza el uso de ellos. Otros nombres y marcas comerciales pertenecen a sus respectivos propietarios. Mediante la presente, Askoll EVA S.p.A., Via industria 30, 36031 Dueville (VI) Italia, declara que el aparato de radio HWE213 es conforme a la Directiva 2014/53/UE. El texto completo de la declaración de conformidad UE se puede consultar a través del siguiente enlace: http://mobility.askoll.com/site/en/assistenza_ricambi/... -
Page 197: Apertura Del Sillín
SILLÍN - eS 25Km/h EVO - eS Apertura del sillín - eS 25Km/h - eS La cerradura para abrir el asiento se encuentra bajo el lado izquierdo del propio asiento en los modelos EVOlution y eS EVOlution, y en la parte trasera izquierda del vehículo en los demás modelos. -
Page 198: Estacionamiento Del Scooter
ESTACIONAMIENTO DEL SCOOTER Estacione el scooter apoyado en el caballete. Baje el caballete con el pie hasta la apertura completa y, al mismo tiempo, levante manualmente el scooter sujetándolo con la mano derecha por el portaequipajes y tire hacia atrás hasta que se apoye por completo. ADVERTENCIA Al empujar el scooter hacia delante, el caballete vuelve automáticamente a la posición de... -
Page 199: Batería Y Recarga
BATERÍA Y RECARGA BATERÍAS Los vehículos eS , eS 25Km/h y eS EVOlution de primer equipamiento se suministran con dos baterías de iones de litio. Los modelos eS y eS 25Km/h incluyen de serie una batería, mientras que la segunda se suministra como opcional (batería mod. - Page 200 BATERÍA Y RECARGA Si el scooter ha estado mucho tiempo a baja temperatura ambiente (entre 0 °C y +10 °C) con el motor apagado, el tiempo de recarga puede ser más largo. En caso de no utilizar el scooter durante mucho tiempo, las baterías se deberán recargar al menos una vez cada dos meses.
- Page 201 BATERÍA Y RECARGA No utilice la batería para fines distintos de los indicados. El uso para fines distintos del previsto puede hacer que la batería sufra un cortocircuito interno y se prenda PRECAUCIÓN fuego. Peligro de incendio • No desmonte ni rompa la batería •...
- Page 202 BATERÍA Y RECARGA Eliminación de las baterías agotadas Al final de su vida útil, las baterías que contienen acumuladores de litio no deben depositarse en los contenedores de residuos domésticos, sino desecharse en conformidad con las normas vigentes. La directiva europea para este tipo de residuos establece que los países firmantes de dicha convención se comprometen a adoptar medidas apropiadas para que los acumuladores agotados se...
-
Page 203: Cargador De Baterías
BATERÍA Y RECARGA CARGADOR DE BATERÍAS Las baterías deben cargarse con el cargador que se suministra de serie (MOD. TVC202). Para activar el cargador de batería, es necesario conectarlo eléctrica cable correspondiente y al vehículo o a una batería mediante la base de enchufe. - Page 204 BATERÍA Y RECARGA El cargador de baterías no debe ser utilizado por personas con capacidades físicas, sensoriales o mentales disminuidas, o que no tengan los conocimientos y la experiencia necesarios, salvo que estén instruidas y supervisadas por una persona PRECAUCIÓN que se haga responsable de su seguridad y del buen uso del aparato.
-
Page 205: Carga De Las Baterías
BATERÍA Y RECARGA CARGA DE LAS BATERÍAS - eS 25Km/h - eS - eS 25Km/h - eS El nivel de carga de las baterías se indica en la parte izquierda de la pantalla digital del vehículo. En Km/trip la pantalla, el icono A indica la carga de la batería alojada en el compartimento A, y el icono B, la de la batería que está... - Page 206 BATERÍA Y RECARGA CARGA CON LA BATERÍA MONTADA Para cargar la batería montada en el vehículo, proceda del siguiente modo: Desactive el sistema. Levante el sillín, controle que el cargador esté conectado a la toma de corriente y que las baterías estén correctamente introducidas en los compartimentos y conectadas a los conectores.
-
Page 207: Bloqueo Del Sillín En Posición Elevada Para Que Pase El Cable
BATERÍA Y RECARGA Bloqueo del sillín en posición elevada para que pase el cable Durante la carga de la batería montada en el vehículo, es posible cerrar el sillín con la cerradura dejando una abertura suficiente para que pase el cable de carga. Esto puede ser útil si la carga se realiza al aire libre, puesto que las baterías y el cargador quedan cubiertos pero se puede disipar el calor generado por... - Page 208 BATERÍA Y RECARGA Cierre el sillín manteniendo presionado el pestillo. El sillín se bloquea en posición elevada para permitir el paso del cable de carga. Al abrir la cerradura con la llave y levantar el sillín, el pestillo vuelve automáticamente a la posición original. eS_Rev02_ES.indb 46 eS_Rev02_ES.indb 46 15/07/2020 17:02:55...
-
Page 209: Carga Con La Batería Desmontada
BATERÍA Y RECARGA CARGA CON LA BATERÍA DESMONTADA El cargador se puede extraer para cargar una batería dejando la otra montada para seguir utilizando el scooter. Desconecte el cable de la batería, presionando las dos aletas laterales del conector para extraerlo. Saque la batería del alojamiento sujetándola por el asa. - Page 210 BATERÍA Y RECARGA Desconecte de la toma el conector del cable del cargador. Para extraerlo, presione las dos aletas laterales. Quite el cargador de su alojamiento junto con los dos cables. Al extraer el cargador, sujételo con firmeza para evitar que se le caiga al suelo o en PRECAUCIÓN los pies.
- Page 211 BATERÍA Y RECARGA Apoye la batería y el cargador en una superficie estable. Conecte primero el cable del cargador a la toma de la batería, situada bajo la tapa de muelle. La clavija está bien insertada en la toma cuando se oye el clic de encastre.
- Page 212 BATERÍA Y RECARGA Coloque la batería en su compartimento, sujetándola por el asa, y conecte el cable del vehículo que tiene el conector a la toma situada bajo la tapa de muelle de la batería. Inserte el conector hasta percibir el clic y controle que la batería esté...
-
Page 213: Ajustes
AJUSTES Y MANTENIMIENTO PERIÓDICO AJUSTES - eS 25Km/h - eS - eS 25Km/h EVO - eS - eS ESPEJOS RETROVISORES En los lados derecho e izquierdo del manillar hay dos retrovisores que se pueden regular girando manualmente la varilla a la posición deseada. FARO DELANTERO Para subir o bajar el haz de luz del faro delantero, gire el tornillo situado debajo del faro con la llave TORX... -
Page 214: Freno De Disco Delantero
AJUSTES Y MANTENIMIENTO PERIÓDICO FRENO DE DISCO DELANTERO - eS 25Km/h - eS - eS 25Km/h - eS El desgaste del disco y de las pastillas se compensa automáticamente, por lo cual no afecta al funcionamiento del freno y no necesita ajustes. Si el freno tiene una carrera excesiva y la palanca se acerca demasiado al puño, puede ser que haya aire en el circuito o que el freno esté... -
Page 215: Freno Trasero De Tambor Con Función Combinada
AJUSTES Y MANTENIMIENTO PERIÓDICO FRENO TRASERO DE TAMBOR - eS 25Km/h - eS - eS 25Km/h) Para regular la acción del freno trasero, gire la tuerca como se ilustra en la figura. Al enroscar la tuerca, la palanca de mando tiene menos holgura y el frenado es más intenso. -
Page 216: Freno Trasero De Disco
AJUSTES Y MANTENIMIENTO PERIÓDICO FRENO TRASERO DE DISCO EVOlution - eS EVOlution) El desgaste del disco y de las pastillas se compensa automáticamente, por lo cual no afecta al funcionamiento del freno y no necesita ajustes. Si el freno tiene una carrera excesiva y la palanca se acerca demasiado al puño, puede ser que haya aire en el circuito o que el freno esté... -
Page 217: Operaciones De Mantenimiento Ordinario Neumáticos
AJUSTES Y MANTENIMIENTO PERIÓDICO OPERACIONES DE MANTENIMIENTO ORDINARIO NEUMÁTICOS El vehículo está equipado con neumáticos sin cámara (tubeless). Controle regularmente la presión de los neumáticos y, si corresponde, restablézcala antes de ponerse en marcha. - eS 25Km/h Presión neumático delantero 2 bar Presión neumático trasero 2,5 bar... -
Page 218: Control Del Nivel De Líquido Del Freno Delantero
AJUSTES Y MANTENIMIENTO PERIÓDICO CONTROL DEL NIVEL DE LÍQUIDO DEL FRENO DELANTERO El depósito de líquido de freno delantero tiene una mirilla de control del nivel. Si el nivel del líquido de frenos está bajo, NO rellene nunca el depósito. Controle el estado de desgaste de las pastillas y del disco de freno y observe si hay fugas en el circuito de freno. -
Page 219: Control Del Nivel De Líquido Del Freno Trasero
AJUSTES Y MANTENIMIENTO PERIÓDICO CONTROL DEL NIVEL DE LÍQUIDO DEL FRENO TRASERO (solo eS EVOlution - eS EVOlution) El depósito de líquido de freno delantero tiene una mirilla de control del nivel. Si el nivel del líquido de frenos está bajo, NO rellene nunca el depósito. -
Page 220: Cambio De La Bombilla Del Faro Delantero
AJUSTES Y MANTENIMIENTO PERIÓDICO CAMBIO DE LA BOMBILLA DEL FARO DELANTERO - eS 25Km/h - eS - eS 25Km/h - eS - eS 25Km/h - eS - eS 25Km/h - eS EVOlution) Para cambiar la bombilla H8 35W del faro delantero, proceda como se indica a continuación, utilizando la llave TORX T 20 suministrada como accesorio y guardada debajo del sillín. -
Page 221: Faro Delantero
AJUSTES Y MANTENIMIENTO PERIÓDICO separe el conector, gire el casquillo hacia la izquierda - eS 25Km/h - eS 25Km/h y extráigalo. - eS 25Km/h - eS - eS 25Km/h - eS Cambie la bombilla y el casquillo por un conjunto nuevo. -
Page 222: Grupo Óptico Trasero E Intermitentes
AJUSTES Y MANTENIMIENTO PERIÓDICO GRUPO ÓPTICO TRASERO E INTERMITENTES El grupo óptico trasero, los intermitentes delanteros y traseros y la luz de la matrícula utilizan bombillas de led y están integrados en la estructura del vehículo. Para la sustitución, acuda a un taller autorizado. eS_Rev02_ES.indb 60 eS_Rev02_ES.indb 60 15/07/2020 17:03:11... -
Page 223: Tabla Sinóptica De Las Operaciones De Mantenimiento Periódico
Desgaste mordazas freno trasero Correas de transmisión Tuercas, pernos, dispositivos de fijación Caballete Rodamientos de la dirección Salvo la orientación del faro, todos los ajustes deben ser realizados por personal cualificado de ASKOLL. eS_Rev02_ES.indb 61 eS_Rev02_ES.indb 61 15/07/2020 17:03:12 15/07/2020 17:03:12... -
Page 224: Limpieza Del Vehículo
AJUSTES Y MANTENIMIENTO PERIÓDICO LIMPIEZA DEL VEHÍCULO Para evitar la oxidación, lave el scooter cada vez que lo utilice en condiciones atmosféricas o viales particulares, como carreteras cubiertas de sal u otros productos antihielo durante el invierno, contaminación ambiental como en ciertas ciudades o zonas industriales, o climas muy húmedos o salinos como en las zonas marítimas. -
Page 225: Inactividad Del Vehículo
AJUSTES Y MANTENIMIENTO PERIÓDICO INACTIVIDAD DEL VEHÍCULO Antes de una inactividad prolongada, se recomienda: • hacer una limpieza general del scooter, • guardar el vehículo en un sitio cubierto, • apoyar el scooter en el caballete para evitar que las ruedas queden apoyadas en el suelo en la misma posición, •... -
Page 226: Códigos De Error
CÓDIGOS DE ERROR CÓDIGOS DE ERROR - eS 25Km/h EVO - eS - eS 25Km/h - eS Fallo del sistema de comunicación: el sistema detecta problemas de comunicación entre las unidades inteligentes del vehículo. Se aconseja llevar el vehículo a un taller autorizado. Fallo del inversor: el sistema detecta un desperfecto del inversor. -
Page 227: Códigos De Error
CÓDIGOS DE ERROR - eS 25Km/h EVO - eS - eS 25Km/h - eS Fallo de la batería B: el sistema detecta un desperfecto en la batería B. Se aconseja llevar la batería a un taller autorizado. Sobretemperatura baterías: el sistema detecta una temperatura excesiva de la batería, por lo cual impide el suministro de potencia al vehículo. - Page 228 CÓDIGOS DE ERROR - eS 25Km/h EVO - eS - eS 25Km/h - eS Fallo de los intermitentes: el sistema detecta un problema en los intermitentes. Controle el funcionamiento y, si es preciso, acuda a un taller autorizado. Fallo del faro trasero y luz de matrícula: el sistema detecta un problema en el faro trasero y la luz de matrícula.
-
Page 229: Datos Técnicos
DATOS TÉCNICOS DIMENSIONES DEL SCOOTER eS_Rev02_ES.indb 67 eS_Rev02_ES.indb 67 15/07/2020 17:03:23 15/07/2020 17:03:23... -
Page 230: Datos Del Motor
DATOS TÉCNICOS MODELO 25Km/h / eS 25Km/h / eS DATOS DEL MOTOR Modelo Sin escobillas, de imán permanente, onda sinusoidal Tipo de motor EME 200 EME 201 Tensión de servicio 54 V Potencia MÁXIMA 1,5 kW 1,4 kW 3 kW 1,4 kW 3 kW limitada... -
Page 231: Datos Del Vehículo
DATOS TÉCNICOS MODELO 25Km/h / eS 25Km/h / eS DATOS DEL VEHÍCULO Largo 1830 mm / 2015 mm (modelos EVO) Ancho 726 mm Distancia entre ejes 1245 mm Altura fijaciones retrovisores 1036 mm Presión neumático delantero 2 bar Presión neumático trasero 2,5 bar 2,8 bar Peso en orden de marcha... -
Page 232: Datos Del Grupo Óptico Trasero
DATOS TÉCNICOS MODELO 25Km/h / eS 25Km/h / eS DATOS DEL GRUPO ÓPTICO TRASERO Faro trasero Luz de freno Intermitentes Luz de matrícula eS_Rev02_ES.indb 70 eS_Rev02_ES.indb 70 15/07/2020 17:03:24 15/07/2020 17:03:24... -
Page 233: Declaración Ue De Conformidad (Doc)
Declaración UE de conformidad (DoC) Declaración UE de conformidad (DoC) Nosotros Nombre de la empresa: Askoll EVA S.p.A. Dirección: Via Industria 30, 36031 Dueville (VI) Italia Declaramos bajo nuestra exclusiva responsabilidad que el siguiente producto: Aparato / Producto: Cargador de batería para E-Scooter... - Page 234 NOTAS eS_Rev02_ES.indb 72 eS_Rev02_ES.indb 72 15/07/2020 17:03:24 15/07/2020 17:03:24...
- Page 235 The constant evolution in the design, aimed to guarantee the safety and quality standards of Askoll vehicles, may result in the fact that some information contained in this Use and Maintenance Handbook can be different from the vehicle in your possession. We are therefore confident that you will understand that the data, figures and descriptions herein may not be grounds for any claims.
- Page 236 INDEX INDEX GENERAL INFORMATIONS SYMBOLS SAFETY IMPORTANT INFORMATION IDENTIFICATION CONTROLS AND INSTRUMENTS SCOOTER OVERVIEW - eS 25Km/h LEFT SIDE - eS 25Km/h RIGHT SIDE - eS 25Km/h LEFT SIDE - eS 25Km/h RIGHT SIDE LEFT SIDE RIGHT SIDE EVOlution - eS EVOlution LEFT SIDE EVOlution - eS EVOlution RIGHT SIDE...
- Page 237 INDEX LH CONTROLS Rear brake lever Rear brake lever with combined function (eS - eS EVOlution only) Power regeneration switch Turn indicators switch Horn RH CONTROLS Front brake lever Throttle control Headlight high beam light ON/OFF selector (eS - eS EVOlution only) Driving mode switch (eS - eS...
- Page 238 Driving mode selection (eS - eS EVOlution) Power regeneration selection SELECTION OF DISPLAY FUNCTIONS Odometer data display mode Setting the clock BLUETOOTH EVOlution - eS EVOlution only) ® Connectivity “ASKOLL DRIVE SMART” application eS_Rev02_EN.indb iv eS_Rev02_EN.indb iv 15/07/2020 11:57:27 15/07/2020 11:57:27...
- Page 239 INDEX SEAT Opening the seat Bag hook PARKING THE SCOOTER BATTERIES AND RECHARGE BATTERIES Battery management in the first use of the scooter Disposal of exhausted batteries BATTERY CHARGER CHARGING THE BATTERIES CHARGING WITH BATTERY ON BOARD Locking the seat in raised position for cable passage CHARGING WITH BATTERY OUTBOARD ADJUSTMENTS AND PERIODIC MAINTENANCE ADJUSTMENTS...
- Page 240 INDEX ORDINARY MAINTENANCE PROCEDURES TYRES FRONT BRAKE FLUID LEVEL CHECK REAR BRAKE FLUID LEVEL CHECK (eS EVOlution - eS EVOlution only) HEADLAMP BULB REPLACEMENT (eS - eS 25Km/h - eS - eS 25Km/h - eS EVOlution) HEADLIGHT (eS - eS EVOlution) TAIL LIGHTS AND TURN INDICATORS ORDINARY MAINTENANCE PROCEDURES TABLE...
-
Page 241: General Informations
GENERAL INFORMATIONS SYMBOLS This manual contains particularly important information that should be read with care. Each signal consists of a different symbol to make clear the content of the text that follows it, and to facilitate the placement of the subjects in the different areas. This symbol indicates situations of particular danger, which could result in death or CAUTION serious injury if not avoided. -
Page 242: Safety Important Information
GENERAL INFORMATIONS SAFETY IMPORTANT INFORMATION It is very important for you to know the electric scooter: read and understand this CAUTION manual before the first use. This operating manual is part of the scooter, keep it for future reference. If the CAUTION scooter is sold, the manual must be delivered to the next owner. -
Page 243: Identification
Identification plates are stamped on frame, engine casing and battery compartment. They must be indicated when ordering spare parts. It is advisable to check the correspondence of vehicle plates with the ones present in its documents. ASKOLL EVA S.R.L. dB(A) - - -... -
Page 244: Controls And Instruments
CONTROLS AND INSTRUMENTS SCOOTER OVERVIEW - eS 25Km/h LEFT SIDE - eS 25Km/h RIGHT SIDE A. Rear view mirror H. Seat hook B. Headlights I. Tail light C. Turn indicator J. License plate holder D. Front LH reflector K. Rear reflector E. -
Page 245: Es 2 - Es 2 25Km/H Left Side
CONTROLS AND INSTRUMENTS SCOOTER OVERVIEW - eS 25Km/h LEFT SIDE - eS 25Km/h RIGHT SIDE A. Rear view mirror I. Tail light B. Headlights J. License plate holder C. Turn indicator K. Rear reflector D. Front LH reflector L. Engine E. -
Page 246: Left Side
CONTROLS AND INSTRUMENTS SCOOTER OVERVIEW LEFT SIDE RIGHT SIDE A. Rear view mirror I. Tail light B. Headlights J. License plate holder C. Turn indicator K. Rear reflector D. Front LH reflector L. Engine E. Stand M. Front RH reflector F. -
Page 247: Es 2 Evolution - Es 3 Evolution Left Side
CONTROLS AND INSTRUMENTS SCOOTER OVERVIEW EVOlution - eS EVOlution LEFT SIDE EVOlution - eS EVOlution RIGHT SIDE A. Rear view mirror I. Tail light B. Headlights J. License plate holder C. Turn indicator K. Rear reflector D. Front LH reflector L. -
Page 248: Controls And Instruments Position
CONTROLS AND INSTRUMENTS CONTROLS AND INSTRUMENTS POSITION DASHBOARD (eS - eS 25Km/h - eS - eS 25Km/h) Km/h Km/trip PWR ECO SELECT A. Instrument panel F. Driving mode switch (eS - eS only) B. Key switch G. Engine start switch C. - Page 249 CONTROLS AND INSTRUMENTS CONTROLS AND INSTRUMENTS POSITION DASHBOARD (eS EVOlution) A. Instrument panel F. Driving mode switch B. Key switch G. Engine start switch C. Power regeneration switch H. Throttle control D. Turn indicators switch I. Front brake lever E. Horn J.
- Page 250 CONTROLS AND INSTRUMENTS CONTROLS AND INSTRUMENTS POSITION DASHBOARD (eS Km/h Km/trip PWR ECO SELECT A. Instrument panel G. Engine start switch B. Key switch H. Throttle control C. Power regeneration switch I. Front brake lever D. Turn indicators switch J. Combined brake control lever E.
- Page 251 CONTROLS AND INSTRUMENTS CONTROLS AND INSTRUMENTS POSITION DASHBOARD (eS EVOlution) A. Instrument panel G. Engine start switch B. Key switch H. Throttle control C. Power regeneration switch I. Front brake lever D. Turn indicators switch J. Combined brake control lever E.
- Page 252 CONTROLS AND INSTRUMENTS LH CONTROLS - eS 25Km/h - eS - eS 25Km/h Rear brake lever The rear brake lever (disc brake for eS EVOlution and eS EVOlution, drum type for all other models) is located on the left side of the handlebar. Rear brake lever with combined function EVO - eS - eS...
- Page 253 CONTROLS AND INSTRUMENTS Turn indicators switch - eS 25Km/h - eS - eS 25Km/h - eS Move the lever to the left to operate LH turn indicator. Move the lever to the right to operate RH turn indicator. Press the button in the centre of the lever to turn the indicators off.
- Page 254 CONTROLS AND INSTRUMENTS RH CONTROLS Front brake lever Front disk brake lever is placed on the right side of the handlebar. Throttle control - eS 25Km/h - eS - eS 25Km/h - eS Scooter speed is adjusted through the grip. eS_Rev02_EN.indb 14 eS_Rev02_EN.indb 14 15/07/2020 11:57:52...
-
Page 255: Headlight High Beam Light On/Off Selector
Three different driving modes can be selected using the switch depending on driving style, road conditions or other. The eS1 25Km/h and eS2 25Km/h models have a single driving mode and their speed is limited to 25 Km/h. Engine start switch... -
Page 256: Key Switch
CONTROLS AND INSTRUMENTS KEY SWITCH The key switch enables or disables system and steering lock. The scooter is provided with a main key and a duplicate, both can be used to actuate the key switch and to open the seat. Please, keep the duplicate key separated from the main one. -
Page 257: Instrument Panel
CONTROLS AND INSTRUMENTS INSTRUMENT PANEL - eS 25Km/h - eS - eS 25Km/h EVO - eS Km/h Km/h Km/trip Km/trip PWR ECO PWR ECO SELECT SELECT A. Warning lights B. Speedometer C. Digital display D. Display controls eS_Rev02_EN.indb 17 eS_Rev02_EN.indb 17 15/07/2020 11:58:00 15/07/2020 11:58:00... -
Page 258: Warning Lights
CONTROLS AND INSTRUMENTS WARNING LIGHTS - eS 25Km/h - eS - eS 25Km/h - eS E. Engine enabling warning light F. Temperature warning light G. Serious problem warning light H. Operating turn indicators warning light I. Lights warning light EVO - eS J. - Page 259 CONTROLS AND INSTRUMENTS Temperature warning light The warning light indicating high temperature is amber, it turns on and remains on to indicate an overtemperature alarm. Its alarm code can be read on the display. Alarm description regarding displayed code is explained in “ERROR CODES”...
-
Page 260: High Beam Light Indicator
CONTROLS AND INSTRUMENTS Operating turn indicators warning light Turn indicators warning light is green, it turns on and blinks to indicate RH or LH activation and it turns off when they are deactivated. Lights warning light Lights warning light is green, it turn on when engine is enabled. - Page 261 CONTROLS AND INSTRUMENTS SPEEDOMETER (eS - eS 25Km/h - eS - eS 25Km/h) Speedometer indicates current speed. The value is displayed in kilometres per hour (km/h) Km/h and miles per hour (mph). SPEEDOMETER (eS Speedometer indicates current speed. The value is displayed in kilometres per hour (km/h) Km/h and miles per hour (mph).
-
Page 262: Menu Setting Buttons
CONTROLS AND INSTRUMENTS SPEEDOMETER (eS - eS EVOlution) Speedometer indicates current speed. The value is displayed in kilometres per hour (km/h). MENU SETTING BUTTONS - eS 25Km/h - eS - eS 25Km/h - eS SELECT and SET buttons must be used to: SELECT •... -
Page 263: Digital Display
CONTROLS AND INSTRUMENTS DIGITAL DISPLAY - eS 25Km/h - eS - eS 25Km/h - eS Km/trip On the digital display it is possible to have all the PWR ECO information regarding vehicle status, namely: • battery presence on A and B compartments, •... - Page 264 CONTROLS AND INSTRUMENTS Maintenance warning light Maintenance warning light can light by itself or together with Serious problem warning light. If it turns on, it is advisable to take the vehicle to an Authorized Dealer to have the problem controlled and solved.
-
Page 265: Checks Before Departure
CHECKS BEFORE DEPARTURE Before using the scooter, it is always good practice to carry out certain controls: • check battery charge, • check headlight, tail light, turn indicators and number plate light operation, • check front and rear brakes operation, •... - Page 266 Avoid departing with the centre stand down: when the rear wheel makes contact WARNING with the ground, it should not turn to avoid abrupt departure. Drive very carefully on bumpy, wet, snowy or slippery roads, it will be necessary to WARNING reduce speed and increase safety distance from other vehicles.
- Page 267 OPERATIONS TO START Steering lock engagement To engage the steering lock, turn the handlebar left until it stops. Press the key inwards and turn counterclockwise; while turning the handlebar slightly clockwise until the key is on the lock; now the steering lock is inserted and you can remove the key.
- Page 268 Engine enabling - eS - eS - eS 25Km/h - eS 25Km/h The engine must be enabled to start. To enable the engine, insert the key into the switch and turn it to , then press for 3 seconds to enable the engine, motion warning light will turn on.
- Page 269 Driving mode selection (eS - eS - eS EVOlution) - eS - eS Three different riding modes can be selected through the ignition switch: Mode ECONOMY Max speed: 32 Km/h. ECO icon appears on the display. Mode NORMAL Max speed: 37 Km/h.
- Page 270 Driving mode selection (eS - eS EVOlution) - eS Using the switch it is possible to select three different driving modes: ECONOMY mode NORMAL mode These modes are used to minimize consumption. POWER mode Full speed: 67 Km/h. The PWR icon appears on the display Autonomy 96 Km according to regulation 168/2013 EC.
- Page 271 Power regeneration selection - eS 25Km/h - eS - eS 25Km/h - eS During scooter deceleration, the battery can be automatically recharged by activating the power regeneration mode. Use the 2 position turn indicators switch to activate or deactivate power regeneration: Pressing button upwards,...
- Page 272 SELECTION OF DISPLAY FUNCTIONS - eS 25Km/h - eS - eS 25Km/h - eS Odometer data display mode Upon power up, all display lights will remain lit for a Km/trip few seconds. PWR ECO Press SELECT to change the parameter on the display: Total mileage.
- Page 273 Setting the clock - eS 25Km/h - eS - eS 25Km/h - eS • Press and hold SELECT button for 2 seconds: two hour digits will start blinking. Km/trip • Press SELECT as necessary to set the right hour. • Press SET: minutes digits will start blinking while hour digits will not blink any more.
-
Page 274: Bluetooth
Bluetooth SIG, Inc. and any ® use of these trademarks by ASKOLL EVA is under license. Other trademarks and trade names belong to their respective owners. Hereby, Askoll EVA SpA, Via Industria 30, 36031 Dueville (VI) Italy, declares that the HWE213 radio equipment complies with Directive 2014/53/EU. -
Page 275: Opening The Seat
SEAT - eS 25Km/h EVO - eS - eS 25Km/h - eS Opening the seat The saddle opening lock is placed under the left side of the saddle for the eS EVOlution and eS EVOlution models, while it is located in the left rear part of the vehicle for all other models. -
Page 276: Parking The Scooter
PARKING THE SCOOTER Use the stand to park. Lower the kickstand with your foot until the opening is complete and simultaneously lift the scooter manually, grabbing the luggage rack with your right hand and accompanying it until the scooter is fully supported. WARNING Pushing the scooter forward the kickstand automatically returns to the starting position:... -
Page 277: Batteries And Recharge
BATTERIES AND RECHARGE BATTERIES The first equipment of the vehicles eS , eS 25Km/h and EVOlution includes two lithium ion batteries. The models eS and eS 25Km/h are supplied with a standard battery, while the second is supplied as an option (model TVC102 batteries). - Page 278 BATTERIES AND RECHARGE If the scooter remains off for a long period at low temperatures (0 °C to +10°C), recharging might take longer. If the scooter is not used for a long time, the batteries must be recharged at least once every two months.
- Page 279 BATTERIES AND RECHARGE Do not use this battery for purposes other than those indicated. Use other than CAUTION intended could result in short circuit within the battery which could catch fire. Fire hazard • Do not disassemble or brake the battery. •...
- Page 280 BATTERIES AND RECHARGE Disposal of exhausted batteries At the end of its useful life, a battery pack containing lithium batteries must be disposed of according to the Current Regulations and cannot be disposed of as simple waste. The European Directive for this type of waste establishes that the States adhering to this convention undertake to adopt “appropriate measures”...
-
Page 281: Battery Charger
BATTERIES AND RECHARGE BATTERY CHARGER Batteries are charged using the specific charger supplied (MOD. TVC202). The charger is activated only when connected to the mains with its cable and to the vehicle or to a battery through the socket. Once connected, all leds will flash for a few seconds, and then indicate the remaining battery depending on the amount of leds lit. - Page 282 BATTERIES AND RECHARGE The charger is not intended to be used by persons with reduced physical, sensory or mental capacities, or lack of experience or knowledge, unless a person responsible for their safety has supervised or instructed them concerning the use of the charger. CAUTION Keep the battery charger and batteries out of the reach of children, make sure that they do not play with the devices.
-
Page 283: Charging The Batteries
BATTERIES AND RECHARGE CHARGING THE BATTERIES - eS 25Km/h - eS - eS 25Km/h - eS Charge level of the batteries is shown on the left side of the digital display of the vehicle. On the display, Km/trip the icon A indicates the charge of the battery housed in compartment A, icon B indicates the charge of the battery housed in compartment B. - Page 284 BATTERIES AND RECHARGE CHARGING WITH BATTERY ON BOARD To charge with battery on board: Disable the system. Raise the seat, make sure the charger is connected to the socket and that the batteries are properly inserted in their compartments and plugged to the connectors, pull out the battery charger spring wire equipped with plug.
-
Page 285: Locking The Seat In Raised Position For Cable Passage
BATTERIES AND RECHARGE Locking the seat in raised position for cable passage While charging the battery on board you can close the seat using its lock while maintaining a sufficient opening for the charging cable. This can be useful in case of outdoors charging so as to keep batteries and charger covered but allowing heat generated by the process to escape. - Page 286 BATTERIES AND RECHARGE Close the seat pressing the mechanism. The seat is locked in raised position to allow the charging cable to pass. Open the lock with the key and lift the seat to automatically return to its original position. eS_Rev02_EN.indb 46 eS_Rev02_EN.indb 46 15/07/2020 11:58:40...
-
Page 287: Charging With Battery Outboard
BATTERIES AND RECHARGE CHARGING WITH BATTERY OUTBOARD The charger can be removed to allow charging a battery leaving the scooter the possibility to circulate only with the other one. Disconnect the battery cable by pressing on the two side tabs of the connector and pull it out. Remove the battery from the compartment using the lifting handle. - Page 288 BATTERIES AND RECHARGE Disconnect the charger cable from its socket, to remove it press the two side tabs. Remove the charger along with its two cables. When removing the battery charger it is recommended to handle it with care to CAUTION prevent it from falling on yourself or on the ground.
- Page 289 BATTERIES AND RECHARGE Place battery and charger on a stable surface. First, connect the charger cable to the battery socket under the spring flap. A “click” shows correct introduction. Then connect the charger to the mains. Select desired recharge mode, as shown in “BATTERY CHARGER”.
- Page 290 BATTERIES AND RECHARGE Place the battery in its compartment holding it by the handle and plug the connector cable of the vehicle to the socket under the spring flap on the battery, insert the connector until you hear a “click” and make sure it is properly secured.
-
Page 291: Adjustments And Periodic Maintenance
ADJUSTMENTS AND PERIODIC MAINTENANCE ADJUSTMENTS - eS 25Km/h - eS - eS 25Km/h EVO - eS - eS REAR VIEW MIRRORS On the right and left of the handlebar, two mirrors are mounted and can be adjusted manually by rotating the rod to the desired position. -
Page 292: Front Disc Brake
ADJUSTMENTS AND PERIODIC MAINTENANCE FRONT DISC BRAKE - eS 25Km/h - eS - eS 25Km/h - eS The wear of disc and pads is automatically compensated, therefore it has no effect on the operation of the brake and does not require registration. If there is excessive stroke and the lever is too close to the grip when operating the brake, it could be due to the presence of air in the circuit or to irregular... -
Page 293: Rear Brake Drum
ADJUSTMENTS AND PERIODIC MAINTENANCE REAR BRAKE DRUM - eS 25Km/h - eS - eS 25Km/h) To adjust rear brake act on the nut as shown. Tightening the nut, free play of the control lever decreases and braking action increases. Conversely, loosening the nut, free play of the control lever increases and braking action decreases. -
Page 294: Rear Disc Brake With Combined Function
ADJUSTMENTS AND PERIODIC MAINTENANCE REAR DISC BRAKE EVOlution - eS EVOlution) The wear of disc and pads is automatically compensated, therefore it has no effect on the operation of the brake and does not require registration. If there is excessive stroke and the lever is too close to the grip when operating the brake, it could be due to the presence of air in the circuit or to irregular operation of the brake. -
Page 295: Ordinary Maintenance Procedures
ADJUSTMENTS AND PERIODIC MAINTENANCE ORDINARY MAINTENANCE PROCEDURES TYRES The vehicle is equipped with tubeless tires. Regularly check tyre pressure and, if necessary, adjust it before riding. - eS 25Km/h Front tyre pressure 2,0 bar. Rear tyre pressure 2,5 bar. - eS 25Km/h - eS EVO - eS - eS... -
Page 296: Front Brake Fluid Level Check
ADJUSTMENTS AND PERIODIC MAINTENANCE FRONT BRAKE FLUID LEVEL CHECK The front brake fluid reservoir is equipped with an inspection window to control the level in the tank. If the brake fluid level is low or insufficient, DO NOT fill the tank but check the wear of pads and disc as well as for leaks in the braking circuit. -
Page 297: Rear Brake Fluid Level Check
ADJUSTMENTS AND PERIODIC MAINTENANCE REAR BRAKE FLUID LEVEL CHECK EVOlution - eS EVOlution only) The front brake fluid reservoir is equipped with an inspection window to control the level in the tank. If the brake fluid level is low or insufficient, DO NOT fill the tank but check the wear of pads and disc as well as for leaks in the braking circuit. -
Page 298: Headlamp Bulb Replacement
ADJUSTMENTS AND PERIODIC MAINTENANCE HEADLAMP BULB REPLACEMENT - eS 25Km/h - eS - eS 25Km/h - eS - eS 25Km/h - eS - eS 25Km/h - eS EVOlution) To replace the headlamp H8 35W bulb, use a supplied TORX T 20 wrench (under the seat), remove the 2 lateral screws under the headlamp and then follow the procedure: first remove the left half-shell and then the right one... -
Page 299: Es 3 Evolution)
ADJUSTMENTS AND PERIODIC MAINTENANCE disconnect the connector, turn the bulb holder - eS 25Km/h - eS 25Km/h anticlockwise and remove it. - eS 25Km/h - eS - eS 25Km/h - eS Replace bulb and holder with a new one. HEADLIGHT (eS - eS EVOlution) - eS... -
Page 300: Tail Lights And Turn Indicators
ADJUSTMENTS AND PERIODIC MAINTENANCE TAIL LIGHTS AND TURN INDICATORS The tail light, front and rear turn indicators and number plate light are equipped with LEDs and are integrated to the vehicle structure. To replace them contact an authorized workshop. eS_Rev02_EN.indb 60 eS_Rev02_EN.indb 60 15/07/2020 11:58:57 15/07/2020 11:58:57... -
Page 301: Ordinary Maintenance Procedures Table
Front brake pad wear Rear brake pad wear Rear brake shoe wear Transmission belts Nuts, bolts, fasteners Stand Steering bearings Except for “Headlamp orientation” all checks must be carried out by qualified personnel from ASKOLL. eS_Rev02_EN.indb 61 eS_Rev02_EN.indb 61 15/07/2020 11:58:58 15/07/2020 11:58:58... -
Page 302: Cleaning The Vehicle
ADJUSTMENTS AND PERIODIC MAINTENANCE CLEANING THE VEHICLE To avoid oxidation, wash the scooter every time it is used in extreme weather conditions or roads sprinkled with salt or de-icing products, conditions of air pollution such as cities, industrial zones, areas of high salinity or moisture in the atmosphere such as maritime areas. -
Page 303: Vehicle Inactivity
ADJUSTMENTS AND PERIODIC MAINTENANCE VEHICLE INACTIVITY In preparation for a long period of inactivity it is advisable to: • make a general clean up of the scooter, • store in a covered place, • park the scooter on the stand so that wheels are not in contact with the ground in the same position. •... - Page 304 ERROR CODES ERROR CODES - eS 25Km/h EVO - eS - eS 25Km/h - eS Communication system failure: detection communication problems between intelligent units. It is advisable to take the vehicle to an authorized workshop. Inverter failure: the system detects a failure on the inverter.
-
Page 305: Error Codes
ERROR CODES - eS 25Km/h EVO - eS - eS 25Km/h - eS Battery B failure: the system detects a failure on battery B. It is advisable to take the battery to an authorized workshop. Battery overtemperature: system detects excessive temperature on the batteries and inhibits the supply power. - Page 306 ERROR CODES - eS 25Km/h EVO - eS - eS 25Km/h - eS Turn indicators malfunction: the system detects the failure or malfunction of the turn indicators. Check its operation and replace them at an authorized workshop. Tail light and number plate light malfunction: the system detects the failure or malfunction of the Tail light and number plate light.
-
Page 307: Technical Data
TECHNICAL DATA SCOOTER DIMENSIONS eS_Rev02_EN.indb 67 eS_Rev02_EN.indb 67 15/07/2020 11:59:10 15/07/2020 11:59:10... -
Page 308: Engine Data
TECHNICAL DATA MODEL / eS / eS 25Km/h 25Km/h ENGINE DATA Model Brushless permanent magnet sinusoidal motor Motor type EME 200 EME 201 Operating voltage 54 V MAX power 1,5 KW 1,4 KW 3 KW 1,4 KW 3 KW electronically electronically electronically electronically... -
Page 309: Vehicle Data
TECHNICAL DATA MODEL / eS / eS 25Km/h 25Km/h VEHICLE DATA Long 1830 mm / 2015 mm (EVO models) Wide 726 mm Wheelbase 1245 mm Rearview mirror connection height 1036 mm Front tire pressure 2 bar Rear tire pressure 2,5 bar 2,8 bar Net weight 72 Kg... -
Page 310: Tail Light Data
TECHNICAL DATA MODEL / eS / eS 25Km/h 25Km/h TAIL LIGHT DATA Taillight Brake light Turn indicators License plate light eS_Rev02_EN.indb 70 eS_Rev02_EN.indb 70 15/07/2020 11:59:11 15/07/2020 11:59:11... -
Page 311: Eu Declaration Of Conformity (Doc)
EU Declaration of Conformity (DoC) EU Declaration of Conformity (DoC) Company name: Askoll EVA S.p.A. Address: Via industria 30, 36031 Dueville (VI) Italy Declare under our sole responsibility that the following product: Apparatus / Product: E-Scooter Battery Charger Model: Type: TVC202;... - Page 312 NOTES eS_Rev02_EN.indb 72 eS_Rev02_EN.indb 72 15/07/2020 11:59:12 15/07/2020 11:59:12...
- Page 313 De constante evolutie in het ontwerp, als waarborg voor de veiligheids- en kwaliteitsstandaards van Askoll voertuigen, kan tot gevolg hebben dan bepaalde infor- matie in dit Gebruiks- en onderhoudsboekje afwijkt van het voertuig dat u bezit. Wij zijn er zeker van dat u zult begrijpen dat de gegevens, de afbeeldingen en de beschrijvingen die hier zijn gegeven geen basis kunnen vormen voor welke claim dan ook.
- Page 314 INHOUD INHOUD ALGEMENE INFORMATIE SYMBOLEN BELANGRIJKE INFORMATIE VOOR DE VEILIGHEID IDENTIFICATIE BEDIENINGSELEMENTEN EN INSTRUMENTEN ALGEMEEN AANZICHT VAN DE SCOOTER - eS 25km/h LINKERZIJDE - eS 25km/h RECHTERZIJDE - eS 25km/h LINKERZIJDE - eS 25km/h RECHTERZIJDE LINKERKANT RECHTERKANT EVOlution - eS EVOlution LINKERKANT EVOlution - eS EVOlution RECHTERKANT...
- Page 315 INHOUD LINKER GROEP BEDIENINGSELEMENTEN Bedieningshendel achterrem Achterremhendel met gecombineerde werking (alleen eS - eS EVOlution) Keuzeschakelaar energieregeneratiemodus Schakelaar knipperlichten Claxonknop RECHTER GROEP BEDIENINGSELEMENTEN Bedieningshendel voorrem Snelheidsbediening Keuzeschakelaar voor inschakeling van het groot licht (alleen eS - eS EVOlution) Keuzeschakelaar rijmodus (alleen eS - eS - eS EVOlution - eS...
- Page 316 Selectie rijmodus (eS - eS EVOlution) Selectie energieregeneratiemodus SELECTIE VAN DE DISPLAYFUNCTIES Weergavemodus gegevens kilometerteller Regeling van de klokfunctie BLUETOOTH (alleen eS EVOlution - eS EVOlution) ® Connectiviteit App “ASKOLL DRIVE SMART” eS_Rev02_NL.indb iv eS_Rev02_NL.indb iv 22/07/2020 10:22:06 22/07/2020 10:22:06...
- Page 317 INHOUD ZADEL Openen van het zadel Tassenhaak STILSTAND VAN DE SCOOTER ACCU EN OPLADEN ACCU’S Beheer van de accu bij het eerste gebruik van de scooter Afvalverwerking van lege accu's ACCUOPLADER OPLADEN VAN DE ACCU’S OPLADEN MET DE ACCU OP HET VOERTUIG Blokkering van het zadel in opgetilde stand om de kabel door te laten OPLADEN MET DE ACCUOPLADER BUITEN HET VOERTUIG REGELINGEN EN PERIODIEK ONDERHOUD...
- Page 318 INHOUD PROCEDURES VOOR GEWOON ONDERHOUD BANDEN CONTROLE VAN HET REMVLOEISTOFPEIL CONTROLE VAN HET REMVLOEISTOFPEIL VAN DE ACHTERREM (alleen eS EVOlution - eS EVOlution) VERVANGING LAMPJE KOPLAMP (eS - eS 25km/h - eS - eS 25km/h - eS EVOlution) KOPLAMP (eS - eS EVOlution) ACHTERLAMPGROEP EN RICHTINGAANWIJZERS...
-
Page 319: Algemene Informatie
ALGEMENE INFORMATIE SYMBOLEN In de handleiding wordt gewezen op bijzonder belangrijke informatie waar speciale aandacht moet worden besteed. Elk signaal bestaat uit een ander symbool, om de inhoud van de tekst die volgt sterker te benadrukken en om het gemakkelijker te maken om onderwerpen op te zoeken in de verschillende gebieden. Dit symbool duidt op bijzonder gevaarlijke situaties die, als ze niet worden LET OP voorkomen, overlijden of ernstig letsel kunnen veroorzaken. -
Page 320: Belangrijke Informatie Voor De Veiligheid
ALGEMENE INFORMATIE BELANGRIJKE INFORMATIE VOOR DE VEILIGHEID Het is van fundamenteel belang dat u de elektrische scooter goed kent: lees en LET OP begrijp deze handleiding voordat de scooter voor het eerst gebruikt. Deze gebruikshandleiding vormt een onlosmakelijk onderdeel van de scooter, LET OP bewaar hem voor raadpleging in de toekomst. -
Page 321: Identificatie
De serienummers voor de identificatie staan in het frame, op de motorkast en in de accuruimte gestanst. Zij moeten altijd worden vermeld bij de bestelling van vervangingsonderdelen. Het is raadzaam na te gaan of de serienummers van het voertuig overeenstemmen met de nummers in de bijbehorende papieren. ASKOLL EVA S.R.L. dB(A) - - - min (-- kW) -
Page 322: Bedieningselementen En Instrumenten Algemeen Aanzicht Van De Scooter
BEDIENINGSELEMENTEN EN INSTRUMENTEN ALGEMEEN AANZICHT VAN DE SCOOTER - eS 25km/h LINKERZIJDE - eS 25km/h RECHTERZIJDE A. Achteruitkijkspiegel H. Zadelhaak B. Koplampgroep I. Achterlampgroep C. Richtingaanwijzer J. Kentekenhouder D. Reflector linksvoor K. Reflector achter E. Standaard L. Motor F. Accuruimte M. -
Page 323: Es 2 - Es 2 25Km/H Linkerzijde
BEDIENINGSELEMENTEN EN INSTRUMENTEN ALGEMEEN AANZICHT VAN DE SCOOTER - eS 25km/h LINKERZIJDE - eS 25km/h RECHTERZIJDE A. Achteruitkijkspiegel I. Achterlampgroep B. Koplampgroep J. Kentekenhouder C. Richtingaanwijzer K. Reflector achter D. Reflector linksvoor L. Motor E. Standaard M. Reflector rechtsvoor F. Accuruimte N. -
Page 324: Linkerkant
BEDIENINGSELEMENTEN EN INSTRUMENTEN ALGEMEEN AANZICHT VAN DE SCOOTER LINKERKANT RECHTERKANT A. Achteruitkijkspiegel I. Achterlampgroep B. Koplampgroep J. Kentekenhouder C. Richtingaanwijzer K. Reflector achter D. Reflector linksvoor L. Motor E. Standaard M. Reflector rechtsvoor F. Accuruimte N. Ontstekingsschakelaar G. Zadel O. Handgreep voor passagier H. -
Page 325: Es 2 Evolution - Es 3 Evolution Linkerkant
BEDIENINGSELEMENTEN EN INSTRUMENTEN ALGEMEEN AANZICHT VAN DE SCOOTER EVOlution - eS EVOlution LINKERKANT EVOlution - eS EVOlution RECHTERKANT A. Achteruitkijkspiegel I. Achterlampgroep B. Koplampgroep J. Kentekenhouder C. Richtingaanwijzer K. Reflector achter D. Reflector linksvoor L. Motor E. Standaard M. Reflector rechtsvoor F. -
Page 326: Dashboard (Es 1 - Es 1 25Km/H - Es 2 - Es 2 25Km/H)
BEDIENINGSELEMENTEN EN INSTRUMENTEN POSITIE BEDIENINGSELEMENTEN EN INSTRUMENTEN DASHBOARD (eS - eS 25km/h - eS - eS 25km/h) Km/h Km/trip PWR ECO SELECT A. Instrumenten F. Keuzeschakelaar rijmodus (alleen voor eS - eS B. Sleutelschakelaar G. Startknop motor C. Keuzeschakelaar energieregeneratiemodus H. -
Page 327: Dashboard
BEDIENINGSELEMENTEN EN INSTRUMENTEN POSITIE BEDIENINGSELEMENTEN EN INSTRUMENTEN DASHBOARD (eS EVOlution) A. Instrumenten F. Keuzeschakelaar rijmodus B. Sleutelschakelaar G. Startknop motor C. Keuzeschakelaar energieregeneratiemodus H. Snelheidsbediening D. Schakelaar knipperlichten I. Bedieningshendel voorrem E. Claxonknop J. Bedieningshendel achterrem eS_Rev02_NL.indb 9 eS_Rev02_NL.indb 9 22/07/2020 10:22:21 22/07/2020 10:22:21... -
Page 328: Dashboard (Es 3 Evolution)
BEDIENINGSELEMENTEN EN INSTRUMENTEN POSITIE BEDIENINGSELEMENTEN EN INSTRUMENTEN DASHBOARD (eS Km/h Km/trip PWR ECO SELECT A. Instrumenten G. Startknop motor B. Sleutelschakelaar H. Snelheidsbediening C. Keuzeschakelaar energieregeneratiemodus I. Bedieningshendel voorrem D. Schakelaar knipperlichten J. Bedieningshendel gecombineerde rem E. Claxonknop K. Koplampschakelaar F. - Page 329 BEDIENINGSELEMENTEN EN INSTRUMENTEN POSITIE BEDIENINGSELEMENTEN EN INSTRUMENTEN DASHBOARD (eS EVOlution) A. Instrumenten G. Startknop motor B. Sleutelschakelaar H. Snelheidsbediening C. Keuzeschakelaar energieregeneratiemodus I. Bedieningshendel voorrem D. Schakelaar knipperlichten J. Bedieningshendel gecombineerde rem E. Claxonknop K. Koplampschakelaar F. Keuzeschakelaar rijmodus eS_Rev02_NL.indb 11 eS_Rev02_NL.indb 11 22/07/2020 10:22:23 22/07/2020 10:22:23...
-
Page 330: Linker Groep Bedieningselementen
BEDIENINGSELEMENTEN EN INSTRUMENTEN LINKER GROEP BEDIENINGSELEMENTEN - eS 25Km/h - eS - eS 25Km/h Bedieningshendel achterrem De achterremhendel (schijfrem voor eS EVOlution en eS EVOlution, trommelrem voor alle andere modellen) zit aan de linkerkant van het stuur. Achterremhendel met gecombineerde werking EVO - eS (alleen eS - eS... -
Page 331: Schakelaar Knipperlichten
BEDIENINGSELEMENTEN EN INSTRUMENTEN Schakelaar knipperlichten - eS 25Km/h - eS - eS 25Km/h - eS Verplaats het hendeltje naar links om de linker knipperlichten te bedienen. Verplaats het hendeltje naar rechts om de rechter knipperlichten te bedienen. Druk op de knop in het midden van het hendeltje om de knipperlichten uit te zetten. -
Page 332: Rechter Groep Bedieningselementen
BEDIENINGSELEMENTEN EN INSTRUMENTEN RECHTER GROEP BEDIENINGSELEMENTEN Bedieningshendel voorrem De hendel van de schijfrem voor zit aan de rechterkant van het stuur. Snelheidsbediening - eS 25Km/h - eS - eS 25Km/h - eS De snelheid van de scooter wordt geregeld door de knop te draaien. -
Page 333: Keuzeschakelaar Voor Inschakeling Van Het Groot Licht
BEDIENINGSELEMENTEN EN INSTRUMENTEN Keuzeschakelaar voor inschakeling van het groot - eS licht (alleen eS - eS EVOlution) Met de keuzeschakelaar kan het groot licht worden ingeschakeld. Keuzeschakelaar rijmodus - eS - eS - eS 25Km/h - eS 25Km/h (alleen eS - eS - eS EVOlution - eS... -
Page 334: Sleutelschakelaar
BEDIENINGSELEMENTEN EN INSTRUMENTEN SLEUTELSCHAKELAAR Met de sleutelschakelaar wordt het stuurslot in- of uitgeschakeld. Bij de scooter worden een hoofdsleutel en een duplicaat geleverd, die zowel kunnen worden gebruikt om de sleutelschakelaar te bedienen als om het zadel te openen. Geadviseerd wordt om het duplicaat apart van de hoofdsleutel te bewaren. -
Page 335: Instrumenten
BEDIENINGSELEMENTEN EN INSTRUMENTEN INSTRUMENTEN - eS 25Km/h - eS - eS 25Km/h EVO - eS Km/h Km/h Km/trip Km/trip PWR ECO PWR ECO SELECT SELECT A. Controlelampjes B. Tachometer C. Digitaal display D. Displaybedieningen eS_Rev02_NL.indb 17 eS_Rev02_NL.indb 17 22/07/2020 10:22:36 22/07/2020 10:22:36... -
Page 336: Controlelampjes
BEDIENINGSELEMENTEN EN INSTRUMENTEN CONTROLELAMPJES - eS 25Km/h - eS - eS 25Km/h - eS E. Indicator motoractivering F. Indicator hoge temperatuur G. Indicator ernstig probleem H. Indicator knipperlichten in werking I. Indicator lichten in werking EVO - eS J. Indicator opladen bezig K. -
Page 337: Indicator Hoge Temperatuur
BEDIENINGSELEMENTEN EN INSTRUMENTEN Indicator hoge temperatuur Het lampje van de indicator van hoge temperatuur is amberkleurig en gaat vast branden om een alarm wegens te hoge temperatuur aan te geven. Op het display is de overeenkomende alarmcode te lezen. Voor de beschrijving van het alarm behorende bij de weergegeven code, raadpleeg het hoofdstuk “FOUTCODES”. -
Page 338: Indicator Groot Licht (Alleen Es 3 - Es 3 Evolution)
BEDIENINGSELEMENTEN EN INSTRUMENTEN Indicator knipperlichten in werking Het lampje van de knipperlichten is groen en gaat knipperen om aan te geven dat de rechter of linker richtingaanwijzer is ingeschakeld. Het gaat uit als de knipperlichten worden uitgezet. Indicator lichten in werking Het lampje dat aangeeft dat de lichten zijn ingeschakeld is groen, het gaat branden wanneer de motor wordt geactiveerd. - Page 339 BEDIENINGSELEMENTEN EN INSTRUMENTEN TACHOMETER (eS - eS 25km/h - eS - eS 25km/h) De tachometer geeft de huidige snelheid aan. De waarde is uitgedrukt in kilometer per uur (km/h) en Km/h in mijl per uur (mph). TACHOMETER (eS De tachometer geeft de huidige snelheid aan. De waarde is uitgedrukt in kilometer per uur (km/h) en Km/h in mijl per uur (mph).
-
Page 340: Evolution - Es 3 Evolution)
BEDIENINGSELEMENTEN EN INSTRUMENTEN TACHOMETER (eS EVOlution - eS EVOlution) De tachometer geeft de huidige snelheid aan. De waarde is uitgedrukt in kilometer per uur (km/h). MENU-INSTELLINGSKNOPPEN - eS 25Km/h - eS - eS 25Km/h - eS De knoppen SELECT en SET moeten worden gebruikt voor het volgende: SELECT •... -
Page 341: Digitaal Display
BEDIENINGSELEMENTEN EN INSTRUMENTEN DIGITAAL DISPLAY - eS 25Km/h - eS - eS 25Km/h - eS Km/trip Via het digitale display kunt u alle informatie krijgen PWR ECO over de staat van het voertuig, en wel: • de aanwezigheid van de accu’s in de ruimten A en B, •... -
Page 342: Onderhoudslampje
BEDIENINGSELEMENTEN EN INSTRUMENTEN Onderhoudslampje Het onderhoudslampje kan alleen gaan branden, of samen met het indicatielampje van een ernstig probleem. Als het gaat branden is het raadzaam om naar een erkende dealer te gaan voor een controle en om het probleem op te lossen. eS_Rev02_NL.indb 24 eS_Rev02_NL.indb 24 22/07/2020 10:22:46... -
Page 343: Gebruik
GEBRUIK CONTROLES VOOR HET WEGRIJDEN Voordat u de scooter gaat gebruiken is het goed om altijd enkele zaken te controleren: • controleer de oplaadtoestand van de accu’s, • controleer de werking van de koplamp, de achterlamp, de richtingaanwijzers en de kentekenverlichting, •... - Page 344 GEBRUIK Rijd nooit weg met de middenstandaard omlaag: om bruusk wegrijden te voorkomen BELANGRIJKE AANWIJZING mag het achterwiel niet draaien wanneer het in contact komt met het terrein. Op onverharde wegen, bij regen, sneeuw of op glad wegdek moet snelheid worden BELANGRIJKE geminderd, moet een grotere veiligheidsafstand worden aangehouden tot andere AANWIJZING...
-
Page 345: Handelingen Om Te Starten
GEBRUIK HANDELINGEN OM TE STARTEN In- en uitschakeling van het stuurslot Om het stuurslot in te schakelen draait u het stuur helemaal naar links. Duw de sleutel naar binnen en draai hem tegen de klok in; draai tegelijkertijd het stuur iets met de klok mee totdat de sleutel op het symbool van het hangslot springt;... -
Page 346: Activering Van De Motor
GEBRUIK Activering van de motor - eS - eS - eS 25Km/h - eS 25Km/h Om de motor te kunnen starten moet hij geactiveerd zijn. De motor wordt geactiveerd door de sleutel in de schakelaar te steken en op te draaien, waarna de activeringsknop van de motor 3 seconden ingedrukt wordt. -
Page 347: Selectie Rijmodus (Es 1 - Es 2 - Es 2 Evolution)
GEBRUIK Selectie rijmodus (eS - eS - eS EVOlution) - eS - eS Met behulp van de schakelaar kan een van de drie verschillende rijmodi worden geselecteerd: ECONOMY-modus Max. snelheid: 32 km/h. Het ECO-symbool verschijnt op het display. NORMAL-modus Max. snelheid: 37 km/h. - Page 348 GEBRUIK Selectie rijmodus (eS - eS EVOlution) - eS Met behulp van de schakelaar kan een van de drie verschillende rijmodi worden geselecteerd: ECONOMY-modus NORMAL-modus Deze modi worden gebruikt om het verbruik te minimaliseren. POWER-modus Max. snelheid: 67 km/h Het PWR-symbool verschijnt op het display. Werkingsduur 96 km volgens de norm 168/2013 EG.
-
Page 349: Selectie Energieregeneratiemodus
GEBRUIK Selectie energieregeneratiemodus - eS 25Km/h - eS - eS 25Km/h - eS Bij het decelereren van de scooter kan de accu automatisch worden opgeladen door de energieregeneratiemodus te activeren. Gebruik tweestandsschakelaar energieregeneratie in of uit te schakelen: Door de knop naar boven te duwen, wordt de energieregeneratie geactiveerd, terwijl tegelijkertijd het deceleratie-effect wordt vergroot. -
Page 350: Selectie Van De Displayfuncties
GEBRUIK SELECTIE VAN DE DISPLAYFUNCTIES - eS 25Km/h - eS - eS 25Km/h - eS Weergavemodus gegevens kilometerteller Bij de inschakeling blijven alle lampjes van het display Km/trip enkele seconden branden. PWR ECO Druk op SELECT om de parameter te veranderen die wordt weergegeven op het display: Totaal aantal afgelegde kilometers. -
Page 351: Regeling Van De Klokfunctie
GEBRUIK Regeling van de klokfunctie - eS 25Km/h - eS - eS 25Km/h - eS • Druk de knop SELECT ongeveer 2 seconden in: de twee cijfers van de uren beginnen te knipperen. Km/trip • Druk herhaaldelijk op SELECT om de juiste tijd in te stellen. -
Page 352: Bluetooth
® -merk en -logo’s zijn geregistreerde handelsmerken die het eigendom zijn van Bluetooth SIG, Inc. en voor elk gebruik van deze merken door ASKOLL EVA is een licentie verleend. Andere merken en handelsnamen zijn eigendom van de respectieve eigenaren. Bij dezen verklaart Askoll EVA S.p.A., Via industria 30, 36031 Dueville (VI) Italië, dat de radioapparatuur HWE213 conform is aan de richtlijn 2014/53/EU. -
Page 353: Openen Van Het Zadel
GEBRUIK ZADEL - eS 25Km/h EVO - eS Openen van het zadel - eS 25Km/h - eS Het slot om het zadel te openen zit onder de linker zijkant van het zadel voor de modellen eS EVOlution en eS EVOlution, en voor alle andere modellen linksachter op het voertuig. -
Page 354: Stilstand Van De Scooter
GEBRUIK STILSTAND VAN DE SCOOTER Gebruik de standaard om de scooter weg te zetten. Breng de standaard met uw voet omlaag tot hij volledig is geopend en til de scooter tegelijk met de hand op door met uw rechterhand de bagagedrager vast te pakken en de scooter te begeleiden tot hij volledig op de standaard steunt. -
Page 355: Accu En Opladen
ACCU EN OPLADEN ACCU’S De voertuigen eS , eS 25km/h en eS EVOlution zijn bij de eerste uitrusting voorzien van twee lithiumionen- accu’s. De modellen eS en eS 25km/h worden standaard geleverd met één accu, terwijl de tweede als optie wordt geleverd (mod. batterijen TVC102). De modellen eS en eS EVOlution worden standaard met... - Page 356 ACCU EN OPLADEN Als de motor van de scooter lange tijd uitgeschakeld blijft in een omgeving met lage temperaturen (tussen 0 °C en +10 °C), kan het opladen langer duren. Als de scooter lange tijd niet wordt gebruikt, moeten de batterijen minstens eenmaal per twee maanden worden opgeladen.
- Page 357 ACCU EN OPLADEN Gebruik deze accu niet voor andere doelen dan die zijn aangegeven. Gebruik voor LET OP andere doelen dan voorzien kan kortsluitingen in de accu veroorzaken, en de accu zou in brand kunnen vliegen. Brandgevaar • Demonteer de accu niet en maak deze niet open •...
-
Page 358: Afvalverwerking Van Lege Accu's 40 Nl
ACCU EN OPLADEN Afvalverwerking van lege accu's Aan het einde van de levensduur moet een accupakket bestaande uit lithiumaccu's volgens de geldende normen worden verwerkt en mag niet als gewoon afval worden weggegooid. De Europese richtlijn voor dit type afval bepaalt dat de bij dit verdrag aangesloten staten zich verbinden om ‘geschikte maatregelen’... -
Page 359: Accuoplader
ACCU EN OPLADEN ACCUOPLADER Voor het opladen van de accu’s dient de meegeleverde specifieke accuoplader te worden gebruikt (MOD. TVC202). De accuoplader is alleen actief wanneer hij is aangesloten op het elektriciteitsnet, en op het voertuig of een accu door middel van de aansluiting. Nadat hij is aangesloten knipperen alle leds enkele seconden. - Page 360 ACCU EN OPLADEN De accuoplader is niet bedoeld om te worden gebruikt door personen met beperkte lichamelijke, sensorische of mentale capaciteiten, of die onvoldoende ervaring of kennis bezitten, tenzij ze onder toezicht staan van iemand die verantwoordelijk is LET OP voor hun veiligheid of instructies krijgen omtrent het gebruik van de accuoplader.
-
Page 361: Opladen Van De Accu's
ACCU EN OPLADEN OPLADEN VAN DE ACCU’S - eS 25Km/h - eS - eS 25Km/h - eS Het oplaadniveau van de accu’s is links op het digitale display van het voertuig zichtbaar. Op het display geeft Km/trip symbool A het opladen van de accu in ruimte A weer, symbool B het opladen van de accu in ruimte B. - Page 362 ACCU EN OPLADEN OPLADEN MET DE ACCU OP HET VOERTUIG Ga als volgt te werk om de accu op te laden op het voertuig: Schakel het systeem uit. Til het zadel op, controleer of de accuoplader verbonden is met de aansluiting en of de accu’s correct in de ruimten zitten en zijn verbonden op de connectors.
-
Page 363: Blokkering Van Het Zadel In Opgetilde Stand Om De Kabel Door Te Laten
ACCU EN OPLADEN Blokkering van het zadel in opgetilde stand om de kabel door te laten Tijdens het opladen van de accu kan het zadel worden afgesloten met het slot, terwijl er voldoende ruimte blijft om de oplaadkabel door te laten. Dit kan nuttig zijn als het opladen buiten plaatsvindt, zodat de accu’s en accuoplader worden afgedekt en de warmte die ontstaat bij het oplaadproces naar... - Page 364 ACCU EN OPLADEN Sluit het zadel terwijl u het mechanisme ingedrukt houdt. Het zadel wordt in opgetilde stand geblokkeerd om de oplaadkabel door te laten. Door het slot te openen met de sleutel en het zadel op te tillen keert het mechanisme automatisch terug in de oorspronkelijke stand.
-
Page 365: Opladen Met De Accuoplader Buiten Het Voertuig
ACCU EN OPLADEN OPLADEN MET DE ACCUOPLADER BUITEN HET VOERTUIG De accuoplader kan worden weggehaald om een accu te kunnen opladen terwijl de scooter gewoon kan blijven rijden met de andere accu. Koppel de accukabel los door op de twee zijvleugeltjes van de connector te duwen om hem los te maken. - Page 366 ACCU EN OPLADEN Haal de connector van de kabel van de accuoplader uit de aansluiting. Duw hiervoor de twee vleugeltjes aan de zijkanten in. Haal de accuoplader uit zijn behuizing, samen met zijn twee kabels. Het is aanbevolen om de accuoplader voorzichtig te hanteren tijdens het verwijderen LET OP om te voorkomen dat hij op u of op de grond valt.
- Page 367 ACCU EN OPLADEN Plaats de accu en de accuoplader op een stabiele ondergrond. Verbind eerst de kabel van de accuoplader met de aansluiting van de accu, onder het klapdeurtje. De stekker zit goed in de aansluiting als u een klikgeluid hoort.
- Page 368 ACCU EN OPLADEN Plaats de accu weer in zijn ruimte door hem vast te houden aan de handgreep, en verbind de kabel van het voertuig met de connector in de aansluiting onder het klapdeurtje op de accu. Steek de connector naar binnen totdat u een klik hoort, en controleer of hij goed vastzit.
-
Page 369: Regelingen En Periodiek Onderhoud
REGELINGEN EN PERIODIEK ONDERHOUD REGELINGEN - eS 25Km/h - eS - eS 25Km/h EVO - eS - eS ACHTERUITKIJKSPIEGELS Op de rechter- en linkerkant van het stuur zijn twee achteruitkijkspiegels gemonteerd, die kunnen worden versteld door de steel met de hand te draaien totdat de spiegel de gewenst stand heeft. -
Page 370: Schijfrem Voor
REGELINGEN EN PERIODIEK ONDERHOUD SCHIJFREM VOOR - eS 25Km/h - eS - eS 25Km/h - eS De slijtage van de schijf en de remblokken wordt automatisch gecompenseerd, zij heeft dus geen effect op de werking van de rem en behoeft geen bijstellingen Als de hendel een te grote slag heeft en hierdoor te dicht bij het handvat komt wanneer de rem wordt... -
Page 371: Trommelrem Achter
REGELINGEN EN PERIODIEK ONDERHOUD TROMMELREM ACHTER - eS 25km/h - eS - eS 25km/h) Om de werking van de achterrem te regelen gebruikt u de moer, zoals op de afbeelding. Door de moer vaster te draaien neemt de vrije speling van de bedieningshendel af en wordt de remwerking sterker. -
Page 372: Schijfrem Achter
REGELINGEN EN PERIODIEK ONDERHOUD SCHIJFREM ACHTER EVOlution - eS EVOlution) De slijtage van de schijf en de remblokken wordt automatisch gecompenseerd, zij heeft dus geen effect op de werking van de rem en behoeft geen bijstellingen Als de hendel een te grote slag heeft en hierdoor te dicht bij het handvat komt wanneer de rem wordt bediend, kan het zijn dat er lucht in het circuit zit of de rem zelf niet goed functioneert. -
Page 373: Procedures Voor Gewoon Onderhoud Banden
REGELINGEN EN PERIODIEK ONDERHOUD PROCEDURES VOOR GEWOON ONDERHOUD BANDEN Het voertuig is voorzien van tubeless banden. Controleer de spanning van de banden regelmatig en corrigeer deze, indien nodig, voordat u gaat rijden. - eS 25km/h Spanning voorband 2 bar. Spanning achterband 2,5 bar. -
Page 374: Controle Van Het Remvloeistofpeil
REGELINGEN EN PERIODIEK ONDERHOUD CONTROLE VAN HET REMVLOEISTOFPEIL Het vloeistofreservoir van de voorrem heeft een inspectieglas om het vloeistofpeil in het reservoir te controleren. Als het peil van de remvloeistof laag of onvoldoende is, moet NIET het reservoir worden bijgevuld maar moet de slijtage van de remblokken en de remschijf worden nagegaan, en moet het remcircuit worden gecontroleerd op lekken. -
Page 375: Controle Van Het Remvloeistofpeil Van De Achterrem
REGELINGEN EN PERIODIEK ONDERHOUD CONTROLE VAN HET REMVLOEISTOFPEIL VAN DE ACHTERREM (alleen eS EVOlution - eS EVOlution) Het vloeistofreservoir van de voorrem heeft een inspectieglas om het vloeistofpeil in het reservoir te controleren. Als het peil van de remvloeistof laag of onvoldoende is, moet NIET het reservoir worden bijgevuld maar moet de slijtage van de remblokken en de remschijf worden nagegaan, en moet het remcircuit worden... -
Page 376: Vervanging Lampje Koplamp
REGELINGEN EN PERIODIEK ONDERHOUD VERVANGING LAMPJE KOPLAMP - eS 25Km/h - eS - eS 25Km/h - eS - eS 25km/h - eS - eS 25km/h - eS EVOlution) Om het lampje van het type H8 35W van de koplamp te vervangen gaat u als volgt te werk: verwijder met behulp van de TORX T 20-sleutel, die als accessoire geleverd is en onder het zadel, zit de 2 schroeven aan de zijkanten onder de koplamp:... -
Page 377: Koplamp (Es 3 - Es 3 Evolution)
REGELINGEN EN PERIODIEK ONDERHOUD maak de stekker los, draai de lamphouder tegen de - eS 25Km/h - eS 25Km/h klok in en haal hem weg. - eS 25Km/h - eS - eS 25Km/h - eS Vervang het lampje en de lamphouder door een nieuw exemplaar. -
Page 378: Achterlampgroep En Richtingaanwijzers
REGELINGEN EN PERIODIEK ONDERHOUD ACHTERLAMPGROEP RICHTINGAANWIJZERS De achterlampgroep, de richtingaanwijzers voor en achter en de kentekenverlichting zijn voorzien van ledlampjes die in de voertuigstructuur zijn geïntegreerd. voor vervanging naar erkend assistentiepunt. eS_Rev02_NL.indb 60 eS_Rev02_NL.indb 60 22/07/2020 10:23:21 22/07/2020 10:23:21... -
Page 379: Samenvattingstabel Van Procedures Voor Gewoon Onderhoud
(elke 2 jaar verversen) Slijtage remblokken voorrem Slijtage remblokken achterrem Slijtage remklauwen achterrem Transmissieriemen Moeren, bouten, bevestigingselementen Standaard Stuurlagers Behalve het “richten van de koplamp” moeten alle controles worden gedaan door gekwalificeerd personeel van ASKOLL. eS_Rev02_NL.indb 61 eS_Rev02_NL.indb 61 22/07/2020 10:23:22 22/07/2020 10:23:22... -
Page 380: Schoonmaken Van Het Voertuig
REGELINGEN EN PERIODIEK ONDERHOUD SCHOONMAKEN VAN HET VOERTUIG Om te voorkomen dat er roest ontstaat, moet de scooter telkens worden schoongemaakt nadat hij gebruikt is in bijzondere weers- of wegomstandigheden, bijvoorbeeld wegen waar zout of producten tegen ijsvorming zijn gebruikt in de winter, verontreinigde lucht in de stad, industriegebieden, zilte of vochtige gebieden, kustgebieden. Voorkom dat vuil, industrieel stof, dode insecten, vogelpoep enz. -
Page 381: Inactiviteit Van Het Voertuig
REGELINGEN EN PERIODIEK ONDERHOUD INACTIVITEIT VAN HET VOERTUIG Bij de voorbereiding op een lange periode van inactiviteit is het volgende raadzaam: • maak de scooter helemaal schoon, • zet hem op een overdekte plaats, • zet de scooter op de standaard, om te voorkomen dat de wielen in dezelfde positie in contact blijven met de grond, •... -
Page 382: Foutcodes
FOUTCODES FOUTCODES - eS 25Km/h EVO - eS - eS 25Km/h - eS Defect in het communicatiesysteem: er worden communicatieproblemen geconstateerd tussen de intelligente units van het voertuig. Geadviseerd wordt het voertuig naar een erkende werkplaats te brengen. Inverterstoring: het systeem neemt een storing in de inverterunit waar. - Page 383 FOUTCODES - eS 25Km/h EVO - eS - eS 25Km/h - eS Storing accu B: het systeem neemt een storing waarin accupack B. Geadviseerd wordt de accu naar een erkende werkplaats te brengen. Overtemperatuur accu’s: het systeem neemt een te hoge temperatuur van de accu waar, en onderdrukt daarom de levering van vermogen aan het voertuig.
- Page 384 FOUTCODES - eS 25Km/h EVO - eS - eS 25Km/h - eS Slechte werking van de richtingaanwijzers: het systeem neemt waar dat de richtingaanwijzers stuk zijn of niet goed werken. Controleer de werking en laat ze vervangen bij een erkende werkplaats. Slechte werking achterlicht en kentekenverlichting: het systeem neemt waar dat de achterlamp en de kentekenverlichting stuk zijn of niet goed werken.
-
Page 385: Technische Gegevens
TECHNISCHE GEGEVENS AFMETINGEN VAN DE SCOOTER eS_Rev02_NL.indb 67 eS_Rev02_NL.indb 67 22/07/2020 10:23:33 22/07/2020 10:23:33... -
Page 386: Motorgegevens
TECHNISCHE GEGEVENS MODEL 25km/h / eS 25km/h / eS MOTORGEGEVENS Model Borstelloze sinusmotor met permanente magneet Type motor EME 200 EME 201 Bedrijfsspanning 54 V MAX. vermogen 1,5 KW 1,4 KW 3 KW 1,4 KW 3 KW elektronisch elektronisch elektronisch elektronisch elektronisch begrensd... -
Page 387: Voertuiggegevens
TECHNISCHE GEGEVENS MODEL 25km/h / eS 25km/h / eS VOERTUIGGEGEVENS Lengte 1830 mm / 2015 mm (EVO-modellen) Breedte 726 mm Wielbasis 1245 mm Bevestigingshoogte spiegels 1036 mm Spanning voorband 2 bar Spanning achterband 2,5 bar 2,8 bar Gewicht, rijklaar 72 kg 77 kg Max. -
Page 388: Gegevens Achterlampgroep
TECHNISCHE GEGEVENS MODEL 25km/h / eS 25km/h / eS GEGEVENS ACHTERLAMPGROEP Achterlamp Remlicht Richtingaanwijzers Kentekenverlichting eS_Rev02_NL.indb 70 eS_Rev02_NL.indb 70 22/07/2020 10:23:33 22/07/2020 10:23:33... -
Page 389: Eu Verklaring Van Overeenstemming (Doc)
EU Verklaring van Overeenstemming (DoC) EU Verklaring van Overeenstemming (DoC) Ondergetekende Naam van het bedrijf: Askoll EVA S.p.A. Adres: Via industria 30, 36031 Dueville (VI) Italië verklaart voor eigen verantwoordelijkheid dat het volgende product: Apparaat / Product: E-Scooter Batterijoplader Model: Type: TVC202;... - Page 390 OPMERKINGEN eS_Rev02_NL.indb 72 eS_Rev02_NL.indb 72 22/07/2020 10:23:34 22/07/2020 10:23:34...