Table des Matières

Publicité

Les langues disponibles

Les langues disponibles

Liens rapides

Having TROUBLE with operation?
Please reset your unit
Refer to page of How to reset your unit
Still having trouble??
USA ONLY
Call 1-800-252-5722
http://www.jvc.com
We can help you!
• "Made for iPod," and "Made for iPhone" mean that an electronic accessory has been designed to
connect specifically to iPod, or iPhone, respectively, and has been certified by the developer to
meet Apple performance standards. Apple is not responsible for the operation of this device or
its compliance with safety and regulatory standards. Please note that the use of this accessory
with iPod, or iPhone may affect wireless performance.
• iPhone, iPod, iPod classic, iPod nano, and iPod touch are trademarks of Apple Inc., registered in
the U.S. and other countries.
• PANDORA® internet radio is a registered trademark of Pandora Media, Inc.
EN, SP, FR
© 2011 Victor Company of Japan, Limited
KD-S48
CD RECEIVER / RECEPTOR CON CD /
RÉCEPTEUR CD
For canceling the display demonstration, see page 4. / Para cancelar la demostración en pantalla,
consulte la página 4. / Pour annuler la démonstration des affichages, référez-vous à la page 4.
0611DTSMDTJEIN
For installation and connections, refer to the separate manual.
Para la instalación y las conexiones, refiérase al manual separado.
Pour l'installation et les raccordements, se référer au manuel séparé.
INSTRUCTIONS
MANUAL DE INSTRUCCIONES
MANUEL D'INSTRUCTIONS
ENGLISH
ESPAÑOL
FRANÇAIS
For customer Use:
Enter below the Model
No. and Serial No. which
are located on the top or
bottom of the cabinet.
Retain this information
for future reference.
Model No.
Serial No.
GET0756-001A
[J]

Publicité

Table des Matières
loading

Sommaire des Matières pour JVC KD-S48

  • Page 1 ENGLISH ESPAÑOL FRANÇAIS KD-S48 CD RECEIVER / RECEPTOR CON CD / Having TROUBLE with operation? RÉCEPTEUR CD Please reset your unit Refer to page of How to reset your unit Still having trouble?? USA ONLY Call 1-800-252-5722 http://www.jvc.com We can help you! •...
  • Page 2 – Connect the equipment into an outlet on a circuit different from that to which the receiver is connected. – Consult the dealer or an experienced radio/TV technician for help. Caution: Changes or modifications not approved by JVC could void the user’s authority to operate the equipment. IMPORTANT FOR LASER PRODUCTS 1. CLASS 1 LASER PRODUCT 2.
  • Page 3: Table Des Matières

    JVC bears no responsibility for any loss of data in an iPod/iPhone and/or USB mass storage class device while using this System.
  • Page 4: Canceling The Display Demonstration

    Canceling the display demonstration Turn on the power. Select <DEMO OFF>. [Hold] (Initial setting) Finish the procedure. (Initial setting) Setting the clock Turn on the power. [Hold] (Initial setting) Select <CLOCK>. Select <CLOCK SET>. Adjust the hour. (Initial setting) Adjust the minute. Finish the procedure.
  • Page 5: Preparing The Remote Controller

    Preparing the remote controller Caution: When you use the remote controller for the first time, pull out the insulation sheet. • Danger of explosion if battery is incorrectly replaced. Replace only with the same or equivalent type. • Battery shall not be exposed to excessive heat Insulation sheet such as sunshine, fire, or the like.
  • Page 6: Basic Operations

    Basic operations Loading slot Control dial Display window Ejects the disc Remote sensor AUX (auxiliary) input jack • DO NOT expose to bright sunlight. Detaches the panel USB (Universal Serial Bus) input terminal When you press or hold the following button(s)... Remote Main unit General operation...
  • Page 7: Listening To The Radio

    Listening to the radio • [Press] Searches for stations automatically. Ÿ • [Hold] Searches for stations manually. “M” flashes, then press the button ] “FM” or “AM” repeatedly. “ST” lights up when receiving an FM stereo broadcast with sufficient signal strength. Improving the FM reception Manual presetting (FM/AM) You can preset up to 18 stations for FM and 6...
  • Page 8: Title Assignment

    Title assignment You can assign titles up to 30 station frequencies (FM and AM) using 8 characters (maximum) for each title. • If you try to assign titles to more than 30 station frequencies, “NAME FULL” appears. Delete unwanted titles before assignment. •...
  • Page 9: Selecting The Playback Modes

    Using the remote controller Selecting the playback modes 5 / ∞ : Selects folder of the MP3/WMA. You can use only one of the following playback 2 / 3 : [Press] Selects track. modes at a time. [Hold] Fast-forwards or reverses the track.
  • Page 10: Listening To A Usb Device

    Listening to a USB device This unit is equipped with two USB input terminals (on the control panel and USB cable from the rear of the unit). You can use these two terminals at the same time. You can operate the USB device in the same way you operate the files on a disc. (page 8, 9) •...
  • Page 11: Using Bluetooth ® Devices

    • A maximum of two devices for Bluetooth phone and one for Bluetooth audio can be connected at a time. Use the Bluetooth device to search and select “JVC Unit.” • For some Bluetooth devices, you may ] Turns on the power.
  • Page 12: Using A Bluetooth Mobile Phone

    To delete a registered device If “PAIRING” = “PIN 0000” scrolls on 1 Press and hold MENU. the display... 2 Turn the control dial to select ] Enter a PIN (Personal Identification <BLUETOOTH>, then press to confirm. Number) code to the Bluetooth device. 3 Turn the control dial to select •...
  • Page 13 If DIAL NUMBER is selected in step 2 ... AUTO ANSWER • Enter the phone number to dial. ON : The unit answers the incoming calls Turn the control dial to select a number automatically. / OFF [Initial] : The unit does not or character (see table below), press answer the calls automatically.
  • Page 14 To select a contact from the phonebook When <AUTO ANSWER> is activated..1 Select PHONEBOOK calling method. The unit answers the incoming calls automatically. (page 12) 2 Press 5/∞ to show the search menu • Press FUNC. or the control dial to answer the incoming call when <AUTO ANSWER>...
  • Page 15: Using A Bluetooth Audio Player

    Using a Bluetooth audio player Operations and display indications differ Selecting the playback modes depending on their availability on the • For Bluetooth devices that support AVRCP 1.3. connected device. ] Select “BT FRONT” or [Hold] “BT REAR.” If playback does not start automatically, operate the Bluetooth audio player to start playback.
  • Page 16 : Shows connected phone name. / AU CNNT DEV * : Shows connected audio device name. / MY BT NAME : Shows the unit name (JVC Unit). / MY ADDRESS : Shows address of USB Bluetooth Adapter. Will not display if two Bluetooth phones are connected at the same time.
  • Page 17: Listening To An Ipod/Iphone

    Listening to an iPod/iPhone You can connect an Apple iPod/iPhone using the USB 2.0 cable (accessory of the iPod/iPhone) to the USB input terminal on the control panel or USB cable from the rear of the unit. Ÿ USB input terminal ] Turns on the power.
  • Page 18 • When operating an iPod/iPhone, some operations may iPhone 3GS not be performed correctly or as intended. In this case, iPhone 3G visit the following JVC web site: <http://www.jvc. iPhone co.jp/english/car/index.html> (English website only). <IPOD MODE/ APP MODE> are not available.
  • Page 19: Preparation

    Using the iPod/iPhone the list application You can operate the Pandora application and some of the JVC original application (eg. JVC Drive Smart) with this unit in <APP MODE>. JVC original application (eg. JVC Drive Smart) ] Select the desired menu.
  • Page 20: Listening To The Hd Radio ™ Broadcast

    Changing the display information Additional information Pandora can be operated only for the compatible iPod Touch/iPhone. For iPod Touch, Pandora can only be Station name = Album name/Artist name = controlled under Wi-Fi connection. Track title = Elapsed playing time = Clock Due to music licensing restrictions, the Pandora radio time = (back to the beginning) service application is available in the United States.
  • Page 21: Listening To The Satellite Radio

    For listening to a SIRIUS Satellite radio: For listening to an XM Satellite radio: • SCC1 and KS-SRA100 • JVC Smart Digital Adapter (XMDJVC100) • D&P, SCVDOC1 and KS-SRA100 • CNP2000UCA and CNPJVC1 For details, refer also to the instructions supplied with the other components.
  • Page 22: Storing Channels In Memory

    Activate your SIRIUS subscription after Storing channels in memory connection You can preset up to 18 channels for both SIRIUS and XM. Tune in to a channel you want to store. (Steps ~ – !, see page 21.) ] “SIRIUS” SIRIUS Satellite radio starts updating all the SIRIUS channels.
  • Page 23: Additional Information

    Changing the display information Using the remote controller 5 / ∞ : Changes the categories. 2 / 3 : [Press] Changes the channels. [Hold] Changes the channels rapidly. Category name = Channel name = Artist name = Composer name * = Song/program Additional information name/title = Clock = (back to the beginning) To learn more about SIRIUS/XM programming or to...
  • Page 24: Selecting A Preset Sound Mode

    Selecting a preset sound mode You can select a preset sound mode suitable Storing your own sound mode for the music genre. You can store your own adjustments in memory. FLAT = NATURAL = DYNAMIC = VOCAL [Hold] BOOST = BASS BOOST = USER = (back to the beginning) While listening, you can adjust the subwoofer ] <PRO EQ>...
  • Page 25: Menu Operations

    Menu operations Repeat step 2 if necessary. [Hold] • To return to the previous menu, press BACK. If no operation is done • To exit from the menu, press for about 60 seconds, the MENU. operation will be canceled. Menu item Selectable setting, [ Initial: Underlined ] DEMO ON : Display demonstration will be activated automatically if no operation is done for...
  • Page 26 Menu item Selectable setting, [ Initial: Underlined ] DIMMER SET AUTO : Changes the display and button illumination between the Day/Night adjustments in <BRIGHTNESS>/<COLOR SETUP> setting when you turn off/on the car headlights * . / ON : Selects the Night adjustments in <BRIGHTNESS>/<COLOR SETUP> setting for the display and button illumination.
  • Page 27 Menu item Selectable setting, [ Initial: Underlined ] AMP GAIN * LOW POWER : VOLUME 00 – VOLUME 30 (Selects if the maximum power of each speaker is less than 50 W to prevent damaging the speakers.) / HIGH POWER : VOLUME 00 – VOLUME 50 Displayed only when the source is “FM”...
  • Page 28: Troubleshooting

    Troubleshooting Symptom Remedy/Cause Sound cannot be heard from the speakers. Adjust the volume to the optimum level. / Make sure the unit is not muted/paused. (page 6) / Check the cords and connections. The unit does not work at all. Reset the unit.
  • Page 29 Symptom Remedy/Cause “READING” keeps flashing on the display. A longer readout time is required. Do not use too many hierarchical levels and folders. / Turn off the power then on again. / Reattach the USB device again. Noise is generated. Skip to another file.
  • Page 30 Reset the unit and try the operation again. If “HW ERROR” appears again, consult your nearest JVC car audio dealer. The iPod does not turn on or does not work. Check the connecting cable and its connection. / Charge the battery of the iPod/iPhone.
  • Page 31 Symptom Remedy/Cause Sound quality changes when receiving HD Fix the reception mode either to <ANALOG/ DIGITAL>. Radio stations. (page 20, 27) No sound can be heard. <ANALOG> is selected when receiving all digital broadcast of HD Radio station. Select <AUTO/ DIGITAL>. (page 20, 27) / <DIGITAL>...
  • Page 32 • The Bluetooth word mark and logos are owned by the Bluetooth SIG, Inc. and any use of such marks by Victor Company of Japan, Limited (JVC) is under license. Other trademarks and trade names are those of their respective owners.
  • Page 33: Specifications

    Specifications AUDIO AMPLIFIER SECTION Wow and Flutter : Less than measurable limit MP3 Decoding Format (MPEG1/2 Audio Layer 3) : Max. Bit Rate: 320 kbps WMA (Windows Media® Audio) Decoding Format : Max. Bit Rate: 320 kbps Power Output : 20 W RMS × 4 Channels at 4 Ω and ≤...
  • Page 34 – Enchufe el equipo a una toma de corriente situada en un circuito distinto del aparato receptor. – Consulte a su distribuidor o a un técnico experto en radio/televisión. Precaución: Los cambios o modificaciones no aprobados por JVC pueden anular la autoridad del usuario para operar el equipo. IMPORTANTE PARA PRODUCTOS LÁSER 1.
  • Page 35: Cómo Montar/Desmontar El Panel De Control

    33 Especificaciones opere la unidad hasta que se normalice la temperatura del habitáculo. JVC no se hará responsable de ninguna pérdida de datos en un iPod/iPhone y/o dispositivo de clase de almacenamiento masivo USB mientras se utiliza este sistema.
  • Page 36: Cancelación De Las Demostraciones En Pantalla

    Cancelación de las demostraciones en pantalla Encienda la unidad. Seleccione <DEMO OFF>. [Sostener] (Configuración inicial) Finalice el procedimiento. (Configuración inicial) Puesta en hora del reloj Encienda la unidad. [Sostener] (Configuración inicial) Seleccione <CLOCK>. Seleccione <CLOCK SET>. Ajuste la hora. (Configuración inicial) Ajuste los minutos.
  • Page 37: Preparación Del Control Remoto

    Preparación del control remoto Precaución: Retire la lámina aislante cuando utilice el control remoto por primera vez. • Peligro de explosión si se instala la pila de manera incorrecta. Cámbiela solamente por una del mismo tipo o de un tipo equivalente. •...
  • Page 38: Operaciones Básicas

    Operaciones básicas Ventanilla de visualización Ranura de carga Disco de control Expulsa el disco Sensor remoto Toma de entrada • DO lo exponga a la luz AUX (auxiliar) solar brillante. Desmonta el panel Terminal de entrada USB (Universal Serial Bus) Si pulsa o mantiene pulsado(s) el(los) siguiente(s) botón(es)...
  • Page 39: Para Escuchar La Radio

    Para escuchar la radio • [Pulse] Efectúa automáticamente la Ÿ búsqueda de emisoras. • [Sostener] Efectúa manualmente la ] “FM” o “AM” búsqueda de emisoras. “M” parpadea, a continuación, pulse el botón repetidamente. “ST” se enciende cuando se recibe una radiodifusión FM estéreo con una intensidad de señal suficiente.
  • Page 40: Asignación De Título

    Asignación de título Puede asignar títulos a un máximo de 30 frecuencias de emisoras (FM y AM) utilizando 8 caracteres (como máximo) para cada título. • Cuando intente asignar títulos a más de 30 frecuencias de emisoras, aparecerá “NAME FULL”. Antes de asignar, borre los títulos que no necesita.
  • Page 41: Cómo Seleccionar Los Modos De Reproducción

    Uso del control remoto Cómo seleccionar los modos de 5 / ∞ : Selecciona la carpeta de MP3/WMA. reproducción 2 / 3 : [Pulse] Selecciona la pista. Podrá utilizar solamente uno de los siguientes [Sostener] Avanzar o retroceder modos de reproducción a la vez. rápidamente la pista.
  • Page 42: Escuchando Un Dispositivo Usb

    Escuchando un dispositivo USB Esta unidad está equipada con dos terminales de entrada USB (en el panel de control y el cable USB que viene de la parte trasera de la unidad). Estos dos terminales se pueden utilizar simultáneamente. Puede accionar el dispositivo USB tal como lo hace con los archivos de un disco. (página 8, 9) •...
  • Page 43: Uso De Dispositivos Bluetooth

    • Sólo se permite conectar simultáneamente un máximo de dos dispositivos para teléfono Bluetooth y uno para audio Bluetooth. Utilice el dispositivo Bluetooth para efectuar la búsqueda y seleccione “JVC Unit”. • Con algunos dispositivos Bluetooth, es ] Encienda la unidad.
  • Page 44: Uso De Un Teléfono Móvil Bluetooth

    Para borrar un dispositivo registrado Si “PAIRING” = “PIN 0000” se 1 Pulse y mantenga pulsado MENU. desplaza en la pantalla. 2 Gire el control giratorio para seleccionar ] Ingrese un código PIN (Número de <BLUETOOTH> y, a continuación, púlselo identificación personal) en el dispositivo para confirmar.
  • Page 45 Si seleccionó DIAL NUMBER en el paso 2 ... AUTO ANSWER • Introduzca el número de teléfono que ON : La unidad contesta automáticamente las desea llamar. llamadas entrantes. / OFF [Inicial] : La unidad Gire el control giratorio para seleccionar no contesta las llamadas automáticamente.
  • Page 46 Para seleccionar un contacto de la guía telefónica Cuando <AUTO ANSWER> está activado..1 Seleccione el método de llamada La unidad contesta automáticamente las llamadas entrantes. PHONEBOOK. (página 12) 2 Pulse 5/∞ para que aparezca el menú de • Pulse FUNC. o el control giratorio para contestar la llamada entrante cuando se búsqueda (A a Z, 0 a 9 y OTHERS).
  • Page 47: Uso Del Reproductor De Audio Bluetooth

    Uso del reproductor de audio Bluetooth Cómo seleccionar los modos de Las operaciones y las indicaciones en pantalla difieren según el dispositivo conectado. reproducción ] Seleccione “BT FRONT” o • Para dispositivos Bluetooth compatibles con AVRCP 1.3. “BT REAR”. Si la reproducción no comienza automáticamente, opere el reproductor de [Sostener] audio Bluetooth para comenzar la reproducción.
  • Page 48 Bluetooth. Continúe la conversación con su teléfono móvil. • El dispositivo se desconecta al apagar la unidad. • Si desea obtener más información sobre Bluetooth, visite el siguiente sitio web de JVC: <http://www.jvc.co.jp/english/car/index.html> (Sitio web sólo en inglés).
  • Page 49: Escuchando Un Ipod/Iphone

    Escuchando un iPod/iPhone Utilizando el cable USB 2.0 (accesorio del iPod/iPhone), puede conectar un iPod/iPhone al terminal de entrada USB del panel de control o el cable USB desde la parte trasera de la unidad. Ÿ Terminal de entrada USB ] Encienda la unidad.
  • Page 50 • Cuando opera un iPod/iPhone, algunas operaciones iPhone pueden no funcionar correctamente o como se desea. En tal caso, visite el siguiente sitio web de JVC: <IPOD MODE / APP MODE> no está disponible. <http://www.jvc.co.jp/english/car/index.html> (Sitio web sólo en inglés).
  • Page 51 JVC (por ejemplo, JVC Drive Smart). Aplicación original de JVC (por ejemplo, JVC Drive Smart) Para más información sobre JVC Drive Smart, ] Seleccione el menú deseado. visite el sitio web de JVC: <http://www.jvc. Visualiza la lista de emisoras: co.jp/english/car/index.html>...
  • Page 52: Para Escuchar La Transmisión De Hd Radio

    Cambio de la información en pantalla Información adicional Pandora sólo puede funcionar con el iPod Touch/iPhone compatible. Para iPod Touch, Pandora sólo puede Nombre de la emisora = Nombre del álbum/ controlarse con la conexión Wi-Fi. Nombre del artista = Título de la pista = Debido a las restricciones de licencia de música, la Tiempo de reproducción transcurrido = Hora aplicación del servicio de radio Pandora sólo está...
  • Page 53: Para Escuchar La Radio Satelital

    Para escuchar la radio satelital SIRIUS: Para escuchar la radio satelital XM: • SCC1 y KS-SRA100 • JVC Smart Digital Adapter (XMDJVC100) • D&P, SCVDOC1 y KS-SRA100 • CNP2000UCA y CNPJVC1 Si desea más información, consulte también las instrucciones suministradas con los otros componentes.
  • Page 54 Active la suscripción de SIRIUS después Cómo almacenar canales en la de la conexión memoria Se pueden preajustar hasta 18 canales para SIRIUS y XM. ] “SIRIUS” Sintonice el canal que desea memorizar. La radio satelital SIRIUS comienza a (Pasos ~ – !, consulte la página 21). actualizar todos los canales SIRIUS.
  • Page 55: Información Adicional

    Cambio de la información en pantalla Uso del control remoto 5 / ∞ : Cambia las categorías. 2 / 3 : [Pulse] Cambia los canales. [Sostener] Cambia rápidamente los Nombre de la categoría = Nombre del canales. canal = Nombre del artista = Nombre del compositor * = Nombre de la canción/ Información adicional programa/título = Reloj = (vuelta al...
  • Page 56: Selección De Un Modo De Sonido Preajustado

    Selección de un modo de sonido preajustado Podrá seleccionar un modo de sonido Cómo guardar su propio modo preajustado adecuado al género musical. de sonido Es posible almacenar sus propios ajustes en la memoria. FLAT = NATURAL = DYNAMIC = VOCAL BOOST = BASS BOOST = USER = (vuelta [Sostener] al comienzo)
  • Page 57: Operaciones De Los Menús

    Operaciones de los menús Repita el paso 2, si es [Sostener] necesario. • Para volver al menú anterior, La operación se cancela si no pulse BACK. se efectúa ninguna operación • Para salir de un menú, pulse durante aproximadamente MENU. 60 segundos.
  • Page 58 Opción del menú Ajuste seleccionable, [ Inicial: Subrayado ] DIMMER SET AUTO : Cambia la iluminación de la pantalla y de los botones entre los ajustes diurno/nocturno en <BRIGHTNESS>/<COLOR SETUP> cuando usted apaga/ enciende los faros del vehículo * . / ON : Selecciona el ajuste nocturno en <BRIGHTNESS>/<COLOR SETUP>...
  • Page 59 Opción del menú Ajuste seleccionable, [ Inicial: Subrayado ] LOW POWER : VOLUME 00 – VOLUME 30 (Selecciónelo si la potencia máxima de cada altavoz es inferior a 50 W, con el fin de evitar posibles daños en los altavoces.) / GAIN * HIGH POWER : VOLUME 00 –...
  • Page 60: Localización De Averías

    Localización de averías Síntoma Soluciones/Causas No se puede escuchar el sonido a través de Ajuste el volumen al nivel óptimo. / Asegúrese de que la unidad los altavoces. no esté enmudecida/en pausa. (página 6) / Inspeccione los cables y las conexiones. El receptor no funciona en absoluto.
  • Page 61 Síntoma Soluciones/Causas “READING” permanece parpadeando en la Se requiere mayor tiempo de lectura. No utilice demasiados pantalla. niveles de jerarquías y carpetas. / Apague la unidad y vuélvala a encender. / Vuelva a conectar el dispositivo USB. Se generan ruidos. Salte a otro archivo.
  • Page 62 Reposicione la unidad e intente la operación otra vez. Si vuelve a aparecer “HW ERROR”, consulte con su concesionario car audio JVC más cercano. El iPod no se enciende o no funciona. Verifique el cable de conexión y su conexión. / Cargue la pila del iPod/iPhone.
  • Page 63 Síntoma Soluciones/Causas La calidad del sonido cambia cuando se Fije el modo de recepción en <ANALOG/ DIGITAL>. reciben emisoras HD Radio. (página 20, 27) El sonido no se escucha. Se selecciona <ANALOG> cuando se reciben todas las transmisiones digitales de una emisora HD Radio. Seleccione <AUTO/ DIGITAL>.
  • Page 64 • La marca Bluetooth y sus logotipos son propiedad de Bluetooth SIG, Inc., y cualquier uso de los mismos por Victor Company of Japan, Limited (JVC) se realiza bajo licencia. Otras marcas y nombres comerciales son de sus respectivos propietarios.
  • Page 65: Especificaciones

    Especificaciones SECCIÓN DEL AMPLIFICADOR DE Lloro y trémolo : Inferior al límite medible Formato de decodificación MP3 (MPEG1/2 AUDIO Audio Layer 3) : Máx. velocidad de bits: 320 kbps Formato de decodificación WMA (Windows Media® Audio) : Máx. velocidad de bits: 320 kbps Salida de potencia : 20 W RMS ×...
  • Page 66: Précautions

    Veuillez lire attentivement toutes les instructions avant d’utiliser l’appareil afin de bien comprendre son fonctionnement et d’obtenir les meilleures performances possibles. Précautions: Tout changement ou modification non approuvé par JVC peut annuler l’autorité de l’utilisateur d’utiliser l’appareil. IMPORTANT POUR PRODUITS LASER 1.
  • Page 67: Comment Attacher/Détacher Le Panneau De Commande

    28 Guide de dépannage la voiture redevienne normale avant d’utiliser l’appareil. 33 Spécifications JVC ne peut être tenu responsable pour toute perte de données dans un iPod/iPhone et/ ou un périphérique USB à mémoire de grande capacité lors de l’utilisation de ce système.
  • Page 68: Annulation Des Démonstrations Des Affichages

    Annulation des démonstrations des affichages Mise sous tension de l’appareil. Choisissez <DEMO OFF>. [Maintenez pressée] (Réglage initial) Terminez la procédure. (Réglage initial) Réglage de l’horloge Mise sous tension de l’appareil. [Maintenez pressée] (Réglage initial) Choisissez <CLOCK>. Choisissez <CLOCK SET>. Ajustez les heures. (Réglage initial) Ajustez les minutes.
  • Page 69: Préparation De La Télécommande

    Préparation de la télécommande Attention: Lorsque vous utilisez la télécommande pour la première fois, tirez sur la feuille isolante pour • Danger d’explosion si la pile est remplacée de la retirer. façon incorrecte. Remplacez-la uniquement avec le même type de pile ou un type équivalent.
  • Page 70: Opérations De Base

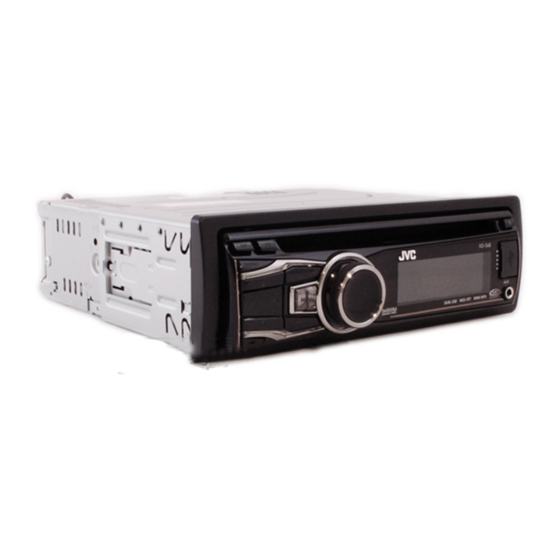
    Opérations de base Fente d’insertion Molette de commande Fenêtre d’affichage Éjection d’un disque Capteur de télécommande Prise d’entrée AUX • NE l’exposez PAS à la (auxiliaire) lumière directe du soleil. Retrait du panneau Prise d’entrée USB (bus série universel) Quand vous appuyez ou maintenez pressées les touches suivantes... Appareil Télécommande Opérations générales...
  • Page 71: Écoute De La Radio

    Écoute de la radio • [Appuyez sur la touche] Recherche des Ÿ stations automatiquement. • [Maintenez pressée] Recherche des ] “FM” ou “AM” stations manuellement. “M” clignote, puis appuyez sur la touche répétitivement. “ST” s’allume lors de la réception d’une émission FM stéréo avec un signal suffisamment fort. Amélioration de la réception FM Préglage manuel (FM/AM) Vous pouvez prérégler un maximum de 18...
  • Page 72: Affectation D'un Titre

    Affectation d’un titre Vous pouvez affecter un titre à 30 fréquences de station (FM et AM) maximum et 8 caractères (maximum) pour chaque titre. • Si vous essayer d’affecter des titres à plus de 30 fréquences de station, “NAME FULL” apparaît. Effacez les titres inutiles avant de faire une autre affectation.
  • Page 73: Sélection Des Modes De Lecture

    Utilisation de la télécommande Sélection des modes de lecture 5 / ∞ : Choisit un dossier d’un disque MP3/WMA. Vous pouvez utiliser un des modes de lecture 2 / 3 : [Appuyez sur la touche] Choisit une suivants à la fois. plage.
  • Page 74: Écoute D'un Périphérique Usb

    Écoute d’un périphérique USB Cet appareil est muni de deux prises d’entrée USB (sur le panneau de commande et sur le câble USB provenant de l’arrière de l’appareil). Vous pouvez utiliser ces deux prises en même temps. Vous pouvez commander le périphérique USB de la même façon que les fichiers sur un disque.
  • Page 75: Utilisation De Périphériques Bluetooth

    • Un maximum de deux périphériques pour Téléphone Bluetooth et un périphérique pour Audio Bluetooth peuvent être connectés en même temps. Utilisez le périphérique Bluetooth pour rechercher et sélectionner “JVC Unit”. • Pour certains périphériques Bluetooth, il ] Met l’appareil sous tension.
  • Page 76: Utilisation D'un Téléphone Portable Bluetooth

    Pour supprimer un périphérique enregistré Si “PAIRING” = “PIN 0000” défile sur 1 Maintenez pressé MENU. l’affichage... 2 Tournez la molette de commande pour ] Entrez un code PIN (Numéro choisir <BLUETOOTH>, puis appuyez d’identification personnel) sur le dessus pour valider. périphérique Bluetooth.
  • Page 77 Si DIAL NUMBER est sélectionné à l’étape 2 ... AUTO ANSWER • Entrez le numéro de téléphone à composer. ON : L’appareil répond automatiquement Tournez la molette de commande pour aux appels entrant. / OFF [Réglage choisir un numéro ou un caractère (voir le initial] : L’appareil ne répond pas tableau ci-dessous), appuyez sur 4 automatiquement aux appels entrant.
  • Page 78: Réception/Terminaison D'un Appel Téléphonique

    Pour choisir un contact à partir du Quand <AUTO ANSWER> est en service..répertoire téléphonique L’appareil répond automatiquement aux appels entrant. 1 Choisissez la méthode d’appel • Appuyez sur FUNC. ou sur la molette de PHONEBOOK. (page 12) commande pour répondre à l’appel entrant 2 Appuyez sur 5/∞...
  • Page 79: Utilisation D'un Lecteur Audio Bluetooth

    Utilisation d’un lecteur audio Bluetooth Les opérations et les indications de l’affichage Sélection des modes de lecture diffèrent en fonction de leur disponibilité sur le • Pour les périphériques Bluetooth compatibles périphérique connecté. avec AVRCP 1.3. ] Choisissez “BT FRONT” ou “BT REAR”.
  • Page 80 • Quand cet appareil est mis hors tension, l’appareil extérieur est déconnecté. • Si vous souhaitez recevoir plus d’informations sur le système Bluetooth, consultez le site web de JVC suivant: <http://www.jvc.co.jp/english/car/index.html> (Site web en anglais uniquement). FRANÇAIS...
  • Page 81: Écoute D'un Ipod/Iphone

    Écoute d’un iPod/iPhone Vous pouvez connecter l’iPod/iPhone Apple en utilisant le câble USB 2.0 (accessoire du iPod/iPhone) à la prise d’entrée USB sur le panneau de commande ou le câble USB à l’arrière de l’appareil. Ÿ Prise d’entrée USB ] Met l’appareil sous tension.
  • Page 82 3GS opérations peuvent ne pas être réalisées correctement iPhone 3G ou comme prévues. Dans ce cas, consultez le site Web iPhone JVC suivant: <http://www.jvc.co.jp/english/car/index. <IPOD MODE> et <APP MODE> ne sont pas html> (Site web en anglais uniquement). disponibles. FRANÇAIS...
  • Page 83: Utilisation De L'application Ipod/ Iphone

    Vous pouvez utiliser l'application Pandora et certaines des applications originales de JVC (par exemple JVC Drive Smart) avec cet appareil en mode <APP MODE>. Application originale de JVC (par exemple JVC Drive Smart) ] Choisissez le menu souhaité.
  • Page 84: Écoute D'une Émission Hd Radio

    Changement des informations sur Informations complémentaires l’affichage Pandora peut être utilisé uniquement avec les iPod Touch/iPhone compatibles. Pour iPod Touch, Pandora peut uniquement être commandé avec une connexion Nom de la station = Nom de l’album/Nom de Wi-Fi. l’artiste = Titre de la plage = Durée de lecture À...
  • Page 85: Écoute De La Radio Satellite

    Pour l’écoute d’une radio satellite SIRIUS: Pour l’écoute d’une radio satellite XM: • SCC1 et KS-SRA100 • Adaptateur JVC Smart Digital (XMDJVC100) • D&P, SCVDOC1 et KS-SRA100 • CNP2000UCA et CNPJVC1 Pour plus d’informations, référez-vous aussi aux instructions fournies avec les autres appareils.
  • Page 86: Mémorisation Des Canaux

    Activez votre suscription SIRIUS après Mémorisation des canaux la connexion Vous pouvez prérégler un maximum de 18 canaux pour SIRIUS et XM. Accordez le canal que vous souhaitez mémoriser. (Étapes ~ – !, voir ] “SIRIUS” page 21.) La radio satellite SIRIUS commence à mettre à...
  • Page 87: Informations Complémentaires

    Changement des informations sur Utilisation de la télécommande 5 / ∞ : Change les catégories. l’affichage 2 / 3 : [Appuyez sur la touche] Permet de changer les canaux. [Maintenez pressée] Permet de changer les canaux rapidement. Nom de la catégorie = Nom du canal = Nom de l’artiste = Nom du compositeur * = Nom Informations complémentaires de la chanson/programme/titre = Horloge =...
  • Page 88: Sélection D'un Mode Sonore

    Sélection d’un mode sonore préréglé Vous pouvez sélectionner un mode sonore Mémorisation de votre propre préréglé adapté à votre genre de musique. mode sonore Vous pouvez mémoriser vos propres ajustements en mémoire. FLAT = NATURAL = DYNAMIC = VOCAL BOOST = BASS BOOST = USER = [Maintenez pressée] (retour au début) Pendant l’écoute, vous pouvez ajuster le niveau...
  • Page 89: Utilisation Des Menus

    Utilisation des menus Répéter l’étape 2 si nécessaire. [Maintenez pressée] • Pour revenir au menu Si aucune opération n’est précédent, appuyez sur effectuée pendant environ BACK. 60 secondes, l’opération est • Pour quitter le menu, annulée. appuyez sur MENU. Article de menu Réglages pouvant être choisis, [ Réglage initial: Souligné...
  • Page 90 Article de menu Réglages pouvant être choisis, [ Réglage initial: Souligné ] DIMMER SET AUTO : Change l’éclairage de l’affichage et des touches entre les réglages Jour et Nuit dans le réglage <BRIGHTNESS>/<COLOR SETUP> quand vous allumez ou éteignez les feux du véhicule * .
  • Page 91 Article de menu Réglages pouvant être choisis, [ Réglage initial: Souligné ] AMP GAIN * LOW POWER : VOLUME 00 – VOLUME 30 (Choisissez ce réglage si la puissance maximum de chaque enceinte est inférieure à 50 W pour éviter tout dommage des enceintes.) / HIGH POWER : VOLUME 00 –...
  • Page 92: Guide De Dépannage

    Guide de dépannage Symptôme Remède/Cause Aucun son n’est entendu des enceintes. Ajustez le volume sur le niveau optimum. / Assurez-vous que le son de l’appareil n’est pas coupé et qu’il n’est pas en pause. (page 6) / Vérifiez les cordons et les connexions. Cet appareil ne fonctionne pas du tout.
  • Page 93 Symptôme Remède/Cause “READING” continue de clignoter sur Un temps d’initialisation plus long est requis. N’utilisez pas l’affichage. trop de niveaux de hiérarchie et de dossiers. / Mettez l’appareil hors tension puis de nouveau sous tension. / Réattachez le périphérique USB. Du bruit est produit.
  • Page 94 Réinitialiser l’appareil et essayez de nouveau l’opération. Si “HW ERROR” apparaît de nouveau, consultez le revendeur autoradio JVC le plus proche. iPod ne peut pas être mis sous tension ou Vérifiez le câble de connexion et le raccordement. / Chargez la ne fonctionne pas.
  • Page 95 Symptôme Remède/Cause La qualité du son change lors de la Fixez le mode de réception sur <ANALOG/ DIGITAL>. réception de stations HD Radio. (page 20, 27) Aucun son n’est entendu. <ANALOG> est choisi lors de la réception d’une station HD Radio entièrement numérique.
  • Page 96: Entretien

    • La marque du mot et les logos Bluetooth sont la propriété de Bluetooth SIG, Inc. et toute utilisation de ces marques par Victor Company of Japan, Limited (JVC) est faite sous licence. Les autres marques et noms de commerce sont la propriété de leur propriétaire respectif.
  • Page 97: Spécifications

    Spécifications SECTION DE L’AMPLIFICATEUR AUDIO Pleurage et scintillement : Inférieur à la limite mesurable Format de décodage MP3 (MPEG1/2 Audio Layer 3) : Débit binaire maximum: 320 kbps Format de décodage WMA (Windows Media® Puissance de sortie : 20 W RMS × 4 canaux à Audio) : Débit binaire maximum: 320 kbps 4 Ω...

Table des Matières