Table des Matières
Publicité
Les langues disponibles
Les langues disponibles
Liens rapides
Publicité
Chapitres
Table des Matières

Manuels Connexes pour TechniSat DIGITRADIO 1990


Sommaire des Matières pour TechniSat DIGITRADIO 1990
- Page 1 DIGITRADIO 1990...
- Page 2 CONTENTS DEUTSCH ..................3-33 ENGLISH ..................35-65 FRANÇAIS..................67-97 ITALIANO..................99-129...
- Page 3 Bedienungsanleitung DIGITRADIO 1990 Portables DAB+/UKW-Radio mit CD-Player und Bluetooth Musikstreaming...
- Page 4 Vorwort Sehr geehrte Kunden, vielen Dank, dass Sie sich für das DIGITRADIO 1990 von TechniSat entschieden haben. Die vorliegende Bedienungsanleitung soll Ihnen helfen, die umfangreichen Funktionen Ihres neuen Gerätes kennen zu lernen und optimal zu nutzen. Sie hilft Ihnen beim bestimmungsgemäßen und sicheren Gebrauch. Sie richtet sich an jede Person, die das Gerät installiert, bedient, reinigt oder entsorgt.
-
Page 5: Table Des Matières
1 Inhaltsverzeichnis ....................... 5 2 Abbildungen .........................7 3 Sicherheitshinweise ......................10 3.1 Bestimmungsgemäßer Gebrauch ..................... 10 3.2 Richtiger Umgang mit dem DIGITRADIO 1990 ..............10 3.3 Verwendungsbereich ........................11 3.4 Aufstellen des Gerätes ........................12 4 Entsorgung ..........................13 5 Rechtliche Hinweise ......................14 5.1 Servicehinweise ..........................15... - Page 6 10.4 UKW-Sender von einem Speicherplatz abrufen .............22 10.5 Überschreiben/Löschen einer Programmplatz-Speicherung ........22 10.6 Displayanzeigen Anpassen .......................23 10.7 Suchlauf-Einstellungen ........................23 10.8 Audio Einstellungen........................23 11 CD Player ........................... 23 11.1 CD Modus wählen..........................23 11.2 CD Einlegen ............................23 11.3 Audio-CD Wiedergabe ........................ 24 11.4 MP3-CD Wiedergabe ........................25 11.5 Wiedergabe programmieren ....................26 12 USB-Wiedergabe ......................26...
-
Page 7: Abbildungen
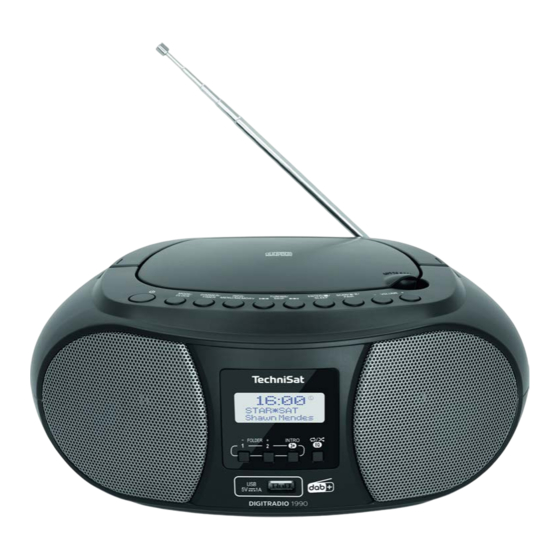
2 Abbildungen Oberseite und Vorderseite... - Page 8 Seitliche Abbildungen und Rückseite...
- Page 9 Tragebügel Ein/Standby (Im Batteriebetrieb gedrückt halten zum Einschalten) MODE/CLOCK - Im Betrieb: Quellenumschaltung, im Standby: Manuelle Uhrzeiteinstellung. DIMMER/TIMER - Im Betrieb: Displayhelligkeit anpassen, im Standby: Timereinstellung. INFO/MENU/MEMORY - Kurz drücken: Displayanzeigen wählen, gedrückt halten: Hauptmenü aufrufen, CD-Modus: Programmieren TUNING/SKIP - Menüauswahl/Titelsuche/Vorheriger Titel (CD) TUNING/SKIP - Menüauswahl/Titelsuche/Nächster Titel (CD) ENTER/STOP/SLEEP - Auswahl bestätigen/Stop (CD), Gedrückt halten: Sleeptimer...
-
Page 10: Sicherheitshinweise
Wiedergabe von verbundenen Audioquellen möglich. Das Gerät kann wahlweise über das Stromnetz oder mit Batterien betrieben werden. 3.2 Richtiger Umgang mit dem DIGITRADIO 1990 Bitte beachten Sie die nachfolgend aufgeführten Hinweise, um Sicherheitsrisiken zu minimieren, Beschädigungen am Gerät zu vermeiden, sowie einen Beitrag zum Umweltschutz zu leisten. -
Page 11: Verwendungsbereich
3.3 Verwendungsbereich WARNUNG! Öffnen Sie niemals das Gerät! Das Berühren Spannung führender Teile ist lebensgefährlich! Beachten Sie alle nachfolgenden Hinweise zur bestimmungsgemäßen Nutzung des Gerätes und um Gerätedefekten und Personenschäden vorzubeugen. Bei Schäden durch falschen Anschluss besteht kein Anspruch auf Garantie. Ein eventuell notwendiger Eingriff darf nur von geschultem Personal vorgenommen werden. -
Page 12: Aufstellen Des Gerätes
Der CD-Player verwendet einen unsichtbaren Laserstrahl. Dieser kann Ihre Augen bei falscher Handhabung verletzten. Schauen Sie niemals in das geöffnete CD-Fach. • Dieses Gerät wurde als Laser-Gerät der Klasse 1 (CLASS 1 LASER) eingestuft. 3.4 Aufstellen des Gerätes Stellen Sie das Gerät auf einen festen, sicheren und horizontalen Untergrund. Sorgen Sie für gute Belüftung. -
Page 13: Entsorgung
Ziehen Sie vor Ausbruch eines Gewitters den Netzstecker. Wenn das Gerät längere Zeit nicht benutzt wird, z.B. vor Antritt einer längeren Reise, ziehen Sie den Netzstecker. Das Gerät nicht in der Nähe von Geräten aufstellen, die starke Magnetfelder erzeugen (z.B. Motoren, Lautsprecher, Transformatoren). 4 Entsorgung Die Verpackung Ihres Gerätes besteht ausschließlich aus wiederverwertbaren Materialien. -
Page 14: Rechtliche Hinweise
Richtlinie 2014/53/EU entspricht. Der vollständige Text der EU- Konformitätserklärung ist unter der folgenden Internetadresse verfügbar: http://konf.tsat.de/?ID=22795 TechniSat ist nicht für Produktschäden auf Grund von äußeren Einflüssen, Verschleiß oder unsachgemäßer Handhabung, unbefugter Instandsetzung, Modifikationen oder Unfällen haftbar. Ihr Gerät trägt das CE-Zeichen und erfüllt alle erforderlichen EU-Normen. -
Page 15: Servicehinweise
Problem kommt, ist unsere Technische Hotline: Mo. - Fr. 8:00 - 18:00 unter Tel.: 03925/9220 1800 erreichbar. Reparaturaufträge können auch direkt online unter www.technisat.de/reparatur, beauftragt werden. Für eine eventuell erforderliche Einsendung des Gerätes verwenden Sie bitte ausschließlich folgende Anschrift: TechniSat Digital GmbH Service-Center Nordstr. -
Page 16: Beschreibung Des Gerätes
6 Beschreibung des Gerätes 6.1 Lieferumfang Bitte stellen Sie sicher, dass alle nachfolgend aufgeführten Zubehörteile vorhanden sind: - DIGITRADIO 1990 - Netzkabel - Bedienungsanleitung. 6.2 Eigenschaften des Gerätes - Mit dem digitalen DAB-Radio steht ein neues digitales Format zur Verfügung, durch welches man kristallklaren Sound in CD-Qualität hören kann. -
Page 17: Batteriebetrieb
Schrank untergebracht werden. Sorgen Sie für einen Freiraum von mindestens 10 cm um das Gerät. 7.3 Batteriebetrieb > Das Batteriefach befindet sich an der Unterseite des DIGITRADIO 1990. > Schieben Sie den Batteriefachdeckel (23) in Pfeilrichtung und nehmen Sie in >... -
Page 18: Lautstärke Verändern
- Menü aufrufen - Taste INFO/MENU/MEMORY (5) gedrückt halten. - Im Menü navigieren - Taste TUNING/SKIP (6, 7). - Änderungen Speichern/Bestätigen - Taste ENTER/STOP/SLEEP (8). - Menü verlassen - Taste INFO/MENU/MEMORY (5) Die aktuell gewählte Funktion/Option wird in eckigen Klammern < > dargestellt. -
Page 19: Dab+ (Digital Radio)-Funktion
9 DAB+ (Digital Radio)-Funktion 9.1 Was ist DAB+ DAB+ ist ein neues digitales Format, durch welches Sie kristallklaren Sound ohne Rauschen hören können. Anders als bei herkömmlichen Analogradiosendern werden bei DAB+ mehrere Sender auf ein und derselben Frequenz ausgestrahlt. Dies nennt man Ensemble oder Multiplex. -
Page 20: Sender Wählen
> Öffnen Sie das Hauptmenü durch gedrückt halten der Taste INFO/MENU/ MEMORY (5) und wählen Sie mit den Tasten TUNING/SKIP (6, 7) den Eintrag <Manuell einstellen>. Drücken Sie die Taste ENTER/STOP/SLEEP (8). > Wählen Sie mit den Tasten TUNING/SKIP (6, 7) einen Kanal (5A bis 13F) und drücken Sie anschließend die Taste ENTER/STOP/SLEEP (8). -
Page 21: Überschreiben/Löschen Einer Programmplatz-Speicherung
9.7 Überschreiben/Löschen einer Programmplatz-Speicherung > Speichern Sie wie beschrieben einfach einen neuen Sender auf einen Favoritenspeicherplatz ab. Beim Aufruf der Werkseinstellungen werden alle Speicherplätze gelöscht. 9.8 Displayanzeigen Anpassen > Drücken Sie kurz mehrmals die Taste INFO/MENU/MEMORY (5), um die verschiedenen Anzeigemodi durchzuschalten. Folgende Anzeigemodi sind im DAB-Betrieb möglich: Ensemble, Frequenz, Datum, Uhrzeit, Signalstärke, Signalfehler, Übertragungsrate, Genre, Zusatzinfos. -
Page 22: Automatische Suche Nach Sendern
10.2 Automatische Suche nach Sendern Alternativ zur manuellen Einstellung einer Empfangsfrequenz können Sie auch automatisch nach Sendern suchen lassen. Hierbei greifen die Einstellungen, die Sie unter Suchlauf-Einstellung festgelegt haben. > Drücken Sie die Taste SCAN/Wiedergabe/Pause/PAIR (9). Im Display erscheint Suchlauf... Es wird nun der nächste zu empfangende Sender gesucht und anschließend wiedergegeben. -
Page 23: Displayanzeigen Anpassen
10.6 Displayanzeigen Anpassen > Drücken Sie kurz mehrmals die Taste INFO/MENU/MEMORY (5), um die verschiedenen Anzeigemodi durchzuschalten. Folgende Anzeigemodi sind im FM-Betrieb möglich: Frequenz, Datum, Uhrzeit, Genre, Toninfo, Zusatzinfos. 10.7 Suchlauf-Einstellungen > Öffnen Sie das Hauptmenü durch gedrückt halten der Taste INFO/MENU/ MEMORY (5) und wählen Sie mit den Tasten TUNING/SKIP (6, 7) den Eintrag <Suchlauf-Einstellung>. -
Page 24: Audio-Cd Wiedergabe
> Sollte die CD nicht gelesen werden können (z.B. bei Verschmutzungen), erscheint [Keine CD] im Display. Reinigen Sie in diesem Fall die Unterseite der CD mit einem weichen, fusselfreien Tuch. 11.3 Audio-CD Wiedergabe Zum steuern der Audio-CD Wiedergabe, benutzen Sie die Wiedergabetasten SCAN/ Wiedergabe/Pause/PAIR (9), TUNING/SKIP (6, 7) und ENTER/STOP/SLEEP (8). -
Page 25: Mp3-Cd Wiedergabe
11.4 MP3-CD Wiedergabe Die Wiedergabe von MP3-CDs funktioniert ähnlich, wie die Wiedergabe von Audio- CDs. Im Display wird Ihnen die Ordnernummer (F) gefolgt von der Titelnummer und die Wiedergabezeit des Titels angezeigt. Wiedergabe: Pause (während der Wiedergabe): Nächster Titel: Vorheriger Titel: 2x Aktueller Titel von vorne: 1x Schneller Vorlauf: gedrückt halten... -
Page 26: Wiedergabe Programmieren
MP3 Titel, die sich auf einem UBS-Massenspeicher, z- B. einem USB-Stick befinden, können am DIGITRADIO 1990 wiedergeben werden. Stecken Sie den USB- Massenspeicher in die USB-Buchse (17) an der Front des DIGITRADIO 1990. Die USB-Buchse kann auch zum Laden externer Geräte wie z. B. Smartphones verwendet werden. -
Page 27: Bluetooth Wiedergabe
Ihrem externen Wiedergabegerät. Die maximale Reichweite beträgt im Bluetooth-Betrieb 8 Meter. Sollte es während der Wiedergabe zu Störgeräuschen oder Aussetzern kommen, verringern Sie die Entfernung zwischen externem Gerät und DIGITRADIO 1990. 13.1 Bluetooth Modus wählen > Drücken Sie die Taste MODE bis [BLUETOOTH] im Display angezeigt wird. -
Page 28: Audio-In
Lautstärkeregelung am DIGITRADIO 1990, als auch am angeschlossenen Gerät. Stellen Sie die Lautstärke am angeschlossenen Gerät möglichst hoch ein und regeln Sie die reguläre Lautstärke dann am DIGITRADIO 1990. Ist die Lautstärke am angeschlossenen Gerät zu leise eingestellt, ist am DIGITRADIO 1990 vermutlich ein Rauschen im Ton zu hören. -
Page 29: Weitere Funktionen
15.2 Weckfunktion Das DIGITRADIO 1990 verfügt über einen internen Wecker, den Sie programmieren können. Der Wecker ist nur verfügbar, wenn das DIGITRADIO 1990 mit dem Netzkabel verbunden wurde. Im Batteriebetrieb ist der Wecker ohne Funktion. > Schalten Sie das DIGITRADIO 1990 in den Standby-Betrieb. -
Page 30: Equalizer
Batterieleistung zu sparen. 15.5 Uhrzeit-Einstellung Grundsätzlich bezieht das DIGITRADIO 1990 die aktuelle Uhrzeit über den DAB+ Empfang. Wenn Sie das Gerät zum ersten mal in Betrieb nehmen, kann es daher einige Zeit dauern, bis die Uhrzeit Synchronisiert ist. Möchten Sie die Uhrzeit manuell einstellen, wenn kein DAB+ Empfang möglich ist, gehen Sie bitte Folgendermaßen... -
Page 31: Software-Version
<SW-Version>. Drücken Sie die Taste ENTER/STOP/SLEEP (8). > Es wird die installierte Software-Version angezeigt. 15.8 Werkseinstellung Möchten Sie das DIGITRADIO 1990 auf den Auslieferungszustand zurücksetzen, gehen Sie wie folgt vor: Dabei gehen alle Einstellungen, Sender und Favoriten verloren. Wählen Sie den DAB+ Radio Betrieb. -
Page 32: Probleme Mit Dem Gerät
Symptom Mögliche Ursache/Abhilfe Der Ton ist schwach oder von Andere Geräte, z. B. Fernseher stören schlechter Qualität. den Empfang. Stellen Sie das Gerät weiter entfernt von diesen Geräten auf. Die Antenne ist nicht ausgezogen oder ausgerichtet. Ziehen Sie die Antenne aus. -
Page 33: Technische Daten
18 Technische Daten Model DIGITRADIO 1990 Stromversorgung AC 100-240 V ~50/60 Hz, 18 W Stromverbrauch Standby (ohne Displaybeleuchtung): 0,3 W Betrieb max.: 10 W Typisch (mittlere Lautstärke): 2,5 W Batteriebetrieb 6 X R14/C-Zellen 1,5 V Bluetooth V4.2 Audioprofile: A2DP, AVRCP... - Page 35 Instruction Manual DIGITRADIO 1990 Portable DAB+/FM radio with CD player und Bluetooth music streaming...
- Page 36 Preface Dear Customer, Thank you for choosing the DIGITRADIO 1990 from TechniSat. This instruction manual is intended to help you get to know the extensive functions that your new unit offers and to make the best use of them. It will help you to use the product as intended and safely.
-
Page 37: Contents
1 Contents ..........................37 2 Illustrations ........................39 3 Safety advice ........................42 3.1 Intended use ............................42 3.2 Operating the DIGITRADIO 1990 correctly ................. 42 3.3 Scope of use............................43 3.4 Setting up the device ........................44 4 Disposal ..........................45 5 Legal notices ........................46 5.1 Servicing notes ...........................47... - Page 38 10.4 Retrieving FM stations from a memory slot ..............54 10.5 Overwriting/Deleting a station memory slot ..............54 10.6 Adjusting the display ........................55 10.7 Scan settings ............................55 10.8 Audio settings ..........................55 11 CD player ........................... 55 11.1 Selecting CD mode .........................55 11.2 Inserting the CD ..........................55 11.3 Playing audio CDs ...........................56 11.4 Playing MP3 CDs ..........................
-
Page 39: Illustrations
1 Illustrations Top and front... - Page 40 Side illustrations and the rear...
- Page 41 Carry handle On/Standby (Hold down to switch on in battery mode) MODE/CLOCK - During operation: Switch sources; In standby mode: Set time manually. DIMMER/TIMER - During operation: Adjust display brightness; In standby mode: Set timer. INFO/MENU/MEMORY - Press briefly to select display; hold down to access the main menu;...
-
Page 42: Safety Advice
CDs and MP3 CDs. It is also possible to play from audio sources connected via Bluetooth. The device can be operated either via the mains or using batteries. 2.2 Operating the DIGITRADIO 1990 correctly Please take note of the following information to minimise safety risks, to prevent damage to the device and to make a contribution to environmental protection. -
Page 43: Scope Of Use
2.3 Scope of use WARNING! Never open the device! Touching live parts can be fatal! Observe all of the following instructions for the intended use of the device and to prevent damage to the device and injury to persons. In the event of damage resulting from incorrect connection, no warranty claim can be made. -
Page 44: Setting Up The Device
The CD player uses an invisible laser beam. If used incorrectly, this can injure your eyes. Never look directly into the open CD compartment. • This devices has been classified as a CLASS 1 LASER. 2.4 Setting up the device Place the device on a firm, secure and horizontal base. -
Page 45: Disposal
Remove the plug before a storm starts. Remove the plug if the device is not going to be used for a prolonged period, e.g. before going away on a long trip. Do not set up the device in the vicinity of equipment which emits intense magnetic fields (e.g. -
Page 46: Legal Notices
Directive 2014/53/EU. The complete text of the EU Declaration of Conformity is available at the following web address: http://konf.tsat.de/?ID=22795 TechniSat accepts no liability for product damage as a result of external influences, wear or improper handling, unauthorised repairs, modifications or accidents. -
Page 47: Servicing Notes
Technical Hotline is available: Mon. - Fri. 8:00 am - 6:00 pm on: +49 (0) 3925 9220 1800. Repairs can also be ordered directly online at www.technisat.de/reparatur. If the device needs to be returned, please use the following address only: TechniSat Digital GmbH Service-Center Nordstr. -
Page 48: Description Of The Device
5.1 Scope of delivery Please ensure that all of the following accessories are present: - DIGITRADIO 1990, mains cable, instruction manual. 5.2 Features of the radio - This digital DAB+ radio uses a new digital format that delivers a crystal-clear sound CD quality. -
Page 49: Battery Mode
To turn on your DIGITRADIO 1990, press the On / Standby button (2). Press the button again to switch it off. To turn the DIGITRADIO 1990 on in battery mode, you will need to press and hold the On/Standby button. -
Page 50: Adjusting The Volume
- Access menu - Keep the INFO/MENU/MEMORY button (5) pressed. - Navigate through the menu - TUNING/SKIP button (6, 7). - Save/Confirm changes - ENTER/STOP/SLEEP button (8). - Exit menu - Keep the INFO/MENU/MEMORY button (5) The currently selected function/option is shown in square brackets < >. The currently active function/option is shown with an asterisk *. -
Page 51: Dab+ (Digital Radio) Function
8 DAB+ (Digital Radio) function 8.1 What is DAB+? DAB+ is a new digital format through which crystal clear sound with no noise can be heard. In contrast to conventional analogue radio stations, DAB+ can be used to broadcast multiple stations on one and the same frequency. This is referred to as an ensemble or multiplex. -
Page 52: Selecting Stations
> Open the main menu by holding down the INFO/MENU/MEMORY button (5) and use the TUNING/SKIP buttons (6, 7) to select the <Manual Setting> item. Press the ENTER/STOP/SLEEP button (8). > Use the TUNING/SKIP buttons (6, 7) to select a channel (5A to 13F) and then press the ENTER/STOP/SLEEP button (8). -
Page 53: Overwriting/Deleting A Station Memory Slot
8.7 Overwriting/deleting a station memory slot > Simply save a new station on a favourite memory slot as described. When retrieving the factory settings all memory slots are deleted. 8.8 Adjusting the display > Press the INFO/MENU/MEMORY button (5) multiple times to scroll through the various display modes. -
Page 54: Searching For Stations Automatically
9.2 Searching for stations automatically As an alternative to manual setting of the reception frequency, you can also search for stations automatically. To do so, access the settings you have set up under Scan Settings. > Press the SCAN/Play/Pause/PAIR button (9). Scan appears in the display... The device now searches for the next station it can receive, and then plays it. -
Page 55: Adjusting The Display
9.6 Adjusting the display > Press the INFO/MENU/MEMORY button (5) multiple times to scroll through the various display modes. The following display modes are possible in FM mode: Frequency, Date, Time, Genre, Sound Info, Additional Info. 9.7 Scan settings > Open the main menu by holding down the INFO/MENU/MEMORY button (5) and use the TUNING/SKIP (6, 7) buttons to select the <Scan Settings>... -
Page 56: Playing Audio Cds
10.3 Playing audio CDs Use the SCAN/Play/Pause/PAIR (9), TUNING/SKIP (6, 7) and ENTER/STOP/SLEEP (8) play buttons to control audio CD playback. The track number (T) and track playing time now appears in the display. Play: Pause (during playback): Next track: Previous track: 2x Current track from the beginning: 1x Fast forward: hold down... -
Page 57: Playing Mp3 Cds
10.4 MP3 CD playback Playback of MP3 CDs is the same as for audio CDs. The folder number (F) followed by the track number and track playing time appear in the display. Play: Pause (during playback): Next track: Previous track: 2x Current track from the beginning: 1x Fast forward: hold down Fast rewind: hold down... -
Page 58: Programmed Playback
MP3 tracks that are located on a USB mass storage device such as a USB stick can be played on the DIGITRADIO 1990. Insert the USB mass storage device into the USB port (17) on the front of the DIGITRADIO 1990. -
Page 59: Bluetooth Playback
12 Bluetooth playback When an external playback device such as a smartphone is connected, you can play music tracks on the DIGITRADIO 1990. When doing so, you can control the playback on your external playback device. The maximum range in Bluetooth mode is 8 metres. If disruptive noise or dropouts occur during playback, reduce the distance between the external device and the DIGITRADIO 1990. -
Page 60: Audio In
DIGITRADIO 1990 and on the connected device. Set the volume on the connected device as high as possible and then regulate the volume on the DIGITRADIO 1990. If the volume on the connected device is set too low, you will probably hear interference in the sound on the DIGITRADIO 1990. -
Page 61: Other Functions
Select Sleep Timer > Off to switch off an active sleep timer. 14.2 Alarm function The DIGITRADIO 1990 has an internal alarm that you can program. The alarm is only available when the DIGITRADIO 1990 is connected to the mains. The alarm will not work in battery mode. >... -
Page 62: Equaliser
It is dimmed again after 10 seconds, to save battery power. 14.5 Setting the time The DIGITRADIO 1990 basically derives the current time from the DAB+ signal. If you are operating the device for the first time, it may take some time until the clock is synchronised. -
Page 63: Software Version
The software version currently installed will now be displayed. 14.8 Factory settings If you want to reset the DIGITRADIO 1990 to the delivery status, proceed as follows: Doing so will delete all settings, stations and favourites. Select DAB+ radio mode. -
Page 64: Problems With The Device
Symptom Possible cause/remedy The sound is weak or of Other devices such as televisions are poor quality. disrupting reception. Move the unit further away from these devices. The antenna is not extended or correctly orientated. Extend the antenna. Rotate the antenna to improve reception. -
Page 65: Technical Specifications
17 Technical data Model DIGITRADIO 1990 Power supply AC 100-240 V ~50/60 Hz, 18 W Power consumption Standby (without display lighting): 0.3 W Operating max.: 10 W Typical (medium volume): 2.5 W Battery mode 6 x R14/C cells, 1.5 V Bluetooth V4.2... - Page 67 Mode d'emploi DIGITRADIO 1990 Radio portative FM/DAB+ avec lecteur CD et streaming de musique via Blue- tooth...
-
Page 68: Avant-Propos
Avant-propos Chers clients, Merci d'avoir fait le choix de la DIGITRADIO 1990 de TechniSat. Le présent mode d’emploi vous aidera à découvrir et à utiliser de manière optimale les nombreuses fonctionnalités de votre nouvel appareil. Il vous aide à l'utiliser de manière sûre et conforme à... -
Page 69: Table Des Matières
1 Table des matières ......................69 2 Illustrations .........................71 3 Consignes de sécurité ..................... 74 3.1 Utilisation conforme ........................74 3.2 Utilisation conforme de la DIGITRADIO 1990 ..............74 3.3 Domaine d'application ........................75 3.4 Installation de l'appareil ........................76 4 Élimination ......................... 77 5 Mentions légales ....................... - Page 70 10.4 Accès à une station FM à partir d’un emplacement mémoire ........86 10.5 Écrasement/suppression d'un programme mémorisé ..........86 10.6 Modification des affichages à l'écran ...................87 10.7 Réglages de la recherche ......................87 10.8 Réglages audio ..........................87 11 Lecteur CD ........................87 11.1 Sélection du mode CD ........................87 11.2 Insertion du CD ..........................87 11.3 Lecture d'un CD audio ........................88...
-
Page 71: Illustrations
2 Illustrations Dessus et façade de l'appareil... - Page 72 Illustrations latérales et face arrière...
- Page 73 Poignée de transport On/Veille (maintenir le bouton enfoncé en mode sur piles pour mettre en marche l'appareil) MODE/CLOCK - En marche : changement de source, en veille : réglage manuel de l'heure. DIMMER/TIMER - En marche : réglage de la luminosité de l'écran, en veille : réglage de la minuterie.
-
Page 74: Consignes De Sécurité
Bluetooth. L'appareil peut au choix être utilisé avec des piles ou branché au secteur. 3.2 Utilisation conforme de la DIGITRADIO 1990 Veuillez observer les indications ci-dessous afin de réduire tout risque en matière de sécurité, d’éviter toute détérioration de l’appareil et de contribuer à la protection de l’environnement. -
Page 75: Domaine D'application
3.3 Domaine d'application AVERTISSEMENT ! N’ouvrez jamais l’appareil ! Tout contact avec des pièces sous tension peut entraîner la mort ! Veuillez respecter toutes les consignes suivantes pour une utilisation conforme de l'appareil et éviter toute perturbation de l'appareil et tout dommage corporel. -
Page 76: Installation De L'appareil
Le lecteur CD utilise un rayon laser invisible. Celui-ci peut blesser vos yeux en cas de mauvaise manipulation. Ne regardez jamais dans le compartiment à CD ouvert. • Cet appareil a été classé comme appareil laser de classe 1 (CLASS 1 LASER). 3.4 Installation de l’appareil Posez l’appareil sur une surface solide, sûre et horizontale. -
Page 77: Élimination
Débranchez la fiche secteur avant qu'un orage n'éclate. Si l’appareil ne doit pas être utilisé pendant une période prolongée, p. ex. avant de partir en voyage, débranchez la fiche. Ne posez pas l'appareil à proximité d'appareils créant des champs magnétiques puissants (p. ex. des moteurs, haut-parleurs, transformateurs). 4 Élimination L’emballage de votre appareil est exclusivement composé... -
Page 78: Mentions Légales
Vous pouvez télécharger une version actuelle du manuel au format PDF dans l'espace de téléchargement du site Internet TechniSat sur www.technisat.de. TechniSat et DIGITRADIO 1990 sont des marques déposées de la société TechniSat Digital GmbH TechniPark Julius-Saxler-Strasse 3 D-54550 Daun/Eifel, Allemagne www.technisat.de... -
Page 79: Consignes D'entretien
Du lundi au vendredi de 8h00 à 18h00 au numéro suivant : + 49 (0) 392 592 201 800. Les demandes de réparation peuvent également être faites directement en ligne sur www.technisat.de/reparatur. En cas d'éventuel retour de l'appareil, merci d'adresser votre colis uniquement à l'adresse suivante :... -
Page 80: Description De L'appareil
6.1 Contenu de la livraison Veuillez vous assurer que tous les accessoires indiqués ci-après sont fournis : - DIGITRADIO 1990, câble d'alimentation, mode d'emploi. 6.2 Caractéristiques de l'appareil La radiodiffusion numérique DAB met à votre disposition un nouveau format numérique vous permettant d'écouter des sons limpides sans grésillement, ni crépitement. -
Page 81: Fonctionnement Sur Piles
8 Commandes de base 8.1 Mise en marche/arrêt de l'appareil Pour mettre en marche votre DIGITRADIO 1990, appuyez brièvement sur la touche On/Veille (2). Pour éteindre ensuite l'appareil, appuyez à nouveau sur la touche. Pour mettre en marche la DIGITRADIO 1990 en mode piles, vous devez maintenir la touche On/Veille brièvement enfoncée. -
Page 82: Réglage Du Volume
- Ouvrir le menu - Maintenir la touche INFO/MENU/ MEMORY (5) enfoncée. - Naviguer dans le menu - Touche TUNING/SKIP (6, 7). - Modifier/valider les modifications - Touche ENTER/STOP/SLEEP (8). - Quitter le menu - Touche INFO/MENU/MEMORY (5) La fonction/option actuellement sélectionnée sera représentée par des crochets <... -
Page 83: Fonction Dab+ (Radiodiffusion Numérique)
9 Fonction DAB+ (radiodiffusion numérique) 9.1 Qu'est-ce que le DAB+ ? Le DAB+ est un nouveau format numérique qui permet d’écouter un son cristallin sans aucun grésillement. Contrairement aux stations de radio analogiques, avec le DAB+ plusieurs stations sont diffusées sur une seule et même fréquence. C'est ce que l'on appelle un ensemble ou un multiplexe. -
Page 84: Choix De La Station
> Ouvrez le menu principal en maintenant la touche INFO/MENU/MEMORY (5) enfoncée et sélectionnez avec les touches TUNING/SKIP (6, 7) l'entrée < Réglage manuel >. Appuyez sur la touche ENTER/STOP/SLEEP (8). > Sélectionnez avec les touches TUNING/SKIP (6, 7) un canal (5A à 13F), puis appuyez sur la touche ENTER/STOP/SLEEP (8). -
Page 85: Écrasement/Suppression D'un Programme Mémorisé
9.7 Écrasement/suppression d'un programme mémorisé > Mémorisez comme décrit une nouvelle station sur un emplacement mémoire de votre choix. Lors de l’affichage des réglages d’usine, tous les emplacements mémoire sont supprimés. 9.8 Modification des affichages à l'écran > Appuyez plusieurs fois brièvement sur la touche INFO/MENU/MEMORY (5) pour basculer entre les différents modes d'affichage. -
Page 86: Recherche Automatique De Stations
10.2 Recherche automatique de stations Outre la recherche manuelle d'une fréquence de réception, vous pouvez également rechercher des stations en mode automatique. Dans ce cadre, les paramètres que vous définissez dans Réglage de la recherche prennent effet. > Appuyez sur la touche SCAN/Lecture/Pause/PAIR (9). Recherche... s'affiche à l'écran. -
Page 87: Modification Des Affichages À L'écran
10.6 Modification des affichages à l'écran > Appuyez plusieurs fois brièvement sur la touche INFO/MENU/MEMORY (5) pour basculer entre les différents modes d'affichage. Les modes d'affichage suivants sont possibles en mode FM : fréquence, date, heure, genre, informations sur le son, informations supplémentaires. 10.7 Réglages de la recherche >... -
Page 88: Lecture D'un Cd Audio
> Si le CD ne peut pas être lu (p. ex. en cas de saletés), [Aucun CD] s'affiche à l'écran. Dans ce cas, nettoyez le dessous du CD avec un chiffon doux, exempt de peluches. 11.3 Lecture d'un CD audio Pour commander la lecture d'un CD audio, utilisez les touches de lecture SCAN/ Lecture/Pause/PAIR (9), TUNING/SKIP (6, 7) et ENTER/STOP/SLEEP (8). -
Page 89: Lecture D'un Cd Mp3
11.4 Lecture d'un CD MP3 La lecture d'un CD MP3 fonctionne de manière similaire à la lecture d'un CD audio. Le numéro de dossier (F) suivi du numéro de titre et de la durée de lecture du titre est affiché à l'écran. Lecture : Pause (pendant la lecture) : Titre suivant :... -
Page 90: Programmation De La Lecture
STOP/SLEEP (8) ou ouvrez le couvercle du compartiment à CD. 12 Lecture USB La DIGITRADIO 1990 permet de lire des titres MP3 qui se trouvent sur un support de stockage USB p. ex. une clé USB. Insérez le support de stockage USB dans le port USB (17) à... -
Page 91: Lecture Bluetooth
[USB] : mode standard dans lequel la lecture est arrêtée lorsque tous les titres ont été diffusés. 13 Lecture Bluetooth Vous pouvez diffuser sur la DIGITRADIO 1990 des titres musicaux via un appareil de lecture externe couplé, p. ex. un smartphone. La commande de la lecture s'effectue sur votre appareil de lecture externe. -
Page 92: Entrée Audio
> Pour un réglage optimal du volume, utilisez le réglage du volume aussi bien sur la DIGITRADIO 1990 que sur l'appareil connecté. Réglez le volume le plus fort possible sur l'appareil connecté puis réglez le volume habituel sur la DIGITRADIO 1990. Si le volume sur l'appareil connecté est trop faible, le son restitué... -
Page 93: Fonctions Supplémentaires
15 Fonctions supplémentaires 15.1 Mise en veille La minuterie de mise en veille met automatiquement en veille la DIGITRADIO 1990 après une durée définie. > Appuyez sur la touche ENTER/STOP/SLEEP (8) et maintenez-la enfoncée jusqu'à ce que [SLEEP] s'affiche à l'écran. -
Page 94: Égaliseur
à nouveau atténué pour économiser l'énergie des piles. 15.5 Réglage de l'heure En principe, la DIGITRADIO 1990 reçoit l'heure grâce à la réception DAB+. Lorsque vous mettez l'appareil pour la première fois en service, il se peut que la synchronisation de l'heure puisse prendre un certain temps. -
Page 95: Version Du Logiciel
> La version installée du logiciel s’affiche. 15.8 Réglage d’usine Procédez comme suit si vous souhaitez remettre la DIGITRADIO 1990 à son état de livraison : tous les réglages, stations et favoris seront alors perdus. Sélectionnez le mode radio DAB+. -
Page 96: Problème Avec L'appareil
Symptôme Cause possible/résolution Le son est faible ou de D'autres appareils, p. ex. un téléviseur, mauvaise qualité. gênent la réception. Éloigner l'appareil de ces appareils. L'antenne n'est pas dépliée ou orientée. Tirer l'antenne sur toute sa longueur. Tourner l'antenne pour améliorer la réception. -
Page 97: Caractéristiques Techniques
18 Données techniques Modèle DIGITRADIO 1990 Alimentation électrique CA 100 - 240 V ~50/60 Hz, 18 W Consommation électrique Veille (sans éclairage de l'écran) : 0,3 W En marche max. : 10 W Typique (volume moyen) : 2,5 W Fonctionnement sur piles... - Page 99 Istruzioni per l'uso DIGITRADIO 1990 Radio DAB+/FM portatile con lettore CD e streaming audio Bluetooth...
- Page 100 Premessa Gentile cliente, grazie per aver scelto DIGITRADIO 1990 di TechniSat. Le presenti istruzioni per l'uso consentono di conoscere e sfruttare al meglio le numerose funzioni del suo nuovo apparecchio. La aiuteranno a farne un uso conforme e sicuro. Sono rivolte a tutti coloro che installano, utilizzano, puliscono o smaltiscono l'apparecchio.
-
Page 101: Indice
1 Indice ..........................101 2 Immagini ...........................103 3 Indicazioni sulla sicurezza ...................106 3.1 Uso conforme alle disposizioni ....................106 3.2 Uso corretto di DIGITRADIO 1990 ..................106 3.3 Ambito di utilizzo ...........................107 3.4 Posizionamento dell'apparecchio ..................108 4 Smaltimento ........................109 5 Indicazioni legali...................... - Page 102 10.4 Aprire l'emittente FM da uno slot di memoria ..............118 10.5 Sovrascrittura/cancellazione di uno slot di memoria ...........118 10.6 Personalizzazione degli indicatori del display ............... 119 10.7 Impostazioni di ricerca automatica ..................119 10.8 Impostazioni audio ........................119 11 Lettore CD ........................119 11.1 Selezionare la modalità...
-
Page 103: Immagini
2 Immagini Lato superiore e lato anteriore... - Page 104 Immagini laterali e lato posteriore...
- Page 105 Maniglia On/Standby (tenere premuto per l'accensione durante il funzionamento a batteria) MODE/CLOCK - durante il funzionamento: commutazione della sorgente, in modalità Standby: impostazione manuale dell'ora. DIMMER/TIMER - durante il funzionamento: regolazione della luminosità del display, in modalità Standby: impostazione timer. INFO/MENU/MEMORY - premere brevemente: selezionare la visualizzazione del display, tenere premuto: accedere al menu principale, Modalità...
-
Page 106: Indicazioni Sulla Sicurezza
è possibile riprodurre le fonti audio collegate. L'apparecchio può essere alimentato a batteria o tramite rete elettrica. 3.2 Uso corretto di DIGITRADIO 1990 Al fine di minimizzare i rischi per la sicurezza, evitare danni all'apparecchio e contribuire alla tutela dell'ambiente, seguire le indicazioni riportate di seguito. -
Page 107: Ambito Di Utilizzo
3.3 Ambito di utilizzo AVVERTENZA! Non aprire mai l'apparecchio. Il contatto con parti sotto tensione può causare lesioni mortali. Rispettare tutte le seguenti indicazioni sull'uso conforme dell'apparecchio al fine di prevenire difetti dell'apparecchio e danni personali. In caso di danni derivanti da un collegamento errato, non vi è alcun diritto alla garanzia. -
Page 108: Posizionamento Dell'apparecchio
Il lettore CD utilizza un raggio laser invisibile. Se non utilizzato correttamente, il laser può causare lesioni agli occhi. Non guardare mai nel vano CD aperto. • Questo apparecchio è stato classificato come apparecchio laser della classe 1 (CLASS 1 LASER). 3.4 Posizionamento dell'apparecchio Posizionare l'apparecchio su una superficie ben salda, sicura e in orizzontale. -
Page 109: Smaltimento
Estrarre la spina prima dello scoppio di un temporale. Estrarre la spina in caso di mancato utilizzo dell'apparecchio per un periodo prolungato, ad es. prima di partire per un lungo viaggio. Non posizionare l'apparecchio nei pressi di dispositivi che creano forti campi magnetici (ad es. -
Page 110: Smaltimento Dell'apparecchio
5 Indicazioni legali Con la presente TechniSat dichiara che il tipo di impianto radiofonico DIGITRADIO 1990 rispetta la direttiva 2014/53/UE. Il testo completo della dichiarazione di conformità UE è disponibile al seguente indirizzo Internet: http://konf.tsat.de/?ID=22795... -
Page 111: Indicazioni Sull'assistenza
- ven. ore 8.00 - 18.00 al tel.: 03925/9220 1800. Gli ordini di riparazione possono essere inviati anche online, direttamente al sito www.technisat.de/reparatur. Qualora fosse necessario spedire l'apparecchio, utilizzare esclusivamente il seguente indirizzo: TechniSat Digital GmbH Service-Center Nordstr. 4a 39418 Staßfurt... -
Page 112: Descrizione Dell'apparecchio
7.2 Collegare alla rete elettrica > Inserire il cavo di alimentazione nella presa di alimentazione (24) su DIGITRADIO 1990 e la spina in una presa di alimentazione (100 - 240 V ~, 50/60 Hz) > Prima di collegarlo alla presa fissa, accertarsi che la tensione d'esercizio... -
Page 113: Funzionamento A Batteria
Provvedere a lasciare uno spazio libero di almeno 10 cm intorno all'apparecchio. 7.3 Funzionamento a batteria > Il vano batterie si trova sul lato inferiore di DIGITRADIO 1990. > Spingere il coperchio del vano batterie (23) nella direzione indicata dalla freccia e rimuoverlo. -
Page 114: Modificare Il Volume
- Accesso al menu - Tenere premuto il tasto INFO/MENU/ MEMORY (5) - Navigare nel menu - Tasto TUNING/SKIP (6, 7). - Salvare/confermare le modifiche - Tasto ENTER/STOP/SLEEP (8). - Uscire dal menu - Tasto INFO/MENU/MEMORY (5) La funzione/opzione attualmente selezionata è rappresentata tra parentesi quadre <... -
Page 115: Funzione Dab+ (Digital Radio)
9 Funzione DAB+ (Digital Radio) 9.1 Cos'è DAB+ DAB+ è un nuovo formato digitale che consente di ascoltare suoni cristallini senza alcun rumore di fondo. A differenza delle emittenti radio analogiche tradizionali, con il DAB+ più emittenti trasmettono ad un'unica frequenza che non cambia. Questo sistema è... -
Page 116: Selezionare L'emittente
> Aprire il menu principale tenendo premuto il tasto INFO/MENU/MEMORY (5) e utilizzare i tasti TUNING/SKIP (6, 7) per selezionare la voce <Impostare manualmente>. Premere il tasto ENTER/STOP/SLEEP (8). > Utilizzare i tasti TUNING/SKIP (6, 7) per selezionare un canale (da 5A a 13F), quindi premere il tasto ENTER/STOP/SLEEP (8). -
Page 117: Personalizzazione Degli Indicatori Del Display
9.7 Sovrascrittura/cancellazione di uno slot di memoria > Per memorizzare una nuova emittente su uno slot di memoria dei preferiti basta seguire la procedura sopra descritta. All'apertura delle impostazioni di fabbrica vengono cancellati tutti gli slot di memoria. 9.8 Personalizzazione degli indicatori del display >... -
Page 118: Ricerca Automatica Di Emittenti
10.2 Ricerca automatica di emittenti In alternativa all'impostazione manuale di una frequenza di ricezione è possibile effettuare una ricerca automatica delle emittenti. In tal modo, vengono eseguite le impostazioni che l'utente ha stabilito nell'impostazione di ricerca automatica. > Premere il tasto SCAN/riproduzione/pausa/PAIR (9). Sul display appare Ricerca... -
Page 119: Personalizzazione Degli Indicatori Del Display
10.6 Personalizzazione degli indicatori del display > Premere brevemente più volte il tasto INFO/MENU/MEMORY (5) per passare da una modalità di visualizzazione all'altra. Nel funzionamento FM, sono possibili le seguenti modalità di visualizzazione: frequenza, data, ora, genere, informazioni audio, informazioni aggiuntive. 10.7 Impostazioni di ricerca automatica >... -
Page 120: Riproduzione Cd Audio
> Se non è possibile leggere il CD (ad esempio, nel caso in cui sia sporco), sul display appare [Nessun CD]. In questo caso, pulire il lato inferiore del CD con un panno morbido che non lascia pelucchi. 11.3 Riproduzione CD audio Per controllare la riproduzione del CD audio, utilizzare i tasti di riproduzione SCAN/ riproduzione/pausa/PAIR (9), TUNING/SKIP (6, 7) ed ENTER/STOP/SLEEP (8). -
Page 121: Riproduzione Cd Mp3
11.4 Riproduzione CD MP3 La riproduzione di CD MP3 funziona in modo simile alla riproduzione CD audio. Sul display viene visualizzato il numero della cartella (F) seguito dal numero del brano e dal tempo di riproduzione dello stesso. Riproduzione: Pausa (durante la riproduzione): Brano successivo: Brano precedente: 2 volte Brano attivo al momento dall'inizio: 1 volta... -
Page 122: Programmare La Riproduzione
ENTER/STOP/SLEEP (8) o aprire il coperchio del vano CD. 12 Riproduzione USB Su DIGITRADIO 1990 si possono riprodurre i brani MP3 contenuti in un dispositivo di memoria UBS, ad es. una chiavetta USB. Inserire il dispositivo di memoria USB nella presa USB (17) posizionata sulla parte anteriore di DIGITRADIO 1990. -
Page 123: Riproduzione Bluetooth
13 Riproduzione Bluetooth Tramite un apparecchio di riproduzione esterno abbinato, ad esempio uno smartphone, è possibile riprodurre brani musicali su DIGITRADIO 1990. La riproduzione è controllata tramite il proprio apparecchio di riproduzione esterno. Il raggio d'azione massimo è di 8 metri in modalità Bluetooth. Se durante la riproduzione si avvertono rumori o interruzioni, ridurre la distanza tra il dispositivo esterno e DIGITRADIO 1990. -
Page 124: Audio In (Ingresso Audio)
DIGITRADIO 1990. Se il volume impostato sull'apparecchio collegato è troppo basso, probabilmente su DIGITRADIO 1990 si sentirà un fruscio. Se non viene riprodotto alcun brano musicale entro 4 ore, DIGITRADIO 1990 passa automaticamente in modalità standby. -
Page 125: Ulteriori Funzioni
Per disattivare uno sleep timer attivo, selezionare Sleep timer > off. 15.2 Funzione sveglia DIGITRADIO 1990 è dotata di una sveglia interna programmabile. La sveglia è disponibile solo se DIGITRADIO 1990 è collegata al cavo di alimentazione. Nel funzionamento a batteria, la funzione sveglia non è disponibile. -
Page 126: Equalizzatore
15.5 Regolazione dell'ora In linea di principio, DIGITRADIO 1990 rileva l'ora corrente tramite ricezione DAB+. Pertanto, se si utilizza l'apparecchio per la prima volta, la sincronizzazione dell'ora potrebbe richiedere un certo tempo. Se non è possibile attivare la ricezione DAB+, impostare manualmente l'ora procedendo come indicato di seguito: >... -
Page 127: Versione Del Software
> Viene visualizzata la versione software installata. 15.8 Impostazione predefinita Per ripristinare lo stato di consegna di DIGITRADIO 1990, procedere come indicato di seguito: In questo modo, si perderanno tutte le impostazioni, le emittenti e i preferiti. Selezionare il funzionamento Radio DAB+. -
Page 128: Problemi Con L'apparecchio
Sintomo Possibile causa/rimedio Il suono è debole o di bassa Altri apparecchi, ad es. televisori qualità. disturbano la ricezione. Posizionare l'apparecchio a una distanza maggiore da questi apparecchi. L'antenna non è stata estratta od orientata. Allungare l'antenna. Girare l'antenna per migliorare la ricezione. 17.2 Problemi con l'apparecchio Sintomo Possibile causa/rimedio... -
Page 129: Dati Tecnici
18 Scheda tecnica Modello DIGITRADIO 1990 Alimentazione di corrente CA 100-240 V ~50/60 Hz, 18 W Consumo elettrico Standby (senza illuminazione del display): 0,3 W Funzionamento massimo: 10 W Consumo tipico (volume medio): 2,5 W Funzionamento a batteria 6 celle R14/C 1,5 V Bluetooth V 4.2... - Page 132 m000/3952...