Table des Matières

Publicité

Les langues disponibles

Les langues disponibles

Liens rapides

Het toestel-identifi catieplaatje bevindt zich aan de onderkant van het toestel.
The appliance identifi cation card is located on the bottom of the appliance.
La plaque d'identifi cation de l'appareil se trouve sur le dessus de l'appareil.
Plak hier het toestel-identifi catieplaatje.
Stick the appliance identifi cation card here.
Placez ici la plaque d'identifi cation de l'appareil.
Houd, wanneer u contact opneemt met de serviceafdeling, het complete typenummer bij de hand.
When contacting the service department, have the complete type number to hand.
En cas de contact avec le service après-vente, ayez auprès de vous le numéro de type complet.
Adressen en telefoonnummers van de serviceorganisatie vindt u op de garantiekaart.
You will fi nd the addresses and phone numbers of the service organisation on the guarantee card.
Les adresses et les numéros de téléphone du service après-vente se trouvent sur la carte de garantie.
gebruiksaanwijzing
inductiekookplaat
instructions for use
induction hob
mode d'emploi
plaque de cuisson à induction
HI3271W

Publicité

Table des Matières

Dépannage

loading

Sommaire des Matières pour Atag HI3271W

  • Page 1 En cas de contact avec le service après-vente, ayez auprès de vous le numéro de type complet. Adressen en telefoonnummers van de serviceorganisatie vindt u op de garantiekaart. HI3271W You will fi nd the addresses and phone numbers of the service organisation on the guarantee card.
  • Page 2 Handleiding NL 3 - NL 30 Manual EN 3 - EN 30 Notice d’utilisation FR 3 - FR 30 Gebruikte pictogrammen - Pictograms used - Pictogrammes utilisés Belangrijk om te weten - Important information - Important à savoir Tip - Conseil...
  • Page 3: Table Des Matières

    INHOUD Uw inductiekookplaat Inleiding Bedieningspaneel Veiligheid Temperatuurbeveiliging Kookduurbegrenzing Gebruik Werking van de aanraaktoetsen Inductiekoken Werking inductie Pannen voor inductiekoken Inductiegeluiden Bediening Inschakelen en vermogen instellen Restwarmte-indicatie Boost Uitschakelen Stand-by modus Eco stand-by modus Kinderslot Pauze Herkennen van een modus Timer / Kookwekker Geluidssignaal in- en uitschakelen Automatische pandetectie De ideale wokstand...
  • Page 4: Uw Inductiekookplaat

    UW INDUCTIEKOOKPLAAT Inleiding Deze inductiekookplaat is ontworpen voor de echte wokliefhebber. De kookzone heeft een hoog vermogen en reageert snel en effectief. De speciaal op de wok afgestemde kookzone verwarmt niet alleen de bodem maar een groot deel van de pan waardoor u een maximaal kookcomfort ervaart.
  • Page 5: Bedieningspaneel

    UW INDUCTIEKOOKPLAAT Bedieningspaneel 10 11 12 1. Pauzetoets 2. Pauze-indicatie 3. Kinderslot-/Eco stand-by toets 4. Kinderslot-indicatie/Eco stand-by indicatie 5. Standen-indicatie in blokjes 6. Aan-/uittoets 7. Vermogen versneld verlagen 8. Vermogen verlagen 9. Vermogen ophogen 10. Vermogen versneld ophogen 11. Boostindicatie 12.
  • Page 6: Veiligheid

    VEILIGHEID Lees voor gebruik eerst de separate veiligheidsinstructies! Temperatuurbeveiliging • De kookzone is voorzien van een sensor. Deze sensor controleert ononderbroken de temperatuur van de bodem van de kookpan en van de onderdelen van de kookplaat om elk risico op oververhitting, bij bijvoorbeeld een drooggekookte pan, te vermijden.
  • Page 7: Gebruik

    GEBRUIK Werking van de aanraaktoetsen Het bedienen van de kookplaat door middel van de aanraaktoetsen is even wennen als u andere bediening gewend bent. Leg uw vinger- toppen plat op de toetsen voor het beste effect. U hoeft niet hard te drukken.
  • Page 8: Werking Inductie

    GEBRUIK Werking inductie In het toestel wordt een magnetisch veld opgewekt. Door een pan met een ijzeren bodem op een kookzone te plaatsen ontstaat in de panbodem een inductiestroom. Deze inductiestroom wekt warmte op in de panbodem. Comfortabel De elektronische regeling is nauwkeurig en eenvoudig in te stellen. Op de laagste stand kunt u bijvoorbeeld chocolade direct in de pan De spoel (1) in de smelten of ingrediënten bereiden die u gewoonlijk au bain marie...
  • Page 9: Pannen Voor Inductiekoken

    • In verband met het verhitten van olie is slechts één pan geschikt voor het wokken op deze inductiekookplaat. Dit is een Curiepan, deze wordt niet warmer dan 250 ˚C. U kunt deze pan bestellen bij Atag (typenummer AA3611W). NL 9...
  • Page 10: Inductiegeluiden

    GEBRUIK Omgang met de wok • Plaats de pan voorzichtig in de kookzone. Als u onvoorzichtig met de pan omgaat, kan het handvat tegen de glasplaat slaan en deze beschadigen. • Schud de pan niet terwijl hij in de kookzone ligt. Daardoor kunnen krassen in de glasplaat ontstaan of de glasplaat kan door het handvat beschadigd raken.
  • Page 11: Bediening

    BEDIENING Inschakelen en vermogen instellen Het vermogen is in te stellen op 12 standen. Daarnaast is er nog een ‘boost’ stand. 1. Plaats een pan in de kookzone. 2. Druk op de kinderslottoets. Er klinkt een enkel geluidssignaal. 3. Druk op de aan-/uittoets van de kookzone. In de display verschijnt een knipperende ‘-’...
  • Page 12: Boost

    BEDIENING Boost De ‘boost’ functie kunt u gebruiken om gedurende een korte tijd (maximaal 10 minuten) op het hoogste vermogen te koken. Na het verstrijken van de maximale boosttijd wordt het vermogen verlaagd naar stand 12. De boostfunctie inschakelen Plaats een pan in de kookzone en schakel de kookzone in. Druk direct na inschakeling een keer op de >>...
  • Page 13: Stand-By Modus

    BEDIENING Stand-by modus In stand-by modus is de kookplaat uitgeschakeld. U kunt naar de stand-by modus schakelen vanuit de eco stand-by modus, of door de kookzone uit te schakelen. Vanuit de stand-by modus kunt u direct beginnen met koken door op de aan-/uittoets te drukken.
  • Page 14: Kinderslot

    BEDIENING Kinderslot U kunt de kookplaat met het kinderslot vergrendelen. Onbedoeld inschakelen van de kookzone wordt hiermee voorkomen. De kookplaat naar kinderslot schakelen 1. Druk gedurende 2 seconden op de kinderslottoets. Er klinkt een dubbel geluidssignaal. Alle toesten zijn nu inactief behalve de kinderslottoets.
  • Page 15: Herkennen Van Een Modus

    BEDIENING Indien u binnen 5 minuten nogmaals op de pauzetoets drukt, zal het gepauzeerde kookproces hervat worden. Er klinkt een dubbel geluidssignaal, de kookplaat hervat de instellingen zoals deze voor de pauze ingesteld zijn. Indien u binnen 5 minuten geen verdere actie onderneemt: Wordt de actieve kookzone automatisch uitgeschakeld.
  • Page 16 BEDIENING Let op • De timer-/kookwekkerfunctie kan ook gebruikt worden zonder de kookzone te activeren. De timer inschakelen 1. Druk éénmaal op de timer-/kookwekkertoets van de kookzone. Drie knipperende nullen en ‘+’ en ‘-’ verschijnen in de display. Als u geen tijd instelt met de + of - toets gaat na 3 seconden automatisch de timer lopen.
  • Page 17: Geluidssignaal In- En Uitschakelen

    BEDIENING De kookduur instellen Schakel de kookwekker in. Toets Stappen van x per Tijdsduur toetsaanraking x = 1 minuut 0.00 tot ... x = 10 seconden 5.00 - 0.00 x = 30 seconden 9.00 - 5.00 x = 1 minuut ...
  • Page 18: Automatische Pandetectie

    BEDIENING Automatische pandetectie in- en uitschakelen Als er, na het inschakelen van de kookplaat, een pan op een inactieve kookzone geplaatst wordt licht de bediening op en kan deze direct bedient worden (zonder de aan-/uittoets te bedienen). Als de kookzone niet binnen 10 seconden ingeschakeld wordt gaat deze weer uit en kan vervolgens weer geactiveerd worden door de pan te verwijderen en opnieuw te plaatsen of door gebruik te maken van de aan-/uittoets.
  • Page 19: De Ideale Wokstand

    << , + , - , >> . Gezond koken Rookpunt van verschillende oliesoorten Om gezond te bakken, adviseert ATAG om de oliesoort af te stemmen op de baktemperatuur. Elke oliesoort heeft een ander rookpunt waarbij giftige gassen vrijkomen. In onderstaande tabel ziet u de rookpunten van verschillende oliesoorten.
  • Page 20: Onderhoud

    ONDERHOUD Reinigen Schakel, voordat u met schoonmaken begint, eerst het kinderslot in. Dagelijkse reiniging • Hoewel overgekookt voedsel niet kan inbranden verdient het aanbeveling de kookplaat direct na gebruik schoon te maken. Voor de dagelijkse reiniging kunt u het beste een mild reinigingsmiddel en een vochtige doek gebruiken.
  • Page 21: Algemeen

    STORING Algemeen Voor het telefoonnummer van de servicedienst kunt u de bijgeleverde garantiekaart raadplegen of kijken op ‘www.atagservice.nl’. Indien u een barstje of scheurtje (hoe klein ook) op de glasplaat ziet, schakel dan de kookplaat onmiddellijk uit, neem direct de stekker van de kookplaat uit het stopcontact, verbreek de (automatische) zekering(en) in de meterkast of zet de schakelaar in de meterkast op nul bij een vaste aansluiting.
  • Page 22 STORING Symptoom Mogelijke oorzaak Oplossing Bij het inschakelen van de Verkeerde aansluiting van de Controleer de elektrische kookplaat slaat de zekering kookplaat. aansluiting. van de installatie door. Foutcode F00. Het bedieningspaneel is Bedieningspaneel schoon- vervuild of er ligt water op. maken.
  • Page 23: Installatievoorschriften

    • Schade ontstaan door verkeerd aansluiten, verkeerd inbouwen of verkeerd gebruik valt niet onder de garantie. Benodigde vrije ruimte rondom Voor een veilig gebruik is voldoende ruimte rondom de kookplaat noodzakelijk. Controleer of deze ruimte aanwezig is. HI3271W: min. 40 cm afzuigkap cooker hood kast cabinet...
  • Page 24: Bevestigingspunten Montagebeugels

    INSTALLATIEVOORSCHRIFTEN Bevestigingspunten montagebeugels Moer niet verwijderen of Dikke werkbladen Dunne werkbladen verdraaien! voorzijde NL 24...
  • Page 25: Installatievoorschrift

    INSTALLATIEVOORSCHRIFT Inbouwmaten In de volgende illustratie zijn de afmetingen van de uitsparing aangegeven. min.40 Beluchting De elektronica in het toestel heeft koeling nodig. Het toestel schakelt na korte tijd uit wanneer er onvoldoende lucht circuleert. Aan de onder- zijde van het toestel bevinden zich de ventilatieopeningen. Door deze openingen moet koele lucht aangezogen kunnen worden.
  • Page 26: Inbouwen Boven Een Lade Of Vaste Blende

    INSTALLATIEVOORSCHRIFT Inbouwen boven een lade of vaste blende Beluchting vindt plaats via plint (A) en achterzijde kast (B). Zaag de beluchtingsopeningen (min. 100 cm2) uit. Luchttoevoer A is overbodig wanneer er, samen met opening B, ergens anders een opening is waar lucht aangezogen kan worden.
  • Page 27: Inbouwsituatie Met Tussenruimte

    INSTALLATIEVOORSCHRIFT Inbouwsituatie met tussenruimte X mm min. 10 mm min.50 X mm +50 mm 50 mm Inbouwsituaties met koppelprofiel Koppelprofiel dient ervoor om de toestellen strak tegen elkaar te monteren NL 27...
  • Page 28: Inbouwen

    INSTALLATIEVOORSCHRIFT Inbouwen Controleer of het keukenmeubel en de uitsparing voldoen aan de gestelde eisen ten aanzien van afmetingen en venti latie. Behandel van kunststof of houten werkbladen de kopse kanten met eventueel afdichtvernis, om uitzetten van het werkblad door vocht te voorkomen.
  • Page 29: Technische Gegevens

    TECHNISCHE GEGEVENS Vermogens- en inbouwtabel Deze toestellen voldoen aan alle relevante CE richtlijnen. Kookplaattype HI3271W Inductie Aansluiting 230V - 50Hz (eurostekker) Aantal fasen Max. vermogen kookzone 3 kW Aansluitwaarde 3 kW (Inbouw)maten Toestel breedte x diepte 384 x 522 mm...
  • Page 30: Milieuaspecten

    MILIEUASPECTEN Afvoeren toestel en verpakking Bij de vervaardiging van dit toestel is gebruik gemaakt van duurzame materialen. Dit toestel moet aan het eind van zijn levenscyclus op verantwoorde wijze worden afgevoerd. De overheid kan u hierover informatie verschaffen. De verpakking van het toestel is recyclebaar. Gebruikt kunnen zijn: •...
  • Page 31 CONTENTS Your induction hob Introduction Control panel Safety instructions Temperature safety Cooking-time limiter Operation of the touch-sensitive buttons Induction cooking How induction works Pans for induction cooking Induction noises Operation Switching on and setting the power Residual heat indicator Boost Switching off Stand-by modus Eco stand-by modus...
  • Page 32: Your Induction Hob

    YOUR INDUCTION HOB Introduction This induction hob is designed for the true lover of cooking. The cooking zone has a high capacity and responds fast and effectively. The cooking zone is designed especially for the wok and does not only heat the base of the pan, but also a large part of the pan itself, making you experience maximum cooking comfort.
  • Page 33: Control Panel

    YOUR INDUCTION HOB Control panel 10 11 12 1. Pauze button 2. Pauze indicator 3. Childproof lock/Eco stand-by button 4. Childproof lock indicator/Eco stand-by indicator 5. Level indicator in cubes 6. On/off button 7. Reduce the power quickly 8. Reduce the power 9.
  • Page 34: Safety Instructions

    SAFETY INSTRUCTIONS Before use, read the separate safety instructions first! Temperature safety • The cooking zone is equipped with a sensor that measures the temperature of the bottom of the pan to avoid any risk of overheating when a pan boils dry. In case of temperatures rising too high, the power is reduced or shut off automatically.
  • Page 35: Use

    It is important to use the wok that is included, as this wok is fully in contact with the cooking zone. Suitable pans are available via the website ‘www.atag.nl’. Attention • Grains of sand may cause scratches which cannot be removed.
  • Page 36: How Induction Works

    How induction works A magnetic field is generated in the appliance. By placing a pan with an iron base on a cooking zone, a current is induced in the pan base. This induced current generates heat in the base of the pan. Easy The electronic controls are accurate and easy to set.
  • Page 37: Pans For Induction Cooking

    • Because of the high cooking oil temperature there is only one wok pan suitable for stir-frying on this induction cooking ring. This is the so-called Curie pan, which cannot be heated to a temperature higher than 250 ˚C. You can order this pan from Atag (type number AA3611W). EN 9...
  • Page 38: Induction Noises

    How to use the wok • Carefully place the pan on the cooking zone. When handling the pan carelessly, the handle may hit and damage the glass. • Do not shake the pan while on the cooking zone. This may cause scratches on the glass, or the glass can get damaged by the handle.
  • Page 39: Operation

    OPERATION Switching on and setting the power The cooking zones have 12 levels. Beside it there is a level ‘boost’. 1. Put a pan into the cooking zone. 2. Press the childproof lock button. You will hear a signal. 3. Press the on/off button of the cooking zone concerned. In the display ‘-’...
  • Page 40: Boost

    OPERATION Boost You can use the ‘boost’ function to cook at the highest power level during a short period of time (max.10 minutes). After the maximum boost time the power will be reduced to setting 12. Switching on ‘boost’ 1. Put a pan into the cooking zone. 2.
  • Page 41: Stand-By Modus

    OPERATION Stand-by modus In stand-by modus the induction hob is switched off. You can switch to the stand-by mode from the eco stand-by mode, or by switching off the cooking zone. From the stand-by mode you can directly start cooking by pressing the on/off button.
  • Page 42: Childproof Lock

    OPERATION Childproof lock Your induction hob is equipped with a childproof lock that lets you lock the appliance. It prevents unintended switching on. Switching on the childproof lock 1. Press the childproof lock button. A double beep will be heard. All buttons are active now, except for the childproof lock button.
  • Page 43: Recognizing A Mode

    OPERATION If you press the pause button again within 5 minutes, the paused cooking process will be resumed. A double beep will be heard, the hob resumes the settings as they were set before the pause. If you do not undertake any further action within 5 minutes: The active cooking zone will be switched off automatically.
  • Page 44 OPERATION Attention • The timer-/kitchen timer function can also be used without activating the cooking zone. Switching on the timer 1. Press the timer/alarmclock button of the cooking zone once. Three flashing zeroes and + and - appear in the display. If you do not set a time with the + or - button, the timer will start running automatically after 3 seconds.
  • Page 45: Switching On And Off The Beep

    OPERATION Setting the cooking time Switch the kitchen timer on. Button Steps of x per button Time contact x = 1 minute 0.00 to... – x = 10 seconds 5.00 - 0.00 – x = 30 seconds 9.00 - 5.00 –...
  • Page 46: Automatic Pan Detection

    OPERATION Switching on/off the automatic pan detection If, after the hob has been turned on, a pan is placed in an inactive cooking zone, the operating controls light up and this can be used immediately (without operating the on/off switch). If the cooking zone is not activated within 10 seconds, the light will go out.
  • Page 47: The Ideal Wok Setting

    Healthy cooking Burning point of different types of oil Burning point of separate kinds of oil ATAG advises to choose an oil based on the baking temperature to bake in a healthy way. Every kind of oil has a different burning point at which toxic gases are released.
  • Page 48: Maintenance

    MAINTENANCE Cleaning Activate the childproof lock before you start cleaning the hob. Daily cleaning • Although food spills cannot burn into the glass, we nevertheless recommend you clean the hob immediately after use. Best for daily cleaning is a damp cloth with a mild cleaning agent. •...
  • Page 49: Faults

    General The service department telephone number can be found on the guarantee card provided or on ‘www.atag.nl’. If you notice a crack in the glass top (however small), switch the hob off immediately, unplug the hob, turn off the (automatic) fuse switch(es) in the meter cupboard or, in the event of a permanent connection, set the switch in the power supply lead to zero.) Contact the service...
  • Page 50 Make sure the venting holes under the cooking plate are open. Fault code E6 Wrong pan. Suitable pans are available via the website ‘www.atag.nl’. Hardware / software error. Contact the service department. Other fault codes. Defective generator. Contact the service department.
  • Page 51: Installation Instructions

    Clearance Sufficient all-round clearance is essential to the safe use of the hob. Check that there is enough clearance. cooker hood cooker hood HI3271W: min. 40 cm cabinet cabinet side wall side wall EN 23...
  • Page 52: Attachment Points For Mounting Brackets

    INSTALLATION INSTRUCTIONS Attachment points for mounting brackets Do not remove or twist Thick worktops Thin worktops the nut! Front EN 24...
  • Page 53: Installation Dimensions

    INSTALLATION INSTRUCTIONS Installation dimensions The dimensions and recesses are shown in the illustration beneath. min.40 Ventilation The electronics in the appliance need cooling. The appliance will automatically switch off if there is insufficient air circulation. There are ventilation openings at the bottom of the appliance. It must be possible for cool air to be drawn in through these openings.
  • Page 54: Constructing Above An Oven Or Fixed Pannel

    INSTALLATION INSTRUCTIONS Constructing above an oven or fixed pannel Ventilation occurs through the plinth (A) and the back of the cupboard (B). Saw out the ventilation openings (min. 100 cm ). Air supply A is superfluous when, together with opening B, there’s an opening somewhere else where air can be drawn in.
  • Page 55: Fitted-Unit Situation With Space

    INSTALLATION INSTRUCTIONS Fitted-unit situation with space X mm min. 10 mm min.50 X mm +50 mm 50 mm Coupling examples with a coupling profile Coupling profile for making certain that appliances are mounted tightly next to each other EN 27...
  • Page 56: Building In

    INSTALLATION INSTRUCTIONS Building in Check that the cabinet and the cut-out meet the dimension and ventilation requirements Treat the sawn ends of wooden or synthetic worktops with sealing varnish if necessary, to prevent moisture causing the worktop to swell. Lay the hob upside down on the worktop. Remove the protective layer from the sealing tape and apply the tape in the groove of the aluminium profile or on the edge of the glass plate.
  • Page 57: Technical Details

    TECHNICAL DETAILS Capacity and dimensions table This appliance complies with all relevant CE directives. Hob type HI3271W Induction Connection 230V - 50Hz (euro plug) Phases Maximum capacity cooking zone 3 kW (Ø180) Connected load 3,0 kW Total connected load 3000 W...
  • Page 58: Environmental Aspects

    ENVIRONMENTAL ASPECTS Disposal of packaging and appliance In the manufacturing of this appliance durable materials were used. Make sure to dispose of this equipment responsibly at the end of its lifecycle. Ask the authorities for more information regarding this. The appliance packaging is recyclable. The following may have been used: •...
  • Page 59 TABLE DES MATIÈRES Votre plaque de cuisson Introduction Tableau de commandes Consignes de sécurité Sécurité anti-surchauffe Limiteur de durée de cuisson Utilisation Fonctionnement des touches sensitives La cuisson par induction Opération induction Casseroles par induction Les bruits de l’induction Fonctionnement Mise en marche et réglage de la puissance Voyant de chaleur résiduelle Boost...
  • Page 60: Votre Plaque De Cuisson

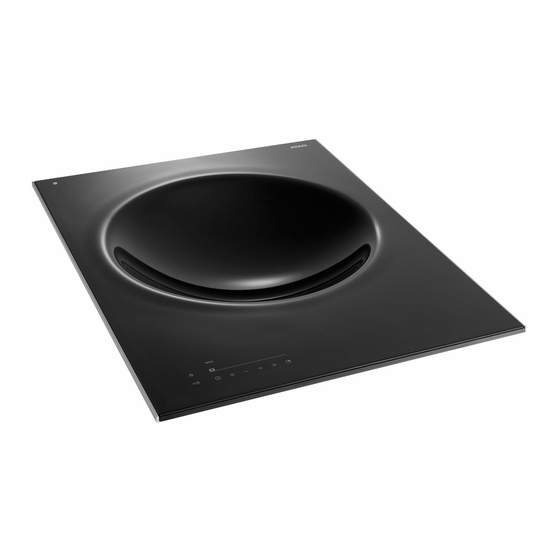
    VOTRE PLAQUE DE CUISSON Introduction Cette plaque de cuisson à induction est conçue pour les vrais gastronomes. La zone de cuisson dispose d’une capacité élevée et réagit de manière rapide et efficace. La zone de cuisson est spécialement conçue pour le wok et chauffe la base de la casserole, mais également une grande partie de la casserole, ce qui vous permet de bénéficier d’un confort maximal pour la cuisson.
  • Page 61: Tableau De Commandes

    VOTRE PLAQUE DE CUISSON Tableau de commande 10 11 12 Touche pause Voyant pause Touche sécurité enfant/Ecoveille Voyant sécurité enfant/Ecoveille Indicateur de réglages sous forme de blocs Touche marche/arrêt Réduction accélérée de la puissance Réduction de la puissance Augmentation de la puissance 10.
  • Page 62: Consignes De Sécurité

    CONSIGNES DE SÉCURITÉ Avant toute utilisation, veuillez lire les consignes de sécurité ! Sécurité anti-surchauffe • La zone de cuisson est dotée d’un capteur thermique. Ce capteur contrôle en permanence la température du fond de la casserole et des éléments de la plaque de cuisson, prévenant tout risque de surchauffe, par exemple par une casserole chauffée à...
  • Page 63: Utilisation

    Il est important d’utiliser le wok inclus. Ce wok est en effet pleinement en contact avec la zone de cuisson. Les casseroles adaptées sont répertoriées sur le site Web ‘www.atag.nl’. Attention • Les grains de sable peuvent provoquer des rayures qui ne partiront plus.
  • Page 64: Opération Induction

    UTILISATION Opération induction IUn champ magnétique est activé dans l’appareil. En plaçant sur une zone de cuisson une casserole avec un fond en fer, un courant à induction va se présenter dans le fond de la casserole. Ce courant à induction génère de la chaleur dans le fond de la casserole.
  • Page 65: Casseroles Par Induction

    • Quand il s’agit de réchauffer de l’huile, seule une casserole est conçue pour cette plaque de cuisson à induction. Il s’agit du modèle Curiepan, cette casserole ne chauffe pas au-delà de 250°C. Vous pouvez la commander auprès de Atag (référence AA3611W). FR 9...
  • Page 66: Les Bruits De L'induction

    UTILISATION Mode d’emploi du wok • Placez délicatement la casserole sur la zone de cuisson. Si vous manipulez la casserole sans faire attention, la poignée risque de heurter et d’endommager la vitre. • Ne secouez pas la casserole lorsqu’elle se trouve sur la zone de cuisson.
  • Page 67: Fonctionnement

    FONCTIONNEMENT Mise en marche et réglage de la puissance Il y a 12 positions de réglage de la puissance. Une fonction boost est également disponible. 1. Mettez une casserole sur la zone de cuisson 2. Appuyez sur la touche sécurité enfant. Un signal sonore est émis.
  • Page 68: Boost

    FONCTIONNEMENT Boost La fonction ‘boost’ permet une cuisson à un très haut niveau de puissance pendant une courte durée (10 minutes au maximum). La puissance revient automatiquement au niveau 12 une fois la durée maximum de la fonction boost écoulée. Activer la fonction boost 1.
  • Page 69: Mode Veille

    FONCTIONNEMENT Mode veille En mode veille, la plaque de cuisson n’est pas en fonctionnement. Vous pouvez passer au mode veille depuis le mode écoveille, ou en éteignant la zone de cuisson. La cuisson peut être démarrée directement depuis le mode veille en appuyant sur la touche marche/arrêt de la zone de cuisson.
  • Page 70: Sécurité Enfant

    FONCTIONNEMENT Sécurité enfant La plaque de cuisson peut être verrouillée à l’aide du dispositif de sécurité enfant. Cela permet d’éviter tout allumage accidentel. Activer la sécurité enfant de la plaque de cuisso 1. Appuyez 2 secondes sur la touche sécurité enfant. Un double signal sonore est émis.
  • Page 71: Identifier Les Différents Modes

    FONCTIONNEMENT Pour redémarrer la cuisson, appuyez à nouveau dans un délai de 5 minutes sur la touche pause. Un double signal sonore est émis, la plaque de cuisson se remet en marche en reprenant les réglages effectués avant de la mettre en pause. Si vous n’effectuez pas d’autres commandes durant 5 minutes : La zone de cuisson active s’éteint automatiquement.
  • Page 72 FONCTIONNEMENT Attention • Il est également possible d’utiliser la fonction horloge/minuteur de cuisson sans activer la zone de cuisson. Activer l’horloge 1. Appuyez une fois sur la touche horloge/minuteur de cuisson de la zone de cuisson. L’affichage de l’horloge s’allume, indiquant trois zéros qui clignotent. Sous l’affichage apparaissent un + et un -.
  • Page 73: Activer Et Désactiver Le Signal Sonore

    FONCTIONNEMENT Régler le temps de cuisson Activez le minuteur de cuisson. Touche Progression x par Durée pression de touche x = 1 minute 0.00 à ... x = 10 secondes 5.00 - 0.00 x = 30 secondes 9.00 - 5.00 x = 1 minute ...
  • Page 74: Détection Automatique De Casserole

    FONCTIONNEMENT Activer et désactiver la détection automatique de casserole Si, après l’activation de la plaque de cuisson, vous posez une casserole sur une zone de cuisson inactive, la touche de commande s’allume et peut directement être contrôlée (sans utiliser la touche marche/arrêt). Si la zone de cuisson n’est pas activée dans les 10 secondes, elle s’éteint automatiquement.
  • Page 75: Réglage Optimal Du Wok

    Cuisson saine Point de fumée des différentes sortes d’huiles Pour un cuisine saine, ATAG conseille d’utiliser une sorte d’huile convenant à la température de cuisson. Le point de fumée auquel des gaz toxiques se dégagent diffère selon la sorte d’huile. Le tableau ci-dessous indique le point de fumée des différentes sortes d’huiles.
  • Page 76: Entretien

    ENTRETIEN Nettoyage Attention Avant de commencer le nettoyage, enclenchez la sécurité à enfants. Nettoyage quotidien • Bien que les aliments qui sont tombés sur la plaque de cuisson ne peuvent pas brûler, il est recommandé de nettoyer la plaque de cuisson tout de suite après utilisation.
  • Page 77: Pannes

    PANNES General Les numéros de téléphone du service après-vente se trouvent sur la carte de garantie. Ou consultez le site Internet ‘www.atag.nl’. N’utilisez pas d’appareil présentant une surface cassée ou fissurée. Arrêtez immédiatement le fonctionnement de l’appareil. Débranchez l’appareil ou mettez l’interrupteur de la conduite d’alimentation (en cas de connexion fixe) sur 0 ou déconnectez le/les fusible(s) de l’armoire...
  • Page 78 Code de panne E6 Casserole incorrecte. Les casseroles adaptées sont répertoriées sur le site Web www.atag.nl. Erreur matérielle/logicielle. Contactez le service après- vente. Autres codes d’erreur. Générateur défectueux. Contactez le service après- vente.
  • Page 79: Consignes D'installation

    Pour garantir une utilisation sans danger, il est nécessaire de laisser suffisamment d’espace libre autour de la plaque de cuisson. Assurez- vous que cet espace libre est respecté. hotte d’aspiration HI3271W: min. 40 cm le boîtier parois du placard Plaque de cuisson...
  • Page 80: Points De Fixation Des Étriers De Montage

    CONSIGNES D’INSTALLATION Points de fixation des étriers de montage Ne pas enlever ou Plans de travail épais Plans de travail minces tordre l’écrou ! Avant FR 24...
  • Page 81: Dimensions D'encastrement

    CONSIGNES D’INSTALLATION Dimensions d’encastrement L’illustration ci-dessus indique les côtes de l´évidement d´encastrement. min.40 Ventilation L’électronique qui se trouve dans l’appareil a besoin d’être refroidie. L’air frais se aspirer en arrière du meuble de cuisine et se souffler par les évents sur la face inférieure de l’appareil. La plaque de cuisson s’arrête en cas d’aération insuffisant.
  • Page 82: Encastrer Au-Dessus D'un Tiroir

    CONSIGNES D’INSTALLATION Encastrer au-dessus d’un tiroir La ventilation s’effectue par la plinthe (A) et le panneau arrière (B) du meuble de cuisine. Pratiquez les ouvertures de ventilation à l’aide d’une scie (min. 100 cm ). L’arrivée d’air A est superflue s’il existe une autre ouverture permettant en combinaison avec l’ouverture B, d’aspirer de l’air frais.
  • Page 83: Situation D'encastrement Avec Espace Intermédiaire

    CONSIGNES D’INSTALLATION Situation d’encastrement avec espace intermédiaire X mm min. 10 mm min.50 X mm +50 mm 50 mm Exemples de raccordement avec la pièce de raccordement La pièce de raccordement sert à monter les appareils les uns contre les autres FR 27...
  • Page 84: Encastrement

    CONSIGNES D’INSTALLATION Encastrement Vérifiez que le meuble de cuisine et l’évidement correspondent aux exigences relatives aux dimensions et à la ventilation. Traitez la tranche des plans de travail en bois ou en matière plastique, éventuellement avec un vernis d’étanchété, afin d’éviter tout gonflement du plan de travail sous l’effet de l’humidité.
  • Page 85: Fiche Technique

    FICHE TECHNIQUE Mesures de puissance et d’encastrement Cet appareil satisfait à toutes les directives CE en la matière. Type de plaque de cuisson HI3271W Induction Branchement 230V - 50Hz (fiche européenne) Phases Puissance maximale zone de cuisson 3 kW Aansluitwaarde 3 kW Dimensions (d’encastrement)
  • Page 86: Aspects Environnementaux

    ASPECTS ENVIRONNEMENTAUX Mise au rebut de l’appareil et de l’emballage Des matériaux durables ont été employés dans la fabrication de cet appareil. Veillez à éliminer cet équipement de façon responsable à l’issue de son cycle de service. Renseignez-vous auprès des autorités à...

Table des Matières