Table des Matières

Publicité

Les langues disponibles

Les langues disponibles

Liens rapides

ENGLISH
FRANÇAIS
DEUTSCH
KD-X441DBT
DIGITAL MEDIA RECEIVER
INSTRUCTION MANUAL
RÉCEPTEUR MULTIMÉDIA NUMÉRIQUE
MANUEL D'INSTRUCTIONS
DIGITAL-MEDIA-RECEIVER
BEDIENUNGSANLEITUNG
B5A-1377-00 [E]

Publicité

Table des Matières
loading

Sommaire des Matières pour JVC KD-X441DBT

  • Page 1 ENGLISH FRANÇAIS DEUTSCH KD-X441DBT DIGITAL MEDIA RECEIVER INSTRUCTION MANUAL RÉCEPTEUR MULTIMÉDIA NUMÉRIQUE MANUEL D’INSTRUCTIONS DIGITAL-MEDIA-RECEIVER BEDIENUNGSANLEITUNG B5A-1377-00 [E]...
  • Page 2 Français Português Par la présente, JVCKENWOOD déclare que Deste modo, a JVCKENWOOD declara que o l’équipement radio « KD-X441DBT » est conforme à la equipamento de rádio “KD-X441DBT” está em directive 2014/53/UE. conformidade com a Diretiva 2014/53/UE. L’intégralité de la déclaration de conformité UE est O texto integral da declaração de conformidade da UE...
  • Page 3 JVCKENWOOD ovim izjavljuje da je radio oprema Русский Slovensko Käesolevaga JVCKENWOOD kinnitab, et “KD-X441DBT” u skladu s Direktivom 2014/53/EU. JVCKENWOOD настоящим заявляет, S tem JVCKENWOOD izjavlja, da je radijska oprema „KD-X441DBT“ raadiovarustus on vastavuses Cjeloviti tekst deklaracije Europske unije o что...
  • Page 4: Table Des Matières

    CONTENTS BEFORE USE BEFORE USE IMPORTANT • To ensure proper use, please read through this manual before using this product. It is especially important BASICS that you read and observe Warning and Caution in this manual. • Please keep the manual in a safe and accessible place for future reference. GETTING STARTED 1 Cancel the demonstration Warning...
  • Page 5: Basics

    BASICS Faceplate Attach Volume knob Display window Detach How to reset Detach button On the faceplate Turn on the power Press • Press and hold to turn off the power. Adjust the volume Turn the volume knob. Press the volume knob to mute the sound or pause playback. •...
  • Page 6: Getting Started

    F/W UP Vxxx For details on how to update the firmware, see: Turn the volume knob to select [CLOCK FORMAT], then press the knob. <http://www.jvc.net/cs/car/>. Turn the volume knob to select [12H] or [24H], then press the knob. FACTORY RESET YES: Resets the settings to default (except the stored station). ;...
  • Page 7: Digital Radio

    DIGITAL RADIO GETTING STARTED About DAB (Digital Audio Broadcasting) CLOCK DAB is one of the digital radio broadcasting systems available today. It can deliver digital TIME SYNC ON: The clock time is automatically set using quality sound without any annoying interference or signal distortion. Furthermore, it can the Clock Time (CT) data in DAB signal. ;...
  • Page 8 DIGITAL RADIO Settings in memory Other settings You can store up to 18 services. Press and hold Turn the volume knob to select an item (see the following table), then press the knob. Store a service Repeat step until the desired item is selected/activated or follow While listening to a service..
  • Page 9: Analog Radio

    ANALOG RADIO DIGITAL RADIO ON: Allows the unit to temporarily switch to Traffic Information if available (“TI” lights up). ; OFF: Cancels. PTY SEARCH Select a PTY code (see below). If there is a station broadcasting a program of the same PTY code as you have selected, that station is tuned in.
  • Page 10 ANALOG RADIO Select a stored station MONO SET ON: Improves the FM reception, but the stereo effect will be lost. ; OFF: Cancels. Press one of the number buttons (1 to 5). (or) NEWS SET * ON: The unit will temporarily switch to News Programme if available. ; Press OFF: Cancels.
  • Page 11: Usb/Ipod/Android

    Do not leave the cable inside the car when not using. When connecting an Android device, “Press [VIEW] to install JVC MUSIC PLAY APP” is shown. Follow the instructions to install the application. You can also install the latest version of JVC MUSIC PLAY application on your Android device before connecting. For Micro USB 2.0 cable *...
  • Page 12 • To return to the previous setting item, press Preparation: • To cancel, press and hold Install the latest version of JVC Remote application on your device before connecting. For more information, visit <http://www.jvc.net/cs/car/>. You can make the settings in the same way as connection via Bluetooth.
  • Page 13: Bluetooth

    BLUETOOTH® BLUETOOTH — Connection Pair and connect a Bluetooth device for the first time Press to turn on the unit. Supported Bluetooth profiles – Hands-Free Profile (HFP) Search and select “KD-X4 DBT” on the Bluetooth device. – Advanced Audio Distribution Profile (A2DP) “BT PAIRING”...
  • Page 14 • The unit answers the call automatically if [AUTO ANSWER] is set to a selected time. ( 13) – [AUTO PAIRING] is set to [ON]. ( 15) – JVC MUSIC PLAY application is installed on During a call: the Android device ( 9) and [AUTO MODE] is •...
  • Page 15 BLUETOOTH® Default: XX On the faceplate MIC GAIN LEVEL –10 to LEVEL +10 (LEVEL –04): The sensitivity of the While talking on the first incoming call... microphone increases as the number increased. Answer another incoming Press or the volume knob. NR LEVEL LEVEL –05 to LEVEL +05 (LEVEL 00): Adjust the noise reduction call and hold the current level until the least noise is being heard during a phone conversation.
  • Page 16 BLUETOOTH® Make a call using voice recognition Make a call Press and hold to activate the connected You can make a call from the call history, phonebook, or dialing the number. Call by phone. voice is also possible if your mobile phone has the feature. Speak the name of the contact you want to call or Press to enter Bluetooth mode.
  • Page 17 BLUETOOTH® Bluetooth mode settings Bluetooth compatibility check mode Press and hold You can check the connectivity of the supported Turn the volume knob to select an item (see the following table), then press the knob. profile between the Bluetooth device and the unit. Repeat step until the desired item is selected/activated or follow the instructions •...
  • Page 18 BLUETOOTH® The connectivity result flashes on the display. BLUETOOTH — Audio “PAIRING OK” and/or “HANDS-FREE OK”* and/ While in BT AUDIO source, you or “AUD.STREAM OK”* and/or “PBAP OK”* can connect to five Bluetooth Compatible audio devices and switch Compatible with Hands-Free Profile (HFP) between these five devices.
  • Page 19 ANDROID CONNECTED: You are able to use the application using the Android Preparation: smartphone connected via Bluetooth. Install the latest version of JVC Remote application on your device before ANDROID NOT CONNECTED: No Android device is connected to use the connecting. For more information, visit <http://www.jvc.net/cs/car/>.
  • Page 20: Aux

    AUDIO SETTINGS Use a portable audio player Connect a portable audio player (commercially available). 3.5 mm stereo mini plug with “L” shaped connector (commercially available) Select a preset equalizer Press repeatedly. Portable audio player Auxiliary input jack (or) Press , then turn the volume knob within 5 seconds. Select [ON] for [BUILT-IN AUX] in [SOURCE SELECT].
  • Page 21 AUDIO SETTINGS Default: XX LOUDNESS LEVEL 01/LEVEL 02: Boosts low or high frequencies to produce a well- balanced sound at low volume. ; OFF: Cancels EQ SETTING SUB.W LEVEL * SPK-OUT * (Not applicable when 3-way crossover is selected.) PRESET EQ Select a preset equalizer suitable to the music genre. SUB.W 00 to SUB.W +06 (SUB.W +03): Adjusts the •...
  • Page 22 AUDIO SETTINGS Speaker output settings SPK/PRE OUT (Not applicable when 3-way crossover is selected.) [SPK/PRE OUT] Depending on the speaker connection method, select the appropriate (Applicable only if [X ' OVER TYPE] is set to [2-WAY]) setting to get the desired output. ( Speaker output settings) Select the output setting for the speakers [SPK/PRE OUT], based on the SPEAKER SIZE Depending on the crossover type you have selected ( [X ' OVER TYPE]),...
  • Page 23 AUDIO SETTINGS 2-way crossover setting items Crossover settings Below are the available setting items for 2-way crossover and 3-way SPEAKER SIZE crossover. FRONT SIZE 8CM/10CM/12CM/13CM/16CM/17CM/18CM/4×6/ Caution 5×7/6×8/6×9/7×10 Select a crossover type according to how the speakers are connected. TWEETER SMALL/MIDDLE/LARGE/NONE (not connected) ( 31) REAR * If you select a wrong type:...
  • Page 24 AUDIO SETTINGS 3-way crossover setting items Digital Time Alignment settings Digital Time Alignment sets the delay time of the speaker output to SPEAKER SIZE create a more suitable environment for your vehicle. TWEETER SMALL/MIDDLE/LARGE • For more information, 23, Determining the value for [DISTANCE] and MID RANGE 8CM/10CM/12CM/13CM/16CM/17CM/18CM/4×6/5×7/6×8/6×9 [GAIN] of [DTA SETTINGS].
  • Page 25: Display Settings

    DISPLAY SETTINGS AUDIO SETTINGS Determining the value for [DISTANCE] and [GAIN] of [DTA SETTINGS] If you specify the distance from the center of the currently set listening position to every speaker, the delay time will be automatically computed and set. 1 Determine the center of the currently set listening position as the reference point.
  • Page 26: References

    SCROLL OFF: Cancels. More information For: – Latest firmware updates and latest compatible item list COLOR – JVC original application PRESET Select an illumination color for the buttons. – Any other latest information Default color: [COLOR 08] Visit <http://www.jvc.net/cs/car/>.
  • Page 27: About Bluetooth

    REFERENCES • Via Bluetooth: Change the display information Made for Each time you press , the display information changes. – iPod touch (5th and 6th generation) • If the information is unavailable or not recorded, “NO TEXT”, “NO NAME”, or other information (eg. station –...
  • Page 28: Troubleshooting

    TROUBLESHOOTING Symptom Remedy Symptom Remedy Sound cannot be heard. • Adjust the volume to the optimum level. “UNSUPPORTED DEVICE” • Check whether the connected device is compatible with • Check the cords and connections. appears. this unit and ensure the file systems are in supported formats.
  • Page 29 Symptom Remedy Symptom Remedy Cannot playback at • Make sure JVC MUSIC PLAY APP is installed on the Android Sound is being • Reduce the distance between the unit and the Bluetooth [AUTO MODE]. device. ( 9) interrupted or skipped audio player.
  • Page 30: Specifications

    SPECIFICATIONS DAB Frequency Range L Band 1 452.960 MHz — 1 490.624 MHz Frequency Response (±1 dB) 20 Hz — 20 kHz Band III 174.928 MHz — 239.200 MHz Signal-to-Noise Ratio (1 kHz) 105 dB Sensitivity –100 dBm Dynamic Range 90 dB Signal-to-Noise Ratio 80 dB Channel Separation 85 dB Antenna Connector Type MP3 Decode Compliant with MPEG-1/2 Audio Layer-3 Antenna Output Voltage 14.4 V (11 V –...
  • Page 31: Installation/Connection

    INSTALLATION/CONNECTION SPECIFICATIONS Warning Maximum Output Power 50 W × 4 or • The unit can only be used with a 12 V DC power supply, negative ground. 50 W × 2 + 50 W × 1 (Subwoofer = 4 Ω) • Disconnect the battery’s negative terminal before wiring and mounting. Full Bandwidth Power 22 W × 4 •...
  • Page 32 INSTALLATION/CONNECTION Installing the unit (in-dash mounting) Part list for installation (A) Faceplate Do the required wiring. ( 31) Hook on the top side (B) Trim plate Orientate the trim plate Dashboard of as illustrated before your car fitting. Bend the appropriate tabs to (C) Mounting sleeve hold the sleeve firmly in place.
  • Page 33: Wiring Connection

    INSTALLATION/CONNECTION Wiring connection When connecting to an external amplifier, connect its ground wire to the Front/Rear/Subwoofer output car’s chassis to avoid damaging the unit. For 3-way crossover: Mid Range/Woofer output Antenna input terminal (for FM/AM) Microphone input jack ( 11) DAB antenna jack Fuse (10 A) (SMB connector)
  • Page 34: Avant L'utilisation

    AVANT L’UTILISATION TABLE DES MATIERES AVANT L’UTILISATION IMPORTANTES • Pour utiliser correctement l’appareil, veuillez ce manuel complément avant de l’utiliser. Il est particulièrement important que FONCTIONNEMENT DE BASE vous lisiez et acceptiez les avertissements et les précautions de ce manuel. •...
  • Page 35: Fonctionnement De Base

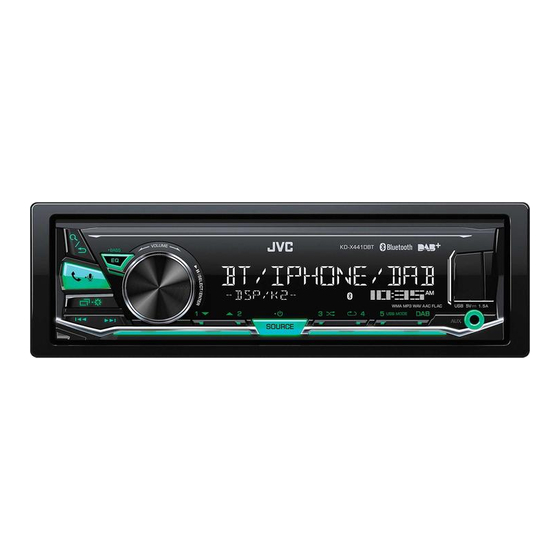
    FONCTIONNEMENT DE BASE Façade Attachez Bouton de volume Fenêtre d’affichage Détachez Comment réinitialiser Touche de détachement Pour Sur la façade Mettez l’appareil sous tension Appuyez sur • Maintenez la touche enfoncée pour mettre l’appareil hors tension. Ajustez le volume Tournez le bouton de volume. Appuyez sur le bouton de volume pour couper le son ou mettre la lecture en pause.
  • Page 36: Prise En Main

    Pour en savoir plus sur la mise à niveau du micrologiciel, référez-vous à: Tournez le bouton de volume pour choisir [CLOCK FORMAT] , puis appuyez sur <http://www.jvc.net/cs/car/>. le bouton. FACTORY RESET : Réinitialise les réglages aux valeurs par défaut (sauf la station mémorisée). ;...
  • Page 37: Radio Numérique

    RADIO NUMÉRIQUE PRISE EN MAIN À propos du DAB (Digital Audio Broadcasting) CLOCK DAB est l’un des systèmes de radio numérique disponibles aujourd’hui. Il peut offrir un son de qualité numérique sans toutes les interférences gênantes ni les distorsions des signaux. De plus, il peut transporter des TIME SYNC : L’horloge est réglée automatiquement à...
  • Page 38 RADIO NUMÉRIQUE Réglages en mémoire Autres paramètres Vous pouvez mémoriser un maximum de 18 services. Maintenez enfoncée Tournez le bouton de volume pour sélectionner un élément voir le tableau suivant , puis appuyez sur le bouton. Mémorisez un service Répétez l’étape jusqu’à...
  • Page 39: Radio Analogique

    RADIO ANALOGIQUE RADIO NUMÉRIQUE : Permet à l’appareil de commuter temporairement sur les informations routières si elles sont disponibles (“TI” s’allume). ; : Annulation. PTY SEARCH Sélectionnez un code PTY (voir ci-dessous). S’il y a une station diffusant un programme du code PTY que vous avez choisi, la station est accordée.
  • Page 40: Sélectionnez Une Station Mémorisée

    RADIO ANALOGIQUE Sélectionnez une station mémorisée MONO SET : Améliore la réception FM mais l’ e ffet stéréo sera perdu. ; : Annulation. Appuyez sur l’une des touches numériques (  à  NEWS SET * : L’appareil commute temporairement sur le programme d’information s’il est disponible. ; (ou) : Annulation.
  • Page 41: Usb/Ipod/Android

    Ne laissez pas le câble à l’intérieur de la voiture quand il n’ e st pas utilisé. Lors de la connexion d’un périphérique Android, “Press [VIEW] to install JVC MUSIC PLAY APP” apparaît. Suivez les instructions pour installer l’application. Vous Câble Micro USB 2.0...
  • Page 42 Tournez le bouton de volume pour sélectionner le caractère Préparation: souhaité. Installez la dernière version de l’application JVC Remote sur votre périphérique avant la : Lettres majuscules (A à Z) connexion. Pour plus d’informations, consultez <http://www.jvc.net/cs/car/>. : Lettres minuscules (a à z) : Nombres (0 à...
  • Page 43: Bluetooth

    BLUETOOTH® BLUETOOTH — Connexion Faites le pairage et connectez un périphérique Bluetooth pour la première fois Profiles Bluetooth pris en charge Appuyez sur pour mettre l’appareil sous tension. – Hands-Free Profile — Profile mains libres (HFP) Cherchez et sélectionnez “KD-X4 DBT”...
  • Page 44: Pairage Automatique

    ( 13) – [AUTO PAIRING] est réglé sur [ON] ( 15) – L’application JVC MUSIC PLAY est installée sur le Pendant un appel: ( 9) [AUTO MODE] périphérique Android • Les touches s’arrêtent de clignoter et s’allument dans la couleur que vous avez sélectionnée dans...
  • Page 45 BLUETOOTH® Défaut: Pour Sur la façade MIC GAIN LEVEL –10 LEVEL +10 LEVEL –04  à   ( ): La sensibilité du microphone Pendant que vous parlez pour le premier appel entrant... augmente quand le numéro augmente. Répondez à un autre appel Appuyez sur ou sur le bouton de NR LEVEL LEVEL –05...
  • Page 46 BLUETOOTH® Faites au appel en utilisant la reconnaissance Faire un appel vocale Vous pouvez faire un appel à partir de l’historique, du répertoire d’adresses ou composer le numéro. Un Maintenez pressé pour activer le téléphone appel par commande vocale est possible si votre téléphone portable possède cette fonction. connecté.
  • Page 47 BLUETOOTH® Réglages du mode Bluetooth Mode de vérification de la compatibilité Bluetooth Maintenez enfoncée Tournez le bouton de volume pour sélectionner un élément voir le tableau suivant , puis Vous pouvez vérifier la connectivité du profile pris en charge appuyez sur le bouton. entre le périphérique Bluetooth et l’appareil.
  • Page 48: Lecteur Audio Via Bluetooth

    BLUETOOTH® Le résultat de la connectivité clignote sur BLUETOOTH — Audio l’affichage. Quand la source est BT AUDIO, “PAIRING OK” et/ou “HANDS-FREE OK”* et/ou “AUD. vous pouvez vous connecter à cinq STREAM OK”* et/ou “PBAP OK”* : Compatible périphériques audio Bluetooth Compatible avec le Profile mains libres (HFP) et commuter parmi ces cinq Compatible avec le Profile de distribution audio avancé...
  • Page 49 : Vous pouvez utiliser l’application à l’aide du smartphone Android Préparation: connecté via Bluetooth. Installez la dernière version de l’application JVC Remote sur votre périphérique avant la ANDROID NOT CONNECTED : Aucun périphérique Android n’ e st connecté pour utiliser connexion.
  • Page 50: Aux

    RÉGLAGES AUDIO Utilisation d’un lecteur audio portable Connectez un lecteur audio portable (en vente dans le commerce). Mini fiche stéréo de 3,5 mm avec connecteur en forme de “L” (en vente dans le commerce) Choisissez un égaliseur préréglé Appuyez répétitivement sur Lecteur audio portable Prise d’...
  • Page 51 RÉGLAGES AUDIO Défaut: LOUDNESS LEVEL 01 LEVEL 02 : Accentue les basses ou hautes fréquences pour produire un son plus équilibré aux faibles niveaux de volume. ; : Annulation EQ SETTING SUB.W LEVEL * SPK-OUT * (Non applicable quand la transition 3 voies est sélectionnée.) PRESET EQ Sélectionne un égaliseur préréglé...
  • Page 52 RÉGLAGES AUDIO Réglages de sortie d’enceinte SPK/PRE OUT (Non applicable quand la transition 3 voies est sélectionnée.) [SPK/PRE OUT] En fonction de la méthode de connexion des enceintes, sélectionner le réglage approprié (Applicable uniquement si [X ' OVER TYPE] est réglé sur [2-WAY]) Réglages de sortie d’enceinte pour obtenir la sortie souhaitée.
  • Page 53 RÉGLAGES AUDIO Options de réglage de la transition 2 voies Réglages de transition Voici les options de réglage disponibles pour la transition 2 voies et la transition SPEAKER SIZE 3 voies. FRONT SIZE 8CM/10CM/12CM/13CM/16CM/17CM/18CM 4×6 Précautions 5×7 6×8 6×9 7×10 Sélectionnez un type de transition en fonction de la connexion de vos enceintes.
  • Page 54 RÉGLAGES AUDIO Options de réglage de la transition 3 voies Réglages de l’alignement temporel numérique L’alignement temporel numérique règle la temporisation de la sortie d’enceinte SPEAKER SIZE pour créer un environnement qui convient mieux à votre véhicule. TWEETER SMALL/MIDDLE/LARGE • Pour plus d’informations, Déterminez la valeur pour [DISTANCE] et [GAIN] de [DTA SETTINGS]...
  • Page 55: Réglages D'affichage

    RÉGLAGES D’AFFICHAGE RÉGLAGES AUDIO Déterminez la valeur pour [DISTANCE] et [GAIN] de [DTA SETTINGS] Si vous spécifiez la distance à partir du centre de la positon d’ é coute actuellement réglée sur n’importe quel réglage, la temporisation est calculée automatiquement et réglée. Détermine le centre de la position d’...
  • Page 56: Références

    Pour: – Les dernières mise à jour du micrologiciel et la liste de compatibilité la plus récente PRESET Sélectionnez une couleur d’ é clairage pour les touches. – Application originale JVC [COLOR 08] Couleur par défaut: – Autres informations récentes •...
  • Page 57 RÉFÉRENCES • Changez l’information sur l’affichage Via Bluetooth: Made for Chaque fois que vous appuyez sur , les informations affichées changent. • – iPod touch (5th et 6th generation) Si aucune information n’ e st disponible ou si aucune information n’ e st enregistrée, “NO TEXT”, “NO NAME”, ou une autre information –...
  • Page 58: Guide De Dépannage

    GUIDE DE DÉPANNAGE Symptôme Remède Symptôme Remède Le son ne peut pas être entendu. • “UNSUPPORTED DEVICE” apparaît. • Ajustez le volume sur le niveau optimum. Vérifiez si le périphérique connecté est compatible avec cet appareil et • Vérifiez les cordons et les connexions. assurez-vous que le système de fichiers est dans un format compatible.
  • Page 59 Lecture impossible en mode • Le son est interrompu ou saute • Assurez-vous que JVC MUSIC PLAY APP est installé sur le périphérique Réduisez la distance entre cet appareil et le lecteur audio Bluetooth. [AUTO MODE] ( 9) pendant la lecture d’un lecteur •...
  • Page 60: Spécifications

    SPÉCIFICATIONS Plage de fréquences L Band 1 452,960 MHz — 1 490,624 MHz Réponse en fréquence (±1 dB) 20 Hz — 20 kHz Bande III 174,928 MHz — 239,200 MHz Taux de Signal/Bruit (1 kHz) 105 dB Sensibilité –100 dBm Gamme dynamique 90 dB Taux de Signal/Bruit 80 dB Séparation des canaux 85 dB...
  • Page 61: Installation/Raccordement

    INSTALLATION/RACCORDEMENT SPÉCIFICATIONS Avertissement Puissance de sortie maximum 50 W × 4 ou • L’appareil peut uniquement être utilisé avec une alimentation de 12 V CC, à masse négative. 50 W × 2 + 50 W × 1 (Caisson de grave = 4 Ω) • Déconnectez la borne négative de la batterie avant le câblage et le montage. Pleine Puissance de Largeur de Bande 22 W × 4 •...
  • Page 62: Installation De L'appareil (Montage Encastré)

    INSTALLATION/RACCORDEMENT Installation de l’appareil (montage encastré) Liste des pièces pour l’installation Façade Réalisez les connexions ( 31) nécessaires. Crochet sur le côté supérieur Plaque d’assemblage Orientez la plaque de Tableau de bord de garniture de la façon illustrée votre voiture avant la fixation.
  • Page 63: Connexions

    INSTALLATION/RACCORDEMENT Connexions Lors de la connexion à un amplificateur extérieur, connectez son fil de masse au châssis de la voiture pour éviter d’ e ndommager l’appareil. Sortie avant/arrière/caisson de grave Pour la transition 3 voies: Sortie de l’ e nceinte des médiums/graves Prise d’...
  • Page 64 INHALT VOR DER INBETRIEBNAHME VOR DER INBETRIEBNAHME WICHTIG • Um richtige Verwendung sicherzustellen, lesen Sie die Bedienungsanleitung vor der Verwendung des Produkts sorgfältig durch. GRUNDLAGEN Es ist besonders wichtig, dass Sie die als Warnung und Vorsicht gekennzeichneten Hinweise in dieser Anleitung lesen und beachten.
  • Page 65: Grundlagen

    GRUNDLAGEN Frontblende Anbringen Lautstärke-Regler Displayfenster Abnehmen Rücksetzen Abnehmen-Taste Auf der Frontblende Einschalten Drücken Sie • Zum Ausschalten halten Sie die Taste gedrückt. Einstellen der Lautstärke Drehen Sie den Lautstärke-Regler. Drücken Sie den Lautstärke-Regler zum Stummschalten des Tons oder zum Pausieren der Wiedergabe. •...
  • Page 66: Erste Schritte

    : Hebt auf (Aktualisierung wird nicht ausgeführt). drücken Sie dann den Regler. F/W UP Vxxx Einzelheiten darüber, wie Sie die Firmware aktualisieren können, siehe: Stunde  Minute <http://www.jvc.net/cs/car/>. [CLOCK FORMAT] Drehen Sie den Lautstärke-Regler zum Wählen von , und drücken Sie dann den Regler.
  • Page 67: Digital Radio

    DIGITAL RADIO ERSTE SCHRITTE Über DAB (Digital Audio Broadcasting) CLOCK DAB ist eines der heute verfügbaren digitalen Rundfunksendesysteme. Es kann Klang in Digitalqualität ohne störende Interferenzen oder Signalverzerrung liefern. Außerdem kann dieser Dienst Text, Bilder und Daten TIME SYNC : Die Uhrzeit wird automatisch mit den Uhrzeitdaten (CT) übermitteln.
  • Page 68: Andere Einstellungen

    DIGITAL RADIO Einstellungen im Speicher Andere Einstellungen Sie können bis zu 18 Dienste speichern. Halten Sie gedrückt. Drehen Sie den Lautstärke-Regler, um einen Gegenstand zu treffen siehe folgende Tabelle , und drücken Sie dann den Regler. Speichern eines Dienstes Wiederholen Sie Schritt , bis der gewünschte Gegenstand gewählt/ Beim Hören eines Dienstes...
  • Page 69: Analog Radio

    ANALOG RADIO DIGITAL RADIO : Erlaubt es, das Gerät kurzzeitig auf Verkehrsinformation schalten, wenn verfügbar (“TI” leuchtet auf). ; : Hebt auf. PTY SEARCH Wählen Sie einen PTY-Code (siehe unten). Wenn ein Sender eine Sendung mit dem PTY-Code ausstrahlt, den Sie gewählt haben, wird dieser Sender eingestellt.
  • Page 70 ANALOG RADIO Wählen Sie einen gespeicherten Sender aus MONO SET : Verbessert den FM (UKW)-Empfang, aber der Stereoeffekt geht verloren. ; : Hebt auf. Drücken Sie eine der Zifferntasten (  bis  NEWS SET * : Das Gerät schaltet kurzzeitig auf das Nachrichtenprogramm, falls verfügbar. ; (oder) : Hebt auf.
  • Page 71: Usb/Ipod/Android

    : iPod oder ANDROID Lassen Sie bei Nichtgebrauch nicht das Kabel im Auto liegen. Wenn ein Android-Gerät angeschlossen wird, wird “Press [VIEW] to install JVC MUSIC PLAY APP” angezeigt. Gehen Sie zur Installation der Anwendung gemäß den Micro-USB 2.0-Kabel Anweisungen vor. Sie können auch vor dem Verbinden die neueste Version der JVC MUSIC PLAY-Anwendung auf Ihrem Android-Gerät installieren. Für die neueste (im Handel erhältlich)
  • Page 72 (über USB-Eingang). Vorbereitung: • Zum Zurückschalten zum vorherigen Einstellelement drücken Sie Installieren Sie vor dem Verbinden die neueste Version der JVC Remote-Anwendung auf • Zum Abbrechen halten Sie gedrückt. Ihrem Gerät. Für die neueste Information besuchen Sie <http://www.jvc.net/cs/car/>.
  • Page 73: Bluetooth

    BLUETOOTH® BLUETOOTH — Verbindung Zum erstmaligen Registrieren und Anschließen eines Bluetooth-Geräts Unterstützte Bluetooth-Profile Drücken Sie , um die Einheit einzuschalten. – Hands-Free Profile (HFP) Suchen und wählen Sie “KD-X4 DBT” am Bluetooth-Gerät. – Advanced Audio Distribution Profile (A2DP) “BT PAIRING” blinkt im Display. –...
  • Page 74 [AUTO ANSWER] auf eine gewählte Zeit gestellt ist. ( 13) – [AUTO PAIRING] [ON] gestellt ist. ( 15) – Die JVC MUSIC PLAY-Anwendung wird auf dem Während eines Rufs: ( 9) [AUTO MODE] Android-Gerät installiert, und wird • Die Tasten hören zu blinken auf und leuchten in der Farbe, die Sie in [RING COLOR] gewählt haben.
  • Page 75 BLUETOOTH® Standard: Auf der Frontblende MIC GAIN LEVEL –10 LEVEL +10 LEVEL –04  bis   ( ): Die Empfindlichkeit des Mikrofons Während des Sprechens beim ersten ankommenden Anruf... nimmt mit höherer Zahl zu. Einen anderen Drücken oder den Lautstärke-Regler. NR LEVEL LEVEL –05 LEVEL +05 LEVEL 00  bis ...
  • Page 76 BLUETOOTH® Einen Ruf mit Spracherkennung tätigen Tätigen Sie einen Ruf Halten Sie gedrückt, um das angeschlossene Sie können einen Ruf von der Ruf-Historie, dem Telefonbuch oder durch Wählen der Telefonnummer Telefon zu aktivieren. tätigen. Ruf durch Sprachbefehl ist auch möglich, wenn Ihr Handy dieses Merkmal hat. Sprechen Sie den Namen des anzurufenden Drücken Sie , um auf Bluetooth-Modus zu schalten.
  • Page 77 BLUETOOTH® Bluetooth-Modus-Einstellungen Prüfmodus für Bluetooth-Kompatibilität Halten Sie gedrückt. Sie können die Konnektivität des unterstützten Profils zwischen Drehen Sie den Lautstärke-Regler, um einen Gegenstand zu treffen siehe folgende Tabelle dem Bluetooth-Gerät und der Einheit prüfen. und drücken Sie dann den Regler. •...
  • Page 78 BLUETOOTH® Das Konnektivitätsergebnis blinkt im Display. BLUETOOTH — Audio “PAIRING OK” und/oder “HANDS-FREE OK”* und/oder Während BT AUDIO als Quelle “AUD.STREAM OK”* und/oder “PBAP OK”* : Kompatibel eingestellt ist, können Sie die Kompatibel mit Hands-Free Profile (HFP) Verbindung zu fünf Bluetooth- Kompatibel mit Advanced Audio Distribution Profile (A2DP) Audiogeräten herstellen und Kompatibel mit Phonebook Access Profile (PBAP) zwischen diesen Geräten...
  • Page 79 : Sie können die Anwendung mit dem über Bluetooth Vorbereitung: angeschlossenen Android-Smartphone verwenden. Installieren Sie vor dem Verbinden die neueste Version der JVC Remote-Anwendung auf ANDROID NOT CONNECTED : Kein Android-Gerät ist zur Verwendung der Anwendung Ihrem Gerät. Für die neueste Information besuchen Sie <http://www.jvc.net/cs/car/>.
  • Page 80: Aux

    AUDIOEINSTELLUNGEN Verwendung eines tragbaren Audioplayers Schließen Sie einen tragbaren Audioplayer (im Handel erhältlich) an. 3,5-mm-Stereo-Ministecker mit “L”-förmigem Anschluss (im Handel erhältlich) Wählen Sie einen Vorwahl-Equalizer Drücken Sie wiederholt. Tragbarer Audioplayer Auxiliary-Eingabebuchse (oder) Drücken Sie , und drehen Sie dann den Lautstärke-Regler innerhalb von 5 Sekunden.
  • Page 81 AUDIOEINSTELLUNGEN Standard: LOUDNESS LEVEL 01 LEVEL 02 : Verstärkt niedrige oder hohe Frequenzen, um eine gute Klangwirkung auch bei niedriger Lautstärke zu erhalten. ; : Hebt auf EQ SETTING SUB.W LEVEL * SPK-OUT * (Nicht anwendbar, wenn 3-Wege-Übergang gewählt ist.) PRESET EQ Wählt einen Vorwahl-Equalizer, der für das Musikgenre geeignet ist. SUB.W 00  bis ...
  • Page 82 AUDIOEINSTELLUNGEN Lautsprecher-Ausgangseinstellungen SPK/PRE OUT (Nicht anwendbar, wenn 3-Wege-Übergang gewählt ist.) [SPK/PRE OUT] Wählen Sie je nach der Art des Lautsprecheranschlusses die geeignete (Gilt nur wenn [X ’ OVER TYPE] auf [2-WAY] gestellt ist) Lautsprecher- Einstellung, um den gewünschten Ausgang zu erhalten. ( Ausgangseinstellungen Wählen Sie die Ausgangseinstellung für die Lautsprecher [SPK/PRE OUT]...
  • Page 83 AUDIOEINSTELLUNGEN Einstellpunkte für 2-Wege-Übergang Übergangseinstellungen Im Folgenden werden die verfügbaren Einstellpunkte für 2-Wege-Übergang und SPEAKER SIZE 3-Wege-Übergang gezeigt. FRONT SIZE 8CM/10CM/12CM/13CM/16CM/17CM/18CM 4×6 Vorsicht 5×7 6×8 6×9 7×10 Wählen Sie einen Übergangstyp entsprechend der Art des Anschlusses der TWEETER SMALL MIDDLE LARGE NONE  (nicht angeschlossen)
  • Page 84 AUDIOEINSTELLUNGEN Einstellpunkte für 3-Wege-Übergang Einstellungen der digitalen Zeitanpassung Die digitale Zeitanpassung stellt die Verzögerungszeit des Lautsprecherausgangs SPEAKER SIZE ein, um eine geeignetere Umgebung für Ihr Fahrzeug zu erzeugen. TWEETER SMALL/MIDDLE/LARGE • Für die weitere Informationen, 23, Bestimmen des Werts für [DISTANCE] und [GAIN] unter [DTA SETTINGS] MID RANGE 8CM/10CM/12CM/13CM/16CM/17CM/18CM...
  • Page 85: Display-Einstellungen

    DISPLAY-EINSTELLUNGEN AUDIOEINSTELLUNGEN Bestimmen des Werts für [DISTANCE] und [GAIN] unter [DTA SETTINGS] Wenn Sie den Abstand von der Mitte der momentan eingestellten Hörposition zu jedem Lautsprecher festlegen, wird die Verzögerungszeit automatisch berechnet und eingestellt. Bestimmen Sie die Mitte der momentan eingestellten Hörposition als Bezugspunkt.
  • Page 86: Zur Bezugnahme

    COLOR 49 – Jegliche neuesten Informationen • USER [DAY COLOR] [NIGHT COLOR] : Die Farbe, die Sie für oder festgelegt Besuchen Sie <http://www.jvc.net/cs/car/>. haben, wird gezeigt. • COLOR FLOW01 COLOR FLOW03 : Die Farbe wechselt bei unterschiedlichen Abspielbare Dateien Geschwindigkeiten. •...
  • Page 87: Über Bluetooth

    ZUR BEZUGNAHME • Ändern der Display-Information Über Bluetooth: Made for Jedesmal, wenn Sie drücken, wechselt die Anzeige-Information. • – iPod touch (5th und 6th generation) Wenn die Information nicht verfügbar oder nicht aufgezeichnet ist, erscheint “NO TEXT”, “NO NAME” oder andere Information –...
  • Page 88: Fehlersuche

    FEHLERSUCHE Symptom Abhilfe Symptom Abhilfe Es wird kein Ton gehört. • “UNSUPPORTED DEVICE” • Die Lautstärke auf den optimalen Pegel einstellen. Prüfen Sie, ob das angeschlossene Gerät kompatibel mit diesem Gerät • erscheint. Prüfen Sie die Kabel und Verbindungen. ist, und stellen Sie sicher, dass die Dateisysteme die unterstützten Formate haben.
  • Page 89 Abhilfe [AUTO MODE] • Der Ton wird unterbrochen • Stellen Sie sicher, dass JVC MUSIC PLAY APP im Android-Gerät installiert Verringern Sie den Abstand zwischen dem Gerät und dem Bluetooth- ( 9) oder weist bei Wiedergabe von Wiedergabe unmöglich. ist.
  • Page 90: Technische Daten

    TECHNISCHE DATEN Frequenzbereich L-Band 1 452,960 MHz — 1 490,624 MHz Frequenzgang (±1 dB) 20 Hz — 20 kHz Band III 174,928 MHz — 239,200 MHz Signal-Rauschabstand (1 kHz) 105 dB Empfindlichkeit –100 dBm Dynamikbereich 90 dB Signal-Rauschabstand 80 dB Kanaltrennung 85 dB Antennenanschluss-Typ MP3-Decodierung Unterstützt MPEG-1/2 Audio Layer-3 Antennen-Ausgangsspannung 14,4 V (11 V – 16 V) WMA-Decodierung Unterstützt Windows Media Audio Antennen-Maximalstrom...
  • Page 91: Einbau/Anschluss

    EINBAU/ANSCHLUSS TECHNISCHE DATEN Warnung Maximale Ausgangsleistung 50 W × 4 oder • Das Gerät kann nur bei 12 V DC-Versorgung mit negativer Masse eingebaut werden. 50 W × 2 + 50 W × 1 (Subwoofer = 4 Ω) • Trennen Sie den negativen Batterieanschluss vor der Verkabelung und Befestigung ab. Volle Bandbreitenleistung 22 W × 4 •...
  • Page 92: Entfernen Der Einheit

    EINBAU/ANSCHLUSS Einbau der Einheit (Einbau im Armaturenbrett) Teileliste für den Einbau Frontblende Führen Sie die erforderliche Verkabelung aus. ( 31) Haken auf der Oberseite Frontrahmen Richten Sie den Frontrahmen Armaturenbrett Ihres Autos vor dem Anbringen aus, wie in der Abbildung gezeigt. Einbauhalterung Die geeigneten Zapfen biegen, um die Manschette sicher festzuhalten.
  • Page 93 EINBAU/ANSCHLUSS Verdrahtungsanschluss Bei Anschluss an einen externen Verstärker schließen Sie dessen Massedraht an der Autokarosserie an, um Beschädigung des Geräts Vorderer/Hinterer/Subwoofer-Ausgang zu vermeiden. Für 3-Wege-Übergang: Mitteltöner/Tieftöner-Ausgang Antennen-Eingangsklemme (für FM/AM) Mikrofoneingangsbuchse ( 11) DAB-Antennenbuchse Sicherung (10 A) (SMB-Anschluss) Anschluss des ISO-Anschlusses an manche Gelb (Batteriekabel) Hellblau/Gelb VW/Audi oder Opel (Vauxhall) Automobile...
  • Page 96 • The Bluetooth® word mark and logos are registered trademarks owned by Bluetooth SIG, Inc. these items and their waste byproducts. and any use of such marks by JVC KENWOOD Corporation is under license. Other trademarks and Contact your local authority for details in locating a recycle facility nearest to you. Proper recycling and trade names are those of their respective owners.

Table des Matières