Télécharger Imprimer la page
JVC KD-X472DBT Guide De Démarrage Rapide
Masquer les pouces Voir aussi pour KD-X472DBT:

Publicité

Les langues disponibles
  • FR

Les langues disponibles

  • FRANÇAIS, page 60

Liens rapides

KD-X472DBT / KD-X272DBT / KD-X172DB
DIGITAL MEDIA RECEIVER
Quick Start Guide
RECEPTOR DE MEDIOS DIGITALES
Guía de inicio rápido
DIGITALE MEDIAONTVANGER
Snelstartgids
RECEPTOR MÉDIA DIGITAL
Guia de Início Rápido
DIGITAL-MEDIA-RECEIVER
Schnellstartanleitung
RÉCEPTEUR MULTIMÉDIA NUMÉRIQUE
Guide de démarrage rapide
RICEVITORE MULTIMEDIALE DIGITALE
Guida di avvio rapido
For detailed operations and information, refer to the INSTRUCTION MANUAL on the following
website:
Para obtener más información y detalles sobre las operaciones, consulte el MANUAL DE
INSTRUCCIONES en el siguiente sitio web:
Raadpleeg de GEBRUIKSAANWIJZING op de volgende website voor gedetailleerde informatie over
de bediening:
Para as operações e informações detalhadas, consulte o MANUAL DE INSTRUÇÕES no website
abaixo:
Für detaillierte Bedienungen und Informationen siehe BEDIENUNGSANLEITUNG auf der folgenden
Website:
Pour les opérations et les informations détaillées, reportez-vous au MANUEL D'INSTRUCTIONS sur
le site web suivant.
Per le operazioni e le informazioni dettagliate, fare riferimento al ISTRUZIONI PER L'USO nel
seguente sito web:
<http://www.jvc.net/cs/car/>
ENGLISH
ESPAÑOL
NEDERLANDS
PORTUGUÊS
DEUTSCH
FRANÇAIS
ITALIANO
B5K-0665-00 [E]

Publicité

loading

Sommaire des Matières pour JVC KD-X472DBT

  • Page 1 ESPAÑOL NEDERLANDS PORTUGUÊS DEUTSCH FRANÇAIS ITALIANO KD-X472DBT / KD-X272DBT / KD-X172DB DIGITAL MEDIA RECEIVER For detailed operations and information, refer to the INSTRUCTION MANUAL on the following Quick Start Guide website: RECEPTOR DE MEDIOS DIGITALES Para obtener más información y detalles sobre las operaciones, consulte el MANUAL DE Guía de inicio rápido...
  • Page 2 Informatie over het weggooien van elektrische en elektronische apparatuur en batterijen (particulieren) Dit symbool geeft aan dat gebruikte elektrische, elektronische producten en batterijen niet bij het normale huishoudelijke afval mogen. Lever deze producten in bij de aangewezen inzamelingspunten, waar ze gratis worden geaccepteerd en op de juiste manier worden verwerkt, teruggewonnen en hergebruikt.
  • Page 3 Information sur l’élimination des anciens équipements électriques et électroniques et piles électriques (applicable dans les pays qui ont adopté des systèmes de collecte sélective) Les produits et piles électriques sur lesquels le pictogramme (poubelle barrée) est apposé ne peuvent pas être éliminés comme ordures ménagères.
  • Page 4 Konformitätserklärung in Bezug auf die RoHS-Vorschrift 2011/65/EU Hereby, JVCKENWOOD declares that the radio Por la presente, JVCKENWOOD declara que el equipment “KD-X472DBT/KD-X272DBT/KD-X172DB” equipo de radio “KD-X472DBT/KD-X272DBT/ Hersteller: is in compliance with Directive 2014/53/EU. KD-X172DB” cumple la Directiva 2014/53/EU. JVCKENWOOD Corporation The full text of the EU declaration of conformity is El texto completo de la declaración de...
  • Page 5 Spoločnosť JVCKENWOOD týmto vyhlasuje, že JVCKENWOOD ar šo deklarē, ka radio aparatūra С настоящото JVCKENWOOD декларира, „KD-X472DBT/KD-X272DBT/KD-X172DB“ rádiové zariadenie „KD-X472DBT/KD-X272DBT/ „KD-X472DBT/KD-X272DBT/KD-X172DB” atbilst че радиооборудването на “KD-X472DBT/ rádióberendezés megfelel a 2014/53/EU KD-X172DB“ vyhovuje smernici 2014/53/EÚ. direktīvas 2014/53/ES prasībām. KD-X272DBT/KD-X172DB” е в съответствие с irányelvnek.
  • Page 6 SOFTWARE LICENSE AGREEMENT Article 4 Right pertaining to the Licensed Software Any and all copyrights and other rights pertaining to the Licensed Software and related documents The software embedded in the Product (hereinafter the "Licensed Software") provided by Licensor is shall belong to the Licensor or the original holder of the right who granted to the Licensor the license or copyrighted to or sublicensable by the Licensor, and this Agreement provides for the terms and conditions sublicense for the Licensed Software (hereinafter the "Original Rightholder"), and the User shall not be...
  • Page 7 Important Notice concerning the Software Article 9 Destruction of the Licensed Software If this Agreement is terminated pursuant to the provision of Article 8, the User shall destroy the Licensed -jansson Software, any related documents and copies thereof within two (2) weeks from such date of termination. Copyright (c) 2009-2012 Petri Lehtinen <petri@digip.org>...
  • Page 8 -CMP sha2 AUTHOR: Aaron D. Gifford - http://www.aarongifford.com/ The MIT License (MIT) Copyright (c) 2014 Charles Gunyon Copyright (c) 2000-2001, Aaron D. Gifford All rights reserved. Permission is hereby granted, free of charge, to any person obtaining a copy of this software and associated documentation files (the "Software"), to deal in the Software without restriction, including without You may obtain a copy of the license at limitation the rights to use, copy, modify, merge, publish, distribute, sublicense, and/or sell copies of the...
  • Page 9 T-Kernel 2.0 Copyright (c) 1995, 1996 Carnegie-Mellon University. All rights reserved. This product uses the source code of T-Kernel 2.0 under T-License 2.0 granted by T-Engine Forum Author: Chris G. Demetriou (www.tron.org) Permission to use, copy, modify and distribute this software and its documentation is hereby granted, BSD-3-Clause provided that both the copyright notice and this permission notice appear in all copies of the software, Copyright (c) 2000-2001, Aaron D.
  • Page 10 Installation/Connection Basic procedure Remove the key from the ignition switch, then disconnect the terminal of the car battery. This section is for the professional installer. Connect the wires properly. See “Wiring connection” on page 3. For safety’s sake, leave wiring and mounting to professionals. Consult the car audio dealer. Install the unit to your car.
  • Page 11 Installing the unit (without mounting sleeve) Wiring connection Remove the mounting sleeve and trim plate from the unit. Align the holes in the unit (on both sides) with the vehicle mounting bracket and secure the unit with screws (commercially DAB antenna jack (SMB connector) available).
  • Page 12 Before Use Basics (on faceplate) *1 Only for illustration purpose. IMPORTANT Display window*1 KD-X272DBT/ • To ensure proper use, please read through this Guide before using KD-X172DB: this product. It is especially important that you read and observe Volume knob Warnings and Cautions in this Guide.
  • Page 13 Turn the volume knob to make the settings, then press the knob. [ESPANOL] applicable. Set the date in the order of “Day” “Month” “Year”. By default, [ENGLISH] is selected. [FRANCAIS] Press to exit. [DEUTSCH]* To return to the previous setting item, press * Only for KD-X472DBT.
  • Page 14 Digital Radio Settings in memory You can store up to 18 services. About DAB (Digital Audio Broadcasting) Store a service DAB is one of the digital radio broadcasting systems available today. It can While listening to a service..deliver digital quality sound without any annoying interference or signal Press and hold one of the number buttons (1 to 6).
  • Page 15 Analog Radio USB/iPod Selectable source: Search for a station • KD-X472DBT: USB/iPod USB or iPod BT Press B SRC repeatedly to select FM or AM. • KD-X272DBT/KD-X172DB: USB Press S / T to search for a station automatically. (For KD-X172DB, press USB to directly select USB (or) source.)
  • Page 16 : Selects language for the menu and music information. [DEUTSCH]*2 : Selects language for the menu and music information. [DEMO MODE] : Activates or deactivates the display demonstration. *1 For KD-X472DBT/KD-X272DBT: Applicable only while talking on the phone. *2 Only for KD-X472DBT.
  • Page 17 (Selectable only when [ALL ZONE] is selected Illumination Color Setting in step 4.) For KD-X472DBT, you can set your preferred illumination color for each zone. Repeat step 4 and step 5 to set color for other zones. Press to exit.
  • Page 18 Pair and connect a Bluetooth device for the first time Press B SRC to turn on the unit. Play back/pause Press the volume knob. Search and select the name of your receiver (“KD-X472DBT”/ Select group or folder Press 2 J / 1 K. “KD-X272DBT”) on the Bluetooth device.
  • Page 20 Instalación/Conexión Procedimiento básico Quite la llave del interruptor de encendido; después, desconecte el terminal de la batería del automóvil. Esta sección es para los instaladores profesionales. Conecte los cables correctamente. Consulte “Conexión del cableado” en la Para fines de seguridad, deje que un profesional realice el cableado y el montaje. Consulte con un página 3.
  • Page 21 Instalación de la unidad (sin manguito de montaje) Conexión del cableado Retire de la unidad, el manguito de montaje y la placa embellecedora. Alinee los orificios de la unidad (en ambos lados) con la ménsula de montaje del vehículo y asegure la unidad con los tornillos (disponibles Toma de antena DAB (conector SMB) en el mercado).
  • Page 22 Antes del uso Puntos básicos (en la placa frontal) *1 Solo para fines ilustrativos. IMPORTANTE Ventanilla de visualización*1 KD-X272DBT/ • Antes de utilizar este producto y para asegurar su uso correcto, lea KD-X172DB: esta guía por completo. En especial, lea y observe las Advertencias y Rueda de volumen Precauciones incluidas en esta guía.
  • Page 23 [FRANCAIS] pulse la rueda. [DEUTSCH]* Gire la rueda de volumen para realizar los ajustes y, a continuación, pulse la rueda. * Solo para KD-X472DBT. Ajuste la fecha en el orden de “Día” “Mes” “Año”. Pulse para salir.
  • Page 24 Radio digital Ajustes en la memoria Puede guardar hasta 18 servicios. Acerca de DAB (Radiodifusión de audio digital) Guardar un servicio DAB es unos de los sistemas de radiodifusión digital de radio disponibles en la Mientras escucha un servicio..actualidad. Puede proporcionar sonido de calidad digital sin ninguna interferencia Pulse y mantenga pulsado uno de los botones numéricos (1 a 6).
  • Page 25 Radio analógica USB/iPod Fuente seleccionable: Búsqueda de una emisora • KD-X472DBT: USB/iPod USB o iPod BT Pulse SRC repetidamente para seleccionar FM o AM. • KD-X272DBT/KD-X172DB: USB Pulse para la búsqueda automática de emisoras. (En el KD-X172DB, pulse USB para seleccionar directamente la fuente USB.)
  • Page 26 [DEUTSCH] : Selecciona el idioma para el menú y la información de música. [DEMO MODE] : Activa o desactiva la demostración en pantalla. *1 Para KD-X472DBT/KD-X272DBT: Aplicable solamente mientras se habla por teléfono. *2 Solo para KD-X472DBT.
  • Page 27 [SUNSET] : Se muestra el patrón del color Ajuste del color de iluminación seleccionado. (Puede seleccionarse sólo si se selecciona Para KD-X472DBT, el color de iluminación preferido se puede ajustar para cada [ALL ZONE] en el paso 4.) zona. Repita los pasos 4 y 5 para definir el color para las otras zonas.
  • Page 28 Reproducción/pausa Pulse la rueda de volumen. Pulse SRC para encender la unidad. Busque y seleccione el nombre de su receptor (“KD-X472DBT”/ Seleccione un grupo o carpeta Pulse 2 “KD-X272DBT) en el dispositivo Bluetooth. Realice (A) o (B) dependiendo de los datos mostrados en la pantalla.
  • Page 30 Installeren/Verbinden Basisprocedure Haal de sleutel uit het contactslot en ontkoppel vervolgens de aansluiting van de auto-accu. Dit gedeelte is voor de professionele installateur. Verbind de draden juist. Zie “Verbinden van draden” op pagina 3. Laat het monteren en verbinden voor de veiligheid door een vakman uitvoeren. Raadpleeg de auto- Installeer het toestel in de auto.
  • Page 31 Installeren van het toestel (zonder bevestigingshuls) Verbinden van draden Verwijder de bevestigingshuls en sierplaat van het toestel. Breng de gaten in het apparaat (beide kanten) in lijn met de bevestigingsbeugel van de auto en zet het apparaat met schroeven DAB-antenneaansluiting (SMB-stekker) (los verkrijgbaar) vast.
  • Page 32 Alvorens gebruik Basispunten (op voorpaneel) *1 Alleen ter illustratie. BELANGRIJK Displayvenster*1 KD-X272DBT/ • Lees alvorens dit product in gebruik te nemen deze handleiding door KD-X172DB: voor een juist gebruik. Het is vooral belangrijk dat u de Waarschuwingen Volumeknop en Voorzorgsmaatregelen in deze handleiding goed doorleest en Aux- opvolgt.
  • Page 33 Draai de volumeknop om de instellingen te maken en druk vervolgens op [DEUTSCH]* de knop. Stel de datum in de volgorde van “Dag” “Maand” “Jaar”. * Alleen voor KD-X472DBT. Druk op om te verlaten. Druk op om naar het voorgaande instelonderdeel terug te keren.
  • Page 34 Digitale radio Geheugeninstellingen U kunt maximaal 18 services opslaan. Meer over DAB (Digital Audio Broadcasting) Opslaan van een service DAB is een van de hedendaagse beschikbare digitale radio-uitzendsystemen. DAB Tijdens het luisteren naar een service..levert een digitale geluidskwaliteit, zonder interferentie en signaalvervorming. Houd een van de cijfertoetsen (1 tot 6) even ingedrukt.
  • Page 35 Analoge Radio USB/iPod Kiesbare bron: Opzoeken van een zender • KD-X472DBT: USB/iPod USB of iPod BT Druk herhaaldelijk op SRC om FM of AM te kiezen. • KD-X272DBT/KD-X172DB: USB Druk op om automatisch een zender op te zoeken. (Druk voor KD-X172DB op USB om de USB-bron direct (of ) te selecteren.)
  • Page 36 Draai de volumeknop om het niveau van de subwoofer in te stellen en druk [DEUTSCH] : Selecteert de taal voor het menu en muziekinformatie. vervolgens op de knop. [DEMO MODE] : Activeert of deactiveert de displaydemonstratie. *1 Voor de KD-X472DBT/KD-X272DBT: Alleen van toepassing tijdens het bellen. *2 Alleen voor KD-X472DBT.
  • Page 37 Kleurinstelling van verlichting getoond. (Alleen kiesbaar indien [ALL ZONE] in stap 4 is Voor KD-X472DBT kunt u de gewenste verlichtingskleur instellen voor elke zone. gekozen.) Herhaal stap 4 en stap 5 om de kleur in te stellen voor andere zones. Druk op om te verlaten.
  • Page 38 Afspelen/pauzeren Druk op de volumeknop. Druk op SRC om het toestel in te schakelen. Zoek en selecteer de naam van uw receiver (“KD-X472DBT”/“KD-X272DBT”) Kiezen van een groep of map Druk op 2 op het Bluetooth-apparaat. Voer afhankelijk van wat op het display verschijnt (A) of (B) uit.
  • Page 40 Instalação/Conexão Processo básico Retire a chave do interruptor de ignição e, em seguida, desconecte o terminal da bateria do automóvel. Esta secção é para o instalador profissional. Conecte os fios adequadamente. Consulte “Conexão da cablagem” na Para o propósito de segurança, encarregue as ligações e a montagem a profissionais. Consulte o página 3.
  • Page 41 Instalação do aparelho (sem manga de montagem) Conexão da cablagem Retire a manga de montagem e a placa de guarnição do aparelho. Alinhe os orifícios no aparelho (em ambos lados) com o suporte de montagem do veículo e fixe o aparelho com parafusos (disponíveis Tomada de antena DAB (conector SMB) comercialmente).
  • Page 42 Antes de utilizar Fundamentos (no painel frontal) *1 Somente para a finalidade de ilustração. IMPORTANTE Visor*1 KD-X272DBT/ • Para garantir a utilização adequada, leia atentamente este Guia antes KD-X172DB: de utilizar o produto. É especialmente importante que leia e observe os Botão de volume Avisos e Cuidados neste Guia.
  • Page 43 Rode o botão de volume para fazer as definições e, em seguida, prima-o. [ENGLISH] Por predefinição, é selecionado. Defina a data na ordem de “Dia” “Mês” “Ano”. [FRANCAIS] Prima para sair. [DEUTSCH]* Para voltar ao item de definição anterior, prima * Somente para Only for KD-X472DBT.
  • Page 44 Rádio digital Definições na memória Pode armazenar até 18 serviços. Sobre DAB (Digital Audio Broadcasting) Armazene um serviço DAB é um dos sistemas de radiodifusão digital disponíveis atualmente. Pode Durante a escuta de um serviço..proporcionar um som de qualidade digital sem interferência desagradável ou Mantenha premido um dos botões numéricos (1 a 6).
  • Page 45 Rádio analógico USB/iPod Fonte selecionável: Procura de uma estação • KD-X472DBT: USB/iPod USB ou iPod BT Prima SRC repetidamente para selecionar FM ou AM. • KD-X272DBT/KD-X172DB: USB Prima para procurar uma estação automaticamente. (Para o KD-X172DB, prima USB para selecionar a fonte (ou) USB diretamente.)
  • Page 46 Rode o botão do volume para ajustar o nível do subwoofer e, em seguida, [DEMO MODE] : Ativa ou desativa a demonstração. prima-o. *1 Para KD-X472DBT/KD-X272DBT: Aplicável apenas enquanto está a falar no telefone. *2 Somente para Only for KD-X472DBT.
  • Page 47 (Selecionável somente se Definição da Cor de Iluminação selecionado no passo 4.) Para KD-X472DBT, pode definir sua cor de iluminação preferida para cada zona. Repita o passo 4 e o passo 5 para definir a cor para outras zonas. Prima para sair.
  • Page 48 Prima SRC para ligar a alimentação do aparelho. Selecionar um grupo ou pasta Prima 2 Busque e selecione o nome do seu recetor (“KD-X472DBT”/“KD-X272DBT”) no dispositivo Bluetooth. Saltar para trás/para a frente Prima Realize (A) ou (B) dependendo do que aparecer no visor.
  • Page 50 Einbau/Anschluss Grundlegendes Verfahren Ziehen Sie den Schlüssel aus dem Zündschloss, und trennen Sie dann den -Klemme der Autobatterie ab. Dieser Abschnitt ist für den professionellen Einbautechniker gedacht. Schließen Sie die Kabel richtig an. Siehe “Verdrahtungsanschluss” auf Überlassen Sie aus Sicherheitsgründen die Arbeiten zur Montage und Verkabelung ausgewiesenem Seite 3.
  • Page 51 Installieren der Einheit (ohne die Einbauhalterung) Verdrahtungsanschluss Nehmen Sie die Einbauhalterung und den Frontrahmen vom Gerät ab. Richten Sie die Öffnungen am Gerät (an beiden Seiten) mit der Befestigungskonsole am Fahrzeug aus und sichern Sie das Gerät mit DAB-Antennenbuchse (SMB-Anschluss) Schrauben (im Handel erhältlich).
  • Page 52 Vor der Inbetriebnahme Grundlagen (auf Frontblende) *1 Nur für Illustrationszwecke. WICHTIG Displayfenster*1 KD-X272DBT/ • Um richtige Verwendung sicherzustellen, lesen Sie die Anleitung vor KD-X172DB: der Verwendung des Produkts sorgfältig durch. Es ist besonders wichtig, Lautstärke-Regler dass Sie die Warnungen und Vorsichtshinweise in dieser Anleitung lesen Auxiliary- und beachten.
  • Page 53 Drehen Sie den Lautstärke-Regler, um die Einstellungen vorzunehmen, [DEUTSCH]* und drücken Sie dann den Regler. Stellen Sie das Datum in der Reihenfolge “Tag” “Monat” “Jahr”. * Nur für KD-X472DBT. Drücken Sie zum Beenden. Zum Zurückschalten zum vorherigen Einstellelement drücken Sie...
  • Page 54 Digitalradio Einstellungen im Speicher Sie können bis zu 18 Dienste speichern. Wissenwertes über DAB (Digital Audio Broadcasting) Speichern eines Dienstes DAB ist eines der heute verfügbaren digitalen Rundfunksendesysteme. Es kann Beim Hören eines Dienstes... Klang in Digitalqualität ohne störende Interferenzen oder Signalverzerrung liefern. Halten Sie eine der Zifferntasten (1 bis 6) gedrückt.
  • Page 55 Analogradio USB/iPod Wählbare Quelle: Suche nach einem Sender • KD-X472DBT: USB/iPod USB oder iPod BT Drücken Sie SRC wiederholt, um FM (UKW) oder AM zu wählen. • KD-X272DBT/KD-X172DB: USB Drücken Sie , um einen Sender automatisch zu suchen. (Für KD-X172DB drücken Sie USB, um direkt die USB- (oder) Quelle zu wählen.)
  • Page 56 : Wählen die Sprache für das Menü und die Musikinformation. drücken Sie dann den Regler. [DEUTSCH] : Wählen die Sprache für das Menü und die Musikinformation. [DEMO MODE] : Aktiviert oder deaktiviert die Displaydemonstration. *1 Für KD-X472DBT/KD-X272DBT: Nur anwendbar, während am Telefon gesprochen wird. *2 Nur für KD-X472DBT.
  • Page 57 (Nur wählbar, wenn [ALL ZONE] in Schritt 4 Einstellung der Beleuchtungsfarbe gewählt ist.) Für KD-X472DBT können Sie Ihre bevorzugte Beleuchtungsfarbe für jede Zone Wiederholen Sie Schritt 4 und Schritt 5, um die Farbe für andere Zonen einstellen. einzustellen. Drücken Sie zum Beenden.
  • Page 58 Zum erstmaligen Registrieren und Anschließen eines Bluetooth-Geräts Auf der Frontblende Drücken Sie SRC, um die Einheit einzuschalten. Suchen und wählen Sie den Namen Ihres Receivers (“KD-X472DBT”/ Wiedergabe/Pause Drücken Sie den Lautstärke-Regler. “KD-X272DBT”) auf dem Bluetooth-Gerät. Wählen Sie die Gruppe oder den Drücken Sie 2...
  • Page 60 Installation/Connexion Procédure de base Retirez la clé de contact, puis déconnectez la borne de la batterie de la voiture. Cette section est réservée aux installateurs professionnels. Connectez les fils correctement. Voir “Connexions” à la page 3. Pour des raison de sécurité, laissez le travail de câblage et de montage des professionnels. Consultez Installez l’appareil dans votre voiture.
  • Page 61 Installation de l’appareil (sans le manchon de montage) Connexions Retirez le manchon de montage et la plaque de garniture de l’appareil. Alignez les entailles de l’appareil (des deux côtés) avec le support de montage du véhicule et fixez l’appareil avec les vis (en vente dans le Prise d’antenne DAB (connecteur SMB) commerce).
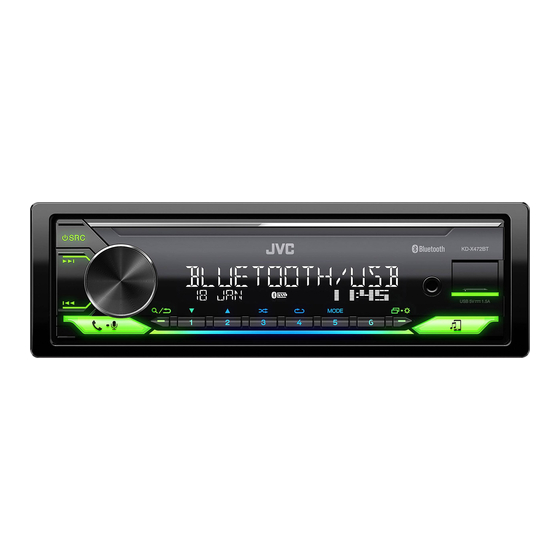
  • Page 62 Avant l’utilisation Fonctionnement de base (sur la façade) *1 Uniquement à des fins d’illustration. IMPORTANTES Fenêtre d’affichage*1 KD-X272DBT/ • Pour utiliser correctement l’appareil, veuillez lire ce Guide complément KD-X172DB: avant de l’utiliser. Il est particulièrement important que vous lisiez et Bouton de volume acceptiez les avertissements et les précautions de ce Guide.
  • Page 63 Tournez le bouton de volume pour faire les réglages, puis appuyez sur le [DEUTSCH]* bouton. Réglez la date dans l’ordre “Jour” “Mois” “Année”. * Uniquement pour KD-X472DBT. Appuyez sur pour quitter. Pour retourner à l’option de réglage précédente, appuyez sur...
  • Page 64 Radio numérique Réglages en mémoire Vous pouvez mémoriser un maximum de 18 services. À propos du DAB (Digital Audio Broadcasting) Mémorisez un service DAB est l’un des systèmes de radio numérique disponibles aujourd’hui. Il peut Pendant l’écoute d’un service..offrir un son de qualité numérique sans toutes les interférences gênantes ni les Maintenez enfoncée une des touches numériques (1 à...
  • Page 65 Radio Analogique USB/iPod Source sélectionnable: Recherchez une station • KD-X472DBT: USB/iPod USB ou iPod BT Appuyez répétitivemenent sur SRC pour sélectionner FM ou AM. • KD-X272DBT/KD-X172DB: USB Appuyez sur pour rechercher une station automatiquement. (Pour le KD-X172DB, appuyez sur USB pour (ou) sélectionner directement la source USB.)
  • Page 66 : Sélectionne la langue pour le menu et les informations sur le morceau. [DEMO MODE] : Met en ou hors service la démonstration des affichages. *1 Pour KD-X472DBT/KD-X272DBT: Utilisable uniquement pendant que vous parlez au téléphone. *2 Uniquement pour KD-X472DBT.
  • Page 67 Réglage de la couleur d’éclairage apparaît. (Sélectionnable uniquement quand [ALL ZONE] Pour le KD-X472DBT, vous pouvez régler votre couleur d’éclairage préférée pour est choisi à l’étape 4.) chaque zone. Répétez l’étape 4 et l’étape 5 pour régler la couleur pour les autres zones.
  • Page 68 Bluetooth pour la première fois Lecture/pause Appuyez sur le bouton de volume. Appuyez sur SRC pour mettre l’appareil sous tension. Recherchez et sélectionnez le nom de votre récepteur (“KD-X472DBT”/ Choisissez un groupe ou un Appuyez sur 2 “KD-X272DBT”) sur le périphérique Bluetooth. dossier Réalisez (A) ou (B) en fonction de ce qui apparait sur l’affichage.
  • Page 70 Installazione e collegamenti Procedura di base Sfilare la chiave di accensione e scollegare la presa della batteria del veicolo. Questa sezione è destinata agli installatori. Collegare correttamente i cavi elettrici. Vedere la sezione “Collegamento Per motivi di sicurezza si raccomanda di affidare l’installazione e i collegamenti elettrici a un tecnico dei cavi”...
  • Page 71 Installazione dell’apparecchio (senza manicotto di montaggio) Collegamento dei cavi Rimuovere il supporto di montaggio e la piastrina di finitura dall’unità. Allineare i fori dell’unità (di entrambi i lati) con quelli della staffa di montaggio del veicolo e fissarvela usando comuni viti. Presa antenna DAB (connettore SMB) Fusibile (10 A) Presa d’antenna...
  • Page 72 Prima dell’uso Fondamenti (sul frontalino) *1 Solo per scopo illustrativo. IMPORTANTE Finestra del display*1 KD-X272DBT/ • Prima di usare l’apparecchio, e per usarlo in modo corretto, si KD-X172DB: raccomanda di leggere a fondo questa Guida. È particolarmente Manopola del volume importante leggere e osservare gli avvisi e le note di attenzione nella Presa d’ingresso Guida.
  • Page 73 Ruotare la manopola del volume sino a selezionare [DATE SET] e quindi [DEUTSCH]* premerla. Ruotando la manopola del volume eseguire le varie impostazioni e quindi * Solo per il modello KD-X472DBT. premerla. Impostare la data nella sequenza “Giorno” “Mese” “Anno”. Premere per uscire.
  • Page 74 Radio digitale Impostazioni in memoria È possibile registrare sino a 18 servizi. Informazioni sulla funzione DAB (Digital Audio Broadcasting) Per salvare un servizio Il DAB è uno dei sistemi di diffusione radio digitale oggi disponibili. Esso offre Durante l’ascolto di un servizio... un suono di qualità...
  • Page 75 Radio analogica USB/iPod Sorgenti selezionabili: Ricercare una stazione • KD-X472DBT: USB/iPod USB o iPod BT Premere SRC sino a selezionare FM o AM. • KD-X272DBT/KD-X172DB: USB Premere per ricercare automaticamente le stazioni. (Con il modello KD-X172DB premere USB per selezionare direttamente la sorgente USB) Premere a lungo sino a quando “M”...
  • Page 76 Ruotare la manopola del volume per regolare il livello del subwoofer, quindi [DEUTSCH] : Seleziona la lingua per i menu e le informazioni sulla musica. premerla. [DEMO MODE] : Attiva o disattiva la dimostrazione del display. *1 Per KD-X472DBT/KD-X272DBT: Applicabile solo durante una conversazione telefonica. *2 Solo per il modello KD-X472DBT.
  • Page 77 : appare il motivo a colori selezionato. Impostazione del colore d’illuminazione (selezionabili soltanto quando al passo 4 si seleziona Nel modello KD-X472DBT è possibile impostare il colore d'illuminazione preferito [ALL ZONE] per ciascuna zona. Ripetere i passi 4 e 5 per impostare il colore delle altre zone.
  • Page 78 Bluetooth Riproduzione/pausa Premere la manopola del volume. Premere SRC per accendere l’apparecchio. Cercare e selezionare il nome del proprio ricevitore (“KD-X472DBT”/ Selezionare un gruppo o una Premere 2 “KD-X272DBT”) sul dispositivo Bluetooth. cartella Sulla base del testo che appare in scorrimento sul display dare luogo all’operazione (A) o (B).
  • Page 80 • Microsoft and Windows Media are either registered trademarks or trademarks of Microsoft Corporation in the United States and/or other countries. • Use of the Made for Apple badge means that an accessory has been designed to connect specifically to the Apple product(s) identified in the badge and has been certified by the developer to meet Apple performance standards.

Ce manuel est également adapté pour:

Kd-x272dbtKd-x172db