Agatec A510S Mode D'emploi
Masquer les pouces Voir aussi pour A510S:
Table des Matières

Publicité

Les langues disponibles

Les langues disponibles

Liens rapides

Buy Now at New England
Laser & Transit
Click to Purchase
Automatic Laser

Publicité

Table des Matières
loading

Sommaire des Matières pour Agatec A510S

  • Page 1 Buy Now at New England Laser & Transit Click to Purchase Automatic Laser...
  • Page 2: Table Des Matières

    Quick start Table of contents Functions using the laser keypad 1. General information 1.1. Description On/Off Press 1.2. Safety Rotation speed Increase with ; decrease with 1.3. Specifications 1.4. Laser overview Stop rotation Press and hold until it stops 1.5. Keypad overview Chalk line Flip collar on head up for chalk line, down for point...
  • Page 3: General Information

    IS EMITTED FROM THIS APERTURE 1. General information 1.1 Description The A510S is an automatic visible laser that can be used for level- ing, vertical alignment, plumb, and squaring. Applications include installing suspended ceilings, partitions, and a variety of outdoor alignment work.
  • Page 5: Laser Overview

    Use the support plate for stability when in vertical mode. 1.5 Keypad overview The A510S has a wide self-leveling range; however, if the laser is set up out of the leveling range, laser beam will continue to blink and rotation will not start.
  • Page 6: Automatic/Manual

    300 rpm is the default setting. The laser beam is more visible at slower rotation speeds. The A510S is in automatic self-leveling mode when turned on. To increase rotation speed, press the + key (16) on the laser. Press Once the instrument has self-leveled, the laser head will start rotating.
  • Page 7: Motorized Mount

    2.7 Motorized mount Functions not available H.I. Alert, setting slope in manual mode, or moving the scan or plumb point are not available in wall mount mode. Exit wall mount mode to use these functions. Detaching the mount Screw both knobs (1) all the way out to detach the mount from the laser. Troubleshooting If the laser does not move on the mount, check that the knobs (1) are tight enough to make the power contact for the motor.
  • Page 8: Squaring

    6. Press the MAN key to return to automatic mode. The A510S can be used to set a manual slope on both X and Y axes. IMPORTANT: In manual mode, the head will rotate Two modes are available even if the laser is not leveled.
  • Page 9: Inclined Plane

    3. Power THIS CHAPTER IS VERY IMPORTANT. Here are a few simple instructions to check your A510S for calibration. Remember that When battery power is low, the laser head will stop rotating and the laser is a precision instrument and that it is important that the low battery LED next to the On/Off key will stay on (20).
  • Page 10: Calibration Overview

    Check and calibrate in this order: the beam a very small amount (1/32" at 150' or 1mm at 100 meters). After pressing the key, the LED will blink rapidly as the Check both sides of X axis. laser reacts. Wait until the LED returns to a slow blink to proceed. •...
  • Page 11 7. After completing the X calibration, press the + or >> key (16) 6. Use the arrow keys to move the beam up or down to the to change the axis and to calibrate the Y axis. When the Y LED halfway mark.
  • Page 12: Cone Error Checking

    Z axis. The beam will not be rotating. When it’s in calibration mode, rotate the beam by pressing the The A510S is a precision instrument which must be handled scan key, and make these adjustments: with care.
  • Page 13: Accessories

    On-grade Level vial manual grade alignment notch TROUBLESHOOTING • Before using a detector, it is very important to set the A510S screen (front) in point mode. The receiver cannot detect the beam in chalk line mode. • If you cannot pick up the beam with the detector, check how you are lined up with the laser.
  • Page 14: Remote Control

    The remote can be used to stop or start rotation, increase or • LCD Display decrease rotation speed, and move the beam or square shot. It also controls scanning and electronic calibration. Low battery ATTERY STATUS • Specifications High OUND Blinking: Normal volume Range* 500 ft.
  • Page 15: Tripods

    You cannot move the scan, plumb point, or slope in wall mount for a period of ninety (90) days from shipment, or through the mode. Exit this mode to use keys 4 & 5 for these functions. end of the original warranty, whichever is longer. All Products The remote control can also be used for calibrating.
  • Page 16: Laser Automatique

    ing from the use of the Product in conjunction with any sort of ancillary or peripheral equipment and the manufacturer deter- mines that there is no fault with the Product itself. LIMITATION OF LIABILITY The manufacturer also excludes any liability, whether based on contract or tort (including negligence), for incidental, conse- quential, indirect, special, or punitive damages of any kind, or costs of procurement of substitute products by customer, or for...
  • Page 17 4.1 Contrôle et calibrage horizontal manuel ou descendre le plan 4.2 Contrôle et calibrage vertical Mettre le A510S en mode support mural 4.3 Contrôle d’erreur conique sur l’A510S rester appuyer simultanément sur les touches pendant plusieurs secondes 5.
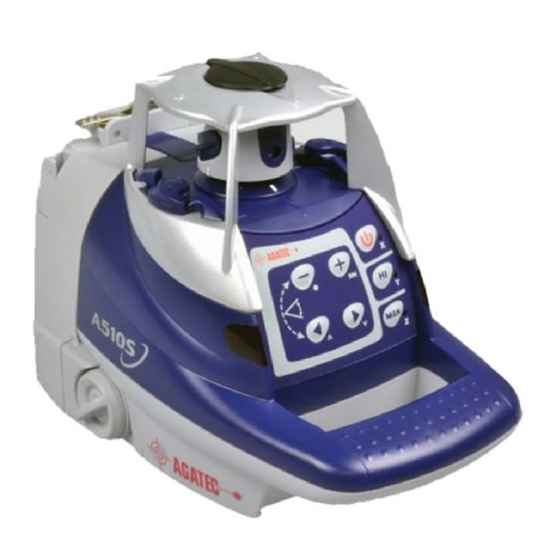
  • Page 18: Généralités

    1.2 Sécurité 2. Protection de tête en aluminium résistant Le A510S est un laser de Classe 3R et et répond aux normes inter- 3. Sortie du rayon laser pour équerrage ou alignement vertical nationales de sécurité sur les lasers EN60825-1. Bien que la puis- 4.
  • Page 19: Comment Utiliser Le A510S

    En activant le mode manuel (19), la rotation de la tête sera con- stante et ne sera pas stoppée si le niveau change ou si le 1. Le A510S peut être posé directement sur le sol ou peut être niveau n’est pas bon. Le mode manuel est généralement utilisé...
  • Page 20: Vitesse De Rotation

    Tilt (18). Le signal lumineux situé à droite de la touche Tilt (21) clignotera rapidement. Lorsque le A510S aura terminé son calage fin (au bout de 30 2.6 Scanning secondes), le signal lumineux Tilt (21) clignotera plus lente- ment.
  • Page 21: Equerrage

    Utiliser le support mural sur le sol soit en correspondance avec votre point de référence. 1. Mettre le A510S fixé sur son support en mode vertical sur le sol. • Aligner le point laser fixe (3) sur le second point de référence 2.
  • Page 22: Pente Manuelle

    Il est très important de vérifier que votre laser n’a pas 3.1 Installer des piles alcalines bougé et que vos mesures sont toujours précises. 1. Pour utiliser des piles alcalines dans votre A510S, utiliser un tournevis ou une pièce afin de dévisser le boitier pile ou batterie 2.9 Pente Manuelle situé...
  • Page 23: Contrôle Et Calibration De Votre A510S

    Passez de l’axe X à l’axe Y monter ou descendre le rayon informer que votre A510S est prêt à être calibrer sur l’axe X. If you laser afin d’ajuster le calibrage need a rotating beam for the detector, press the scan key.
  • Page 24: Calibrage De L'axe Z

    éloigné (b’), en utilisant un détecteur si nécessaire. 1. Placer le A510S en mode vertical sur une surface plate à 6. Installer le A510S à 1 mètre du mur (b’) Lorsque le A510S est environ 6 mètres d’un fil à plomb courant le long d’un mur.
  • Page 25: Accessoires

    2. Bien que votre A510S soit résistant à la pluie et à la poussière, vous devez le conserver , ainsi que ses accessoires, secs et propres. Nous vous recommandons de le nettoyer ainsi que ses accessoires après chaque utilisation.
  • Page 26 • Partie haute du clavier • Ecran LCD Mode Mode détection télécommande Mode scanning Batterie faible DE LA BATTERIE Choix du Haut Déplace le point Dirige le scan vers niveau sonore la gauche vers la gauche Clignote : volume normal (mode vertical) Intermediaire haut...
  • Page 27: Vue De La Télécommande

    6.3 Trépieds • Calibrer le laser • Réaliser des alignements verticaux gauche ou droite Le A510S peut être installé sur n’importe quel trépied possédant • Développer tout ce qui se rapporte au support motorisé. un insert standard 5/8’’. Pour changer la pile de la télécommande, ouvrir le logement pile 6.4 Autres accessoires...
  • Page 28 7. Garantie fabricant internationale produits/pièces réparés ou de remplacement. Le fabricant Replace «Le fabricant » with the French word for « the manufacturer » ??? exclut toute responsabilité pour tout dommage survenu au cours du transport. Le fabricant décide du lieu d’exécution des DECLARATION DE GARANTIE POUR MATERIEL travaux sous garantie.
  • Page 29 direct, indirect, spécial, consécutif, punitif, toute perte de revenus ou de profits, perte d’informations ou de données ou autres pertes financières résultant de la vente, de l’installation, de la maintenance, de l’utilisation, de la performance, d’une panne, d’une interruption de fonctionnement du produit ou liées à...
  • Page 30 Guia rápida Tabla de contenidos Funciones usando el teclado 1. Información general On/Off presione 1.1 Descripción 1.2 Segruidad Rotación rápida incrementa con la tecla 1.3 Especificaciones disminuye con la tecla 1.4 Laser en general 1.5 Teclas en general Parada rotación mantener presionada la tecla hasta que pare la rotación Marcar la linea...
  • Page 31: Información General

    1.1 Descripción Alcance 300 metros de diámetro Precisión de nivelado ± 10 mm a 100 metros El A510S es un láser visible automático que puede ser usado Autonivelación Horizontal y vertical para nivelación, alineación vertical, plomadas y escuadras. Rango autonivelación ±...
  • Page 32: Composicion

    1.5 Conjunto de teclado El A510S tiene un rango de autonivelación, no obstante si el láser está fuera de ese rango, el rayo láser continuará parpadeando y la rotación no comenzará. 13. Movimiento a la izquierda: scan o alineación vertical/ Mueve la calibración del rayo hacia arriba...
  • Page 33: Scan

    Apagar el láser y volver a empezar de nuevo. Chequee si la ele- Si el láser esta en línea láser, vuelva a la posición de punto antes vación del rayo ha sido cambiada de la posición original. de empezar con el modo scan. El láser no permanece en H.I.
  • Page 34: Escuadras

    Como mover el soporte manualmente, uso (6) 4. Cierre la abrazadera de nuevo al soporte de techos. El soporte Precaución: tenga cuidado cuando usted este en el modo de no excederá 3 mm de grosor. soporte no presione las teclas < o > a menos que usted intente 5.
  • Page 35: Modo Manual

    El láser puede ser empleado en modo inclinación desde varios ángulos sobre el soporte. El A510S puede ser usado para inclinaciones manuales conjunta- mente en los ejes X e Y. 1. Ponga el láser en modo vertical, preferible sobre un trípode.
  • Page 36: Recargas Tardías

    ESTE CAPÍTULO ES MUY IMPORTANTE. Aquí hay unas sencil- movimiento. las instrucciones para comprobrar su A510S para calibración. Recuerde que el láser es un instrumento de precision y es muy Si el rayo es visible, calibrar usando el punto parado. Si hay importante que esté...
  • Page 37: Comprobando Los Ejes

    Taclas utilizadas cuando el láser está en modo calibración 1. Apague el láser, presione On/Off y suelte. 2. Presione y mantenga la tecla Auto/Man. Simultáneamente presione sobre la tecla ON. Utilise las teclas con 3. Después de que las tres luces (LEDS) parpadeen en sucesión, Cambia del eje X al eje Y las flechas para soltar la tecla Auto/Man.
  • Page 38: Chequeo Final X O Y

    Proceda a “chequeo final X o Y”. Si las marcas no están lo 4.7 Chequeando el eje Z suficientemente cerca, el eje Y necesitará ser calibrado. 1. Ponga en láser en posición vertical sobre una base sólida y estable a una distancia de 6 metros desde una línea de 4.5 Calibrando el eje Y plomada (plomada de metal colgada sobre una cuerda, sobre 8 metros de alturas) usted comparará...
  • Page 39: Cuidado Y Manejo

    4. Mueva el láser 180 grados. Marque la localización en el centro Antes de usar el detector es muy importante que el A510S este del rayo sobre la pared (b). en modo de punto.
  • Page 40 • Pantalla LCD • Botones superiores SATDO DE LA Batería baja BATERÍA Modo remoto Modo escaneado Modo detector (botones rojos) Alto ONIDO Elección del nivel Mueve la Dirige el escaneo Parpadeo: Volumen normal Nivel de sonido captura hacia la hacia la izquierda excedido izquierda (modo vertical)
  • Page 41: Mando A Distancia

    El mando a distancia permite detener, comenzar o variar el senti- do de rotación del haz de láser, así como mover el haz vertical a El láser A510S puede ser montado en una cabeza con rosca izquierda y derecha. También sirve para controlar la exploración 5/8”.
  • Page 42: Otros Accesorios

    UTILIZACIÓN DE LA GARANTÍA 6.4 Otros accesorios El cliente debería solicitar, dentro del plazo de garantía, una autorización de prestaciones de garantía o bien al comerciante 1. Gafas para ampliación de luminosidad en caso de que las autorizado por el fabricante o a un centro de servicio del condiciones de luz sean altas.
  • Page 43: Límites De Responsabilidad

    físicos o malfunciones del producto que resulten del uso del pro- ducto junto con cualquier tipo de aparatos adicionales o per- iféricos si el fabricante llega a la conclusión que el mismo pro- ducto no muestra una malfunción. LÍMITES DE RESPONSABILIDAD Dentro del límite impuesto por la ley, el fabricante excluye cualquier responsabilidad –...

Table des Matières