Lifetime GEODOME Instructions De Montage
GEODOME
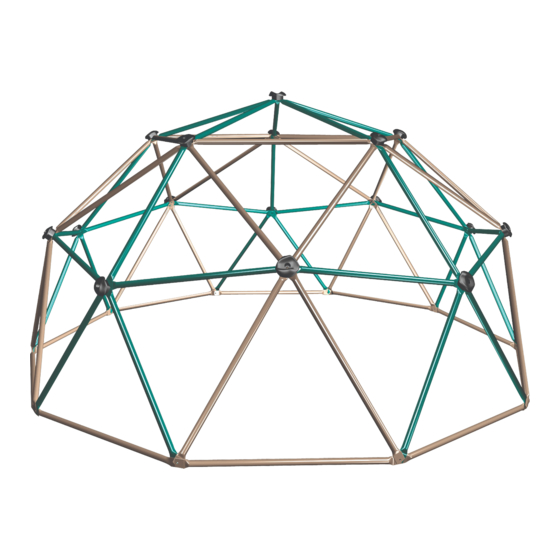
MODEL #60091
MODEL 90136
BEFORE ASSEMBLY:
• Prepare a level surface with the proper Safety Zone
(see page 12).
• 2 people recommended for setup
Save this instruction in the event that the manufacturer has
to be contacted for replacement parts.
For Customer Service in Mainland Europe and the United Kingdom»
E-mail : cs@lifetimeproducts.eu
TOOLS REQUIRED
3/16" (5 mm)
(1, incluido)
QUESTIONS?
CONTACT LIFETIME CUSTOMER SERVICE:
Call: 1-800-225-3865
7:00 am–5:00 pm (Monday–Friday) MST
and 9:00 am–1:00 pm Saturday MST
1/2" (13 mm)
(x1)
Live Chat: www.lifetime.com
(click on "Ask An Expert" tab)
Video Instructions:
www.youtube.com/lifetimeproducts
ASSEMBLY INSTRUCTIONS
Pour le français, voir la page 2. Para el español, ver la página 3.
Icon Legend................................4
Notices....................................5
Safety Information.....................6
Safe Play Area............................12
Geodome Assembly...................13
Maintenance Instructions..........24
Registration...........................27
(x2)
Warning Sticker........................28
Warranty..............................29
MODEL# AND PRODUCT ID
Model Number: 90136
Product ID:
TABLE OF CONTENTS
(you will need both when contacting us)
Table des Matières

Manuels Connexes pour Lifetime GEODOME


Sommaire des Matières pour Lifetime GEODOME
- Page 1 Geodome Assembly....13 Maintenance Instructions..24 Registration......27 (x2) Warning Sticker......28 Warranty......29 QUESTIONS? CONTACT LIFETIME CUSTOMER SERVICE: Live Chat: www.lifetime.com MODEL# AND PRODUCT ID Call: 1-800-225-3865 (you will need both when contacting us) (click on “Ask An Expert” tab) Model Number: 90136 7:00 am–5:00 pm (Monday–Friday) MST...
-
Page 2: Instructions D'assemblage
(x2) Autocollant d’avertissement..28 Garantie......30 ® QUESTIONS ? CONTACTEZ AUX SERVICES À LA CLIENTÈLE LIFETIME t’Chat en direct: www.lifetime.com N° DE MODÈLE ET RÉFÉRENCE DU PRODUIT Composer le 1-800-225-3865 (vous aurez besoin des deux lorsque vous nous contactez) (cliquer sur la languette « Ask An Expert ») N°... -
Page 3: Instrucciones De Ensamble
Autoadhesivo de advertencia..28 (x2) Garantía......31 ® ¿PREGUNTAS? PÓNGASE EN CONTACTO CON LOS SERVICIOS DE CLIENTES LIFETIME Chat en vivo: www.lifetime.com MODEL E ID DEL PRODUCTO Llamar : 1-800-225-3865 (necesitará los dos al contactarnos) (cliquee en la lengüeta «Ask An Expert») Número de modelo: 90136... - Page 4 ICON LEGEND / LÉGENDE DES ICÔNES / LEYENDA DE ÍCONOS • Indicates special heed should be taken when reading. • Ceci indique que vous devez faire attention à ce que vous lisez. • Indica que uno debe prestar atención al leer. •...
- Page 5 WARNINGS & NOTICES / AVERTISSEMENTS ET AVIS / ADVERTENCIAS Y AVISOS SAFETY INSTRUCTIONS FAILURE TO FOLLOW THESE WARNINGS MAY RESULT IN SERIOUS INJURY OR PROPERTY DAMAGE AND WILL VOID WARRANTY. Owner must ensure that all players know and follow these rules for safe operation of the system. To ensure safety, do not attempt to assemble this product without following the instructions carefully.
- Page 6 **IMPORTANT SAFETY INFORMATION** PLEASE READ BEFORE BEGINNING ASSEMBLY: INSTALLATION & GROUND PREPARATION INSTRUCTIONS • Place the equipment on a level, well-drained ground, not less than 6.6 ft (2.0 m) from any struc- ture or obstruction such as a fence, garage, house, overhanging branches, laundry lines, or electrical wires.
- Page 7 CONSUMER INFORMATION SHEET FOR PLAYGROUND SURFACING MATERIALS* Select Protective Surfacing—One of the most important things you can Do not install loose fill surfacing over hard surfaces such as concrete or asphalt. to reduce the likelihood of serious head injuries is to install shock-absorbing Poured-In-Place surfaces or Pre-manufactured protective surfacing under and around your play equipment.
-
Page 8: Veuillez Lire Avant De Commencer L'assemblage
**INFORMATIONS DE SÉCURITÉ IMPORTANTES** VEUILLEZ LIRE AVANT DE COMMENCER L’ASSEMBLAGE : INSTRUCTIONS D’INSTALLATION ET DE PRÉPARATION DE TERRAIN • Placez l’équipement sur un terrain de niveau et bien drainé, à plus de 2 m (6,6 pi) de toute structure ou ob- struction telle qu’une clôture, un garage, une maison, des branches basses, des cordes à... - Page 9 FEUILLE D’INFORMATION AU CLIENT POUR LES MATÉRIAUX DE SURFAÇAGE DE TERRAIN DE JEU* Sélectionner une surface protectrice—L’une des choses les plus importantes Vérifi er and maintenir la profondeur du matériel protecteur de surface en vrac. que vous puissiez faire pour réduire la probabilité de blessures graves à la tête Pour maintenir la quantité...
- Page 10 **INFORMACIÓN DE SEGURIDAD IMPORTANTE** LEA POR FAVOR ANTES DE INICIAR EL ENSAMBLE: INSTRUCCIONES DE INSTALACIÓN Y DE PREPARACIÓN DEL PISO • Coloque el equipo sobre un piso nivelado, bien drenado, a no menos de 2.0 m (6.6 pies) de cualquier estruc- tura u obstrucción como una cerca, cochera o una casa, ramas que cuelgan, lazos para tender ropa o cables eléctricos.
- Page 11 HOJA DE INFORMACIÓN DEL CONSUMIDOR PARA LOS MATERIALES DE REVESTIMIENTO SUPERFICIAL DEL EQUIPO DE PATIO DE RECREO* Seleccionar la superfi cie protectora—Una de las cosas más fácilmente cuando debe rellenar y/o redistribuir la superfi cie. importantes que uno puede hacer para disminuir la probabilidad de No instalar relleno suelto encima de los pavimentos duros tales como lesiones graves en la cabeza es de instalar una superfi...
- Page 12 SAFE PLAY AREA / ZONA DE SEGURIDAD / ZONE DE SÉCURITÉ SAFETY ZONE — Place the equipment no less than 6.6 ft. (2 m) from any structure or obstruction such as a fence, garage, house, overhanging branches, laundry lines, or electrical wires. The impact surfacing needs to cover the entire recommended play area.
- Page 13 GEODOME ASSEMBLY / ASSEMBLAGE DE LA GEODOME / ENSAMBLE DE LA GEODOME HARDWARE REQUIRED / QUINCAILLERIES REQUIS / HERRAJE REQUERIDO Hardware Blister Pack / Plaquette des accessoires / Blíster de herraje ASE (x27) ARL (x88) ASI (x17) EEO (x1) ARN (x11) ATL (x17) PARTS REQUIRED / PIÈCES REQUISES / PIEZAS REQUERIDAS...
- Page 14 SECTION 1 (CONTINUED) / SECTION 1 (SUITE) / SECCIÓN 1 (CONTINUACIÓN) TOOLS AND HARDWARE REQUIRED / OUTILS ET QUINCAILLERIES REQUIS / INSTRUMENTAL Y HERRAJE REQUERIDOS 1/2 in/po (≈13 mm) 3/16 in/po (≈5 mm) ASI (x5) ATL (x5) ARL (x10) • Slide a Washer (ARL) over a Bolt (ASI), then slide the Bolt through the two Green Tubes (CPF) and four Light Brown Tubes (CPD) in the order indicated by the numbers.
- Page 15 SECTION 1 (CONTINUED) / SECTION 1 (SUITE) / SECCIÓN 1 (CONTINUACIÓN) TOOLS AND HARDWARE REQUIRED / OUTILS ET QUINCAILLERIES REQUIS / INSTRUMENTAL Y HERRAJE REQUERIDOS 1/2 in/po (≈13 mm) 3/16 in/po (≈5 mm) ARN (x10) ASE (x10) ARL (x20) • Attach a Light Brown Tube (CPD) to the bottom of the assembly completed in the previous step (Joint A). Slide a Bolt (ARN) through a Washer (ARL) and the two Light Brown Tubes.
- Page 16 SECTION 1 (CONTINUED) / SECTION 1 (SUITE) / SECCIÓN 1 (CONTINUACIÓN) TOOLS AND HARDWARE REQUIRED / OUTILS ET QUINCAILLERIES REQUIS / INSTRUMENTAL Y HERRAJE REQUERIDOS 1/2 in/po (≈13 mm) 3/16 in/po (≈5 mm) ASI (x1) ATL (x1) ARL (x2) • Bring the assemblies completed in steps 1.1 and 1.2 together as shown. Place a Green Tube (CPC) over the Light Brown Tubes (CPD) and secure the Green and Light Brown Tubes together at the top joint as shown below by placing a Bolt (ASI) through Washer (ARL) then through the Brown Tubes and Green Tube.
- Page 17 SECTION 1 (CONTINUED) / SECTION 1 (SUITE) / SECCIÓN 1 (CONTINUACIÓN) TOOLS AND HARDWARE REQUIRED / OUTILS ET QUINCAILLERIES REQUIS / INSTRUMENTAL Y HERRAJE REQUERIDOS 1/2 in/po (≈13 mm) 3/16 in/po (≈5 mm) ASI (x1) ATL (x1) ARL (x2) • Add two additional Green Tubes (CPC) in the order indicated. Place the Bolt (ASI) through the Washer (ARL) then through the fi...
- Page 18 SECTION 1 (CONTINUED) / SECTION 1 (SUITE) / SECCIÓN 1 (CONTINUACIÓN) TOOLS AND HARDWARE REQUIRED / OUTILS ET QUINCAILLERIES REQUIS / INSTRUMENTAL Y HERRAJE REQUERIDOS 1/2 in/po (≈13 mm) 3/16 in/po (≈5 mm) • Remove the Nylock Nut (ASE) from the bottom two Light Brown Tubes (CPD). Place a new Light Brown Tube at the bottom of the green pentagon assemblies.
- Page 19 SECTION 1 (CONTINUED) / SECTION 1 (SUITE) / SECCIÓN 1 (CONTINUACIÓN) TOOLS AND HARDWARE REQUIRED / OUTILS ET QUINCAILLERIES REQUIS / INSTRUMENTAL Y HERRAJE REQUERIDOS 1/2 in/po (≈13 mm) 3/16 in/po (≈5 mm) ASI (x8) ATL (x8) ARL (x16) • Add one of the assemblies completed in step 1.2, to the assembly completed in step 1.5. Use the instructions from steps 1.3, 1.4, and 1.5 to attach the assemblies.
- Page 20 SECTION 1 (CONTINUED) / SECTION 1 (SUITE) / SECCIÓN 1 (CONTINUACIÓN) TOOLS AND HARDWARE REQUIRED / OUTILS ET QUINCAILLERIES REQUIS / INSTRUMENTAL Y HERRAJE REQUERIDOS 1/2 in/po (≈13 mm) 3/16 in/po (≈5 mm) • Remove the hardware at Joint F. Place the removed Bolt and Washer through the added Light Brown Tubes (CPE), and Green Tube (CPF) in the order indicated.
- Page 21 SECTION 1 (CONTINUED) / SECTION 1 (SUITE) / SECCIÓN 1 (CONTINUACIÓN) TOOLS AND HARDWARE REQUIRED / OUTILS ET QUINCAILLERIES REQUIS / INSTRUMENTAL Y HERRAJE REQUERIDOS 1/2 in/po (≈13 mm) 3/16 in/po (≈5 mm) • Remove the Nut (ATL), the Washers (ARL) and the Bolt (ASI) at Joint D and add an additional Light Brown Tube (CPE). Replace the Washer, Nut, and Bolt, however do not completely tighten to Joint D.
- Page 22 Geodome before the handholds are in place. Vérifiez et serrez tous les boulons avant de permettre aux enfants de jouer. Ne laissez pas les enfants jouer sur le Geodome avant que les poignées ne soient installées. Revise y apriete todos los tornillos antes de permitir jugar a los niños.
- Page 23 SECTION 1 (CONTINUED) / SECTION 1 (SUITE) / SECCIÓN 1 (CONTINUACIÓN) TOOLS AND HARDWARE REQUIRED / OUTILS ET QUINCAILLERIES REQUIS / INSTRUMENTAL Y HERRAJE REQUERIDOS 1/2 in/po (≈13 mm) 3/16 in/po (≈5 mm) ARL (x32) ASE (x16) 1.10 • Attach Handholds (CPB) to each of the joints not touching the ground. Attach the handholds by sliding a Washer (ARL) over the Bolt (ASI) and placing the Handhold over the Bolt.
- Page 24 MAINTENANCE INSTRUCTIONS If routine checks and maintenance procedures are not done, the equipment could overturn and/or become a hazard. At the beginning of each play season: • Tighten all hardware. • Lubricate all metallic moving parts. • Check all protective coverings on bolts, pipes, edges and corners. Replace if they are loose, cracked or missing. •...
- Page 25 INSTRUCTIONS DE l’ENTRETIEN Si des vérifi cations routinières et des procédures de maintenance ne sont pas assurés, l’équipement pourrait se renverser et/ou devenir dangereux. À la commencement de chaque saison de jouer : • Serrez tous les accessoires. • Lubrifi ez tous les pièces en métal mobiles. •...
- Page 26 INSTRUCCIONES DE MANTENIMIENTO Si no se realizan revisiones y mantenimiento de rutina, el equipo podría voltearse y/o volverse peligroso. Al comienzo de cada temporada de juegos: • Apriete todos el herraje. • Lubrique todas las piezas móviles metálicas. • Compruebe todas las cubiertas protectoras en los pernos, tubos, bordes y esquinas. Sustituya los elementos que estén fl...
- Page 27 ® À Lifetime , l’entretien de votre confi dentialité est notre politique de longue date. Et vous pouvez être sûr que Lifetime ne vendra pas ni fournira pas vos données personnelles à d’autres tiers, ou les permettra d’utiliser vos données personnelles à leur propres fi ns.
- Page 28 • Enlevez les casques de vélo ou d’autres sports equipment. avant de jouer sur l’équipement de l’aire de jeu. www.lifetime.com Lifetime Products, Inc. PO Box 160010 • Freeport Center, Bldg. D-11 • Clearfield, UT 84016 • USA • 1-800-225-3865 5/19/2016 1175452 THIS PRODUCT IS INTENDED FOR USE BY CHILDREN FROM AGES 3 TO 10.
- Page 29 2. This warranty is nontransferable and is expressly limited to the repair or replacement of defective playground equipment. If the equipment is defective within the terms of this warranty, Lifetime Products, Inc. will repair or replace defective parts at no cost to the purchaser.
- Page 30 DISPONIBLES OR SONT OBSOLÈTES 1. Les systèmes de Terrain de Jeu Lifetime sont garantis pour l’acheteur original d’être libres de tout défaut de matériel ou main d’oeuvre pour une période d’un an à partir de la date d’achat originale sur la facture. Le mot « défaut » est défi ni comme une imperfection pouvant affecter l’utilisation du produit.
- Page 31 NO ESTÁN DISPONIBLES O SON OBSOLETAS. 1. Se garantiza al comprador original que los sistemas Lifetime Playground están libres de defectos en el material o la mano de obra durante un período de un año a partir de la fecha de la compra al menudeo original. La palabra «defectos» se defi...
- Page 32 ® MEJORE SU COMPRA DE LIFETIME AGREGANDO ACCESORIOS U OTROS MARAVILLOSOS PRODUCTOS Para comprar accesorios u otros productos visítenos en: de Lifetime®, visítenos en: www.lifetime.com O llame al: 1-800-424-3865 De lunes hasta viernes 7:00 hr–17:00 hr Horario Éstandar de la Montaña (MST) y sábados 9:00 hr–13:00 hr (MST)