Homestyles 73005123 Manuel Du Propriétaire
Table des Matières
Liens rapides
PLEASE READ OWNER'S MANUAL
COMPLETELY BEFORE ASSEMBLING
YOUR SHED.
ALL STATED SIZES ARE NOMINAL DIMENSIONS.
PRIÈRE DE LIRE LE MANUEL DU
PROPRIÉTAIRE EN ENTIER AVANT
D'ASSEMBLER LA REMISE.
TOUTES LES DIMENSIONS INDIQUÉES SONT NOMINALES.
Models / Modèles / Modelos
8x6
8x8
8x10
Owner's Manual
Manuel du propriétaire
Manual del Propietario
Version / Edición
1.2
POR FAVOR, LEA COMPLETAMENTE
EL MANUAL DEL PROPIETARIO ANTES
DE ENSAMBLAR LA EDIFICACIÓN.
TODAS LAS DIMENSIONES INDICADAS SON NOMINALES.
73005123
73005124
73005101
73005125
73005126
73005102
73005127
73005128
73005103
Table des Matières

Manuels Connexes pour Homestyles 73005123

Sommaire des Matières pour Homestyles 73005123
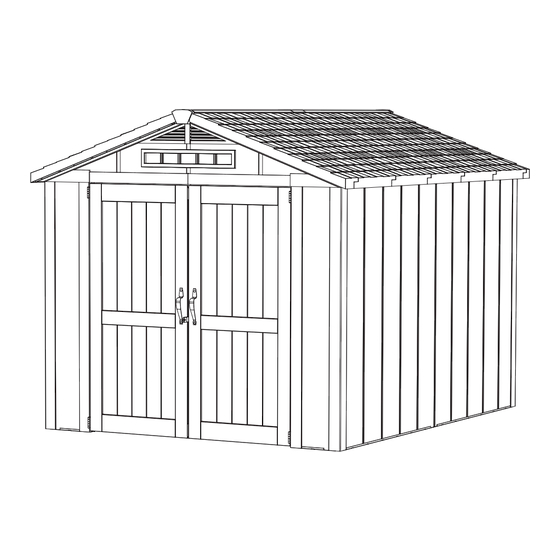
- Page 1 Models / Modèles / Modelos 73005123 73005124 73005101 73005125 73005126 73005102 8x10 73005127 73005128 73005103 Owner’s Manual Manuel du propriétaire Manual del Propietario Version / Edición PLEASE READ OWNER’S MANUAL PRIÈRE DE LIRE LE MANUEL DU POR FAVOR, LEA COMPLETAMENTE COMPLETELY BEFORE ASSEMBLING PROPRIÉTAIRE EN ENTIER AVANT...
-
Page 2: Parts List
This building must be anchored to the foundation to pre- vent wind damage. See pages 11 to 16 for how to anchor. ) 2 . 5 1 ( THE HOMESTYLES SHED IS CONSTRUCTED OF HEAVY DUTY Shed Tie Strap 53 7/16 (110.4) RTS1 Screws for anchoring to concrete are not included. -
Page 3: Liste Des Pièces
AVERTISSEMENT CONCERNANT LES COMPOSANTES DE LA REMISE HOMESTYLES SONT FAITES DE ne sont pas fournies. 16 pour apprendre comment rattacher. Les vis d’ancrage 16 pour apprendre comment rattacher. Les vis d’ancrage... -
Page 4: Lista De Piezas
Los materiales para el anclaje al ce- este procedimiento. Los materiales para el anclaje al ce- ADVERTENCIA CONTRA EL COBERTIZO HOMESTYLES ESTÁ HECHO DE COMPONENTES DE METAL Y z u r c o h c e t e t r o p... - Page 5 D . 9 D - 7 7 R É I F I È I À È I È I F S E L I ' È I M Î É PIÈCES DE RECHANGE, VEUILLEZ APPELER LE 1-877-362-3409. A Í Ó I Á...
- Page 6 D . 9 D - 7 7 PLEASE TAKE A COMPLETE INVENTORY OF ALL PARTS USING THE PARTS LIST AND PART IDENTIFICATION GUIDE PROVIDED ON PAGES 1, 5, 7 AND 9. DO NOT ATTEMPT TO ASSEMBLE BUILDING IF PARTS ARE MISSING OR DAMAGED. DO NOT RETURN PRODUCT TO STORE. IF YOU NEED REPLACEMENT PARTS PLEASE CALL 1-877-362-3409. R É...
- Page 7 D . 9 D - 7 7 R É I F I È I À È I È I F S E L I ' È I M Î É PIÈCES DE RECHANGE, VEUILLEZ APPELER LE 1-877-362-3409. A Í Ó I Á...
-
Page 8: Part Identification
Base Track Floor Back/Side Wall Panel (AL1-AL4) (FT1) (WP1/WP2) Part Identification Left Gable Right Gable Window Fram Base Track Floor Back/Side Wall Panel Front Wall Panel Corner Post Door Jamb (GHL) (GHR) (WF1) (AL1-AL4) (FT1) (WP1/WP2) (WP3) (CN1) (VDJV) Left Gable Right Gable Window Frame Window Gable Glass... -
Page 9: Outils Requis
Rail de base Panneau de plancher Panneau mural arrière/latéral Canal de base Tarima Panel de pared posterior/lateral Identification des pièces / Identificación de las piezas (AL1-AL4) (FT1) (WP1/WP2) des pièces / Identificación de las piezas Pignon gauche Pignon droit Cadre de fenêtre Hastial izquierdo Hastial derecho Marco de ventana... - Page 10 Part Identification / Identification des pièces / Identificación de las piezas • #10 x 1/2" Pan Head • #10 x 1" Pan Head • #10 x 1-1/2" Pan Head • Vis à tête cylindrique • Vis à tête cylindrique • Vis à tête cylindrique no 10 x 1/2 po no 10 x 1 po no 10 x 1-1/2 po...
-
Page 11: Matériaux Nécessaires
IMPORTANT NOTE ON CONDENSATION! REMARQUE IMPORTANTE SUR LA CONDENSATION ¡NOTA IMPORTANTE SOBRE LA CONDENSACIÓN! All buildings are subject to condensation. Some of the Tous les immeubles peuvent subir de la condensation causée par En todo edificio ocurre el fenómeno de la condensación. Algunas causes of condensation are poor ground conditions, im- un mauvais état du sol, une base ou une construction in- de sus causas son: condiciones deficientes del suelo, cimientos y... - Page 12 8x10 Wood Platform Option Option avec plate-forme en bois pour 8x10 Opción para la plataforma de madera por 8x10 To provide the best support for your building and to ensure that the Afin de fournir le meilleur support pour la remise et pour s’assurer que Para proveer el mejor apoyo a la edifica ción y para asegurarse que las les coins soient perpendiculaires, la plateforme doit être installée légère- esquinas estén en ángulo recto, la plataforma debe estar ligeramente in-...
- Page 13 IMPORTANT NOTE ON CONDENSATION! REMARQUE IMPORTANTE SUR LA CONDENSATION ¡NOTA IMPORTANTE SOBRE LA CONDENSACIÓN! All buildings are subject to condensation. Some of the Tous les immeubles peuvent subir de la condensation causée par En todo edificio ocurre el fenómeno de la condensación. Algunas causes of condensation are poor ground conditions, im- un mauvais état du sol, une base ou une construction in- de sus causas son: condiciones deficientes del suelo, cimientos y...
- Page 14 8x8 Wood Platform Option Option avec plate-forme en bois pour 8x8 Opción para la plataforma de madera por 8x8 To provide the best support for your building and to ensure that the Afin de fournir le meilleur support pour la remise et pour s’assurer que Para proveer el mejor apoyo a la edifica ción y para asegurarse que las les coins soient perpendiculaires, la plateforme doit être installée légère- esquinas estén en ángulo recto, la plataforma debe estar ligeramente in-...
- Page 15 IMPORTANT NOTE ON CONDENSATION! REMARQUE IMPORTANTE SUR LA CONDENSATION ¡NOTA IMPORTANTE SOBRE LA CONDENSACIÓN! All buildings are subject to condensation. Some of the Tous les immeubles peuvent subir de la condensation causée par En todo edificio ocurre el fenómeno de la condensación. Algunas causes of condensation are poor ground conditions, im- un mauvais état du sol, une base ou une construction in- de sus causas son: condiciones deficientes del suelo, cimientos y...
- Page 16 8x6 Wood Platform Option Option avec plate-forme en bois pour 8x6 Opción para la plataforma de madera por 8x6 To provide the best support for your building and to ensure that the Afin de fournir le meilleur support pour la remise et pour s’assurer que Para proveer el mejor apoyo a la edifica ción y para asegurarse que las les coins soient perpendiculaires, la plateforme doit être installée légère- esquinas estén en ángulo recto, la plataforma debe estar ligeramente in-...
- Page 17 Identify your base track configuration using the diagrams below. Install the base track sections on your foundation using #10 x 1" pan head screws (AS3). Please go to your local hardware store for appropriate screws for a concrete slab. Please note: The diagonal measurement included in the diagram may vary slightly from the actual measurement. ⁄...
- Page 18 For models with floor panels, layout the Floor Panels (FT1) as shown and secure with #10 x 1" pan head screws (AS3). The floor panels are designed to overlap but should be spaced appoximately 1/16" to 1/8" apart from each other and the base track for expansion and contraction.
- Page 19 Continue adding Back and Side Wall Panels (WP1/WP2) and Corner Post (CN1). Snap panels together and push down into the base track. Image shown is for 8x10. Ensure all parts are fully seated. Continuez l’installation des panneaux muraux arrière (WP1), des panneaux mu- raux latéraux (WP2) et des poteaux corniers (CN1).
- Page 20 Complete the front walls by adding the Corner Posts (CN1), Front Wall Panels (WP3) and Door Jambs (VDJV). Insert the Door Jamb Aluminum Supports (VDJI) into the door jamb cavity as shown. Ensure all parts are fully seated. Pour construire le mur avant, installez les poteaux VDJI corniers (CN1), les panneaux muraux avant (WP3) VDJI...
- Page 21 Assemble the Left Gable (GHL) and Right Gable (GHR) as shown. Assemblez le pignon gauche (GHL) et le pignon droit (GHR). Ensamble el Hastial izquierdo (GHL) y el Hastial derecho (GHR) como se muestra. Add the Window Gable Glass (WGG) and Window Frame (WF1) to the front of the gable.
- Page 22 Install the assembled gables onto the front and rear walls and into the cavities of the corner posts. Push down firmly to seat. Tighten the screws in the lintels. Posez les pignons assemblés sur les murs avant et arrière et dans les cavités des poteaux corniers.
- Page 23 Install the assembled ridge beam into the cavity at the top of the front and rear gables. Image shown is for 8x10. IMPORTANT: Temporarily secure the Ridge Beam to the gables (otherwise the beam may fall out). Secure the beam by running a zip-tie through the first hole on the beam and then through the vent in the gable.
- Page 24 Using the layouts on pages 4, 5 and 6 as a guide, add Roof Panel s (RPA-RPC), starting on the side without the zip-ties installed at step 11. Remove teh zip ties before installing the other side of the roof. Ensure that each panel added engages the ridge beam and the previous panel until the roof is complete.
-
Page 25: Back View
Cut out and set template “A” on Door Jambs (VDJV) as Install the Door Trim (DT1) pieces over the top and bottom of the door shown. Mark the screw hole locations and pre-drill panels folllowed by the Door Caps (DC1, DC2) as shown. starter holes for hinge screws using a 9/64”... - Page 26 las Cubiertas de puerta con tornillos #10 x 1/2" (AS2), excepto por la Cubierta de puerta en la parte superior de la puerta con el astrágalo. No apriete demasiado los tornillos. BACK VIEW VUE ARRIÈRE / VISTA ATRÁS Set Template “B” on front face of the door and fold it over the door’s edge along the line provided. Be sure to line up template flush with the locator mark on the edge of the door as shown. Mark the screw hole locations and pre-drill starter holes for the hinge screws using a 9/64”...
- Page 27 To attach the doors, center the door on the door jamb 3/8" from the edge Attach all hinges (HA3) to doors using #9 x ½” Undercut Self Tapping, ⁄ " to 9" from of the jamb stop, mark the hinge screw hole locations on the jamb and Flat Head Screws (DHS2).
- Page 28 To attach the doors, center the door on the door jamb 3/8" from the edge Attach top hinge to door jamb (VDJV) using #9 x 1/2” Undercut Self of the jamb stop, mark the hinge screw hole locations on the jamb and To attach the doors, center the door on the door jamb 3/8"...
- Page 29 Fasten the roof panels to the ridge beam IMPORTANT: For the next two steps, be sure to check door alignment several times during screw installation to ensure building has not moved out of alignment. using 1/4" x 1-3/4" (TS4) truss head screws If it has, realign and resume installation of screws.
- Page 30 Add Shed Tie Straps (RTS1) to the Fixez des tirants de remise (RTS1) à l’appui transversal Coloque Vigas de sujeción (RTS1) en el Soporte de techo Fasten the roof panels to the ridge beam Roof Cross Support at the middle of de toiture au centre de la toiture au moyen de vis à...
- Page 31 From the inside of the building, close the doors and place a Lock Bracket (LB1) on the door so that it lines up with the lock b racket on the opposite door and Add Shed Tie Straps (RTS1) to the Coloque Vigas de sujeción (RTS1) en el Soporte de techo Fixez des tirants de remise (RTS1) à...
- Page 32 For 8x6 sheds, slide the Ridge Beam Cap (RB1) on across the top of the roof. From the inside of the building, close the doors and place a Lock Bracket (LB1) on the door so that it lines up with the lock b racket on the opposite door and For 8x6 sheds, slide the Ridge Beam Cap (RB1) on across the top of the roof.
- Page 33 Attach the Ridge Beam End Caps (RBEC) using the provided PVC cement. For 8x6 sheds, slide the Ridge Beam Cap (RB1) on across the top of the roof. Attach the Ridge Beam End Caps (RBEC) using the provided PVC cement. For 8x10 and 8x8 sheds, place two Ridge Beam Caps (RB1) together then add PVC cement to the underside of the Ridge Beam Joint Cover (RBJC) and center in place over the joint where the ridge beam caps meet.
- Page 34 From the inside of the building, close the doors and position the From the inside of the building, close the doors and position the To attach the hinges, ip the doors front face down as shown. Set the hinge at the edge of the door radius approximately 8 ⁄...
- Page 35 Garantie limitée à dix ans non transférable Garantía limitada intransferible de 10 años 7830 Freeway Circle 7830 Freeway Circle Middleburg Heights, Ohio 44130 Middleburg Heights, Ohio 44130 www.barretteoutdoorliving.com www.barretteoutdoorliving.com En ce qui a trait aux remises en vinyle qu’elle fabrique (ci-après désignées « produits »), Barrette Outdoor Living, une Barrette Outdoor Living, ("Barrette") le garantiza a usted, el comprador original, que sus productos de vinilo para edifi- division de Barrette, garantit à...
-
Page 36: Instructions For Cleaning
Models / Modèles / Modelos 73005101/73005102/73005103/73005123/73005124/73005125/73005126/73005127/73005128 Owners Manual / Manuel du propriétaire / Manual del propietario Structure made in U.S.A. / Fabriqué aux États-Unis/ Hecho en EE.UU. Printed in U.S.A. / Imprimé aux États-Unis / Impreso en EE.UU.