Sony CDP-CE375 Mode D'emploi
Masquer les pouces Voir aussi pour CDP-CE375:

Publicité

Les langues disponibles

Les langues disponibles

Liens rapides

Compact Disc
Player
Operating Instructions
Mode d'emploi
CDP-CE375
CDP-CE275
© 2001 Sony Corporation
4-233-300-21(2)
US
FR
FR
FR
ES

Publicité

Chapitres

Table des Matières
loading

Sommaire des Matières pour Sony CDP-CE375

  • Page 1 4-233-300-21(2) Compact Disc Player Operating Instructions Mode d’emploi CDP-CE375 CDP-CE275 © 2001 Sony Corporation...
  • Page 2 This Class B digital apparatus complies with About this manual Canadian ICES-003. CAUTION The instructions in this manual are for CDP-CE375 TO PREVENT ELECTRIC SHOCK, DO NOT USE and CDP-CE275. CDP-CE375 is the model used for THIS POLARIZED AC PLUG WITH AN illustration purposes only.
  • Page 3: Table Des Matières

    Front Panel ..........................4 Rear Panel ..........................5 Remote Control ........................5 Getting Started Inserting Batteries Into the Remote Control (CDP-CE375 only) ..........6 Hooking Up the System ......................6 Playing CDs Loading the CD ........................7 Playing the CD –– Normal Play/Shuffle Play/Repeat Play ............. 8 Using the CD display ......................
  • Page 4: Parts Identification

    Parts Identification Front Panel The items are arranged in alphabetical order. Refer to the pages indicated in parentheses ( ) for details. CDP-CE375 CDP-CE275 CHECK w; (11, 12) BUTTON DESCRIPTIONS PHONES jack wa (9) CLEAR 9 (11, 12) PLAY MODE qa (8, 9, 11, 13) A OPEN/CLOSE ws (7, 9) DISC 1–5 2 (8, 9, 11)
  • Page 5: Rear Panel

    Rear Panel ANALOG OUT L/R jacks 2 (6) DIGITAL OUT OPTICAL jack 1 (7) Mains lead 3 (6) Remote Control (CDP-CE375 only) ANALOG OUT LEVEL +/– qk (6, 7) CHECK qs (11, 12) CLEAR qd (11, 12) CONTINUE 2 (8) DISC 1–5 7 (8, 9, 11)
  • Page 6: Remote Control

    : Signal flow To mains replace both batteries with new ones. Note Tip (CDP-CE375 only) • Do not leave the remote near an extremely hot or You can adjust the analog output level to the humid place. amplifier using the remote comes with this player.
  • Page 7: Playing Cds

    Playing CDs Making digital hookups Loading a CD If you have a digital component such as a digital amplifier, D/A converter, DAT, or MD, connect the component via the DIGITAL OUT Turn on the amplifier and select the CD (OPTICAL) connector using the optical cable player position so that you can listen to (not supplied).
  • Page 8: Playing The Cd -- Normal Play/Shuffle Play/Repeat Play

    DISC 1 – 5 again. The semi-circles disappear. To return to ALL DISCS Shuffle Play, press PLAY MODE until “ALL DISCS SHUFFLE” appears in the display. • You can select the playing mode by pressing CONTINUE, SHUFFLE, or PROGRAM on the remote (CDP-CE375 ONLY).
  • Page 9: Other Operations

    The track numbers in the music calendar volume with the ANALOG OUT LEVEL +/– on disappear after they are played. the remote (CDP-CE375 only). • If there is no CD in the player, “no dISC” appears in the display. Notes •...
  • Page 10: Replacing Discs While Playing A Disc

    Using the CD display (continued) Replacing Discs While Playing a Disc To check the remaining time Press TIME during playback. You can open the disc tray while playing a disc Each time you press this button while playing a so that you can check what discs are to be disc, the display changes as shown in the chart played next and replace discs without below.
  • Page 11: Programming The Cd Tracks

    To cancel Program Play Programming the CD Press PLAY MODE. tracks Tips • You can create your program while checking the You can arrange the order of the tracks on the disc labels. discs and create your own program. The While the disc tray is open, follow Steps 1 to 4 with program can contain up to 32 “steps”...
  • Page 12: Fading In Or Out

    Recording From CDs Programming the CD tracks Recording a CD by (continued) Specifying Tape Length Changing the track order You can change your program before you start (Time Edit) playing. You need to You can have the player create a program that will fit the length of the tape.
  • Page 13: Adjusting The Recording Level (Peak Search)

    Start recording on the deck and then Adjusting the Recording press H on the player. Level (Peak Search) Reverse the tape to side B and press H or X on the player to resume playing the remaining tracks. The player locates the highest level among the tracks to be recorded to let you adjust the recording level before you start recording.
  • Page 14: Additional Information

    Additional Information If you have any questions or problems concerning your player, please consult your Precautions nearest Sony dealer. On safety Notes on CDs • Caution — The use of optical instruments with this product will increase eye hazard. • Should any solid object or liquid fall into the...
  • Page 15: Troubleshooting

    • Check that the player is connected securely. Harmonic distortion Less than 0.0045% • Make sure you operate the amplifier correctly. • Adjust the analog output level with ANALOG Outputs OUT LEVEL +/– on the remote (CDP-CE375 only). Jack Maximum Load type...
  • Page 16: A Propos De Ce Manuel

    AUCUNE PARTIE A DECOUVERT. Conseil Les instructions de ce manuel décrivent les commandes du lecteur. Vous pouvez également utiliser les commandes de la télécommande si elles portent les même noms que celles du lecteur ou des noms similaires (CDP-CE375 uniquement).
  • Page 17 Panneau avant .......................... 4 Panneau arrière ........................5 Télécommande ........................5 Préparation Insertion de piles dans la télécommande (CDP-CE375 uniquement) ........6 Raccordement du système ....................... 6 Lecture de CD Chargement d’un CD ....................... 7 Lecture de CD –– Lecture normale/Lecture aléatoire/Lecture répétée ........8 Utilisation de la fenêtre d’affichage CD ..................
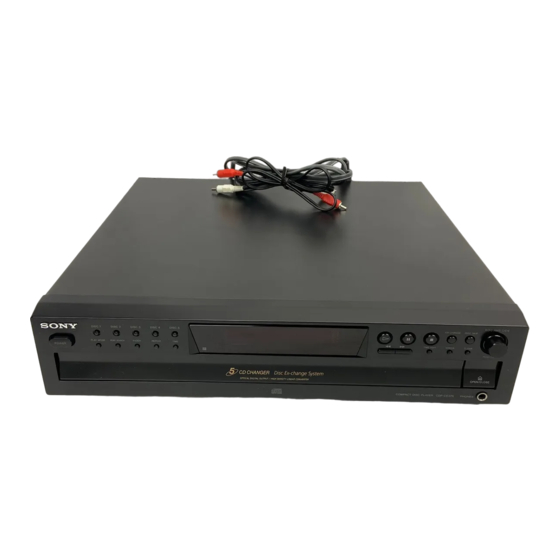
  • Page 18: Panneau Avant

    Identification des pièces Panneau avant Les éléments sont classés par ordre alphabétique. Reportez-vous aux pages indiquées entre parenthèses ( ) pour plus de détails. CDP-CE375 CDP-CE275 Capteur de la télécommande qh (6) DESCRIPTIONS DES PEAK SEARCH qs (13) CHECK w; (11, 12)
  • Page 19: Panneau Arrière

    Panneau arrière Câble secteur 3 (6) Prises ANALOG OUT L/R 2 (6) Prise DIGITAL OUT OPTICAL 1 (7) Télécommande (CDP-CE375 uniquement) ANALOG OUT LEVEL +/– qk (6, 7) CHECK qs (11, 12) CLEAR qd (11, 12) CONTINUE 2 (8) DISC 1–5 7 (8, 9, 11)
  • Page 20: Télécommande

    Vers le remplacez les deux piles par des piles neuves. secteur Remarque Conseil (CDP-CE375 uniquement) • Ne laissez pas la télécommande dans un endroit extrêmement chaud ou humide. Vous pouvez régler le niveau de sortie analogique de l’amplificateur à l’aide de la télécommande livrée •...
  • Page 21: Raccordements Numériques

    Lecture de CD Raccordements numériques Chargement d’un CD Si vous disposez d’un composant numérique, comme par exemple un amplificateur numérique, un convertisseur D/A, DAT ou Mettez l’amplificateur sous tension et MD, raccordez le composant via le connecteur sélectionnez la position du lecteur CD DIGITAL OUT (OPTICAL) à...
  • Page 22: Lecture De Cd -- Lecture Normale/Lecture Aléatoire/Lecture Répétée

    Pour revenir à la lecture aléatoire ALL DISCS, appuyez sur PLAY MODE jusqu’à ce que l’indication “ALL DISCS SHUFFLE” apparaisse dans la fenêtre d’affichage. • Vous pouvez sélectionner le mode de lecture en appuyant sur les touches CONTINUE, SHUFFLE ou PROGRAM de la télécommande (CDP-CE375 uniquement).
  • Page 23: Autres Opérations

    • Si vous appuyez sur les touches ANALOG OUT LEVEL +/– de la télécommande en cours d’enregistrement, le niveau d’enregistrement sera modifié même s’il est préréglé sur la platine cassette (CDP-CE375 uniquement).
  • Page 24: Remplacement De Disques En Cours De Lecture D'un Disque

    Utilisation de la fenêtre d’affichage Remplacement de disques CD (suite) en cours de lecture d’un Pour vérifier la durée restante disque Appuyez sur TIME en cours de lecture A chaque fois que vous appuyez sur cette En cours de lecture d’un disque, vous pouvez touche en cours de lecture d’un disque, l’affichage change de la façon indiquée dans le ouvrir le plateau pour vérifier les disques...
  • Page 25: Programmation Des Pistes Du Cd

    Pour annuler la lecture programmée Programmation des pistes Appuyez sur PLAY MODE. du CD Conseils • Vous pouvez créer votre programme en vérifiant les Vous pouvez définir l’ordre des pistes des disques étiquettes des disques. et créer votre propre programme. Le programme Tandis que le plateau est ouvert, suivez les étapes 1 peut contenir jusqu’à...
  • Page 26: Modification De L'ordre Des Pistes

    Enregistrement de CD Programmation des pistes du CD (suite) Enregistrement d’un CD en spécifiant la longueur Modification de l’ordre des de la bande (Time Edit) pistes Vous pouvez modifier votre programme avant Le lecteur peut créer un programme le début de la lecture. correspondant à...
  • Page 27: Réglage Du Niveau D'enregistrement (Recherche De Crête)

    Commencez l’enregistrement sur la Réglage du niveau platine, puis appuyez sur la touche H du lecteur. d’enregistrement Passez à la bande de la face B et (Recherche de crête) appuyez sur la touche H ou X sur le lecteur pour reprendre la lecture des pistes restantes.
  • Page 28: Informations Complémentaires

    Informations complémentaires Si vous avez des questions ou des problèmes concernant votre lecteur, consultez votre Précautions revendeur Sony le plus proche. Sécurité Remarques sur les CD • Attention : l’utilisation d’instruments optiques avec ce produit peut augmenter les risques oculaires.
  • Page 29: Dépannage

    Câble audio (2 fiches phono – 2 fiches phono) (1) Télécommande (1) (CDP-CE375 uniquement) • Dirigez la télécommande vers le capteur Piles R6 (AA) (2) (CDP-CE375 uniquement) lecteur. • Remplacez toutes les piles de la télécommande si La conception et les spécifications sont sujettes elles sont faibles.
  • Page 32 Sony Corporation Printed in China...

Ce manuel est également adapté pour:

Cdp-ce275

Table des Matières