GRE TTE Notice De Montage
Table des Matières
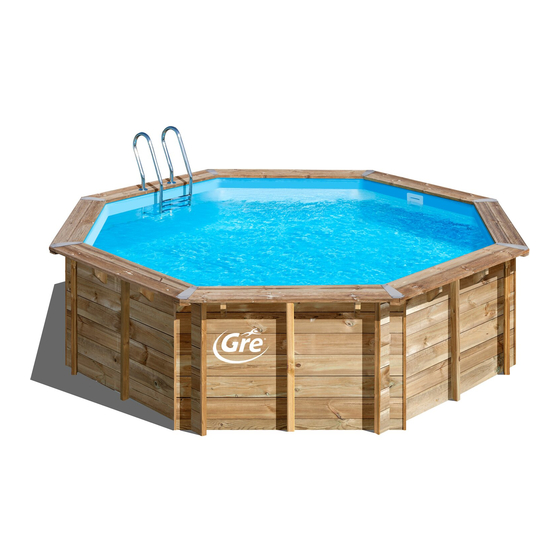
www.gre.es
790080
Ø 2,90 x H 1,05 m
790081
Ø 2,90 x H 1,19 m
790082
Ø 4,12 x H 1,19 m
790083
Ø 4,12 x H 1,19 m
790084
Ø 4,12 x H 1,19 m
790085
Ø 5,112 x H 1,24 m
NON-CONTRACTUAL PHOTOS AND PICTURES. FOTOS E IMÁGENES NO CONTRACTUALES. PHOTOS ET IMAGES NON CONTRACTUELLES. PHOTOS UND BILDER SIND NICHT VERTRAGLICH.
LA FOTOGRAFIA O IL DISEGNO È SOLO A SCOPO ILLUSTRATIVO ED INFORMATIVO. FOTO'S EN AFBEELDINGEN HEBBEN GEEN CONTRACTUELE WAARDE. FOTOS E IMAGENS NAO CONTRATADA.
Instruction Manual
EN
Take the reference number of your pool into
account when you do the assembly
Manual de Instrucciones
ES
Tenga en cuenta la referencia y las medidas de
su piscina a la hora de realizar el montaje
Notice de Montage
FR
Considérez la référence et les mesures de
votre piscine avant de procéder au montage
Bedienungsanleitung
DE
Bitte beachten Sie die Referenz und die
Masse Ihres Schwimmbads, wenn Sie die
Montage ausführen
LI
LLI
VA
NI
LLE
VIO
LE
TTE
Manuale delle instruzioni
IT
Tener presente il riferimento della piscina al
momento del montaggio
Handleiding met instructies
NL
Op het moment van monteren dient u
rekening te houden met de referentie en de
afmetingen van uw zwembad
Manual de instruções
PT
Tenha em conta a referência da piscina momento
de realizar a montagem
Table des Matières

Manuels Connexes pour GRE TTE


Sommaire des Matières pour GRE TTE
- Page 1 Tenha em conta a referência da piscina momento Bedienungsanleitung de realizar a montagem Bitte beachten Sie die Referenz und die www.gre.es Masse Ihres Schwimmbads, wenn Sie die Montage ausführen 790080 Ø 2,90 x H 1,05 m 790081 Ø...
-
Page 2: Table Des Matières
Assembly of the structure / Montaje de la estructura / Assemblage de la structure / Zusammenbau des Ref. 790080 Ø2,90 x H 1,05m SUMMARY Tragwerks / Montaggio della struttura / Montage van de constructie / Montagem da estrutura Ref. 790081 Ø2,90 x H 1,19m ÍNDICE Ref. -
Page 3: Important
IMPORTANT IMPORTANTE IMPORTANT WICHTIG IMPORTANTE BELANGRIJK IMPORTANTE COMPULSORY·OBLIGATORIO·IMPÉRATIF·OBLIGATORISC ·OBBLIGATORIO ·VERPLICHT ·OBRIGATÓRIO Make sure you keep this sheet from the manufacturer. It will be necessary to resolve any problem that may arise in the future. Without this sheet, the guarantee of the pool may be void. Acuérdese de guardar la hoja del fabricante. - Page 4 In the case of breakages and/or deformations of the wood, make a complete inventory of the state of the pieces before requesting them from after-sales. This way, the pieces will all arrive in the same delivery For the assembly, the tongue of the strip should always be facing upwards, (for pools with tongue and groove system). (A) In the first line of strips, (at the base of the pool) it is normal that some strips have a groove at the bottom part and others do not have one, with a flat base (medium width strips).
- Page 5 To install the blocks (pieces of wood that support the beaches), pay attention to the pool drawing. It is important that these are screwed in the exact position Before screwing on the beaches of the pool, the wood should be presented for its correct localization. If your pool has a double beach, both the internal one and indicated on the drawing.
- Page 6 En su objetivo constante de mejorar nietig zijn in het geval een defect. sus productos, Manufacturas Gre se reserva el derecho a modificar en cualquier momento y sin previo aviso las características, los detalles técnicos, los equipamientos estandarizados y las opciones de sus productos.
- Page 7 INSTALLATION SUGGESTION online declaration, via the www.service-gre.com website, products, colour maintenance and wear due to friction of the When you receive the packets, store the pieces of wood in together with receipt of purchase.
-
Page 8: Safety Instructions
- Instruct all pool users, including children, what to do in case of an emergency TO THE NORM www.gre.es -Never dive into any shallow body of water. This can lead to serious injury or death. - Do not use the swimming pool when using alcohol or medication that may impair your ability to safely use the pool. -
Page 9: Antes Del Montaje
• Portes de ENVÍO por cargo del cliente. comprender bien la instalación de la piscina. DURACIÓN DE LA GARANTÍA: • Portes de RETORNO por cuenta de Manufacturas Gre (para aquellas piezas comprendidas en el esquema de la garantía). PISCINAS ENTERRADAS Y NORMATIVA ESPECÍFICA •... -
Page 10: Instrucciones De Seguridad
>inicio > servicios > servicio técnico > españa web: − Explique a los usuarios de la piscina, también a los niños, qué procedimiento deben seguir en caso de urgencia. www.gre.es − Nunca se tire a piscinas poco profundas, dado que puede sufrir lesiones graves o mortales. -
Page 11: Garantie
(ne vidangez jamais complètement votre piscine). stockage. - Alarme de piscine www.service-gre.com, accompagnée de la preuve d’achat. Il est impératif de conserver l’étiquette du numéro de série Dès réception des colis, veillez à stocker les pièces bois à plat, à... -
Page 12: Consignes De Securite
Sécurité d’emploi de la piscine TO THE NORM SERVICE APRES VENTE: web: www.gre.es - Incitez tous les utilisateurs, en particulier les enfants, à apprendre à nager. - Apprenez les gestes qui sauvent (réanimation cardiopulmonaire) et remettez régulièrement à jour vos connaissances. Ces gestes peuvent sauver une vie en cas d’urgence. - Page 13 Abnutzung aufgrund der Reibung des Materials an verschiedenen Folglich müssen Lagerung bestimmte - Abdeckung des Pools Webseite www.service-gre.com, zusammen mit dem Oberflächen, Verformungen des Liners, der länger als 24 Stunden Vorsichtsmaßnahmen treffen. - Poolhütte Kaufbeleg, geltend gemacht werden. ohne Wasser zurückblieb (leeren Sie den Pool nie vollständig).
- Page 14 − Halten Sie am Pool ein einwandfrei funktionierendes Telefon und eine Liste mit den Notrufnummern bereit. Germany & Austria Sichere Nutzung des Pools Freie nummer: 0 800-952 49 72 e-mail: info-germany@gre.es − Regen Sie alle Benutzer, vor allem Kinder, dazu an, schwimmen zu lernen. web: www.gre.es −...
- Page 15 24 ore (la piscina non deve mai precauzioni per lo stoccaggio. − Copertura della piscina tramite la pagina web www.service-gre.com, allegando lo essere svuotata completamente). Quando ricevi i prodotti imballati, riponi le parti in legno in −...
- Page 16 - Non tuffarsi mai in piscine poco profonde, in quanto ciò può provocare lesioni gravi o mortali. web: www.gre.es - Non utilizzare la piscina dopo aver assunto alcol o farmaci che possono ridurre la capacità di farlo in tutta sicurezza.
- Page 17 - Beveiligingsbarrière online declaratie, via de website www.service-gre.com, van contact met oxidatiemiddelen, kleuronderhoud en slijtage Wanneer u de pakketten ontvangt, moet u de houten delen vlak - Zwembadalarm tezamen met het aankoopbewijs.
- Page 18 − Leer reddingstechnieken (m.n. cardiopulmonaire reanimatie) en werk uw kennis regelmatig bij. Deze technieken kunnen een leven redden in web: www.gre.es geval van nood. − Leg aan alle gebruikers van het zwembad uit, óók aan kinderen, welke procedures ze moeten volgen in noodgevallen.
- Page 19 - Alarme de piscina uma declaração online, no site www.service-gre.com, cor e o desgaste devidos à fricção do material sobre diversas Quando receba as embalagens, guarde as peças de madeira - Cobertura de piscina juntamente com o comprovativo de compra.
- Page 20 > inicio > serviço > serviço técnico > portugal − Encoraje todos os usuários, especialmente as crianças, a aprender a nadar. web: www.gre.es − Aprenda técnicas de salvamento (reanimação cardiopulmonar) e atualize periodicamente os seus conhecimentos. Isto pode salvar uma vida numa emergência.
-
Page 21: Learn About The Wood/ Conozca La Madera/ Mieux Connîatre Le Bois/ Das Holz Besser Kennenlernen
LEARN ABOUT THE WOOD WOOD: A LIVING MATERIAL CONOZCA LA MADERA Wood is a natural product, the fissures visible on the edges of the wood are completely normal and do not modify the MIEUX CONNÎATRE LE BOIS resistance characteristics of the same. Wood is always a malleable material (from 3% to 4% of dimensional variations) with humidity and temperature DAS HOLZ BESSER KENNENLERNEN... -
Page 22: Installation Drawing / Plano De Instalación / Plan D`implantation / Aufstellplan / Piano Di Installazione
Ref. 790080 Ref. 790080 INSTALLATION DRAWING PLANO DE INSTALACIÓN PLAN D´IMPLANTATION Dimensions in mm Dimensions in mm Cotas en mm Cotas en mm AUFSTELLPLAN Cotations en mm Cotations en mm Höhenangaben Höhenangaben in mm in mm PIANO DI INSTALLAZIONE Livello in mm Livello in mm Afmetingen in mm Afmetingen in mm... - Page 23 Ref.790081 Ref.790081 INSTALLATION DRAWING PLANO DE INSTALACIÓN PLAN D´IMPLANTATION AUFSTELLPLAN Dimensions in mm Dimensions in mm Cotas en mm Cotas en mm Cotations en mm Cotations en mm PIANO DI INSTALLAZIONE Höhenangaben Höhenangaben in mm in mm TIPS VOOR DE VEILIGHEID Livello in mm Livello in mm Afmetingen in mm...
- Page 24 Ref. 790082 Ref. 790082 INSTALLATION DRAWING PLANO DE INSTALACIÓN PLAN D´IMPLANTATION Dimensions in mm Dimensions in mm Cotas en mm Cotas en mm AUFSTELLPLAN Cotations en mm Cotations en mm Höhenangaben Höhenangaben in mm in mm PIANO DI INSTALLAZIONE Livello in mm Livello in mm Afmetingen in mm Afmetingen in mm...
- Page 25 Ref. 790083 Ref. 790083 INSTALLATION DRAWING 790084 790084 PLANO DE INSTALACIÓN PLAN D´IMPLANTATION 2054 AUFSTELLPLAN Dimensions in mm Dimensions in mm 2000 1886 Cotas en mm Cotas en mm Cotations en mm Cotations en mm PIANO DI INSTALLAZIONE Höhenangaben Höhenangaben in mm in mm TIPS VOOR DE VEILIGHEID...
-
Page 26: Installation Drawing / Plano De Instalación / Plan D`implantation / Aufstellplan / Piano Di Installazione
Ref. 790085 Ref. 790085 INSTALLATION DRAWING PLANO DE INSTALACIÓN PLAN D´IMPLANTATION Dimensions in mm Dimensions in mm Cotas en mm Cotas en mm AUFSTELLPLAN Cotations en mm Cotations en mm Höhenangaben Höhenangaben in mm in mm PIANO DI INSTALLAZIONE Livello in mm Livello in mm Afmetingen in mm Afmetingen in mm... - Page 27 PRECAUZIONI PREVISIONS PRECAUZIONI REKENING HOUDEN MET REKENING HOUDEN MET PREVISIONES 3,50 m min. 3,50 m min. PREVISÕES PREVISÕES A PRÉVOIR VORAUSPLANUNG Fig. 1 Fig. 1 Abb. 1 Afb. 1 FILTER GROUP GRUPO DE FILTRACIÓN GROUPE DE FILTRATION FILTRATIONSAGGREGAT The filter group and especially El grupo defiltración y en groupe filtration...
- Page 28 First level Fig. 2 Fig. 2 Nivel de filtración Livello di filtrazione INSTALLATION Abb. 2 INSTALLAZIONE Abb. 2 Niveau de la filtration Filterniveau Filtrationshöhe Nível de filtração INSTALACIÓN INSTALLATIE INSTALAÇÃO IMPLANTACIÓN MONTAGE Above ground Semi in-ground In-ground Fuori terra Seminterrata Interrata Sobre el suelo Semienterrada...
- Page 29 Take the reference number of your pool into account when you do the assembly GROUND LAYOUT - TRAZADO EN EL TERRENO - TRACÉ AU SOL Tenga en cuenta la referencia de su piscina a la hora de realizar el montaje Considérez la référence et les mesures de votre piscine avant de procéder au montage Bitte beachten Sie die Referenz und die Masse Ihres Schwimmbads, wenn Sie die Montage ausführen Ref.
-
Page 30: Preparing The Land / Preparación Del Terreno / Terrassement / Geländevorbereitung
PREPARING THE LAND ABSTECKEN AUF DEM BODEN - TRACCIATURA NEL SUOLO - GRONDLIJNEN UITZETTEN - TRAÇADO NO SOLO Ref. 790080 Ref. 790081 Ref. 790082 Ref. 790084 Ref. 790085 The recommendations about the construction for completely or partially in-ground pools are effective in the context of an installation in land which is not humid. Ref. -
Page 31: Preparación Del Terreno
PREPARACIÓN DEL TERRENO TERRASSEMENT Las recomendaciones sobre la construcción para las piscinas total o parcialmente enterradas son efectivas en el contexto de una instalación en un terreno que no Les recommandations sur la mise en oeuvre pour les bassins enterrés ou semi-enterrés sont effectives dans le cadre d’une installation en terrain non humide. Il sea húmedo. -
Page 32: Preparazione Del Terreno
GELÄNDEVORBEREITUNG PREPARAZIONE DEL TERRENO Die Empfehlungen zum Bau von ganz oder teilweise eingelassenen Pools gelten im Rahmen eines Einbaus in ein Gelände, das nicht feucht ist. Er ist ratsam, die Le indicazioni per la costruzione delle piscine totalmente o parzialmente interrate sono efficaci nel caso di installazione in un terreno che non sia umido. È grundlegenden Anweisungen anzupassen, um Einschränkungen in Bezug auf die Art des Geländes (zum Beispiel Lehm) oder das übermäßige Vorhandensein von consigliabile seguire le istruzioni di base per evitare le restrizioni relative al tipo di terreno (ad esempio, argilla) o la presenza eccessiva di acqua nel terreno Wasser im Boden (Quellen, Abflüsse…) zu vermeiden. -
Page 33: Voorbereiding Van Het Terrein
PREPARAÇÃO DO TERRENO VOORBEREIDING VAN HET TERREIN De aanbevelingen voor zwembaden die geheel of gedeeltelijk verdiept worden aangelegd, zijn effectief binnen de context van inbouwen in een terrein dat niet As recomendações sobre a construção para as piscinas total ou parcialmente enterradas são efetivas no contexto de uma instalação num terreno que não seja vochtig is. - Page 34 Ref. 790080 Ref. 790081 BOARDS TABLAS IDENTIFICATION/ Identification of the boards / Identificación de las tablas / Repérage des IDENTIFICACIÓN/ CTD/QTÉ/ MADRIERS madriers / Kennzeichnung der holzbohlen / Identificazione della tavole / REPÉRE/KENNZEICH- DENOMINATION/DENOMINACIÓN/DÉSIGNATION/BEZEICHNUNG/ DENOMINAZIONE/ REF/RÉF/ ANZ/AANT/ NUNG/IDENTIFICA- BENAMING/DENOMINAÇÃO/ HINWEIS/RIF Identificatie van de planken / Identificação das tábuas ZIONE/IDENTIFICA- ERDARBEITEN...
- Page 35 Ref. 790082/790083/790084 Ref. 790082/790083/790084 BOARDS PROTECTIVE GROUND BLANKET TABLAS MANTA PROTECTORA DE FONDO Identification of the boards / Identificación de las tablas / Repérage des After having done the installation and preparation of the ground you can start with assembling the pool. Start by laying the protective blanket, MADRIERS madriers / Kennzeichnung der holzbohlen / Identificazione della tavole / FEUTRE DE FOND...
- Page 36 Ref. 790085 Ref. 790085 BOARDS PROTECTIVE GROUND BLANKET TABLAS MANTA PROTECTORA DE FONDO After having done the installation and preparation of the ground you Identification of the boards / Identificación de las tablas / Repérage des can start with assembling the pool. Start by laying the protective blanket, MADRIERS FEUTRE DE FOND madriers / Kennzeichnung der holzbohlen / Identificazione della tavole /...
-
Page 37: Assembly Of The Structure / Montaje De La Estructura / Assemblage De La Structure / Zusammenbau Des
Ref. 790080/790081 After having installed the first layer, you should check the inside dimensions of the pool. For a ASSEMBLY OF THE STRUCTURE perfect assembly, the diagonals should be equal, and in conformity with the assembly drawing Ref. 790082/790083/790084 at the end of this manual. Take special care when installing this first layer of boards. - Page 38 IMPORTANT: It is very important that the boards are correctly installed, above all the bottom ones, (where the water pressure is greater). There is a possibility of SPECIFIC BOARDS: Refilling fitting with key: place the specific board for the refilling with key (E7) situating the larger diameter on the external side of the pool. some boards coming loose.
-
Page 39: Assembly Of The Structure / Montaje De La Estructura / Assemblage De La Structure / Zusammenbau Des
Ref. 790085 After having installed the first layer, you should check the inside dimensions of the pool. For a ASSEMBLY OF THE STRUCTURE perfect assembly, the diagonals should be equal, and in conformity with the assembly drawing at the end of this manual. Take special care when installing this first layer of boards. - Page 40 IMPORTANT: It is very important that the boards are correctly installed, above all the bottom ones, (where the water pressure is greater). There is a possibility of SPECIFIC BOARDS: Refilling fitting with key: place the specific board for the refilling with key (E12) situating the larger diameter on the external side of the pool. some boards coming loose.
-
Page 41: Wooden Blocks, Reinforcements And Trimmings / Tacos, Refuerzos Y Embellecedores / Consoles, Renforts
La posizione dei tasselli e dei rinforzi è indicata nel disegno (Vedere a pagina 42-47). Per posizionare i tasselli si può utilizzare una scala di legno, vedi il capitolo WOODEN BLOCKS, REINFORCEMENTS AND TRIMMINGS sulla scala. TASSELLI A• Allineare la parte superiore dei tasselli al livello dell’ultima tavola. Mantenere i tasselli al loro posto TACOS, REFUERZOS Y EMBELLECEDORES B•... - Page 42 ZIERLEISTEN L: DIE REFERENZNUMMER 790080/790081 UMFASSTE KEINE ZIERLEISTEN L VERSTEVIGINGEN: REFERENTIE 790080/790081 BEVAT NIET VERSTEVIGINGEN • Legen Sie die Zierleiste L auf die Enden der Bretter. • Falls erforderlich, schneiden Sie das, was von der Zierleiste übersteht, je nach Höhe des •...
-
Page 43: Escada De Madeira
Models 790080 and 790084 do not include the wooden / steel staircase, check your pool kit to Consultare i disegni (Vedere a pagina 40-48 WOODEN STEPLADDER verify the ladder assembly. La scala di legno per accedere alla piscina è inclusa. Non utilizzarla per scopi diversi. Las Ref. - Page 44 Fig. 22/ Abb. 22 / Afb. 22 88 mm 235 mm ...
-
Page 45: Protective Wall Blanket / Manta Protectora De Pared / Feutre De Paroi / Schutzdecke An Der Wand
PROTECTIVE WALL BLANKET MANTA PROTECTORA DE PARED FEUTRE DE PAROI SCHUTZDECKE AN DER WAND Fig. 23/Abb. 23/Afb. 23 Fig. 24/Abb. 24/Afb. 24 Fig. 25/Abb. 25/Afb. 25 COPERTURA DI PROTEZIONE DELLA PARTE (DIE REFERENZNUMMER 790080/790081/790082/79008 UMFASSTE KEINE SCHUTZDECKE AN DER WAND) Zwei Möglichkeiten zum BESCHERMDEKEN MUUR Anbringen der Wandschutzdecke. -
Page 46: Fixing Of The Skimmer Joint / Fijación De La Junta Skimmer / Fixation Du Joint De Skimmer / Befestigung Der
LOCATION OF THE REFILLING FITTING WITH KEY FIXING OF THE SKIMMER JOINT Wooden structure • Estructura de madera • Structure bois • FIJACIÓN DE LA JUNTA DEL SKIMMER SITUACIÓN DE LA BOQUILLA DE SALIDA Tragewerk aus Holz • Struttura in legno • Houten constructie •... - Page 47 INSTALLATION OF THE LINER HOOKING PROFILE · Continue positioning the white profiles as indicated below. Part of the profile must be introduced into the part of the profile, until it reaches the limit. COLOCACIÓN DE LOS PERFILES DE ENGANCHE DEL LINER ·...
- Page 48 Take the measurement and cut the liner profile • Tome la medida • Prise • y corte el perfil del Ends of the profiles at 20 mm de mesure • Nehmen Sie liner • et découpe de la from the axis • Extremos de los Maß...
-
Page 49: Installation Of The Liner / Colocación Del Liner / Mise En Place Du Liner / Positionierung Des Liners
PREVIOUS CHECK BEFORE INSTALLING THE LINER INSTALLATION OF THE LINER CONTROL PREVIO A LA COLOCACIÓN DEL LINER COLOCACIÓN DEL LINER CONTRÔLES AVANT LA POSE DU LINER MISE EN PLACE DU LINER KONTROLLE VOR DER POSITIONIERUNG DES LINERS POSITIONIERUNG DES LINERS CONTROLLO PRECEDENTE AL POSIZIONAMENTO DEL LINER POSIZIONAMENTO DEL LINER CONTROLEER VOORAFGAAND AAN DE PLAATSING VAN DE LINER... -
Page 50: Montage
Vor der Positionierung muss der Liner mindestens 24 Stunden bei einer Umgebungstemperatur von mindestens 20 °C verbracht haben. Die Maße des Liners sind einige Zen- To move the already installed liner, slide it along the profile. If this is difficult the liner can be removed by lifting it not to damage it. Make sure that the liner is well timeter kürzer als die Innenmaße des Beckens, um sicherzustellen, dass der Liner gespannt angebracht wird. - Page 51 Um den bereits positionierten Liner zu bewegen, lassen Sie ihn an der Leiste entlanggleiten. Sollte sich dies als sehr schwierig erweisen, so können Sie den Liner LAND-FILLING entfernen, indem Sie ihn anheben, um die Verknüpfung nicht zu beschädigen. Stellen Sie sicher, dass der Liner sowohl am Boden als auch an den Wänden gut positioniert ist, richten Sie die Spannung des Liners gleichmäßig ein (drücken Sie den Liner an den Ecken mit der Fußspitze Richtung Ecken der Wände) (Abb.
- Page 52 Draining gravel ø 10-30 • Grava drenante ø 10-30 • Gegebenenfalls das Rohr der peripheren Drainage zu schützen, indem Sie es mit Geotextil überziehen. Es ist wichtig, die Befüllung des Pools parallel zur Graviers drainants ø 10-30 • Kies zur Entwässerung ø 10-30 Anschüttung durchzuführen, damit der Druck ausglichen wird und Verformungen im Tragwerk während des Betriebes vermieden werden.
- Page 53 POSITIONING OF THE SEALING PIECES SKIMMER REFILLING FITTING WITH KEY Start filling the pool with water, up to 4 cm. from the lower edge of the valve hole. • Before continuing, make sure that the skimmer flap is well positioned. Mark the hole with a felt tip pen (A) and cut a cross in the centre of the opening (B) with a cutter (BLADE), •...
- Page 54 SKIMMER POSICIONAMIENTO DE LAS PIEZAS DE SELLADO BOQUILLA DE IMPULSIÓN Empezar a llenar de agua la piscina, deteniendo el llenado a unos 4 cms del borde inferior del orificio de la • Antes de proceder, cerciórese de que la trampilla del skimmer está bien posicionada. válvula.
-
Page 55: Positionnement Des Pièces À Sceller
POSITIONNEMENT DES PIÈCES À SCELLER SKIMMER BUSE DE REFOULEMENT • Avant de procéder, assurez-vous que le volet du skimmer est bien positionné. Commencez à remplir la piscine d’eau, en arrêtant le remplissage à 4 cm environ du bord inférieur de l’orifice •... - Page 56 SKIMMER POSITIONIERUNG DER VERSIEGELUNGSTEILE DRUCKVENTIL Beginnen Sie damit, das Schwimmbecken bis ungefähr 4 cm unterhalb des unteren Randes der Öffnung des • Bevor Sie fortfahren, stellen Sie sicher, dass die Klappe des Skimmers richtig positioniert ist. Rücklaufventils mit Wasser zu füllen. •...
- Page 57 SKIMMER POSIZIONAMENTO DEI PEZZI DI SALDATURA UGELLO DI MANDATA Iniziare ad immettere acqua nella piscina, interrompendo il riempimento a 4 cm dal liner inferiore della bocca • Prima di proseguire, accertarsi che lo sportello dello skimmer sia ben posizionato. della valvola. •...
- Page 58 SKIMMER PLAATSING VAN DE AF TE DICHTEN ONDERDELEN UITSTROOMMONDSTUK Laat het zwembad gedeeltelijk vollopen, en stop wanneer het waterniveau ongeveer 4 cm onder de rand van de klep staat. • Voordat u verder gaat, verzeker u ervan dat de afsluiter van de skimmer is de juiste stand staan. Merk de opening met een merkpen (A) en maak een kruisvormige snede in het midden (B) van de opening met •...
-
Page 59: Posicionamento Das Peças De Selagem + Skimmer
SKIMMER POSICIONAMENTO DAS PEÇAS DE SELAGEM BOQUILHA DE IMPULSÃO Encha a piscina de água até aprox. 4 cm por debaixo do bordo inferior do orifício da válvula. Assinale o orifício com um marcador (A) e faça um corte em cruz no centro do orifício B) com a ajuda de um •... -
Page 60: Filter / Filtración / Filtration / Filtration / Filtrazione / Filtering / Filtração
FILTER FILTRACIÓN FILTRATION FILTRATION FILTRAZIONE FILTERING FILTRAÇÃO ASSEMBLY SUGGESTIONS: • The filter should be located at least 3.50 m from the pool. The following diagrams explain the movement direction of the water. Check the manual that comes with the filter group for the assembly instruc- tions. -
Page 61: Sand Filter / Filtro De Arena / Filtre À Sable / Sandfilter / Filtro Per La Sabbia / Zandfilter / Filtro De Areia
2. WASHING POSITION (OR BACKWASH): Sand washing position. Allow the water to circulate in reverse direction in the filter. The water enters through the SAND FILTER lower part of the filter elevates the filtering mass and therefore collects all its impurities and because they are lighter than sand, they area evacuated through the upper part of the filter towards the drain. - Page 62 4. EMPTYING POSITION / DRAIN (OR WASTE): Position to evacuate the water of for emptying the pool. In this case, the water does not pass through the filter, 6. RECIRCULATION POSITION / CIRCULATION**: Position used so the water circulates through the hydraulic network without passing through the filter. This it goes directly to the drain.
- Page 63 Edge•Playa•Margelle BORDI: Le estremità del bordo vengono tagliate a 67,5 ˚ . Consultare i disegni (Vedere a pagina 42-50). EDGES Ref. 790080 •Rand•Bordo PREPARAZIONE •Ränd•Bordo Ref.790097 • Prima di fissare il bordo posizionare tutte le lamine di prova (senza avvitarle). BORDES •...
- Page 64 Inside edge•Playa inte- BORDI rior•Margelle intérieur Outside edge•Playa exte- Ref. 790083 Il bordo è composto da 2 lastre, una interna e una esterna. Consultare i disegni (Vedere a pagina 42-50). •Innerer Rand•Bordo rior•Margelle extérieur Ref. 790084 PREPARAZIONE interno•Binnenrand•Bor- •Äußerer Rand•Bordo •...
-
Page 65: Fixing Of The Stainless Steel Ladder / Fijación De La Escalera Inoxidable / Fixation De L`echelle Inox
PIECE UNDER THE EDGES FIXING OF THE STAINLESS STEEL LADDER • Position the pieces of wood under the edges at the angles and fix them with 4 screws (4x40). PLACA BAJO LAS PLAYAS FIJACIÓN DE LA ESCALERA INOXIDABLE • Coloque las placas de madera bajo los bordes en los ángulos y fíjelas mediante los 4 tornillos (4x40). PLAQUE SOUS MARGELLES FIXATION DE L’ECHELLE INOX Fixing of the plates... - Page 66 IDENTIFICATION/IDEN- TIFICACIÓN/REPÉRE/ DENOMINATION/DENOMINACIÓN/DÉSIGNATION/BEZEICHNUNG/ CTD/QTÉ/ANZ/ KENNZEICHNUNG/IDEN- DENOMINAZIONE/BENAMING/DENOMINAÇÃO/ AANT/TD TIFICAZIONE/IDENTIFICA- TIE/IDENTIFICAÇÃO Upper handrail•Pasamanos superior•Rampe supérieure•O- beres Geländer•Corrimano superiore•Bovenste trapleu- ning•Corrimão superior Trimming•Embellecedor•Enjoliveur•Zierleiste•Copertura•- Sierlijsten•Embelezador Screw Ø 8x30 mm•Tornillo Ø 8x30 mm•Vis Ø 8x30 Fig/Abb/Afb 39 mm•Schraube Ø 8 x 30 mm•Vite Ø 8x30 mm•Schroef Ø 8x30 mm•Parafuso Ø...
-
Page 67: Putting Into Service
5. Stop the filer and put the multi-directional flap into FILTERING position. CONTACT: 6. Re-start the filter and check that the pressure is correct. web: www.service-gre.com CLEANING THE POOL With a manual pool cleaner 1. Connect the pool cleaner tube 2. -
Page 68: Puesta En Servicio
- Compruebe periódicamente el nivel de engrasado del filtro. CONSULTAS: El mantenimiento y el ivernaje del filtro de arena precisa de evacuaciones de agua. Es imprescindible prever las evacuaciones para la instalación del grupo web: www.service-gre.com de filtración. TRATAMIENTO DEL AGUA Cualquiera que sea el sistema de filtración utilizado, es necesario tratar químicamente el agua de la piscina para destruir las bacterias y los... -
Page 69: Mise En Service
Avec un balai manuel EN CAS DE PROBLEME... NOUS CONSULTER! 1. Branchez le tuyau sur le balai. web: www.service-gre.com 2. Mettez le balai dans l’eau. 3. Remplissez le tuyau d’eau en le mettant devant une bouche de refoulement 4. Fixez l’autre extrémité sur la prise balai 5. - Page 70 - Es ist vorgeschrieben, zu überprüfen, dass die Ansaugöffnungen nicht verstopft sind. - Es ist vorgeschrieben, die Filtration während des Instandhaltungsbetriebs des Filtrationssystems zu stoppen. web: www.service-gre.com - Prüfen Sie regelmäßig den Grad der Schmierung des Filters. Die Instandhaltung und das Überwintern des Sandfilters erfordern das Abfließen des Wassers. Es ist unbedingt erforderlich, Entleerungen für die Installation des Filtrationsaggregats vorzusehen.
-
Page 71: Messa In Servizio
5. Passare il pulitore lentamente (per evitare che si alzi la polvere) e senza toglierlo dall’acqua per evitare che la pompa si disattivi. web: www.service-gre.com 6. Quando la pulizia è terminata, pulire il filtro prima di sistemarlo nella posizione abituale. -
Page 72: Ingebruikname
MOCHT U EEN PROBLEEM HEBBEN... ¡RAADPLEEG ONS! 5. De bodemreiniger moet langzaam worden bewogen (om te voorkomen dat er vuil opdwarrelt) en zonder hem uit het water te halen, om te voorkomen dat de web: www.service-gre.com pomp zich uitschakelt. 6. Wanneer het schoonmaken klaar is, het filter reinigen voordat hij in zijn gebruikelijke stand wordt teruggezet . -
Page 73: Colocação Em Serviço
CONSULTA: 3. Preencha o tubo com água situando-o perante uma boquilha de impulsão. web: www.service-gre.com 4. Coloque o outro extremo na tomada limpa-fundos. 5. Deve passar o limpa-fundos lentamente (para evitar que a poeira se levante) e sem retirá-lo da água, para evitar que a bomba se desative. -
Page 74: Normal Maintenance
NORMAL MAINTENANCE RESPECT THE ENVIRONMENT system. DO NOT TAKE APART THE POOL UNLESS IT IS STRICTLY NECESSARY. IF YOU DO SO, PLEASE REUSE THE WATER. WATER IS A SCARCE GOOD. MECHANICAL MEASURES: MAINTENANCE AND USE: Check the filter, the skimmer, the valves and the pipes are well connected to the pool. Do consider high water temperature will - Switch on the filter system once a day in to insure a complete water volume renewal and never do it when somebody is in the pool involved more time for the filtering. -
Page 75: Mantenimiento Habitual
MANTENIMIENTO HABITUAL Nunca bañarse hasta que se estabilice el nivel de cloro. Utilizar siempre un Dosificador flotante para la disolución del producto químico (pastillas). La dosificación de los productos químicos se hace en función de: El volumen de agua de su piscina, la frecuencia del baño, las condiciones climáticas, temperatura del agua y ubicación. -
Page 76: Entretien Courant
ENTRETIEN COURANT et emplacement. Toujours agiter l’eau et attendre la dissolution d’un produit chimique avant d’en rajouter un autre. Attendre environ RECOMMANDATION POUR L’ENVIRONNEMENT : 12 h. entre chaque ajustement de pH, de Chlore, ou d’anti-algues en faisant fonctionner le système de filtration. «NE DÉMONTEZ PAS LA PISCINE SI CELA N’EST PAS ABSOLUMENT NÉCESSAIRE. - Page 77 ÜBLICHE INSTANDHALTUNG werden, bevor nicht der Chlorgehalt eingestellt ist. Zum Auflösen des chemischen Produktes (Pastillen) verwenden Sie immer einen Schwimmdosierer. Die Dosierung chemischer Produkte erfolgt in Abhängigkeit: vom Wasservolumen Ihres Pools, der Badehäufigkeit, den klimatischen Bedingungen, der Wassertemperatur und dem Standort. Nach dem Eindosieren immer rühren und abwarten, bis sich das chemische Produkt gelöst hat, bevor ein weiteres zugegeben wird.
-
Page 78: Manutenzione Ordinaria
MANUTENZIONE ORDINARIA PRECAUZIONE PER L’ECOSISTEMA AMBIENTALE NON SMONTARE LA PISCINA SE NON E’ STRETTAMENTE NECESSARIO.NEL CASO LO FOSSE VI PREGHIAMO DI MEZZI MECCANICI: RIUTILIZZARE L’ACQUA. L’ACQUA NON VA SPRECATA. Verificare che il depuratore, lo skimmer, le valvole e i tubi flessibili siano correttamente collegati alla piscina. Tenere sempre presente USO E MANUTENZIONE: che a maggior temperatura dell’acqua sarà... -
Page 79: Routineonderhoud
ROUTINEONDERHOUD Algicide te worden toegvoegd om het onstaan van algen te voorkomen. Nooit baden voordat het chloorniveau in evenwicht is. Gebruik altijd een drijvende doseermaat voor de oplossing van het chemische product (tabletten). De dosering van de chemische producten geschiedt in overeenstemming met:Het watervolume van het zwembad, de veelvuldigheid van het baden, de weersomstandigheden, de temperatuur van het water en de ligging van het zwembad. - Page 80 MANUTENÇÃO HABITUAL O MEIO AMBIENTE AGRADECE MEIOS MECÂNICOS: Verificar se a junção à piscina do depurador, do skimmer, das válvulas e das mangueiras é correcta. Tenha em conta que quanto mais “DESMONTAR A PISCINA SE ABSOLUTAMENTE NECESSÁRIO. NESTE CASO, POR FAVOR REUTILIZE A ÁGUA. A ÁGUA É...
- Page 81 SARDEGNA SUD - ECO PISCINE DI TOMMASO RAZZOLINI - VIA ARETINA, 17 - 50060 PELAGO (FI) - PI. 05071080484 - info@ecopiscineita- VIZCAYA ACONAGUA 2000, S.L 94/476-28-38 LA CORUÑA ASTYCO 981/52-10-09 lia.it - WWW.ECOPISCINEITALIA.IT GESTIONE ARTICOLI IN GARANZIA: No VERDE : 800 781 592 - MAIL: satitalia@gre.es - FAX: 0034. 946740321 ZARAGOZA M.A.RAFALES 976/63-66-09 LAS PALMAS JESUS ROMERO 629/56-74-32 ZARAGOZA ZARVIGAS, S.L.
- Page 82 DISTRIBUIDO POR MANUFACTURAS GRE S.A. ARITZ BIDEA 57, BELAKO INDUSTRIALDEA 48100 MUNGIA (VIZCAYA) ESPAÑA Nº REG. IND.: 48-06762 FABRICADO EN EUROPA...