Table des Matières
Publicité
Les langues disponibles
Les langues disponibles
Liens rapides
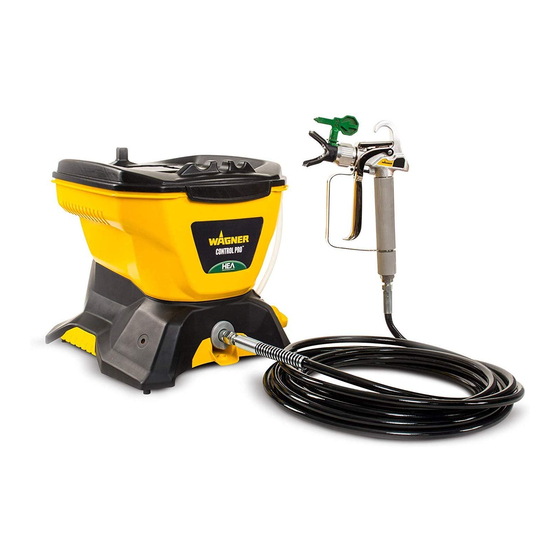
CONTROL PRO
OWNER'S MANUAL • GUIDE D'UTILISATION •
MANUAL DEL PROPIETARIO
READ THIS MANUAL FOR COMPLETE INSTRUCTIONS •
LIRE CE MANUEL POUR OBTENIR DES DIRECTIVES COMPLÈTES •
LEA ESTE MANUAL PARA OBTENER LAS INSTRUCCIONES COMPLETAS
wagner-group.com
130 POWER TANK
™
ES
EN
F
ENGLISH -
P. 2
FRANÇAIS -
P. 20
ESPAÑOL -
P. 38
0918 • Form No. 0580686B
Publicité
Chapitres
Table des Matières
Dépannage

Manuels Connexes pour WAGNER CONTROL PRO 130 POWER TANK


Sommaire des Matières pour WAGNER CONTROL PRO 130 POWER TANK
- Page 1 READ THIS MANUAL FOR COMPLETE INSTRUCTIONS • ENGLISH - P. 2 LIRE CE MANUEL POUR OBTENIR DES DIRECTIVES COMPLÈTES • FRANÇAIS - P. 20 LEA ESTE MANUAL PARA OBTENER LAS INSTRUCCIONES COMPLETAS ESPAÑOL - P. 38 wagner-group.com 0918 • Form No. 0580686B...
-
Page 2: Table Des Matières
IMPORTANT SAFETY INFORMATION TABLE OF CONTENTS EXPLANATION OF SYMBOLS Read all safety information before operating the equipment. Save IMPORTANT SAFETY INFORMATION ___________________ 2-4 these instructions. Explanation of Symbols ________________________________ 2 To reduce the risks of fire or explosion, electrical shock and the Grounding Instructions ________________________________ 3 injury to persons, read and understand all instructions included in Important Electrical Information _________________________ 3... -
Page 3: Important Safety Information
See a physician immediately. When the sprayer is used with a generator or uncontrolled line voltage, the use of Wagner’s “Line PREVENTION: Surge Protector” (P/N 800-935) is recommended. •... - Page 4 Check hoses and parts for signs of damage, a leak can inject Severe injury and/or property damage can occur. material into the skin. Inspect hose before each use. Replace any damaged hoses or parts. Only use Wagner original-high- pressure hoses in order to ensure functionality, safety and durability.
-
Page 5: General Information
GENERAL INFORMATION SPECIFICATIONS WARNING: HAZARDOUS VAPORS Paints, solvents, insecticides, and other materials Control Pro 130 Power Tank can be harmful if inhaled or come in contact Maximum Pressure 1600 PSI (11.1 MPa) with the body. Vapors can cause severe nausea, Capacity 0.24 GPM (0.91 LPM) -
Page 6: Parts And Components
PARTS AND COMPONENTS Tank lid Spray hose Spray gun Spray tip Inlet filter (A) PRIME Tank Material return tube ON/OFF switch Tip guard SPRAY The PRIME/SPRAY knob can be turned PRIME/SPRAY in either direction to Spray hose knob (B) desired setting Washer (a) and port saddle seat (b) -
Page 7: Before You Begin
BEFORE YOU BEGIN This section contains instructions that will be repeated throughout this manual. Read and understand this section before using the equipment. SPRAY GUN TRIGGER LOCK Engage the trigger lock whenever instructed. LOCKED The gun is locked when the trigger lock is at a 90º angle (perpendicular to the trigger in either direction). -
Page 8: Load Material
LOAD MATERIAL These steps will prime the system and get it ready to spray. www.wagnercontrolpro.com/howtoCP130 YOU WILL NEED PUSH • The material you plan to spray • Extension cord • Waste bucket Recommendation: It is good practice to perform the steps on this page using water to familiarize yourself with the function of the unit as well as to ensure the unit is set up properly. -
Page 9: Spraying
SPRAYING Follow these steps to deliver spray material from the tank to the spray gun. YOU WILL NEED • Waste bucket • Scrap material / cardboard • Drop cloths to protect floors and furnishings from overspray Make sure the tip and spray guard are removed. Point the spray gun into a separate waste container. -
Page 10: Practice Spraying
PRACTICE SPRAYING YOU WILL NEED • A surface to practice spraying (wood, carboard or scrap drywall) While spraying, the spray guard / tip assembly can be rotated to better suit your spraying motion. Lock the spray gun trigger prior to rotating the spray guard / tip assembly. -
Page 11: Clear The Spray Tip
SPRAYING TROUBLESHOOTING - CLEAR THE SPRAY TIP If the spray pattern becomes distorted or stops spraying completely while the gun is triggered, the spray tip could be clogged. Follow the steps below. YOU WILL NEED • Scrap material / cardboard Do not attempt to unclog or clean the tip with your finger. -
Page 12: Clean The Inlet Filter
SPRAYING TROUBLESHOOTING - CLEAN THE INLET FILTER If the spray pattern becomes distorted or stops spraying completely while the gun is triggered, the inlet filter could be clogged. Follow the steps below. YOU WILL NEED • Warm, soapy water for latex material •... -
Page 13: Short Term Storage
SHORT TERM STORAGE This procedure should be used when taking a short term break or when ending your project for the day. If your break is longer than 16 hours follow Cleanup instructions, pages 14-15. YOU WILL NEED • Water •... -
Page 14: Cleanup
CLEANUP CLEANING NOTES - READ BEFORE CLEANING FOLLOW THESE STEPS WHENEVER CLEANING WITH MINERAL SPIRITS: • • When using latex material, clean sprayer and components with If spraying or cleaning with oil-based materials, the spray gun warm, soapy water. For oil based material use mineral spirits. must be grounded while preparing the spray hose or cleaning. - Page 15 CLEANUP - CONTINUED Perform Pressure Relief Procedure (page 7). Remove the inlet filter. Clean by hand using a soft-bristled brush. Snap back into place when clean. Remove the tip guard and spray tip from the cleaning solution. Clean by hand using a soft bristled brush. IMPORTANT STEP: Fill the tank with warm, soapy water.
-
Page 16: Long Term Storage
LONG TERM STORAGE Follow these steps to prepare your sprayer for long- term storage. YOU WILL NEED • Light household oil (such as 10W30 motor oil or vegetable oil for example) / All Guard • Rags • Two adjustable wrenches Pull trigger guard from gun housing. -
Page 17: Maintenance - Cleaning The Inlet Valve
MAINTENANCE - CLEANING THE INLET VALVE Cleaning or servicing the inlet valve may be required if the unit has priming problems. Priming problems may be prevented by properly cleaning the sprayer and following the long-term storage steps. YOU WILL NEED •... -
Page 18: Cleaning The Outlet Valve
MAINTENANCE - CLEANING THE OUTLET VALVE Cleaning or servicing the outlet valve may be necessary if spray performance remains poor after following the steps in the Troubleshooting section. Call Technical Service (1-800-328- 8251) to order a new outlet valve assembly. YOU WILL NEED •... -
Page 19: Troubleshooting
TROUBLESHOOTING PROBLEM CAUSE SOLUTION A. The sprayer does not turn on. 1. The sprayer is not plugged in. 1. Plug the sprayer in. 2. The sprayer is turned OFF (0). 2. Switch the sprayer ON (l). 3. The sprayer shuts off while under pressure. 3. -
Page 20: Explication Des Symboles Utilisés
CONSIGNES DE SÉCURITÉ IMPORTANTES TABLE DE MATIÈRES EXPLICATION DES SYMBOLES UTILISÉS Lire toutes ces consignes avant d’utiliser l’appareil. Garder ces CONSIGNES DE SÉCURITÉ IMPORTANTES ____________ 20-22 consignes. Explication des symboles utilisés _______________________ 20 Pour réduire les risques d’incendie ou d’explosion, de choc électrique Directives de mise à... -
Page 21: Consignes De Sécurité Importantes
à la mise à terre de l’appareil. Ne pas modifier la fiche de l’appareil; si elle ne s’adapte pas dans la prise voulue, la faire remplacer par un électricien qualifié. Les rallonges Wagner recommandées sont les suivantes : N° de pièce 0090241 Rallonge de 6,1 m (20 pi) Conçu pour les circuits de 120 V, cet appareil est doté... - Page 22 étincelles en connectant et en déconnectant les cordons exclusivement des tuyaux flexibles à haute pression d‘origine électriques. de Wagner. • Ne pulvérisez pas et ne les nettoyez pas avec des liquides ayant •...
-
Page 23: Renseignements Généraux
MISE EN GARDE : ÉMANATIONS SPECIFICATIONS DANGEREUSES Certains produits (peintures, solvants, insecticides ou autres) peuvent être nocifs s’ils sont inhalés Control Pro 130 Power Tank ou entrent en contact avec l’organisme. Les Pression Max. 11,1 MPa émanations de ces produits peuvent provoquer graves nausées,... -
Page 24: Pièces Et Composants
PIÈCES ET COMPOSANTS Couvercle de réservoir Flexible Pistolet Embout Filtre d’entrée (A) PRIME Réservoir Tube de retour Interrupteur Déflecteur SPRAY On peut tourner le bouton PRIME/SPRAY dans l’une ou Bouton de Raccord de l’autre des directions au Le rondelle (a) PRIME/SPRAY (B) réglage souhaité... -
Page 25: Avant De Commencer
AVANT DE COMMENCER La section ci-dessous contient des renseignements qui seront répétes plus loin dans le manuel. Assurez-vous de lire et bien comprendre cette section avant d’utiliser l’équipement. VERROU DE DÉTENTE Verrouillez la détente du pistolet de pulvérisation chaque fois que c’est VERROU indiqué. -
Page 26: Remplissez De Matière Liquide
REMPLISSEZ DE MATIÈRE LIQUIDE Ces étapes amorceront le système et le prépareront à la pulvérisation. www.wagnercontrolpro.com/howtoCP130 CE DONT VOUS AUREZ BESOIN POUSSER • Le matériau que vous voulez peinturer • Une rallonge • Un contenant vide Recommandation : Il est recommandé d'exécuter les étapes figurant sur cette page en utilisant de l'eau pour vous familiariser avec le fonctionnement de l'appareil, ainsi que pour vous assurer que... -
Page 27: Pulvérisation
PULVÉRISATION Suivez ces étapes pour acheminer le produit à pulvériser la réservoir au pistolet de pulvérisation. CE DONT VOUS AUREZ BESOIN • Un contenant vide • Des matériaux/cartons mis au rebut • Toiles de peinture pour protéger les planchers et les meubles de la surpulvérisation. -
Page 28: Exercices De Pulvérisation
EXERCICES DE PULVÉRISATION CE DONT VOUS AUREZ BESOIN • Une surface pour pratiquer la pulvérisation (bois, carton ou morceau de cloison sèche). Pendant la pulvérisation, on peut tourner l’ensemble anti-éclaboussure/embout afin qu’il convienne mieux à votre mouvement de pulvérisation. Verrouillez la détente du pistolet de pulvérisation avant de tourner l’ensemble anti-éclaboussure/... -
Page 29: Désobstruction De L'embout
PROBLÈMES POTENTIELS - DÉSOBSTRUCTION DE L’EMBOUT Si la pulvérisation devient déformée ou s’arrête complètement pendant que vous appuyez sur la détente, il se peut que l’embout soit obstrué. Suivez les étapes ci-dessous. CE DONT VOUS AUREZ BESOIN • Des matériaux/cartons mis au rebut N’essayez pas de désobstruer ou de nettoyer l’embout avec vos doigts. -
Page 30: Problèmes Potentiels - Nettoyage Du Filtre D'entrée
PROBLÈMES POTENTIELS - NETTOYAGE DU FILTRE D’ENTRÉE Si la pulvérisation devient déformée ou s’arrête complètement pendant que vous appuyez sur la détente, il se peut que le filtre d’entrée soit obstrué. Suivez les étapes ci-dessous. CE DONT VOUS AUREZ BESOIN •... -
Page 31: Rangement À Court Terme
RANGEMENT À COURT TERME Cette méthode devrait être suivie lorsque vous faites une pause de courte durée ou lorsque vous avez terminé votre projet pour la journée. Si vous interrompez votre projet pendant plus de 16 heures, suivez les instructions de «Nettoyage» à la page 32-33. CE DONT VOUS AUREZ BESOIN •... -
Page 32: Nettoyage
NETTOYAGE REMARQUES IMPORTANTES AU SUJET DU NETTOYAGE - LIRE AVANT DIRECTIVES SPÉCIALES POUR LE NETTOYAGE AU MOYEN D’ESSENCE DE NETTOYER MINÉRALE : • • Lorsque vous utilisez une peinture au latex, nettoyez Si vous pulvérisez des matériaux à base d’huile ou nettoyez avec le pulvérisateur et ses composantes avec de l’eau tiède ces derniers, le pistolet de pulvérisation doit être mis à... -
Page 33: Nettoyage (Suite)
NETTOYAGE (SUITE) Suivez la «Procédure de Décompression», page 25. Retirer le filtre d’entrée de la réservoir. Nettoyez-les à la main à l’aide d’une brosse aux soies douces. Remettre le filtre d’entrée. Retirez le protège-embout et l’embout de la solution de nettoyage. Nettoyez-les à... -
Page 34: Rangement À Long Terme
RANGEMENT À LONG TERME Suivez ces étapes pour préparer votre pulvérisateur pour l’entreposage à long terme. CE DONT VOUS AUREZ BESOIN • De l’huile domestique légère (comme de l’huile à moteur 10W30 ou de l’huile végétale, par exemple) / All Guard •... -
Page 35: Nettoyage De La Soupape De D'entrée
NETTOYAGE DE LA SOUPAPE DE ENTRÉE En cas de difficulté d’amorçage de l’appareil, il peut être nécessaire de nettoyer ou de réparer le soupape de entrée. Il est possible de résoudre un problème d’amorçage en nettoyant correctement le pulvérisateur et en exécutant les étapes Rangement à long terme. CE DONT VOUS AUREZ BESOIN •... -
Page 36: Nettoyage De La Soupape De Sortie
NETTOYAGE DE LA SOUPAPE DE SORTIE Le nettoyage ou l’entretien de la soupape de sortie peuvent être nécessaires si les performances de la pulvérisation restent médiocres après avoir suivi les étapes de la section Dépannage. Appelez le service technique (1-800-328-8251) pour commander un nouvel ensemble de soupape de sortie. CE DONT VOUS AUREZ BESOIN •... -
Page 37: Dépannage
DÉPANNAGE PROBLÈME CAUSE SOLUTION A. Le pulvérisateur ne s’allume 1. Le pulvérisateur n’est pas branché. 1. Brancher le pulvérisateur. pas. 2. L’interrupteur est hors tension (0). 2. Mettre l’interrupteur sous tension (l). 3. Le pulvérisateur s’arrête lorsqu’il est sous pression. 3. -
Page 38: Explicación De Los Símbolos Utilizados
INFORMACIÓN IMPORTANTE SOBRE SEGURIDAD CONTENIDO EXPLICACIÓN DE LOS SÍMBOLOS UTILIZADOS Lea toda la información de seguridad antes de operar el equipo. INFORMACIÓN IMPORTANTE SOBRE SEGURIDAD _____ 38-40 Guarde estas insturcciones. Explicación de los símbolos utilizados ___________________ 38 Para reducir los riesgos de incendios, explosiones, descargas Instrucciones para la conexión a tierra ___________________ 39 eléctricas o lesiones a las personas, lea y entienda todas las Información eléctrica importante _______________________ 39... -
Page 39: Información Importante Sobre Seguridad
CONSULTE A UN MÉDICO Cuando se usa el rociador con un generador o INMEDIATAMENTE. línea o sin control, uncontrolled line voltage, se recomienda que Wagner’s “Line Surge Protector” Atención (P/N 800-935) se utiliza. PREVENCIÓN: •... - Page 40 No pulverice materiales inflamables ni combustibles cerca y duración, emplear únicamente mangueras de alta presión de llamas desnudas, pilotos o fuentes de ignición como originales de Wagner. objetos calientes, cigarrillos, motores, equipos eléctricos • Este sistema es capaz de producir 11.1 MPa (1600 PSI). Utilice o electrodomésticos.
-
Page 41: Información General
PELIGROSOS ESPECIFICACIONES Las pinturas, solventes, insecticidas y demás materiales pueden ser nocivos si se inhalan o toman contacto con el cuerpo. Los vapores Control Pro 130 Power Tank pueden causar náuseas graves, desmayos o envenamiento. Presión Máx. 11,1 MPa Capacidad 0,91 LPM PREVENCIÓN:... -
Page 42: Piezas Y Componentes
PIEZAS Y COMPONENTES Tapa de la tanque Manguera Pistola Boquilla Filtro de entrada (A) PRIME Tanque Tubo de retorno Interruptor Cubierta SPRAY La perilla PRIME/SPRAY se puede girar en cualquier dirección al Perilla de Conector de La arandela (a) ajuste deseado PRIME/SPRAY (B) y el asiento (b) manguera... -
Page 43: Avant De Comenzar
AVANT DE COMENZAR Esta sección contiene instrucciones que se repetirán en el manual. Lea y comprenda esta sección antes de utilizar el equipo. SEGURO DEL GATILLO Bloquee el gatillo de la pistola pulverizadora siempre que se indique. BLOQUEE La pistola se encuentra asegurada cuando el seguro del gatillo está a un ángulo de 90º... -
Page 44: Cargar Material
CARGAR MATERIAL Estos pasos van a cebar el sistema y estará listo para pulverizar. www.wagnercontrolpro.com/howtoCP130 QUÉ NECESITARÁ EMPUJE • El material que planea rociar • Cable de extensión • Contenedor para desechos Recomendación: Se recomienda realizar los pasos en esta página con agua para que se familiarice con el funcionamiento de la unidad y para garantizar que la unidad esté... -
Page 45: Rociado
ROCIADO Siga estos pasos para descargar material de pulverización desde el tanque hasta la pistola pulverizadora. QUÉ NECESITARÁ • Contenedor para desechos • Material de desecho o cartón • Paños para proteger pisos y muebles de salpicaduras Asegúrese de retirar la cubierta y boquilla. Apunte la pistola pulverizadora a un contenedor de desechos separado. -
Page 46: Practique El Rociado
PRACTIQUE EL ROCIADO QUÉ NECESITARÁ • Una superficie para practicar pulverizar (madera, cartón o cartón yeso) Mientras pulveriza, puede girar el conjunto de boquilla y protección de pulverización para adecuarse mejor al movimiento de pulverización. Bloquee el gatillo de la pistola pulverizadora antes de girar el conjunto de boquilla y protección de pulverización. -
Page 47: Solución De Problemas De Rociado
SOLUCIÓN DE PROBLEMAS DE ROCIADO - LIMPIE LA BOQUILLA DEL ROCIADOR Si el patrón de pulverización se distorsiona o deja de pulverizar completamente mientras presiona el gatillo, es posible que la boquilla de pulverización esté obstruida. Siga los pasos a continuación. QUÉ... -
Page 48: Limpie El Filtro De Entrada
SOLUCIÓN DE PROBLEMAS DE ROCIADO - LIMPIE EL FILTRO DE ENTRADA Si el patrón de pulverización se distorsiona o deja de pulverizar completamente mientras presiona el gatillo, es posible que el filtro de entrada esté obstruido. Siga los pasos a continuación. QUÉ... -
Page 49: Almacenamiento De Corto Plazo
ALMACENAMIENTO DE CORTO PLAZO Este procedimiento se debe realizar cuando toma un descanso breve o cuando finaliza el proyecto por el día. Si su descanso dura más de 16 horas, siga las instrucciones de Limpieza en la página 50-51. QUÉ NECESITARÁ •... -
Page 50: Limpieza
LIMPIEZA NOTAS IMPORTANTES DE LIMPIEZA - LEA ANTES LIMPIEZA INSTRUCCIONES DE LIMPIEZA ESPECIALES PARA USAR CON ALCOHOLES MINERALES: • Cuando use material de látex, limpie el rociador y los • componentes con agua tibia con jabón. Use disolventes Si rocía o limpia con materiales a base de aceite, la pistola de minerales para el material a base de aceite. - Page 51 LIMPIEZA (CONTINUACIÓN) Realice el Procedimiento de Alivio de Presión, página 43. Retire el filtro de entrada de la tanque. Limpie a mano con un cepillo de cerdas suaves. Reemplace el filtro de entrada. Retire la boquilla de pulverización y la protección de la boquilla de la solución de limpieza.
-
Page 52: Almacenamiento A Largo Plazo
ALMACENAMIENTO A LARGO PLAZO Siga estos pasos para preparar el pulverizador para ser almacenado por períodos largos. QUÉ NECESITARÁ • Aceite común liviano (tal como aceite de motor 10W30 o aceite vege- tal) / All Guard • Trapos • Llave (2) Tire de la cubierta del gatillo para separarlo del alojamiento de pistola. -
Page 53: Limpieza De La Válvula De Entrada
LIMPIEZA DE LA VÁLVULA DE ENTRADA Tal vez sea necesario limpiar o reparar la válvula de entrada si la unidad presenta problemas de imprimación. Los problemas de imprimación pueden prevenirse si se limpia el rociador adecuadamente y se siguen los pasos para el almacenamiento a largo plazo. QUÉ... -
Page 54: Limpieza De La Válvula De Salida
LIMPIEZA DE LA VÁLVULA DE SALIDA Puede ser necesario limpiar o dar servicio a la válvula de salida si el rendimiento de la pulverización sigue siendo deficiente después de seguir los pasos de la sección Solución de problemas. Llame al Servicio Técnico (1-800-328-8251) para pedir un nuevo ensamble de la válvula de salida. -
Page 55: Solución De Problemas
SOLUCIÓN DE PROBLEMAS PROBLEMA CAUSA SOLUCIÓN A. El pulverizador no enciende. 1. El pulverizador no está enchufado. 1. Enchufe el pulverizador. 2. El interruptor está apagado (0). 2. Ponga el interruptor en la posición encendida (l). 3. El pulverizador se apaga cuando está bajo presión. 3. -
Page 56: Lista De Piezas
PARTS LIST • LISTE DE PIÈCES • LISTA DE PIEZAS MAIN ASSEMBLY • ENSEMBLE PRINCIPAL • MONTAJE PRINCIPAL Description Description Descripción 0580538A Tank lid Couvercle de la réservoir Tapa de la tanque 0580072A Outlet valve assembly Ensemble de la soupape de sortie Conjunto de la válvula de salida 0580070 Set screw... - Page 57 PARTS LIST • LISTE DE PIÈCES • LISTA DE PIEZAS SPRAY GUN ASSEMBLY • PISTOLET DE PULVÉRISATION • PISTOLA DE ROCIADORA Replacement parts available by calling customer service On peut obtenir des pièces de rechange en appelant le Service à la clientèle. Los repuestos están disponibles llamanado al servicio a clientes.
- Page 58 ACCESSORIES • ACCESSOIRES • ACCESORIOS PART NO. DESCRIPTION DESCRIPTION DESCRIPCIÓN SPRAY GUNS PISTOLETS DE PULVÉRISATION PISTOLAS DE PULVERIZACIÓN 0580600 Control Pro spray gun Pistolet de pulvérisation Control Pro Pistola de pulverización de Control Pro 0580601 Control Pro M spray gun Pistolet de pulvérisation Control Pro M Pistola de pulverización de Control Pro M SPRAY TIPS AND ACCESSORIES...
-
Page 59: Garantie
GARANTIE MATÉRIEL DE PULVÉRISATION DE PEINTURE SANS AIR Ce produit, fabriqué par Wagner, est garanti, au bénéfice de l’acheteur au détail d’origine, contre tout vice de matières et toute malfaçon pour deux années à compter de la date d’achat. La présente garantie ne s’applique pas aux dégâts entraînés par une utilisation incorrecte, par la négligence de l’usager ou par l’usure normale. -
Page 60: Necesita Ayuda
QUESTIONS? BESOIN D’AIDE? Call Wagner Technical Service at: Appelez le service technique Wagner 1-800-328-8251 1-800-328-8251 Register your product online at: Enregistrement du produit en ligne sur le site : www.wagnerspraytech.com www.wagnerspraytech.com ¿NECESITA AYUDA? Llame Wagner Technical Service al: 1-800-328-8251 Regístrelo del producto en línea en: www.wagnerspraytech.com...