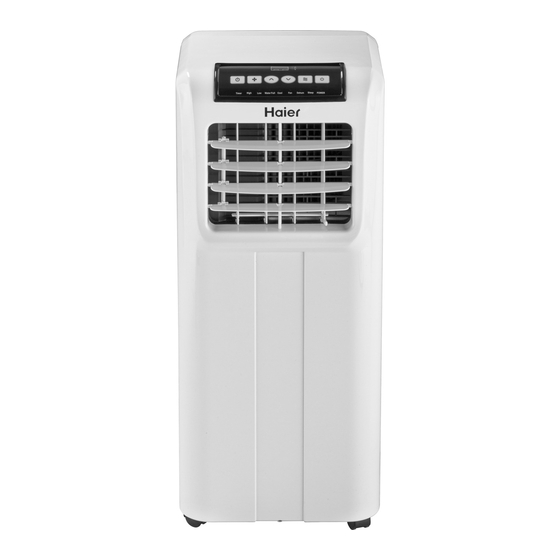
Haier HPP08XCR Guide De L'utilisateur
Masquer les pouces
Voir aussi pour HPP08XCR:
- Instructions d'installation et guide de l'utilisateur (40 pages) ,
- Installation et guide de l'utilisateur (40 pages) ,
- Guide de l'utilisateur (39 pages)

Manuels Connexes pour Haier HPP08XCR


Sommaire des Matières pour Haier HPP08XCR
- Page 1 Installation and User Manual Instructions d’installation et Guide de l’utilisateur Instrucciones de instalación y Manual del usuario HPP08XCR, HPP10XCT, HPP10XCT-E, Portable Air Conditioner QPCD05AXMW Climatiseur portatif Acondicionador de aire portatil 49-7780-1 12-17 GEA...
-
Page 3: Table Des Matières
RECORD KEEPING ..................1 RECORD KEEPING Thank you for purchasing this Haier product. This user manual will _______________________________________ help you get the best performance from your new air conditioner. -
Page 4: Air Conditioner Safety
AIR CONDITIONER SAFETY Your safety and the safety of others are very important. We have provided many important safety messages in this manual and on your appliance. Always read and obey all safety messages. This is the safety alert symbol. This symbol alerts you to potential hazards that can kill or hurt you and others. -
Page 5: Parts And Features
PARTS AND FEATURES Control Panel Side Handle Vertical Air Vent Louver Horizontal Air Vent Louver Casters Center Drain Cap Power Cord Storage Air Filter Real Air Discharge Lower Drain Cap INSTALLATION REQUIREMENTS TOOLS AND PARTS Gather the required tools and parts before starting installation. -
Page 6: Location Requirements
If this power supply cord is damaged, it cannot be repaired. It must be replaced with a cord from the product manufactur- er. If the power supply cord is damaged call Haier Customer Service: 1-877-337-3639. RESET TEST 20”... -
Page 7: Installation Instructions
INSTALLATION INSTRUCTIONS STEP 1 - UNPACK AIR STEP 3 - INSTALL MAIN WINDOW CONDITIONER PANEL AND EXTENSION PANELS NOTE: Depending on the size of your window opening, use WARNING the main panel and one or both of the extension panels. 1. -
Page 8: Step 4 - Attach Exhaust Hose To The Exhaust Nozzle
4. For vinyl windows only. 6. Place the window panel assembly in the window, and using Skip to step 6 for wood windows. the screws provided, fasten the assembly to the window Place the two top window brackets and two bottom sill and window frame. -
Page 9: Step 5 - Connect Exhaust Hose To The Air Conditioner
INSTALLATION INSTRUCTIONS STEP 6 - COMPLETE INSTALLATION STEP 5 - CONNECT EXHAUST HOSE TO THE AIR CONDITIONER WARNING IMPORTANT: When connecting the hose, the air conditioner must be close enough to the window that you will not dislodge the window seal plate. Once the hose is connected, move the air conditioner 20”... -
Page 10: Control Panel
REMOTE CONTROL FAN SPEED BUTTON speed when the air conditioner is in operation. NOTE: in Dehum mode. • Press the Fan Speed button to toggle among the two speeds. The corresponding fan speed indicator will illuminate. REMOTE CONTROL SIGNAL RECEIVING WINDOW Aim the Remote Control at this window so the Control will receive the signal. -
Page 11: Air Conditioner Use
AIR CONDITIONER USE • IMPORTANT: If the air conditioner has been tilted on its side, When turning on the unit after previous use, it will remember the last settings used. wait 24 hours before turning on the air conditioner to allow the oil to return to the compressor. -
Page 12: Troubleshooting
TROUBLESHOOTING First try the solutions suggested here to possibly avoid the cost of a service call. PROBLEM POSSIBLE CAUSE(S) SOLUTION Unit does not start or Power supply cord is not plugged into an outlet. Plug the power cord into a grounded 3 prong operate outlet. -
Page 13: Limited Warranty
Service location for service. In Alaska, the warranty excludes the cost of shipping or service calls to your home. legal rights, and you may also have other rights which vary from state to state. To know what your legal rights are, consult your Warrantor US: GE Appliances, a Haier company... - Page 14 TABLE DES MATIÈRES SÉCURITÉ DU CLIMATISEUR ................. 13 PIÈCES ET CARACTÉRISTIQUES .
-
Page 15: Sécurité Du Climatiseur
SÉCURITÉ DU CLIMATISEUR Votre sécurité et celle des autres est très importante. “DANGER,” “AVERTISSEMENT” ou “ATTENTION.” DANGER AVERTISSEMENT provoquer la mort ou des blessures graves. ATTENTION blessure et ce qui peut se produire en cas de non-respect des instructions. IMPORTANTES INSTRUCTIONS DE SÉCURITÉ AVERTISSEMENT : •... -
Page 16: Pièces Et Caractéristiques
PIÈCES ET CARACTÉRISTIQUES Tableau de commande Poignée latérale Persienne de sortie d’air verticale Persienne de sortie d’air horizontale Roulettes Capuchon de vidange central Rangement du cordon d’alimentation Filtre à air Sortie d’air arrière Capuchon de vidange inférieur EXIGENCES D’INSTALLATION OUTILLAGE ET PIÈCES OUTILS NÉCESSAIRES •... - Page 17 SPÉCIFICATIONS ÉLECTRIQUES AVERTISSEMENT • • Bande de Bande de • mousse mousse • Piles (2) (10 mm x 10 (10 mm x mm x 10 mm x 102 cm) 102 cm) Risque de choc électrique EXIGENCES D’EMPLACEMENT Ne pas enlever la broche de liaison à la terre du cordon •...
-
Page 18: Instructions D'installation
INSTRUCTIONS D’INSTALLATION ÉTAPE 1 - DÉBALLAGE DU CLIMATISEUR REMARQUE : AVERTISSEMENT Risque du poids excessif installer le climatiseur. Vis à bord Le non-respect de cette instruction peut causer une plat • ÉTAPE 3 - INSTALLATION DU PAN- REMARQUE : NEAU DE FENÊTRE PRINCIPAL ET •... - Page 19 tension sur le panneau principal. Installer depuis l’arrière. Pour les fenêtres en vinyle seulement. Aller à l’étape 6 pour les fenêtres en bois. maintenir au mieux le ou les panneaux de raccord. Avant assemblage SEULEMENT POUR VINYLE INSTALLATION TYPIQUE POUR FENÊTRES EN VINYLE Bande de mousse Bande de mousse Panneau de raccord...
- Page 20 ÉTAPE 6 - FIN DE L’INSTALLATION ÉTAPE 4 - RACCORDEMENT DU TUYAU D’ÉVACUATION À LA BUSE D’ÉVACUATION AVERTISSEMENT REMARQUE : refroidissement et pourrait endommager le climatiseur. Risque de choc électrique Ne pas enlever la broche de liaison à la terre du cordon Ne pas utiliser un adaptateur.
-
Page 21: Tableau De Commande
TABLEAU DE COMMANDE °C °F Timer High Low Water Full Cool Dehum Sleep POWER BOUTONS BOUTON DE MINUTERIE BOUTONS DE FLÈCHES HAUT/BAS Réglage de la température : Lorsque le climatiseur fonctionne : 30 ºC) lorsque le climatiseur est en mode de refroidisse- 1. -
Page 22: Utilisation Du Climatiseur
TÉLÉCOMMANDE TÉMOINS LUMINEUX Timer High Water Full Cool Dehum Sleep POWER signal sur le tableau de commande pour faire fonctionner WATER FULL (RÉSERVOIR D’EAU PLEIN) le climatiseur. BOUTON SLEEP (SOMMEIL) consulter les instructions à la section “Entretien du climatiseur”. REMARQUE : Le ventilateur fonctionne à vitesse basse Annulation du mode Sleep (sommeil) : •... -
Page 23: Entretien Du Climatiseur
ENTRETIEN DU CLIMATISEUR AVERTISSEMENT REMARQUE : aspirateur. REMARQUE : Risque de choc électrique nettoyage. RÉSERVOIR D’EAU INTERNE NETTOYAGE Vidage du réservoir d’eau interne : uniquement. REMARQUE : • nettoyer le climatiseur. 3. Retirer le capuchon et le bouchon en caoutchouc et vidan- •... - Page 24 PROBLÈME CAUSE(S) POSSIBLE(S) SOLUTION Appuyer et relâcher le bouton RESET tion. Appuyer sur le bouton de mise sous tension sur le ALLUMER le climatiseur. de commande”. Remplacer les piles. tiseur”. REMARQUE : La télécommande ne Remplacer les piles. fonctionne pas. sens.
-
Page 25: Garantie Limitée
Toute garantie implicite, y compris les garanties implicites relatives à la qualité marchande ou à l’adéquation à un usage particulier, se limitera à une période d’un an ou à la période la plus courte prescrite par la loi. Clients des États-Unis domicile. Garant, Nous : GE Appliances, a Haier company... - Page 26 INFORMACIÓN A TENER EN CUENTA ............... . . 24 INFORMACIÓN A TENER EN CUENTA Le agradecemos la compra de este producto de marca Haier. Este _______________________________________ Número de modelo...
-
Page 27: Seguridad Del Acondicionador De Aire
SEGURIDAD DEL ACONDICIONADOR DE AIRE Su seguridad y la seguridad de los demás es muy importante. vertencia de seguridad y de la palabra “PELIGRO”, “ADVERTENCIA” o “PRECAUCIÓN”. Se trata de una situación de peligro inminente. Si no sigue las instrucciones de PELIGRO inmediato, usted puede morir o sufrir una lesión grave. -
Page 28: Piezas Y Características
PIEZAS Y CARACTERÍSTICAS Panel de Control Manija lateral Rejilla vertical de descarga de aire Rejilla horizontal de descarga de aire Ruedecillas Tapa de desagüe central Almacenamiento para el cable eléctrico Filtro de aire Descarga de aire real Tapa de desagüe inferior REQUISITOS DE INSTALACIÓN HERRAMIENTAS Y PIEZAS Reúna las herramientas y piezas necesarias antes de... -
Page 29: Requisitos De Ubicación
REQUISITOS ELÉCTRICOS ADVERTENCIA • •Tira de espu- •Control Tira de remoto espuma inferior •Pilas (2) superior (3 mm x (10 mm x 10 mm x 10 mm x Peligro de Choque Eléctrico 102 cm) 102 cm) Conecte a un contacto de pared de conexión a tierra de 3 terminales. -
Page 30: Instrucciones De Instalación
INSTRUCCIONES DE INSTALACIÓN PASO 1 - DESEMPAQUE SU ACONDICIONADOR DE AIRE NOTA: En una unidad de manguera doble, instale una boquilla ADVERTENCIA Peligro de Peso Excesivo Use dos o más personas para mover e instalar el acondicionador de aire. No seguir esta instrucción puede ocasionar una lesión Tornillo en la espalda u otro tipo de lesiones. - Page 31 5. Coloque la tira de espuma superior (incluida) a lo largo de la ancho o altura de la ventana, como se muestra. tira de espuma inferior (incluida) a lo largo de borde frontal NOTA: La instalación de algunas ventanas requiere que se corten los paneles de extensión.
-
Page 32: Paso 5 - Conecte La Manguera De Escape Para El Acondicionador De Aire
PASO 6 - COMPLETE LA PASO 4 - SUJETE LA MANGUERA DE INSTALACIÓN ESCAPE A LA BOQUILLA DE ESCAPE ADVERTENCIA suavemente para extender la manguera. NOTA: No conecte mangueras adicionales para coloque el extremo abierto de la manguera de escape en la Peligro de Choque Eléctrico boquilla de escape. -
Page 33: Panel De Control
PANEL DE CONTROL °C °F Timer High Low Water Full Cool Dehum Sleep POWER BOTONES BOTÓN TIMER (TEMPORIZADOR) BOTONES CON FLECHAS HACIA ARRIBA Y HACIA ABAJO Programe un tiempo desde (1 hora a 24 horas) para que el acondicionador de aire se apague o se encienda. Cuando se programa un tiempo diferido, la luz indicadora de Timer Para jar la temperatura: (Temporizador) se iluminará. -
Page 34: Control Remoto
CONTROL REMOTO LUCES INDICADORAS Timer High Water Full Cool Dehum Sleep POWER 1. Inserte dos pilas (provistas). Se iluminarán para indicar el modo, la velocidad o el estado que se seleccionó. panel de control para hacer funcionar el acondicionador WATER FULL (MÁXIMO NIVEL DE AGUA) de aire. -
Page 35: Cuidado Del Acondicionador De Aire
CUIDADO DEL ACONDICIONADOR DE AIRE NOTA: ADVERTENCIA NOTA: Peligro de choque eléctrico TANQUE DE AGUA INTERNO No seguir esta instrucción puede ocasionar la muerte o El indicador Water Full (Máximo nivel de agua) se ilumina cuando el tanque de agua interno se llena de agua conden- sada. - Page 36 PROBLEMA POSIBLE(S) CAUSA(S) SOLUCIÓN El botón Power (Encendido) no se ha Presione el botón Power (Encendido) en el panel presionado. de control o el control remoto para ENCENDER el acondicionador de aire. Se ha fundido un fusible de la casa o se ha Reemplace el fusible o reposicione el disparado un cortacircuitos.
-
Page 37: Garantía Limitada
Garantía Limitada. Las garantías implícitas, incluyendo garantías implícitas de comerciabilidad o conveniencia sobre un propósito particular, se limitan a un año o al período más corto permitido por la ley. Para Clientes de EE.UU: Garante en EE.UU: GE Appliances, a Haier company... - Page 38 IMPORTANT Do Not Return This Product To The Store If you have a problem with this product, please call 1-877-337-3639 for the name and telephone number of the nearest authorized service center. DATED PROOF OF PURCHASE REQUIRED FOR WARRANTY SERVICE IMPORTANT Ne pas Réexpédier ce Produit au Magasin En cas de problème avec ce produit, veuillez composer le 1-877-337-3639 pour connaître le...