Table des Matières
Publicité
Liens rapides
A L L
P U R P O S E
V I N Y L
G A R D E N
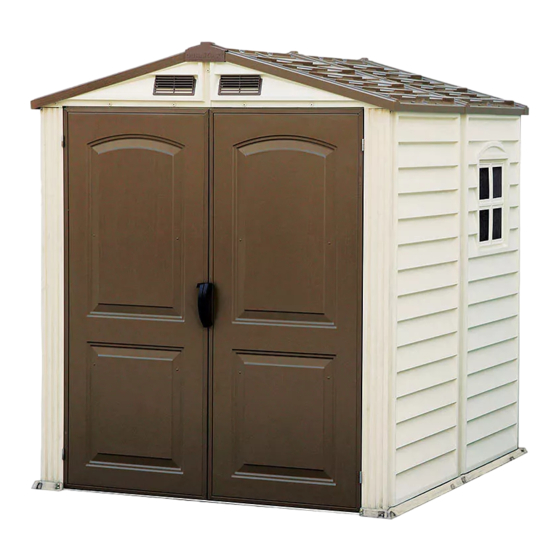
VINYL GARDEN SHED
(EN)
HANGAR DE JARDIN DE VINYLE
(FR)
(EN) OWNER'S MANUAL /
Instructions for Assembly '6 Ft StoreMate'
Size 6 Ft x 6 Ft / 1.9 m x 1.9 m
Ver: 2.01
(EN) Your Total Solution To Maintenance Free Storage Sheds.
• All Weather Durable PVC
• Won't Dent, Rust, Rot or Mildew
• Tall Walk In Shed
• Never Needs Painting
• 61 Inch Wide Double Doors
• Easy Assembly
• Snow Load Tested 20lbs/sq. ft
• Pad Lock Ready (Lock not included)
• Shatter Proof Glazed Window Included
• Floor Included
Requires two people and takes about 2-3 hours for Installation.
Call us for any missing or damaged parts.
Do not return to the store.
Approximate
Size
Area
6 Ft x 6 Ft
33 1/4 Sq. Ft 198 1/2 Cu.Ft
1.9 m x 1.9 m
3.1 Sq.m
Taille
approximative
Secteur
33 1/4 Carré
6 Pieds x 6 Pieds
pieds
1.9 Mètre x
3.1 Mètre
1.9 Mètre
carré
TM
A Product of
S H E D S
(Approx.)
(EN) Building Dimensions :
Storage
Volume
Base Dimension
Width
Depth
5.6 Cu.m
Height
(FR) Dimensions du bâtiment :
Stockage
Dimension de base
Volume
198 1/2 Pieds
cube
Largeur
Profondeur
5.6 Mètre
cube
Hauteur
(FR) GUIDE D'INSTRUCTIONS /
Mode d'emploi pour Assemblage '6 Pieds StoreMate''
Mesures 6 Pieds x 6 Pieds / 1.9
Ver: 2.01
(FR) Votre solution pour des remises d'entreposage sans entretien.
• Solidité Assurée en Toute Saison
• Ne se cabosse pas, ne rouille pas, ne moisit pas et ne se pique pas
•
• Pas besoin de peinture
• Larges doubles portes de 61''
• Montage facile
• Charge de neige testée 60 livres/pieds 2
• Possibilité de cadenas (Verrou non inclus)
•
Vitrageincassableinclus
•
Plancher inclus
Il faut deux personnes et ça prend 2-3 heures pour l'installation.
Appelez-nous pour toute les pièces manquantes ou endommagées.
Exterior Dimension
Roof Edge to Edge
inch
cm
inch
74 3/4
190
73 1/2
192
75 5/8
73 7/8
83 7/8
Dimension extérieure
Toit de bord au bord
pouce
pouce
cm
74 3/4
190
73 1/2
192
75 5/8
73 7/8
83 7/8
(EN) Customer
Service Hotline
(800) 483-4674
www.duramaxbp.com
(FR) Service
Hotline Client.
(800) 483-4674
www.duramaxbp.com
Ne pas retourner au magasin.
Interior Dimension
Wall to Wall
cm
inch
cm
186.8
69 1/4
176
187.6
176
69 1/4
213
181
71 1/4
Dimension intérieure
Mur à mur
pouce
cm
cm
186.8
69 1/4
176
187.6
176
69 1/4
213
181
71 1/4
x 1.9
(Approx.)
Door Opening
inch
cm
154
60 5/8
178
70
Ouverture de
porte
cm
pouce
154
60 5/8
178
70
Publicité
Table des Matières

Manuels Connexes pour DuraMax StoreMate


Sommaire des Matières pour DuraMax StoreMate
- Page 1 (EN) OWNER’S MANUAL / (FR) GUIDE D’INSTRUCTIONS / Instructions for Assembly ‘6 Ft StoreMate’ Mode d’emploi pour Assemblage ‘6 Pieds StoreMate’’ Size 6 Ft x 6 Ft / 1.9 m x 1.9 m Mesures 6 Pieds x 6 Pieds / 1.9 x 1.9...
- Page 2 (EN) Duramax Garden Shed Limited Fifteen Year Warranty U.S. Polymer Inc. will send a replacement part free of charge, in the event of material defects and or workmanship for a period of fifteen years from the date of purchase. This warranty is extended only to the original purchaser. A purchase receipt or other proof of date of original purchase will be required before warranty service is rendered.
- Page 3 (EN) SAFETY & PRECAUTIONS (FR) SÉCURITÉ ET PRÉCAUTIONS (FR) SÉCURITÉ ET PRÉCAUTIONS (EN)Before You Begin... 1. Check your local building codes regarding footings, location, etc. 2. Select a site that allows enough working space around the shed. 3. Determine building foundation and anchor system. 4.
- Page 4 (FR) SÉCURITÉ ET PRÉCAUTIONS (EN) SAFETY & PRECAUTIONS (EN) For your own safety, please read and follow these instructions during the shed assembly. (FR) Pour votre propre sûreté, svp lisez et suivez ces instructions pendant le montage. 1. (EN) Always wear work gloves, long sleeves and eye protection during assembly of the shed.
- Page 5 (EN) IMPORTANT (FR) IMPORTANT (EN) Wear eye protection when using any form of power tools. Do not use voltage power tools in a wet or damp enviornment to avoid electric shock. (FR) Portez la protection d'oeil en employant n'importe quelle forme de machines-outils. N'employez pas les machines-outils de tension dans un environnement humide afin d’éviter le choc électrique.
- Page 6 (EN) 6’ x 6’ StoreMate Parts List (FR) 6’ x 6’ StoreMate Liste des pièces (EN) PARTS (FR) PIÈCES (EN) ACCESSORIES (FR) ACCESSORIES (EN)CODE (EN)QTY (EN)CODE (EN)QTY (EN)CODE (EN)QTY (EN)CODE (EN)QTY (FR)CODE (FR)QTÉ (FR)CODE (FR)QTÉ (FR)CODE (FR)QTÉ (FR)CODE (FR)QTÉ FCLM...
- Page 7 (EN) 6’ x 6’ StoreMate Exploded View (FR) 6’ x 6’ StoreMate Vue Explosée R2LR R1LR R1RR R2RR FPRM FPLM RS3R RS2RR RS9R RS8R RS2LR RS2LR RS5R RS2LR RS9R RS9R RS15Q RS1R RS9R RS1R RS2RR RS15Q RS2RR RS8R FPLM DSHQ...
- Page 8 A. (EN) Walls & Columns (FR) Murs et colonnes (EN) 1. It is important that these instructions are followed step by step. Note 2. All parts are clearly marked and care should be taken to use the correct one. 3. Don’t install under windy conditions. 4.
- Page 9 BPBR BPFR 1,2,3&4 BPBR BPBR BPIN BPFR BPFR Fig.1 Fig.2 Fig.3 Fig.4 (EN) Back (FR) Arrière FCRM FCRM BPFR FCRM BPBR Fig.1 Fig.2 BPFR FCRM BPFR (EN) Front (FR) Avant Fig.3 2&3...
- Page 10 1. (EN) One shatter proof glazed window Note panel (SPMW ) included. This can be used in any of the wall positions. (FR) Un panneau de vitrage incassable (SPMW ) inclus. Ceci peut être utilisé dans toutes les positions de mur. FCRM 2.
- Page 11 CB3R Fig.1 CB3R Fig.2 SPMW SPMW SPMW Fig.1 Fig.2 Back (EN) Back (FR) Arrière SPMW BPBR Fig.1 Fig.2 2&3 (EN) Back (FR) Arrière Fig.3...
- Page 12 (EN) Do not tighten the screw. Note Leave it loose. (FR) Ne pas serrer la vis. Laisser le lâche. CB3R (EN) Back (FR) Arrière Fig.1 CB3R (EN) Back CB3R (FR) Arrière Fig.1 Fig.1 Fig.2 (EN) Back (FR) Arrière...
- Page 13 Fig.1 BPBR 2&3 BPBR (EN) Back Fig.2 Fig.3 (FR) Arrière 1&2 CB3R CB3R CB3R (EN) Back (FR) Arrière CB3R Fig.1 Fig.2 CB3R Fig.3 (EN) Back Wall (FR) Mur arrière Fig.1...
- Page 14 BPBR Fig.1 Fig.2 2&3 BPBR Fig.3 (EN) Do not tighten the screw. Note Leave it loose. (FR) Ne pas serrer la vis. Laisser le lâche. Fig.1 CB3R CB3R Fig.1...
- Page 15 BPBR Fig.1 Fig.2 (EN) Front (FR) Avant BPFR Fig.1 Fig.2 1&3 BPFR (EN) Front Fig.3 (FR) Avant (EN) Left Wall (FR) Mur à gauche 1&2 CB3R CB3R CB3R Fig.2 CB3R Fig.1 CB3R Fig.3...
- Page 16 (EN) Front (FR) Avant FCLM BPFR FCLM FCLM Fig.1 Fig.2 FCLM BPFR BPFR 1&3 (EN) Front (FR) Avant Fig.3 FCLM (EN) Do not tighten the screw. Note Leave it loose. (FR) Ne pas serrer la vis. (EN) Front Laisser le lâche. (FR) Avant FCLM CB3R...
- Page 17 FCLM (EN) Front (FR) Avant CB3R CB3R (EN) After completing the center band Note assembly, fully tighten the four center band fittings (FCB) to the corner column. (FR) Apres avoir complete l’assemblage de la bande centre, resserez completement les quatres bandes centre ajustables (FCB) à la colonne d’angle.
-
Page 18: Table Des Matières
B. (EN) Roof Structures (FR) Structure Du Toit (EN)Parts Needed: (EN)Pièces nécessaires (EN) CODE (EN) QTY (EN) CODE (EN) QTY (FR) CODE (FR) CODE (FR)QTÉ (FR)QTÉ RS1R DSHQ RS3R FDCL RS5R FDCR RS8R RS9R RS2LR RS2RR RS15Q Fig.1 Fig.2 Fig.2 Fig.1 1&2 3&4... -
Page 19: Rs1R
FDCR 1&2 FDCR (EN) Front FCRM (FR) Avant FCRM FCRM 3&4 Fig.1 Fig.2 FCLM FDCL FDCL FCLM FCLM Fig.3 Fig.4 (EN) 6’ x 6’ Roof Structure Exploded View (FR) 6’ x 6’ Vue Agrandie De La Structure Du Toit RS2RR RS3R RS15Q RS2LR... - Page 20 (EN) Front roof structure assembly (FR) Assemblage De La Structure Avant Du Toit RS9R RS8R RS1R RS8R RS9R RS9R RS8R RS1M RS8R DSHQ RS9R (EN) Back roof structure assembly (FR) Assemblage De La Structure Arriere Du Toit RS9R RS8R RS1R RS8R RS9R...
- Page 21 (EN) Make 2 sets. Note (FR) Faire 2 ensembles. RS3R RS3R RS3R 1&2 RS1R RS9R RS8R RS1R RS1R RS8R RS9R FCRM FCRM FCRM FDCR 3&4 (EN) Front Fig.1 Fig.2 (FR) Avant RS1R RS1R FDCL FCLM FCLM Fig.3 Fig.4...
-
Page 22: Fcc
RS1R RS8R RS9R (EN) Back (FR) Arrière RS9R RS8R RS1R RS1R RS3R Fig.1 RS3R RS1R RS1R 1,2&3 Fig.2 Fig.3... - Page 23 RS3R RS5R RS8R RS8R Fig.1 RS5R RS5R 1&2 RS8R RS8R Fig.2 RS8R RS8R RS5R Fig.3...
-
Page 24: Rs2Lr
RS2LR RS2LR RS2RR RS2RR RS8R RS8R Fig.1 RS2RR RS3R RS9R Fig.2 Fig.3 (EN) Front (FR) Avant RS2RR RS2RR (EN) Back (FR) Arrière RS2LR RS2LR RS8R RS8R Fig.1 RS2LR RS3R RS9R Fig.2 Fig.3... -
Page 25: Rs15Q
RS3R RS2LR RS5R RS2LR RS2RR RS2RR RS5R Fig.1 RS2RR RS3R RS3R Fig.2 RS8R RS8R RS15Q Fig.1 RS15Q RS8R RS8R Fig.2... - Page 26 C. (EN) Roof Panels 1.(EN) Insert roof plugs into Facia Panel Note only as indicated. (FR) Planches de Toiture (FR) Insérer les bouchons du toit dans le Panneau Facia seulement comme indiqué. 2.(EN) Use the same colour Plugs & Pins (EN)Parts Needed: (PPG &...
- Page 27 (EN)1. Use a screw driver to align the holes. Note 2. Insert roof plugs into roof panels only as indicated. (FR)1. Utilisez un tournevis pour aligner les trous. 2. Inserez les pistons de plastique dans les panneaux de toiture uniquement. comme indiqué. (EN) Back (FR) Arrière R2LR...
- Page 28 (EN) Apply silicone around the roof plugs. This is (EN) Apply silicone on the perimeter of transparent sheet Note Note optional and should be done for heavy rain areas if from inside. This is optional and should be done for heavy needed.
- Page 29 (EN)Parts Needed: D. (EN) Doors (FR) Les Portes (FR)Pièces Nécessaires (EN)CODE (EN)QTY (FR)CODE (FR)QTÉ Fig.1 Fig.2 Fig.1 Fig.2...
- Page 30 U.S. Polymers, Inc. 1057 S. Vail Ave Montebello, CA 90640, United States of America...