Publicité
Les langues disponibles
Les langues disponibles
Liens rapides
PLASMA DISPLAY
ÉCRAN À PLASMA
PLASMA-DISPLAY
DISPLAY A PLASMA
PANTALLA DE PLASMA
ПЛАЗМЕННЫЙ ДИСПЛЕЙ
PLASMASCHERM
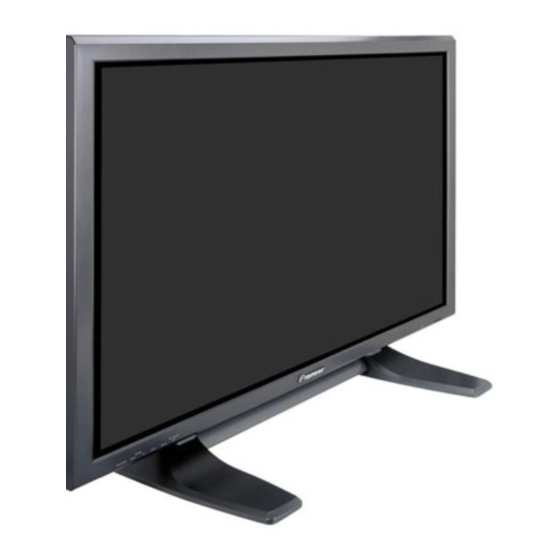
PDP-42MVE1
Operating Instructions
Mode d'emploi
Bedienungsanleitung
Istruzioni per l'utilizzo
Manual de instrucciones
Инструкция по эксплуатации
Gebruiksaanwijzing
Publicité

Manuels Connexes pour Pioneer PDP-42MVE1


Sommaire des Matières pour Pioneer PDP-42MVE1
- Page 1 PLASMA DISPLAY ÉCRAN À PLASMA PLASMA-DISPLAY DISPLAY A PLASMA PANTALLA DE PLASMA ПЛАЗМЕННЫЙ ДИСПЛЕЙ PLASMASCHERM PDP-42MVE1 Operating Instructions Mode d’emploi Bedienungsanleitung Istruzioni per l’utilizzo Manual de instrucciones Инструкция по эксплуатации Gebruiksaanwijzing...
- Page 2 Operating Instructions Thank you very much for purchasing this PIONEER product. Before using your Plasma Display, please carefully read the “Important Information” and these “Operating Instructions” so you will know how to operate the Plasma Display properly. Keep this manual in a safe place. You will find it useful in the future.
- Page 3 Important Information Precautions Warnings and Safety Precaution Please read this manual carefully before using your plasma This plasma monitor designed monitor and keep the manual handy for future reference. manufactured to provide long, trouble-free service. No maintenance other than cleaning is required. Please see the section “Plasma monitor cleaning CAUTION procedure”...
- Page 4 3. To ensure proper ventilation, cleaning of the ventilation NOTE: areas must be carried out monthly. More frequent cleaning When you connect a computer to this monitor, use an RGB may be necessary depending on the environment in which cable including the ferrite core on both ends of the cable. the plasma monitor is installed.
- Page 5 This product complies with the Low Voltage Directive (73/23/EEC, amended by 93/68/EEC), EMC Directives (89/336/EEC, amended by 92/31/EEC and 93/68/EEC). Caution This model is for use with the following optional accessories. Use with other optional accessories is capable of resulting in instability causing possible injury.
- Page 6 Contents Installation ............2 Setting the power management for computer images . 19 Ventilation Requirements for enclosure mounting ..2 STANDBY/ON indicator ........... 19 How to use the safety metal fittings and the screws for Setting the picture to suit the movie ......19 safety metal fittings ..........
- Page 7 Installation You can attach your optional mounts or stand to the plasma monitor in one of the following two ways: * While it is upright. (See Drawing A) * As it is laid down with the screen face down (See Drawing B). Lay the protective sheet, which was wrapped around the monitor when it was packaged, beneath the screen surface so as not to scratch the screen face.
- Page 8 Creating a video wall With built-in matrix display capability, you can create a 4-25 video wall. • Connect signal cables and remote cables as shown below. Video signal PC/COMPONENT signal BNC connector BNC connector PC signal / VIDEO signal COMPONENT RCA phono plug signal VIDEO signal...
- Page 9 BNC INPUT • Rotate 90° clockwise as seen from the front when installing. D-SUB INPUT RGB SELECT AUTO HD SELECT • After installing, check with the PIONEER logo mark 1080B INPUT SKIP ALL RESET 1024 768 as seen from the front.
- Page 10 Part Names and Function Front View t LEFT/– and RIGHT/+ q Power ( Functions as the CURSOR ( / ) buttons in the On- Turns the monitor’s power on and off. Screen Display (OSD) mode. w Remote sensor window y VOLUME Receives the signals from the remote control.
- Page 11 Connect the (positive) speaker wire to the Never connect any component to this connector EXT SPEAKER terminal and the (negative) without first consulting your Pioneer installation speaker wire to the EXT SPEAKER terminal on technician. both LEFT and RIGHT channels.
- Page 12 u EXIT Remote Control Press this button to exit the OSD controls in the main menu. Press this button during the display of the sub menu to return to the previous menu. i POINT ZOOM Press this button to display the pointer. o ZOOM (+ /–) Enlarges or reduces the image.
- Page 13 Basic Operations POWER OFF TIMER To turn the unit ON and OFF: To set the off timer: The off timer can be set to turn the power off after 30, 60, 1. Plug the power cord into an active AC power outlet. 90 or 120 minutes.
- Page 14 WIDE Operations SCREEN SIZE Operation 2.35:1 size screen (manual) With this function, you can select one of six screen sizes. When viewing videos or digital video discs 1. Press the SCREEN SIZE button on the remote control. 2. Within 3 seconds ... Original image Information is lost on both sides.
- Page 15 SCREEN SIZE Operation with Information Computer Signals Supported resolution Switch to the wide screen mode to expand the 4 : 3 image See page 29 for details on the display output of the to fill the entire screen. various VESA signal standards supported by the 1.
- Page 16 Controls (On Screen Display) Menu Operations Note: The main menu disappears by pressing the EXIT The OSD window is displayed with respect to the button. screen as shown on the diagram. Information * Depending on the screen’s mode, the OSD may be displayed differently.
- Page 17 Menu Tree :Shaded areas indicate the default value. ←→ button to adjust. : Press the :Menu items in a ruled box are available when the ADVANCED OSD is set to ON. Main menu Sub menu Sub menu 2 Sub menu 3 Sub menu 4 RESET REFERENCE...
- Page 18 Main menu Sub menu Sub menu 2 Sub menu 3 Sub menu 4 RESET REFERENCE OPTION2 PWR. MGT. OFF←→ON PURECINEMA OFF←→ON LONG LIFE AUTO/LOCK 1/LOCK 2/LOCK 3 ORBITER AUTO 1 AUTO 2 MANUAL H-DOT/V-LINE/TIME INVERSE WORKING TIME/WAITING TIME WHITE SCREEN WIPER WORKING TIME/WAITING TIME/SPEED SOFT FOCUS OFF/1/2/3/4...
- Page 19 Picture Settings Menu Reducing noise in the picture Use these settings if the picture has noise due to poor Adjusting the picture reception or when playing video tapes on which the picture The contrast, brightness, sharpness, color and tint can be quality is poor.
- Page 20 Adjusting the color to the desired level Making the Low Tone adjustments Use this procedure to adjust the white balance for each This feature allows more detailed tone to be reproduced color temperature to achieve the desired color quality. especially in the dark area. Example: Adjusting the “R.HIGH”...
- Page 21 SOUND Settings Menu SCREEN Settings Menu Adjusting the treble, bass and left/right Adjusting the Position, Size, PHASE, CLOCK balance and audio input select The position of the image can be adjusted and flickering The treble, bass and left/right balance can be adjusted to of the image can be corrected.
- Page 22 Option1 Settings Menu Setting the PC2/COMPONENT2 connectors Select whether to set the PC2/COMPONENT2 to RGB, Setting the on-screen display component or SCART1, 2. This sets the position of the menu, the display format Example: Set the BNC INPUT mode to “COMP.” (horizontal or vertical) etc.
- Page 23 Setting a computer image to the correct RGB Setting high definition images to the suitable select screen screen size With the computer image, select the RGB Select mode Use this procedure to set whether the number of vertical for a moving image such as (video) mode, wide mode or lines of the input high definition image is 1035 or 1080.
- Page 24 Option2 Settings Menu Setting the picture to suit the movie The film image is automatically discriminated and Setting the power management for computer projected in an image mode suited to the picture. images [NTSC, PAL, PAL60, 480I (60Hz), 525I (60Hz), 576I This energy-saving (power management) function (50Hz), 625I (50Hz), 1035I (60Hz), 1080I (60Hz) only] automatically reduces the monitor’s power consumption...
- Page 25 ORBITER INVERSE Use this to set the picture shift. Use this to set the inverse mode or to display a white screen. Example: Setting “ORBITER” to “AUTO1” Example: Setting “INVERSE” to “WHITE” On “ORBITER” of “LONG LIFE” menu, select “AUTO1”. On “INVERSE”...
- Page 26 SCREEN WIPER SOFT FOCUS When this is set to ON, a white vertical bar moves Reduces edges and softens the image. repeatedly from the left and of the screen to the right end Example: Setting “SOFT FOCUS” to “2” at a constant speed. On “SOFT FOCUS”...
- Page 27 Setting the screen size for S1/S2 video input Option3 Settings Menu If the S-video signal contains screen size information, the Using the timer image will be automatically adjusted to fit the screen when This function sets the monitor to turn ON/OFF this S1/S2 is set to AUTO.
- Page 28 Setting the power on mode PROGRAM TIMER This function sets the input mode at the time the power is This sets the day and time at which the power will be switched on. switched ON/OFF as well as the input mode. Example: Setting “VIDEO2”...
- Page 29 Enabling/disabling remote control wireless ID number setting transmission When using more than one of these displays, this function This function enables/disables remote control wireless sets ID numbers so that operation of the remote control transmission. does not cause multiple monitors to operate at the same time.
- Page 30 DISP. MODE DIVIDER Set the 4-25 video wall. Select the screen mode from between two options (NORMAL, ADJUST). Example: Setting “4” Example: Setting “ADJUST” On “DIVIDER” of “VIDEO WALL” menu, select “4”. On “DISP. MODE” of “VIDEO WALL” menu, select VIDEO WALL “ADJUST”.
- Page 31 SCREEN ABL LINK The position of the image can be adjusted and flickering Use this function to set a uniform brightness for each of the image can be corrected. display. Turn on the AUTO ID and set the DIVIDER (at 1, 4 or 9) Example: Adjusting the vertical position before the following operations.
- Page 32 Color System Settings Menu REPEAT TIMER Setting the video signal format Use this to set two timers. Each timer can use the Use these operations to set the color systems of composite DIVIDER, SOURCE and WORK TIME functions. video signals or Y/C input signals. Turn on the AUTO ID and set the DIVIDER (at 1, 4 or 9) before the following operations.
- Page 33 Pin Assignments mini D-Sub 15-pin connector DVI-D 24-pin connector (Digital) (Analog) The unit is equipped with a type of connector commonly used for digital. (This cannot be used for an analog input.) PC 1 (TMDS can be used for one link only.) 10 9 PC 3 15 14 13 12 11...
- Page 34 Table of Signals Supported Supported resolution • When the screen mode is NORMAL, each signal is converted to a 640 dots 480 lines signal. (Except for * • When the screen mode is FULL, each signal is converted to a 853 dots 480 lines signal. (Except for * Computer input signals supported by this system Sync Polarity Presence...
- Page 35 *1 Only when using a graphic accelerator board that is capable of displaying 852 480. *2 Display only 400 lines with the screen center of the vertical orientation located at the center. *3 The picture is displayed in the original resolution. The picture will be compressed for other signals. *4 Aspect ratio is 5:4.
- Page 36 Troubleshooting If the picture quality is poor or there is some other problem, check the adjustments, operations, etc., before requesting service. Symptom Checks Remedy The unit emits a crackling sound. • Are the image and sound normal? • If there are no abnormalities in the image and sound, the noise is caused by the cabinet reacting to changes in temperature.
- Page 37 Specifications Screen Size 921(H) 518(V) mm (1.38") 1018 (40") 36.3"(H) 20.4"(V) inches (2.13") diagonal 42" Aspect Ratio 16 : 9 Resolution 853(H) 480(V) pixels Signals Synchronization Range Horizontal : 15.5 to 110 kHz (automatic : step scan) Vertical : 50.0 to 120 Hz (automatic : step scan) Input Signals RGB, NTSC (3.58/4.43), PAL (B,G,M,N),...
- Page 38 Faites toujours réaliser le montage et l’installation par un spécialiste ou par votre revendeur. PIONEER ne peut être tenu responsable pour tout dommage causé par une erreur d’installation ou de montage, une mauvaise utilisation ou un désastre naturel.
- Page 39 Recommandations importantes Précaution 7. Ne pas essayer d’intervenir ou de réparer l’appareil. Le fabricant décline toute responsabilité en cas de blessure corporelle ou de dégâts Veuillez lire avec attention ce manuel avant d’utiliser le moniteur à matériels résultant d’une opération d’entretien quelconque effectuée plasma et le conserver accessible pour s’y référer ultérieurement.
- Page 40 Méthode de nettoyage du moniteur à plasma: AVERTISSEMENT: 1. Utiliser un chiffon (fourni) ou un chiffon doux et sec pour nettoyer le panneau avant et le cadre. Ne jamais utiliser de solvants de type EN POSITIONNANT L’EQUIPEMENT, S’ASSURER QUE alcool ou diluant pour le nettoyage de ces surfaces. LA FICHE ET LA PRISE DE RACCORDEMENT DE 2.
- Page 42 Table des matière Installation ............2 Menu des réglages de Option2 ....... 19 Ventilation requise pour le montage de l’ensemble ..2 Sélection de l’alimentation pour images d’ordinateur ..19 Comment fixer les fixations métalliques sécurisées et Indicateur STANDBY/ON ......... 19 les vis fournies ............
- Page 43 Installation Le socle-support optionnel peut être attaché au moniteur à plasma selon l’une des deux méthodes suivantes : * Position verticale. (Voir la figure A) * Position horizontale avec l’écran face vers le bas (Voir la figure B). Poser la feuille de protection, enveloppant le moniteur dans son emballage, sous la surface de l’écran pour la protéger contre les rayures.
- Page 44 Créer un mur d’images Grâce aux possibilités de l’affichage matriciel, il est possible de créer un mur vidéo 4-25. • Raccorder les câbles signal et les câbles télécommande comme illustré ci-dessous. Signal vidéo Signal PC/COMPONENT BNC connector BNC connector VIDEO signal PC signal / RCA phono plug COMPONENT...
- Page 45 • Lors de l’installation, faites pivoter de 90° dans le sens des aiguilles d’une montre en faisant face au moniteur. OPTION1 BNC INPUT • Après installation, vérifiez avec la marque de logo PIONEER D-SUB INPUT RGB SELECT AUTO HD SELECT en faisant face au moniteur.
- Page 46 Noms des composants et leur fonction Vue de face t GAUCHE/ – et DROITE/ + q Alimentation électrique ( Fonctionne comme les boutons du CURSEUR Met en marche ou arrête le moniteur. ) dans le mode d’affichage des menus (OSD). w Fenêtre du capteur des signaux de télécommande y VOLUME plus fort et moins fort Reçoit les signaux de la télécommande.
- Page 47 Ne branchez jamais un composant sur cette prise EXT SPEAKER pour chaque canal GAUCHE et sans consulter au préalable le technicien DROIT. d’installation Pioneer. Voir le mode d’emploi des haut-parleurs. Cette prise est utilisée pour les réglages de C VIDEO1, 2, 3 (BNC, RCA, S-Video) configuration de l’écran à...
- Page 48 u EXIT Télécommande Appuyer sur ce bouton pour sortir des commandes OSD dans le menu principal. Appuyer sur ce bouton pendant l’affichage d’un sous-menu pour retourner au menu précédent. i POINT ZOOM Appuyer sur ce bouton pour afficher le pointeur. o ZOOM (+ /–) Elargit ou réduit la taille de l’image.
- Page 49 Fonctions de base POWER (MARCHE/ARRÊT) Informations Pour mettre en marche et arrêter l’appareil : Paramètre AUTO SET UP MARCHE 1. Relier le câble d’alimentation à une prise active du sec- Lorsqu’une entrée RGB (image fixe) est sélectionnée: teur. Le réglages de PHASE, HORLOGE, position et contraste 2.
- Page 50 Fonctionnement avec écran large (WIDE) Opération de taille d’écran L’image est agrandie sur les axes vertical et horizontal (manuel) tout en conservant les proportions originales. Cette fonction permet de sélectionner un des six formats *Utiliser ce mode pour les films de format cinéma (large), d’écran.
- Page 51 Opération de taille d’écran sur Informations des signaux d’ordinateur Résolutions disponibles Commuter vers le mode grand écran pour agrandir l’image Voir la page 30 pour plus de détails sur la sortie 4/3 et remplir l’écran en entier. d’affichage des différents standards VESA pouvant être 1.
- Page 52 Commandes OSD (MENUS ÉCRAN) Opérations de menu Remarque: Le menu principal disparaît en appuyant La fenêtre OSD s’affiche sur l’écran exactement sur le bouton EXIT (sortie). comme indiqué sur le schéma. * Selon le mode dans lequel se trouve l’écran, l’OSD Informations peut montrer un affichage différent.
- Page 53 Arborescence de menus :La partie hachurée indique la valeur par défaut. ←→ Appuyer sur le bouton pour régler. :Les rubriques du menu sont accessibles dans une fenêtre réglée quand OSD AVANCÉ est réglé sur MARCHE. MENU PRINCIPAL SOUS-MENU SOUS-MENU 2 SOUS-MENU 3 SOUS-MENU 4 RÉINITIALISATION...
- Page 54 MENU PRINCIPAL SOUS-MENU SOUS-MENU 2 SOUS-MENU 3 SOUS-MENU 4 RÉINITIALISATION REFERENCE OPTION2 ECO ÉNERGIE ARRET←→MARCHE PURECINEMA ARRET←→MARCHE LONGUE DURÉE AUTO/VERROU1/VERROU2/VERROU3 ROTATION PIX AUTO 1 AUTO 2 MANUEL PIXEL H/LIGNE V/DURÉE ARRET INVERSION ARRET MARCHE TEMPS FONCT./TEMPS ATTEN. BLANC SCREEN WIPER ARRET MARCHE TEMPS FONCT./TEMPS ATTEN./VITESSE...
- Page 55 Menu de réglage de l’image Réduction du bruit de l’image (parasites) Utiliser ce réglage si le bruit de l’image est du à une mau- Réglage de l’image vaise réception ou à la qualité médiocre de la cassette vidéo. Le contraste, la luminance, le piqué, la couleur et la teinte Exemple: Réglage de “HAUT”...
- Page 56 Ajustement des couleurs à la qualité désirée Réglages des tons bas Pour le réglage de la balance du blanc dans chaque Cette fonction permet une reproduction plus fine des tons température de couleur pour la qualité de couleur bas en particulier dans les zones sombres. souhaitée, procéder de la manière suivante.
- Page 57 Menu des réglage du son Menu des réglage de l’écran Réglage des aigus des graves et de la Réglage de la position, de la taille, de la balance gauche/droit PHASE et de la HORLOGE. L’équilibre droite/gauche, les graves et les aigus peurent La position et le scintillement de l’image peuvent être corrigés.
- Page 58 Menu des réglages de Option1 Réglage des connecteurs PC2/COMPONENT2 Sélectionner l’entrée PC2/COMPONENT2 sur RGB, Réglage du menu écran systèmes de composant, ou SCART1, 2. Ce réglage permet de positionner le menu, le format de Exemple: Régler le mode de “SELECT BNC” sur l’affichage (horizontal ou vertical) etc...
- Page 59 Réglage d’une image d’ordinateur vers OPTION 1 1 / 3 l’écran de sélection de RGB correct SELECT BNC Sur l’image ordinateur, sélectionner le mode Sélect RGB SELECT D-SUB SÉLECT. RVB AUTO pour une image animée tel que mode (vidéo), mode large HD SELECT 1035 ou émission numérique.
- Page 60 Menu des réglages de Option2 Réglage de l’image pour s’adapter au format cinéma Sélection de l’alimentation pour images L’image au format film est détectée et projetée dans un d’ordinateur mode d’image adapté. Cette fonction d’économie d’énergie (alimentation) réduit [Uniquement NTSC, PAL, PAL60, 480I (60Hz), 525I automatiquement la consommation du moniteur dès que (60Hz), 576I (50Hz), 625I (50Hz), 1035I (60Hz) et 1080I ce dernier reste inactif pendant un certain temps.
- Page 61 Informations Informations Réglage de ABL Réglages de la fonction ROTATION PIX AUTO: Le réglage de la luminosité de l’écran est effectué PIXEL H: Déplacement de 1 à 20 pixels dans la direction automatiquement en fonction de la qualité de l’image. horizontale.
- Page 62 * La fonction “TEMPS ATTEN.” ne peut pas être Informations déterminée quand “TEMPS FONCT.” est sur Paramétrage du temps MARCHE. TEMPS FONCT.: Permet de régler la durée du mode * Le “TEMPS FONCT.” et le “TEMPS ATTEN.” sont “SCREEN WIPER”. réglables jusqu’à...
- Page 63 Informations Informations MASQUE CÔTÉ Réglages PLUG/PLAY PC: Si un signal PC est utilisé. Ajuste la luminance des noirs (niveau de gris) sur les côtés de l’écran. BLACK LEVEL est automatiquement réglé sur Le réglage standard est 0 (noir). Le niveau peut être “LOW”.
- Page 64 Menu des réglages de OPTION3 PROGRAMMATION HORLOGE Utilisation de la minuterie Cette fonction permet de régler le jour et l’heure auxquels Cette fonction permet de régler la mise en/hors fonction l’alimentation électrique ainsi que le mode entrée seront automatique du moniteur à une heure donnée. mis en/hors fonction.
- Page 65 Réglage du mode Power ON Mise en/hors fonction de la transmission des télécommandes par câble Cette fonction permet de régler le mode d’entrée au moment de la mise sous tension. Cette fonction permet de mettre en/hors fonction la transmission des télécommandes par câble. Exemple : Réglage “VIDEO2”...
- Page 66 Réglage du numéro d’identification (Numéro Réglage du mur d’images Cette fonction permet de configurer un mur d’image 4- Si plusieurs écrans d’affichage sont utilisés en même temps, cette fonction permet d’assigner un numéro d’ID Régler “OSD AVANCÉ” sur “MARCHE” dans le MENU de sorte que les commandes à...
- Page 67 Informations Informations Réglage de POSITION MUR D’IMAGES Réglage de AUTO ID 1 écran: Un positionnement n’est pas nécessaire. MARCHE: La fonction Auto ID est active. Dans le cas 4 écrans 9 écrans suivant, l’affichage 1 prend le numéro d’identification 1, l’affichage 2 le numéro d’identification 2 etc..
- Page 68 REMOTE Informations No.1 No.2 No.1 No.2 REMOTE REMOTE No.4 No.3 No.4 No.3 Réglage de ON DIFFÉRÉ REMOTE Display 2 Display 1 MARCHE: Chaque affichage est mis sous tension au bout d’un certain délai. REMOTE ARRET: Tous les affichages sont mis sous tension au No.1 No.2 No.1 No.2 REMOTE...
- Page 69 Menu des réglages de OSD Avancé Menu des réglages de SIGNAL INFORMATION Passage au mode menu Cette fonction permet d’accéder à toutes les rubriques du Vérification des fréquences, polarités des menu. signaux d’entrée, et de la résolution Si ON. DIFFÉRÉ ou ABL LINK est réglé sur MARCHE Utiliser cette fonction pour vérifier les fréquences et les (ON), cette fonction reste active.
- Page 70 Fonctions des broches Connecteur mini D-sub à 15 broches Connecteur DVI-D à 24 broches (analogique) (numérique) Cet appareil est équipé d’un type de connecteurs fréquemment utilisés pour des branchements numériques. PC 1 (Cela ne peut pas être utilisé pour une entrée analogique.) (TMDS ne peut être utilisé...
- Page 71 Tableau des signaux pris en charge par l’appareil Résolutions compatible • Quand le mode d’écran est NORMAL, tous les signaux sont convertis en signaux 640 points × 480 lignes. (Sauf pour * 2, *4 • Quand le mode d’écran est COMPLET, tous les signaux sont convertis en signaux 853 points × 480 lignes. (Sauf pour * Signaux d’entrée ordinateur pris en charge par ce système Modèle Fréquence...
- Page 72 *1 Uniquement en utilisant une carte graphique accélératrice capable d’afficher 852 × 480. *2 Affiche 400 lignes uniquement avec l’axe d’orientation verticale de l’écran situé au centre. *3 L’image est affichée dans la résolution originale. L’image est comprimée pour d’autres signaux. *4 Le format est 5/4.
- Page 73 Dépannage Si l’image est de qualité médiocre ou s’il existe un autre problème, vérifier les réglages, le fonctionnement, etc., avant d’appeler le service après-vente. Vérification Solution Symptôme • L’image et le son sont-ils normaux ? • S’il n’y a pas d’anomalie dans l’image et le son ; le bruit L’appareil émet un bruit de craquement.
- Page 74 Caractéristiques Dimensions de l’écran 921(H) 518(l) mm (1,38") 1018 (40") 36,3"(H) 20,4"(l) pouces (2,13") 42" de diagonale Rapport largeur/hauteur 16 / 9 Résolution 853(H) 480(l) pixels Signaux Gamme de Horizontal : de 15,5 à 110 kHz synchronisation (Automatique : scanner par incréments) Vertical : de 50,0 à...
- Page 76 Dieses Produkt ist für die Installation durch einen Fachmann bestimmt. Der Käufer muss dieses Produkt entweder von einem qualizifierten Techniker oder vom Fachhändler installieren und einrichten lassen. PIONEER übernimmt keinerlei Haftung für Schäden, die auf unsachgemäße Installation oder Befestigung, zweckentfremdeten...
- Page 77 Wichtige Informationen Zur Beachtung Warnungen und Sicherheitshinweise Dieser Plasma-Monitor wurde konzipiert und hergestellt, um Lesen Sie dieses Handbuch bitte sorgfältig durch, bevor Sie Ihren einen langen und problemfreien Betrieb sicherzustellen. Plasma-Monitor in Betrieb setzen und bewahren Sie dieses Handbuch Ausgenommen von der Reinigung, ist keine Wartung des leicht zugänglich auf.
- Page 78 Empfehlungen zur Vermeidung einer Phosphor-Einbrennung: HINWEIS: Plasma-Monitore können, wie jedes Display auf Phosphor-Basis und Bei Anschluß eines Computers an den Monitor verwenden alle übrigen Gas-Plasma-Displays, unter bestimmten Umständen Sie ein RGB-Kabel mit Ferritkernen an beiden Enden. anfällig sein für Phosphor-Einbrennung. Bestimmte Betriebsbedingungen, wie z.B.
- Page 80 Inhaltsverzeichnis Installation ............2 Option2 Einstellungsmenü ........19 Ventilationsanforderungen für Gehäusebefestigung ..2 Einstellung des Power-Management für Verwendung der Metall-Befestigungswinkel und Computerbildschirme ..........19 der zugehörigen Schrauben ........2 STANDBY/ON-Anzeige ........... 19 Einstellung des Bildes entsprechend des Filmformats ..19 Aufbau einer Video-Wand ........
- Page 81 Installation Sie können auf eine der beiden folgenden Arten optionale Halterungen oder Ständer an den Plasma-Monitor befestigen: * Aufrecht. (Siehe Zeichnung A) * Aufstellen mit der Bildschirmvorderseite nach unten gerichtet (Siehe Zeichnung B). Legen Sie das Schutzblatt, das bei der Verpackung um den Monitor gewickelt wurde, unter die Bildschirmoberfläche, damit die Bildschirmvorderseite nicht zerkratzt wird.
- Page 82 Aufbau einer Video-Wand Mit der eingebauten Matrix-Anzeigefunktion können Sie eine 4-25 Videowand kreieren. • Nehmen Sie die Anschlüsse der Signal und Fernbedienungskabel wie nachfolgend gezeigt vor. Videosignal PC/COMPONENT-Signal BNC connector BNC connector PC signal/ VIDEO signal COMPONENT RCA phono plug signal VIDEO signal PC signal/...
- Page 83 • Drehen Sie bei der Installation von vorne betrachtet um 90° im Uhrzeigersinn. BNC INPUT D-SUB INPUT RGB SELECT AUTO • Überprüfen Sie nach der Installation die PIONEER-Logomarkierung von vorne betrachtet. HD SELECT 1080B INPUT SKIP ALL RESET • Stellen Sie sicher, dass Sie die Option “OSD WINKEL” bei der 1024 768 SEL.
- Page 84 Bezeichnung und Funktion der Komponenten Vorderansicht t LINKS (LEFT) /– und RECHTS (RIGHT) /+ q Netztaste ( Funktioniert wie die CURSOR ( )-Tasten im Schaltet die Stromversorgung des Monitors ein oder Anzeigebildschirm-Modus (OSD). aus. y Lautstärke (VOLUME) w Fenster für den Fernbedienungssensor Einstellung der Lautstärke.
- Page 85 RS-232C Machen Sie sich bitte mit der Gebrauchsanleitung der Stellen Sie AUF KEINEN FALL ohne vorherige Lautsprecher vertraut. Konsultation des technischen Personals von Pioneer C VIDEO1, 2, 3 einen Anschluss an dieser Buchse her! Für den Anschluß von Videorecordern, DVD-Spielern, Diese Buchse wird für Setup-Justierungen des Plasma-...
- Page 86 t MENU/SET Fernbedienung Drücken Sie diese Taste, um Zugriff auf die OSD- Steuerungen zu erlangen. Drücken Sie dieseTaste während derAnzeige des Hauptmenüs, um in das Untermenü zu gelangen. y CURSOR (L / M / Verwenden Sie diese Tasten zur Auswahl verschiedener Punkte oder Einstellungen sowie zur Abstimmung von Einstellwerten.
- Page 87 Allgemeine Bedienung STROMVERSORGUNG (POWER) Information Ein- und Ausschalten des Gerätes: AUTO SET UP EIN-Einstellung 1. Stecken Sie das Netzkabel in eine aktive WS- Bei Wahl von RGB- (Standbild)-Eingang: PHASE, Netzsteckdose. CLOCK, Position, und Kontrast werden automatisch 2. Drücken Sie den Hauptschalter (am Hauptgerät). eingestellt.
- Page 88 BREIT-Bildbetrieb Betrachtung mit einem Breitbildschirm Das Bild wird in horizontaler und vertikaler Richtung in den originalen Proportionen vergrößert. (manuell) * Verwenden Sie dieses Format für Cinema, Filme (Breitbild) Mit dieser Funktion können Sie eine aus sechs etc. Bildformaten selektieren. 2.35:1-“Bildschirmformat” Wenn Sie Videos oder Digital-Video-Discs ansehen 1.
- Page 89 Ansehen von Computerbildern im Information Breitbildformat Unterstützte Bildauflösung Für die Vergrößerung des 4:3-Bildes auf die gesamte Für Einzelheiten über die Displayausgabe der Bildschirmgröße, auf den Breitbildformat-Modus umschalten. verschiedenen VESA-Signalstandards, die vom Monitor 1. Drücken Sie die SCREEN SIZE-Taste auf der unterstützt werden, siehe Seite 30.
- Page 90 OSD-Bedienung (Bildschirm-Menu) Bedienung der Menüs Hinweis: Wenn die EXIT-Taste gedrückt wird, Das OSD-Fenster wird hinsichtlich des Bildschirms verschwindet das Hauptmenü. angezeigt, wie auf dem Diagramm abgebildet. * Die Bildschirm-Menüanzeigen (OSD) sind abhängig vom Information aktuellen Bildschirmmodus unterschiedlich. In der Erweitertes Menü Erläuterung wird der OSD-Bereich genau angezeigt.
- Page 91 Menü-Baum :Die schraffierten Bereiche bezeichnen die Vorgabeeinstellung des Herstellers. ←→ Drücken Sie zum Einstellen die Tasten entsprechend. :Die umrandet dargestellten Menüparameter stehen zur Verfügung, wenn ERWEIT. OSD auf EIN gestellt ist. Hauptmenü Untermenü Untermenü 2 Untermenü 3 Untermenü 4 Zurückstellen Bezugswert ←→...
- Page 92 Hauptmenü Untermenü Untermenü 2 Untermenü 3 Untermenü 4 Zurückstellen Bezugswert OPTION2 POWER MGT. AUS←→EIN PURECINEMA AUS←→EIN LANGZEIT EIN/AUS1/AUS2/AUS3 ORBITER AUTO1 AUTO2 MANUELL H-DOT/V-LINE/ZEIT INVERSION ARBEITSZEIT/WARTEZEIT WEISS SCREEN WIPER ARBEITSZEIT/WARTEZEIT/SCHNELLE SOFT FOCUS AUS/1/2/3/4 0← … →3← … →15 SEITENMASKE S1/S2 AUTO←→AUS DVI SET-UP PLUG/PLAY PC←→STB/DVD...
- Page 93 Bild-Einstellungsmenü DYNAM.: Dieser Betrieb liefert hellere Bilder als der Betrieb STD. Einstellung des Bildes DEFAULT: Verwenden Sie die Rückstellungsfunktion, um den Kontrast, Helligkeit, Bildschärfe, Farbe und Farbtönung Monitor auf die Voreinstellung des Herstellers können wie gewünscht eingestellt werden. zurückzusetzen. Beispiel: Einstellung des Kontrasts Reduzierung von Bildstörungen Stellen Sie den Kontrast unter “KONTRAST”...
- Page 94 Einstellung der Farbe auf die gewünschte Einstellen der niedrigen Farbtöne Qualität Diese Funktion erlaubt eine detaillierte Wiedergabe der Mit dieser Funktion den Weißabgleich für die niedrigen Farbtöne insbesondere in dunklen Bildbereichen. entsprechenden Farbtemperaturen einstellen, um eine gute Beispiel: Einstellung “2” Farbqualität zu erzielen.
- Page 95 Ton-Einstellungsmenü Menü für Bildschirm Einstellung von Höhen, Tiefen und linker/ Einstellung der Position, Gröse, PHASE, rechter Balance CLOCK Höhen, Tiefen und die linke/rechte Balance kann Die Position des Bildes kann eingestellt und das Flackern des Bildes korrigiert werden. entsprechend Ihrer Wünsche eingestellt werden. Beispiel: Einstellung der vertikalen Position im norma- Beispiel: Einstellung der Tiefenwiedergabe len Betrieb...
- Page 96 Option1 Einstellungsmenü Einstellung PC2/COMPONENT2- Steckverbinder Einstellung des OSD-Menüs Den Eingang der PC2/COMPONENT2 auf RGB, Diese Funktion dient zur Einstellung der Position des Komponent oder SCART1, 2 stellen. Menüs auf dem Bildschirm, des Anzeigeformats (horizontal oder vertikal) usw. Beispiel: Stellen Sie den BNC SIGNAL-Modus auf "KOMP."...
- Page 97 Einstellung eines Computerbildes auf den Wählen Sie unter “HD SEL.” im “OPTION1”-Menü “1035I”. korrekten RGB-Auswahlbildschirm 1 / 3 OPTION1 Im Falle eines Computer-Bilds wählen Sie den Wahlmodus BNC SIGNAL für ein bewegtes Bild, wie z.B. (Video-) Modus, D-SUB SIGNAL Breitmodus oder Digital-Broadcast. RGB WÄHLEN AUTO HD SEL.
- Page 98 Option2 Einstellungsmenü Einstellung des Bildes entsprechend des Filmformats Einstellung des Power-Management für Das Filmbild wird automatisch unterschieden in einem Computerbildschirme Bildmodus angezeigt, der für das BIld geeingnet ist. Diese Energiespar-Funktion (Power-Management) [nur NTSC, PAL, PAL60, 480I (60Hz), 525I (60Hz), 576I reduziert automatisch die Leistungsaufnahme des (50Hz), 625I (50Hz), 1035I (60Hz), 1080I (60Hz)] Monitors, wenn innerhalb eines bestimmten Zeitraums...
- Page 99 ORBITER INVERSION Zur Einstellung des Bildversatzes. Zur Einstellung des Inversions-Modus oder Anzeige eines weißen Bildschirms. Beispiel: Einstellung “ORBITER” auf “AUTO1” Beispiel: Einstellung “INVERSION” auf “WEISS” Wählen Sie unter “ORBITER” im “LANGZEIT”-Menü “AUTO1”. Wählen Sie unter “INVERSION” im “LANGZEIT”-Menü “WEISS”. LANGZEIT LANGZEIT ORBITER AUTO1...
- Page 100 SCREEN WIPER SOFT FOCUS In Stellung “EIN” wischt ein weißer vertikaler Balken mit Reduziert Kanten und erhöht die Weichzeichnung des konstanter Geschwindigkeit von links nach rechts über den Bildes. Bildschirm. Beispiel: Einstellung “SOFT FOCUS” auf “2” Beispiel: Einstellung “SCREEN WIPER” auf “EIN” Wählen Sie unter “SOFT FOCUS”...
- Page 101 Einstellen des Bildschirmformats auf S1/S2- Option3 Einstellungsmenü Videoeingangssignale Timer-Funktion Enthält S-Videosignal Bildschirmformat- Mit dieser Funktion läßt sich der Monitor zu festgesetzten Informationen, so wird das Bild bei S1/S2-Position AUTO Zeiten automatisch ein- und ausschalten. automatisch so eingestellt, dass es auf den Schirm passt. Stellen Sie im HAUPT MENUE (1/2) “ERWEIT.
- Page 102 Einstellen des Einschaltmodus “PWR. ON TIMER PROGRAMMIERUNG MODE” Zur Einstellung des Wochentags und der Uhrzeit, an dem Mit dieser Funktion läßt sich das Eingangssignal einstellen, das Gerät ein- oder ausgeschaltet werden soll, sowie daß bei Einschalten des Monitors gültig sein soll. Einstellung des INPUT-Modus.
- Page 103 Aktivieren/Deaktivieren Infrarot- Einstellen der ID-Nummer Fernbedienung Bei Verwendung von mehreren Monitoren können Sie den Mit dieser Funktion läßt sich ein- und ausschalten, ob die einzelnen Monitoren individuelle ID-Nummern zuordnen, Signale der IR-Fernbedienung vom Gerät empfangen damit bei Fernbedienung wirklich nur der beabsichtigte werden.
- Page 104 TEILER DISP MODE Zur Konfiguration der Video-Wand bestehend aus 4-25 Zur Wahl des Bildschirmmodus zwischen NORMAL und Monitoren. EINST. Beispiel: Einstellung “4” Beispiel: Einstellen von “EINST.” Wählen Sie unter “TEILER” im “VIDEO WAND”-Menü Wählen Sie unter “DISP MODE” im “VIDEO WAND”- “4”.
- Page 105 BILDSCHIRM ABL LINK Die Position des Bildes läßt sich justieren und Bildflicker Diese Funktion dient zur Einstellung einer gleichmäßigen reduzieren. Helligkeit für alle Monitore. Schalten Sie “AUTO ID” ein und stellen Sie “DIVIDER” Beispiel: Einstellen der vertikalen Bildposition vor den folgenden Bedienschritten entsprechend (auf 1, 4 Wählen Sie im “VIDEO WAND”-Menü...
- Page 106 ERWEIT. OSD Einstellungsmenü REPEAT TIMER Einstellen der Menü-Betriebsart Mit dieser Funktion lassen sich zwei Timer einstellen. Mit dieser Funktion können Sie alle Menüparameter im Jeder Timer kann die Einstellungen von TEILER, Bildschirm anzeigen. SOURCE (Signaleingang) und ARBEITSZEIT Bei P. ON VERZÖG. oder ABL LINK in Stellung EIN berücksichtigen.
- Page 107 Farb System Einstellungsmenü Einstellung des Videosignalformats Verwenden Sie dieses Verfahren zur Einstellung des Farbsystems der FBAS- oder Y/C-Eingangssignale. Beispiel: Einstellung des Farbsystems auf “3.58 NTSC”. Wählen Sie im “HAUPT MENUE” die “FARB SYSTEM” und drücken Sie dann die MENU/SET-Taste. Der Bildschirm “FARB SYSTEM” wird angezeigt. Wählen Sie im “FARB SYSTEM”-Menü...
- Page 108 Anschluss-Belegung mini D-Sub 15-Pin-Stecker (Analog) PC 1 10 9 15 14 13 12 11 Pin-Nr. Signal (Analog) Grün oder Synch. an Grün Blau Offen Erde Rote Erde Grüne Erde Blaue Erde Offen Synch.-Signal Erde Offen Bi-direktional DATA (SDA) Horizontalsynchronisation oder Bildaustast-Synchronisation Vertikale Synch.
- Page 109 Tabelle für unterstützte Signale Unterstützte Auflösung • Beim Screen-Modus NORMAL wird jedes Signal in ein 640 Punkte × 480 Zeilen-Signal umgewandelt. (Außer für * • Beim Screen-Modus VOLL wird jedes Signal in ein 853 Punkte × 480 Zeilen-Signal umgewandelt. (Außer für * Computer-Eingangssignale, die bei diesem System unterstützt werden Vertikal- Synchronisierungspolarität...
- Page 110 *1 Nur wenn Sie eine Grafikkarte benutzen, die in der Lage ist 852 × 480 darzxustellen. *2 Die Auflösung in der Bildschirmmitte beträgt 400 Linien. *3 Das Bild wird in der ursprünglichen Auflösung angezeigt. Für andere Signale wird das Bild komprimiert. *4 Abbildungsmaßstab ist 5:4.
- Page 111 Störungsbeseitigung Bei schlechter Bildqualität oder bei einem anderen Problem, prüfen Sie die Einstellungen, Funktionen, etc. bevor Sie einen Kundendienst anfordern. Symptom Überprüfungen Behebung Es sind Knackgeräusche vom Monitor zu • Sind Bild- und Tonwiedergabe normal? • Falls es hinsichtlich des Bildes und des Tons keine hören.
- Page 112 Technische Daten Bildgröße 921(H) 518(V) mm (1.38") 1018 (40") 36,3"(H) 20,4"(V) Zoll (2.13") Diagonal 42" DarstellungsverhUältnis 16 : 9 Auflösung 853(H) 480(V) Pixel Signale Synchronisationsbereich Horizontal : 15,5 bis 110 kHz (automatisch: Schrittabtastung) Vertikal : 50,0 bis 120,0 Hz (automatisch: Schrittabtastung) Eingangssignale RGB, NTSC (3.58/4.43), PAL (B,G,M,N), PAL60, SECAM, HD*...
- Page 114 Richiedere sempre ad uno specialista di installazioni, o al rivenditore, di procedere all’installazione e messa in opera dell’apparecchio. La PIONEER non può assumersi responsabilità per danni causati da errori nell’installazione o nel montaggio, da usi errati, da modifiche o da disastri naturali.
- Page 115 Informazioni importanti Avvertenze AVVERTENZA: Leggere attentamente questo manuale prima di utilizzare il monitor Quando al monitor collegate un computer, utilizzate un Plasma e tenerlo a portata di mano per consultarlo all’occorrenza. cavo RGB alle cui estremità vanno applicati i nuclei in ferrite.
- Page 116 Consigli per evitare o minimizzare le combustioni di fosforo: Come tutti i dispositivi di display al fosforo e tutti gli altri display plasma al gas, i monitor Plasma possono essere suscettibili a combustioni di fosforo in determinate circostanze. Alcune condizioni operative, come per esempio la visione continuata di un’immagine statica in un lungo periodo di tempo, possono provocare combustioni di fosforo se non si prendono le dovute precauzioni.
- Page 118 Indice Installazione ............ 2 Impostazione della funzione risparmio energia per le Requisiti per la ventilazione nel caso di montaggio in immagini del computer ..........19 luogo chiuso ............2 Indicatore STANDBY / ON (ALIMENTAZIONE/ Modalità di utilizzo degli accessori metallici di sicurezza e STANDBY) ............
- Page 119 Installazione Potete collegare la montatura opzionale o il supporto al monitor Plasma in uno dei seguenti modi: * Verticalmente. (Vedere la figura A) * All'ingiù con lo schermo rivolto verso il basso (Vedere la figura B). Ponete il foglio protettivo, avvolto attorno al monitor al momento dell'imballaggio, al di sotto della superficie dello schermo in modo da evitare di graffiare la stessa.
- Page 120 Realizzazione di una parete video Con capacità display matrice inclusa, potete creare una parete video 4-25. • Collegate i cavi segnale ed i cavi di controllo a distanza nel modo di seguito indicato. Segnale video: Segnale PC/COMPONENT: BNC connector BNC connector PC signal / VIDEO signal COMPONENT...
- Page 121 D-SUB INPUT • Dopo l’installazione, verificate con il segno del logo RGB SELECT AUTO HD SELECT 1080B INPUT SKIP PIONEER come se lo vedeste di fronte. ALL RESET 1024 768 SEL. MENU • Assicurarsi d’impostare “OSD ANGOLO” su “VERT.” EXIT RETURN quando lo utilizzate.
- Page 122 Nomi e funzioni delle componenti Vista frontale q Pulsante di accensione( t LEFT/- e RIGHT/+ Funziona nello stesso modo dei tasti CURSOR ( Accende e spegne il monitor. ) nel modo del dis-play visualizzato sullo schermo w Finestrella del sensore a distanza (OSD).
- Page 123 SPEAKER ed il filo (negativo) al terminale connettore senza aver prima consultato il tecnico EXT SPEAKER. esperto di installazioni della Pioneer. Fate riferimento al manuale d’uso dell’altoparlante. Questo connettore viene utilizzato per le regolazioni C VIDEO1, 2, 3 di messa a punto del pannello al plasma.
- Page 124 t MENU/SET (Pulsante di procedimento) Telecomando Premete questo pulsante per accedere ai controlli OSD. Premete questo pulsante durante la visualizzazione del menù principale per procedere al menù secondario. y CURSOR (L / M / Utilizzate questi pulsanti per scegliere voci o per impostazioni e aggiungere delle impostazioni.
- Page 125 Funzionamento generale POWER (ALIMENTAZIONE) Informazioni Per accendere e spegnere l'unità: Impostazione AUTO SET UP 1. Inserire la spina del cavo di alimentazione in una presa Quando viene scelta un’immagine (ferma) RGB: FASE, OROLOGIO, Posizione e Contrasto vengono 2. Premete il pulsante di accensione situato sull’unità. L a regolati automaticamente.
- Page 126 Funzioni di REG.AMPIEZZA. Funzione SCREEN SIZE (manuale) * Utilizzate questo schermo per film in formato teatro (wide) ecc. Con questa funzione è possibile selezionare una delle sei dimensioni previste per lo schermo. Formato di schermo 2.35:1 Quando si guardano video o dischi video digitali 1.
- Page 127 Funzione SCREEN SIZE con segnali Informazioni del computer Risoluzione supportata Passare al modo grande schermo per espandere l'immagine Fate riferimento a pagina 30 per ulteriori dettagli sulla 4:3 e riempire l'intero schermo. visualizzazione in uscita dei vari segnali VESA 1. Premete il pulsante SCREEN SIZE sul telecomando. supportati dal monitor.
- Page 128 Comandi OSD (On Screen Display) Funzioni del menu Nota: Il menù principale scompare alla pressione del La finestra OSD viene visualizzata rispetto allo pulsante EXIT. schermo come mostrato in figura. * Dipendentemente dal modo di impostazione dello schermo, Informazioni l’OSD può risultare visualizzato in modo diverso. Modo menu avanzato Nella spiegazione, la sezione OSD è...
- Page 129 Struttura ad albero del menu :Le zone ombreggiate indicano il valore predefinito. ←→ Premete il tasto in modo da eseguire la regolazione. :Le opzioni di menu nella finestra delineata sono disponibili quando la funzione OSD AVANZ. è impostata su ON. Menu princip.
- Page 130 Menu princip. Sottomenu Sottomenu 2 Sottomenu 3 Sottomenu 4 Azzeramento RIFERIMENTO OPTION2 RISP. ENERGIA OFF←→ON SÌ PURECINEMA OFF←→ON SÌ LUNGA DURATA AUTO/BLOCCO1/BLOCCO2/BLOCCO3 SÌ ORBITANTE AUTO 1 SÌ AUTO 2 SÌ MANUALE H-DOT/V-LINE/TEMPO SÌ SÌ INVERSIONE SÌ DURATA/TEMPO ATTESA SÌ BIANCO SÌ...
- Page 131 Menu impostazioni immagine DINAM.: Questo modo fornisce immagini più chiare rispetto al modo STD. Regolazione dell’immagine DEFAULT: Utilizzate questo modo per ripristinare i valori E' possibile regolare contrasto, luminosità, definizione, dell'immagine impostati in fabbrica. colore e tonalità come desiderato. Esempio: regolazione del contrasto Riduzione delle interferenze all'interno dell'immagine In “CONTRASTO”...
- Page 132 Regolazione del colore alla qualità desiderata Regolazione dei bassi toni La procedura che segue va utilizzata per regolare il Questa funzione consente di riprodurre toni più definiti bilanciamento del bianco per ciascuna temperatura del specialmente nelle zone scure. colore, in modo da ottenere la qualità di colore desiderata. Esempio: impostazione “2”...
- Page 133 Menu impostazioni SUONO Menu delle impostazioni di SCHERMO Regolazione di alti, bassi e bilanciamento sinistro/destro Regolazione di posizione, dimensione, FASE, E' possibile regolare alti, bassi e bilanciamento sinistro/ OROLOGIO destro come si desidera. La posizione dell'immagine può essere regolata e si può Esempio: regolazione dei bassi correggere lo sfarfallamento dell'immagine.
- Page 134 Menu delle impostazioni Option1 Impostazioni CONTR. OSD NORMALE: la luminosità OSD è impostata su normale. Impostazione del menu a schermo BASSO: la luminosità OSD è impostata su basso. Questa funzione imposta la posizione del menu, il formato di visualizzazione (orizzontale o verticale) e Impostazione dei connettori PC2/COMPONENT2 così...
- Page 135 Impostazione di un’immagine del computer Esempio: Impostazione del modo “SCELTA HD” su al corretto schermo selezionato RGB “1035I” Con immagini da computer, scegliete il modo RGB Select In “SCELTA HD” nel menu “OPTION1”, selezionate per un’immagine mobile, ad esempio del modo (video), “1035I”.
- Page 136 Menu delle impostazioni Option2 Impostazione dell'immagine a seconda del film L'immagine del film viene automaticamente classificata e Impostazione della funzione risparmio proiettata nel modo immagine adatto al film. energia per le immagini del computer [solo NTSC, PAL, PAL60, 480I (60Hz), 525I (60Hz), 576I La funzione di risparmio energia riduce automaticamente (50Hz), 625I (50Hz), 1035I (60Hz), 1080I (60Hz) ] il consumo energetico del monitor se non vengono effet-...
- Page 137 Informazioni Informazioni Impostazioni ABL Impostazioni della funzione ORBITANTE AUTO: La luminosità dello schermo viene H-DOT: Sposta da 1 a 20 pixel in direzione orizzontale. V-LINE: Sposta da 1 a 20 righe in direzione verticale. automaticamente regolata in modo da soddisfare la qualità TEMPO: Intervallo da 1 a 5 minuti (1 punto orizzontale o dell’immagine.
- Page 138 * L’opzione “TEMPO ATTESA” non può essere Informazioni impostata quando “DURATA” si trova su “ON”. Impostazione della durata * “DURATA” e “TEMPO ATTESA” possono essere DURATA: Imposta la durata della modalità “SCREEN impostati sino a 12 ore e 45 minuti in passi di 3 minuti. WIPER”.
- Page 139 Informazioni Informazioni MASCH. LAT Impostazioni PLUG/PLAY PC: quando è collegato ad un segnale PC. Per regolare la luminosità del nero (livello del grigio) ai lati dello schermo. BLACK LEVEL è impostato su “LOW” automaticamente. STB/DVD: quando è collegato ad un DECODER, DVD Lo standard è...
- Page 140 Menu delle impostazioni Option3 PROGRAM. TIMER Utilizzo del temporizzatore Questa opzione imposta il giorno e l’ora in cui il monitor Questa funzione imposta il monitor in modo che si verrà acceso o spento, nonché il modo di ingresso. accenda/spenga automaticamente all’ora prestabilita. Esempio: effettuare l’impostazione in modo che Nel MENU PRINCIP.
- Page 141 Impostazione del modo all’accensione (PWR. Disabilitazione/abilitazione della ON MODE) trasmissione del telecomando senza filo Questa funzione imposta il modo di ingresso nel momento Questa funzione abilita e disabilita la trasmissione del in cui il monitor si accende. telecomando senza filo. Esempio: impostazione “VIDEO2”...
- Page 142 Impostazione del numero ID Nota: il metodo contingente di ricorrere alla Quando si utilizzano più di uno di questi monitor, questa disalimentazione deve essere utilizzato nei casi di funzione ne imposta i codici ID in modo che il emergenza durante la realizzazione della parete video. funzionamento dei relativi telecomandi non determini il funzionamento contemporaneo di più...
- Page 143 DISP. MODE SCHERMO Selezione del modo schermo tra le due opzioni disponibili La posizione dell’immagine può essere regolata, mentre è (NORMALE, REGOL.). possibile correggerne i tremolii. Esempio: impostazione “REGOL.” Esempio: regolare la posizione verticale In “DISP. MODE” nel menu “VIDEO WALL”, selezionate In menu “VIDEO WALL”, selezionate “SCHERMO”, quindi “REGOL.”.
- Page 144 ABL LINK RIPET. TIMER 1 DISTRIB. Questa funzione va utilizzata per impostare una luminosità SORGENTE VIDEO1 uniforme per ciascun monitor. WORK TIME 00H03M Prima di eseguire le operazioni di seguito descritte, attivate 2 DISTRIB. AUTO ID ed impostate DIVIDER (su 1, 4 o 9). SORGENTE PC1DSUB WORK TIME...
- Page 145 Menu delle impostazioni OSD Informazioni AVANZ. Formati dei segnali video Impostazione del modo menu I diversi paesi utilizzano formati diversi per i segnali Questa funzione consente di accedere a tutte le opzioni del menu. video. Selezionare quindi il sistema colore utilizzato Quando la funzione P.
- Page 146 Assegnazioni pin Connettore mini D-Sub 15-pin (Analogico) PC 1 10 9 15 14 13 12 11 N˚ Pin Segnale (analogico) Rosso Verde o sincronizzazione del verde Nessun collegamento Massa Massa rossa Massa verde Massa blu Nessun collegamento Massa del segnale di sincronizzazione Nessun collegamento DATI bidirezionali (SDA) Sincronizzazione orizzontale o segnale composito...
- Page 147 Tabella dei segnali supportati Risoluzione supportata *2, *4 • Quando il modo dello schermo è NORMALE, ciascun segnale viene convertito in 640 punti 480 righe (salvo • Quando il modo dello schermo è PIENO, ciascun segnale viene convertito in 853 punti 480 righe (salvo Segnali in entrata da computer supportati da questo sistema Polarità...
- Page 148 *1 Solo quando usate una piastra di accelerazione grafica in grado di visualizzare 852 480. *2 Visualizza solamente 400 righe con il centro della rappresentazione verticale collocato in posizione centrale. *3 Quest’immagine viene visualizzata nella sua risoluzione originale. L’immagine verrà compressa per altri segnali. *4 Il rapporto d’aspetto dell’immagine è...
- Page 149 Soluzione dei problemi Se la qualità dell’immagine è scadente o vi sono altri problemi, controllate regolazione, voci ecc. prima di chiedere assistenza. Sintomi Verifiche Rimedi L’unità emette scricchiolii. • L’immagine ed il suono sono regolari? • Se l’immagine ed il suono non presentano anomalie, il rumore risulta essere prodotto dalla cassa dell’unità...
- Page 150 Specifiche Dimensioni dello schermo 921(O) 518(V) mm (1,38") 1018 (40") 36,3"(O) 20,4"(V) pollici (2,13") diagonale 42" Rapporto dell'immagine 16 : 9 Risoluzione 853(O) 480(V) pixel Segnali Gamma di Orizzontale: da 15,5 a 110 kHz sincronizzazione (automatico: scansione a passi) Verticale : da 50,0 a 120,0 Hz (automatico: scansione a passi) Segnali di input RGB, NTSC (3.58/4.43), PAL (B,G,M,N),...
- Page 152 Solicite siempre a un especialista en instalaciones o a su distribuidor que realice la instalación y configuración del producto. PIONEER no se hace responsable de los daños causados por una instalación o montaje incorrectos, por la manipulación indebida, modificaciones ni desastres naturales.
- Page 153 Información importante Precauciones Advertencias y Precauciones de Rogamos que lea este manual atentamente antes de utilizar el Monitor Seguridad de Plasma y que lo guarde en un lugar seguro para futuras consultas. Este monitor de plasma ha sido diseñado y fabricado con la idea de un servicio largo en el tiempo y libre de problemas de PRECAUTION..
- Page 154 precauciones debidas. Para proyectar sus imágenes en este monitor de NOTA: plasma, por favor observe los siguientes consejos y recomendaciones Cuando conecte un ordenador a este monitor, utilice un para minimizar las posibilidades de una quemadura por fósforo: cable RGB que incluya el núcleo de ferrita en ambos * Asegúrese de activar y utilizar el protector de pantalla de su ordenador cuando sea posible mientras lo usa con una fuente de entrada de extremos del cable.
- Page 156 Índice Instalación ............2 Menú de ajustes OPCION2 ........19 Necesidades de ventilación en el caso de montaje en Ajuste de la gestión de energía para las imágenes de un sitio cerrado ............ 2 ordenador ..............19 Indicador STANDBY/ON ........19 Cómo utilizar los accesorios metálicos de seguridad y sus tornillos ............
- Page 157 Instalación Se pueden conectar monturas o bases opcionales al moni-tor de plasma en una de las dos siguientes maneras: * Durante en se coloca de manera vertical. (Véase la ilustración A) * Si se coloca con la pantalla boca abajo (Véase la ilustración B). Ponga la hoja de protección, que se colocó para cubrir el monitor durante el embalaje, debajo de la superficie de la pantalla de forma tal que ésta no resulte arañada.
- Page 158 Creación de una video wall (videopared) Con la capacidad de visualización de matriz incorporada, usted puede crear una video wall 4-25. • Conecte los cables de señales y los de mando a distancia como se muestra más abajo. Señal de vídeo Señal PC/COMPONENT BNC connector BNC connector...
- Page 159 BNC INPUT agujas del reloj al instalarlo. D-SUB INPUT RGB SELECT AUTO HD SELECT 1080B • Después de instalarlo, verifique que la marca con el logotipo PIONEER se visualice INPUT SKIP ALL RESET 1024 768 en el lado frontal. SEL. MENU...
- Page 160 Nombres y funciones de las partes Vista Frontal q Alimentación ( t LEFT/- y RIGHT/+ (izquierda/derecha) Funcionan como botones de CURSOR ( ) en el Enciende y apaga el monitor. modo de visualización en pantalla (OSD). w Ventana del sensor de mando a distancia y VOLUME Recibe la señal proveniente del mando a distancia.
- Page 161 SPEAKER para ambos canales, el izquierdo (LEFT) conector sin consultar primero con su técnico en y el derecho (RIGHT). instalaciones de Pioneer. Consulte el manual del propietario de sus altavoces. Este conector se utiliza para los ajustes de C VIDEO1, 2, 3 configuración de la pantalla de plasma.
- Page 162 y CURSOR (L/M/ Mando a distancia Utilice estos botones para seleccionar ítems o ajustes, y para realizar ajustes. u EXIT (salir) Pulse este botón para salir de los controles OSD en el menú principal. Mientras visualiza el submenú, pulse este botón para volver a la pantalla anterior. i POINT ZOOM (apuntador) Pulse este botón para visualizar el apuntador.
- Page 163 Operaciones básicas POWER (alimentación) Cuando se seleccione la entrada RGB (imagen móvil), VIDEO o Y/Pb/Pr (componente): Para encender y apagar la unidad (ON/OFF): El tamaño de la pantalla cambiará automáticamente al 1. Enchufe el cable en una toma de corriente general activa modo ZOOM con el texto superpuesto mostrado de CA.
- Page 164 Funcionamiento WIDE (pantalla ancha) Visión con una pantalla ancha Pantalla de tamaño 2.35:1 (manual) Con esta función, puede seleccionar uno de seis tamaños. Cuando vea vídeos o discos vídeo digitales 1. Pulse el botón SCREEN SIZE en el mando a distancia. 2.
- Page 165 Visión de imágenes de ordenador Información con pantalla ancha Resolución posible Cambie al modo de pantalla ancha para ampliar la imagen Vea la página 30 para más detalles de la emisión de la 4 : 3 y ajustarla al tamaño de la pantalla completa. pantalla de los muchos estándares de señal VESA 1.
- Page 166 Controles OSD (en pantalla) Funciones de Menú Nota: Para cancelar el menú principal, pulse el botón La ventana OSD se visualiza con respecto a la EXIT. pantalla tal como se muestra en el diagrama. * Dependiendo del modo de la pantalla, puede que el OSD Información se visualice de forma ligeramente diferente.
- Page 167 Árbol del Menú :Las áreas indican el valor predeterminado. ←→ Pulse el botón para ajustar. :Los elementos de menú en un cuadro reglado se encuentran disponibles cuando OSD AVANZADO se pone en ON. Menú Principal Submenú Submenú 2 Submenú 3 Submenú...
- Page 168 Menú Principal Submenú Submenú 2 Submenú 3 Submenú 4 Reajuste REFERENCIA OPCION2 AHORRO ENERG OFF←→ON SÍ PURECINEMA OFF←→ON SÍ LARGA DURAC. AUTO/BLOQ. 1/BLOQ. 2/BLOQ. 3 SÍ ORBITADOR AUTO 1 SÍ AUTO 2 SÍ MANUAL H-DOT/V-LINE/TIEMPO SÍ SÍ INVERSIÓN SÍ WORKING TIME/WAITING TIME SÍ...
- Page 169 Menú de ajustes de la imagen DINÁM: Este modo proporciona imágenes más luminosas que las obtenidas en el modo STD. Ajuste de la imagen DEFECTO: Utilice este tipo para reconfigurar la imagen Se pueden ajustar a voluntad el contraste, el brillo, la a los ajustes por defecto de fábrica.
- Page 170 Ajuste del color a la calidad deseada Ajustes de tono bajo Utilice este procedimiento para ajustar el balance del Esta función permite reproducir tonos más detallados, blanco para cada temperatura de color y lograr así la especialmente en las áreas oscuras. calidad del color deseada.
- Page 171 Menú de ajustes de SONIDO Menú de ajustes de PANTALLA Ajuste de agudos, graves y balance Ajuste de las opciones Posición, Tamaño, FASE, izquierda/derecha RELOJ Los agudos, graves y el balance izquierda/derecha del La posición de la imagen puede ser ajustada y el parpadeo sonido pueden ajustarse para que se adapte a sus gustos.
- Page 172 Menú de ajustes OPCION1 Ajuste de los conectores PC2/COMPONENT2 Permite ajustar la entrada de los conectores PC2/ Ajuste del menú en pantalla COMPONENT2 a RGB, componente o SCART1, 2. Esto ajusta la posición del menú, el formato de Ejemplo: Para ajustar el modo de SELEC. BNC a visualización (horizontal o vertical), etc.
- Page 173 Ajuste de una imagen de ordenador a la Ejemplo: Para ajustar el modo “SELEC. HD” a “1035I” pantalla de selección RGB correcta En “SELEC. HD” del menú “OPCION1”, seleccione “1035I”. Con la imagen de ordenador, seleccione el modo de OPCION1 1 / 3 selección RGB para una imagen móvil como, por ejemplo, una de modo de vídeo, del modo panorámico o una emisión...
- Page 174 Menú de ajustes OPCION2 Ajuste de la imagen según la película La imagen de la película es detectada y proyectada Ajuste de la gestión de energía para las automáticamente en un modo de imagen apropiado. imágenes de ordenador [sólo NTSC, PAL, PAL60, 480I (60Hz), 525I (60Hz), 576I Esta función de ahorro de energía (gestión de energía) re- (50Hz), 625I (50Hz), 1035I (60Hz), 1080I (60Hz)] duce automáticamente el consumo de electricidad del...
- Page 175 Información Información Ajuste de ABL Ajustes de la función ORBITADOR AUTO: El brillo de la pantalla se ajusta automáticamente H-DOT: Se mueve de 1 a 20 puntos en el sentido para adaptarse a la calidad de la imagen. horizontal. BLOQ. 1, 2, 3: Ajusta el brillo máximo. V-LINE: Se mueve de 1 a 20 líneas en el sentido vertical.
- Page 176 * “WAITING TIME” no se puede ajustar cuando Cuando TIEMPO FUNCI está en “ON”, el modo dura “WORKING TIME” está en ON. indefinidamente. WAITING TIME (TIEMPO ESPERA): Ponga el tiempo * El tiempo de “WORKING TIME” y “WAITING TIME” hasta que se inicie el modo “SCREEN WIPER”. puede ajustarse hasta un máximo de 12 horas y 45 VELOCIDAD: Ajuste la velocidad de movimiento para minutos en unidades de 3 minutos.
- Page 177 Ajuste del tamaño de la pantalla para la Menú de ajustes OPCION3 entrada de vídeo S1/S2 Utilización del temporizador Si la señal de S-vídeo contiene información del tamaño Esta función prepara el monitor para que se encienda/ de la pantalla, la imagen se ajustará automáticamente para apague automáticamente a la hora establecida.
- Page 178 Ajuste del modo de conexión de la TEMPORIZADOR PROGRAMA alimentación Esto pone el día y la hora a la que la alimentación va a Esta función ajusta el modo de entrada en el momento conectarse/desconectarse y a la que va activarse/ que se conecta la alimentación.
- Page 179 Activación/desactivación de la transmisión Ajuste del número de identificación inalámbrica del mando a distancia Cuando utilice más de uno de estos monitores, esta función Esta función activa/desactiva la transmisión inalámbrica ajustará los números de identificación para que las del mando a distancia. operaciones del mando a distancia no hagan que funcionen al mismo tiempo múltiples monitores.
- Page 180 Ajuste de una video wall Información Utilice esta función para configurar una video wall de 4- Ajustes de POSICION VIDEO WALL 1 pantalla: No es necesario ajustar POSICION. Ponga “OSD AVANZADO” en “ON” en el MENU 4 pantallas: 9 pantallas: PRINCIPAL (1/2), y luego realice las operaciones siguientes.
- Page 181 Información Información Ajustes de AUTO ID Ajustes de P. ON DELAY ON: Activa la función de identificación automática. En el ON: Conecta la alimentación principal de cada pantalla caso mostrado abajo, la pantalla 1 será ID1, la 2 será ID2, después de transcurrir un tiempo de retardo.
- Page 182 Menú de ajustes OSD Avanzado * Con la video wall de 3×3, conecte la pantalla final a la primera pantalla de igual forma que con la video wall Ajuste del modo del menú de 2×2. Esto permite acceder a todos los elementos del menú. Cuando P.
- Page 183 Menú de ajustes Sistem Color Ajuste del formato de la señal de vídeo Utilice estas funciones para ajustar los sistemas de color de las señales de vídeo compuesto o de las señales de entrada Y/C. Ejemplo: Ajuste del sistema de color a “3.58 NTSC”. En el menú...
- Page 184 Asignación de pines Conector mini D-Sub 15-pin (Analógico) PC 1 10 9 15 14 13 12 11 Nº de pin Señal (analógica) Rojo Verde o Sinc en Verde Azul Sin conectar Tierra Tierra - rojo Tierra - verde Tierra - azul Sin conectar Tierra - señal de sincronización Sin conectar...
- Page 185 Tabla de las Señales Soportadas Resolución posible 2, *4 • Cuando el modo de la pantalla sea NORMAL, cada señal será convertida en una señal de 640 puntos 480 líneas. (Excepto para * • Cuando el modo de la pantalla sea FULL, cada señal se convertirá en una señal de 853 puntos 480 líneas.
- Page 186 *1 Sólo al utilizar una tarjeta aceleradora de gráficos que sea capaz de proyectar imágenes en 852 480. *2 Visualiza solamente 400 líneas con el centro de la pantalla de la orientación vertical situado en el centro. *3 La imagen se visualiza con la resolución original. La imagen se comprimirá para otras señales. *4 La relación de aspecto es 5:4.
- Page 187 Solución de Problemas Si la calidad de la imagen es mala o se presenta algún otro problema, compruebe los ajustes, operaciones, etc., antes de llamar al servicio técnico. Síntoma Comprobaciones Solución La unidad emite un sonido de chisporroteo. • ¿Son normales la imagen y el sonido? •...
- Page 188 Especificaciones Tamaño de la pantalla 921 (H) 518 (V) mm (1,38") 1018 (40") 36,3" (H) 20,4" (V) pulgadas (2,13") diagonal 42" Proporción de la pantalla 16 : 9 Resolución 853(H) 480(V) pixels Señales Margen de Horizontal : 15,5 to 110 kHz sincronización (automático: exploración de paso) Vertical : 50,0 a 120,0 Hz...
- Page 191 Кабель DVI (не входит в комплект поставки) лента лента Разъём сердечник (малый) сердечник (малый) Шнур питания (входит в комплект поставки) сердечник ( к большой) сердечник ( к большой)
- Page 195 Рисунок B Рисунок A Стена Резьбовое отверстие 50 мм (2") 50 мм (2") Болт или крюк и т.п. (В комплект поставки Стена не входит) Предохранительная металлическая арматура Болт для Стена предохранительной металлической арматуры 50 мм (2") Металлическая цепочка (В комплект поставки не...
- Page 196 BNC connector BNC connector VIDEO signal PC signal / RCA phono plug COMPONENT signal VIDEO signal PC signal / COMPONENT Remote control signal OUT Remote control Remote control Remote control римечание: 1. ыводы VIDEO1 и PC1 могут использоваться как для О...
- Page 197 OPTION1 BNC INPUT D-SUB INPUT RGB SELECT AUTO HD SELECT 1080B INPUT SKIP ALL RESET 1024 768 SEL. MENU EXIT RETURN...
- Page 198 нопка Power ( нопки LEFT/– и RIGHT/+ w Окно сенсора дистанционного управления нопки VOLUME и ндикатор STANDBY / ON нопка MENU/SET нопка INPUT / EXIT римечание: Этот плазменный монитор способен воспроизводить изображение с подключённых проигрывателей DVD-дисков европейского стандарта с выходным сигналом SCART, являющимся сигналом RGB с полной синхронизацией. аш...
- Page 199 ыводы EXT SPEAKER L и R ывод RS-232C икогда не подсоединяйте компонент к этому выводу без предварительной консультации с ашим техником по установке оборудования Pioneer. ывод REMOTE IN ыводы VIDEO1, 2, 3 (BNC, RCA, S-Video) ывод REMOTE OUT ыводы AUDIO1, AUDIO2, AUDIO3 ыводы...
- Page 200 нопка MENU/SET О А (L / M / нопки У нопка EXIT нопки POINT ZOOM нопки ZOOM (+ /–) нопки VOLUME (+ /–) нопка MUTING нопка SCREEN SIZE нопка DISPLAY нопка OFF TIMER нопка AUTO SET UP нопка ID NO. SET нопка...
- Page 201 → → → → → ТАЙМЕР ВЫКЛ. ТАЙМЕР ВЫКЛ. ТАЙМЕР ВЫКЛ. зменение масштаба изображения: зменение позиции изображения: римечание: осле выключения питания с помощью таймера выключения ... лабый ток всё ещё подаётся в монитор. сли ы уходите из помещения или не планируете использовать...
- Page 202 → → → → → 2.35:1 → 14:9 ↔ 2.35:1 римечание: е позволяйте монитору длительное время работать в режиме 4:3 или 14:9. Это может привести к выгоранию фосфора.
- Page 203 нформация течение 3 секунд ... → → → римечание: е позволяйте монитору длительное время работать в режиме 4:3 или14:9. Это может привести к выгоранию фосфора.
- Page 204 римечание: лавное меню закрывается нажатием кнопки EXIT. нформация ГЛАВНОЕ МЕНЮ 1 / 2 КАРТИНКА ЗВУК НАСТРОЙКА ИЗОБР. ОПЦИЯ1 РАСШИР. OSD ВЫКЛ. СЛЕДУЮЩАЯ ГЛАВНОЕ МЕНЮ SEL. ВЫХОД MENU EXIT 1 / 2 КАРТИНКА ЗВУК НАСТРОЙКА ИЗОБР. ОПЦИЯ1 ОПЦИЯ2 ОПЦИЯ3 РАСШИР. OSD ВКЛ.
- Page 205 ←→ ←→ ← → ←→ ← → ←→ ← → ←→ ← → ←→ ← → ←→ ← → ←→ ← → ←→ ← → ←→ ← → ←→ ← → ←→ ← → ←→ ←→ ← … → ←→ ← … → ←→...
- Page 206 ←→ ←→ ← … → ← … → ←→ ←→ ←→ ←→ ←→ ←→ ←→ ←→ ← … → ← … → ← … → ← … → ← … → ←→ ←→ ←→ ← → ←→ ← → ←→ ←→...
- Page 207 КАРТИНКА 1 / 2 КОНТРАСТ ЯРКОСТЬ ЧЕТКОСТЬ ЦВЕТ ОТТЕНОК К З КАРТИНКА 1 / 2 BЫБOP AV CTAHД. КОНТРАСТ ВЫКЛ. ЯРКОСТЬ СЛЕДУЮЩАЯ КОНТРАСТ ЧЕТКОСТЬ SEL. ADJ. EXIT НАЗАД ЦВЕТ ОТТЕНОК К З BЫБOP AV CTAHД. римечание: сли на экране появляется “ Ь...
- Page 208 А О Ю (1/2) для “ А . OSD” установите значение “ . ” , а затем выполните следующие операции. А О Ю (1/2) для функции “ А . OSD” установите значение “ . ” , а затем выполните следующие операции. КАРТИНКА...
- Page 209 ЗВУК НИЗКИЕ ВЫСОКИЕ БАЛАНС ↔ АУДИО ВХОД1 ВИДЕО1 АУДИО ВХОД2 COMPNT1 АУДИО ВХОД3 PC1DSUB SEL. ADJ. EXIT НАЗАД НАСТРОЙКА ИЗОБР. римечание: сли на экране появляется “ Ь Я РАЗM. ЗKPAHA 4 : 3 В. ПОЛОЖEHИE А О Ь”... Г. ПОЛОЖEHИE равильно...
- Page 210 ОПЦИЯ1 1 / 3 ВХОД BNC COMP. ВХОД D-SUB ВЫБОР RGB АВТО ВЫБОР HD 1080B ПРОПУСК ВХОД ВЫКЛ. ОБЩ. СБРОС ВЫКЛ. ПОКАЗ OSD ВЫКЛ. СЛЕДУЮЩАЯ РEГУЛИР OSD SEL. ADJ. EXIT НАЗАД УГЛ. ПОЛ. OSD ВЫСОТА ОРБИТР OSD ВЫКЛ. КОНТРАСТ OSD НИЗКИЙ...
- Page 211 нформация ОПЦИЯ1 1 / 3 ВХОД BNC ВХОД D-SUB ВЫБОР RGB АВТО ВЫБОР HD 1080B ПРОПУСК ВХОД ВКЛ. ОБЩ. СБРОС ВЫКЛ. СЛЕДУЮЩАЯ SEL. ADJ. EXIT НАЗАД нформация нформация о пунктах, параметры которых будут восстановлены, приведена на странице 12. одробная информация об описанных выше ОПЦИЯ1 ОБЩ.
- Page 212 А О Ю (1/2) для функции “ А . OSD” установите значение “ . ” , а затем выполните следующие операции. А О Ю (1/2) для функции “ А . OSD” установите значение “ . ” , а затем выполните следующие...
- Page 213 LONG LIFE АВТО СДВИГ АВТО1 LONG LIFE ИНВЕРСИЯ ВЫКЛ. АВТО ПРОЖИГ ЭКР. ВЫКЛ. СДВИГ ВЫКЛ. СГЛАЖИВАНИЕ ВЫКЛ. ИНВЕРСИЯ БЕЛЫЙ ПРОЖИГ ЭКР. ВЫКЛ. СГЛАЖИВАНИЕ ВЫКЛ. SEL. ADJ. EXIT НАЗАД SEL. ADJ. EXIT НАЗАД нформация нформация ИНВЕРСИЯ/БЕЛЫЙ ВРЕМЯ РАБОТЫ 01Ч30M ВРЕМЯ ОЖИД. 02Ч00M SEL.
- Page 214 LONG LIFE АВТО СДВИГ ВЫКЛ. ИНВЕРСИЯ ВЫКЛ. ПРОЖИГ ЭКР. ВЫКЛ. LONG LIFE СГЛАЖИВАНИЕ АВТО СДВИГ ВЫКЛ. ИНВЕРСИЯ ВЫКЛ. ПРОЖИГ ЭКР. ВКЛ. SEL. ADJ. EXIT НАЗАД СГЛАЖИВАНИЕ ВЫКЛ. нформация SEL. ADJ. EXIT НАЗАД нформация А О Ю (1/2) для функции “ А .
- Page 215 А О Ю (1/2) для функции “ А . OSD” установите значение “ .”, а затем выполните следующие операции. А О Ю (1/2) для функции “ А . OSD” установите значение “ . ” , а затем выполните следующие операции. ТАЙМЕР...
- Page 216 А О Ю (1/2) для функции “ А . OSD” установите значение “ . ” , а затем выполните следующие операции. ОПЦИЯ3 3 / 3 ПРЕДЫДУЩАЯ ТАЙМЕР ТАЙМЕР ПРОГРАММ РЕЖИМ ВКЛ. ВИДЕО2 ДАТА ВКЛ. ВЫКЛ. ВХОД ФУНКЦИЯ БЛОК. KЛABИШ ВЫКЛ. 08 : 30 10 : 30 ИНВЕРСИЯ...
- Page 217 А О Ю (1/2) для функции “ А . OSD” установите значение “ . ” , а затем выполните следующие операции. ОПЦИЯ3 3 / 3 А О Ю (1/2) для функции “ А . OSD” ПРЕДЫДУЩАЯ установите значение “ . ” , а затем выполните ТАЙМЕР...
- Page 218 ВИДЕОСТЕНА ВИДЕОСТЕНА ДЕЛИТЕЛЬ ДЕЛИТЕЛЬ ПОЗИЦИЯ ПОЗИЦИЯ РЕЖИМ ЭКРАНА CTAHД. РЕЖИМ ЭКРАНА HACTP. АВТО ИДЕНТ. ВЫКЛ. АВТО ИДЕНТ. ВЫКЛ. НАСТР. ИЗОБ. НАСТР. ИЗОБ. ЗАДЕРЖ. ВКЛ. ВЫКЛ. ЗАДЕРЖ. ВКЛ. ВЫКЛ. ABL LINK ВЫКЛ. ABL LINK ВЫКЛ. ТАЙМЕР ПОВТ. ВЫКЛ. ТАЙМЕР ПОВТ. ВЫКЛ. SEL.
- Page 219 ВИДЕОСТЕНА НАСТРОЙКА ИЗОБР. ДЕЛИТЕЛЬ РАЗM. ЗKPAHA 4 : 3 ПОЗИЦИЯ В. ПОЛОЖEHИE РЕЖИМ ЭКРАНА CTAHД. Г. ПОЛОЖEHИE АВТО ИДЕНТ. ВЫКЛ. РАЗM. ВEPTИK НАСТР. ИЗОБ. РАЗM. ГOPИЗ АВТО. ИЗОБ. ВЫКЛ. ЗАДЕРЖ. ВКЛ. ВЫКЛ. ФAЗA ABL LINK ВКЛ. ЧACЫ В. ПОЛОЖEHИE + 6 4 ТАЙМЕР...
- Page 220 ГЛАВНОЕ МЕНЮ ГЛАВНОЕ МЕНЮ 1 / 2 1 / 2 КАРТИНКА КАРТИНКА ЗВУК ЗВУК НАСТРОЙКА ИЗОБР. НАСТРОЙКА ИЗОБР. ОПЦИЯ1 ОПЦИЯ1 ОПЦИЯ2 ОПЦИЯ3 РАСШИР. OSD ВЫКЛ. РАСШИР. OSD ВКЛ. СЛЕДУЮЩАЯ СЛЕДУЮЩАЯ SEL. ADJ. EXIT ВЫХОД SEL. ADJ. EXIT ВЫХОД ТАЙМЕР ПОВТ. нформация...
- Page 221 СИСТЕМА ЦВЕТНОСТИ СИСТЕМА ЦВЕТНОСТИ 3.58NTSC ADJ. EXIT НАЗАД нформация ИНФОРМ О СИГНАЛЕ Г-ЧАСТОТА 48.4kHz В-ЧАСТОТА 60.0Hz Г-ПОЛЯРНОСТЬ ОТР. В-ПОЛЯРНОСТЬ ОТР. ПАМЯТЬ × РАЗРЕШЕНИЕ 1024 EXIT НАЗАД...
- Page 222 PC 1 10 9 15 14 13 12 11 PC 3 9 10 11 12 13 14 15 16 21 22 23 24...
- Page 223 640 400 70,1 31,5 640 480 59,9 31,5 72,8 37,9 75,0 37,5 43,3 85,0 100,4 51,1 120,4 61,3 848 480 60,0 31,0 852 480* 60,0 31,7 35,2 800 600 56,3 60,3 37,9 72,2 48,1 75,0 46,9 85,1 53,7 99,8 63,0 120,0 75,7 1024 768...
- Page 224 А есмотря на то, что входные сигналы соответствуют разрешению, указанному в приведённой выше таблице, в случае ошибок синхронизации ашего компьютера ы можете настроить положение и размер изображения или улучшить его качество. Этот монитор имеет разрешение 853 точек 480 строк. екомендуется, чтобы входной сигнал был VGA, wide VGA или эквивалентный им. цифровым...
- Page 226 (1,38") 1018 (40") (2,13") (3,5") ходные сигналы HD/DVD/DTV, поддерживаемые этой системой качестве входов PC2 и COMPONENT2 используются разъёмы 5-BNC. ыберите один из них под “BNC INPUT”. овместимо с HDCP. оддерживаемые сигналы римечание:...
- Page 228 Gebruiksaanwijzing Dank u voor het vertrouwen dat u in dit product van PIONEER heeft gesteld. Lees de “Belangrijke informatie” en rest van deze gebruiksaanwijzing aandachtig door voordat u dit plasmascherm in gebruik neemt, zodat u weet hoe u het plasmascherm op de juiste wijze moet bedienen. Bewaar deze gebruiksaanwijzing op een veilige plaats voor naslag in de toekomst.
- Page 229 Belangrijke informatie Voorzorgsmaatregelen Waarschuwingen en voorzorgsmaatregelen Lees deze gebruiksaanwijzing voordat u het plasmascherm in gebruik neemt aandachtig door en bewaar hem binnen Dit plasmascherm is ontworpen en gefabriceerd om handbereik voor latere naslag. langdurig probleemloos dienst te doen. Behalve reiniging is geen onderhoud nodig. Zie het hoofdstuk “Reiniging van het plasmascherm”...
- Page 230 Reiniging van het plasmascherm: OPMERKING: 1. Gebruik het reinigingsdoekje (meegeleverd) of een zachte, Voor aansluiting van dit plasmascherm op een pc moet droge doek om het voorpaneel en het scherm te reinigen. een RGB-kabel worden gebruikt die aan beide uiteinden Gebruik voor het reinigen van deze oppervlakken nooit is voorzien van een ferrietkern.
- Page 231 Dit product voldoet aan de laagspanningsrichtlijn (73/23/ EEG, gewijzigd bij 93/68/EEG), EMC-richtlijnen (89/336/ EEG, gewijzigd bij 92/31/EEG en 93/68/EEG). Let op Dit model is voor gebruik met de volgende optionele accessoires. Gebruik met andere optionele accessoires kan resulteren in instabiliteit en lichamelijk letsel tot gevolg hebben. Luidspreker: PDP-S32-LR Stander: PDK-TS09 Wandbevestiging: PDK-WM04...
- Page 232 Inhoud Installatie ............2 Instellingenmenu OPTION2 ........19 Ventilatievereisten voor plaatsing in een ombouw ..2 Instelling van energiebeheer voor computerbeelden ... 19 Gebruik van de metalen veiligheidsaccessoires .... 2 STANDBY/ON-indicator .......... 19 Creëren van een videowand ........3 Aanpassen van het beeld aan de film ......19 Verminderen van het gevaar voor inbranden van het Kabelbeheer ............
- Page 233 Installatie U kunt de optionele bevestigingen of standers op de volgende twee manieren bevestigen: * Rechtstandig (zie tekening A). * Plat, met het scherm naar beneden (zie tekening B). Leg het beschermende verpakkingsmateriaal waarin het plasmascherm was verpakt, onder het scherm zodat er geen krassen op het scherm komen. * Raak het oppervlak van het scherm tijdens het hanteren van het toestel niet aan.
- Page 234 Creëren van een videowand U kunt dankzij de ingebouwde mogelijkheid voor matrixweergave een videowand opbouwen die uit 4 tot 25 schermen bestaat. • Sluit de signaal- en afstandsbedieningskabels als volgt aan: Videosignaal Pc-/componentsignaal BNC connector BNC connector PC signal/ VIDEO signal COMPONENT RCA phono plug signal...
- Page 235 Bovenkant installatie over te gaan. • Draai het toestel vóór installatie 90°, zoals van voren gezien. OPTION1 BNC INPUT • Controleer na installatie op het PIONEER logo op de juiste plaats zit. D-SUB INPUT RGB SELECT AUTO HD SELECT 1080B •...
- Page 236 Benaming van de onderdelen en hun functie Vooraanzicht t LEFT/– en RIGHT/+ q Netschakelaar ( Fungeren als cursortoetsen ( ) in het on-screen Voor het in- en uitschakelen van de netspanning. display (OSD). w Sensor van de afstandsbediening y VOLUME Ontvangt de signalen van de afstandsbediening.
- Page 237 Sluit luidsprekers (los verkrijgbaar) op deze RS-232C aansluitingen aan. Let op de polariteit. Sluit het Sluit op deze aansluiting nooit een component aan (positieve) luidsprekersnoer aan op de zonder dat u eerst uw Pioneer installatiemonteur hebt geraadpleegd. SPEAKER-aansluiting en het (negatieve) luidsprekersnoer op de...
- Page 238 u EXIT Afstandsbediening Druk op deze toets wanneer het hoofdmenu wordt weergegeven om het on-screen display te sluiten. Druk op deze toets wanneer een submenu wordt weergegeven om terug te keren naar een bovenliggend menu. i POINT ZOOM Druk op deze toets om de aanwijzer weer te geven. o ZOOM (+ /–) Voor het vergroten of verkleinen van het beeld.
- Page 239 BASISBEDIENING POWER Met een RGB (bewegend beeld), VIDEO, of COMPONENT (Y/Pb/Pr) ingangsbron: Om het plasmascherm in en uit te schakelen: Het beeldformaat wordt automatisch ingesteld op de 1. Steek de stekker van het netsnoer in een stopcontact. ZOOM-stand met volledige weergave van ondertitels 2.
- Page 240 BEDIENING VAN HET BREEDBEELD SCREEN SIZE * Gebruik deze instelling voor het bekijken van (Handmatige instelling van het bioscoopfilms, enz. beeldformaat) Met deze functie kunt u kiezen uit zes verschillende Beeldformaat 2.35:1 beeldformaten. Voor het bekijken van video’s of digitale videodiscs 1.
- Page 241 SCREEN SIZE Bij weergave van Informatie computerbeelden Ondersteunde resoluties Schakel de stand voor breedbeeld in om het 4:3 beeld Zie blz. 29 voor details over de weergave van de diverse schermvullend weer te geven. signalen die voldoen aan de VESA-norm en die door 1.
- Page 242 BEDIENEN VAN HET ON-SCREEN DISPLAY (OSD) Menubewerkingen Opmerking: Het hoofdmenu verdwijnt als op de EXIT- Het venster van het on-screen display (OSD) wordt toets wordt gedrukt. in een gedeelte van het scherm weergegeven, zoals onderstaande afbeelding laat zien. Informatie * De exacte positie van het OSD is afhankelijk van de Geavanceerde menufunctie beeldinstelling.
- Page 243 Menuopbouw :De gearceerde vakken duiden op de standaard waarden. ←→ Druk op de -toets om deze waarden in te stellen. :Menu-items in een omlijnd vak zijn beschikbaar wanneer ADVANCED OSD is ingesteld op ON. Hoofdmenu Submenu Submenu 2 Submenu 3 Submenu 4 RESET REFERENCE...
- Page 244 Hoofdmenu Submenu Submenu 2 Submenu 3 Submenu 4 RESET REFERENCE OPTION2 PWR. MGT. OFF←→ON PURECINEMA OFF←→ON LONG LIFE AUTO/LOCK 1/LOCK 2/LOCK 3 ORBITER AUTO 1 AUTO 2 MANUAL H-DOT/V-LINE/TIME INVERSE WORKING TIME/WAITING TIME WHITE SCREEN WIPER WORKING TIME/WAITING TIME/SPEED SOFT FOCUS OFF/1/2/3/4 0←...
- Page 245 Het instellingenmenu PICTURE Onderdrukken van beeldruis Gebruik deze instellingen als er beeldruis optreedt wanneer Instellen van het beeld de televisieontvangst slechts is of tijdens weergave van Contrast, helderheid, scherpte, kleur en tint kunnen naar videobanden met een slechte beeldkwaliteit. voorkeur worden ingesteld. Voorbeeld: Instellen op “HIGH”...
- Page 246 Instellen van de kleur op het gewenste niveau Instellen van de nuance Volg deze procedure om de witbalans voor elke Met deze instellingen kan de nuance wordt verhoogd, kleurtemperatuur in te stellen om zo de gewenste vooral in de donkere partijen. kleureigenschappen te verkrijgen.
- Page 247 Het instellingenmenu SOUND Het beeldformaat verandert telkens wanneer op de toets wordt gedrukt in onderstaande volgorde: Instellen van de hoge en lage tonen, de 4:3 ↔ FULL balans en selecteren van de audio-ingang * Het beeldformaat kan ook worden gewijzigd met behulp De hoge en lage tonen en de balans tussen het linker en van de SCREEN SIZE-toets van de afstandsbediening.
- Page 248 Instellingenmenu OPTION1 Instellen PC2/COMPONENT- aansluitingen Instellen van de on-screen display Via de instelling “BNC INPUT” kan de PC2/ Er zijn diverse keuzemogelijkheden voor de positie van COMPONENT2-aansluiting worden ingesteld op RGB, het menu, de stand (horizontaal of verticaal), enz. component en SCART1 of 2. Voorbeeld: Uitschakelen van het on-screen display Voorbeeld: Instellen van “BNC INPUT”...
- Page 249 Instellen van de juiste RGB-keuzestand voor Instellen van high-definition beelden op het computerbeelden juiste beeldformaat Selecteer bij computerbeelden de juiste RGB-keuzestand Volg deze procedure om het aantal verticale lijnen van het voor bewegende beelden, zoals video, breedbeeld of ingevoerde HD-signaal in te stellen op 1035 of 1080. digitale uitzendingen.
- Page 250 Instellingenmenu OPTION2 Aanpassen van het beeld aan de film Het filmbeeld wordt automatisch beoordeeld en Instelling energiebeheer voor geprojecteerd met de instellingen die het beste bij de film computerbeelden passen. Deze functie voor energiebesparing (energiebeheer) [Alleen MTSC, PAL, PAL60, 480I (60 Hz) , 525I (60 Hz), reduceert automatisch het stroomverbruik van het 576I (50 Hz), 625I (50 Hz), 1035I (60 HZ), 1080I (60 Hz)] plasmascherm wanneer er gedurende een bepaalde tijd...
- Page 251 ORBITER INVERSE Gebruik deze instelling om de beeldverschuiving te Gebruik deze instelling om het beeld invers weer te geven bepalen. of om een wit scherm weer te geven. Voorbeeld: Instellen van “INVERSE” op “WHITE” Voorbeeld: Instellen van “ORBITER” op “AUTO1” Zet “ORBITER”...
- Page 252 SCREEN WIPER SOFT FOCUS Deze instelling vermindert de randen en verzacht het beeld. Wanneer deze instelling op “ON” wordt gezet, beweegt zich een witte, verticale balk herhaaldelijk en met een Voorbeeld: Instellen van ‘SOFT FOCUS” op “2” constante snelheid van links naar rechts over het scherm. Zet “SOFT FOCUS”...
- Page 253 Instellen van het beeldformaat van het S1/S2 Instellingenmenu OPTION3 videosignaal Gebruik van de timer Als het S-videosignaal informatie over het beeldformaat Met deze functie kan het plasmascherm automatisch op bevat en de instelling S1/S2 op “AUTO” is gezet, wordt het geprogrammeerde tijdstip worden ingeschakeld. het beeld automatisch aangepast en schermvullend Zet “ADVANCED OSD”...
- Page 254 Instellen van de aanvangsmodus PROGRAM TIMER Met deze instelling kan worden bepaald welke ingang Hiermee worden de dag en het tijdstip waarop het wordt gekozen wanneer het plasmascherm wordt plasmascherm wordt in- en uitgeschakeld en de te ingeschakeld. gebruiken ingangsbron geprogrammeerd. Voorbeeld: Instellen op “VIDEO2”...
- Page 255 Activeren/deactiveren van de draadloze op één afstandsbediening reageren. afstandsbediening Voorbeeld: Instellen op “2” Via deze instelling kan de bediening via de draadloze Zet “ADVANCED OSD” van het hoofdmenu (1/2) op afstandsbediening worden geactiveerd en gedeactiveerd. “ON” en voer daarna de volgende handelingen uit. Voorbeeld: Instellen op “OFF”...
- Page 256 DISP. MODE DIVIDER Instellen van het aantal plasmaschermen waaruit de Selecteer één van de twee standen van de beeldmodus, videowand bestaat. NORMAL of ADJUST. Voorbeeld: Instellen op “4”. Voorbeeld: Instellen op “ADJUST”. Zet “DIVIDER” van het “VIDEO WALL”-menu op “4”. Zet “DISP.
- Page 257 SCREEN ABL LINK Het is mogelijk om de positie van het beeld te wijzigen en Gebruik deze functie om ervoor te zorgen dat alle flikkeringen van het beeld te verhelpen. plasmaschermen voortdurend een uniforme helderheid hebben. Voorbeeld: Instellen van de verticale positie van het Hiervoor moet de automatische identificatie zijn beeld ingeschakeld en de DIVIDER op 1, 4 of 9 zijn ingesteld.
- Page 258 Instellingenmenu COLOR SYSTEM REPEAT TIMER Instellen van het soort videosignaal Hiermee kunnen twee timers worden ingesteld. Elke timer Volg deze procedure om de kleursystemen van composiet heeft de beschikking over de functies DIVIDER, SOURCE videosignalen of Y/C gescheiden videosignalen in te en WORK TIME.
- Page 259 Toewijzing van pinnen 15-pins mini D-sub aansluiting 24-pins DVI-D aansluiting (digitaal) (analoog) Dit plasmascherm is uitgerust met een veel gebruikte digitale aansluiting. Deze aansluiting kan niet voor analoge signalen worden gebruikt. (TMDS kan slechts voor één PC 1 verbinding worden gebruikt.) 10 9 PC 3 15 14 13 12 11...
- Page 260 Tabel van ondersteunde signalen Ondersteunde resolutie • Wanneer het beeldformaat is ingesteld op 4:3, wordt elk signaal geconverteerd in een signaal van 640 punten 480 lijnen (met uitzondering van * en * • Wanneer het beeldformaat is ingesteld op FULL, wordt elk signaal geconverteerd in een signaal van 853 punten 480 lijnen (met uitzondering van * Computersignalen die door dit systeem worden ondersteund Sync polariteit Beeldformaat...
- Page 261 *1 Alleen bij gebruik van een grafische versneller waarmee een resolutie van 852 480 bereikt kan worden. *2 Geeft 400 lijnen weer met het verticale middelpunt van het beeld in het midden van het scherm. *3 Het beeld wordt met de oorspronkelijk resolutie weergegeven. Het beeld van overige signalen wordt gecomprimeerd. *4 De beeldverhouding bedraagt 5:4.
- Page 262 Verhelpen van storingen Als de beeldkwaliteit niet goed is of zich een probleem voordoet, controleer dan eerst de instellingen, aansluitingen, enz. voordat u het plasmascherm ter reparatie aanbiedt. Symptoom Controlepunt Oplossing Het plasmascherm geeft een krakend geluid. • Zijn beeld en geluid wel normaal? •...
- Page 263 Technische gegevens Schermgrootte 421 (H) 518 (V) mm (1,38") 1018 (40") 42" diagonaal (2,13") Beeldverhouding 16 : 9 Resolutie 853 (H) 480 (V) pixels Signalen Synchronisatiebereik Horizontaal : 15,5 tot 110 kHz (automatisch : stappenaftasting) Verticaal : 50,0 tot 120 Hz (automatisch : stappenaftasting) Ingangsignalen RGB, NTSC (3,58/4,43),...
- Page 266 300 Allstate Parkway, Markham, Ontario L3R OP2, Canada TEL: 1-905-479-4411 PIONEER EUROPE NV MULTIMEDIA DIVISION Pioneer House Hollybush Hill, Stoke Poges, Slough SL2 4QP, U.K., TEL: 44-1753-789-789 PIONEER ELECTRONICS AUSTRALIA PTY. LTD. 178-184 Boundary Road, Braeside, Victoria 3195, Australia, TEL: 61-39-586-6300 PIONEER ELECTRONICS ASIACENTRE PTE.