Table des Matières
Publicité
Les langues disponibles
Les langues disponibles
Liens rapides
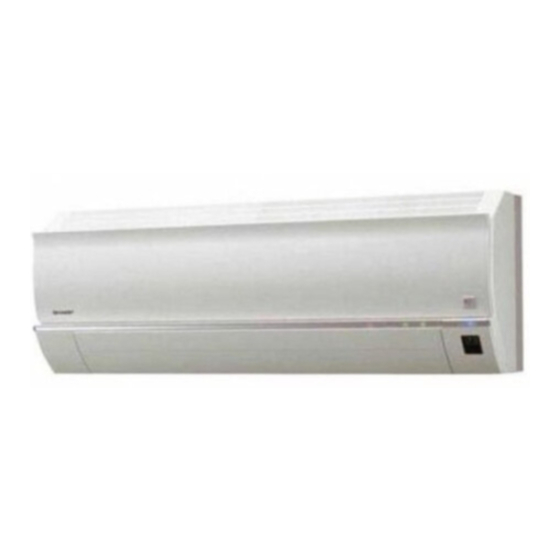
Air Conditioner
*Plasmacluster is a trademark of Sharp
Corporation.
R
MULTI SPLIT TYPE
ROOM AIR CONDITIONER
OPERATION MANUAL
CLIMATISEUR DE SALLE
DE TYPE A DIVISION MULTIPLE
MODE D'EMPLOI
ACONDICIONADOR DE AIRE PARA
HABITACIÓN TIPO MULTI DIVISIÓN
MANUAL DE INSTRUCCIONES
TIPO A SEZIONE MULTIPLA
CONDIZIONATORE D ARIA PER
ABITAZIONI
MANUALE DI ISTRUZIONI
AR CONDICIONADO DE SALA
DE MÚLTIPLAS UNIDADES
MANUAL DE OPERAÇÃO
ÇOK ÜNİTELİ SPLIT TİPİ
ODA KLİMASI
KULLANIM KILAVUZU
INDOOR UNIT
UNITE INTERIEURE
UNIDAD INTERIOR
UNITÀ INTERNA
UNIDADE INTERIOR
Ç ÜNİTE
AY-XPM7FR
AY-XPM9FR
AY-XPM12FR
Publicité
Chapitres
Table des Matières

Manuels Connexes pour Sharp AY-XPM7FR


Sommaire des Matières pour Sharp AY-XPM7FR
- Page 1 MANUAL DE INSTRUCCIONES TIPO A SEZIONE MULTIPLA Air Conditioner CONDIZIONATORE D ARIA PER ABITAZIONI MANUALE DI ISTRUZIONI AR CONDICIONADO DE SALA DE MÚLTIPLAS UNIDADES MANUAL DE OPERAÇÃO ÇOK ÜNİTELİ SPLIT TİPİ ODA KLİMASI KULLANIM KILAVUZU *Plasmacluster is a trademark of Sharp Corporation.
- Page 2 1. In the European Union If the product is used for business purposes and you want to discard it: Please contact your SHARP dealer who will inform you about the take-back of the product. You might be charged for the costs arising from take-back and recycling.
-
Page 3: Table Des Matières
ENGLISH Please read this manual carefully before using the product. This manual should be kept in a safe place for handy reference. CONTENTS • IMPORTANT SAFETY INSTRUCTIONS ... GB-1 • PLASMACLUSTER OPERATION ..GB-12 • SELF CLEAN OPERATION ....GB-13 • PART NAMES........... GB-3 •... -
Page 4: Important Safety Instructions
IMPORTANT SAFETY INSTRUCTIONS CAUTION • Open a window or door periodically to ventilate the room, especially when using gas appliances. Insuffi cient ventilation may cause oxygen shortage. • Do not operate the buttons with wet hand. It may cause electric shock. •... -
Page 5: Part Names
PART NAMES INDOOR UNIT 1 AUX Button 2 Inlet (Air) 3 Open Panel 4 Deodorant Dust Collection Filter 5 Air Filters 6 Indicator 7 Receiver Window 8 Vertical Adjustment Louvres 9 Horizontal Adjustment Louvres 10 Outlet (Air) 11 Remote Control 12 PLASMACLUSTER Lamp (blue) 13 TEMPERATURE INDICATOR... -
Page 6: Remote Control Display
PART NAMES REMOTE CONTROL 1 TRANSMITTER 2 DISPLAY 3 PLASMACLUSTER Button 4 DISPLAY Button 5 ON/OFF Button 6 THERMOSTAT Button 7 FULL POWER Button 8 COANDA AIRFLOW Button 9 MODE Button 10 TIMER ON Button (for setting the timer) DISPLAY 11 TIMER OFF Button (for setting the timer) 12 1-HOUR OFF TIMER Button 13 TIME ADVANCE Button... -
Page 7: Setting Deodorant Dust Collecting Filter
SETTING DEODORANT DUST COLLECTION FILTER The deodorant dust collection fi lters are packed as accessory of this unit. During operation of the air conditioner, the fi lters remove dust and tobacco smoke from the air and discharges clean air. Take out the air fi lters. Open the open panel. -
Page 8: Using The Remote Control
USING THE REMOTE CONTROL LOADING BATTERIES Use two size-AAA (R03) batteries. Remove the remote control cover. Remote control cover Insert batteries in the com- partment, making sure the (+) and (-) polarities are correctly a lign ed. • The display indicates “AM 6:00”... - Page 9 SET CURRENT CLOCK TIME There are two clock modes: Example: 5 o’clock in the afternoon 12-hour mode and 24-hour Clock Display mode. 12-hour mode PM 5:00 24-hour mode 17:00 To set to the 12-hour mode, press the MODE CLOCK button once in the fi rst step. CLEAN To set to the 24-hour mode, press the CLOCK button twice in the fi...
-
Page 10: Basic Operation
BASIC OPERATION Press the MODE button to select the opera- tion mode AUTO HEAT COOL Press the ON/OFF button to start operation. • The red OPERATION lamp ( ) on the unit will light. Press the THERMOSTAT button to set the desired temperature. -
Page 11: Tips About Indicator Panel
TIPS ABOUT AUTO MODE In the AUTO mode, the temperature setting and mode are automatically selected according to the room temperature and outdoor temperature when the unit is turned on. Modes and Temperature Settings Outdoor temp. (°C) Cool Cool Cool (24°C) (25°C) (26°C) -
Page 12: Adjusting The Air Flow Direction
ADJUSTING THE AIR FLOW DIRECTION VERTICAL AIR FLOW DIRECTION Adjustment range Press the SWING button on the re- mote control once. COOL and DRY modes HEAT mode • The vertical adjustment louvres will swing. Press the SWING button again when the vertical adjustment lou- vres are at the desired position. -
Page 13: Coanda Airflow
COANDA AIRFLOW In cool or dry mode, vertical airfl ow louvre is set obliquely upward to deliver cool air to the ceiling in order to avoid direct airfl ow. In heat mode, vertical airfl ow louvre is set downward to deliver the warm air down to the fl oor. During operation, press the COANDA AIRFLOW button. -
Page 14: Plasmacluster Operation
PLASMACLUSTER OPERATION The Plasmacluster Ion generator inside the air conditioner will release positive and negative plasmacluster ions into the room. Approximately the same numbers of positive and negative ions released into the air will reduce some airborne mold. During operation, press the PLASMACLUSTER button. -
Page 15: Self Clean Operation
SELF CLEAN OPERATION SELF CLEAN operation will reduce the growth mold fungus with Plasmacluster ions and dry inside of the unit. Utilize the operation at seasonal change over terms. Mold fungus already grown can not be eliminated by this operation. Press the SELF CLEAN button when the unit is not operating. -
Page 16: Timer Operation
TIMER OPERATION NOTE: Before setting the timer, make sure the clock is properly set with the current time. TIMER OFF Press the TIMER OFF ( ) button. The TIMER OFF indicator will blink; press the TIME ADVANCE or REVERSE buttons to set the desired time. - Page 17 TIMER ON Press the TIMER ON ( ) button. The TIMER ON indicator will blink; press the TIME ADVANCE or REVERSE buttons to set the desired time. (The time can be set in 10-minute increments.) Point the remote control at the signal receiver window on the unit and press the TIMER SET (SET/C) button.
-
Page 18: Auxiliary Mode
AUXILIARY MODE Use this mode when the remote control is not available. TO TURN ON Lift the front panel of the indoor unit and press the AUX button on the operation panel. • The red OPERATION lamp ( ) on the unit will light and the unit will start operating in the AUTO mode. -
Page 19: Cleaning The Unit And The Remote Control
MAINTENANCE CLEANING THE UNIT AND THE REMOTE CONTROL • Wipe them with a soft cloth. • Do not directly splash or pour water on them. We can cause electrical shock or equipment damage. • Do not use hot water, thinner, abrasive powders or strong solvents. MAINTENANCE BEFORE MAINTENANCE AFTER AIR CONDITIONER SEASON... -
Page 20: Additional Notes On Operation
ADDITIONAL NOTES ON OPERATION OPERATING TEMPERATURE RANGE INDOOR TEMP. OUTDOOR TEMP. upper limit 32˚C 43˚C COOLING lower limit 21˚C 21˚C upper limit 27˚C 24˚C HEATING lower limit –15˚C • The built-in protective device may prevent the unit from operating when used out of this range. •... -
Page 21: Before Calling For Service
BEFORE CALLING FOR SERVICE The following conditions do not denote equipment malfunctions UNIT DOES NOT OPERATE SWISHING NOISE The soft, swishing noise is the sound of the re- The unit will not operate if it is turned on immediately after it is turned off. The unit will not frigerant fl... - Page 22 BEFORE CALLING FOR SERVICE If the unit appears to be malfunctioning, check the following points before calling for service. IF THE UNIT FAILS TO OPERATE Check to see if the circuit breaker has tripped or the fuse has blown. IF THE UNIT FAILS TO COOL (OR HEAT) THE ROOM EFFECTIVELY Check the outdoor unit to make Check the thermostat is proper Check the fi...
- Page 24 Si ce produit est utilisé dans le cadre des activités de votre entreprise et que vous souhaitiez le mettre au rebut : Veuillez contacter votre revendeur SHARP qui vous informera des conditions de reprise du produit. Les frais de reprise et de recyclage pourront vous être facturés.
-
Page 25: Avertissements
FRANÇAIS Lire attentivement ce manuel avant d’utiliser l’appareil. Ce mode d’emploi doit être conservé en lieu sûr et rester facile d’accès. TABLE DES MATIERES • CONSIGNES DE SECURITE • OPERATION DE NETTOYAGE IMPORTANTES ........FR-1 AUTOMATIQUE ........FR-13 • NOMENCLATURE ........FR-3 •... -
Page 26: Consignes De Securite Importantes
CONSIGNES DE SECURITE IMPORTANTES PRÉCAUTIONS • Ouvrir périodiquement une fenêtre ou une porte pour aérer la pièce, en particulier lors de l’ utilisation d’appareils à gaz. Une ventilation insuffi sante risque de provoquer un manque d’ oxygène. • Ne pas utiliser les touches avec les mains mouillées. Cela risque de provoquer une électrocution. -
Page 27: Nomenclature
NOMENCLATURE UNITE INTERIEURE 1 Touche AUX. 2 Bouche d’entrée (Air) 3 Panneau d’ouverture 4 Filtre de collecte de poussiere désodorisant 5 Filtres à air 6 Voyant 7 Fenêtre de réception 8 Volets d’aération à réglage vertical 9 Volets d’aération à réglage horizontal 10 Bouche de sortie (Air) 11 Télécommande... - Page 28 NOMENCLATURE TELECOMMANDE 1 EMETTEUR 2 AFFICHAGE (Affi chage à cristaux liquides) 3 Touche PLASMACLUSTER 4 Touche DISPLAY 5 Touche MARCHE/ARRET 6 Touche de THERMOSTAT 7 Touche PLEIN REGIME 8 Touche de DEBIT D’AIR PROGRESSIF 9 Touche MODE 10 Touche MARCHE DE LA MINUTERIE (pour régler la minuterie) DISPLAY 11 Touche d’ARRET DE LA MINUTERIE (pour...
-
Page 29: Regler Le Filtre De Collecte De Poussiere Desodorisant
REGLER LE FILTRE DE COLLECTE DE POUSSIERE DESODORISANT Les fi ltres de collecte de poussière désodorisants sont fournis en tant qu’acces- soires de cet appareil. Pendant le fonctionnement du climatiseur, le fi ltre élimine de l’ air la poussière et la fumée de cigarette et génère de l’air propre. Retirer les fi... -
Page 30: Utilisation De La Telecommande
UTILISATION DE LA TELECOMMANDE CHARGER LES BATTERIES Utiliser deux piles de format AAA (R03). R e t i r e r l e c o u v e r c l e d e l a t é l é - commande. -
Page 31: Regler L'heure Actuelle De L'horloge
REGLER L’HEURE ACTUELLE DE L’HORLOGE Il y a deux modes d’horloge : Exemple : 5 heures de l’après-midi le mode 12 heures et le mode Horloge Affi chage 24 heures. Mode 12 heures PM 5:00 Mode 24 heures 17:00 Pour régler le mode 12 heures, appuyer MODE une fois sur la touche d’HORLOGE dans la première étape. -
Page 32: Fonctionnement De Base
FONCTIONNEMENT DE BASE Appuyer sur la touche MODE pour sélec- tionner le mode de fonctionnement. AUTO CHAUF- FRAIS FAGE Appuyer sur la touche MARCHE/ARRET pour commencer l’utilisation. • Le voyant rouge de MARCHE ( ) s’allume sur l’ appareil. Appuyer sur la touche de THERMOSTAT pour régler la température souhaitée. -
Page 33: Conseils A Propos Du Panneau D'indicateurs
CONSEILS A PROPOS DU MODE AUTO En mode AUTO, les réglages de température et de mode sont sélectionnés automatiquement selon la température de la pièce et la température extérieure lorsque l’appareil est allumé. Modes et réglages de température Temp. (°C) extérieure Frais Frais... -
Page 34: Reglage De La Direction Du Debit D'air
REGLAGE DE LA DIRECTION DU DEBIT D’AIR DEBIT D’AIR VERTICAL Appuyer une fois sur la touche Intervalle de réglage SWING de la télécommande. Modes FRAIS et SEC Mode CHAUFF • Le volet de réglage vertical d’ aéra tion change continuel lement d’angle. -
Page 35: Debit D'air Progressif
DEBIT D’AIR PROGRESSIF Appuyer sur la touche de DÉBIT D’AIR PROGRESSIF pendant le refroidissement ou le mode sec lorsque l’on ne veut pas sentir d’air froid. Le volet de réglage vertical est tourné de manière oblique vers le haut pour envoyer l’air frais vers le plafond. Appuyer sur la touche pendant l’opération de chauffage. -
Page 36: Fonctionnement Du Plasmacluster
FONCTIONNEMENT DU PLASMACLUSTER L’ionisateur Plasmacluster à l’intérieur du climatiseur va délivrer des ions dans la pièce. Une même quantité d’ions négatifs et positifs permettent de réduire la quantité de champignons de moisissure formés dans l’air. Pendant le fonctionnement, appuyer sur la touche PLASMACLUSTER. -
Page 37: Operation De Nettoyage Automatique
OPERATION DE NETTOYAGE AUTOMATIQUE La fonction de NETTOYAGE AUTOMATIQUE permet de réduire la prolifération des moisissures dans l’air, et de sécher l’intérieur du climatiseur grâce aux ions Plasmacluster. Utiliser cette opération à chaque changement de saison. Les champignons de moisissure déjà présents ne peuvent pas être éliminés par cette opération. Appuyer sur la touche CLEAN lorsque l’appareil n’... -
Page 38: Fonctionnement De La Minuterie
FONCTIONNEMENT DE LA MINUTERIE REMARQUE : Avant de régler la minuterie, s’assurer que l’horloge est réglée correctement à l’heure courante. MINUTERIE DESACTIVEE Appuyer sur la touche d’ARRET DE LA MINU- TE RIE ( Le voyant ARRET DE LA MINUTERIE com- mence à... -
Page 39: Utilisation Combinee Des Minuteries Marche/Arret
MARCHE DE LA MINUTERIE Appuyer sur la touche MARCHE DE LA MINU TERIE Le voyant MARCHE DE LA MINUTERIE commence à clignoter ; appuyer sur la touche d’AVANCE DU TEMPS ou de RECUL DE TEMPS pour régler l’heure courante. (L’heure peut être réglée par incréments de 10 minutes.) Pointer la télécommande sur la fenêtre de réception du signal de l’appareil et appuyer sur la touche de... -
Page 40: Mode Auxiliaire
MODE AUXILIAIRE Utiliser ce mode si la télécommande n’est pas disponible. POUR ALLUMER Soulever le panneau avant de l’unité intérieure et appuyer sur la touche AUX. du panneau de commande. • Le voyant rouge de MARCHE ( ) s’allume sur l’appareil et l’ appareil commence à... -
Page 41: Nettoyer L'appareil Et La Telecommande
ENTRETIEN NETTOYER L’APPAREIL ET LA TELECOMMANDE • Essuyer avec un chiffon doux. • Ne pas éclabousser de l’eau ou verser de l’eau dessus. Cela peut provoquer un choc électrique ou endommager l’appareil. • Ne pas utiliser de l’eau chaude, un diluant, des poudres abrasives ou des solvants forts. -
Page 42: Autres Remarques Sur Le Fonctionnement
AUTRES REMARQUES SUR LE FONCTIONNEMENT GAMME DE TEMPERATURES DE SERVICE TEMP. INT. TEMPE. EXT. limite supérieure 32°C 43°C REFROI DIS- SEMENT limite inférieure 21°C 21°C limite supérieure 27°C 24°C CHAUFFAGE limite inférieur –15°C • De la condensation peut se former sur la sortie d’air si cette unité fonctionne continuellement en mode FRAIS ou SEC et que l’hu midité... -
Page 43: Avant D'appeler Le Service Apres-Vente
AVANT D’APPELER LE SERVICE APRES-VENTE Les conditions suivantes ne signifi ent pas un mauvais fonctionnement de l’appareil. LEGER BRUISSEMENT L’APPAREIL NE FONCTIONNE PAS L’appareil ne fonctionne pas s’il est allumé im- Le bruit de bruissement doux est produit par le ré- frigérant se propageant à... -
Page 44: Si L'appareil Ne Fonctionne Pas
AVANT D’APPELER LE SERVICE APRES-VENTE Si l’appareil semble mal fonctionner, vérifi er les points suivants avant de faire appel au service après-vente. SI L’APPAREIL NE FONCTIONNE PAS Vérifi er si le disjoncteur a été déclenché ou si le fusible est grillé. SI L’APPAREIL NE REFROIDIT PAS (OU NE CHAUFFE PAS) LA PIECE CORRECTEMENT Vérifi... - Page 46 1. En la Unión Europea Si el producto se utiliza en una empresa y quiere desecharlo: Por favor póngase en contacto con su distribuidor SHARP, quien le informará sobre la recogida del producto. Puede ser que le cobren los costes de recogida y reciclaje. Puede ser que los productos de tamaño pequeño (y las cantidades pequeñas) sean recogidos por sus centros de...
- Page 47 ESPAÑOL Antes de usar la unidad lea detenidamente el manual. Guárdelo en un lugar seguro para consultarlo con facilidad. ÍNDICE • INSTRUCCIONES IMPORTANTES • FUNCIÓN DE LIMPIEZA AUTOMÁTICA ..ES-13 DE SEGURIDAD ........ES-1 • FUNCIONAMIENTO CON EL • DESIGNACIÓN DE LAS PIEZAS ....ES-3 TEMPORIZADOR DE UNA HORA ....
-
Page 48: Instrucciones Importantes De Seguridad
INSTRUCCIONES IMPORTANTES DE SEGURIDAD PRECAUCIÓN • Abrir periódicamente una ventana o una puerta para ventilar la habitación, sobre todo si se usan aparatos que funcionan con gas. Una ventilación insufi ciente puede causar escasez de oxigeno. • No opere los botones con las manos mojadas. Esto puede causar descargas eléctricas. •... -
Page 49: Designación De Las Piezas
DESIGNACIÓN DE LAS PIEZAS UNIDAD INTERIOR 1 Tecla AUX. 2 Entrada de aire 3 Panel de apertura 4 Filtro desodorante recolector de polvo 5 Filtros de aire 6 Indicador 7 Célula receptora 8 Defl ectores de ajuste vertical 9 Defl ectores de ajuste horizontal 10 Salida de aire 11 Mando a distancia... - Page 50 DESIGNACIÓN DE LAS PIEZAS CUBIERTA DEL MANDO A DISTANCIA 1 TRANSMISOR 2 VISUALIZADOR (de cristal líquido) 3 Tecla PLASMACLUSTER 4 Tecla de VISUALIZACIÓN (DISPLAY) 5 Tecla de CONEXIÓN/DESCONEXIÓN 6 Tecla del TERMOSTATO 7 Tecla de CAPACIDAD MÁXIMA 8 Tecla de CORRIENTE DE AIRE PROGRESIVA 9 Tecla de MODO (MODE) 10 Tecla de ACTIVACIÓN DEL TEMPORIZADOR (para regularlo)
-
Page 51: Configuración Del Filtro Desodorante Recolector De Polvo
CONFIGURACIÓN DEL FILTRO DESODORANTE RECOLECTOR DE POLVO Los fi ltros desodorantes recolectores de polvo se encuentran empacados como un accesorio de esta unidad. Durante el funcionamiento del acondicionador de aire, los fi ltros eliminan el polvo y el humo del tabaco del aire y se suelta aire limpio. Saque los fi... -
Page 52: Uso Del Mando A Distancia
USO DEL MANDO A DISTANCIA FORMA DE COLOCAR LAS PILAS Use dos pilas tamaño AAA (R03). Retire la cubierta del mando a dis- tancia. Cubierta del mando a distancia I n s e r t e l a s p i l a s e n e l c o m - partimiento, asegúrese de que las polaridades (+) y (-) están correcta- mente alineadas. -
Page 53: Ajustar La Hora
AJUSTAR LA HORA Ejemplo: 5 de la tarde Existen dos modos para ajuste de la hora: ciclo de 12 horas y ci- Reloj Visualizador clo de 24 horas. Modo de 12 horas PM 5:00 Modo de 24 horas 17:00 Para ajustar el modo de 12 horas, pulse MODE la tecla de RELOJ una vez. -
Page 54: Funcionamiento Básico
FUNCIONAMIENTO BÁSICO Pulse la tecla MODE para elegir el modo de funcionamiento. AUTOMÁTICO CALENTAR ENFRIAR DESHUMECTAR Pulse la tecla de CONEXIÓN/DESCO NEXIÓN para comenzar el funcionamiento. • La lámpara roja de FUNCIONAMIENTO ( ) en la unidad se iluminará. Pulse la tecla TERMOSTATO para regular la temperatura deseada. -
Page 55: Consejos Sobre El Panel De Indicaciones
NOTAS SOBRE EL MODO AUTOMÁTICO En el modo AUTOMÁTICO, los ajustes de temperatura y modo son regulados automática- mente dependiendo de la temperatura ambiente y la temperatura exterior cuando la unidad está activada. Ajustes de los modos y la temperatura Temp. -
Page 56: Reglaje De La Dirección De La Corriente De Aire
REGLAJE DE LA DIRECCIÓN DE LA CORRIENTE DE AIRE CORRIENTE DE AIRE VERTICAL Pulse una vez la tecla SWING Margen de ajuste en el mando a distancia. Modo CALENTAR Modos ENFRIAR • El deflector de ajuste vertical Y DESHUMECTAR cambi ará su ángulo continua- mente. -
Page 57: Corriente De Aire Progresiva
CORRIENTE DE AIRE PROGRESIVA Pulse la tecla de CORRIENTE DE AIRE PROGRESIVA durante la operación de enfria- miento o deshumectación cuando no desee sentir aire frío. El defl ector de ajuste vertical se coloca de forma oblicua hacia arriba para enviar el aire frío hacia el techo. Pulse el botón durante la operación de calentamiento. -
Page 58: Funcionamiento Del Plasmacluster
FUNCIONAMIENTO DEL PLASMACLUSTER El generador de iones Plasmacluster que se encuentra dentro del acondicionador de aire, liberará en la habitación iones plasmacluster positivos y negativos. La liberación en el aire de aproximadamente el mismo número de iones negativos y positivos reducirá el moho transportado en el aire. Durante el funcionamiento, pulse la tecla PLASMACLUSTER. -
Page 59: Función De Limpieza Automática
FUNCIÓN DE LIMPIEZA AUTOMÁTICA La operación de LIMPIEZA AUTOMÁTICA provocará la reducción en el crecimiento del hongo del moho y secará por dentro el acondicionador de aire con los iones Plasmacluster. Utilice el funcionamiento con el cambio estacional sobre los términos. Los hongos de moho ya formados no se pueden eliminar con esta operación. -
Page 60: Funcionamiento Con El Temporizador
FUNCIONAMIENTO CON EL TEMPORIZADOR NOTA: Antes de programar el temporizador‚ asegúrese de que el reloj esté ajustado apropiada- mente con la hora actual. DESACTIVACIÓN DEL TEMPORIZADOR Pulse la tecla de DESACTIVACIÓN DEL TEM- PORIZADOR ( El indicador de DESACTIVACIÓN DEL TEMPO RIZADOR parpadeará;... -
Page 61: Activación Del Temporizador
ACTIVACIÓN DEL TEMPORIZADOR Pulse la tecla de ACTIVACIÓN DEL TEMPORI- ZADOR ( El indicador de ACTIVACIÓN DEL TEMPO RI- ZADOR parpadeará; pulse las teclas de AVANCE o RETROCESO DE HORAS para ajustar la hora deseada. (El tiempo puede regularse en incre- mentos de 10 minutos). -
Page 62: Modo Auxiliar
MODO AUXILIAR Use este modo si no dispone de un mando a distancia. ACTIVACIÓN Levante el panel frontal de la unidad interna y pulse la tecla AUX. en el panel de operaciones. • Se encenderá la lámpara roja de FUNCIONAMIENTO ( que está... - Page 63 MANTENIMIENTO LIMPIEZA DE LA UNIDAD Y DEL MANDO A DISTANCIA • Límpielos con un paño suave. • No rocíe o derrame agua directamente sobre ellos. Puede producirse una des- carga eléctrica o daño del equipo. • No utilice agua caliente, diluyente, polvos abrasivos o disolventes fuertes. MANTENIMIENTO DESPUÉS MANTENIMIENTO ANTES DE DE UTILIZAR EL ACONDI -...
-
Page 64: Observaciones Adicionales Sobre El Funcionamiento
OBSERVACIONES ADICIONALES SOBRE EL FUNCIONAMIENTO GAMA DE TEMPERATURA DE FUNCIONAMIENTO TEMP. INTERIOR TEMP. EXTERIOR ENFRIAR límite superior 32 °C 43 °C límite inferior 21 °C 21 °C límite superior 27 °C 24 °C CALENTAR límite inferior – -15 °C • En la salida de aire puede for marse condensación, si el aparato funciona continua mente en el modo ENFRI- AR o DESHUMEC TAR, cuando la hu medad ambiental es superior a un 80%. -
Page 65: Antes De Llamar Al Departamento De Servicio Técnico
ANTES DE LLAMAR AL DEPARTAMENTO DE SERVICIO TÉCNICO Las siguientes condiciones no signifi can mal funcionamiento del equipo. LA UNIDAD NO FUNCIONA RUIDOS DE SILBIDOS Los ruidos suaves, de silbidos son los sonidos del La unidad no funcionará inmediatamente después de encenderla. - Page 66 ANTES DE LLAMAR AL DEPARTAMENTO DE SERVICIO TÉCNICO Si la unidad parece estar funcionando mal, verifi que los siguientes puntos antes de llamar al servicio técnico. SI LA UNIDAD NO FUNCIONA Verifi que si el cortacircuito se ha disparado o si el fusible se ha fundido. SI LA UNIDAD NO ENFRÍA (O CALIENTA) LA HABITACIÓN EFICAZMENTE Examine los filtros.
- Page 68 Se il prodotto è impiegato a scopi commerciali, procedere come segue per eliminarlo. Contattare il proprio rivenditore SHARP che fornirà informazioni circa il ritiro del prodotto. Potrebbero essere addebitate le spese di ritiro e riciclaggio. Prodotti piccoli (e quantitativi ridotti) potranno essere ritirati anche dai centri di raccolta locali.
-
Page 69: Importanti Istruzioni Per La Sicurezza
ITALIANO Vi preghiamo di leggere attentamente questo manuale prima di utilizzare il climatizzatore. Si consiglia di tenere questo manuale in un posto sicuro, in caso di consultazioni future. SOMMARIO • IMPORTANTI ISTRUZIONI PER • OPERAZIONE DI AUTO PULIZIA ....IT-13 LA SICUREZZA ..........IT-1 •... - Page 70 IMPORTANTI ISTRUZIONI PER LA SICUREZZA PRECAUZIONI • Aprite una fi nestra o una porta periodicamente per ventilare la stanza, specialmente quando si usano apparecchi a gas. Una ventilazione insuffi ciente potrebbe causare mancanza d’ossigeno. • Non toccate i tasti con le mani bagnate. Ciò potrebbe provocare una scossa elettrica. •...
-
Page 71: Nomi Dei Componenti
NOMI DEI COMPONENTI UNITÀ INTERNA 1 Tasto AUX. 2 Presa (d’aria) 3 Pannello frontale 4 Filtro di raccolta polvere deodorante 5 Filtri dell’aria 6 Indicatore 7 Ricevitore 8 Defl ettore di regolazione ver- ticale 9 Defl ettore di regolazione orizzontale 10 Uscita (d’aria) 11 Telecomando 12 Spia PLASMACLUSTER... - Page 72 NOMI DEI COMPONENTI TELECOMANDO 1 TRASMETTITORE 2 DISPLAY (display a cristalli liquidi) 3 Tasto PLASMACLUSTER 4 Tasto DISPLAY 5 Tasto d’ACCENSIONE/SPEGNIMENTO 6 Tasto TERMOSTATO 7 Tasto di PIENA POTENZA 8 Tasto FLUSSO D’ARIA EFFETTO COANDA 9 Tasto del MODO (MODE) 10 Tasto ATTIVAZIONE TIMER (per impostare il timer) 11 Tasto DISATTIVAZIONE TIMER...
-
Page 73: Impostazione Del Filtro Di Raccolta Della Polvere Deodorante
IMPOSTAZIONE DEL FILTRO DI RACCOLTA DELLA POLVERE DEODORANTE I fi ltri di raccolta della polvere deodorante sono impacchettati come accessorio di quest’unità. Durante il funzionamento del condizionatore d’aria, il fi ltro rimuove pol- vere e fumo di tabacco dall’aria e rilascia aria pulita. Estraete i fi... -
Page 74: Uso Del Telecomando
USO DEL TELECOMANDO Utilizzate due batterie di INSERIMENTO DELLE BATTERIE dimensioni AAA (R03). Togliete il coperchio del teleco- mando. Coperchio del teleco- mando Inserite le batterie nel compar- to, assicurandovi che le polarità (+) e (-) siano allineate corret ta- mente. - Page 75 IMPOSTAZIONE DELL’ORA ATTUALE Ci sono due modalità orolo- Esempio: 17 del pomeriggio gio: modalità a 12 ore e mo- Orologio Display dalità a 24 ore. Modalità a 12 ore PM 5:00 Modalità a 24 ore 17:00 Per impostare la modalità a 12 ore, pre- MODE mete innanzitutto il tasto OROLOGIO una volta.
-
Page 76: Funzioni Di Base
FUNZIONI DI BASE Premete il tasto MODE per selezionare la mo- dalità di funzionamento. AUTO- RISCALDA- RINFRES- DEUMIDIFI- MATICO MENTO CAMENTO CAZIONE Premete il tasto d’ACCENSIONE/SPEG- NIMENTO per iniziare il funzio na mento. • La spia rossa di FUNZIONAMENTO ( ) sull’... - Page 77 SUGGERIMENTI SULLA MODALITÀ AUTOMATICO In modalità AUTOMATICO, le impostazioni della temperatura e la modalità vengono selezi- onati automaticamente in funzione della temperatura della stanza e della temperatura es- terna al momento dell’accensione dell’unità. Modalità e impostazioni della temperatura Temp. (°C) esterna Raffrescament(24°C) Raffrescament Raffrescament...
-
Page 78: Regolazione Della Direzione Del Flusso D'aria
REGOLAZIONE DELLA DIREZIONE DEL FLUSSO D’ARIA DIREZIONE VERTICALE DEL FLUSSO D’ARIA Premete il tasto SWING sul Gamma di regolazione tele comando una volta. Modalità Modalità • Il defl ettore di regolazione verti- RAFFRESCAMENTO e RISCALDAMENTO DEUMIDIFICAZIONE cale cambierà l’angolo continua- mente. -
Page 79: Flusso D'aria Effetto Coanda
FLUSSO D’ARIA EFFETTO COANDA In modalità raffreddamento o deumidifi cazione il defl ettore di regolazione verticale è inclinato verso l’alto per indirizzare l’aria fredda verso il soffi tto per evitare il fl usso d’aria diretto. Durante il funzionamento, premete il tasto FLUS- SO D’ARIA EFFETTO COANDA. -
Page 80: Funzionamento Del Plasmacluster
FUNZIONAMENTO DEL PLASMACLUSTER Il generatore di ioni Plasmacluster all’interno del condizionatore d’aria rilascerà ioni al plasma (plasmacuster) positivi e negativi nella stanza. Approssimativamente lo stesso numero di ioni positivi e negativi rilasciati nell’aria ridurranno alcuni funghi causati dall’aria. Durante il funzionamento, premere il tasto PLAS MACUSTER. -
Page 81: Operazione Di Auto Pulizia
OPERAZIONE DI AUTO PULIZIA L’operazione AUTO PULIZIA consentirà di ridurre la crescita dei funghi della muffa e di asciugare la parte interna del condizionatore d’aria con ioni al plasma (plasmacluster). Eseguite l’operazione ad ogni cambio di stagione. I funghi della muffa già cresciuti non possono essere eliminati con questa operazione. Premete il tasto CLEAN quando l’unità... -
Page 82: Funzionamento Del Timer
FUNZIONAMENTO DEL TIMER NOTA: Prima di impostare il timer, assicuratevi che l’orologio sia impostato con l’ora giusta. DISATTIVAZIONE TIMER Premete il tasto DISATTIVAZIONE TIMER L’indicatore TIMER DISATTIVATO lampeg gerà; premete i tasti AVANZAMENTO DELL’ ORA o ARRETRAMENTO per impostare l’ora desi de- ra ta. - Page 83 ATTIVAZIONE TIMER Premete il tasto ATTIVAZIONE TIMER ( L’indicatore TIMER ATTIVATO lampeggerà; pre- mete i tasti AVANZAMENTO DELL’ORA o AR- RETRAMENTO per impostare l’ora deside rata. (L’ora può essere impostata in incrementi di 10 minuti.) Puntate il telecomando verso la fi nestra di rice- zione del segnale sull’unità...
-
Page 84: Modalità Ausiliaria
MODALITÀ AUSILIARIA Usate questo modo quando il telecomando non è disponibile. PER ACCENDERE IL RICEVITORE Sollevate il pannello frontale dell’unità interna e premete il tasto AUX. sul pannello operativo. • La spia rossa di FUNZIONAMENTO ( ) sull’unità si illuminerà e l’unità... - Page 85 MANUTENZIONE PULIZIA DELL’UNITÀ E DEL TELECOMANDO • Strofi nateli con un panno morbido. • Non spruzzate o gettate acqua direttamente su di essi. Ciò potrebbe causare scossa elettrica o provocare danni all’attrezzatura. • Non usate acqua calda, diluenti, polvere abrasiva o solventi forti. MANUTENZIONE UNA VOLTA MANUTENZIONE PRIMA DELLA TERMINATA LA STAGIONE DEL...
-
Page 86: Ulteriori Note Riguardanti Il Funzionamento
ULTERIORI NOTE RIGUARDANTI IL FUNZIONAMEN LIMITI OPERATIVI TEMP. INTERNA TEMP. ESTERNA RAFFRESCA- limite sup. 43°C 32°C MENTO limite inf. 21°C 21°C limite sup. 24°C 27°C RISCALDA- MENTO limite inf. -15°C – • Il sistema di protezione in corporato potrebbe inter rompere il funziona mento dell’unità quando la si uti-lizza fuori da questi limiti. -
Page 87: Prima Di Richiedere Assistenza
PRIMA DI RICHIEDERE ASSISTENZA Le condizioni seguenti non signifi cano malfunzionamento SIBILO L’UNITÀ NON FUNZIONA L’unità non funziona se accesa subito dopo averla Il suono delicato, tipo sibilo, è prodotto dal refri- gerante che scorre all’interno dell’unità. spenta. L’unità non funziona immediatamente dopo aver cambiato la modalità. -
Page 88: Se L'unità Non Raffredda (O Riscalda) L'ambiente Efficacemente
PRIMA DI RICHIEDERE ASSISTENZA Se vi sembra che l’unità non funzioni tanto bene, controllate i seguenti punti prima di richiedere assistenza. SE L’UNITÀ NON FUNZIONA Controllate che l’interruttore del circuito non sia saltato o che non sia bruciato un fusibile. SE L’UNITÀ... - Page 90 1. Na União Europeia Se o produto for usado para fi ns comerciais e quiser eliminá-lo: Contacte o seu revendedor SHARP que irá informá-lo sobre a melhor forma de eliminar o produto. Poderá ter de pagar as despesas resultantes da recolha e reciclagem do produto. Alguns produtos mais pequenos (e em pequenas quantidades) poderão ser recolhidos pelas estações locais.
-
Page 91: Instruções De Segurança Importantes
PORTUGUÊS Leia atentamente este manual de instruções antes de usar o produto. Guarde o manual num lugar seguro para rápida consulta futura. CONTEÚDO • OPERAÇÃO DE AUTO LIMPEZA ..... PT-13 • INSTRUÇÕES DE SEGURANÇA IMPORTANTES ........PT-1 • TEMPORIZADOR DE UMA HORA.... PT-13 •... - Page 92 INSTRUÇÕES DE SEGURANÇA IMPORTANTES ATENÇÃO • Abrir periodicamente uma janela ou uma porta para ventilar o compartimento, especialmente quando utilizar electrodomésticos a gás. A ventilação insufi ciente poderá causar redução de oxigénio. • Não utilizar os botões com a mão molhada. Poderá causar choque eléctrico. •...
-
Page 93: Nomes Das Peças
NOMES DAS PEÇAS UNIDADE INTERIOR 1 Botão AUX. 2 Entrada (Ar) 3 Painel de abrir 4 Filtro desodorizante e de recolha de pó 5 Filtros de ar 6 Indicador 7 Janela receptora 8 Reguladores verticais 9 Reguladores horizontais 10 Saída (Ar) 11 Tampa do controlo remoto 12 Lâmpada PLASMACLUSTER (azul) -
Page 94: Controlo Remoto
NOMES DAS PEÇAS CONTROLO REMOTO 1 TRANSMISSOR 2 MOSTRADOR LCD (de cristais líquidos) 3 Botão PLASMACLUSTER 4 Botão MOSTRADOR (DISPLAY) 5 Botão LIGAR/DESLIGAR 6 Botão do TERMOSTATO 7 Botão de PLENA FORÇA 8 Botão de FLUXO DE AR COANDA 9 Botão MODO (MODE) 10 Botão LIGAR TEMPORIZADOR (para regular o temporizador) DISPLAY... -
Page 95: Instalação Do Filtro Desodorizante E De Recolha De Pó
INSTALAÇÃO DO FILTRO DESODORIZANTE E DE RECOLHA DE PÓ Os fi ltros desodorizantes e de recolha de pó são fornecidos como acessórios desta unidade. Durante o funcionamento do ar condicionado, os fi ltros retiram a poeira e o fumo de tabaco do ar e debitam ar limpo. Retire os fi... -
Page 96: Utilização Do Controlo Remoto
UTILIZAÇÃO DO CONTROLO REMOTO CARREGAR AS PILHAS Use duas pilhas AAA (R03). Retire a tampa do controlo remoto. Tampa do con- trolo remoto Insira as pilhas no comparti mento assegurando que os pólos (+) e (-) fi quem cor recta mente posicionados. •... - Page 97 ACERTAR AS HORAS DO RELÓGIO Exemplo: 5 horas da tarde Existem dois tipos de funciona - mento: relógio de 12 horas e Relógio Mostrador relógio de 24 horas. Relógio de 12 horas PM 5:00 Relógio de 24 horas 17:00 Para activar o relógio de 12 horas car- MODE regue uma vez no botão RELÓGIO no primeiro passo.
-
Page 98: Funcionamento Básico
FUNCIONAMENTO BÁSICO Carregue no botão MODE para escolher o modo de funcionamento. AUTO CALOR FRIO SECAR Carregue no botão LIGAR/DESLIGAR para activar a função. • A lâmpada vermelha ( ) de FUNCIONA MENTO da unidade acender-se-á. Carregue no botão TERMOSTATO para regu- lar a temperatura desejada. -
Page 99: Sugestões Acerca Do Painel Indicador
SUGESTÕES REFERENTES AO MODO AUTO No modo AUTO, a temperatura e o modo são seleccionados automaticamente consoante a temperatura ambiente e a temperatura exterior no momento em que a unidade é ligada. Modos e regulações de temperatura Temp. (°C) exterior Frio Frio Frio... -
Page 100: Regulação Da Direcção Do Fluxo Do Ar
REGULAÇÃO DA DIRECÇÃO DO FLUXO DO AR DIRECÇÃO DO FLUXO VERTICAL DO AR Carregue uma vez no botão Margem de regulação SWING no controlo remoto. Modo CALOR Modo FRIO e SE- • O regulador vertical modifi cará continuamente o seu ângulo. Carregue mais uma vez no bo tão SWING assim que o regula dor vertical alcançar a... -
Page 101: Fluxo De Ar Coanda
FLUXO DE AR COANDA Nos modos frio e secar, as palhetas verticais posicionam-se em diagonal para cima direccionando o ar fresco para o tecto, evitando assim fl uxos de ar directos. No modo calor, as palhetas verticais viram-se para baixo para enviar o ar quente em direcção ao chão. -
Page 102: Operação Do Plasmacluster
OPERAÇÃO DO PLASMACLUSTER O gerador de iões Plasmacluster dentro do ar condicionado libertará iões Plasmacluster positivos e negativos para dentro da sala. Aproximadamente o mesmo número de iões positivos e negativos libertados reduzem os fungos no ar. Durante a operação, prima o botão PLASMA -CLUSTER. -
Page 103: Operação De Auto Limpeza
OPERAÇÃO DE AUTO LIMPEZA A operação AUTO LIMPEZA é efectiva na redução de fungos de bolor, e a secar o interior da unidade de ar condicionado com iões Plasmacluster. Utilize a operação nas mudanças de estação. Fungos de mofo já desenvolvidos não podem ser eliminados por esta operação. Prima o botão CLEAN enquanto a unidade não estiver a funcionar. -
Page 104: Funcionamento Com Temporizador
FUNCIONAMENTO COM TEMPORIZADOR NOTA: Antes de acertar o temporizador, verifi que primeiro se a hora do relógio está certa. DESLIGAR TEMPORIZADOR Carregue no botão DESLIGAR TEMPORI ZA- DOR ( O indicador DESLIGAR TEMPORIZADOR fi ca intermitente; prima os botões AVANÇAR ou RECUAR A HORA para acertar a hora. - Page 105 LIGAR TEMPORIZADOR Carregue no botão LIGAR TEMPORIZADOR O indicador LIGAR TEMPORIZADOR fi ca inter- mitente; prima os botões AVANÇAR ou RECUAR A HORA para acertar a hora. (A hora pode ser regulada em passos de 10 minutos.) Aponte o controlo remoto para a janela receptora da unidade e carregue no botão ACERTAR TEM- PORIZADOR (SET/C).
-
Page 106: Modo De Funcionamento Auxiliar
MODO DE FUNCIONAMENTO AUXILIAR Use este modo de funcionamento quando não tiver o controlo remoto à disposição. PARA ACTIVAR Levante o painel frontal da unidade interna e prima o botão AUX. no painel de operação. • A lâmpada vermelha ( ) de FUNCIONAMENTO na unidade acende e a unidade começa a funcionar no modo AUTO . -
Page 107: Troca Do Filtro Desodorizante E De Recolha De Pó
MANUTENÇÃO LIMPEZA DA UNIDADE E DO CONTROLO REMOTO • Limpe-os com um pano macio. • Não os salpique ou molhe directamente com água. Poderá originar um choque eléctrico ou danifi car o equipamento. • Não use água quente, diluente, pós abrasivos ou solventes fortes. MANUTENÇÃO APÓS ÉPOCA MANUTENÇÃO ANTES DE DE AR CONDICIONADO... -
Page 108: Notas Suplementares Sobreo Funcionamento
NOTAS SUPLEMENTARES SOBRE O FUNCIONAMENTO GAMA DE TEMPERATURA DE SERVIÇO TEMP. INTERIOR TEMP. EXTERIOR limite superior 32°C 43°C ARREFECI- MENTO limite inf 21°C 21°C limite superior 27°C 24°C AQUECIMENTO limite inf – -15°C • O dispositivo de protecção instalado pode impedir o funcionamento da unidade ao ser usada fora desta gama. -
Page 109: Antes De Chamar O Serviço De Assistência Técnica
ANTES DE CHAMAR O SERVIÇO DE ASSISTÊNCIA TÉCNICA As condições de funcionamento seguidamente descritas não denunciam avarias do equipamento. UNIDADE NÃO FUNCIONA RUÍDO SIBILANTE A u n i d a d e n ã o f u n c i o n a r á s e f o r l i g a d a O ruído suave e sibilante que se ouve é... - Page 110 ANTES DE CHAMAR O SERVIÇO DE ASSISTÊNCIA TÉCNICA Se o aparelho parecer estar a funcionar mal, verifi que os pontos seguidamente refe- ridos antes de chamar o serviço de assistência técnica. SE A UNIDADE NÃO FUNCIONA Verifi que se o disjuntor de corrente actuou ou se o fusível se fundiu. SE A UNIDADE NÃO ARREFECER (OU AQUECER) O QUARTO DEVIDAMENTE Controle a unidade exterior para Verifi...
-
Page 113: Önemli̇ Güvenli̇k Tali̇matlari
TÜRKÇE Ürünü kullanmadan önce lütfen bu kılavuzu dikkatle okuyun. İstenildiğinde başvurulabilmesi için bu kılavuz güvenli bir yerde saklanmalıdır. İÇİNDEKİLER • ÖNEMLİ GÜVENLİK TALİMATLARI ..TR-1 • PLASMACLUSTER’İN İŞLETİMİ ....TR-12 • KENDİNİ TEMİZLEME İŞLEMİ ....TR-13 • PARÇALARIN İSİMLERİ ......TR-3 • KOKU GİDERİCİ TOZ TUTMA •... - Page 114 ÖNEMLİ GÜVENLİK TALİMATLARI UYARI • Özellikle gazlı cihazlar kullanırken odayı havalandırmak için periyodik olarak bir pencere veya kapı açın. Yetersiz havalandırma oksijen eksikliğine sebep olabilir. • Düğmelere ıslak elle dokunmayın. Elektrik çarpmasına sebep olabilir. • Emniyet amacıyla, klima uzun süre kullanılmayacağı zaman sigortasını kapatın. •...
-
Page 115: Parçalarin İsi̇mleri̇
PARÇALARIN İSİMLERİ İÇ ÜNİTE 1 YARDIMCI MOD Düğmesi (AUX.) 2 Hava Girişi 3 Açılır Panel 4 Koku Giderici Toz Tutma Filtresi 5 Hava Filtreleri 6 Gösterge 7 Alıcı Gözü 8 Dikey Ayar Kanatçıkları 9 Yatay Ayar Kanatçıkları 10 Hava Çıkışı 11 Uzaktan Kumanda 12 PLASMACLUSTER Lambası... -
Page 116: Uzaktan Kumanda
PARÇALARIN İSİMLERİ UZAKTAN KUMANDA 1 VERİCİ 2 GÖSTERGE 3 PLASMACLUSTER Düğmesi 4 GÖSTERGE Düğmesi 5 AÇMA/KAPAMA Düğmesi 6 SICAKLIK Düğmesi 7 TAM GÜÇ Düğmesi 8 COANDA HAVA AKIŞI Düğmesi 9 MOD Düğmesi 10 ZAMANLAYICIYLA AÇILMA Düğmesi (zamanlayıcıyı ayarlamak için) DISPLAY 11 ZAMANLAYICIYLA KAPANMA Düğmesi (zamanlayıcıyı... -
Page 117: Fi̇ltresi̇ni̇n Ayarlanmasi
KOKU GİDERİCİ TOZ TUTMA FİLTRESİNİN AYARLANMASI Koku giderici toz tutma fi ltreleri bu ünitenin aksesuarları olarak pakete dahil edil- mişlerdir. Klimanın çalışması esnasında fi ltreler havadaki tozu ve tütün dumanını alır ve temiz hava verir. Hava fi ltrelerini çıkarın. Açılır paneli açın. Hava fi... -
Page 118: Uzaktan Kumandanin Kullanimi
UZAKTAN KUMANDANIN KULLANIMI PİLLERİN TAKILMASI İki adet AAA boyutunda (R03) pil kullanın. Uzaktan kumandanın kapağı- nı çıkarın. Uzaktan kumanda ka- pağı Pilleri bölmeye yerleştirin, (+) ve (-) kutupların doğru hizada olmasına dikkat edin. • Piller doğru takıldığında göstergede “AM 6:00” yazısı gözükür. -
Page 119: Saati̇n Ayarlanmasi
SAATİN AYARLANMASI İki saat modu bulunmaktadır: Örnek: Öğleden sonra saat 5 12-saatlik mod ve 24-saatlik Saat Gösterge mod. 12-saat modu PM 5:00 24-saat modu 17:00 12 saat moduna ayarlamak için ilk adımda MODE SAAT düğmesine bir kez basın. CLEAN 24 saat moduna ayarlamak için ilk adımda SAAT düğmesine iki kez basın. -
Page 120: Temel İşleti̇m
TEMEL İŞLETİM İşletim modunu seçmek için MOD düğmesine basın OTOMATİK ISITMA SOĞUTMA NEM ALMA İşletimi başlatmak için AÇMA/KAPAMA düğ- mesine basın. • Ünite üzerindeki kırmızı İŞLETİM lambası ( yanar. İstenen sıcaklığı ayarlamak için SICAKLIK düğmesine basın. (OTOMATİK/NEM ALMA MODU) • Sıcaklık, otomatik olarak ayarlanmış olan sıcak- DISPLAY lıktan ±2 °C oynatılabilir. - Page 121 OTOMATİK MOD HAKKINDA BİLGİLER OTOMATİK modunda sıcaklık ayarı ve modu, ünitenin devreye alındığı zamanki oda sıcaklığı ve dışarıdaki sıcaklığa göre otomatik olarak seçilir. Modlar ve Sıcaklık Ayarları (°C) Dış sıc. Soğutma Soğutma Soğutma (24°C) (25°C) (26°C) Isıtma Isıtma Isıtma Nem alma (24°C) (23°C) (22°C)
-
Page 122: Hava Akiş Yönünün Ayarlanmasi
HAVA AKIŞ YÖNÜNÜN AYARLANMASI DİKEY HAVA AKIŞ YÖNÜ Ayar aralığı Uzaktan kumandadaki SALINIM düğmesine bir kez basın. SOĞUTMA ve NEM ISITMA modu • Dikey ayar kanatçıkları hareket eder. ALMA modları Dikey ayar kanatçığı istenen po- zisyonda olduğunda SALINIM düğ- mesine tekrar basın. •... -
Page 123: Coanda Hava Akişi
COANDA HAVA AKIŞI Soğutma veya nem alma modunda dikey hava akış kanatçığı, doğrudan hava akışı vermemek için soğuk havayı tavana vermek maksadıyla yukarı eğimli durur. Isıtma modunda kanatçık sıcak havayı zemine vermek için aşağı dönük durur. Çalışma sırasında, COANDA HAVA AKIŞI düğmesine basın. -
Page 124: Plasmacluster'i̇n İşleti̇mi̇
PLASMACLUSTER’İN İŞLETİMİ Klimanın içindeki plasmacluster iyon oluşturucusu odaya pozitif ve negatif plasmacluster iyonları salar. Havaya salınan yaklaşık aynı sayılardaki pozitif ve negatif iyonlar havadaki küfü azaltır. Cihaz çalışırken PLASMACLUSTER düğmesine basın. • Uzaktan kumandada “ ”görülür. • Ünitedeki mavi PLASMACLUSTER lambası yanar. -
Page 125: Kendi̇ni̇ Temi̇zleme İşlemi̇
KENDİNİ TEMİZLEME İŞLEMİ KENDİNİ TEMİZLEME işlemi, Plasmacluster iyonları ile mavi küf büyümesini azaltır ve ünitenin içini kuru tutar. Mevsimsel olarak şartlar değiştiğinde bu işlemden faydalanın. Zaten oluşmuş olan mavi küfl er bu işlem ile temizlenemez. KENDİNİ TEMİZLE düğmesine ünite çalışmıyor durumdayken basın. -
Page 126: Zamanlayici Kullanimi
ZAMANLAYICI KULLANIMI NOT: Zamanlayıcıyı ayarlamadan önce saatin doğru ayarlanmış olduğundan emin olun. ZAMANLAYICIYLA KAPANMA ZAMANLAYICIYLA KAPANMA ( ) düğme- sine basın. ZAMANLAYICIYLA KAPANMA göstergesi yanıp söner; istediğiniz süreyi ayarlamak için ZAMAN İLERLETME veya GERİLETME düğmelerine basın. (Süre 10 dakikalık artışlarla ayarlanabi- lir.) Uzaktan kumandayı... - Page 127 ZAMANLAYICIYLA AÇILMA AMANLAYICIYLA AÇILMA ( ) düğmesine basın. ZAMANLAYICIYLA AÇILMA göstergesi yanıp söner; istediğiniz süreyi ayarlamak için ZAMAN İLERLETME veya GERİLETME düğmelerine ba- sın. (Süre 10 dakikalık artışlarla ayarlanabilir.) Uzaktan kumandayı ünitedeki sinyal alıcı gözü- ne doğrultun ve ZAMANLAYICI AYAR (AYAR/C) düğmesine basın.
-
Page 128: Yardimci Mod
YARDIMCI MOD Uzaktan kumanda bulunmadığı zaman bu modu kullanın. AÇMAK İÇİN İç ünitenin ön panelini kaldırın ve işletim panelindeki AUX düğmesine basın. • Ünite üzerindeki kırmızı İŞLETİM lambası ( ) yanar ve ünite OTOMATİK modda çalışmaya başlar. • Fan hızı ve sıcaklık ayarı OTOMATİK’e ayarlanır. KAPATMAK İÇİN İşletim panelindeki AUX düğmesine yeniden basın. - Page 129 BAKIM ÜNİTENİN VE UZAKTAN KUMANDANIN TEMİZLENMESİ • Yumuşak bir bezle silin. • Bunlara doğrudan su sıçratmayın veya dökmeyin. Elektrik çarpmasına veya ekip- man arızasına neden olabilirsiniz. • Sıcak su, tiner, aşındırıcı tozlar veya güçlü çözücüler kullanmayın. KLİMA İŞLETİM MEVSİMİN- KLİMA İŞLETİM MEVSİMİN- DEN SONRA BAKIM DEN ÖNCE BAKIM Mekanizmanın tamamen kuruması...
-
Page 130: İşleti̇mle İlgi̇li̇ İlave Notlar
İŞLETİMLE İLGİLİ İLAVE NOTLAR ÇALIŞMA SICAKLIĞI ARALIĞI İÇ SIC. DIŞ SIC. üst limit 32˚C 43˚C SOĞUTMA alt limit 21˚C 21˚C üst limit 27˚C 24˚C ISITMA alt limit –15˚C • Entegre koruma tertibatı bu aralık dışında kullanıldığında ünitenin çalışmasını önler. • Nem %80’in üzerinde olduğunda ünite SOĞUTMA veya NEM ALMA modunda sürekli çalışırsa hava çıkışında yoğuşma olabilir. -
Page 131: Servi̇s Çağirmadan Önce
SERVİS ÇAĞIRMADAN ÖNCE Aşağıdaki koşullar ekipmanın hatalı çalıştığını göstermez ÜNİTENİN ÇALIŞMAMASI HIŞIRTI Yumuşak hışırtı sesi, ünitenin içinde akan soğut- Ünite kapatıldıktan hemen sonra açılırsa çalışmaz. Ünite mod değiştirildikten hemen sonra çalışmaz. ma gazının sesidir. Bu, dahili mekanizmaları korumak içindir. Üniteyi çalıştırmak için 3 dakika bekleyin. - Page 132 SERVİS ÇAĞIRMADAN ÖNCE Ünite hatalı çalışıyor gibi görünürse servis çağırmadan önce aşağıdaki hususları kontrol edin. ÜNİTE ÇALIŞMAZSA Devre kesicinin ya da sigortanın atmış olup olmadığını kontrol edin. ÜNİTE ODAYI ETKİN ŞEKİLDE ISITMAZ YA DA SOĞUTMAZSA Dış üniteyi kontrol ederek hava Sıcaklığın uygun ayarlı...
- Page 136 SHARP ELECTRONICS (Europe) GmbH Sonninstra e 3, D-20097 Hamburg ß Printed in Thailand TINSEA656JBRZ 10E- TH 1...