V-ZUG Komfort 60i Notice D'installation
Masquer les pouces
Voir aussi pour Komfort 60i:
- Mode d'emploi (88 pages) ,
- Notice d'installation (12 pages) ,
- Mode d'emploi (36 pages)
Table des Matières
Publicité
Les langues disponibles
Les langues disponibles
Liens rapides
Publicité
Chapitres
Table des Matières

Manuels Connexes pour V-ZUG Komfort 60i


Sommaire des Matières pour V-ZUG Komfort 60i
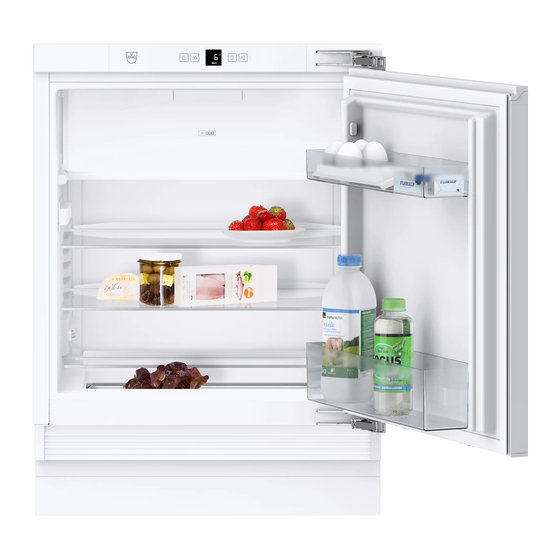
- Page 1 Installationsanleitung | Notice d’installation Istruzioni d'installazione | Installation instructions Komfort 60i Kühl- und Gefriergerät | réfrigerateur et congelateur Frigorifero e congelatore | Refrigerator and freezer...
-
Page 2: Table Des Matières
Situa- Beschädigungsgefahr! tion, die Tod oder schwere Körper- Fehlerhafte Side-by-Side- (SBS) Montage führt zu Kondens- verletzung zur Folge haben könnte, wasser zwischen den Geräten. V-Zug-Geräte folgendermaßen wenn sie nicht vermieden wird. montieren: VORSICHT kennzeichnet eine gefährliche Situa- u Gefriergerät neben Kühlgerät einbauen. -
Page 3: Gerätemaße
Gerätemaße 5 Nischenmaße WARNUNG Das Gerät ist ein Unterbaugerät und wird unter eine Arbeits- Brand- und Beschädigungsgefahr durch blockierte Belüftungs- platte eingebaut. Das betreffende Küchenmöbel muss genau öffnungen! nach den vorgegebenen Maßen ausgeführt sein und eine u Die Belüftungsöffnungen immer freihalten. Immer auf gute ausreichende Be- und Entlüftung ermöglichen, damit ein Be- und Entlüftung achten! korrekter Gerätebetrieb gewährleistet ist. -
Page 4: Türanschlag Wechseln
ACHTUNG Verletzungsgefahr, wenn der Schließdämpfer sich zusammen- Beschädigungsgefahr durch aneinander schlagende Türen!* zieht! Wenn Sie Side-by-Side (SBS) Geräte von V-ZUG neben u Schließdämpfer vorsichtig abmontieren. einem anderen Gerät aufbauen: u Geräte so aufstellen, dass sich die Türen nach außen u Schließdämpfer abnehmen: Schließdämpfer vom Kugel- öffnen. - Page 5 Türanschlag wechseln u Schrauben erst herausdrehen , wenn die Tür mit den Schar- nieren abgenommen wurde. Fig. 7 Fig. 6 u Scharniere umsetzen. VORSICHT Verletzungsgefahr, wenn Scharniere zusammenklappen! u Scharniere geöffnet lassen. u Tür abnehmen: Tür nach vorne und dann nach außen schieben, aushängen und beiseite stellen.
-
Page 6: Gerät In Die Nische Einbauen
Gerät in die Nische einbauen 8 Gerät in die Nische einbauen WARNUNG Brandgefahr durch Kurzschluss! u Beim Einschieben des Gerätes in die Nische die Netzan- schlussleitung nicht quetschen, einklemmen oder beschä- digen. u Gerät nicht mit defekter Netzanschlussleitung betreiben. ACHTUNG Beschädigungsgefahr für die Scharniere! Wenn beim Verschieben das Gerät an der Tür gefasst wird, können die Scharniere beschädigt werden. -
Page 7: Gerät Montieren
Einbau 9.1 Gerät montieren Fig. 15 u Gerätesockelblende, falls bereits montiert, nach vorn abziehen. u Das Anschlusskabel Geräterückseite abnehmen. Dabei den Kabelhalter entfernen, sonst entstehen Vibrationsgeräusche! u Anschlusskabel mit Hilfe einer Schnur so verlegen, dass das Gerät nach dem Einbau leicht angeschlossen werden kann. - Page 8 Einbau Fig. 20 u Schaumstoffteil in die Gerätesockelblende einsetzen - funk- tionswichtig für getrennte Luftströme! Fig. 18 u Beide Winkel vor der Montage an jeweils einem Ende umbiegen. Die gerade Seite in die Aufnahmeöffnung der Gerätedecke einstecken und nach vorne umbiegen. u Gerät in die Nische einschieben und ausrichten, siehe Punkt Ausrichten des Gerätes.
-
Page 9: Möbeltür Montieren
Einbau Fig. 25 (11) über die Kontermuttern u Befestigungstraverse Fig. 25 (10) abschrauben. Fig. 26 Fig. 26 (11) mit den Montagehilfen u Befestigungstraverse Fig. 26 (12) auf die Innenseite der Möbeltür hängen. Fig. 26 (11) mittig auf der Tür u Befestigungstraverse Fig. -
Page 10: Verpackung Entsorgen
Verpackung entsorgen 10 Verpackung entsorgen u Möbeltür mit der Gerätetür verschrauben. u Befestigungslöcher in der Möbeltür vorbohren (evtl. mit einem Stichel vorstechen). u Gerätetür mit Schrauben durch die Befestigungswinkel auf der Möbeltür verschrauben. WARNUNG Erstickungsgefahr durch Verpackungsmaterial und Folien! u Kinder nicht mit Verpackungsmaterial spielen lassen. Die Verpackung ist aus wiederverwertbaren Materialien hergestellt: Wellpappe/Pappe... -
Page 11: Transport De L'appareil
Risque d'incendie dû à l'humidité ! produits mesure Lorsque des pièces sous tension ou le câble de raccordement au secteur deviennent humides, un court-circuit peut se Komfort 60i 51089 Euro 60 produire. u L'appareil a été conçu pour être placé dans des locaux 1 Consignes de sécurité... -
Page 12: Dimensions De L'appareil
Risque d'endommagement ! Le montage incorrect des appareils Side-by-Side (SBS) peut provoquer la formation d'eau de condensation entre les appa- reils. Monter les appareils V-Zug en procédant comme suit : u Installer le congélateur à côté du réfrigérateur. AVERTISSEMENT Risque d'incendie et d'endommagement dû au blocage des ouvertures d'aération ! -
Page 13: Porte Du Meuble De Cuisine
Risque d’endommagement dû aux portes fermant l’une contre ATTENTION l’autre !* Risque de blessures lorsque l'amortisseur de fermeture se Si vous installez un appareil Side-by-Side (SBS) de V-ZUG contracte ! près d’un autre appareil : u Démonter soigneusement l'amortisseur de fermeture. - Page 14 Changer le sens de la porte Fig. 6 ATTENTION Risque de blessures lorsque les charnières se replient ! u Laisser les charnières ouvertes. u Retirer la porte : pousser la porte vers l'avant puis vers l'ex- térieur, la décrocher et la poser sur le côté. Fig.
- Page 15 Changer le sens de la porte Fig. 9 u Replacer la porte : accrocher la porte avec les charnières et visser fermement les vis. Fig. 7 u Permuter les charnières. Fig. 10 u Replacer l'amortisseur de fermeture : visser le pivot sphé- rique (1), visser fermement l'élément de fixation (2) et accro- cher l'amortisseur de fermeture dans le pivot sphérique.
-
Page 16: Installer L'appareil Dans La Niche
Installer l'appareil dans la niche. 8 Installer l'appareil dans la niche. AVERTISSEMENT Risque d'incendie dû à un court-circuit ! u Lors de l'insertion de l'appareil dans la niche, ne pas pincer, coincer, ou endommager le cordon d'alimentation. u Ne pas utiliser l'appareil avec un câble de raccord au réseau défectueux. -
Page 17: Monter L'appareil
Encastrable 9.1 Monter l'appareil Fig. 15 u Sortir par l’avant la plinthe de l'appareil si elle est déjà Fig. 18 montée. u Plier une extrémité des deux équerres avant le montage. u Enlever le câble de raccord sur la paroi arrière de l'ap- Enfoncer le côté... -
Page 18: Monter La Porte Du Placard
Encastrable Fig. 20 u Placer le morceau de mousse dans la plinthe de l’appareil - important pour les flux d’air séparés ! Fig. 23 u Pour une fixation sous le plan de travail, visser les équerres de fixation sous le plan de travail avec deux vis respective- ment. - Page 19 Encastrable Fig. 25 (11) au moyen des u Dévisser la traverse de fixation Fig. 25 (10) . contre-écrous Fig. 28 u Visser la porte du placard sur la porte de l'appareil : u Prépercer des trous de fixation dans la porte du placard Fig.
-
Page 20: Eliminer L'emballage
Eliminer l'emballage Fig. 31 u Poser le couvercle supérieur et le clipser. Contrôler les points suivants afin d'être certain que l'appareil est installé correctement. Une installation incorrecte risque d'entraîner la formation de givre et de condensation d'eau ainsi que des dysfonctionnements. w La porte doit fermer correctement w La porte du placard ne doit pas être en contact avec le corps du placard. -
Page 21: Avvertenze Generali Di Sicurezza
Un montaggio non corretto di Side-by-Side (SBS) causa la guenza la morte o gravi lesioni formazione di condensa fra gli apparecchi. Montare gli appa- personali. recchi V-Zug come segue: u installare il congelatore accanto al frigorifero. * A seconda del modello e delle dotazioni... -
Page 22: Dimensioni Dell'apparecchio
Dimensioni dell'apparecchio 5 Dimensione della nicchia AVVERTENZA L'apparecchio è un modello sottopiano e viene montato sotto il Pericolo di incendio e di danni a causa dei fori di ventilazione piano di lavoro. Il mobile da cucina interessato deve essere ostruiti! realizzato esattamente secondo le dimensioni prescritte e deve u Tenere sempre liberi i fori di ventilazione. -
Page 23: Cambio Della Battuta Della Porta
In caso di installazione di apparecchi Side-by-Side (SBS) di u Eliminazione dell'ammortizzatore di chiusura: Togliere l'am- V-ZUG accanto ad un altro apparecchio: mortizzatore di chiusura dal perno sferico (1), svitare il u installare gli apparecchi in modo che le porte si aprano supporto (2). - Page 24 Cambio della battuta della porta Fig. 6 Fig. 7 u Spostare le cerniere. ATTENZIONE Pericolo di lesioni se le cerniere si chiudono! u Lasciare aperte le cerniere. u Togliere la porta: Spingere la porta in avanti e poi verso l'esterno, sganciare e riporre di lato. Fig.
-
Page 25: Installazione Dell'apparecchio Nella Nicchia
Installazione dell'apparecchio nella nicchia 8 Installazione dell'apparecchio nella nicchia AVVERTENZA Pericolo di incendio per cortocircuito! u Quando si spinge l'apparecchio nella nicchia, non schiac- ciare, incastrare o danneggiare il cavo di collegamento alla rete. u Non mettere in funzione l'apparecchio con il cavo di allaccia- mento alla rete difettoso. -
Page 26: Montaggio Dell'apparecchio
Montaggio 9.1 Montaggio dell'apparecchio Fig. 15 u Se lo zoccolo dell'apparecchio è già montato, staccarlo tirando in avanti. u Staccare il cavo di alimentazione dal lato posteriore dell'apparecchio. Rimuovere anche il reggicavo per evitare rumori dovuti alle vibrazioni! u Aiutandosi con una corda, posare il cavo di alimentazione in modo da poter facilmente allacciare l'apparecchio dopo... - Page 27 Montaggio Fig. 20 u Inserire un elemento in materiale espanso nello zoccolo dell'apparecchio, importante per il circolo separato dei flussi d'aria! Fig. 18 u Prima del montaggio piegare entrambe le squadre ad un'e- stremità. Inserire il lato diritto nell'apertura della copertura dell’apparecchio e piegare in avanti.
-
Page 28: Montaggio Della Porta Del Mobile
Montaggio Fig. 25 (11) svitando i u Allentare la traversa di fissaggio Fig. 25 (10) . controdadi Fig. 26 u Sospendere la traversa di montaggio Fig. 26 (11) sul lato interno dell'anta del mobile servendosi degli attrezzi di Fig. 26 (12) . montaggio Fig. -
Page 29: Smaltimento Dell'imballaggio
Smaltimento dell’imballaggio Fig. 31 u Applicare il coprifuga superiore e inserire a scatto. Verificare i punti seguenti per assicurarsi che l'apparecchio sia Fig. 28 installato correttamente. In caso contrario questo può provo- u Avvitare l’anta del mobile alla porta dell’apparecchio: care la formazione di ghiaccio, di acqua di condensa e difetti u Praticare nell'anta del mobile i fori di fissaggio (eventual- funzionali:... -
Page 30: Transporting The Appliance
Risk of damage. danger which, if not obviated, may An incorrect Side-by-Side- (SBS) assembly leads to conden- result in death or severe bodily sate between the appliances. Assemble the V-Zug appliances injury. as follows: u Install the freezer next to the refrigerator. -
Page 31: Appliance Dimensions
This is a base unit and should be installed under a worktop. Appliance model Maximum unit door The kitchen units must be fitted according to the specifications, weight allowing sufficient ventilation to ensure the equipment works properly. Komfort 60i 10 kg * Depending on model and options... -
Page 32: Changing The Door Direction
Risk of injury if soft stop contracts! Risk of damage due to colliding doors!* u Carefully remove the soft stop mechanism. If you are installing V-ZUG Side-by-Side (SBS) appliances next to another appliance: u Remove the closing damper: Remove the closing dampers u Install the appliances so that the doors open outwards. - Page 33 Changing the door direction Fig. 6 Fig. 7 u Move the hinges. CAUTION Risk of injury if hinges fold! u Leave hinges open. u Remove the door: Slide the door towards you and out, then lift off the brackets and put aside. Fig.
-
Page 34: Installing The Appliance In The Recess
Installing the appliance in the recess 8 Installing the appliance in the recess WARNING Fire hazard from short-circuiting! u When pushing the appliance into the recess, take care not to crush, jam or damage the mains power cable. u Do not operate the appliance with a defective mains power cable. -
Page 35: Installing The Appliance
Installation 9.1 Installing the appliance Fig. 15 u If already in place, pull the plinth panel forwards. u Detach the connecting cable from the rear of the appli- ance, removing the cable holder at the same time because otherwise there will be vibratory noise! u Lay the connecting cable with the help of a string in such a way that the appliance can be... - Page 36 Installation Fig. 20 u Place the foam pad in the plinth panel – this is essential for separating air flows! Fig. 18 u Bend both brackets at one end before installation. Insert the straight edge into the holder on the top of the unit and bend towards the front.
-
Page 37: Fitting The Unit Door
Installation Fig. 26 Fig. 26 (11) to the inside of the u Attach fastening crosspiece Fig. 26 (12) . unit door using the assembly aids Fig. 26 (11) in the middle of the door. u Align the crosspiece w Distances to the outer edge are equal at the left and right. For chipboard doors: Fig. -
Page 38: Disposing Of Packaging
Disposing of packaging The packaging is made of recyclable materials: corrugated board/cardboard expanded polystyrene parts polythene bags and sheets polypropylene straps nailed wooden frame with polyethylene panel* u Take the packaging material to an official collecting point. 11 Connecting the appliance NOTICE Fig. - Page 39 Connecting the appliance * Depending on model and options...
- Page 40 7088155-00 20181122 1066350–R01 V-ZUG AG, Industriestrasse 66, CH-6302 Zug Tel. +41 58 767 67 67, Fax +41 58 767 61 61 info@vzug.com, www.vzug.com...