Publicité

Les langues disponibles

Les langues disponibles

Liens rapides

KW-R910BT
CD RECEIVER
INSTRUCTION MANUAL
RÉCEPTEUR CD
MANUEL D'INSTRUCTIONS
Please read all instructions carefully before
operation to obtain the best possible performance
from the unit.
Veuillez lires les instructions attentivement avant
d'utiliser l'appareil afin d'obtenir les meilleures
performances possibles de l'appareil.
GET0952-001A [E/EN]
ENGLISH
FRANÇAIS

Publicité

Chapitres

Table des Matières
loading

Sommaire des Matières pour JVC KW-R910BT

  • Page 1 ENGLISH FRANÇAIS KW-R910BT CD RECEIVER Please read all instructions carefully before INSTRUCTION MANUAL operation to obtain the best possible performance from the unit. RÉCEPTEUR CD Veuillez lires les instructions attentivement avant MANUEL D’INSTRUCTIONS d’utiliser l’appareil afin d’obtenir les meilleures performances possibles de l’appareil.
  • Page 2 à conserver les ressources et à nous préserver des EU Representative: leurs effets nocifs sur notre santé et sur l’environnement. JVC Technical Services Europe GmbH Remarque: Le symbole “Pb“ ci-dessous sur des piles électrique indique que cette pile contient Konrad-Adenauer-Allee 1-11, D-61118 Bad Vilbel, Germany du plomb.
  • Page 3 Con la presente JVC KENWOOD dichiara che JVC KENWOOD vakuuttaa täten että Šiuo, JVC KENWOOD, pareiškia, kad šis unit KW-R910BT is in compliance with the questo KW-R910BT è conforme ai requisiti KW-R910BT tyyppinen laite on direktiivin KW-R910BT atitinka pagrindinius Direktyvos...
  • Page 4: Table Des Matières

    CONTENTS BEFORE USE Warning BEFORE USE Do not operate any function that takes your attention away from safe driving. BASICS Caution Volume setting: GETTING STARTED • Adjust the volume so that you can hear sounds outside the car to prevent accidents. •...
  • Page 5: Basics

    BASICS Faceplate Remote control (RM-RK52) (not supplied) This unit can be remotely controlled with an Display window optionally purchased remote control. Loading slot Remote sensor How to reset (Do not expose to bright sunlight.) Your preset adjustments will also be erased. Pull out the insulation sheet when using for the first time.
  • Page 6: Getting Started

    Turn the volume knob to select [12 HOUR] or [24 HOUR], then press the F/W xxxx YES: Starts upgrading the firmware. ; NO: Cancels (upgrading is not knob. activated). Press MENU to exit. For details on how to update the firmware, see: <http://www.jvc.net/cs/car/>. * Not displayed when the corresponding source is selected.
  • Page 7: Cd / Usb / Ipod

    Fast-forward Repeat play * Press 3 B repeatedly to make a selection. • Audio CD or JVC Playlist Creator (JPC) / JVC Music Control (JMC) file ( 17): iPod/iPhone TRACK RPT, RPT OFF • MP3/WMA/WAV file: TRACK RPT, FOLDER RPT, RPT OFF USB input terminal •...
  • Page 8 CD / USB / iPod Select a track/file from a list Change the USB drive For iPod: Applicable only when [HEAD MODE] is selected. ( 5) When a smartphone (Mass Storage Class) is connected to the USB input Press MENU terminal, you can select its internal memory or external memory (such as an Turn the volume knob to make a selection, then press the knob.
  • Page 9: Radio

    RADIO • To select a stored station: Press J / K or one of the number buttons (1 to 6). (or) Press MENU, then turn the volume knob to select a preset number and press the knob to confirm. Search for your favorite program (PTY Search) Available only for FM source.
  • Page 10: Aux

    RADIO Default: XX Use a portable audio player RADIO TIMER Turns on the radio at a specific time regardless of the current source. Connect a portable audio player (commercially available). 1 ONCE/ DAILY/ WEEKLY/ OFF: Select how often the timer will be turned 3.5 mm stereo mini plug with “L”...
  • Page 11: Bluetooth

    Refer to the instruction manual of the Bluetooth device for more information. Press B /SOURCE to turn on the unit. Search and select “JVC UNIT” on the Bluetooth device. “BT PAIRING” flashes on the display. Adjust the •...
  • Page 12: Bluetooth Mobile Phone

    “CHECK MODE” appears. “SEARCH NOW USING time, the unit answers incoming call PHONE” “PIN IS 0000” scrolls on the display. automatically. ( 11) Search and select “JVC UNIT” on the Bluetooth device within Reject an incoming Press and hold or the volume knob. 3 minutes.
  • Page 13 BLUETOOTH® Improve the sound quality during a call 1 Turn the volume knob to select a name, then press the knob. PHONEBOOK 2 Turn the volume knob to select a phone number, then press the knob to call. While talking on the phone..•...
  • Page 14 BLUETOOTH® Text message notification Store a contact in memory When the phone receives a text message, the unit rings and “RCV You can store up to 6 contacts. MESSAGE” appears. Press to enter Bluetooth mode. • You cannot read, edit, or send a message through the unit. Turn the volume knob to select [RECENT CALL], [PHONEBOOK], or •...
  • Page 15 MY BT NAME: Displays the unit name (JVC UNIT). ; MY ADDRESS: Shows address of this unit. GROUP RND, ALL RND, JVC Smart Music Control is designed to view JVC car receiver status and perform simple control RND OFF operations on Android smart phones. For JVC Smart Music Control operations, visit JVC website: <http://www.jvc.net/cs/car/>.
  • Page 16: Audio Settings

    AUDIO SETTINGS Default: XX Do this EQ SETTING Select a preset Press EQ repeatedly. equalizer (or) EQ PRESET FLAT / HARD ROCK / JAZZ / POP / R&B / TALK / USER1 / USER2 / VOCAL BOOST / Press EQ, then turn the volume knob BASS BOOST / CLASSICAL / DANCE: Selects a preset equalizer. within 2 seconds.
  • Page 17: Display Settings

    DISPLAY SETTINGS AUDIO SETTINGS FADER * R06 — F06 (00): Adjusts the front and rear speaker output balance. BALANCE * L06 — R06 (00): Adjusts the left and right speaker output balance. VOL ADJUST –05 — +05 (00): Presets the volume adjustment level of each source (compared to the FM volume level). Before adjustment, select the source you want to adjust.
  • Page 18: More Information

    MORE INFORMATION DISPLAY SETTINGS Default: XX About discs and audio files • This unit can only play the following CDs: COLOR PRESET You can select a color for [ALL ZONE], [ZONE 1], [DISP ZONE], or [ZONE 2] separately. For [ALL ZONE], you can also select a color pattern. •...
  • Page 19 Control. If not recorded, “NO NAME” appears. • When you play audio file with song data added using the JVC Playlist Creator or JVC Music Control, you can search for audio file by Genres, Artists, Albums, Playlists, and Songs. • JVC Playlist Creator and JVC Music Control are available from the following web site: <http://www.jvc.net/cs/car/>.
  • Page 20: Troubleshooting

    TROUBLESHOOTING Symptom Remedy Symptom Remedy Sound cannot be heard. • Adjust the volume to the optimum level. “CANNOT PLAY” flashes and/ • Check whether the connected device is compatible with • Check the cords and connections. or connected device cannot be this unit and ensure the files are in supported formats.
  • Page 21: Installation / Connection

    INSTALLATION / CONNECTION TROUBLESHOOTING Warning Symptom Remedy • The unit can only be used with a 12 V DC power supply, negative ground. “NOT SUPPORT” appears. The connected phone does not support Voice • Disconnect the battery’s negative terminal before wiring and mounting. Recognition feature.
  • Page 22 INSTALLATION / CONNECTION How to remove the unit Part list for installation Installing the unit (in-dash mounting) (A) Trim plate Do the required wiring. (  21) Bend the appropriate tabs to hold the sleeve firmly in place. (B) Mounting sleeve Dashboard of your car (C) Wiring harness...
  • Page 23: Wiring Connection

    Signal cord Remote wire (not supplied) To Blue/white wire of the (not supplied) wiring harness (C) Front output JVC Amplifier Rear/subwoofer output Fuse (10 A) Microphone input jack ( 9) Antenna terminal For some VW/Audi or Opel (Vauxhall) automobiles ISO connector...
  • Page 24: Specifications

    SPECIFICATIONS FM Frequency Range 87.5 MHz to 108.0 MHz (50 kHz step) USB Standard USB 1.1, USB 2.0 (Full speed) Usable Sensitivity (S/N = 26 dB) 0.71 μV/75 Ω Compatible Devices Mass storage class Quieting Sensitivity 2.0 μV/75 Ω File System FAT12/ 16/ 32 (DIN S/N = 46 dB) Maximum Supply Current DC 5 V   1 A Frequency Response (±3 dB) 30 Hz to 15 kHz MP3 Decode Compliant with MPEG-1/2 Audio Layer-3 Signal-to-Noise Ratio (MONO)
  • Page 25 SPECIFICATIONS Maximum Output Power 50 W × 4 Output Power 30 W × 4 (DIN 45324, +B = 14.4 V) Speaker Impedance 4 Ω — 8 Ω Preout Level/Load (CD) 2 500 mV/10 kΩ load (full scale) Preout Impedance ≤ 600 Ω Operating Voltage 14.4 V (10.5 V — 16 V allowable) Maximum Current Consumption 10 A Operating Temperature Range 0°C to +40°C Installation Size (W × H × D) 182 mm × 112 mm × 159 mm Weight...
  • Page 26 TABLE DES MATIERES AVANT L’UTILISATION Avertissement AVANT L’UTILISATION N’utilisez aucune fonction qui risque de vous distraire de la conduite sure de votre véhicule. FONCTIONNEMENT DE BASE 3 Précautions Réglage du volume: PRISE EN MAIN • Ajustez le volume de façon à pouvoir entendre les sons extérieurs à la voiture afin d’éviter tout risque d’accident. •...
  • Page 27: Fonctionnement De Base

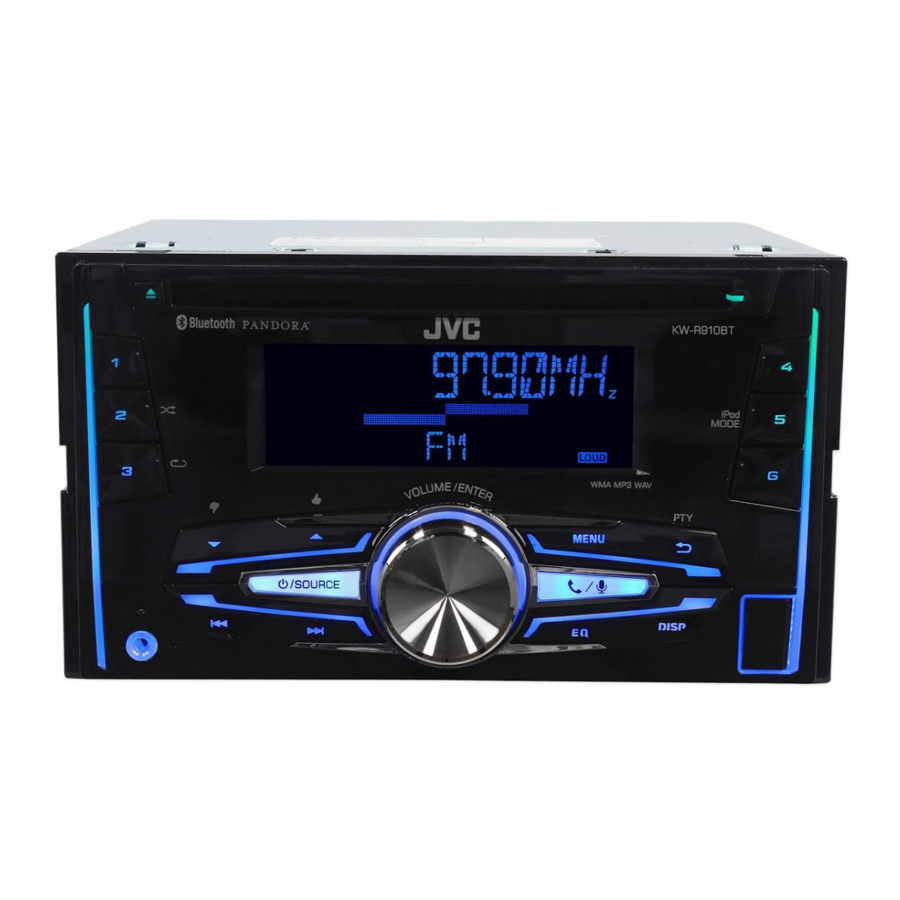
    FONCTIONNEMENT DE BASE Façade Télécommande (RM-RK52) (non fournie) Cet appareil peut être commandé à distance avec une télécommande vendue séparément. Fenêtre d’affichage Fente d’insertion Capteur de télécommande Comment réinitialiser (Ne l’exposez Pas à la lumière directe du soleil.) Vos ajustements préréglés sont aussi effacés.
  • Page 28: Prise En Main

    Pour en savoir plus sur la mise à niveau du micrologiciel, référez-vous à: Jour Heure Minute <http://www.jvc.net/cs/car/>. Tournez le bouton de volume pour choisir [24H/ 12H] , puis appuyez sur * Pas d’affichage quand la source correspondante est sélectionnée.
  • Page 29: Cd / Usb / Ipod

      * Répéter la lecture Appuyez répétitivement sur la touche pour faire un choix. iPod/iPhone • CD Audio ou fichier JVC Playlist Creator (JPC) / JVC Music Control (JMC) (  17) : TRACK RPT, RPT OFF Prise d’entrée USB • Fichier MP3/WMA/WAV: TRACK RPT, FOLDER RPT, RPT OFF •...
  • Page 30 CD / USB / iPod Sélectionnez une plage/fichier à partir d’une liste Changez le lecteur USB Quand un smartphone (périphérique à mémoire de grande capacité) est connecté à la Pour iPod: Fonctionne uniquement quand [HEAD MODE] est sélectionné. ( 5) prise d’entrée USB, vous pouvez sélectionnez sa mémoire interne ou sa mémoire externe MENU Appuyez sur...
  • Page 31: Radio

    RADIO • Pour choisir une station mémorisée: Appuyez sur ou sur l’une des touches numériques (  à  (ou) Appuyez sur MENU , puis tournez le bouton de volume pour choisir un numéro préréglé, puis appuyez sur le bouton pour valider. Recherche de votre programme préféré...
  • Page 32: Aux

    RADIO Défaut: Utilisation d’un lecteur audio portable RADIO TIMER Met la radio sous tension à une heure spécifique quelle que soit la source actuelle. Connectez un lecteur audio portable (en vente dans le commerce). 1 ONCE DAILY WEEKLY : Sélectionnez la fréquence de mise en service de la Mini fiche stéréo de 3,5 mm avec connecteur en forme minuterie.
  • Page 33: Bluetooth

    B /SOURCE Appuyez sur pour mettre l’appareil sous tension. Cherchez et sélectionnez “JVC UNIT” sur le périphérique Bluetooth. “BT PAIRING” clignote sur l’affichage. • Pour certains périphériques Bluetooth, il se peut que vous ayez besoin d’entrer le code PIN (numéro d’identification personnel) immédiatement après la recherche.
  • Page 34: Mode De Vérification De La Compatibilité Bluetooth

    “PIN IS • Quand [AUTO ANSWER] est réglé sur l’heure choisie, 0000” défile sur l’affichage. l’appareil répond automatiquement aux appels Cherchez et sélectionnez “JVC UNIT” sur le périphérique Bluetooth entrants. ( 11) avant 3 minutes. Refus d’un appel entrant Maintenez enfoncé...
  • Page 35 BLUETOOTH® Pour améliorer la qualité du son pendant un appel PHONEBOOK Tournez le bouton de volume pour choisir un nom, puis appuyez sur le bouton. Tournez le bouton de volume pour choisir un numéro de téléphone, puis appuyez sur le bouton pour Quand vous parlez au téléphone..
  • Page 36 BLUETOOTH® Notification de message texte Stockage d’un contact en mémoire Quand le téléphone reçoit un message texte, l’appareil sonne et “RCV MESSAGE” Vous pouvez mémoriser un maximum de 6 contacts. apparaît. Appuyez sur pour entrer en mode Bluetooth. • Vous ne pouvez pas lire, modifier ou envoyer un message via cet appareil. [RECENT CALL] [PHONEBOOK] Tournez le bouton de volume pour choisir...
  • Page 37 : Affiche l’adresse de cet appareil. Lecture aléatoire Appuyez répétitivement JVC Smart Music Control est conçu pour voir l’état de l’autoradio JVC et réaliser des commandes simple à partir de sur la touche pour smartphones Android. Pour JVC Smart Music Control, consultez le site Web JVC: <http://www.jvc.net/cs/car/>.
  • Page 38: Réglages Audio

    RÉGLAGES AUDIO Défaut: Pour Faire EQ SETTING Choisissez Appuyez répétitivement sur un égaliseur (ou) EQ PRESET FLAT HARD ROCK JAZZ R&B TALK USER1 USER2 VOCAL BOOST  /  /  /  /  /  /  /  /  / préréglé Appuyez sur , puis tournez le bouton de BASS BOOST  / CLASSICAL...
  • Page 39: Réglages D'affichage

    RÉGLAGES D’AFFICHAGE RÉGLAGES AUDIO FADER *  —   ( ): Règle la balance de sortie des enceintes avant et arrière. BALANCE *  —   ( ): Règle la balance de sortie des enceintes gauche et droite.   ADJUST –05  —   ( ): Prérègle le niveau d’ajustement du volume de chaque source (en comparaison avec le niveau de volume FM).
  • Page 40: Plus D'informations

    PLUS D’INFORMATIONS RÉGLAGES D’AFFICHAGE Défaut: À propos des disques et des fichiers audio • Cet appareil ne peut lire que les CD suivants: COLOR PRESET ALL ZONE ZONE 1 Vous pouvez sélectionner une couleur séparément pour [ ], [ DISP ZONE ] ou [ ZONE 2 ].
  • Page 41 • Cet appareil prend en charge l’application PC JVC Playlist Creator et l’application Android JVC Music Control. • Quand vous reproduisez un fichier audio avec des données de chanson ajoutée en utilisant JVC Playlist Creator ou Jour/Horloge JVC Music Control, vous pouvez rechercher des fichiers audio par genre, artiste, album, liste de lecture et chansons.
  • Page 42: Guide De Dépannage

    GUIDE DE DÉPANNAGE Symptôme Remède Symptôme Remède Le son ne peut pas être entendu. • Ajustez le volume sur le niveau optimum. “CANNOT PLAY” clignote et/ou le • Vérifiez si le périphérique connecté est compatible avec cet appareil et • Vérifiez les cordons et les connexions. périphérique connecté...
  • Page 43: Installation / Raccordement

    INSTALLATION / RACCORDEMENT GUIDE DE DÉPANNAGE Avertissement Symptôme Remède • L’appareil peut uniquement être utilisé avec une alimentation de 12 V CC, à masse négative. “NOT SUPPORT” apparaît. Le téléphone connecté ne prend pas en charge la fonction de • Déconnectez la borne négative de la batterie avant le câblage et le montage. reconnaissance vocale.
  • Page 44: Liste Des Pièces Pour L'installation

    INSTALLATION / RACCORDEMENT Liste des pièces pour l’installation Comment retirer l’appareil Installation de l’appareil (montage encastré) Plaque d’assemblage Réalisez les connexions nécessaires.   Tordez les languettes appropriées pour maintenir le manchon en place. Manchon de montage Tableau de bord de votre voiture Faisceau de fils Lors d’une installation sans manchon de montage...
  • Page 45: Connexions

    Cordon de signal Fil de télécommande (non fournie) Le fil bleu/blanc du faisceau (non fournie) de fils (C) Sortie avant JVC Amplificateur Sortie arrière/caisson de grave Fusible (10 A) (  9) Prise d’entrée du microphone Borne de l’antenne Pour certaines automobiles VW/Audi ou Opel...
  • Page 46: Spécifications

    SPÉCIFICATIONS FM Plage de fréquences 87,5 MHz à 108,0 MHz (pas de 50 kHz) Standard USB USB 1.1, USB 2.0 (vitesse maximale) Sensibilité utilisable (S/B = 26 dB) 0,71 μV/75 Ω Périphériques compatibles À mémoire de grande capacité Seuil de sensibilité (DIN S/N = 46 dB) 2,0 μV/75 Ω...
  • Page 47 SPÉCIFICATIONS Puissance de sortie maximum 50 W × 4 Puissance de sortie 30 W × 4 (DIN 45324, +B = 14,4 V) Impédance d’enceinte 4 Ω — 8 Ω Niveau de préamplification/charge (CD) 2 500 mV/10 kΩ en charge (pleine échelle) Impédance du préamplificateur ≤ 600 Ω Tension de fonctionnement 14,4 V (10,5 V — 16 V admissible) Consommation de courant maximale 10 A Gamme de température de fonctionnement...
  • Page 48 • Android is trademark of Google Inc. • The Bluetooth® word mark and logos are registered trademarks owned by Bluetooth SIG, Inc. and any use of such marks by JVC KENWOOD Corporation is under license. Other trademarks and trade names are those of their respective owners.

Table des Matières