Table des Matières

Publicité

Les langues disponibles

Les langues disponibles

Liens rapides

KW-R940BTS
CD RECEIVER
INSTRUCTION MANUAL
RÉCEPTEUR CD
MANUEL D'INSTRUCTIONS
RECEPTOR CON CD
MANUAL DE INSTRUCCIONES
KW-X840BTS
DIGITAL MEDIA RECEIVER
INSTRUCTION MANUAL
RÉCEPTEUR MULTIMÉDIA NUMÉRIQUE
MANUEL D'INSTRUCTIONS
RECEPTOR DE MEDIOS DIGITALES
MANUAL DE INSTRUCCIONES
For customer Use:
Enter below the Model No. and Serial No. which are
located on the top or bottom of the cabinet. Retain this
information for future reference.
Model No.
Serial No.
ENGLISH
FRANÇAIS
ESPAÑOL
B5A-3110-00 [K]

Publicité

Table des Matières
loading

Sommaire des Matières pour JVC KW-R940BTS

  • Page 1 ENGLISH FRANÇAIS ESPAÑOL KW-R940BTS KW-X840BTS CD RECEIVER DIGITAL MEDIA RECEIVER INSTRUCTION MANUAL INSTRUCTION MANUAL RÉCEPTEUR CD RÉCEPTEUR MULTIMÉDIA NUMÉRIQUE MANUEL D’INSTRUCTIONS MANUEL D’INSTRUCTIONS RECEPTOR CON CD RECEPTOR DE MEDIOS DIGITALES MANUAL DE INSTRUCCIONES MANUAL DE INSTRUCCIONES For customer Use: Enter below the Model No. and Serial No. which are located on the top or bottom of the cabinet.
  • Page 2 Los productos con el símbolo de un contenedor con ruedas tachado no podrán ser Products: CD RECEIVER desechados como residuos domésticos. Los equipos eléctricos y electrónicos al final Model Name: KW-R940BTS de la vida útil, deberán ser reciclados en instalaciones que puedan dar el tratamiento Products: DIGITAL MEDIA RECEIVER adecuado a estos productos y a sus subproductos residuales correspondientes.
  • Page 3: Software License Agreement

    SOFTWARE LICENSE AGREEMENT IC (Industry Canada) Caution This device contains licence-exempt transmitter(s)/receiver(s) that comply with Innovation, Science and Economic Development Canada’s licence-exempt RSS(s). Operation is subject to the following two The software embedded in the Product (hereinafter the "Licensed Software") provided by Licensor is conditions: copyrighted to or sublicensable by the Licensor, and this Agreement provides for the terms and conditions 1.
  • Page 4 Article 4 Right pertaining to the Licensed Software Article 9 Destruction of the Licensed Software Any and all copyrights and other rights pertaining to the Licensed Software and related documents If this Agreement is terminated pursuant to the provision of Article 8, the User shall destroy the Licensed shall belong to the Licensor or the original holder of the right who granted to the Licensor the license or Software, any related documents and copies thereof within two (2) weeks from such date of termination.
  • Page 5 Important Notice concerning the Software -CMP The MIT License (MIT) Copyright (c) 2014 Charles Gunyon -jansson Permission is hereby granted, free of charge, to any person obtaining a copy of this software and associated Copyright (c) 2009-2012 Petri Lehtinen <petri@digip.org> documentation files (the "Software"), to deal in the Software without restriction, including without Permission is hereby granted, free of charge, to any person obtaining a copy of this software and associated limitation the rights to use, copy, modify, merge, publish, distribute, sublicense, and/or sell copies of the...
  • Page 6 sha2 Copyright (c) 1995, 1996 Carnegie-Mellon University. All rights reserved. AUTHOR: Aaron D. Gifford - http://www.aarongifford.com/ Author: Chris G. Demetriou Copyright (c) 2000-2001, Aaron D. Gifford Permission to use, copy, modify and distribute this software and its documentation is hereby granted, All rights reserved.
  • Page 7 T-Kernel 2.0 This product uses the source code of T-Kernel 2.0 under T-License 2.0 granted by T-Engine Forum (www.tron.org) BSD-3-Clause Copyright (c) 2000-2001, Aaron D. Gifford All rights reserved. You may obtain a copy of the license at https://opensource.org/licenses/BSD-3-Clause THE SOFTWARE IS PROVIDED “AS IS”, WITHOUT WARRANTY OF ANY KIND, EXPRESS OR IMPLIED, INCLUDING BUT NOT LIMITED TO THE WARRANTIES OF MERCHANTABILITY, FITNESS FOR A PARTICULAR PURPOSE AND NONINFRINGEMENT.
  • Page 8: Table Des Matières

    Using Other Applications ..............18 • Operations are explained mainly using buttons on the faceplate of KW-R940BTS. Bluetooth® ....................19 • English indications are used for the purpose of explanation. You can Bluetooth - Connection select the display language from the menu.
  • Page 9: Before Use

    Before Use IMPORTANT • For KW-R940BTS: If a disc error occurs due to condensation on the laser lens, eject the disc and wait for the moisture to evaporate. • To ensure proper use, please read through this manual before using this •...
  • Page 10: Faceplate

    Basics Faceplate KW-R940BTS: KW-X840BTS: Loading slot Display window* Volume knob How to reset * Only for illustration purpose. On the faceplate Turn on the power Press SOURCE B. • Press and hold to turn off the power. Adjust the volume Turn the volume knob.
  • Page 11: Basics

    Getting Started Basics Remote control (RM-RK52) This unit can be remotely controlled with an optionally purchased remote control. Remote sensor (Do not expose to bright sunlight.) Cancel the demonstration Pull out the insulation sheet when using for the first time. When you turn on the power for the first time (or [FACTORY RESET] is set to [YES], see page 6), the display shows: “CANCEL DEMO”...
  • Page 12: Set The Basic Settings

    MENU to exit. activated). For details on how to update the firmware, visit To return to the previous setting item, press <http://www.jvc.net/cs/car/>. [FACTORY RESET] [YES]: Resets the settings to default (except the stored station). ; Set the basic settings [NO]: Cancels.
  • Page 13: Radio

    Radio Settings in memory You can store up to 18 stations for FM and 6 stations for AM. Store a station While listening to a station... Press and hold one of the number buttons (1 to 6). (or) Press and hold the volume knob until “PRESET MODE” flashes. Turn the volume knob to select a preset number, then press the knob.
  • Page 14 Radio Default: [XX] [AREA] [N.AMERICA]: For North/Central/South America, AM/FM intervals: 10 kHz/200 kHz. ; [TUNER SETTING] [S.AMERICA]: For some South American countries, AM/FM intervals: [RADIO TIMER] Turns on the radio at a specific time regardless of the current source. 10 kHz/50 kHz. ; 1 [ONCE]/[DAILY]/[WEEKLY]/[OFF]: Select how often the timer will be [EUROPE]: For any other areas, AM/FM intervals: 9 kHz/50 kHz.
  • Page 15: Cd/Usb/Ipod

    (commercially available) The source changes to USB automatically and playback starts. * Do not leave the cable inside the car when not in use. Selectable source: • KW-R940BTS: CD/USB/iPod USB or iPod BT • KW-X840BTS: USB/iPod USB or iPod BT ENGLISH...
  • Page 16 CD/USB/iPod Select music drive On the faceplate On the remote control Press and hold S / T. Press and hold H / I. Reverse/ While in USB source, press 6 MODE repeatedly. Fast-forward Stored songs in the following drive will be played back. Select a track/file Press S / T.
  • Page 17: Aux

    CD/USB/iPod You can listen to music from a portable audio player via the auxiliary input Quick search (applicable only for CD source and USB source) jack. If you have many files, you can search through them quickly. Preparation: Press Select [ON] for [BUILT-IN AUX] in [SOURCE SELECT]. (Page 6) Turn the volume knob to select a folder/list, then press the knob.
  • Page 18: Pandora

    Pandora® You can listen to Pandora on iPhone/iPod touch (via Bluetooth or via USB On the faceplate On the remote control input terminal) or Android device (via Bluetooth). Press d. Play back/pause Press the volume knob. Preparation: Press T. Press I. Skip a track •...
  • Page 19: Spotify

    Spotify Pandora® You can listen to Spotify on iPhone/iPod touch (via Bluetooth or via USB Bookmark current song information input terminal) or Android device (via Bluetooth). Press and hold the volume knob. Preparation: “BOOKMARKED” appears and the information is stored to your device. •...
  • Page 20 Spotify Search for a song or station On the faceplate On the remote control Press d. Play back/pause Press the volume knob. Press Turn the volume knob to select a list type, then press the knob. Press S*1 / T. Press H*1 / I.
  • Page 21: Siriusxm® Radio

    SiriusXM® Radio Only SiriusXM® brings you more of what you love to listen to, all in one place. Start listening Get over 140 channels, including commercial-free music plus the best sports, news, talk, comedy and entertainment. Welcome to the world of satellite Press SOURCE B repeatedly to select SIRIUS XM.
  • Page 22: Siriusxm Replay

    SiriusXM® Radio Select a stored channel SmartFavorites and TuneStart™ Press one of the number buttons (1 to 6) (or press J / K on the remote User preset channels are initially assigned as the SmartFavorites channels. control). SmartFavorite channel is available with SXV200 or later SiriusXM tuner (or) models.
  • Page 23 SiriusXM® Radio TuneScan™ On the faceplate Select a stored Press one of the number buttons (1 to 6). You can get a short preview of the songs that you have missed on each of SmartFavorite your SmartFavorites music channels or a music channel currently tuned into. Press channel Turn the volume knob to select PRESET, then press...
  • Page 24: Using Other Applications

    1 Press the volume knob to enter [NEW CODE]. 2 Turn the volume knob to select a number. You can control the JVC car receiver from iPhone/iPod touch (via Bluetooth 3 Press S / T to move to the entry position.
  • Page 25: Bluetooth

    Bluetooth® Using Other Applications Default: [XX] • Depending on the Bluetooth version, operating system and the firmware version of your mobile phone, Bluetooth features may not [REMOTE APP] work with this unit. [SELECT] Selects the device ([IOS] or [ANDROID]) to use the application. •...
  • Page 26 • Once the pairing is completed, the Bluetooth device will remain registered in the unit even if you reset the unit. To delete the paired device, see Search and select the name of your receiver (“KW-R940BTS”/ [DEVICE DELETE] on page 24.
  • Page 27: Bluetooth - Mobile Phone

    Bluetooth® Bluetooth — Mobile phone The following operations may differ or be unavailable depending on the connected phone. On the faceplate On the remote control First incoming call... Answer a call Press J / K / H / I. Press or the volume knob.
  • Page 28: Make A Call

    Bluetooth® *1 This adjustment will not affect the volume of the other sources. Default: [XX] *2 Press and hold VOL + to continuously increase the volume to 15. [SETTINGS] *3 Operations may vary according to the connected Bluetooth device. [AUTO ANSWER] [01 SEC] to [30 SEC]: Answers an incoming call automatically in the selected time (in seconds).
  • Page 29 Bluetooth® Store a contact in memory [PHONEBOOK] (Applicable only if the phone supports PBAP.) 1 Press 1 J / 2 K to select the desired letter (A to Z, 0 to 9, and OTHERS). You can store up to 6 contacts into the number buttons (1 to 6). •...
  • Page 30 [DEVICE DELETE] 1 Turn the volume knob to select a device to delete, then press the knob. Search and select the name of your receiver (“KW-R940BTS”/ 2 Turn the volume knob to select [YES] or [NO], then press the knob.
  • Page 31: Bluetooth - Audio

    Bluetooth® The connectivity result flashes on the display. Bluetooth — Audio “PAIRING OK” and/or “HANDS-FREE OK”*1 and/or “AUD.STREAM OK”*2 and/ or “PBAP OK”*3: Compatible *1 Compatible with Hands-Free Profile (HFP) *2 Compatible with Advanced Audio Distribution Profile (A2DP) *3 Compatible with Phonebook Access profile (PBAP) After 30 seconds, “PAIRING DELETED”...
  • Page 32: Amazon Alexa

    (Page 9) • If you plug in an iPod/iPhone to the USB input terminal while listening to http://www.jvc.net/car/alexa iPod BT source, the source automatically changes to iPod USB source. Press SOURCE B to select iPod BT source if the device is still connected via Bluetooth.
  • Page 33: Basic Operations

    Tap “Add Device”. Tap “Automotive Accessory” or “Headphones” from the list of device types. Tap the name of your receiver (“KW-R940BTS”/“KW-X840BTS”) and follow the instructions. Once the setup process is completed, the Alexa mobile application will establish a connection with this unit.
  • Page 34: Audio Settings

    Audio Settings AMAZON ALEXA Start listening While in Alexa idle state... Press on the unit to activate Alexa. The display shows: “LISTENING...”. Communicate with Alexa via the connected microphone. (Page 19) During music playback in ALEXA source, you can perform the following operations: On the faceplate On the remote control...
  • Page 35: Other Settings

    Audio Settings Other settings [PRO EQ] Adjusts your own sound settings for each source. • The settings are stored to [USER] in [PRESET EQ]. Press and hold MENU. • The settings made may affect the current settings of [EASY EQ]. Turn the volume knob to select an item (see the following table), then [62.5HZ] press the knob.
  • Page 36 Audio Settings [FADER] (Not applicable when 3-way crossover is selected.) [SOUND EFFECT] [POSITION R15] to [POSITION F15] ([POSITION 00]): Adjusts the front [SPACE ENHANCE] (Not applicable for FM/AM source.) and rear speaker output balance. [SMALL]/[MEDIUM]/[LARGE]: Virtually enhances the sound space. ; [BALANCE]*3 [POSITION L15] to [POSITION R15] ([POSITION 00]): Adjusts the left and [OFF]: Cancels.
  • Page 37 Audio Settings Speaker output settings Crossover settings [SPK/PRE OUT] Below are the available setting items for 2-way crossover and 3-way (Applicable only if [X ' OVER TYPE ] is set to [2-WAY]) (page 30) crossover. Select the output setting for the speakers [SPK/PRE OUT], based on the speaker CAUTION connection method.
  • Page 38 Audio Settings 2-way crossover setting items [SUBWOOFER [SW LPF FRQ] [30HZ]/[40HZ]/[50HZ]/[60HZ]/[70HZ]/[80HZ]/ LPF]*2 [90HZ]/[100HZ]/[120HZ]/[150HZ]/[180HZ]/ [SPEAKER SIZE] [220HZ]/[250HZ]/[THROUGH] [FRONT] [SIZE] [3.5"]/[4"]/[4.75"]/[5"]/[6.5"]/[6.75"]/[7"]/ [SW LPF SLOPE] [–06DB]/[–12DB]/[–18DB]/[–24DB] [4×6]/[5×7]/[6×8]/[6×9]/[7×10] [SW LPF PHASE] [REVERSE] (180°)/ [NORMAL] (0°) [TWEETER] [SMALL]/[MIDDLE]/[LARGE]/[NONE] (not [SW LPF GAIN] [–08DB] to [00DB] connected) [REAR]*1 [3.5"]/[4"]/[4.75"]/[5"]/[6.5"]/[6.75"]/[7"]/[4×6]/[5×7]/[6×8]/...
  • Page 39 Audio Settings Digital Time Alignment settings [MID RANGE] [HPF FRQ] [30HZ]/[40HZ]/[50HZ]/[60HZ]/[70HZ]/[80HZ]/[90HZ]/ [100HZ]/[120HZ]/[150HZ]/[180HZ]/[220HZ]/[250HZ]/ Digital Time Alignment sets the delay time of the speaker output to create a [THROUGH] more suitable environment for your vehicle. [HPF SLOPE] [–06DB]/[–12DB] • For more information, see “Determining the delay time automatically” on page 34.
  • Page 40: Display Settings

    Display Settings Audio Settings Zone identification for brightness settings Determining the delay time automatically If you specify the distance from the currently set listening position to every speaker, the delay time will be automatically calculated. 1 Set [POSITION] and determine the listening position as the reference point (the reference point for [FRONT ALL] will be the center between the right and left in the front seats).
  • Page 41 Display Settings Press and hold MENU. [TEXT SCROLL]*2 [SCROLL ONCE]: Scrolls the display information once. ; Turn the volume knob to select an item (see the following table), then [SCROLL AUTO]: Repeats scrolling at 5-second intervals. ; press the knob. [SCROLL OFF]: Cancels.
  • Page 42: References

    2 [RED]/[GREEN]/[BLUE]: Select a primary color. For: – Latest firmware updates and latest compatible item list 3 [00] to [31]: Select the level. – JVC original application Repeat step 2 and step 3 for all the primary colors. [NIGHT COLOR] – Any other latest information •...
  • Page 43 • The song order displayed on the selection menu of this unit may differ from that of the iPod/ iPhone. • You cannot operate iPod if “JVC” or “ ” is displayed on iPod. • Depending on the version of the operating system of the iPod/iPhone, some functions may not operate on this unit.
  • Page 44: Change The Display Information

    Song title (Artist) with Music Synchronization Effect*2 Song title (Album title) Song title (Date) Playing CD/USB For CD-DA (applicable only for KW-R940BTS): time (Date) back to the beginning Track title (Artist) Track title (Artist) with Music Synchronization Effect*2 Track title (Disc title)
  • Page 45: Troubleshooting

    Troubleshooting Symptom Remedy Symptom Remedy Sound cannot be heard. • Adjust the volume to the optimum level. Playback order is not as The playback order is determined by the order in which • Check the cords and connections. intended. files were recorded (disc) or the file name (USB). “MISWIRING CHECK WIRING Turn the power off, then check to be sure the terminals of Elapsed playing time is not...
  • Page 46 Troubleshooting Symptom Remedy Symptom Remedy “LOADING” appears when This unit is still preparing the iPod/iPhone music list. It “DISCONNECTED” USB is disconnected from the head unit. Please make sure you enter search mode by may take some time to load, try again later. the device is connected properly through USB.
  • Page 47 Troubleshooting Symptom Remedy Symptom Remedy “SUBSCRIPTION UPDATED Your subscription is updated. Press the volume knob to Sound is being interrupted • Reduce the distance between the unit and the Bluetooth – PRESS ENTER TO continue. or skipped during playback audio player. CONTINUE.”...
  • Page 48: Installation/Connection

    Contact (USA only) to the terminal on the vehicle’s fuse box which provides 12 V DC power supply and is turned on Call: 1-800-252-5722 ( or ) visit: <http://www.jvc.com> and off by the ignition key. • Keep all cables away from heat dissipate metal parts.
  • Page 49: Basic Procedure

    Installation/Connection Part list for installation Installing the unit (in-dash mounting) Install onto the car brackets using the supplied screws (B) or (C). The screw holes differ depending on the model of the cars. (A) Wiring harness (×1) Do the required wiring. (Page 44) (B) Flat head screw, M5 ×...
  • Page 50: Wiring Connection

    Installation/Connection Wiring connection IMPORTANT We recommend installing the unit with a commercially available custom wiring harness specific for your car and leave this job to professionals for your safety. Consult your car audio dealer. Antenna terminal Vehicle Fuse (10 A) dashboard Factory wiring harness (vehicle)
  • Page 51 500 mA): To the optional SiriusXM Vehicle Tuner (commercially available). (Page 15) FRONT: Front output Mid Range output For KW-R940BTS: Microphone input jack (page 19) Subwoofer output Woofer output For KW-R940BTS: Expansion port (12 V 500 mA): To the optional SiriusXM Vehicle Tuner (commercially available).
  • Page 52: Specifications

    20 Hz — 20 kHz Stereo Separation (1 kHz) 40 dB Signal-to-Noise Ratio (1 kHz) KW-R940BTS: 98 dB AM Frequency Range 530 kHz — 1 700 kHz (10 kHz step) KW-X840BTS: 99 dB 531 kHz — 1 611 kHz (9 kHz step)
  • Page 53 12 V DC car battery Frequency Range 2.402 GHz — 2.480 GHz Installation Size (W × H × D) KW-R940BTS: 178 mm × 100 mm × 156 mm RF Output Power (E.I.R.P.) +4 dBm (MAX), Power Class 2 (7-1/16" × 3-15/16" × 6-3/16") Maximum Communication Range Line of sight approx.
  • Page 54 • Les opérations sont expliquées principalement en utilisant les touches de la Utilisation d’autres applications ............18 façade du KW-R940BTS. • Les indications en anglais sont utilisées dans un but explicatif. Vous pouvez Bluetooth® ....................19 choisir la langue d’affichage à...
  • Page 55: Avant L'utilisation

    Avant l’utilisation IMPORTANTES • Pour KW-R940BTS: Si une erreur de disque se produit à cause de la condensation sur l’objectif laser, éjectez le disque et attendez que l’humidité s’évapore. • Pour utiliser correctement l’appareil, veuillez ce manuel complément avant • En fonction du type de voiture, l’antenne s’étendra automatiquement quand de l’utiliser.
  • Page 56: Fonctionnement De Base

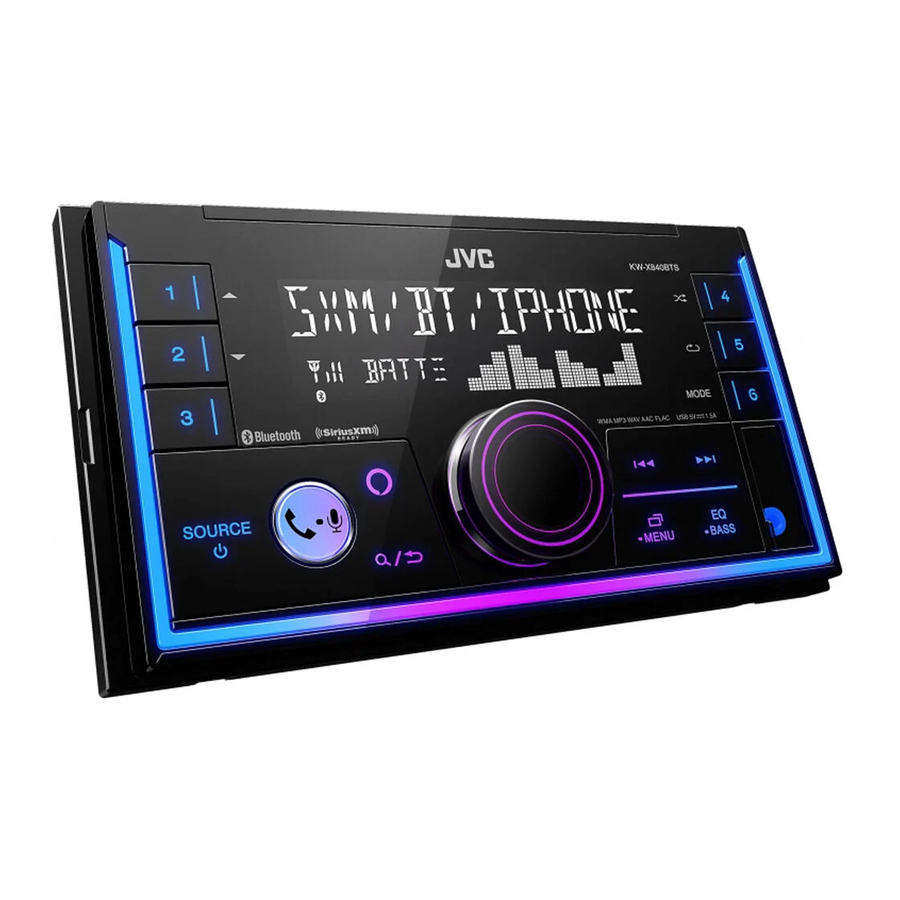
    Fonctionnement de base Façade KW-R940BTS: KW-X840BTS: Fente d’insertion Fenêtre d’affichage* Bouton de volume Comment réinitialiser * Uniquement à des fins d’illustration. Pour Sur la façade Mettez l’appareil sous tension Appuyez sur SOURCE • Maintenez la touche enfoncée pour mettre l’appareil hors tension.
  • Page 57: Prise En Main

    Prise en main Fonctionnement de base Télécommande (RM-RK52) Cet appareil peut être commandé à distance avec une télécommande vendue séparément. Capteur de télécommande (Ne l’exposez Pas à la lumière directe du soleil.) Annulez la démonstration Retirez la feuille d’isolant lors de la première utilisation.
  • Page 58: Faites Les Réglages De Base

    Réglez la date dans l’ordre “Jour”  “Mois”  “Année”. Pour en savoir plus sur la mise à niveau du micrologiciel, consultez Appuyez sur MENU pour quitter. <http://www.jvc.net/cs/car/>. Pour retourner à l’option de réglage précédente, appuyez sur [FACTORY RESET] [YES] : Réinitialise les réglages aux valeurs par défaut (sauf la station [NO] mémorisée). ;...
  • Page 59: Radio

    Radio Réglages en mémoire Vous pouvez mémoriser un maximum de 18 stations pour FM et de 6 stations pour AM. Mémorisez une station Pendant l’écoute d’une station... Maintenez enfoncée une des touches numériques (1 à 6). (ou) Maintenez enfoncé le bouton de volume jusqu’à ce que “PRESET MODE” clignote.
  • Page 60 Radio [XX] Défaut: [AREA] [N.AMERICA] : Pour l’Amérique du Nord/Centrale/du Sud, intervalles AM/FM: 10 kHz/200 kHz. ; [TUNER SETTING] [S.AMERICA] : Pour les pays d’Amérique du Sud, intervalles AM/FM: [RADIO TIMER] Met la radio sous tension à une heure spécifique quelle que soit la source actuelle. 10 kHz/50 kHz. ;...
  • Page 61: Cd/Usb/Ipod

    La source change automatiquement sur USB et la lecture démarre. * Ne laissez pas le câble à l’intérieur de la voiture quand il n’est pas utilisé. Source sélectionnable: • KW-R940BTS : CD/USB/iPod USB ou iPod BT • KW-X840BTS : USB/iPod USB ou iPod BT FRANÇAIS...
  • Page 62 CD/USB/iPod Sélectionnez le lecteur de musique Pour Sur la façade Sur la télécommande Recherche rapide Maintenez enfoncée Maintenez enfoncée Quand la source est USB, appuyez répétitivement sur 6 MODE. vers l’arrière/vers Les morceaux mémorisés dans le lecture suivant seront lus. l’avant •...
  • Page 63: Aux

    CD/USB/iPod Vous pouvez écouter de la musique à partir d’un lecteur audio portable via la prise Recherche rapide (applicable uniquement pour la source CD et USB) d’entrée auxiliaire. Si vous avez beaucoup de fichiers, vous pouvez effectuer une recherche rapide parmi eux.
  • Page 64: Pandora

    Pandora® Vous pouvez écouter Pandora à partir d’un iPhone/iPod touch (via Bluetooth ou Pour Sur la façade Sur la télécommande via la prise d’entrée USB) ou périphérique Android (via Bluetooth). Lecture/pause Appuyez sur le bouton de Appuyez sur Préparation: volume. •...
  • Page 65: Spotify

    Spotify Pandora® Vous pouvez écouter Spotify à partir d’un iPhone/iPod touch (via Bluetooth ou via Enregistrez un signet sur le morceau actuel la prise d’entrée USB) ou périphérique Android (via Bluetooth). Maintenez enfoncé le bouton de volume. Préparation: “BOOKMARKED” apparaît et l’information est mémorisée sur votre périphérique. •...
  • Page 66: Sauvegarde Des Informations Des Morceaux Favoris

    Spotify Recherche d’un morceau ou d’une station Pour Sur la façade Sur la télécommande Appuyez sur Lecture/pause Appuyez sur le bouton de Appuyez sur volume. Tournez le bouton de volume pour choisir un type de liste, puis appuyez sur le bouton. Sauter une plage Appuyez sur *1 /...
  • Page 67: Radio Siriusxm

    Radio SiriusXM® Seul SiriusXM® vous apporte plus de ce que vous aimez écouter, en un seul Démarrez l’écoute endroit. Obtenez plus de 140 canaux, y compris de la musique sans pauses publicitaires, le meilleur du sport, les nouvelles, les discussions, les comédies et Appuyez répétitivement sur SOURCE pour sélectionner SIRIUS XM.
  • Page 68: Sélectionnez Un Canal Mémorisé

    Radio SiriusXM® Sélectionnez un canal mémorisé SmartFavorites et TuneStart™ Appuyez sur une des touches numériques (1 à 6) (ou appuyez sur J / K sur la Les canaux préréglés de l’utilisateur sont affectés initialement comme canaux télécommande). SmartFavorites. Les canaux préférés intelligents sont disponibles avec le tuner (ou) SiriusXM SXV200 ou ultérieur.
  • Page 69: Réglages Siriusxm

    Radio SiriusXM® TuneScan™ Pour Sur la façade Sélectionnez un Appuyez sur l’une des touches numériques (1 à 6). Vous pouvez obtenir un bref aperçu des morceaux que vous avez manqués sur canal SmartFavorite chacun de vos canaux de musique SmartFavorites ou sur le canal de musique que Appuyez sur vous écoutez actuellement.
  • Page 70: Utilisation D'autres Applications

    Répétez les étapes 2 à 5 pour confirmer le code secret. • Notez le nouveau code secret afin de pouvoir accéder aux réglages de Préparation: verrouillage de canal la fois suivante. Installez la dernière version de l’application JVC Remote sur votre périphérique avant la connexion. [LOCK SETTING] [MATURE CH] : Sélectionne le réglage du verrouillage défini SiriusXM. ;...
  • Page 71: Bluetooth

    Bluetooth® Utilisation d’autres applications [XX] Défaut: • En fonction de la version Bluetooth, du système d’exploitation et de la version du micrologiciel de votre téléphone portable, la fonction Bluetooth peut ne [REMOTE APP] pas fonctionner avec cet appareil. [SELECT] [IOS] [ANDROID] Sélectionnez le périphérique ( ) pour utiliser l’application.
  • Page 72: Faites Le Pairage Et Connectez Un Périphérique Bluetooth Pour La Première Fois

    à la page 24. Recherchez et sélectionnez le nom de votre récepteur • Un maximum de deux téléphones Bluetooth et un périphérique audio (“KW-R940BTS”/“KW-X840BTS”) sur le périphérique Bluetooth. Bluetooth peuvent être connecté en même temps. Pour connecter ou “BT PAIRING” clignote sur l’affichage.
  • Page 73: Bluetooth - Téléphone Portable

    Bluetooth® Bluetooth — Téléphone portable Les opérations suivantes peuvent différer ou peuvent ne pas être disponibles en fonction du téléphone connecté. Pour Sur la façade Sur la télécommande Premier appel entrant... Répondre à un appel Appuyez sur Appuyez sur ou sur le bouton de volume.
  • Page 74: Amélioration De La Qualité Des Voix

    Bluetooth® *1 Cet ajustement n’affecte pas le volume des autres sources. [XX] Défaut: *2 Maintenez VOL + enfoncé de façon continue pour augmenter le volume sur 15. [SETTINGS] *3 Les opérations peuvent différer en fonction du périphérique Bluetooth connecté. [AUTO ANSWER] [01 SEC] [30 SEC] à ...
  • Page 75 Bluetooth® Stockage d’un contact en mémoire [PHONEBOOK] (Applicable uniquement quand le téléphone prend en charge PBAP.) Appuyez sur 1 pour choisir la lettre souhaitée (A à Z, 0 à 9, et OTHERS). Vous pouvez mémoriser un maximum de 6 contacts sur les touches numériques •...
  • Page 76: Appuyez Sur S

    • Vous pouvez connecter un maximum de deux téléphones Bluetooth et un “PIN IS 0000” défile sur l’affichage. périphérique audio Bluetooth en même temps. Recherchez et sélectionnez le nom de votre récepteur (“KW-R940BTS”/ “KW-X840BTS”) sur le périphérique Bluetooth avant 3 minutes. [DEVICE DELETE] Tournez le bouton de volume pour choisir le périphérique à...
  • Page 77: Bluetooth - Audio

    Bluetooth® Le résultat de la connectivité clignote sur l’affichage. Bluetooth — Audio “PAIRING OK” et/ou “HANDS-FREE OK” *1 et/ou “AUD.STREAM OK” *2 et/ou “PBAP OK” *3 : Compatible *1 Compatible avec le Profile mains libres (HFP) *2 Compatible avec le Profile de distribution audio avancé (A2DP) *3 Compatible avec le Profile d’accès au répertoire d’adresses (PBAP) Après 30 secondes, “PAIRING DELETED”...
  • Page 78: Amazon Alexa

    Accédez à l’URL suivant ou scannez le code QR avec votre smartphone : Appuyez répétitivement sur SOURCE B pour sélectionner iPod BT. • Vous pouvez commander iPod/iPhone de la même façon que iPod/iPhone via http://www.jvc.net/car/alexa prise d’entrée USB. (Page 9) • Si vous branchez un iPod/iPhone sur la prise d’entrée USB pendant l’écoute d’une source iPod BT, la source change automatiquement sur iPod USB.
  • Page 79 Touchez “Add Device (Ajout de périphérique)”. Touchez “Automotive Accessory (Accessoire automobile)” ou “Headphones (Casque d’écoute)” sur la liste des types de périphérique. Touchez le nom de votre autoradio (“KW-R940BTS”/“KW-X840BTS”) et suivez les instructions. Une fois le processus de configuration terminé, l’application Alexa mobile établit une connexion avec l’appareil.
  • Page 80: Réglages Audio

    Réglages audio AMAZON ALEXA Démarrez l’écoute Quand Alexa est en attente... Appuyez sur sur l’appareil pour activer Alexa. L’affichage montre: “LISTENING... ” . Communiquez avec Alexa via le microphone connecté. (Page 19) Pendant la lecture de musique avec la source ALEXA, vous pouvez réaliser les opérations suivantes.
  • Page 81: Autres Paramètres

    Réglages audio Autres paramètres [PRO EQ] Ajuste vos propres réglages sonores pour chaque source. [USER] [PRESET EQ] • Les réglages sont mémorisés sur dans Maintenez enfoncée MENU. [EASY EQ] • Les réglages réalisés peuvent affecter les réglages actuels de Tournez le bouton de volume pour sélectionner un élément (voir le tableau [62.5HZ] suivant), puis appuyez sur le bouton.
  • Page 82 Réglages audio [FADER] (Non applicable quand la transition 3 voies est sélectionnée.) [SOUND EFFECT] [POSITION R15] [POSITION F15] [POSITION 00]  à   ( ): Règle la balance de [SPACE ENHANCE] (Ne s’applique pas à la source FM/AM.) sortie des enceintes avant et arrière. [SMALL] [MEDIUM] [LARGE] : Améliore virtuellement l’espace sonore. ;...
  • Page 83 Réglages audio Réglages de sortie d’enceinte Réglages de transition [SPK/PRE OUT] Voici les options de réglage disponibles pour la transition 2 voies et la transition (Applicable uniquement si [X ‘ OVER TYPE ] est réglé sur [2-WAY]) (page 30) 3 voies. Sélectionnez le réglage de sortie pour les enceintes [SPK/PRE OUT] , sur la base de la...
  • Page 84 Réglages audio Options de réglage de la transition 2 voies [SUBWOOFER [SW LPF FRQ] [30HZ] [40HZ] [50HZ] [60HZ] [70HZ] [80HZ] LPF] [90HZ] [100HZ] [120HZ] [150HZ] [180HZ] [220HZ] [250HZ] [THROUGH] [SPEAKER SIZE] [SW LPF SLOPE] [–06DB] [–12DB] [–18DB] [–24DB] [FRONT] [SIZE] [3.5"] [4"] [4.75"]...
  • Page 85 Réglages audio Réglages de l’alignement temporel numérique [MID RANGE] [HPF FRQ] [30HZ] [40HZ] [50HZ] [60HZ] [70HZ] [80HZ] [90HZ] [100HZ] [120HZ] [150HZ] [180HZ] [220HZ] [250HZ] L’alignement temporel numérique règle la temporisation de la sortie d’enceinte [THROUGH] pour créer un environnement qui convient mieux à votre véhicule. [HPF SLOPE] [–06DB] [–12DB] •...
  • Page 86: Réglages D'affichage

    Réglages d’affichage Réglages audio Identification de zone pour les réglages de la luminosité Détermination automatique du temps de retard Si vous spécifiez la distance à partir de la position d’écoute actuellement réglée pour n’importe quelle enceinte, le temps de retard est calculé automatiquement.
  • Page 87 Réglages d’affichage Maintenez enfoncée MENU. [TEXT SCROLL] [SCROLL ONCE] : Fait défiler une fois les informations de l’affichage. ; Tournez le bouton de volume pour sélectionner un élément (voir le tableau [SCROLL AUTO] : Répète le défilement à 5 secondes d’intervalle. ; suivant), puis appuyez sur le bouton. [SCROLL OFF] : Annulation.
  • Page 88: Références

    Pour: – Les dernières mise à jour du micrologiciel et la liste de compatibilité la plus récente 2 [RED] [GREEN] [BLUE] : Choisissez une couleur primaire. – Application originale JVC 3 [00] à [31] : Sélectionnez le niveau. – Autres informations récentes [NIGHT COLOR]...
  • Page 89: Fichiers Pouvant Être Lus

    • L’ordre des morceaux affichés sur le menu de sélection de cet appareil peut être différent de celui de iPod/iPhone. • Il n’est pas possible d’utiliser un iPod lorsque “JVC” ou “ ” est affiché sur l’iPod. • En fonction de la version du système d’exploitation de l’iPod/iPhone, certaines fonctions peuvent ne pas être utilisables sur cet appareil.
  • Page 90: Changez L'information Sur L'affichage

    (Date) Durée de lecture (Date) retour au début CD/USB Pour CD-DA (applicable uniquement pour le KW-R940BTS): Nom de la source (Date) Nom de la source (Date) avec effet de Titre de plage (Artiste) Titre de plage (Artiste) avec effet de synchronisation musicale*2 retour au début...
  • Page 91: Guide De Dépannage

    Guide de dépannage Symptôme Remède Symptôme Remède Le son ne peut pas être • Ajustez le volume sur le niveau optimum. L’ordre de lecture n’est pas celui L’ordre de lecture est déterminé par l’ordre dans lequel les entendu. • Vérifiez les cordons et les connexions. que vous pensiez.
  • Page 92 Guide de dépannage Symptôme Remède Symptôme Remède “LOADING” apparaît quand Cet appareil continue de préparer la liste des morceaux de “DISCONNECTED” La prise USB est déconnectée de l’appareil principal. Assurez- vous entrez en mode de l’iPod/iPhone. Le chargement des données peut être long, vous que l’appareil est connecté...
  • Page 93 Guide de dépannage Symptôme Remède Symptôme Remède “SUBSCRIPTION UPDATED Votre abonnement a été mis à jour. Appuyez sur le bouton de Le son est interrompu ou • Réduisez la distance entre cet appareil et le lecteur audio – PRESS ENTER TO volume pour continuer.
  • Page 94: Installation/Connexion

    Contactez (USA uniquement) • Montez l’appareil avec un angle de moins de 30º. Appelez: 1-800-252-5722 ( ou ) consultez: <http://www.jvc.com> • Si le faisceau de fils de votre véhicule ne possède pas de borne d’allumage, connectez le fil d’allumage (rouge) à la borne du boîtier de fusible de votre véhicule qui offre une alimentation de 12 V CC et qui se met en et hors service avec la clé...
  • Page 95: Liste Des Pièces Pour L'installation

    Installation/Connexion Liste des pièces pour l’installation Installation de l’appareil (montage encastré) Faites l’installation sur un support de voiture en utilisant les vis fournies . Les trous de vis diffèrent en fonction du modèle de Faisceau de fils (×1) voiture. Réalisez les connexions nécessaires. (Page 44) Vis à...
  • Page 96: Connexion Recommandée

    Installation/Connexion Connexions IMPORTANTES Nous recommandons d’installer l’appareil en utilisant un harnais de câblage en vente dans le commerce recommandé spécifiquement pour votre voiture et, pour votre sécurité, de laisser ce travail a des professionnels. Consultez votre revendeur autoradio. Borne de l’antenne Tableau de bord du véhicule Fusible (10 A)
  • Page 97: Connexion D'appareils Extérieurs

    FRONT: Sortie avant Sortie de l’enceinte des commerce). (Page 15) médiums Pour KW-R940BTS: Connecteur femelle d’entrée du microphone (page 19) Sortie de caisson de grave Sortie de l’enceinte des graves Pour KW-R940BTS: Port d’extension (12 V   500 mA): Au tuner SiriusXM Vehicle optionnel (en vente dans le commerce).
  • Page 98: Spécifications

    Réponse en fréquence (±1 dB) 20 Hz — 20 kHz Séparation stéréo (1 kHz) 40 dB Taux de Signal/Bruit (1 kHz) KW-R940BTS: 98 dB AM Plage de fréquences 530 kHz — 1 700 kHz (pas de 10 kHz) KW-X840BTS: 99 dB 531 kHz — 1 611 kHz (pas de 9 kHz)
  • Page 99 Tension de fonctionnement Batterie de voiture 12 V CC Plage de fréquences 2,402 GHz — 2,480 GHz Dimensions d’installation (L × H × P) KW-R940BTS: 178 mm × 100 mm × 156 mm Puissance de sortie RF (E.I.R.P.) +4 dBm (MAX), Classe d’alimentation 2 (7-1/16 pouces × 3-15/16 pouces × 6-3/16 pouces) Portée de communication maximale Ligne de vue approximative 10 m (32,8 pieds)
  • Page 100 • Las operaciones se explican utilizando principalmente los botones de la placa Bluetooth® ....................19 frontal del KW-R940BTS. • Se utilizan indicaciones en inglés para las explicaciones. Puede seleccionar el Bluetooth - Conexión idioma de visualización desde el menú.
  • Page 101: Antes Del Uso

    Antes del uso IMPORTANTE • Para KW-R940BTS: Si ocurre un error de disco debido a la condensación en el lente láser, extraiga el disco y espere hasta que se evapore la humedad. • Antes de utilizar este producto y para asegurar su uso correcto, lea •...
  • Page 102: Puntos Básicos

    Puntos básicos Placa frontal KW-R940BTS: KW-X840BTS: Ranura de carga Ventanilla de visualización* Rueda de volumen Cómo reinicializar * Solo para fines ilustrativos. Para En la placa frontal Encender la unidad Pulse SOURCE • Pulse y mantenga pulsado para apagar la unidad.
  • Page 103: Procedimientos Iniciales

    Procedimientos iniciales Puntos básicos Mando a distancia (RM-RK52) Esta unidad puede controlarse a distancia mediante un mando a distancia adquirido a opción. Sensor remoto (DO lo exponga a la luz solar brillante.) Cancele la demostración Retire la hoja aislante cuando se Cuando enciende la unidad por primera vez (o [FACTORY RESET] está...
  • Page 104: Realice Los Ajustes Básicos

    Ajuste la fecha en el orden de “Día”  “Mes”  “Año”. Para obtener información sobre cómo actualizar el firmware, visite Pulse MENU para salir. <http://www.jvc.net/cs/car/>. Para volver al elemento de ajuste anterior, pulse [FACTORY RESET] [YES] : Se restablecen los ajustes predeterminados (excepto la emisora [NO] memorizada). ;...
  • Page 105: Radio

    Radio Ajustes en la memoria Puede almacenar hasta 18 emisoras de FM y 6 emisoras de AM en la memoria. Almacene una emisora Mientras escucha una emisora..Pulse y mantenga pulsado uno de los botones numéricos (1 a 6). Pulse y mantenga pulsada la rueda de volumen hasta que “PRESET MODE” parpadee.
  • Page 106 Radio [XX] Predeterminado: [AREA] [N.AMERICA] : Intervalos de AM/FM para América del Norte/Central/Sur: 10 kHz/200 kHz. ; [TUNER SETTING] [S.AMERICA] : Intervalos de AM/FM para algunos países de América del Sur: [RADIO TIMER] Enciende la radio a una hora específica, independientemente de la fuente actual. 10 kHz/50 kHz. ;...
  • Page 107: Cd/Usb/Ipod

    La fuente cambia automáticamente a USB y se inicia la reproducción. * No deje el cable dentro del vehículo cuando no lo esté utilizando. Fuente seleccionable: • KW-R940BTS: CD/USB/iPod USB o iPod BT • KW-X840BTS: USB/iPod USB o iPod BT ESPAÑOL...
  • Page 108 CD/USB/iPod Seleccionar Music drive Para En la placa frontal En el mando a distancia Retroceder/avanzar Pulse y mantenga pulsado Pulse y mantenga pulsado Pulse 6 MODE repetidamente mientras está en una fuente USB. rápidamente Se reproducirán las canciones almacenadas en la siguiente unidad. Seleccionar una •...
  • Page 109: Aux

    CD/USB/iPod La música de un reproductor de audio portátil se puede escuchar a través de una Búsqueda rápida (aplicable solo para fuentes CD y USB) toma de entrada auxiliar. Si existen numerosos archivos, puede realizar una búsqueda rápida. Preparativos: Pulse Seleccione [ON] para...
  • Page 110: Pandora

    Pandora® Puede escuchar Pandora en el iPhone/iPod touch (a través de Bluetooth o del En el mando a terminal de entrada USB) o dispositivo Android (a través de Bluetooth). Para En la placa frontal distancia Preparativos: Reproducción/pausa Pulse la rueda de volumen. Pulse •...
  • Page 111: Spotify

    Spotify Pandora® Puede escuchar Spotify en el iPhone/iPod touch (a través de Bluetooth o del Para marcar la información sobre la canción actual terminal de entrada USB) o dispositivo Android (a través de Bluetooth). Pulse y mantenga pulsada la rueda de volumen. Preparativos: Aparece “BOOKMARKED”...
  • Page 112 Spotify Buscar una canción o una emisora En el mando a Para En la placa frontal distancia Pulse Gire la rueda de volumen para seleccionar un tipo de lista y, a continuación, Reproducción/pausa Pulse la rueda de volumen. Pulse pulse la rueda. Saltar una pista Pulse *1 /...
  • Page 113: Radio Siriusxm

    Radio SiriusXM® Solo SiriusXM® ofrece todo lo que quiere escuchar, en un solo lugar. Con más Comience a escuchar de 140 canales, incluida música sin publicidad además de lo mejor en deportes, noticias, entrevistas, comedia y entretenimiento. Bienvenido al mundo de la radio Pulse SOURCE repetidamente para seleccionar SIRIUS XM.
  • Page 114 Radio SiriusXM® Seleccionar un canal presintonizado SmartFavorites y TuneStart™ Pulse uno de los botones numéricos (1 a 6) (o pulse J / K en el mando a Los canales presintonizados por el usuario se asignan inicialmente a los canales distancia). SmartFavorites. El canal SmartFavorite estará disponible con los sintonizadores SiriusXM modelo SXV200 o posteriores.
  • Page 115 Radio SiriusXM® TuneScan™ Para En la placa frontal Seleccionar un Pulse uno de los botones numéricos (1 a 6). Puede obtener una pequeña vista previa de las canciones que se perdió en cada canal SmartFavorite uno de los canales de música SmartFavorites o el canal de música sintonizado Pulse guardado actualmente.
  • Page 116: Uso De Otras Aplicaciones

    Repita los pasos 2 a 5 para volver a confirmar el código de acceso. Preparativos: • Tome nota del nuevo código de acceso para la próxima vez que ingrese a Antes de la conexión, instale la versión más reciente de la aplicación JVC Remote la configuración de bloqueo de canales. en su dispositivo.
  • Page 117: Bluetooth

    Bluetooth® Uso de otras aplicaciones [XX] Predeterminado: • Las funciones Bluetooth podrían no funcionar con esta unidad, dependiendo de la versión de Bluetooth, del sistema operativo y de la versión de firmware [REMOTE APP] de su teléfono móvil. [SELECT] [IOS] [ANDROID] Seleccione el dispositivo ( ) en el que desea ejecutar la aplicación.
  • Page 118 • Una vez finalizado el procedimiento, el dispositivo Bluetooth quedará registrado Pulse SOURCE para encender la unidad. en la unidad aunque la reinicialice. Para borrar el dispositivo emparejado, Busque y seleccione el nombre de su receptor (“KW-R940BTS”/“KW-X840BTS”) consulte [DEVICE DELETE] en la página 24.
  • Page 119: Bluetooth - Teléfono Móvil

    Bluetooth® Bluetooth — Teléfono móvil Las siguientes operaciones pueden diferir o no estar disponibles dependiendo del teléfono que se haya conectado. Para En la placa frontal En el mando a distancia Primera llamada entrante... Contestar una llamada Pulse o la rueda Pulse de volumen.
  • Page 120: Realizar Una Llamada

    Bluetooth® *1 Este ajuste no influirá en el volumen del resto de las fuentes. [XX] Predeterminado: *2 Pulse y mantenga pulsado VOL + para aumentar continuamente el volumen a 15. [SETTINGS] *3 Las operaciones pueden variar dependiendo del dispositivo Bluetooth conectado. [AUTO ANSWER] [01 SEC] [30 SEC] a ...
  • Page 121: Almacenar Un Contacto En La Memoria

    Bluetooth® Almacenar un contacto en la memoria [PHONEBOOK] (Solo si el teléfono es compatible con PBAP.) Pulse 1 para seleccionar la letra que desee (A a Z, 0 a 9, y OTHERS). Puede guardar hasta 6 contactos en los botones numéricos (1 a 6). •...
  • Page 122 Bluetooth a la vez. “PIN IS 0000” se desplazan en la pantalla. Busque y seleccione el nombre de su receptor (“KW-R940BTS”/“KW-X840BTS”) [DEVICE DELETE] Gire la rueda de volumen para seleccionar el dispositivo a eliminar y, a en el dispositivo Bluetooth en el lapso de 3 minutos.
  • Page 123: Bluetooth - Audio

    Bluetooth® El resultado de la conectividad parpadea en la pantalla. Bluetooth — Audio “PAIRING OK” y/o “HANDS-FREE OK” *1 y/o “AUD.STREAM OK” *2 y/o “PBAP OK” *3 : Compatible *1 Compatible con el Perfil Manos Libres (HFP, Hands-Free Profile) *2 Compatible con el Perfil Avanzado de Distribución de Audio (A2DP, Advanced Audio Distribution Profile) *3 Compatible con el Perfil de acceso a la guía telefónica (PBAP, Phonebook Access Profile) Después de 30 segundos, aparece “PAIRING DELETED”...
  • Page 124: Amazon Alexa

    Acceda a la siguiente URL o escanee el código QR con su smartphone: Pulse SOURCE B repetidamente para seleccionar iPod BT. http://www.jvc.net/car/alexa • Puede operar el iPod/iPhone de la misma forma en que lo hace cuando el iPod/ iPhone está conectado a través del terminal de entrada USB. (Página 9) •...
  • Page 125 Toque “Add Device (Añadir dispositivo)”. Toque “Automotive Accessory (Accesorio automotriz)” o “Headphones (Auriculares)” en la lista de tipos de dispositivos. Toque el nombre de su receptor (“KW-R940BTS”/“KW-X840BTS”) y siga las instrucciones. Una vez completado el proceso de configuración, la aplicación móvil de Alexa establecerá...
  • Page 126: Ajustes De Audio

    Ajustes de audio AMAZON ALEXA Comience a escuchar Cuando Alexa está en estado de inactividad... Para activar Alexa, pulse en la unidad. En la pantalla se muestra: “LISTENING... ” . Comuníquese con Alexa a través del micrófono conectado. (Página 19) Puede realizar las siguientes operaciones durante la reproducción de música de la fuente ALEXA: Para En la placa frontal...
  • Page 127 Ajustes de audio Otros ajustes [PRO EQ] Configura sus propios ajustes de sonido para cada fuente. [USER] [PRESET EQ] • Los ajustes se guardan en para Pulse y mantenga pulsado MENU. [EASY EQ] • Los ajustes realizados afectan a los ajustes actuales de Gire la rueda de volumen para seleccionar un elemento (consulte la [62.5HZ] siguiente tabla) y, a continuación, pulse la rueda.
  • Page 128 Ajustes de audio [FADER] (No aplicable si se ha seleccionado crossover de 3 vías.) [SOUND EFFECT] [POSITION R15] [POSITION F15] [POSITION 00]  a   ( ): Ajusta el balance de [SPACE ENHANCE] (No aplicable para la fuente FM/AM.) salida de los altavoces delanteros y traseros. [SMALL] [MEDIUM] [LARGE]...
  • Page 129 Ajustes de audio Ajustes salida altavoz Ajustes de crossover [SPK/PRE OUT] A continuación se describen los elementos de ajuste disponibles para crossover (Aplicable solo si [X ‘ OVER TYPE ] está ajustado a [2-WAY]) (página 30) de 2 vías y crossover de 3 vías. Seleccione la configuración de salida para los altavoces [SPK/PRE OUT] , basándose...
  • Page 130 Ajustes de audio Elementos de ajuste de crossover de 2 vías [SUBWOOFER [SW LPF FRQ] [30HZ] [40HZ] [50HZ] [60HZ] [70HZ] [80HZ] LPF] [90HZ] [100HZ] [120HZ] [150HZ] [180HZ] [220HZ] [250HZ] [THROUGH] [SPEAKER SIZE] [SW LPF SLOPE] [–06DB] [–12DB] [–18DB] [–24DB] [FRONT] [SIZE] [3.5"] [4"]...
  • Page 131 Ajustes de audio Ajustes de la alineación del tiempo digital [MID RANGE] [HPF FRQ] [30HZ] [40HZ] [50HZ] [60HZ] [70HZ] [80HZ] [90HZ] [100HZ] [120HZ] [150HZ] [180HZ] [220HZ] [250HZ] La Alineación de Tiempo Digital ajusta el tiempo de retardo de la salida de los [THROUGH] altavoces creando un entorno más adecuado para su vehículo.
  • Page 132: Ajustes De Visualización

    Ajustes de visualización Ajustes de audio Identificación de zonas para los ajustes de brillo Cómo determinar automáticamente el tiempo de retraso Si especifica la distancia a cada altavoz desde la posición de escucha actualmente establecida, el tiempo de retraso se calcula automáticamente. Configure [POSITION] y determine la posición...
  • Page 133 Ajustes de visualización Pulse y mantenga pulsado MENU. [TEXT SCROLL] [SCROLL ONCE] : Desplaza una vez la información en pantalla. ; Gire la rueda de volumen para seleccionar un elemento (consulte la [SCROLL AUTO] : El desplazamiento se repite a intervalos de 5 segundos. ; siguiente tabla) y, a continuación, pulse la rueda.
  • Page 134: Referencias

    Para: – Últimas actualizaciones de firmware y lista de los últimos elementos compatibles Selecciona una zona ( [ZONE 1] [ZONE 2] ). (Véase la ilustración en la – Aplicación original JVC página 34.) – Cualquier otra información más reciente 2 [RED] [GREEN] [BLUE] : Seleccione un color primario.
  • Page 135: Acerca Del Ipod/Iphone

    • El orden de canciones mostrado en el menú de selección de esta unidad puede diferir del que se encuentra en el iPod/iPhone. • El iPod no se puede utilizar si se visualiza “JVC” o “ ” en el iPod. • Según la versión del sistema operativo del iPod/iPhone, algunas funciones podrían no estar disponibles en esta unidad.
  • Page 136: Cambiar La Información En Pantalla

    (Estado) Nombre de la categoría (Estado) Fecha (Estado) vuelta al comienzo CD/USB Para CD-DA (aplicable solo para KW-R940BTS): Título de la pista (Artista) Título de la pista (Artista) con efecto de BT AUDIO/ALEXA Título de la canción (Artista) Título de la canción (Artista) con efecto sincronización de música*2...
  • Page 137: Localización Y Solución De Problemas

    Localización y solución de problemas Síntoma Solución Síntoma Solución El sonido no se escucha. • Ajuste el volumen al nivel óptimo. El orden de reproducción no es El orden de reproducción se determina por el orden en que • Inspeccione los cables y las conexiones. el que se esperaba.
  • Page 138 Localización y solución de problemas Síntoma Solución Síntoma Solución “LOADING” aparece al acceder Esta unidad está preparando todavía la lista de música del “DISCONNECTED” El USB está desconectado de la unidad cabezal. Por favor al modo búsqueda iPod/iPhone. Puede que tarde un poco, inténtelo de nuevo más asegúrese de que el dispositivo esté...
  • Page 139 Localización y solución de problemas Síntoma Solución Síntoma Solución “SUBSCRIPTION UPDATED Su suscripción ha sido actualizada. Para continuar, pulse la rueda El sonido se interrumpe o se • Reduzca la distancia entre la unidad y el reproductor de audio – PRESS ENTER TO de volumen.
  • Page 140: Instalación/Conexión

    • Si el mazo de conductores de su vehículo no dispone de terminal de encendido, conecte el cable de Llame al: 1-800-252-5722 ( o ) visite: <http://www.jvc.com> encendido (rojo) al terminal de la caja de fusibles del vehículo, el cual suministrará una alimentación de 12 V CC y podrá...
  • Page 141: Lista De Piezas Para La Instalación

    Instalación/Conexión Lista de piezas para la instalación Instalación de la unidad (montaje en el tablero) Instálelo sobre los soportes para coche utilizando tornillos suministrados . Los orificios de los tornillos difieren entre los Mazo de conductores (×1) modelos de coches. Prepare el cableado necesario.
  • Page 142: Conexión Del Cableado

    Instalación/Conexión Conexión del cableado IMPORTANTE Se recomienda instalar la unidad con un mazo de cables disponible en el mercado que sea adecuado para su automóvil y, para fines de seguridad, deje esta tarea en manos de profesionales. Consulte con un distribuidor de productos de audio para automóviles. Terminal de la antena Salpicadero del vehículo...
  • Page 143 Salida posterior Salida del tweeter (disponible en el mercado). (Página 15) FRONT: Salida frontal Salida de rango medio Para KW-R940BTS: Jack de entrada de micrófono (página 19) SW : Salida del subwoofer Salida del woofer Para KW-R940BTS: Puerto de expansión (12 V ...
  • Page 144: Especificaciones

    Respuesta de frecuencia (±3 dB) 30 Hz — 15 kHz Respuesta de frecuencia (±1 dB) 20 Hz — 20 kHz Relación señal a ruido (MONO) 64 dB Relación señal a ruido (1 kHz) KW-R940BTS: 98 dB KW-X840BTS: 99 dB Separación estéreo (1 kHz) 40 dB Gama dinámica 93 dB AM Gama de frecuencias 530 kHz —...
  • Page 145 50 W × 2 + 50 W × 1 (Subwoofer = 4 Ω) Potencia en todo el ancho de banda 22 W × 4 (a menos del 1 % THD) Impedancia del altavoz 4 Ω — 8 Ω Nivel de salida de preamplificador/carga KW-R940BTS: 4 000 mV/10 kΩ KW-X840BTS: 2 500 mV/10 kΩ Impedancia de salida de preamplificador ≤ 600 Ω ESPAÑOL...
  • Page 148 • Microsoft and Windows Media are either registered trademarks or trademarks of Microsoft Corporation in the United States and/or other countries. • Use of the Made for Apple badge means that an accessory has been designed to connect specifically to the Apple product(s) identified in the badge and has been certified by the developer to meet Apple performance standards.

Ce manuel est également adapté pour:

Kw-x840bts

Table des Matières