Husqvarna T435 Manuel D'utilisation
Masquer les pouces Voir aussi pour T435:
Table des Matières

Publicité

Les langues disponibles
  • FR

Les langues disponibles

  • FRANÇAIS, page 64

Liens rapides

EN
Operator's manual
DE
Bedienungsanweisung
FR
Manuel d'utilisation
NL
Gebruiksaanwijzing
IT
Manuale dell'operatore
ES
Manual de usuario
PT
Manual do utilizador
SL
Navodila za uporabo
2-31
32-63
64-96
97-127
128-160
161-193
194-225
226-255
T435

Publicité

Table des Matières
loading

Sommaire des Matières pour Husqvarna T435

  • Page 1 T435 Operator's manual 2-31 Bedienungsanweisung 32-63 Manuel d'utilisation 64-96 Gebruiksaanwijzing 97-127 Manuale dell'operatore 128-160 Manual de usuario 161-193 Manual do utilizador 194-225 Navodila za uporabo 226-255...
  • Page 2: Table Des Matières

    Introduction Intended use Product description This product is for professional tree maintenance such The Husqvarna T435 is a chainsaw model with a as pruning and to disassemble tree crowns. combustion engine. Work is constantly in progress to increase your safety Note: National regulations can set limit to the operation and efficiency during operation.
  • Page 3: Symbols On The Product

    9. Starter rope handle 10. Front handle 11. Chain oil tank Air purge bulb. 12. Oil pump adjustment screw 13. Air purge bulb 14. Choke Adjustment of the oil pump. 15. Throttle trigger lockout 16. Throttle trigger 17. Start/stop switch Fuel.
  • Page 4: Safety

    EU V Note: Other symbols/decals on the product refer to certification requirements for some markets. WARNING: Tampering with the engine voids the EU type-approval of this product. Safety Safety definitions you get into a situation where you feel unsafe, stop and seek expert advice.
  • Page 5 • Never use the product if you are fatigued, while effect of kickback and lets you keep the chainsaw under the influence of alcohol or drugs, medication under control. Do not let go of the handles! or anything that could affect your vision, alertness, coordination or judgement.
  • Page 6: Personal Protective Equipment

    Do not • Always have a first-aid kit with you. hesitate to contact your dealer or Husqvarna if you • Risk of sparks. Keep fire extinguishing tools and a have any questions about the use of the chainsaw.
  • Page 7: Fuel Safety

    handle and press the throttle trigger lockout (A), it Muffler releases the throttle trigger (B). If you release the WARNING: The muffler becomes very hot handle, the throttle trigger and the throttle trigger lockout during/after operation and at idle speed. move back to their initial positions.
  • Page 8: Safety Instructions For Maintenance

    • Always move the product at least 3 m (10 ft) away • Use protective gloves when you use or do from the refuelling area and fuel source before maintenance on the saw chain. A saw chain that starting. does not move can also cause injuries. •...
  • Page 9: Assembly

    Assembly Introduction 6. Align the hole in the guide bar with the chain adjuster pin and install the clutch cover. WARNING: Read and understand the safety chapter before you assemble the product. To assemble the guide bar and saw chain 1.
  • Page 10 • For best results and performance use Husqvarna two-stroke oil. • If Husqvarna two-stroke oil is not available, use a two-stroke oil of good quality for air-cooled engines. Speak to your servicing dealer to select the correct oil. CAUTION: Do not use two-stroke oil for water-cooled outboard engines, also referred to as outboard oil.
  • Page 11 It is how you use the product when the kickback occurs that causes • Use Husqvarna chain oil for maximum saw chain life the direction of the movement. and to prevent negative effects on the environment.
  • Page 12: To Start The Product

    Common questions about kickback 1. Move the front hand guard forward to engage the chain brake. • Will the hand always engage the chain brake during a kickback? No. It is necessary to use some force to push the front hand guard forward. If you do not use the force necessary, the chain brake will not be engaged.
  • Page 13 1. Move the front hand guard forward to engage the 4. Pull the starter rope handle slowly with your right chain brake. hand until you feel resistance. 2. Push the air purge bulb about 6 times or until fuel starts to fill the bulb. It is not necessary to fill the air WARNING: Do not twist the starter cord purge bulb fully.
  • Page 14: To Stop The Product

    To start the product in the tree Note: Make sure that you have sufficient fuel before you start the product. 1. Engage the chain brake. 2. Hold the product on the left or right side of your body when you start the product. a) If you hold the product on your left side, put your left hand on the front handle.
  • Page 15 1. Before you disconnect the safety strop from the ascent tools, you must attach the product to the harness. Attach the product to the harness through the belt eyelet or a steel ring on the safety strop. To prepare the product for operation in the tree Ground operator As a ground operator, do the following steps.
  • Page 16 • Make sure that you are stable on your feet and keep WARNING: You must engage the chain a low lateral force when you cut vertical branches. brake when you lower the product onto Steer the safety line through a different connection its strop.
  • Page 17: Maintenance

    Maintenance Introduction WARNING: Read and understand the safety chapter before you do maintenance on the product. Maintenance schedule Daily maintenance Weekly maintenance Monthly maintenance Clean the external parts of the prod- Clean the cooling system. Refer to Do a check of the brake band. Refer To clean the cooling system on page To do a check of the brake band uct and make sure that there is no oil...
  • Page 18 Daily maintenance Weekly maintenance Monthly maintenance Make sure that these are no fuel leaks from the engine, tank or fuel lines. Make sure that the saw chain does not rotate when the engine is at idle speed. Make sure that the muffler is correct- ly attached, has no damages and that no parts of the muffler are miss- ing.
  • Page 19 To do a check of the throttle trigger and the 2. Make sure that the chain catcher is stable and attached to the body of the product. throttle trigger lockout 1. Make sure that the throttle trigger and throttle trigger lockout move freely and that the return spring works correctly.
  • Page 20: Carburetor Adjustment

    3. Loosen the screws and nuts. fumes from your product. You can only turn the adjustment screws maximum ½ turn. 4. Remove the muffler and make sure that it is not defective. 5. Assemble the muffler and make sure that it is Basic adjustments and run-in correctly attached to the product.
  • Page 21 To adjust the high speed needle (H) 4. Let the pulley rotate slowly rearward to release the recoil spring. The engine is adjusted at the factory to operate at sea level. At higher altitudes, in different weather or different temperatures it can be necessary to adjust the high speed needle.
  • Page 22 Replace a worn or damaged guide bar or saw chain with the guide bar and saw chain combination recommended by Husqvarna. This is necessary to keep the safety Accessories on page functions of the product. Refer to 30 , for a list of replacement bar and chain combinations that we recommend.
  • Page 23 • File position. • Drive link width, mm/in. • Round file diameter. It is not easy to sharpen a saw chain correctly without the correct equipment. Use Husqvarna file gauge. This 733 - 002 -...
  • Page 24 Decrease the pressure on the pull stroke. 1. Use a flat file and a depth gauge tool to adjust the depth gauge setting. Only use Husqvarna depth gauge tool to get the correct depth gauge setting and bevel for the depth gauge.
  • Page 25 1. Loosen the bar nuts that hold the clutch cover/chain 3. If the saw chain lubrication is correct, you see a clear brake. Use a wrench. line of oil on the surface after 1 minute. Note: Some models have only one bar nut. 2.
  • Page 26 4. Remove the clutch drum and lubricate the needle 2. Examine if there are burrs on the edges of the guide bearing with a grease gun. Use engine oil or a bar. Remove the burrs using a file. bearing grease of high quality. 3.
  • Page 27: Troubleshooting

    To do maintenance on the fuel tank To clean the cooling system and the chain oil tank The cooling system keeps the engine temperature down. The cooling system includes the air intake on the • Drain and clean the fuel tank and the chain oil tank starter (A), the air guide plate (B), the pawls on the regularly.
  • Page 28: Transportation And Storage

    Product part to examine Possible cause Action Ignition, no spark The spark plug is dirty or wet. Make sure that the spark plug is dry and clean. The electrode gap is incorrect. Clean the spark plug. Make sure that the electrode gap and spark plug is correct, and that the correct spark plug type is the recommended or equivalent.
  • Page 29: Technical Data

    4. Do a complete servicing of the product. Technical data Technical data Husqvarna T435 Engine Cylinder displacement, cm 35.2 Idle speed, rpm 2900 Maximum engine power acc. to ISO 8893, kW/hp @ rpm 1.5/2.0@10000 Ignition system Spark plug NGK CMR6H Electrode gap, mm 0.65...
  • Page 30: Accessories

    If you are not sure how to identify the type of saw chain on your product, refer to www.husqvarna.com for more Use a Husqvarna file gauge to sharpen the saw chain. A information. Husqvarna file gauge makes sure that you get the 5/32 in / 4.0 mm...
  • Page 31: Ec Declaration Of Conformity

    EC Declaration of conformity Husqvarna AB, SE-561 82 Huskvarna, Sweden, tel: +46-36-146500, declares under sole responsibility that the chainsaw for tree-service Husqvarna T435 from 2016’s serial numbers and onwards (the year is clearly stated in plain text on the type plate with subsequent serial number), are in conformity with the requirements of the COUNCIL’S DIRECTIVES:...
  • Page 32: Produktübersicht

    EG-Konformitätserklärung..........63 Einleitung Verwendungszweck Produktbeschreibung Dieses Produkt ist für die professionelle Baumpflege wie Husqvarna T435 ist ein Motorsägenmodell mit einem das Auslichten von Bäumen und das Zerlegen von Verbrennungsmotor. Baumkronen konzipiert. Wir arbeiten laufend daran, Ihre Sicherheit und die Effektivität während des Betriebs zu verbessern. Ihr Hinweis: Der Betrieb des Geräts kann durch nationale...
  • Page 33: Symbole Auf Dem Gerät

    7. Zündkerze/Zündkappe Kettenbremse, aktiviert (rechts). 8. Startvorrichtungsgehäuse Kettenbremse, ausgeschaltet (links). 9. Startseilgriff 10. Vorderer Handgriff 11. Kettenöltank 12. Stellschraube, Ölpumpe Kraftstoffpumpe 13. Kraftstoffpumpe 14. Choke Einstellen der Ölpumpe. 15. Gashebelsperre 16. Gashebel 17. Start-/Stoppschalter Kraftstoff. 18. Führungsschiene 19. Sägekette 20. Umlenkstern 21.
  • Page 34: Sicherheit

    EU V yyyywwxxxx Das Typenschild zeigt die Seriennummer. JJJJ ist das Produktionsjahr, ww WARNUNG: Bei einem Eingriff in den Motor ist die Produktionswoche. erlischt die EU-Typgenehmigung für dieses Produkt. Hinweis: Sonstige Symbole/Aufkleber am Gerät beziehen sich auf Zertifizierungsanforderungen, die in bestimmten Ländern gelten.
  • Page 35 geschult wurden. Dazu zählen auch Schulungen für Führungsschiene und Sägekette kann sich die die Verwendung von Sicherheits- und Kupplung lösen und schwere Schäden verursachen. Kletterausrüstung, wie z. B. Gurtzeug, Seile, Gurte, Steigeisen, Hackensprengringen, Karabinerhacken usw. • Versuchen Sie nie, fallendes Schnittgut aufzufangen. Sägen Sie nie in den Baum, wenn Sie mit nur einem Seil gesichert sind.
  • Page 36: Persönliche Schutzausrüstung

    Sie einen Fachmann um Rat, bevor Sie fortfahren. Zögern Sie nicht, Ihren Händler • Verwenden Sie die Motorsäge niemals über oder Husqvarna anzusprechen, wenn Sie Fragen Schulterhöhe. bezüglich dem Gebrauch der Motorsäge haben. Wir sind gerne für Sie da und helfen Ihnen beim optimalen und sicheren Einsatz Ihrer Motorsäge.
  • Page 37 Prüfung der Sicherheitseinrichtungen auf dem Gerät auf Seite 49 . • Wenn die Sicherheitsvorrichtungen defekt sind, wenden Sie sich an Ihre Husqvarna- Servicewerkstatt. Kettenbremse mit Handschutz Ihr Gerät ist mit einer Kettenbremse versehen, welche die Sägekette bei einem Rückschlag stoppt. Die Kettenbremse verringert die Unfallgefahr nur, wenn Sie selbst die erforderlichen Vorsichtsmaßnahmen...
  • Page 38: Sicherer Umgang Mit Kraftstoff

    Sicherer Umgang mit Kraftstoff richtige Anwendung der Wartung der Sägekette und Führungsschiene verringern die Gefahr von Unfällen. WARNUNG: Lesen Sie die folgenden Warnhinweise, bevor Sie das Gerät benutzen. • Beim Tanken und Mischen von Kraftstoff (Benzin und Zweitaktöl) ist für gute Belüftung zu sorgen. •...
  • Page 39: Sicherheitshinweise Für Die Wartung

    Sicherheitshinweise für die Wartung • Behalten Sie den korrekten Tiefenbegrenzerabstand bei. Befolgen Sie die Anweisungen und verwenden Sie die empfohlene Tiefenbegrenzereinstellung. Ein zu großer Tiefenbegrenzerabstand erhöht die WARNUNG: Lesen Sie die folgenden Warnhinweise, bevor Sie das Gerät warten. Rückschlaggefahr. • Sie dürfen nur die Wartungs- und Servicearbeiten ausführen, die in dieser Bedienungsanleitung beschrieben sind.
  • Page 40: Betrieb

    7. Ziehen Sie die Schienenmutter von Hand fest an. Hinweis: Wenn der Kupplungsdeckel nicht einfach zu entfernen ist, schrauben Sie die Schienenmutter 8. Spannen Sie die Sägekette. Eine Anleitung finden So stellen Sie die Spannung der Sägekette ein Sie in fest, aktivieren Sie die Kettenbremse und lösen Sie auf Seite 56 .
  • Page 41: Kraftstoff

    8. Stellen Sie sicher, dass der Kettenfänger richtig • Wenn Husqvarna Zweitaktöl nicht verfügbar ist, angebracht ist. verwenden Sie ein qualitativ hochwertiges Zweitaktöl für luftgekühlte Motoren. Wenden Sie sich an Ihren 9. Stellen Sie sicher, dass die Sägekette die richtige Kundendienst zur Auswahl der richtigen Ölsorte.
  • Page 42 So füllen Sie den Kraftstofftank • Verwenden Sie Husqvarna Kettenöl, um die maximale Lebensdauer der Sägekette zu 1. Säubern Sie den Bereich rund um den Tankdeckel. gewährleisten und negative Auswirkungen auf die Umwelt zu vermeiden. Wenn Husqvarna Kettenöl nicht verfügbar ist, empfehlen wir, ein Standardkettenöl zu verwenden.
  • Page 43 aber auch in eine andere Richtung. Sie beeinflussen die Nein, die Kettenbremse muss richtig funktionieren, Richtung der Bewegung durch Ihr Verhalten beim um Schutz zu bieten. Die Kettenbremse muss bei Auftreten des Rückschlags. einem Rückschlag auch aktiviert werden, damit sie die Kette anhält.
  • Page 44 4. Bringen Sie den Choke in Choke-Lage. WARNUNG: Wenn sich die Sägekette im Leerlauf dreht, sprechen Sie mit Ihrem Kundendienst, und benutzen Sie das Gerät nicht. 1. Stellen Sie das Produkt auf dem Boden ab. 2. Legen Sie die linke Hand auf den vorderen Griff. 3.
  • Page 45 zum Tode des Benutzers oder anderer 7. Bewegen Sie den Handschutz nach hinten, um die Kettenbremse zu lösen. Personen kommen. • Setzen Sie die volle Leistung beim Schneiden ein und reduzieren Sie die Geschwindigkeit nach jedem Schnitt in den Leerlauf. ACHTUNG: Am Motor können Schäden auftreten, wenn der Motor zu lange mit voller Leistung ohne Last läuft.
  • Page 46 • Beim Sägen mit „schiebender“ Kette sägen Sie mit 6. Halten Sie das Gerät an. der Oberseite der Führungsschiene. Die Sägekette 7. Aktivieren Sie die Kettenbremse. schiebt das Gerät in der Richtung des Bedieners. 8. Heben Sie das Gerät mit Hebewerkzeugen zum Bediener im Baum an.
  • Page 47 5. Aktivieren Sie die Kettenbremse direkt nachdem der • Überprüfen Sie in regelmäßigen Abständen das Schnitt gemacht wurde. Gurtzeug, den Gurt und die Seile. • Wenn Sie mit dem Gerät klettern müssen, befestigen 6. Schalten Sie das Gerät aus und verbinden Sie es Sie das Gerät an dem hinteren Verbindungspunkt am sekundären Verbindungspunkt.
  • Page 48: Wartung

    Wartung Einleitung WARNUNG: Lesen Sie vor dem Warten des Geräts das Kapitel über Sicherheit, und machen Sie sich damit vertraut. Wartungsplan Tägliche Wartung Wöchentliche Wartung Monatliche Wartung Reinigen Sie die äußeren Bauteile Reinigen Sie das Kühlsystem. Siehe Prüfen Sie das Bremsband. Siehe So reinigen Sie das Kühlsystem auf kontrollieren Sie das Bremsband auf des Geräts und achten Sie darauf,...
  • Page 49 Tägliche Wartung Wöchentliche Wartung Monatliche Wartung Überprüfen Sie, ob alle Muttern und Schrauben angezogen sind. Prüfen Sie den Start-/Stopp-Schalter. So prüfen Sie den Start-/ Siehe Stopp-Schalter auf Seite 50 . Stellen Sie sicher, dass von Motor, Tank oder Kraftstoffleitungen kein Kraftstoff ausläuft.
  • Page 50 So überprüfen Sie den Gashebel und die 2. Stellen Sie sicher, dass der Kettenfänger stabil und am Körper des Geräts angebracht ist. Gashebelsperre 1. Prüfen Sie, ob sich der Gashebel und die Gashebelsperre frei bewegen lassen und ob die Rückholfeder korrekt funktioniert. So prüfen Sie das Antivibrationssystem 1.
  • Page 51: Vergasereinstellung

    3. Schrauben und Muttern lösen. können die Einstellschrauben nur die max. ½ Umdrehung drehen. 4. Entfernen Sie den Schalldämpfer und stellen Sie sicher, dass er nicht defekt ist. 5. Montieren Sie den Schalldämpfer und stellen Sie Grundlegende Einstellungen und Einfahren sicher, dass er richtig am Gerät befestigt ist.
  • Page 52 3. Ziehen Sie das Startseil ca. 30 cm/12 Zoll heraus, WARNUNG: Wenn Sie die Schraube für und setzen Sie es in die Aussparung an der niedrige Drehzahl drehen und die Sägekette Riemenscheibe ein. nicht anhält, wenden Sie sich an den nächsten Servicehändler.
  • Page 53 3. Stellen Sie sicher, dass Sie die Riemenscheibe noch 3. Befestigen Sie den Luftfilter wieder und achten Sie ½ Umdrehung drehen können, nachdem das darauf, dass der Luftfilter völlig dicht am Filterhalter Startseil vollständig ausgefahren ist. anliegt. Hinweis: Aufgrund der unterschiedlichen So montieren Sie das Arbeitsbedingungen, Wetterlagen und Jahreszeiten kann Ihr Gerät mit verschiedenen Arten von Luftfiltern...
  • Page 54 Tauschen Sie abgenutzte oder beschädigte Führungsschienen und Sägeketten mit den von • Nutbreite der Schiene, mm. Die Nutbreite der Husqvarna empfohlenen Kombinationen von Schiene muss identisch mit der Breite der Führungsschienen und Sägeketten aus. Dies ist Treibglieder der Kette sein.
  • Page 55 Der Tiefenbegrenzerabstand (C) nimmt ab, wenn Sie Ohne Hilfsmittel ist es nicht leicht, eine Sägekette den Schneidezahn (A) schärfen. Um die maximale korrekt zu schärfen. Verwenden Sie Husqvarna Schneidleistung zu erhalten, müssen Sie Feilmaterial Schärflehre. Dies hilft Ihnen, die maximale von der Tiefenbegrenzerlehre (B) entfernen, um den Schneidleistung zu erhalten und die Rückschlaggefahr...
  • Page 56 Führungsschiene sitzt, sich aber noch immer einfach 1. Verwenden Sie eine Flachfeile und eine Schärflehre bewegen kann. zum Einstellen des Tiefenbegrenzerabstands. Verwenden Sie nur die Husqvarna Schärflehre für den Tiefenbegrenzerabstand, um das korrekte Maß und den richtigen Winkel für den Tiefenbegrenzer zu erhalten.
  • Page 57 Produktübersicht auf Seite 32 finden Sie die Unter Hinweis: Einige Modelle haben nur eine Position der Kettenspannschraube an Ihrem Gerät. Schienenmutter. So prüfen Sie die Schmierung der 3. Setzen Sie das Gerät auf einem stabilen Untergrund Sägekette mit der Kupplungstrommel nach oben ab. 4.
  • Page 58 So prüfen Sie die Führungsschiene 6. Kontrollieren Sie, ob der Umlenkstern der Führungsschiene sich leicht bewegen lässt und sein 1. Stellen Sie sicher, dass die Ölleitung nicht verstopft Schmierloch offen ist. Reinigen und schmieren Sie ist. Reinigen Sie sie, falls dies notwendig ist. ihn bei Bedarf.
  • Page 59: Fehlersuche

    So reinigen Sie das Kühlsystem ACHTUNG: Eine Verschmutzung oder Verstopfung des Kühlsystems führt zur Das Kühlsystem hält die Motortemperatur niedrig. Das Überhitzung des Gerätes, was das Gerät Kühlsystem umfasst den Lufteinlass am Anlasser (A), beschädigen kann. die Luftleitplatte (B), die Starterklinken am Schwungrad (C), den Kühlkanal(D) und den Kupplungsdeckel (E).
  • Page 60: Transport Und Lagerung

    Zu überprüfendes Bauteil des Pro- Mögliche Ursache Maßnahme dukts Zündkerze und Zylinder Die Zündkerze sitzt lose. Zündkerze festziehen. Die Maschine ist „abgesoffen“ auf- Entfernen und reinigen Sie die Zünd- grund von wiederholten Starts mit kerze. Legen Sie das Produkt auf die vollständigem Choke nach der Zün- Seite, sodass die Zündkerzenöffnung dung.
  • Page 61: Technische Daten

    Technische Daten Technische Angaben Husqvarna T435 Motor Hubraum, cm 35,2 Leerlaufdrehzahl, U/min 2900 Motorhöchstleistung nach ISO 8893, kW/PS bei U/min 1,5/2,0 @ 10000 Zündanlage Zündkerze NGK CMR6H Elektrodenabstand, mm 0,65 Kraftstoff- und Schmiersystem Füllmenge Kraftstofftank, l/cm 0,26/260 Füllmenge Kraftstofftank, l/cm 0,17/170 Ölpumpe, Typ...
  • Page 62: Zubehör

    Zubehör Empfohlene Schneidausrüstung mit den unten aufgeführten Kombinationen aus Führungsschiene und Sägekette. Das Motorsägenmodell Husqvarna T435 wurde auf Sägekette mit geringem Rückschlag Sicherheit gemäß EN ISO 11681-2:2011/A1:2017 geprüft (Maschinen für die Forstwirtschaft: Tragbare Eine Kette mit niedrigem Rückschlag erfüllt die Kriterien Kettensägen –...
  • Page 63: Eg-Konformitätserklärung

    Dokumentation) +46-36-146500, erklären hiermit unsere alleinige Haftung dafür, dass die Motorsäge für die Baumpflege Husqvarna T435, auf die sich diese Erklärung bezieht, von den Seriennummern des Baujahrs 2016 an (die Jahreszahl wird im Klartext auf dem Typenschild...
  • Page 64: Utilisation Prévue

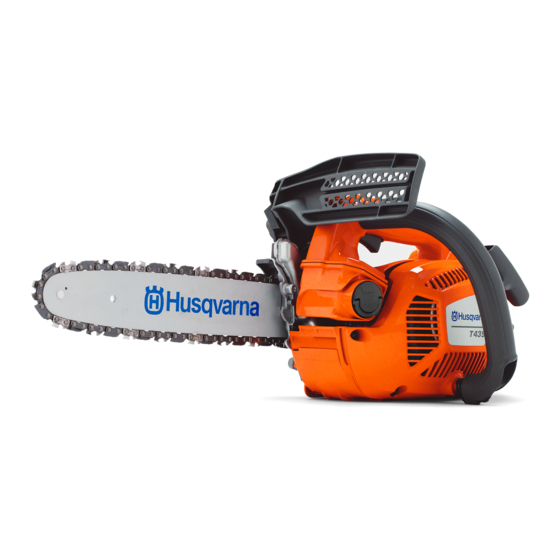
    Introduction Utilisation prévue Description du produit Ce produit est conçu pour l'entretien arboricole La Husqvarna T435 est un modèle de tronçonneuse professionnel comme l'élagage et la coupe des équipé d'un moteur à combustion. couronnes d'arbres. Nous travaillons en permanence à l'amélioration de votre sécurité...
  • Page 65: Symboles Concernant Le Produit

    7. Bougie/chapeau de bougie Frein de chaîne, serré (droite). Frein de 8. Corps du lanceur chaîne, desserré (gauche). 9. Poignée du câble du démarreur 10. Poignée avant 11. Réservoir d’huile pour chaîne 12. Vis de réglage de la pompe à huile Poire de la pompe à...
  • Page 66: Sécurité

    UE V yyyywwxxxx La plaque signalétique in- dique le numéro de série. yyyy est l'année de pro- AVERTISSEMENT: toute altération du duction et ww est la sem- moteur a pour effet d'annuler l'homologation aine de production. de type UE de ce produit. Remarque: les autres symboles/autocollants présents sur le produit concernent des exigences de certification spécifiques à...
  • Page 67 professionnelle spécifique à un tel travail, incluant l'embrayage peut se détacher et causer des une formation relative à l'utilisation d'un équipement blessures graves. de sécurité et autre équipement de grimpée comme des harnais, des cordages, des ceintures, des étriers, des mousquetons, etc. •...
  • Page 68: Équipement De Protection Individuelle

    à suivre, demandez conseil à un expert avant de poursuivre. N'hésitez pas à prendre contact avec votre revendeur ou Husqvarna si vous avez des questions sur l'utilisation de la tronçonneuse. Nous sommes à votre disposition et vous conseillerons avec plaisir pour vous aider à...
  • Page 69: Dispositifs De Sécurité Sur Le Produit

    • Si les dispositifs de sécurité sont défectueux, parlez- ralenti. en à votre atelier d'entretien Husqvarna. Frein de chaîne avec arceau protecteur Votre produit est équipé d'un frein de chaîne qui arrête la chaîne en cas de rebond. Le frein de chaîne réduit le risque d'accident, mais seul l'utilisateur peut les prévenir.
  • Page 70: Sécurité Carburant

    Sécurité carburant approprié de la chaîne et du guide-chaîne diminuent le risque d'accident. AVERTISSEMENT: Lisez les instructions qui suivent avant d'utiliser le produit. • Veillez à une bonne aération lors du remplissage et du mélange de carburant (essence et huile deux temps).
  • Page 71: Consignes De Sécurité Pour L'entretien

    Consignes de sécurité pour l'entretien • Veillez à travailler avec un réglage de jauge de profondeur correct. Respectez les instructions et AVERTISSEMENT: Lisez les instructions utilisez le réglage de jauge de profondeur recommandé. Un réglage de jauge de profondeur qui suivent avant d'effectuer l'entretien du produit.
  • Page 72: Montage

    Montage Introduction 6. Alignez l'orifice avec le guide-chaîne grâce à la goupille de réglage de la chaîne, puis installez le carter d'embrayage. AVERTISSEMENT: Assurez-vous de lire et de comprendre le chapitre dédié à la sécurité avant de monter l’appareil. Pour monter le guide-chaîne et la chaîne de sciage 1.
  • Page 73: Carburant

    Husqvarna. et qu'elles ne sont pas endommagées ou manquantes. • Si l'huile deux temps Husqvarna n'est pas disponible, utilisez une huile deux temps de haute 8. Assurez-vous que l'attrape-chaîne est fixé qualité pour moteurs refroidis à l'air. Contactez votre correctement.
  • Page 74: Pour Remplir Le Réservoir De Carburant

    90 . d'un mois de carburant à chaque fois. • Utilisez de l'huile de chaîne Husqvarna pour Pour remplir le réservoir de carburant optimiser la durée de vie de la chaîne et éviter de nuire à l'environnement. Si l'huile de chaîne 1.
  • Page 75: Pour Démarrer Le Produit

    peut être soudain et fort et projeter le produit vers Non. Premièrement, le frein de chaîne doit l'opérateur. fonctionner correctement. Reportez-vous à la section Pour contrôler le frein de chaîne à la page 81 pour des instructions de contrôle du frein de chaîne. Nous vous recommandons de procéder à...
  • Page 76: Pour Préparer Le Démarrage Avec Un Moteur Chaud

    2. Appuyez environ 6 fois sur la poire de la pompe à 2. Appuyez environ 6 fois sur la poire de la pompe à carburant ou jusqu'à ce qu'elle commence à se carburant ou jusqu'à ce qu'elle commence à se remplir de carburant.
  • Page 77: Pour Arrêter Le Produit

    Pour arrêter le produit a) Si vous démarrez votre produit avec un moteur froid, tirez la poignée du câble du démarreur 1. Mettez l'interrupteur marche/arrêt en position jusqu'à ce que le moteur démarre. ARRÊT. Remarque: vous savez que le moteur démarre lorsque vous entendez un «...
  • Page 78: Opérateur Dans L'arbre

    • La méthode tirée consiste à couper à l'aide de la 3. Fixez l'extrémité d'une estrope de sécurité partie inférieure du guide-chaîne. La chaîne est tirée homologuée à l'œillet de câble. à travers l'arbre pendant la coupe. Dans cette position, vous avez un meilleur contrôle du produit et du positionnement de la zone de rebond.
  • Page 79: Pour Utiliser Le Produit Dans Un Arbre

    • Utilisez un coulisseau pour conserver une position AVERTISSEMENT: Si vous n'utilisez de travail sûre. que l'estrope de sécurité pour attacher le produit sur le harnais, faites descendre le produit complètement à l'aide de l'estrope de sécurité. Ne lâchez pas le produit depuis les hauteurs.
  • Page 80: Maintenance

    Maintenance Introduction AVERTISSEMENT: assurez-vous de lire et de comprendre le chapitre sur la sécurité avant de procéder à l'entretien du produit. Calendrier de maintenance Entretien quotidien Entretien hebdomadaire Entretien mensuel Nettoyez les pièces externes du pro- Nettoyez le système de refroidisse- Contrôlez la bande de frein.
  • Page 81: Entretien Et Contrôle Des Dispositifs De Sécurité Du Produit

    Entretien quotidien Entretien hebdomadaire Entretien mensuel Nettoyez la prise d'air du démarreur. Assurez-vous que les vis et les écrous sont serrés. Contrôlez l'interrupteur d'arrêt. Re- Pour contrôl- portez-vous à la section er l'interrupteur marche/arrêt à la page 82 . Vérifiez qu'il n'y a pas de fuite de car- burant du moteur, du réservoir ou des conduites de carburant.
  • Page 82: Pour Contrôler La Gâchette D'accélération Et Son Blocage

    3. Faites tourner le produit à plein régime et inclinez le 3. Vérifiez que la gâchette d'accélération est bloquée poignet gauche contre la protection de la poignée en position de ralenti lorsqu'elle est déverrouillée. avant pour serrer le frein de chaîne. La chaîne doit s'arrêter immédiatement.
  • Page 83: Pour Contrôler Le Silencieux

    2. Mettez l'interrupteur marche/arrêt en position 5. Montez le silencieux et assurez-vous qu'il est ARRÊT. Le moteur doit s'arrêter. correctement fixé au produit. Pour contrôler le silencieux 6. Certains silencieux sont dotés d'une grille antiflamme spéciale. Nettoyez la grille antiflamme 1.
  • Page 84: Pour Régler L'aiguille De Ralenti (L)

    Pour vérifier si le carburateur est REMARQUE: Ne laissez pas le produit correctement réglé tourner à un régime trop élevé durant les 10 premières heures. • Assurez-vous que le produit a la bonne capacité d'accélération. REMARQUE: si la chaîne tourne au régime •...
  • Page 85: Pour Serrer Le Ressort De Rappel

    Pour nettoyer le filtre à air 9. Installez la vis au centre de la poulie. Éliminez la saleté et la poussière du filtre à air régulièrement. Cela permet d'éviter un dysfonctionnement du carburateur, des problèmes de démarrage, une perte de puissance du moteur, l'usure des pièces du moteur et l'augmentation de la consommation de carburant.
  • Page 86: Pour Affûter La Chaîne De Sciage

    Remplacez un guide-chaîne ou une chaîne usé(e) ou endommagé(e) par la combinaison guide-chaîne/chaîne recommandée par Husqvarna. Cela est nécessaire pour maintenir les fonctions de sécurité du produit. Reportez- Accessoires à la page 94 pour une vous à la section •...
  • Page 87: Pour Affûter Les Dispositifs De Coupe

    équipement adapté. Utilisez la jauge de profondeur Le réglage de la jauge de profondeur (C) diminue lors Husqvarna. Elle vous aidera à préserver des de l'affûtage de la dent de coupe (A). Afin de préserver des performances de coupe optimales, vous devez...
  • Page 88: Pour Régler La Tension De La Chaîne

    1. Pour le réglage de la jauge de profondeur, utilisez une lime plate et un gabarit d'affûtage. Utilisez uniquement le gabarit d'affûtage Husqvarna pour obtenir l'épaisseur souhaitée et le bon angle pour la jauge de profondeur.
  • Page 89: Pour Contrôler La Lubrification De La Chaîne De Sciage

    Pour contrôler la lubrification de la 3. Placez le produit sur une surface stable, le tambour d'embrayage vers le haut. chaîne de sciage 4. Retirez le tambour d'embrayage et lubrifiez le 1. Démarrez le produit et faites-le tourner aux ¾ de sa roulement à...
  • Page 90: Pour Contrôler Le Guide-Chaîne

    Pour contrôler le guide-chaîne 6. Vérifiez que le pignon du nez du guide-chaîne tourne librement et que l'orifice de lubrification situé à cet 1. Assurez-vous que la conduite d'huile n'est pas endroit n'est pas obstrué. Nettoyez-le et lubrifiez-le si obstruée. Nettoyez-la si nécessaire. nécessaire.
  • Page 91: Dépannage

    b) Tournez la vis de réglage dans le sens contraire 1. Nettoyez le circuit de refroidissement avec une des aiguilles d'une montre pour réduire le débit brosse une fois par semaine ou plus fréquemment si d'huile. nécessaire. 2. Assurez-vous que le système de refroidissement n'est pas encrassé...
  • Page 92: Le Moteur Démarre, Puis S'arrête À Nouveau

    Pièce du produit à examiner Cause possible Action Allumage, pas d'étincelle La bougie d'allumage est sale ou hu- Assurez-vous que la bougie est sè- mide. che et propre. L'écartement des électrodes est in- Nettoyez la bougie. Assurez-vous correct. que l'écartement des électrodes et de la bougie est correct, et que le type de bougie correspond au type recommandé...
  • Page 93: Pour Préparer Votre Produit Pour Un Entreposage À Long Terme

    4. Effectuez un entretien complet du produit. REMARQUE: si la chaîne et le guide- chaîne ne sont pas nettoyés, ils risquent de devenir rigides ou de s'obstruer. Caractéristiques techniques Caractéristiques techniques Husqvarna T435 Moteur Cylindrée, cm 35,2 Régime de ralenti, tr/min 2 900...
  • Page 94: Accessoires

    La sécurité des modèles de tronçonneuses Husqvarna Chaîne à faible rebond T435 a été évaluée conformément à la norme EN ISO 11681-2:2011/A1:2017 (matériel forestier - Une chaîne de tronçonneuse conçue pour un faible tronçonneuses portatives - exigences en matière de rebond, conforme à...
  • Page 95 4,0 mm/5/32 po 505 24 37-01 0,025 po/ 30° 80° 0,65 mm 4,0 mm/5/32 po 579 65 36-01 0,025 po/ 30° 80° 0,65 mm 733 - 002 -...
  • Page 96: Déclaration De Conformité Ce

    Husqvarna AB, SE-561 82 Huskvarna, Suède, tél. : +46-36-146500, déclarons, sous notre seule responsabilité, que les tronçonneuses pour entretien des arbres Husqvarna T435 à partir des numéros de série de l'année de fabrication 2016 et au-delà (l'année est indiquée en clair sur la plaque d'identification et suivie d'un numéro de série) sont conformes aux...
  • Page 97: Productoverzicht

    Inleiding Gebruik Productbeschrijving Dit product is bestemd voor professioneel De Husqvarna T435 is een motorkettingzaag. onderhoudswerk aan bomen, zoals snoeien en het Er wordt voortdurend gewerkt aan het verhogen van uw verwijderen van boomkronen. veiligheid en efficiëntie tijdens bedrijf. Neem voor meer informatie contact op met uw dealer.
  • Page 98: Symbolen Op Het Product

    9. Startkoordhendel 10. Voorste handgreep 11. Kettingolietank Primerbalg van brandstofpomp. 12. Afstelschroef, oliepomp 13. Primerbalg van brandstofpomp 14. Choke Afstelling van de oliepomp. 15. Gashendelvergrendeling 16. Gashendel 17. Start/stop-schakelaar Brandstof. 18. Geleider 19. Zaagketting 20. Neuswiel 21. Gordeloog Kettingolie. 22. Kabeloog 23.
  • Page 99: Veiligheid

    EU V yyyywwxxxx Het productplaatje toont het serienummer. jjjj is het WAARSCHUWING: De EU- productiejaar en ww is de typegoedkeuring van dit product vervalt als productieweek. ongeoorloofde wijzigingen aan de motor aangebracht worden. Let op: Andere symbolen/stickers op het product hebben betrekking op certificeringseisen voor bepaalde markten.
  • Page 100 klimuitrusting, zoals draagstellen, touwen, riemen, • Start het product nooit binnenshuis. Vergeet niet dat klimijzers, snappers, karabijnhaken, enz. het gevaarlijk is om de uitlaatgassen van de motor in te ademen. • Probeer nooit een vallend stuk hout op te vangen. Zaag nooit in een boom wanneer u slechts met één •...
  • Page 101: Persoonlijke Beschermingsuitrusting

    Aarzel niet om • Draag handschoenen met zaagbescherming. contact op te nemen met uw leverancier of met Husqvarna als u nog vragen hebt over het gebruik • Draag een broek met zaagbescherming. van deze motorkettingzaag. We zijn graag bereid om...
  • Page 102 113 . • Als de veiligheidsvoorzieningen defect zijn, neem dan contact op met uw Husqvarna servicedealer. Kettingrem met terugslagbeveiliging Uw product heeft een kettingrem die de zaagketting Kettingvanger stopt in het geval van terugslag. Een kettingrem...
  • Page 103: Veiligheidsinstructies Voor Onderhoud

    Geluiddemper • Verwijder het product altijd ten minste 3 m (10 ft) uit de buurt van de tankplaats en brandstofbron voordat WAARSCHUWING: De geluiddemper wordt u het product gaat starten. erg heet tijdens en na gebruik en bij stationair toerental. Hierdoor is er brandgevaar, vooral wanneer u het product in de nabijheid van brandbare materialen en/of dampen gebruikt.
  • Page 104: Montage

    • Gebruik alleen de door ons aanbevolen combinaties • Zorg dat de zaagketting de juiste spanning heeft. Als van zaagblad/zaagketting en de hulpmiddelen voor de zaagketting niet strak tegen het zaagblad loopt, Accessoires op pagina 126 voor vijlen. Zie kan de zaagketting van het zaagblad lopen. Een instructies.
  • Page 105: Bediening

    • Gebruik voor de beste resultaten en optimale prestaties Husqvarna tweetaktolie. • Als geen Husqvarna tweetaktolie beschikbaar is, gebruik dan een andere hoogwaardige tweetaktolie voor luchtgekoelde motoren. Bespreek de keuze van de tweetaktolie met uw servicedealer. OPGELET: Gebruik geen tweetaktolie...
  • Page 106: Brandstoftank Vullen

    Toevoer van de kettingolie afstellen op pagina 122 . 3. Schud het brandstofmengsel. 4. Giet de resterende hoeveelheid benzine in de • Gebruik kettingolie van Husqvarna voor een houder. maximale levensduur van de zaagketting en om negatieve effecten op het milieu te voorkomen. We 5.
  • Page 107 Gebruik een zaagketting met geringe terugslag om de effecten van terugslag te beperken. Laat de terugslagzone geen objecten raken. WAARSCHUWING: Geen enkele zaagketting kan terugslag volledig voorkomen. Volg altijd de instructies. Veelgestelde vragen over terugslag Productoverzicht op pagina 97 om te zien Let op: Zie •...
  • Page 108 1. Duw de terugslagbeveiliging naar voren om de 1. Duw de terugslagbeveiliging naar voren om de kettingrem in te schakelen. kettingrem in te schakelen. 2. Druk 6 keer op het primerbalgje van de 2. Druk 6 keer op het primerbalgje van de brandstofpomp of anders net zo vaak tot het balgje brandstofpomp of anders net zo vaak tot het balgje zich met brandstof vult.
  • Page 109 4. Trek met uw rechterhand langzaam aan de greep 8. Gebruik het product. van het startkoord totdat u weerstand voelt. De motor starten terwijl u in een boom aan het werk bent Let op: Zorg dat u over voldoende brandstof beschikt voordat u het product start.
  • Page 110 Het product voorbereiden voor gebruik in de boom Gebruiker op de grond Wanneer u op de grond blijft bij boomonderhoud, doe Trekslag en duwslag dan het volgende. U kunt met het product op twee manieren hout zagen. 1. Inspecteer het product. •...
  • Page 111 1. Voordat u de veiligheidsstrop van de klimmaterialen • Zorg dat uw voeten op een stabiele ondergrond loskoppelt, moet u het product aan het draagstel staan en gebruik weinig dwarskracht wanneer u bevestigen. Bevestig het product aan het draagstel verticale takken zaagt. Leid de veiligheidslijn via een door het gordeloog of een stalen ring op de ander bevestigingspunt om grotere zijdelingse veiligheidsstrop.
  • Page 112: Onderhoud

    WAARSCHUWING: U moet de WAARSCHUWING: Probeer het product kettingrem inschakelen wanneer u het niet los te trekken. Risico op ernstig product aan de strop laat zakken. letsel. 4. Gebruik indien nodig een handzaag of een tweede Een vastgelopen product losmaken kettingzaag om het product los te maken.
  • Page 113 Dagelijks onderhoud Wekelijks onderhoud Maandelijks onderhoud Controleer het kettingaandrijfwiel. Zie Het spur-aandrijftandwiel controleren op pagina 121 . Reinig de luchtinlaat op de starter. Controleer of moeren en schroeven goed vastgedraaid zijn. Controleer de stopschakelaar. Zie start/stop-schakelaar controleren op pagina 114 . Controleer of er geen brandstof uit de motor, tank of brandstofleidingen lekt.
  • Page 114 3. Geef volgas en draai uw linkerpols tegen de 3. Controleer of de gashendel vergrendeld is in de terugslagbeveiliging om de kettingrem te activeren. stationaire stand wanneer de De zaagketting moet onmiddellijk stoppen. gashendelvergrendeling wordt losgelaten. WAARSCHUWING: Laat de voorhandgreep niet los wanneer u de kettingrem inschakelt.
  • Page 115 2. Duw de start/stop-schakelaar naar de STOP-stand. 5. Monteer de geluiddemper en controleer of deze De motor moet uitschakelen. correct is bevestigd op het product. Geluiddemper controleren 6. Sommige geluiddempers hebben een speciaal vonkenopvangnet. Reinig het vonkenopvangnet 1. Draai de schroeven (A en B) los. minimaal één keer per week indien uw product voorzien is van dit type geluiddemper.
  • Page 116: Controleren Of De Carburateur Correct Is Afgesteld

    • Als het product lastig start of minder goed OPGELET: Als de zaagketting bij stationair accelereert, stel dan de naalden voor laag en hoog toerental draait, draait u de stelschroef voor toerental af. stationair toerental linksom totdat de zaagketting stopt. OPGELET: Onjuiste afstellingen kunnen De naald voor laag toerental (L) afstellen motorschade veroorzaken.
  • Page 117: Het Luchtfilter Reinigen

    9. Monteer de bout in het midden van de poelie. van motoronderdelen en een hoger brandstofverbruik dan normaal. 1. Verwijder het luchtfilterdeksel en het luchtfilter. 2. Borstel of schud het luchtfilter schoon. Gebruik een reinigingsmiddel en water om het filter goed te reinigen.
  • Page 118: Zaagketting Slijpen

    Als het zaagblad of de zaagketting versleten of beschadigd is, moet u deze vervangen door een door Husqvarna aanbevolen combinatie van zaagblad en • Kettingolie-opening en opening voor zaagketting. Zo blijven de veiligheidsfuncties van het kettingstrekkerpen.
  • Page 119 • Vijlhoek. Accessoires op pagina 126 voor Let op: Zie informatie over welke vijl en mal door Husqvarna wordt aangeraden voor uw zaagketting. 2. Breng de vijlmal correct aan op de messen. Raadpleeg de instructies die bij de vijlmal worden meegeleverd.
  • Page 120 1. Gebruik een platte vijl en een vijlmal om de hoogte van de dieptesteller aan te passen. Gebruik alleen een Husqvarna-vijlmal om de juiste tanddiepte en vijlhoek te verkrijgen. 2. Plaats de vijlmal op de zaagketting. 5. Draai de zaagbladmoeren vast met de moersleutel...
  • Page 121 3. Als de kettingsmering correct is, ziet u na 1 minuut 4. Verwijder de koppelingstrommel en smeer het een duidelijke olielijn op het oppervlak. naaldlager met een smeerpistool. Gebruik motorolie of hoogwaardig lagervet. 4. Indien de kettingsmering niet correct werkt, Snijuitrusting controleren controleer dan het zaagblad.
  • Page 122: Onderhoud Uitvoeren Aan De Brandstoftank En De Kettingolietank

    De geleider controleren 6. Controleer of het neuswiel van het zaagblad soepel draait en of de smeeropening in het neuswiel van het 1. Controleer of het oliekanaal niet verstopt is. Reinig zaagblad open is. Maak schoon en smeer indien indien nodig. nodig.
  • Page 123: Problemen Oplossen

    Koelsysteem reinigen OPGELET: Een vuil of verstopt koelsysteem kan tot oververhitting en Het koelsysteem zorgt ervoor dat de motor niet te warm schade aan het product leiden. wordt. Het koelsysteem bestaat uit de luchtinlaat op de starter (A), de luchtgeleidingsplaat (B), de haken op het vliegwiel (C), het koelkanaal (D) en het koppelingsdeksel (E).
  • Page 124: Transport En Opslag

    Ook voor instructies. een zaagketting die niet kan bewegen, kan ernstige 4. Voer een volledige onderhoudsbeurt uit. verwondingen veroorzaken. • Maak de bougiekap los en activeer de kettingrem. Technische gegevens Technische gegevens Husqvarna T435 Motor 733 - 002 -...
  • Page 125 Husqvarna T435 Cilinderinhoud, cm 35,2 Stationair toerental, rpm 2900 Maximaal motorvermogen volgens ISO 8893, kW/pk bij 1,5/2,0 bij 10000 Ontstekingssysteem Bougie NGK CMR6H Elektrodenafstand, mm 0,65 Brandstof-/smeersysteem Inhoud brandstoftank, liter/cm 0,26/260 Inhoud olietank, l/cm 0,17/170 Type oliepomp Verstelbaar Gewicht Gewicht, kg...
  • Page 126: Accessoires

    Als u niet zeker weet hoe u het type zaagketting op uw product kunt herkennen, raadpleegt u Gebruik een Husqvarna-vijlmal om de zaagketting te www.husqvarna.com voor meer informatie. slijpen. Een Husqvarna-vijlmal zorgt ervoor dat u de 5/32 inch/4,0 mm 505 24 37-01 0,025 in / 0,65 30°...
  • Page 127: Eg-Conformiteitsverklaring

    EG-conformiteitsverklaring EG verklaring van overeenstemming Husqvarna AB, SE-561 82 Huskvarna, Zweden, tel: +46-36-146500, verklaart hierbij dat de motorkettingzaag voor boomverzorging Husqvarna T435 met serienummers van 2016 en later (het jaartal staat duidelijk op het productplaatje vermeld, gevolgd door het serienummer) voldoen aan de vereisten van de volgende EU-RICHTLIJNEN: •...
  • Page 128: Uso Previsto

    Introduzione Uso previsto Descrizione del prodotto Questo prodotto è per i professionisti di silvicoltura, Husqvarna T435 è una motosega portatile con motore a come la potatura delle cime degli alberi. benzina. Il lavoro è in costante evoluzione per aumentare Nota: I regolamenti nazionali possono imporre sicurezza ed efficienza durante le attività.
  • Page 129: Simboli Riportati Sul Prodotto

    9. Impugnatura cavo di avviamento 10. Impugnatura anteriore 11. Serbatoio dell'olio della catena Primer del carburante. 12. Vite di regolazione pompa dell’olio 13. Primer del carburante 14. Valvola dell'aria Regolazione della pompa dell'olio. 15. Blocco del grilletto acceleratore 16. Grilletto acceleratore 17.
  • Page 130: Sicurezza

    UE V aaaassxxxx La targhetta dati di funzio- namento riporta il numero di serie. aaaa è l'anno di AVVERTENZA: La manomissione del produzione e ss è la setti- motore rende nulla l'omologazione UE del mana di produzione. prodotto. Nota: I restanti simboli/decalcomanie sul prodotto riguardano particolari requisiti necessari per ottenere la certificazione in alcuni mercati.
  • Page 131 • Non tentare, di afferrare le parti che cadono. Non con la macchina o ne compromettano il controllo da procedere mai con il taglio quando si è assicurati parte vostra. solo con una fune. Utilizzare sempre due funi di sicurezza. •...
  • Page 132 Non esitate a contattare • Utilizzare pantaloni dotati di protezione per sega. il rivenditore o Husqvarna per qualsiasi domanda • Utilizzare stivali dotati di protezione per sega, punta sull'utilizzo della motosega. Oltre a offrirvi assistenza in acciaio e suola antiscivolo.
  • Page 133 145 . • Se i dispositivi di sicurezza sono difettosi, rivolgersi al rivenditore Husqvarna. Freno della catena con protezione anti-contraccolpo Fermo della catena Il prodotto è dotato di un freno della catena che arresta la catena in caso di contraccolpo.
  • Page 134 Marmitta • Allontanare sempre la macchina ad almeno 3 metri dal luogo e dalla fonte di rifornimento prima della AVVERTENZA: La marmitta si riscalda messa in moto. notevolmente durante e dopo l'utilizzo, e quando il motore è a regime minimo. Vi è il rischio di incendio, soprattutto quando si aziona il prodotto vicino a materiali infiammabili e/o fumi.
  • Page 135: Montaggio

    Istruzioni di sicurezza per l'attrezzatura di taglio • Assicurarsi che la catena sia correttamente tesa. Se la catena non è serrata contro la barra di guida, la catena può sganciarsi. Una tensione della catena AVVERTENZA: Leggere le seguenti non corretta aumenta l'usura della barra di guida, avvertenze prima di utilizzare il prodotto.
  • Page 136: Per Montare L'occhiello Della Cinghia

    7. Accertarsi che tutte le parti siano assemblate correttamente e non siano danneggiate o assenti. • Utilizzare carburante alchilato premiscelato Husqvarna di buona qualità, per garantire le migliori 8. Accertarsi che il fermo della catena sia collegato prestazioni e l'aumento della durata del motore. correttamente.
  • Page 137: Rifornimento Di Carburante

    Per risultati e prestazioni ottimali, utilizzare l'olio per motori a due tempi Husqvarna. • Se l'olio per motori a due tempi Husqvarna non è ATTENZIONE: Non mescolare il carburante disponibile, utilizzare un olio per motori a due tempi più di 1 volta al mese.
  • Page 138 Utilizzare l'olio della catena Husqvarna per ottenere la massima durata della motosega e per evitare gli effetti negativi sull'ambiente. Se l'olio della catena Husqvarna non è disponibile, si consiglia di utilizzare un comune olio per catene. Il contraccolpo avviene sempre lungo il piano di taglio •...
  • Page 139: Avviamento Dell'unità

    Avviamento dell’unità Utilizzare una catena con basso contraccolpo per ridurre gli effetti di contraccolpo. Non lasciare che il settore di contraccolpo tocchi un oggetto. Preparazione dell'avviamento a motore freddo AVVERTENZA: Nessuna catena impedisce completamente il contraccolpo. Attenersi AVVERTENZA: Il freno della catena deve sempre alle istruzioni.
  • Page 140 Preparazione dell'avviamento a motore 4. Tirare la maniglia della fune di avviamento lentamente con la mano destra, finché non si avverte caldo una certa resistenza. AVVERTENZA: Il freno della catena deve essere inserito all'avviamento della motosega per diminuire il rischio di lesioni. 1.
  • Page 141: Arresto Del Prodotto

    7. Muovere in avanti la protezione anticontraccolpo per • Accelerare al massimo quando si taglia e diminuire disinserire il freno della catena. la velocità al minimo dopo ogni taglio. ATTENZIONE: Si possono verificare danni al motore se quest'ultimo gira al massimo troppo a lungo senza carico.
  • Page 142: Operatore Sull'albero

    • Il taglio con catena in spinta è quando si taglia con la 6. Arrestare il prodotto. parte superiore della barra di guida. La catena 7. Inserire il freno della catena. spinge il prodotto in direzione dell'operatore. 8. Trasportare il prodotto all'operatore sull'albero, utilizzando un mezzo di trasporto che lo sollevi.
  • Page 143 6. Spegnere il prodotto e sistemarlo nel suo punto di • Effettuare un controllo dell'imbracatura, della cinghia collegamento secondario. e delle funi a intervalli regolari. • Se si deve salire con il prodotto, fissare il prodotto al Per utilizzare il prodotto su un punto di collegamento posteriore sull'imbracatura.
  • Page 144: Manutenzione

    Manutenzione Introduzione AVVERTENZA: Leggere attentamente il capitolo sulla sicurezza prima di eseguire la manutenzione del prodotto. Programma di manutenzione Manutenzione giornaliera Manutenzione settimanale Manutenzione mensile Pulire i componenti esterni del pro- Pulire il sistema di raffreddamento. Controllare il nastro del freno. Vedere Per pulire il sistema di raf- Controllo del nastro del freno alla dotto e verificare che non vi siano...
  • Page 145 Manutenzione giornaliera Manutenzione settimanale Manutenzione mensile Assicurarsi che i dadi e le viti siano serrati. Effettuare un controllo dell'interrut- Controllo tore di arresto. Vedere dell’interruttore di avviamento/arresto alla pagina 146 . Controllare che non vi siano perdite di carburante nel motore, nel serba- toio o nei flessibili carburante.
  • Page 146 Controllo del grilletto acceleratore e del 2. Assicurarsi che il fermo della catena sia stabile e fissato al corpo dell'unità. blocco del grilletto acceleratore 1. Controllare che grilletto acceleratore e blocco del grilletto acceleratore si muovano liberamente e che le molle di richiamo funzionino correttamente. Controllo del sistema di smorzamento delle vibrazioni 1.
  • Page 147: Regolazione Del Carburatore

    Regolazione del carburatore 2. Rimuovere il coperchio della marmitta. A causa di leggi sulla protezione dell'ambiente e sulle emissioni, il prodotto è dotato di limitazioni sulle viti di regolazione del carburatore. In questo modo si riducono le emissioni di scarico dannose provenienti dal prodotto. È...
  • Page 148 4. Far ruotare lentamente all'indietro la puleggia per AVVERTENZA: Se la catena non si ferma rilasciare la molla di ritorno. quando si gira la vite del minimo, rivolgersi al più vicino centro assistenza. Non usare il prodotto fino a quando non è stata eseguita la corretta regolazione.
  • Page 149: Controllo Della Candela

    3. Assicurarsi che sia possibile far ruotare la puleggia 3. Al momento del montaggio, controllare che il filtro di mezzo giro dopo che la fune di avviamento è dell'aria chiuda ermeticamente il proprio completamente estesa. alloggiamento. Nota: A causa delle diverse condizioni di lavoro, delle Montare il carter avviamento sul condizioni climatiche o stagionali, il prodotto può...
  • Page 150 Sostituire la barra di guida se usurata o danneggiata con le combinazioni di barra di guida e catena consigliate da Husqvarna. Questa operazione è necessaria per mantenere le funzioni di sicurezza del prodotto. Per un elenco delle combinazioni di barre e catene di ricambio Accessori alla pagina 158 .
  • Page 151 Accessori alla pagina 158 Nota: Fare riferimento a per informazioni sulla dima di affilatura che Husqvarna consiglia per la catena in uso. 2. Applicare la dima di affilatura correttamente sul tagliente. Fare riferimento alle istruzioni fornite con la dima di affilatura.
  • Page 152: Controllo Della Lubrificazione Della Catena

    Si raccomanda l'utilizzo del nostro strumento di misurazione dell'aggetto di spoglia Husqvarna per avere profondità e angolo corretti. 2. Posizionare lo strumento di misurazione dell'aggetto 5. Serrare i dadi della barra di guida con la chiave e di spoglia sopra la catena.
  • Page 153 3. Se la lubrificazione della catena è corretta, si vedrà 4. Rimuovere il tamburo della frizione e lubrificare il una linea chiara di olio sulla superficie dopo 1 cuscinetto a rullini con una pistola ingrassatrice. minuto. Usare olio motore o un grasso per cuscinetti di alta qualità.
  • Page 154 Controllo della barra guida 6. Controllare che il rocchetto puntale ruoti liberamente e che il relativo foro di lubrificazione non sia ostruito. 1. Assicurarsi che il condotto dell'olio non sia ostruito. Pulire e lubrificare se necessario. Pulire se necessario. 2. Verificare l'eventuale presenza di irregolarità sui bordi della barra di guida.
  • Page 155: Anomalie Di Funzionamento

    Per pulire il sistema di ATTENZIONE: Se il sistema di raffreddamento raffreddamento è sporco o ostruito, provoca il surriscaldamento del prodotto, Il sistema di raffreddamento mantiene bassa la con conseguenti danni. temperatura del motore. Il sistema di raffreddamento comprende la presa d'aria sul motorino di avviamento (A), il collettore dell'aria (B), i ganci sul volano (C), il tubo di raffreddamento (D) e il coperchio della frizione (E).
  • Page 156: Trasporto E Rimessaggio

    Parte del prodotto da esaminare Possibile causa Intervento Accensione, nessuna scintilla La candela è sporca o umida. Accertarsi che la candela sia asciutta e pulita. La distanza tra gli elettrodi della can- Pulire la candela. Assicurarsi che la dela è errata. distanza tra gli elettrodi e la candela siano corrette, e che il tipo corretto di candela sia quello consigliato o...
  • Page 157: Dati Tecnici

    4. Eseguire una manutenzione completa del prodotto. irrigidirsi o bloccarsi. 2. Fissare la protezione per il trasporto. Dati tecnici Dati tecnici Husqvarna T435 Motore Cilindrata, cm 35,2 Regime minimo, giri/min 2900 Potenza max. motore a norma ISO 8.893, kW/hp a...
  • Page 158: Accessori

    Accessori Attrezzatura di taglio consigliata Catena a contraccolpo ridotto La sicurezza del modello di motosega Husqvarna T435 Una catena progettata per ridurre il contraccolpo che è stata valutata in conformità allo standard EN ISO soddisfa i requisiti relativi al contraccolpo specificati 11681-2:2011/A1:2017 (macchinari per silvicoltura - nella norma ANSI B175.1-2012.
  • Page 159 5/32 poll. / 4,0 505 24 37-01 0,025 poll./0,65 30° 80° 5/32 poll. / 4,0 579 65 36-01 0,025 poll./0,65 30° 80° 733 - 002 -...
  • Page 160: Dichiarazione Ce Di Conformità

    Husqvarna AB, SE-561 82 Huskvarna, Svezia, tel.: +46-36-146500, dichiara con la presente che la motosega per la potatura Husqvarna T435, che reca i numeri di serie a partire dal 2016 (l'anno è chiaramente indicato sulla targhetta nominale, seguito dal numero di...
  • Page 161: Descripción Del Producto

    Uso previsto Descripción del producto Este producto está diseñado para el desarrollo de La Husqvarna T435 es un modelo de motosierra con actividades profesionales en el ámbito de la silvicultura, motor de combustión. como la poda y la reducción de copas de árboles.
  • Page 162 7. Bujía/sombrerete de bujía Freno de cadena, activado (derecha). Freno 8. Cuerpo del mecanismo de arranque de cadena, desactivado (izquierda). 9. Empuñadura de la cuerda de arranque 10. Mango delantero 11. Depósito de aceite de cadena 12. Tornillo de ajuste, bomba de aceite Perilla de la bomba de combustible.
  • Page 163: Seguridad

    UE V aaaassxxxx La placa de característi- cas muestra el número de serie. aaaa es el año de ADVERTENCIA: La manipulación del motor fabricación y ss es la anula la homologación de la UE de este semana de fabricación. producto. Nota: Los demás símbolos/etiquetas que aparecen en el producto corresponden a requisitos de homologación específicos en algunos mercados.
  • Page 164 • Nunca intente coger las secciones que caen. Nunca • Observe el entorno y asegúrese de que no haya corte subido al árbol si solo está asegurado personas o animales en riesgo de entrar en contacto mediante una cuerda. Utilice siempre dos cuerdas con el equipo de corte o capaces de afectar a su de seguridad.
  • Page 165: Equipo De Protección Personal

    • No utilice nunca la motosierra por encima de los Husqvarna si tiene alguna duda en cuanto al empleo hombros. de la motosierra. Estaremos encantados de poder aconsejarle y ayudarle a utilizar la motosierra de manera eficaz y segura. Le recomendamos hacer un cursillo sobre empleo de motosierras.
  • Page 166 178 . • Si los dispositivos de seguridad están defectuosos, hable con su taller de servicio Husqvarna. Freno de cadena con protección contra reculadas Captor de cadena El producto cuenta con un freno de cadena que detiene El captor de cadena sujeta la cadena de sierra si se la cadena en caso de reculada.
  • Page 167: Seguridad En El Uso Del Combustible

    Interruptor de arranque/parada • Para repostar, abra despacio la tapa del depósito de combustible para evacuar lentamente la eventual Utilice el interruptor de arranque/parada para parar el sobrepresión. motor. • Después de repostar, apriete bien la tapa del depósito de combustible. •...
  • Page 168: Montaje

    garantizamos que realizarán reparaciones y • Asegúrese de que la cadena de sierra tiene la mantenimiento profesionales en su producto. tensión correcta. Si la cadena de sierra no está bien tensada en la espada, puede soltarse. Si la tensión de la cadena de sierra es incorrecta, el desgaste de Instrucciones de seguridad para el equipo de corte la espada, la cadena de sierra y el piñón de arrastre ADVERTENCIA: Lea las siguientes...
  • Page 169: Funcionamiento

    Combustible premezclado ninguna. • Utilice gasolina de alquilato premezclada Husqvarna 8. Asegúrese de que el captor de cadena esté bien de buena calidad para mejorar el rendimiento y montado. prolongar la vida útil del motor. Este combustible...
  • Page 170: Mezcla De Combustible

    Husqvarna. • Si no se dispone de aceite para motores de dos tiempos Husqvarna, puede utilizarse un aceite para PRECAUCIÓN: No mezcle combustible motores de dos tiempos de buena calidad para para más de 1 mes como máximo.
  • Page 171 La reculada sigue siempre el sentido del plano de la espada. Por lo general, el producto sale despedido • Utilice aceite para cadena Husqvarna para prolongar contra el operador, pero también puede moverse en al máximo la vida útil de la cadena de sierra y evitar cualquier otra dirección.
  • Page 172 el sector de riesgo de reculada entre en contacto con 1. Mueva la protección contra reculadas hacia delante ningún objeto. para acoplar el freno de cadena. ADVERTENCIA: No existe ninguna cadena de sierra que evite por completo la reculada. Cumpla siempre las instrucciones. Preguntas frecuentes acerca de las reculadas •...
  • Page 173 1. Mueva la protección contra reculadas hacia delante 4. Tira lentamente de la empuñadura de arranque con para acoplar el freno de cadena. la mano derecha hasta que note resistencia. 2. Presione la perilla de la bomba de combustible 6 veces aproximadamente o hasta que la perilla se ADVERTENCIA: No enrosque el cordón empiece a llenar de combustible.
  • Page 174 7. Mueva la protección contra reculadas hacia atrás • Al cortar, acelere al máximo; una vez que finalice el para desacoplar el freno de cadena. corte, reduzca el régimen hasta llegar a ralentí. PRECAUCIÓN: El motor puede resultar dañado si funciona mucho tiempo a máxima velocidad sin carga.
  • Page 175 cadena de sierra empujará el producto en la 7. Active el freno de cadena. dirección del operador. 8. Levante el producto hasta llegar al operador que se encuentra en el árbol con herramientas de elevación. ADVERTENCIA: Asegúrese de que el producto esté...
  • Page 176 6. Detenga el producto y colóquelo en el punto de • Revise periódicamente el arnés, la correa y las conexión secundario. cuerdas. • Si trepa con el producto, sujete el producto al punto Uso del producto en un árbol de conexión trasero del arnés. El punto de conexión trasero sirve para que el producto no interfiera en las ADVERTENCIA: La mayoría de los cuerdas de escalada y centra el peso sobre la...
  • Page 177: Mantenimiento

    Mantenimiento Introducción antes de realizar tareas de mantenimiento en el producto. ADVERTENCIA: Asegúrese de leer y comprender el capítulo sobre seguridad Programa de mantenimiento Mantenimiento diario Mantenimiento semanal Mantenimiento mensual Limpie el exterior del producto y ase- Limpie el sistema de refrigeración. Realice una comprobación de la cin- Para limpiar el gúrese de que no haya aceite en los...
  • Page 178 Mantenimiento diario Mantenimiento semanal Mantenimiento mensual Limpie la toma de aire del arranque. Asegúrese de que las tuercas y los tornillos están bien apretados. Compruebe el interruptor de parada. Comprobación Consulte la sección del interruptor de arranque/parada en la página 179 . Asegúrese de que no haya fugas de combustible en el motor, el depósito o los conductos de combustible.
  • Page 179 3. Acelere al máximo e incline la muñeca izquierda 3. Asegúrese de que el acelerador está bloqueado en hacia la protección contra reculadas para activar el la posición de ralentí cuando el bloqueo se suelta. freno de cadena. La cadena de sierra debe detenerse inmediatamente.
  • Page 180: Ajuste Del Carburador

    2. Ponga el interruptor de arranque/parada en la 5. Monte el silenciador y asegúrese de que está bien posición de parada. El motor se debe detener. fijado al producto. Comprobación del silenciador 6. Algunos silenciadores disponen de una red apagachispas especial. Limpie la red apagachispas 1.
  • Page 181 • Asegúrese de que la cadena de sierra no gire a PRECAUCIÓN: No utilice el producto a un ralentí. régimen demasiado alto durante las • Si es difícil poner en marcha el producto o la primeras 10 horas de funcionamiento. aceleración es incorrecta, ajuste las agujas de régimen bajo y alto.
  • Page 182: Mantenimiento De La Bujía

    Para limpiar el filtro de aire 9. Ponga el tornillo en el centro de la polea. Limpie el filtro de aire con regularidad para eliminar los restos de suciedad y el polvo. De esta forma, se evitarán averías en el carburador, problemas de arranque, la pérdida de potencia del motor, el desgaste de los componentes del motor y un consumo anormalmente alto de combustible.
  • Page 183 Husqvarna. Esto es necesario para conservar los niveles de seguridad del producto. Accesorios en la página 191 para ver una lista...
  • Page 184 Accesorios en la página 191 para Nota: Consulte obtener información sobre la lima y el calibrador que Husqvarna recomienda para su cadena de sierra. 2. Coloque correctamente el calibrador de afilado en el eslabón de corte. Consulte las instrucciones facilitadas con el calibrador de afilado.
  • Page 185: Ajuste De La Tensión De La Cadena De Sierra

    1. Utilice una lima plana y un calibrador de profundidad para ajustar el calibre de profundidad. Utilice solamente el calibrador de profundidad Husqvarna para obtener el ajuste de calibre de profundidad y el ángulo del calibre de profundidad adecuados.
  • Page 186: Lubricación Del Cojinete De Agujas

    Descripción del producto en la página 161 Consulte Nota: Algunos modelos cuentan solo con una tuerca para conocer la posición del tornillo de tensado de la de espada. cadena en su producto. 3. Ponga el producto en una superficie estable con el Para comprobar la lubricación de la tambor de embrague hacia arriba.
  • Page 187 Comprobación de la espada 7. Gire la espada todos los días para prolongar su vida útil. 1. Asegúrese de que el canal de aceite no esté obstruido. Si es necesario, proceda con su limpieza. Mantenimiento del depósito de 2. Compruebe si se han formado rebabas en los lados combustible y del depósito de aceite de la espada.
  • Page 188: Resolución De Problemas

    1. Limpie el sistema de refrigeración con un cepillo una PRECAUCIÓN: Un sistema de vez a la semana o con más frecuencia si es refrigeración sucio u obturado puede necesario. producir el sobrecalentamiento del 2. Asegúrese de que el sistema de refrigeración no producto, lo cual puede provocar daños esté...
  • Page 189: Transporte Y Almacenamiento

    Parte del producto que se debe Causa posible Acción examinar Bujía y cilindro La bujía está suelta. Apriete la bujía. El motor se cala tras intentar arran- Retire y limpie la bujía. Sitúe el pro- car varias veces con el estrangulador ducto de lado con el orificio de la bu- al máximo.
  • Page 190: Datos Técnicos

    Datos técnicos Datos técnicos Husqvarna T435 Motor Cilindrada, cm 35,2 Régimen de ralentí, rpm 2900 Potencia máxima del motor según ISO 8893, kW/CV a 1,5/2,0 a 10 000 Sistema de encendido Bujía NGK CMR6H Distancia de electrodos, mm 0,65 Sistema de combustible y lubricación Capacidad del depósito de combustible, litros/cm...
  • Page 191: Accesorios

    Equipo de corte recomendado Cadena de motosierra de reculada reducida El modelo de motosierra Husqvarna T435 se ha sometido a evaluaciones de seguridad de acuerdo con Una cadena de sierra que se designa como cadena de la norma EN ISO 11681-2:2011/A1:2017 (Maquinaria sierra de reculada reducida cumple con los requisitos de forestal.
  • Page 192 4,0 mm / 5/32 579 65 36-01 0,65 mm/0,025 30° 80° pulg pulg 733 - 002 -...
  • Page 193: Declaración Ce De Conformidad

    Husqvarna AB, SE-561 82 Huskvarna (Suecia), tel.: +46-36-146500, declara bajo su estricta responsabilidad que la motosierra para servicio forestal Husqvarna T435 con números de serie de 2016 en adelante (el año se indica claramente en texto simple en la placa de especificaciones, seguido del número de serie) cumple...
  • Page 194: Vista Geral Do Produto

    Introdução Finalidade Descrição do produto Este produto foi concebido para a manutenção A Husqvarna T435 é uma motosserra com motor de profissional de árvores como, por exemplo, trabalhos de combustão. poda, e para a desmontagem de copas de árvore. Decorre um trabalho constante para aumentar a sua segurança e eficiência durante o funcionamento.
  • Page 195: Símbolos No Produto

    7. Vela de ignição/cobertura da vela de ignição Travão da corrente, engatado (lado direito). 8. Caixa do dispositivo de arranque Travão da corrente, desengatado (lado 9. Punho do cabo de arranque esquerdo). 10. Punho dianteiro 11. Depósito de óleo da corrente 12.
  • Page 196: Segurança

    UE V yyyywwxxxx A etiqueta de tipo apre- senta o número de série. yyyy corresponde ao ano de produção e ww à sem- ATENÇÃO: A adulteração do motor anula a ana de produção. aprovação deste produto pela UE. Nota: Os restantes símbolos/autocolantes existentes no produto dizem respeito às exigências de homologação de alguns países.
  • Page 197 • Nunca tente apanhar secções em queda. Nunca • Observe o espaço à sua volta e certifique-se de que efetue cortes na árvore quando estiver seguro não há risco de pessoas ou animais entrarem em apenas com uma corda. Utilize sempre duas cordas contacto com o produto ou afetarem o seu controlo seguras.
  • Page 198: Equipamento De Proteção Pessoal

    Utilize botas com proteção contra serra, biqueira de entrar em contacto com o seu revendedor ou com a aço e sola antiderrapante. Husqvarna. Teremos todo o prazer em apoiá-lo e • O kit de primeiros socorros deve estar sempre à...
  • Page 199 211 . • Se os dispositivos de segurança estiverem defeituosos, fale com o seu revendedor com assistência técnica Husqvarna. Travão de corrente com protector anti-retrocesso Retentor de corrente O seu produto possui um travão da corrente que para a O retentor de corrente prende a corrente da serra caso corrente da serra em caso de retrocesso.
  • Page 200: Instruções De Segurança Para Manutenção

    Silenciador • Antes de arrancar o produto, afaste-o sempre no mínimo 3 m (10 pés) da fonte de combustível e do ATENÇÃO: O silenciador aquece muito local de abastecimento. durante/após a utilização e à velocidade de ralenti. Existe o risco de incêndio, especialmente quando utiliza o produto próximo de materiais e/ou gases inflamáveis.
  • Page 201: Montagem

    • Utilize apenas as combinações de lâmina-guia/ • Certifique-se de que a corrente da serra está corrente da serra e o equipamento de enchimento corretamente esticada. Se a corrente da serra não Acessórios na página 223 recomendados. Consulte estiver bem apertada contra a lâmina-guia, a para obter instruções.
  • Page 202: Funcionamento

    • Utilize combustível alquilado previamente misturado 8. Certifique-se de que o retentor de corrente está da Husqvarna de boa qualidade para obter o melhor devidamente preso. desempenho e prolongar a vida útil do motor. Este combustível contém substâncias químicas menos nocivas em comparação com o combustível normal,...
  • Page 203 Óleo para motores a dois tempos • Para obter melhores resultados e desempenho, use 1. Encha metade da quantidade de gasolina num o óleo para motor de dois tempos da Husqvarna. recipiente limpo para combustível. • Se o óleo para motores de dois tempos da 2.
  • Page 204 220 . operador. • Utilize óleo de corrente da Husqvarna para obter o tempo de vida útil máximo da corrente e para evitar efeitos negativos no meio ambiente. Se o óleo de corrente da Husqvarna não estiver disponível, recomenda-se a utilização de um óleo de corrente...
  • Page 205 setor de risco de retrocesso entre em contacto com um 1. Mova para a frente a proteção dianteira para a mão objeto. para engatar o travão da corrente. ATENÇÃO: Nenhuma corrente da serra evita totalmente o retrocesso. Respeite sempre as instruções. Perguntas comuns sobre o retrocesso •...
  • Page 206 1. Mova para a frente a proteção dianteira para a mão 4. Puxe o punho do cabo de arranque lentamente com para engatar o travão da corrente. a mão direita até sentir resistência. 2. Pressione a ampola da purga de ar aproximadamente 6 vezes ou até...
  • Page 207 7. Desloque a proteção dianteira para a mão para trás • Utilize a aceleração total durante trabalhos de corte para desengatar o travão da corrente. e diminua para a velocidade de ralenti após cada corte. CUIDADO: O motor pode sofrer danos caso funcione durante períodos longos à...
  • Page 208 • Serrar com a corrente a empurrar significa serrar 6. Pare o produto. com a parte superior da lâmina-guia. A corrente da 7. Engate o travão da corrente. serra empurra o produto na direção do operador. 8. Levante o produto até ao operador que se encontra na árvore utilizando as ferramentas de elevação.
  • Page 209 6. Pare o produto e coloque-o no respetivo ponto de • Faça uma verificação do arnês, do cinto e das ligação secundário. cordas em intervalos regulares. • Se tiver de subir com o produto, prenda o produto ao Operar o produto na árvore ponto de ligação traseiro no arnês.
  • Page 210: Manutenção

    Manutenção Introdução antes de realizar tarefas de manutenção no produto. ATENÇÃO: Certifique-se de que leu e compreendeu o capítulo sobre segurança Esquema de manutenção Controle diário Controle semanal Manutenção mensal Limpe as peças externas do produto Limpe o sistema de arrefecimento. Verifique a faixa do travão.
  • Page 211: Verificar O Travão Da Corrente

    Controle diário Controle semanal Manutenção mensal Verifique o interruptor de paragem. Verificar o interruptor de ar- Consulte ranque/paragem na página 212 . Certifique-se de que não há fugas de combustível do motor, depósito ou tubagem de combustível. Certifique-se de que a corrente da serra não roda quando o motor está...
  • Page 212 Verificar o bloqueio do acelerador e o 2. Certifique-se de que o retentor de corrente se encontra estável e fixado ao corpo do produto. acelerador 1. Confirme que o acelerador e o respetivo bloqueio se movem livremente e que a mola de retorno funciona corretamente.
  • Page 213 3. Solte os parafusos e as porcas. escape nocivos provenientes do seu produto. Só pode rodar os parafusos de ajuste no máximo ½ volta. 4. Retire o silenciador e certifique-se de que não está defeituoso. 5. Monte o silenciador e certifique-se de que está Ajustes básicos e rodagem devidamente montado no produto.
  • Page 214 assistência. Não utilize o produto até que 4. Deixe o carretel rodar lentamente para trás para esteja devidamente ajustado. libertar a mola de retorno. Ajustar a agulha de alta rotação (H) O motor é ajustado na fábrica para funcionar ao nível do mar.
  • Page 215: Verificar A Vela De Ignição

    Substitua uma lâmina-guia ou corrente da serra gasta ou danificada pelas combinações de lâmina-guia e corrente da serra recomendadas pela Husqvarna. Isto é necessário para manter as funções de segurança do Acessórios na página 223 para obter produto.
  • Page 216 • Número de dentes no roleto (T). • Largura dos elos de acionamento, mm/pol. • Passo da corrente, pol. A distância entre os elos de acionamento da corrente da serra deve estar alinhada com a distância dos dentes no roleto e no Informações gerais sobre como afiar os pinhão.
  • Page 217 Utilize apenas a ferramenta de abertura de corte da Husqvarna para obter a definição e o ângulo corretos para a abertura de corte. 2. Coloque a ferramenta de abertura de corte na corrente da serra.
  • Page 218 3. Utilize a lima plana para remover a parte da abertura 6. Confirme que consegue puxar a corrente da serra de corte que se estende ao logo da ferramenta de facilmente com a mão e que esta não fica abertura de corte. pendurada da lâmina-guia.
  • Page 219: Verificar A Lâmina-Guia

    • Verifique regularmente o nível de desgaste visível 4. Substitua a corrente da serra, se a parte mais longa no pinhão de impulso. Substitua o tambor da do dente de corte for inferior a 4 mm/0,16 pol. embraiagem com o pinhão de impulso se existir Substitua também a corrente da serra se existirem demasiado desgaste.
  • Page 220: Ajustar O Fluxo De Óleo De Corrente

    5. Verifique se a ponta da lâmina-guia está irregular ou 1. Rode o parafuso de ajuste da bomba de óleo. Use muito desgastada. uma chave de parafusos ou uma chave de combinação. a) Rode o parafuso de ajuste para a direita para aumentar o fluxo de óleo.
  • Page 221: Resolução De Problemas

    Resolução de problemas O motor não arranca Peça do produto a examinar Causa possível Ação Prendedores de arranque Os prendedores do dispositivo de ar- Ajuste ou substitua os prendedores ranque estão obstruídos. do dispositivo de arranque. Limpe a área em redor dos prende- dores.
  • Page 222: Transporte E Armazenamento

    • Remova a cobertura da vela de ignição e engate o travão da corrente. Especificações técnicas Especificações técnicas Husqvarna T435 Motor Cilindrada, cm 35,2 Velocidade ao ralenti, rpm 2900 Potência máxima do motor de acordo com a norma ISO...
  • Page 223: Acessórios

    Equipamento de corte recomendado Corrente da serra com baixa tendência de retrocesso O modelo de motosserra da Husqvarna T435 foi avaliado relativamente à segurança de acordo com EN Uma corrente da serra que seja de baixo retrocesso ISO 11681-2:2011/A1:2017 (Máquinas para silvicultura ‐...
  • Page 224: Retrocesso E Raio Da Extremidade Da Lâmina De Guia

    Equipamento e ângulos de afiação Se não tiver a certeza sobre como identificar o tipo de Utilize um calibrador de lima da Husqvarna para afiar a corrente da serra no produto, consulte corrente da serra. Um calibrador de lima da Husqvarna www.husqvarna.com para obter mais informações.
  • Page 225: Declaração Ce De Conformidade

    (2006/42/CE), artigo 12.º, ponto 3b. O certificado para o exame CE de tipo de acordo com o anexo IX, tem o número: 0404/09/2013 – T435. Adicionalmente, RISE SMP Svensk Maskinprovning AB, Box 7035, SE-750 07 Uppsala, Suécia, atribuiu a certificação de conformidade com o anexo V da Diretiva...
  • Page 226: Namen Uporabe

    Uvod Namen uporabe Opis izdelka Izdelek je namenjen strokovnemu vzdrževanju dreves, Husqvarna T435 je model motornih žag z motorjem z na primer prirezovanju in razrezu drevesnih krošenj. notranjim zgorevanjem. Stalno delamo na tem, da bi povečali varnost in Opomba: Uporabo tega izdelka je lahko omejena z učinkovitost med delovanjem.
  • Page 227 9. Ročica zaganjalne vrvice 10. Sprednji ročaj 11. Posoda za verižno olje Membrana črpalke goriva. 12. Nastavitveni vijak za oljno črpalko 13. Membrana črpalke goriva 14. Čok Nastavitev oljne črpalke. 15. Zaklep ročice plina 16. Ročica plina 17. Vklopno/izklopno stikalo Gorivo.
  • Page 228: Varnost

    EU V Opomba: Ostali simboli in oznake na izdelku se nanašajo na zahteve za certifikacijo, ki veljajo za nekatere trge. OPOZORILO: Zaradi predelave motorja se razveljavi EU-homologacija tega izdelka. Varnost Varnostne definicije zaidete v situacijo, v kateri se ne počutite varno, zaustavite stroj in prosite za nasvet strokovnjaka.
  • Page 229 • Izdelka ne uporabljajte, če ste utrujeni, pod vplivom prijem morate uporabljati ne glede na to, ali ste alkohola ali drog ali zdravil oziroma v drugih desničar ali levičar. Tak prijem zmanjša učinek okoliščinah, ki vplivajo na vaš vid, pozornost, povratnega udarca in omogoča, da obdržite nadzor koordinacijo ali presojo.
  • Page 230: Osebna Zaščitna Oprema

    Uporabljajte škornje z zaščito za motorne žage, motorne žage, se obrnite na svojega pooblaščenega ojačano konico in nedrsečim podplatom. prodajalca ali družbo Husqvarna. Radi vam bomo • S sabo imejte vedno komplet prve pomoči. priskočili na pomoč z nasveti in vam pomagali, da •...
  • Page 231 Povlecite sprednji ščitnik roke nazaj, da izklopite zavoro Vklopno/izklopno stikalo verige. Z vklopno/izklopnim stikalom izklopite motor. Zaklep ročice plina Dušilnik Zaklep ročice plina preprečuje neželeno uporabo ročice plina. Če z dlanjo objamete ročaj in pritisnete zaklep OPOZORILO: Dušilnik med in po delovanju ročice plina (A), se ročica plina (B) sprosti.
  • Page 232: Varnostna Navodila Za Vzdrževanje

    • Pri ponovnem dolivanju goriva pokrov odpirajte • Uporabljajte samo kombinacije mečev in verig ter počasi za počasno sproščanje morebitnega opremo za brušenje, ki jih priporočamo. Za navodila Dodatna oprema na strani 254 . odvečnega tlaka. glejte poglavje • Po dolivanju goriva skrbno privijte pokrov za gorivo. •...
  • Page 233: Montaža

    Montaža Uvod 6. Poravnajte luknjo v meču z vijakom za napenjanje verige in namestite pokrov sklopke. OPOZORILO: Preden začnete sestavljati izdelek, morate prebrati in razumeti poglavje o varnosti. Sestavljanje meča in verige 1. Sprostite zavoro verige. 2. Odvijte matico meča in odstranite pokrov sklopke. Opomba: Če pokrova sklopke ni mogoče preprosto odstraniti, privijte matico meča ter aktivirajte zavoro verige in jo sprostite.
  • Page 234 Za čim boljše rezultate in zmogljivost uporabite olje za dvotaktne motorje Husqvarna. • Če olje za dvotaktne motorje Husqvarna ni na voljo, lahko uporabite kakovostno olje za dvotaktne motorje z zračnim hlajenjem. Za izbiro ustreznega olja se obrnite na servisnega zastopnika.
  • Page 235 Nastavitev pretoka verižnega olja na strani 250 . • Za dolgo življenjsko dobo verige in preprečitev negativnih vplivov na okolje uporabljajte verižno olje Husqvarna. Če verižno olje Husqvarna ni na voljo, priporočamo uporabo standardnega verižnega olja. • Uporabljajte verižno olje, ki se dobro prime verige.
  • Page 236: Zagon Izdelka

    lahko odboj poteka v različne smeri. Na smer odboja udarcem vklopiti, da zaustavi verigo. Če ste blizu vpliva način uporabe izdelka v času povratnega udarca. meča, zavora verige morda ne bo imela dovolj časa za zaustavitev verige, preden vas veriga zadene. OPOZORILO: Povratni udarec lahko preprečite samo vi in ustrezen način uporabe.
  • Page 237 Zagon izdelka 5. Za dodatna navodila glejte poglavje 4. Z desno roko počasi povlecite ročico zaganjalne na strani 237 . vrvice, dokler ne začutite upora. Priprava zagona s toplim motorjem OPOZORILO: Ko zaženete izdelek, mora biti zavora verige vklopljena, da se zmanjša nevarnost poškodb.
  • Page 238: Izklop Izdelka

    8. Uporabite izdelek. Zagon izdelka na drevesu Opomba: Pred zagonom izdelka se prepričajte, da je dovolj goriva. 1. Aktivirajte zavoro verige. 2. Med zagonom izdelek držite na levi ali desni strani svojega telesa. a) Če držite izdelek na levi strani, z levo roko primite prednji ročaj.
  • Page 239 1. Pred odstranitvijo varnostne zanke s pripomočkov za vzpenjanje morate izdelek pripeti na oprtnik. Izdelek pripnite v oprtnik skozi zaponko za jermen ali jekleni obroček na varnostni zanki. Priprava izdelka za uporabo na drevesu Uporabnik na tleh Kot uporabnik na tleh opravite naslednje. 1.
  • Page 240 • Stabilno stojte in navpične veje žagajte z nizko OPOZORILO: Pred spustom izdelka na stransko silo. Varnostno vrv napeljite skozi različne kovinsko zanko morate aktivirati zavoro pritrdilne točke, da izničite ali zmanjšate rastoče verige. stranske sile. Uporabite lahko tudi nastavljivo kovinsko zanko z oprtnika za drugo pritrdilno točko.
  • Page 241: Vzdrževanje

    Vzdrževanje Uvod OPOZORILO: Pred izvajanjem vzdrževalnih del na izdelku morate prebrati in razumeti poglavje o varnosti. Urnik vzdrževanja Dnevno vzdrževanje Tedenska vzdrževalna opravila Mesečna vzdrževalna opravila Čiš- Prever- Očistite zunanje dele izdelka in se Očistite hladilni sistem. Glejte Preverite zavorni trak. Glejte čenje hladilnega sistema na strani janje zavornega traku na strani 242 .
  • Page 242 Dnevno vzdrževanje Tedenska vzdrževalna opravila Mesečna vzdrževalna opravila Prepričajte se, da se veriga med de- lovanjem motorja v prostem teku ne vrti. Prepričajte se, da je dušilnik pravilno nameščen in da ni poškodovan ter da ne manjka noben del dušilnika. Vzdrževanje in preverjanje 2.
  • Page 243 Preverjanje stikala za vklop/izklop 2. Potisnite zaklep ročice plina navzdol in se prepričajte, da se vrne v začetni položaj, ko ga 1. Zaženite motor. sprostite. 2. Vklopno/izklopno stikalo potisnite v položaj STOP. Motor se mora izklopiti. Preverjanje dušilnika 3. Prepričajte se, da je ročica plina zaklenjena v položaju prostega teka, ko je zaklep ročice plina 1.
  • Page 244 5. Sestavite dušilec in se prepričajte, da je pravilno POZOR: Če se veriga vrti v prostem teku, pritrjen na izdelek. obračajte vijak za nastavitev števila vrtljajev v prostem teku v nasprotni smeri urinega kazalca, dokler se veriga ne ustavi. Nastavitev igle za nizko hitrost (L) •...
  • Page 245: Čiščenje Zračnega Filtra

    • Prepričajte se, da se veriga v prostem teku ne vrti. 9. Privijte vijak na sredini jermenice. • Če izdelka ne morete preprosto zagnati ali če ima izdelek slabo zmogljivost pospeševanja, nastavite igli za nizko in visoko hitrost. POZOR: Nepravilna nastavitev lahko poškoduje motor.
  • Page 246: Brušenje Verige

    Obrabljen ali poškodovan meč oziroma verigo zamenjajte s kombinacijo meča in verige, ki jo priporoča Husqvarna. To je potrebno za ohranjanje varnostnih funkcij izdelka. Za seznam nadomestnih kombinacij meča in verige, ki jih priporočamo, glejte poglavje Dodatna oprema na strani 254 .
  • Page 247 Premer okrogle pile. Verige ni enostavno pravilno nabrusiti brez ustrezne Splošne informacije o brušenju rezil opreme. Uporabite šablono za brušenje Husqvarna. Tako boste ohranili največjo učinkovitost rezanja in Ne uporabljajte tope verige. Če je veriga topa, morate zmanjšali tveganje povratnega udarca.
  • Page 248: Nastavitev Napetosti Verige

    247 . Nastavitev globine reza priporočamo po Opomba: Za informacije o tem, katero pilo in vsakem tretjem brušenju rezalnih zob. šablono priporoča družba Husqvarna za vašo verigo, Dodatna oprema na strani 254 . glejte poglavje Priporočamo uporabo naše šablone za brušenje globinskih zob za nastavitev ustrezne globine in šablono...
  • Page 249 Preverjanje verižnika 3. Dvignite sprednji del meča in zavrtite vijak za napenjanje verige. Uporabite ključ. Boben sklopke ima verižnik, ki je privarjen nanj. 4. Verigo napnite toliko, da se tesno prilega meču, vseeno pa jo lahko z lahkoto premikate. • Redno vizualno preverjajte stopnjo obrabe verižnika.
  • Page 250 3. Verigo primerjajte z novo verigo, da ugotovite, če so 5. Preverite, ali je konica meča groba ali zelo kovice in členi obrabljeni. obrabljena. 4. Zamenjajte verigo, ko je najdaljši del rezalnega zoba krajši od 4 mm/0,16 palca. Verigo prav tako zamenjajte, če so na rezilih razpoke.
  • Page 251: Odpravljanje Težav

    b) Za zmanjšanje pretoka olja zavrtite nastavitveni 2. Prepričajte se, da hladilni sistem ni umazan ali vijak v nasprotni smeri urinega kazalca. zamašen. Čiščenje hladilnega sistema POZOR: Umazan ali zamašen hladilni Hladilni sistem ohranja nizko temperaturo motorja. sistem lahko povzroči pregrevanje Sistem hlajenja sestavlja vstopna odprtina za zrak na izdelka, zaradi česar lahko pride do zaganjalniku (A), ploščo za usmerjanje zraka (B),...
  • Page 252: Prevoz In Skladiščenje

    škodo na izdelku. Vzdrževanje na strani 241 . Tudi nepremična veriga lahko povzroči hude 4. Opravite popoln servis izdelka. poškodbe. • Odstranite pokrovček s svečke in aktivirajte zavoro verige. Tehnični podatki Tehnični podatki Husqvarna T435 Motor 733 - 002 -...
  • Page 253 Husqvarna T435 Gibna prostornina valja v cm 35,2 Število vrtljajev v prostem teku, vrt/min 2900 Največja izhodna moč motorja, v skladu z ISO 8893, 1,5/2,0/10000 kW/KM pri vrt/min Vžigalni sistem Svečka NGK CMR6H Razmik elektrod, mm 0,65 Sistem za gorivo in mazanje...
  • Page 254: Dodatna Oprema

    Priporočena rezalna oprema Veriga z majhnim povratnim udarcem Ocena varnosti modela motornih žag Husqvarna T435 je izdelana v skladu s standardom EN ISO 11681-2:2011/ Veriga, ki je označena kot veriga z majhnim povratnim A1:2017 (Gozdarski stroji – Zahteve za varnost in udarcem, izpolnjuje zahtevo za majhen povratni udarec preskušanje prenosnih motornih verižnih žag.
  • Page 255: Izjava Es O Skladnosti

    Izjava ES o skladnosti Husqvarna AB, SE-561 82 Huskvarna, Sweden, tel: +46-36-146500, izjavlja pod izključno odgovornostjo, da so motorne žage za nego dreves Husqvarna T435 s serijskimi številkami iz leta 2016 in novejšimi (leto je jasno navedeno v besedilu na tipski ploščici z zaporedno serijsko številko) skladne z zahtevami...
  • Page 256 Original instructions Istruzioni originali Originalanweisungen Instrucciones originales Instructions d’origine Instruções originais Originele instructies Izvirna navodila 1140545-39 2018-10-15...

Table des Matières