JVC RX-5060B Manuel D'instructions
Masquer les pouces Voir aussi pour RX-5060B:
Table des Matières

Publicité

Les langues disponibles

Les langues disponibles

Liens rapides

AUDIO/VIDEO CONTROL RECEIVER
RECEPTEUR DE COMMANDE AUDIO/VIDEO
RX-5060B
TA/NEWS/INFO
DISPLAY MODE
INSTRUCTIONS
MANUEL D'INSTRUCTIONS
LVT1507-002A
[C]

Publicité

Chapitres

Table des Matières
loading

Sommaire des Matières pour JVC RX-5060B

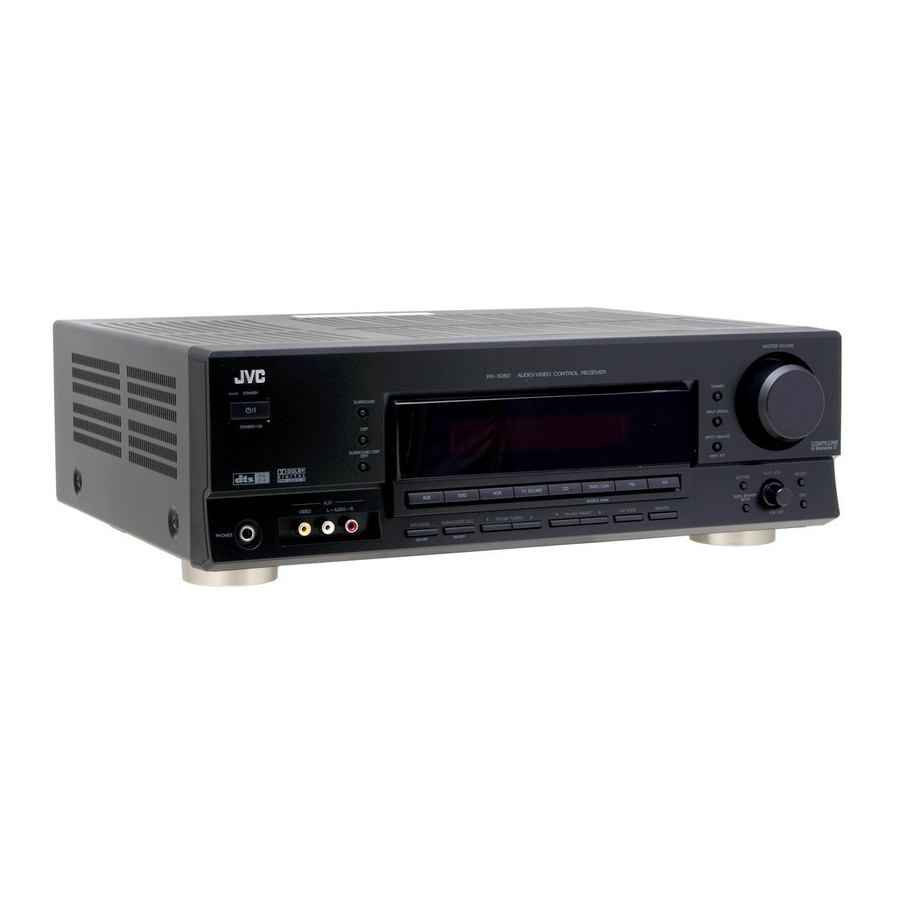
  • Page 1 AUDIO/VIDEO CONTROL RECEIVER RECEPTEUR DE COMMANDE AUDIO/VIDEO RX-5060B TA/NEWS/INFO DISPLAY MODE INSTRUCTIONS MANUEL D’INSTRUCTIONS LVT1507-002A...
  • Page 2: Warnings, Cautions And Others/Mises En Garde, Précautions Et Indications Diverses

    • When the unit is on standby, the STANDBY lamp lights red. CAUTION • When the unit is turned on, the STANDBY lamp goes off. Changes or modifications not approved by JVC could void The power can be remote controlled. the user’s authority to operate the equipment. Attention––Touch STANDBY/ON Déconnectez la fiche d’alimentation secteur pour mettre...
  • Page 3: Table Des Matières

    COMPU LINK Remote Control System ..28 Attenuating the Input Signal ............ 12 Changing the Source Name ............12 Operating JVC’s Audio/Video Components ... 29 Muting the Sound ..............13 Operating Audio Components ..........29 Using the Sleep Timer .............. 13 Operating Video Components ..........
  • Page 4: Parts Identification

    Parts Identification Front Panel 1 2 3 4 7 8 9 p MASTER VOLUME RX—6030V AUDIO/VIDEO CONTROL RECEIVER STANDBY SURROUND DIMMER STANDBY/ON INPUT DIGITAL DUALMONO 3D - PHONIC VIRTUAL SB TUNED STEREO AUTO MUTING SLEEP H.PHONE PRO LOGIC DSP DIGITAL EQ INPUT ATT VOLUME SURROUND/DSP...
  • Page 5 See pages in parentheses for details. Remote Control 1 TV/CATV selector (31) 2 Number buttons for selecting preset channels (15, 29) Number buttons for sound adjustment (22, 29) Number buttons for operating audio/video components (29 – 32) CATV A/V CONTROL STANDBY/ON RECEIVER 3 SOUND button (22, 29)
  • Page 6: Getting Started

    Do not connect the AC power cord until all other connections have been made. Getting Started This section explains how to connect audio/video components and speakers to the receiver, and how to connect the power supply. Notes: Before Installation • Supplied batteries are for the initial setup. Replace for continued use.
  • Page 7: Connecting The Speakers And Subwoofer

    Do not connect the AC power cord until all other connections have been made. AM antenna connections Connecting the Speakers and Subwoofer You can connect five speakers (a pair of front speakers, a center speaker, and a pair of surround speakers) and a subwoofer. AM Loop Antenna CAUTIONS: (supplied)
  • Page 8: Connecting The Subwoofer

    Do not connect the AC power cord until all other connections Getting Started have been made. Connecting the subwoofer Connecting Audio/Video Components You can enhance the bass by connecting a subwoofer. Connect the input jack of a powered subwoofer to the rear panel, When connecting individual components, refer also to the manuals using a cable with RCA pin plugs (not supplied).
  • Page 9 Do not connect the AC power cord until all other connections have been made. Video component connections DVD player Use the cables with RCA pin plugs (not supplied). Connect the white plug to the audio left jack, the red plug to the audio right jack, and the yellow plug to the video jack.
  • Page 10: Digital Connections

    Do not connect the AC power cord until all other connections Getting Started have been made. Digital Connections Notes: By connecting the receiver and the source component through the • When shipped from the factory, the DIGITAL IN terminals have been set for use with the following components: digital terminals, sound reproduction quality will be much improved.
  • Page 11: Basic Operations

    Basic Operations The following operations are commonly used when you play any sound sources. Operations hereafter will be explained using the buttons on the front panel. You can also use the buttons on the remote control for the same functions if they have the same and similar names/marks. Daily Operational Procedure Selecting the Source to Play When you have connected digital source components using the...
  • Page 12: Selecting Different Sources For Picture And Sound

    Basic Operations Speaker and signal indicators on the display Selecting different sources for picture and sound By checking the following indicators, you can easily confirm which speakers you are activating and which signals are coming into this While watching pictures from a video source, you can listen to receiver.
  • Page 13: Listening With Headphones

    Listening with headphones: Selecting the Analog or Digital Input Mode Remote You can enjoy not only stereo software but also multi- channel software through the headphones. (Sounds are When you have connected digital source components using the both down-mixed to the front channels while playing multi-channel analog and digital terminals (see pages 6 to 8), you can select the software.) input mode—either digital or analog—for these components.
  • Page 14: Changing The Display Brightness

    Basic Operations When playing software encoded with Dolby Digital or DTS, the Attenuating the Input Signal Remote following symptoms may occur: • Sound does not come out at the beginning of playback. When the input level of the analog source is too high, the sounds •...
  • Page 15: Muting The Sound

    The following basic operations are possible only using the Recording a source remote control. You can record any sources playing through the receiver to a cassette deck (or a CD recorder) connected to the TAPE/CDR jacks and the VCR connected to the VCR jacks at the same time.
  • Page 16: Receiving Radio Broadcasts

    Receiving Radio Broadcasts You can browse through all the stations or use the preset function to go immediately to a particular station. Tuning in to Stations Manually Remote Using Preset Tuning 1 Press FM or AM to select the band. Once a station is assigned to a channel number, the station can be quickly tuned in.
  • Page 17: Selecting The Fm Reception Mode

    To tune in a preset station Selecting the FM Reception Mode On the front panel: When an FM stereo broadcast is hard to receive or noisy, you can change the FM reception mode while receiving an FM broadcast. 1 Press FM or AM to select the band. •...
  • Page 18: Basic Settings

    Basic Settings Some of the following settings are required after connecting and positioning your speakers while others will make operations easier. You can use QUICK SPEAKER SETUP to easily set up your speaker configuration. 5 Press in MULTI JOG (PUSH SET). Quick Speaker Setup Remote “COMPLETE”...
  • Page 19: Basic Setting Items

    Basic Setting Items Remote Basic Procedure On the following pages, you can adjust the following items: • You can only select the items currently available. For details, see the explanation of each item. Items To do See page SUBWOOFER* Register your subwoofer. FRNT SPEAKERS* Register your front speaker size.
  • Page 20: Setting The Speakers

    Basic Settings ¶ Speaker distance—FRONT L DIST, FRONT R DIST, Setting the Speakers CENTER DIST, SURR L DIST, SURR R DIST To obtain the best possible surround effect from the Surround and Set the distance from the listening point within the range of DSP modes, register the setting about the speaker arrangement after 0.3 m (1 ft) to 9.0 m (30 ft), in 0.3 m (1 ft) intervals.
  • Page 21: Selecting The Main Or Sub Channel

    ¶ Crossover frequency—CROSSOVER Selecting the Main or Sub Channel You can select the crossover frequency for the small speakers You can select the playback sound (channel) you want while playing used. The signals below the preset frequency level will be sent to digital software recorded (or broadcast) in Dual Mono mode (see and be reproduced by the subwoofer (or by “LARGE”...
  • Page 22: Setting For Effective Surround Operations

    Basic Settings Setting for Effective Surround Operations Setting the Digital Input Terminals ¶ Virtual Surround Back—VIRTUAL SBACK When you use the digital input terminals, register which components you have connected to the digital input terminals. You can enjoy the surround back channel while playing back Dolby Digital Surround EX software or DTS-ES software ¶...
  • Page 23: Adjusting Sound

    Adjusting Sound You can make sound adjustment to your preference after completing basic settings. Basic Adjustment Items Basic Procedure Remote On the following pages, you can adjust the following items: • You can adjust only the items applicable to the current sound mode.
  • Page 24: Adjusting The Equalization Patterns

    Adjusting Sound Adjusting the Equalization Patterns For Pro Logic II Music only You can adjust the equalization patterns to your preference. PANORAMA CTRL: Select “PANORAMA ON” to add • Once you have made adjustment, it is memorized for each source. “wraparound”...
  • Page 25: Using The Surround Modes

    Using the Surround Modes This unit activates a variety of Surround modes automatically. The basic settings and adjustments stored (see pages 16 to 22) are applied automatically. Reproducing Theater Ambience Introducing the Surround Modes In a movie theater, many speakers are located on the walls to Dolby Digital* reproduce impressive multi-surround sounds, reaching you from all Dolby Digital is a digital signal compression method, developed...
  • Page 26 • If both the surround speakers and center speaker are set to DTS 96/24 “NONE” in the speaker setting, JVC’s original 3D-PHONIC In recent years, there has been increasing interest in higher sampling processing (which has been developed to create the surround rates both for recording and for reproducing at home.
  • Page 27: Activating The Surround Modes

    • For DTS multi-channel digital software (except 2-channel Activating the Surround Modes and Dual Mono software), incoming signals are automatically detected and “DTS SURROUND” is activated. Available Surround modes vary depending on the incoming signals. Activating one of the Surround modes for a source automatically recalls the memorized settings and adjustments (see pages 16 to 22).
  • Page 28: Using The Dsp Modes

    • If surround speakers are set to “NONE” in the speaker setting, Headphone Mode is activated without respect to the type of JVC’s original 3D-PHONIC processing (which has been software played back. “3D H PHONE” appears on the display developed to create the surround effect through the front speakers and the DSP and H.PHONE indicators light up.
  • Page 29: Activating The Dsp Modes

    • If surround speakers are set to “NONE” in the speaker setting, JVC’s original 3D-PHONIC processing (which has been developed to create the surround effect through the front speakers only) is used. The 3D-PHONIC indicator lights up on the display.
  • Page 30: Compu Link Remote Control System

    COMPU LINK Remote Control System The COMPU LINK remote control system allows you to operate JVC’s audio components through the remote sensor on the receiver. Automatic Source Selection To use this remote control system, you need to connect JVC’s audio...
  • Page 31: Operating Jvc's Audio/Video Components

    Operating JVC’s Audio/Video Components You can operate JVC’s audio and video components with this receiver’s remote control, since control signals for JVC’s components are preset in the remote control. Operating Audio Components Tuner You can always perform the following operations:...
  • Page 32: Operating Video Components

    Return to the beginning of the current (or previous) control: track. • Some JVC’s VCRs can accept two types of the control signals— ¢: Skip to the beginning of the next track. remote code “A” and “B.” Before using this remote control, make sure Stop playing.
  • Page 33: Operating Other Manufacturers' Video Equipment

    Operating Other Manufacturers’ Video Equipment This remote control supplied for the receiver can transmit control signals for other manufacturers’ TVs, CATV converters, VCRs and DVD players. To change the transmittable signals for When operating the other manufacturers’ components, refer also to the manuals supplied with them.
  • Page 34 Operating Other Manufacturers’ Video Equipment To change the transmittable signals for To change the transmittable signals for operating another manufacturer’s DVD player operating another manufacturer’s VCR 1 Press and hold STANDBY/ON DVD. 1 Press and hold STANDBY/ON VCR. 2 Press DVD. 2 Press VCR.
  • Page 35: Troubleshooting

    Troubleshooting Use this chart to help you solve daily operational problems. If there is any problem you cannot solve, contact your JVC’s service center. PROBLEM POSSIBLE CAUSE SOLUTION The display does not light up. The power cord is not plugged in.
  • Page 36: Specifications

    Specifications Amplifier Output Power 100 W per channel, min. RMS, driven into 8 Ω, at 1 kHz with no Front channels: more than 10% total harmonic distortion. 100 W, min. RMS, driven into 8 Ω, at 1 kHz with no more than 10% Center channel: total harmonic distortion.
  • Page 37 Système de commande à distance COMPU LINK ... 28 Atténuation du signal d’entrée ..........12 Modification du nom de la source ..........12 Commande d’appareils audio/vidéo JVC ..29 Mise en sourdine du son ............13 Commande d’appareils audio ........... 29 Utilisation de la minuterie d’arrêt ..........
  • Page 38: Indentification Des Parties

    Indentification des parties Panneau avant 1 2 3 4 7 8 9 p MASTER VOLUME RX—6030V AUDIO/VIDEO CONTROL RECEIVER STANDBY SURROUND DIMMER STANDBY/ON INPUT DIGITAL DUALMONO 3D - PHONIC VIRTUAL SB TUNED STEREO AUTO MUTING SLEEP H.PHONE PRO LOGIC DSP DIGITAL EQ INPUT ATT VOLUME SURROUND/DSP...
  • Page 39: Panneau Arrière

    Pour les détails, se référer aux pages entre parenthèses. Télécommande 1 Sélecteur TV/CATV (31) 2 Touches numérotées pour la sélection des canaux préréglées (15, 29) Touches numérotées pour l’ajustement du son (22, 29) CATV A/V CONTROL STANDBY/ON RECEIVER Touches numérotées pour la commande des appareils audio/ TEST FRONT L FRONT R...
  • Page 40: Pour Commencer

    Ne connectez pas le cordon d’alimentation secteur avant que toutes les connexions soient terminées. Pour commencer Cette section explique comment connecter les appareils audio/vidéo et les enceintes à l’ampli-tuner, et comment connecter l’appareil au secteur. Remarques: Avant l’installation • Les piles fournies sont uniquement pour les réglages initiaux. Remplacez-les pour continuer à...
  • Page 41: Connexion De L'antenne Am

    Ne connectez pas le cordon d’alimentation secteur avant que toutes les connexions soient terminées. Connexion de l’antenne AM Connexion des enceintes et du caisson de grave Il est possible de connecter cinq enceintes (une paire d’enceintes avant, une enceinte centrale et une paire d’enceintes Surround) et un Antenne cadre caisson de grave.
  • Page 42: Connexion Du Caisson De Grave

    Ne connectez pas le cordon d’alimentation secteur avant que Pour commencer toutes les connexions soient terminées. Connexion du caisson de grave Connexion des appareils audio/vidéo Vous pouvez améliorer les graves en connectant un caisson de grave. Connectez la prise d’entrée d’un caisson de grave au panneau arrière Lors de la connexion de composants individuels, référez-vous aussi en utilisant un câble à...
  • Page 43: Connexion Des Appareils Vidéo

    Ne connectez pas le cordon d’alimentation secteur avant que toutes les connexions soient terminées. Connexion des appareils vidéo Lecteur de DVD Utiliser des câbles munis de fiches cinch (non fournis). Connectez la fiche blanche à la prise audio gauche, la prise rouge à la fiche audio droite et la fiche jaune à...
  • Page 44: Connexions Numériques

    Ne connectez pas le cordon d’alimentation secteur avant que Pour commencer toutes les connexions soient terminées. Connexions numériques Remarques: En connectant l’ampli-tuner et l’appareil source par les prises • A l’expédition de l’usine, les prises DIGITAL IN ont été réglées pour être utilisées avec les appareils suivants: numériques, la qualité...
  • Page 45: Opérations De Base

    Opérations de base Les opérations suivantes sont utilisées ordinairement lors de la reproduction de n’importe quelle source. Les opérations ci-après sont expliquées en utilisant les touches du panneau avant. Vous pouvez aussi utiliser les touches de la télécommande pour la même fonction si elles portent le même nom/marque ou un nom/ marque similaire.
  • Page 46: Indicateurs D'enceinte Et De Signal Sur L'affichage

    Opérations de base Indicateurs d’enceinte et de signal sur l’affichage Sélection d’une source différente pour l’image et le son En vérifiant les indicateurs suivants, vous pouvez vérifier facilement quelle enceinte est en service et quels signaux entrent dans cet Quand vous regardez des images provenant d’une source vidéo, ampli-tuner.
  • Page 47: Écoute Avec Un Casque D'écoute

    Écoute avec un casque d’écoute: Sélection du mode d’entrée analogique ou Remote Vous pouvez écouter avec un casque d’écoute non numérique seulement les supports stéréo mais aussi les supports multicanaux. (Les sons sont sous-mixés sur les canaux avant lors de Si vous avez connecté...
  • Page 48: Changement De La Luminosité De L'affichage

    Opérations de base Lors de la reproduction d’une source codée avec Dolby Digital Atténuation du signal d’entrée Remote ou DTS, les symptômes suivant peuvent se produire: • Aucun son ne sort au début de la lecture. Quand le niveau d’entrée de la source analogique est trop élevé, les •...
  • Page 49: Mise En Sourdine Du Son

    Les opérations de base suivantes sont possibles uniquement Enregistrement d’une source en utilisant la télécommande. Vous pouvez enregistrer, en même temps, n’importe quelle source à travers l’ampli-tuner sur une platine cassette (ou un enregistreur de CD) connecté aux prises TAPE/CDR et sur un magnétoscope connecté...
  • Page 50: Réception D'émissions De Radio

    Réception d’émissions de radio Vous pouvez parcourir toutes les stations ou utiliser la fonction de préréglage pour aller directement à une station particulière. Accord manuel d’une station Remote Utilisation de l’accord par préréglage 1 Appuyez sur FM ou AM pour sélectionner la Une fois qu’une station est affectée à...
  • Page 51: Sélection Du Mode De Réception Fm

    Pour accorder une station préréglée Sélection du mode de réception FM Sur le panneau avant: Quand une émission FM stéréo est difficile à recevoir ou parasitée, il est possible de changer le mode de réception FM lors de la 1 Appuyez sur FM ou AM pour sélectionner la réception d’une émission FM.
  • Page 52: Réglages De Base

    Réglages de base Certains des réglages suivants doivent être effectués après la connexion et la disposition des enceintes tandis que d’autres rendront les opérations plus simples. Vous pouvez utiliser QUICK SPEAKER SETUP pour faciliter la configuration de vos enceintes. 5 Apppuyez sur MULTI JOG (PUSH SET). Configuration rapide des enceintes Remote “COMPLETE”...
  • Page 53: Éléments Des Réglages De Base

    Éléments des réglages de base Remote Procédure de base Sur les pages suivantes, vous pouvez ajuster les réglages suivants: • Vous pouvez choisir uniquement les éléments actuellement disponibles. Pour les détails, référez-vous aux explications associées. Éléments Pour Voir page SUBWOOFER* Enregistrer le caisson de grave.
  • Page 54: Réglage Des Enceintes

    Réglages de base ¶ Distance des enceintes—FRONT L DIST, FRONT R Réglage des enceintes DIST, CENTER DIST, SURR L DIST, SURR R DIST Pour obtenir le meilleur son Surround possible avec les modes Réglez la distance à partir du point d’écoute dans une plage de Surround et DSP, il faut enregistrer des informations sur la 0,3 m (1 pied) à...
  • Page 55: Sélection Du Canal Principal Ou Secondaire

    ¶ Fréquence de transition—CROSSOVER Sélection du canal principal ou secondaire Vous pouvez choisir la fréquence de transition pour les petites Vous pouvez choisir le son (canal) de lecture lors de la reproduction enceintes utilisées. Les signaux en dessous du niveau de d’un support numérique enregistré...
  • Page 56: Réglage Pour Une Utilisation Efficace Du Surround

    Réglages de base Réglage pour une utilisation efficace du Réglage des prises d’entrée numérique Surround Quand vous utilisez les prises d’entrée numérique, enregistrez quel ¶ Surround arrière virtuel—VIRTUAL SBACK appareil est connecté aux prises d’entrée numérique. Vous pouvez profiter du canal Surround arrière lors de la lecture ¶...
  • Page 57: Ajustment Du Son

    Ajustment du son Vous pouvez ajuster le son selon vos préférences après avoir terminé les réglages de base. Éléments des réglages de base Procédure de base Remote Sur les pages suivantes, vous pouvez ajuster les éléments décrits ci-dessous: • Vous pouvez uniquement ajuster les éléments applicables au mode sonore actuel.
  • Page 58: Ajustement Des Courbes D'égalisation

    Ajustment du son Ajustement des courbes d’égalisation Pour le Pro Logic II Music uniquement Vous pouvez ajuster les courbes d’égalisation selon vos préférences. PANORAMA CTRL: Choisissez “PANORAMA ON” pour ajouter un effet “panoramique” au son avec une • Une fois que l’ajustement est réalisé, il est mémorisé pour chaque image de murs latéraux.
  • Page 59: Utilisation Des Modes Surround

    Utilisation des modes Surround Cet appareil permet de mettre en service une variété de modes Surround automatiquement. Les réglages de base et les ajustements mémorisés (voir pages 16 à 22) sont appliqués automatiquement. Reproduction de l’ambiance d’un cinéma Introduction des modes Surround Dans une salle de cinéma, beaucoup d’enceintes sont situées sur les Dolby Digital* murs pour reproduire un son multi-surround impressionnant vous...
  • Page 60: Mode De Casque D'écoute 3D-3D H Phone

    “NONE” dans le réglage des enceintes, le traitement original 3D- fréquences d’échantillonnage élevées pour l’enregistrement et la PHONIC de JVC (qui a été mis au point pour créer un effet lecture à domicile. Les fréquences d’échantillonnage plus élevées Surround à travers les enceintes avant uniquement) est utilisé.
  • Page 61: Mise En Service Du Mode Surround

    • Pour les supports numériques multicanaux DTS (sauf les Mise en service du mode Surround supports à 2 canaux et Dual Mono), les signaux entrants sont détectés automatiquement et “DTS SURROUND” est mis en Les modes Surround disponibles dépendent des signaux entrant. service.
  • Page 62: Utilisation Des Modes Dsp

    • Si les enceintes Surround sont réglées sur “NONE” dans le réglage des enceintes, le mode 3D-PHONIC original de JVC (qui a été mis au point pour créer un effet Surround uniquement à partir des enceintes avant) est utilisé. L’indicateur 3D-PHONIC s’allume...
  • Page 63: Mise En Service Du Mode Dsp

    • Si les enceintes Surround sont réglées sur “NONE” dans le réglage des enceintes, le traitement 3D-PHONIC original de JVC (qui a été mis au point pour créer un effet Surround uniquement à l’aide des enceintes avant) est utilisé. L’indicateur 3D-PHONIC s’allume sur l’affichage.
  • Page 64: Système De Commande À Distance Compu Link

    Système de commande à distance COMPU LINK Le système de commande à distance COMPU LINK vous permet de commander les appareils audio JVC à travers l’ampli-tuner. Pour utiliser ce système de commande à distance, vous devez Sélection automatique de source connecter les appareils audio JVC à...
  • Page 65: Commande D'appareils Audio/Vidéo Jvc

    Commande d’appareils audio/vidéo JVC Vous pouvez commander des appareils audio et vidéo JVC avec la télécommande de cet ampli-tuner car les signaux de commande des appareils JVC sont préréglés dans la télécommande. Commande d’appareils audio Tuner Vous pouvez toujours réaliser les opérations suivantes:...
  • Page 66: Commande D'appareils Vidéo

    Commande d’appareils vidéo Après avoir appuyé sur CD-DISC, vous pouvez réaliser les IMPORTANT: opérations suivantes sur un changeur de CD: Pour commander des appareils vidéo JVC en utilisant cette Démarer la lecture. télécommande: Retourner au début de la plage actuelle (ou •...
  • Page 67: Commande D'appareils Vidéo D'autres Fabricants

    Commande d’appareils vidéo d’autres fabricants La télécommande fournie avec l’ampli-tuner peut émettre les signaux de commande pour les téléviseurs, les convertisseurs CATV, les magnétoscopes, et les lecteurs de DVD d’autres fabricants. Pour changer les signaux émettables pour Pour commander les appareils d’autres fabricants, référez-vous aussi à commander un convertisseur CATV d’un autre leur mode d’emploi fabricant...
  • Page 68 Commande d’appareils vidéo d’autres fabricants Pour changer les signaux émettables pour Pour changer les signaux émettables pour commander le lecteur de DVD d’un autre fabricant commander le magnétoscope d’un autre fabricant 1 Maintenez pressée STANDBY/ON DVD. 1 Maintenez pressée STANDBY/ON VCR.
  • Page 69: Guide De Dépannage

    Guide de dépannage Utilisez ce tableau pour vous aider à résoudre les problèmes de fonctionnement quotidiens. Si certains problèmes ne peuvent pas être résolus, contacter un centre de réparation JVC. PROBLÈME CAUSE POSSIBLE SOLUTION L’affichage ne s’allume pas. Le cordon d’alimentation n’est pas Brancher le cordon d’alimentation sur une prise...
  • Page 70: Spécifications

    Spécifications Amplificateur Puissance de sortie 100 W par canal, min. RMS, entraîné sur 8 Ω à 1 kHz, avec moins Canaux avant: de 10% de distorsion harmonique totale. 100 W, min. RMS, entraîné sur 8 Ω à 1 kHz, avec moins de 10% de Canal central: distorsion harmonique totale.
  • Page 71 EN, FR © 2006 Victor Company of Japan, Limited 0106YHMMDWJEIN...

Table des Matières