Pioneer DJM-900SRT Serato DJ Edition Mode D'emploi

Pioneer DJM-900SRT Serato DJ Edition Mode D'emploi

Masquer les pouces Voir aussi pour DJM-900SRT Serato DJ Edition:
Table des Matières

Publicité

Les langues disponibles
  • FR

Les langues disponibles

  • FRANÇAIS, page 30

Liens rapides

DJM-900SRT
DJM-900SRT Serato DJ Edition
http://pioneerdj.com/support/
The Pioneer DJ support site shown above offers FAQs, information on software and various other types of
information and services to allow you to use your product in greater comfort.
Le site de support DJ de Pioneer indiqué ci-dessus propose une FAQ, des informations sur le logiciel et divers
types d'informations et de services qui permettent une utilisation plus confortable de ce produit.
Die oben gezeigte Pioneer DJ-Support-Website enthält häufig gestellte Fragen, Informationen über Software
und andere wichtige Informationen und Dienste, die Ihnen helfen, Ihr Produkt optimal zu verwenden.
Il sito di supporto DJ Pioneer indicato qui sopra offre una sezione FAQ, informazioni sul software ed
informazioni e servizi di vario tipo, per permettere un uso più confortevole dei nostri prodotti.
De bovengenoemde Pioneer DJ ondersteuningswebsite biedt een overzicht van de vaak gestelde vragen,
informatie over software en allerlei andere soorten informatie en diensten die u in staat stellen dit product met
meer gemak te gebruiken.
El sitio de asistencia Pioneer DJ mostrado arriba ofrece las preguntas frecuentes, información del software y
varios otros tipos de información y servicios que le permitirán usar su producto con mayor confort.
На указанном выше сайте поддержки Pioneer DJ содержатся раздел часто задаваемых вопросов,
информация по программному обеспечению, а также различные другие типы информации и услуг,
позволяющие использовать ваше изделие более лучшим образом.
http://rekordbox.com/
For various types of information and services regarding rekordbox™, see the Pioneer website above.
Pour les différents types d'informations et de services concernant rekordbox™, consultez le site Pioneer ci-dessus.
Weitere Informationen und Dienste bezüglich rekordbox™ finden Sie auf der oben angegebenen Pioneer-Website.
Per quanto riguarda vari tipi di informazione e servizi riguardanti rekordbox™, vedere il sito Pioneer menzionato qui sopra.
Zie de hierboven genoemde Pioneer website voor allerlei soorten informatie en diensten met betrekking tot rekordbox™.
Para varios tipos de información y servicios acerca del rekordbox™, visite el sitio web de Pioneer indicado arriba.
Относительно различных типов информации и услуг относительно rekordbox™ смотрите вебсайт Pioneer выше.
http://serato.com/
For the latest version of the Serato DJ software, access Serato.com and download the software from there.
Pour la toute dernière version du logiciel Serato DJ, accédez à Serato.com et téléchargez le logiciel de ce site.
Für die neueste Version der Serato DJ-Software gehen Sie zu Serato.com und laden die Software von dort
herunter.
Per ottenere la più recente versione di Serato DJ, raggiungere Serato.com e scaricare il software di lì.
Ga voor de nieuwste versie van de Serato DJ-software naar Serato.com en download de software van deze site.
Para la versión más reciente del software Serato DJ, acceda a Serato.com y descargue el software desde allí.
Относительно самой последней версии программного обеспечения Serato DJ зайдите на Serato.com и
загрузите оттуда программное обеспечение.
Operating Instructions
Mode d'emploi
Bedienungsanleitung
Istruzioni per l'uso
Handleiding
Manual de instrucciones
Инструкции по эксплуатации
DJ MIXER
TABLE DE MIXAGE
DJ-MISCHPULT
MIXER PER DJ
DJ MENGPANEEL
MESA DE MEZCLAS DJ
DJ микшерный пульт

Publicité

Table des Matières
loading

Sommaire des Matières pour Pioneer DJM-900SRT Serato DJ Edition

  • Page 1 Le site de support DJ de Pioneer indiqué ci-dessus propose une FAQ, des informations sur le logiciel et divers types d’informations et de services qui permettent une utilisation plus confortable de ce produit.
  • Page 2: Federal Communications Commission Declaration Of Conformity

    Thank you for buying this Pioneer product. Please read through these operating instructions so you will know how to operate your model properly. After you have finished read- ing the instructions, put them away in a safe place for future reference.
  • Page 3: Information To User

    A damaged power cord can cause a fire or give you an electrical shock. Check the power cord once in a while. When you find it damaged, ask your nearest PIONEER authorized service center or your dealer for a replacement. S002*_A1_En...
  • Page 4: Table Des Matières

    Downloading the Serato DJ software manual (p. 28). The latest version of the operating instructions (this manual) and the “Quick Start Guide – Serato DJ Edition” can be downloaded from the Pioneer support site. For details, see Downloading the latest versions of the operating instruc- tions and the Quick Start Guide - Serato DJ Edition (p.28).
  • Page 5: Before Start

    Pioneer model (DJM-800). STANDARD LAYOUT This unit carries over the control panel layout of the Pioneer DJM series, the world standard in DJ mixers. The simple, straightforward control panel layout not only facilitates DJ performances but lets even DJs using this unit for the first time to operate it without hesitation, so it can be used without worry as a mixer that is permanently installed in the club.
  • Page 6: Installing The Software

    You are located. 3 Ownership. Pioneer or its licensor retains all right, title and interest in and to 3 Severability and Waiver. If any provision of this Agreement is held to be...
  • Page 7: Installing The Serato Dj Software

    Click [Yes]. Supported operating systems The web browser is launched and the Pioneer DJ support site is displayed. Mac OS X 10.6 / 10.7 / 10.8 5 Click [Software Download] under [DJM-900SRT] on the 32-bit version ®...
  • Page 8 Connected to the internet?” is displayed. Click [Yes]. If any other programs are running on the computer, quit them. The web browser is launched and the Pioneer DJ support site is displayed. 1 Insert the CD-ROM into the computer’s CD drive.
  • Page 9 11 Read the terms of the license agreement carefully, and if you agree, click [Agree]. If you do not agree to the contents of the usage agreement, click [Disagree] to cancel installation. 12 If the following screen appears, drag and drop the [Serato DJ] icon on the [Applications] folder icon.
  • Page 10: Connections

    Outputs the master channel audio signals. b LINK terminal (page 11) Connect these to the LINK terminals on Pioneer DJ players or the LAN ports of computers on which rekordbox is installed (PRO DJ LINK). To connect multiple devices, use a switching hub (commercially available).
  • Page 11: Connecting Input Terminals

    Switching hub PRO DJ LINK rekordbox Computers Pioneer DJ players 2 Pioneer DJ players 2 To power outlet 1 For details on PRO DJ LINK, see About PRO DJ LINK on page 15. 2 To use the fader start function with PRO DJ LINK, connect a LAN cable (page 16).
  • Page 12: Connecting To The Control Panel

    Connecting to the control panel Connecting this unit and computer For instructions on operating in combination with Serato DJ, see the “Quick Start Be sure to connect using the Computers Guide – Serato DJ Edition”. For details, see Downloading the latest versions of the included USB cable.
  • Page 13: Operation

    Operation Control Panel POWER MASTER MIDI START ON/ OFF LFO FORM / STOP CD/ LINE PHONO CD/ LINE PHONO CD/ LINE PHONO CD/ LINE PHONO MIC1 LEVEL DIGITAL DIGITAL DIGITAL DIGITAL DECK DECK DECK DECK UTILITY WAKE UP BEAT EFFECTS TRIM TRIM TRIM...
  • Page 14: Basic Operation

    g COLOR control (page 16) Basic Operation This changes the parameters of the SOUND COLOR FX of the different channels. h Channel Fader (page 14) Adjusts the level of audio signals output in each channel. Outputting sound i CROSS FADER ASSIGN (A, THRU, B) selector switch (page 14) Sets the output destination of each channel to [A] or [B].
  • Page 15: Advanced Operations

    2 Set the [OFF, ON, TALK OVER] selector switch to [ON] or [TALK OVER]. When a Pioneer DJ player supporting PRO DJ LINK (e.g. CDJ-2000nexus, CDJ-2000, — [ON]: The indicator lights. CDJ-900), a computer on which rekordbox is installed and this unit are connected by —...
  • Page 16: Using The Fader Start Function

    These are effects that change in association with the [COLOR] control. Connect this unit and a computer on which Serato DJ is running beforehand. In the same way, when this unit and a Pioneer DJ player are connected by LAN 1 Press one of the [SOUND COLOR FX] selection buttons.
  • Page 17: Operating Procedure

    — [AUTO]: The BPM is measured automatically from the audio signal that is Operating procedure 2 being input. The [AUTO] mode is set when this unit’s power is turned on. — [TAP]: The BPM is input manually by tapping the [TAP] button with a finger. 1 Perform steps 1 to 5 of the Using the BEAT EFFECT function The [AUTO] BPM measurement range is BPM = 70 to 180.
  • Page 18 [SND/RTN] [1/7 [2/7 [3/7 [7/7 [6/7 [5/7 [4/7 3 Press the [BEAT , ] button. Set the MIDI signal’s waveform output time. 4 Press the [ON/OFF] button of [BEAT EFFECTS] or touch the [X-PAD]. The MIDI message for turning the effect on is sent. When the [LFO FORM (WAKE UP)] button is pressed and a setting from [1/7 ] –...
  • Page 19: Types Of Effects

    Types of effects LEVEL/DEPTH control (param- Use this to set the balance between the original sound and the Types of SOUND COLOR FX effects eter 3) echo sound. X-PAD (parameter 4) Use this to set the delay time. Effect Name Descriptions [COLOR] control Turn counterclockwise: Applies the...
  • Page 20 [BEAT ] buttons. When the effect time changes, the input sound is recorded again. DJM-900SRT Serato DJ Edition Original buttons (parameter 1) — BEAT TIME control (parameter 2) —...
  • Page 21 The MIDI signal waveform pattern switches each time the [LFO FORM (WAKE UP)] button is pressed. Use these to set a waveform output time of 1/4 – 64/1 with buttons (parameter 1) BEAT respect to one beat of the BPM. TIME control (parameter 2) Use this to set the waveform output time.
  • Page 22: Midi Assignment Map

    MIDI assignment map MIDI assignment map “CC” is the abbreviation of “control change”. A control change is a type of MIDI signal used to transmit various types of control information, such as timbre, volume, etc. On this unit, values from 0 to 127 are output as CC mainly when controls and faders are operated. CC are also output when certain buttons are operated. “Note”...
  • Page 23 Button/Control/Switch Category MIDI assignment Trigger/Toggle Transmitted data Name Type Switch CC 034 OFF=0, ON=127 Switch CC 035 OFF=0, ON=127 Switch CC 036 OFF=0, ON=127 Switch CC 037 OFF=0, ON=127 CH SELECT Switch CC 038 OFF=0, ON=127 Switch CC 039 OFF=0, ON=127 CF.A Switch CC 040...
  • Page 24: Changing The Settings

    1 Note that the output sound may be distorted even if the master level indicator does not light up to the very top. About the setting utility software For Mac OS X Click [Macintosh HD] icon > [Application] > [Pioneer] > [DJM-900SRT] > [DJM- The setting utility can be used to make the checks and settings described below. 900SRT Settings Utility].
  • Page 25: Checking The Latest Information On The Driver Software

    Click the [MIXER INPUT] tab. Adjusting the buffer size (when using Windows ASIO) If an application using this unit as the default audio device (DJ software, etc.) is run- ning, quit that application before adjusting the buffer size. Display the setting utility before starting. Click the [ASIO] tab.
  • Page 26: Additional Information

    Inspect the other components and electrical appliances being used. If the trouble cannot be rectified after checking the items below, ask your nearest Pioneer authorized service center or your dealer to carry out repair work.
  • Page 27: Block Diagram

    Block Diagram MIC1 MIC1 LEVEL I/Fμ com ETHER SW IC MIC2 LEVEL Ether MIC2 DIGITAL MASTER CD/LINE TRIM PHONO PHONES Digital MASTER Control Tone DIGITAL MASTER 1 PHONES CD/LINE TRIM CH1_Analog MASTER PHONO MUTE MASTER 2 CH2_Analog Control Tone BOOTH DIGITAL MUTE BOOTH...
  • Page 28: Acquiring The Manual

    3 “An internet environment is required to access the site. Connected to the internet?” is displayed. Click [Yes]. The web browser is launched and the Pioneer DJ support site is displayed. http://pioneerdj.com/support/ 4 On the Pioneer DJ support site, click “Manuals” under “DJM-900SRT”.
  • Page 29: Specifications

    See the information on the Pioneer DJ support site (http://pioneerdj.com/ Specifications support/). — CONTROL VINYL Use a shop that handles Serato DJ products or an online shop such as that General of Serato (http://serato.com/). Power requirements ............AC 110 V to 240 V, 50 Hz/60 Hz ©...
  • Page 30: Précaution De Ventilation

    Nous vous remercions d’avoir acquis un produit Pioneer. Veuillez lire attentivement ce mode d’emploi afin de connaître la manière d’utiliser l’appareil comme il convient. Cela fait, conservez le mode d’emploi de façon à pouvoir vous y référer en cas de nécessité.
  • Page 31 CONTROL CD ou le CONTROL VINYL fourni avec cet appareil pour gérer Serato DJ. Le “Guide de démarrage rapide – Édition Serato DJ” peut être téléchargé du site de support DJ de Pioneer (http:// pioneerdj.com/support/). Pour les instructions relatives au téléchargement, repor- tez-vous à...
  • Page 32: Informations Préliminaires

    (disque) ou CONTROL CD inclus. Par ailleurs, cet appareil présente les principales fonctions, la qualité et les per- formances d’un Pioneer DJM-900nexus, devenu la norme dans tous les clubs du monde entier et un puissant support pour tous les professionnels DJ actifs sur la scène disco.
  • Page 33: Installation Du Logiciel

    Pioneer pour tous dommages ne dépassera 1 Licence limitée. Sous réserve des restrictions stipulées dans cet accord, le montant que vous avez payé à Pioneer ou à ses filiales pour le programme. Pioneer vous concède une licence limitée, non-exclusive, non-transférable Les parties admettent que les limites de responsabilité...
  • Page 34: Marche À Suivre (Windows)

    Serato DJ. Le “Guide de démarrage rapide – 6 Depuis la page de téléchargement, téléchargez le pilote Édition Serato DJ” peut être téléchargé du site de support DJ de Pioneer (http:// pour Windows (DJM-900SRT_X.XXX.exe).
  • Page 35: Cliquez Sur Le Lien Vers La Page De Téléchargement De Serato

    Pour les toutes dernières informations sur l’environnement opérationnel et la compatibilité ainsi que pour acquérir le tout dernier système d’exploitation, reportez-vous à “Software Info” dans “DJM-900SRT” sur le site de support DJ de Pioneer ci-dessous : http://pioneerdj.com/support/ Le fonctionnement sur tous les ordinateurs n’est pas garanti, même lorsque les conditions de fonctionnement mentionnées ci-dessus sont remplies.
  • Page 36 — Suivez les instructions à l’écran, saisissez votre adresse de messagerie et le mot de passe souhaité, puis sélectionnez votre région de résidence. — Si vous cochez [E-mail me Serato newsletters], Serato vous enverra des newsletters avec les toutes dernières informations sur les produits Serato.
  • Page 37: Panneau Arrière

    Transmet les signaux audio du canal principal. b Prise LINK (page 10) Ces prises doivent être reliées aux prises LINK des lecteurs DJ Pioneer ou aux ports LAN d’ordinateurs sur lesquels rekordbox est installé (PRO DJ LINK). Pour raccorder plusieurs dispositifs, utilisez un concentrateur-commutateur (en vente dans le commerce).
  • Page 38: Raccordement Des Prises D'entrée

    PRO DJ LINK rekordbox Ordinateurs Lecteurs DJ Pioneer 2 Lecteurs DJ Pioneer 2 À la prise électrique 1 Pour le détail sur PRO DJ LINK, reportez-vous à la page 14, À propos de PRO DJ LINK. 2 Pour lancer la lecture par le fader avec PRO DJ LINK, raccordez un câble LAN (page 15).
  • Page 39: Raccordement Au Panneau De Commande

    Raccordement au panneau de commande Raccordement de cet appareil à un ordinateur Veillez à utiliser le câble USB Ordinateurs fourni pour le raccordement. Pour les instructions sur le fonctionnement avec Serato DJ, reportez-vous au “Guide de démarrage rapide – Édition Serato DJ”. Pour plus de détails, reportez- vous à...
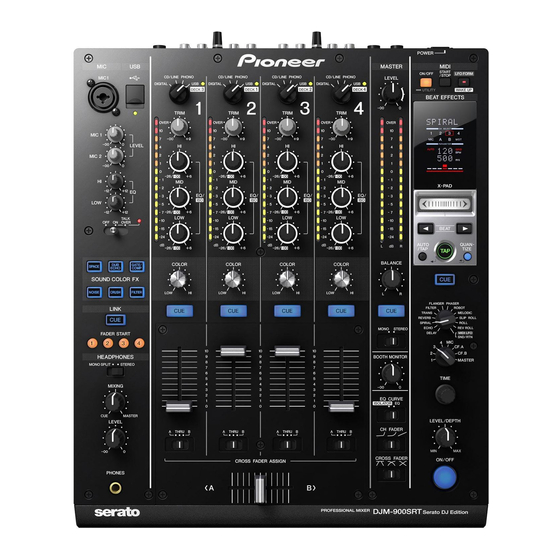
  • Page 40: Fonctionnement

    Fonctionnement Panneau de commande POWER MASTER MIDI START ON/ OFF LFO FORM / STOP MIC1 CD/ LINE PHONO CD/ LINE PHONO CD/ LINE PHONO CD/ LINE PHONO LEVEL DIGITAL DIGITAL DIGITAL DIGITAL DECK DECK DECK DECK UTILITY WAKE UP BEAT EFFECTS TRIM TRIM TRIM...
  • Page 41: Opérations De Base

    f Indicateur de niveau de canal (page 13) F Touche ON/OFF (page 15) Indique le niveau sonore des différents canaux avant de passer par les faders de Met en/hors service la fonction BEAT EFFECT. canaux. N’exercez pas de force excessive lorsque vous tirez les boutons de fader de canal et de crossfader.
  • Page 42: Utilisation D'un Microphone

    Pour utiliser la fonction QUANTIZE avec PRO DJ LINK, raccordez cet appareil à un Pour régler le son à la sortie des prises [USB], sélectionnez [MIX (REC OUT)] lecteur DJ Pioneer compatible PRO DJ LINK. Pour les instructions sur le raccorde- dans [Mixer Audio Output] de l’utilitaire de réglage.
  • Page 43: Utilisation De La Fonction Link Monitor

    Raccordez d’abord cet appareil à un ordinateur sur lequel Serato DJ est installé. être effectuée. De même, lorsque cet appareil est raccordé à un lecteur DJ Pioneer par un câble LAN, le lancement de la lecture sur le lecteur DJ et d’autres opérations de ce type peuvent être lancées par le fader de cet appareil.
  • Page 44: Fonctionnement Du [X-Pad]

    [AUTO] s’éclaire lorsque le mode auto est spécifié comme mode 2 Tournez le sélecteur d’effet calé sur le tempo. AUTO (TAP) de mesure BPM. Sélectionnez [SND/RTN (MIDI LFO)]. [TAP] s’éclaire en mode de saisie manuelle. En mode auto, la valeur du BPM détectée automatiquement est 3 Tournez le sélecteur de canal d’effet.
  • Page 45: Utilisation De Midi Lfo

    Les séquenceurs MIDI externes ne peuvent pas être synchronisés sur les 1 Appuyez sur la touche [ON/OFF (UTILITY)]. sources dont le BPM ne peut pas être mesuré de manière stable. Mettez la fonction MIDI en service. Les horloges de synchronisation MIDI sont fournies même si les valeurs du BPM 2 Tournez le sélecteur d’effet calé...
  • Page 46: Types D'effets

    Types d’effets Sert à régler le retard. Types d’effets SOUND COLOR FX Commande TIME (paramètre 2) 1 à 4000 (ms) Commande LEVEL/DEPTH Sert à régler la balance entre le son original et l’écho. Nom de l’effet Descriptions Commande [COLOR] (paramètre 3) Rotation antihoraire : Applique X-PAD (paramètre 4) Sert à...
  • Page 47 Le son présent au moment où la touche [ON/OFF] est pressée est enregistré, et le son enregistré est reproduit de manière répétée selon la fraction de temps spécifiée avec les touches [BEAT OVER TALK Générateur d’effets Lorsque la durée de l’effet change, le son entrant est de nouveau enregistré. DJM-900SRT Serato DJ Edition...
  • Page 48 Touches BEAT (paramètre — Commande TIME (paramètre 2) — Commande LEVEL/DEPTH Sert à ajuster le niveau sonore à l’entrée de la prise [RETURN]. (paramètre 3) X-PAD (paramètre 4) — MIDI LFO L’onde du signal MIDI (0 – 127) change selon le tempo du morceau. Le motif de la forme d’onde du signal MIDI change à...
  • Page 49: Tableau Des Attributions Midi

    Tableau des attributions MIDI Tableau des attributions MIDI “CC” est l’abréviation de “control change”. Un changement de commande est un type de signal MIDI utilisé pour transmettre les différents types d’informations de com- mande, concernant par exemple le timbre, le volume, etc. Sur cet appareil, les valeurs 0 à...
  • Page 50 Touche/Commande/Commutateur Catégorie Attribution MIDI Déclenchement/Basculement Données transmises Type Commutateur CC 034 OFF=0, ON=127 Commutateur CC 035 OFF=0, ON=127 Commutateur CC 036 OFF=0, ON=127 Commutateur CC 037 OFF=0, ON=127 CH SELECT Commutateur CC 038 OFF=0, ON=127 Commutateur CC 039 OFF=0, ON=127 CF.A Commutateur CC 040...
  • Page 51: Changement Des Réglages

    L’utilitaire de réglage peut être utilisé pour effectuer les contrôles et réglages Pour Windows suivants. Cliquez sur le menu [Démarrer] > [Tous les programmes] > [Pioneer] > [DJM- — Vérification de l’état des sélecteurs d’entrée de cet appareil 900SRT] > [Utilitaire de réglage du DJM-900SRT].
  • Page 52: Vérification De L'état Des Sélecteurs D'entrée De Cet Appareil

    Le réglage de [USB Output Level] s’applique à tous les sons. Toutefois, lorsque Vérification de l’état des sélecteurs d’entrée de 1 du tableau de l’étape 2 est sélectionné, le son sort au volume auquel il entre cet appareil dans cet appareil. Si le volume n’est pas suffisant avec le réglage de volume du logiciel DJ seu- Affichez l’utilitaire de réglage avant de commencer.
  • Page 53: Informations Supplémentaires

    Parfois, le problème peut provenir d’un autre composant. Examinez les autres composants et les appareils électriques utilisés. Si le problème per- siste malgré les vérifications des points suivants, confiez les réparations au service après-vente Pioneer le plus proche ou à votre revendeur.
  • Page 54: Schéma Fonctionnel

    Schéma fonctionnel MIC1 MIC1 LEVEL I/Fμ com ETHER SW IC MIC2 LEVEL Ether MIC2 DIGITAL MASTER CD/LINE TRIM PHONO PHONES Digital MASTER Control Tone DIGITAL MASTER 1 PHONES CD/LINE TRIM CH1_Analog MASTER PHONO MUTE MASTER 2 CH2_Analog Control Tone BOOTH DIGITAL MUTE BOOTH...
  • Page 55: Obtention Du Manuel

    3 “Une connexion internet est nécessaire pour pouvoir accéder au site. Connecté à internet ?” apparaît. Cliquez sur [Oui]. Le navigateur web démarre et le site de support DJ de Pioneer apparaît. http://pioneerdj.com/support/ 4 Sur le site de support DJ de Pioneer, cliquez sur “Manuals”...
  • Page 56: Spécifications

    Reportez-vous aux informations sur le site de support DJ de Pioneer (http:// Spécifications pioneerdj.com/support/). — CONTROL VINYL Utilisez un magasin qui vend des produits Serato DJ ou un magasin en ligne Général tel que Serato (http://serato.com/). Alimentation ..............CA 110 V à 240 V, 50 Hz/60 Hz ©...
  • Page 58 Vielen Dank, dass Sie sich für dieses Pioneer-Produkt entschieden haben. Bitte lesen Sie diese Bedienungsanleitung gründlich durch, um sich mit der Bedienung des Geräts vertraut zu machen. Nachdem Sie die Bedienungsanleitung gelesen haben, legen Sie sie griffbereit zum Nachschlagen ab.
  • Page 59 Einstellungen, die zur Verwendung der mit dieser Einheit mit- gelieferten CONTROL CD oder CONTROL VINYL zur Bedienung von Serato DJ erforderlich sind. Die „Kurzanleitung – Serato DJ Edition“ kann von der Pioneer DJ Support-Website (http://pioneerdj.com/support/) heruntergeladen werden. Anweisungen zum Herunterladen finden Sie in unter Herunterladen der neuesten Versionen der Bedienungsanleitungen und der Kurzanleitung - Serato DJ Edition in dieser Anleitung (S.
  • Page 60: Vor Der Inbetriebnahme

    Außerdem kann die Scratch-Funktion des Serato DJ mit dem mitgelieferten CONTROL VINYL (Aufnahme) oder CONTROL CD gesteuert werden. Dabei werden die Hauptfunktionen, die Qualität und die Leistung des Pioneer DJM- 900nexus in dieser Einheit bewahrt, ein Standardmodell in Clubs in der ganzen Welt, das leistungsstarke Unterstützung für Auftritte aller professionellen DJs in der...
  • Page 61: Installieren Der Software

    Kopien des Programms und der Dokumentierung zerstören und 2 „Programm“ bedeutet die gesamte Pioneer-Software, oder einen Teil davon, Pioneer dann schriftlich davon informieren. Die Abschnitte 2.2, 2.3, 2.4, 3, 4, 5, 6 und die Sie gemäß dieser Vereinbarung unter Lizenz von Pioneer erhalten.
  • Page 62: Installieren Der Serato Dj Software

    CONTROL CD oder CONTROL VINYL zur Bedienung von Serato DJ 8 Lesen Sie sorgfältig die Software-Lizenzvereinbarung erforderlich sind. Die „Kurzanleitung – Serato DJ Edition“ kann von der Pioneer DJ Support-Website (http://pioneerdj.com/support/) heruntergeladen werden. durch, und markieren Sie, wenn Sie den Bedingungen Anweisungen zum Herunterladen finden Sie in unter Herunterladen der neuesten zustimmen, das Kontrollkästchen [Ich stimme zu.] und klicken...
  • Page 63 3 „Eine Internet-Umgebung ist zum Zugriff auf die Site erforderlich. Internetverbindung vorhanden?“ wird angezeigt. Klicken Sie auf [Ja]. Der Webbrowser wird gestartet, und die globale Pioneer DJ-Support-Website wird angezeigt. 4 Klicken Sie auf [Software Info] unter [DJM-900SRT] auf der Pioneer DJ-Support-Website.
  • Page 64 4 „Eine Internet-Umgebung ist zum Zugriff auf die Site erforderlich. Internetverbindung vorhanden?“ wird angezeigt. Klicken Sie auf [Ja]. Der Webbrowser wird gestartet, und die globale Pioneer DJ-Support-Website wird angezeigt. 5 Klicken Sie auf [Software Info] unter [DJM-900SRT] auf der Pioneer DJ-Support-Website.
  • Page 65: Anschlüsse

    DIGITAL MASTER OUT-Buchse (Seite 10) Gibt die Masterkanal-Audiosignale aus. b LINK-Buchse (Seite 10) Schließen Sie diese an die LINK-Buchsen an Pioneer DJ-Playern oder den LAN- Anschlüssen von Computern an, auf denen rekordbox installiert ist (PRO DJ LINK). Zum Anschließen mehrere Geräte verwenden Sie einen Switching Hub (im...
  • Page 66: Anschließen Der Eingangsbuchsen

    Switching hub PRO DJ LINK rekordbox Computer Pioneer DJ-Player 2 Pioneer DJ-Player 2 Netzsteckdose 1 Einzelheiten über PRO DJ LINK siehe Über PRO DJ LINK auf Seite 14. 2 Zur Verwendung der Fader-Startfunktion mit PRO DJ LINK schließen Sie ein LAN-Kabel an (Seite 15).
  • Page 67: Anschließen An Das Steuerpult

    Anschließen an das Steuerpult Verbinden dieses Geräts mit dem Computer Schließen Sie immer das Computer mitgelieferte USB-Kabel an. Anweisungen zur Bedienung in Kombination mit Serato DJ von siehe „Kurzanleitung – Serato DJ Edition“. Einzelheiten siehe Herunterladen der neues- ten Versionen der Bedienungsanleitungen und der Kurzanleitung - Serato DJ Edition (S.
  • Page 68: Bedienung

    Bedienung Bedienpult POWER MASTER MIDI START ON/ OFF LFO FORM / STOP MIC1 CD/ LINE PHONO CD/ LINE PHONO CD/ LINE PHONO CD/ LINE PHONO LEVEL DIGITAL DIGITAL DIGITAL DIGITAL DECK DECK DECK DECK UTILITY WAKE UP BEAT EFFECTS TRIM TRIM TRIM TRIM...
  • Page 69: Grundlegender Betrieb

    g COLOR-Regler (Seite 15) Ziehen Sie nicht gewaltsam an den Kanal-Fader- und Crossfader-Knöpfen. Die Dies ändert die Parameter von SOUND COLOR FX der verschiedenen Kanäle. Knöpfe haben eine Struktur, die verhindert, dass sie leicht herausgezogen wer- den. Durch starkes Ziehen an den Knöpfen kann das Gerät beschädigt werden. h Kanalfader (Seite 13) Stellt den Pegel der Audiosignale ein, die in jedem Kanal ausgegeben werden.
  • Page 70: Erweiterte Bedienungen

    [MIC]-Kanals um 18 dB (Standard) gedämpft, wenn ein Sound von –10 dB oder mehr am Mikrofon anliegt. Wenn ein PRO DJ LINK unterstützender Pioneer DJ-Player (z.B. CDJ-2000nexus, Die [TALK OVER]-Sounddämpfung kann bei [USER SETUP] geändert werden. CDJ-2000, CDJ-900), ein Computer, auf dem rekordbox installiert ist und dieses Anweisungen zur Änderung siehe Ändern der Einstellungen auf Seite 23.
  • Page 71: Verwendung Der Fader Start-Funktion

    Entsprechend können Bedienungen wie Starten der Wiedergabe des DJ-Players 4 Drücken Sie die Taste [CUE] für [LINK]. mit dem Fader dieser Einheit gesteuert werden, wenn diese Einheit und ein Pioneer Der mit rekordbox gewählte Track wird vom Kopfhörer ausgegeben. DJ-Player über LAN-Kabel verbunden sind.
  • Page 72 Der quantitative Parameter des Effekts kann durch Drehen des Reglers [LEVEL/ Verwendung der BEAT EFFECT-Funktion DEPTH] eingestellt werden. Die Taste [ON/OFF] blinkt, wenn der Effekt eingeschaltet ist. Diese Funktion erlaubt es Ihnen, sofort verschiedene Effekte entsprechend dem Wenn die Taste [ON/OFF] erneut gedrückt wird, wird der Effekt ausgeschaltet. Tempo (BPM = Taktschläge pro Minute) des laufenden Tracks einzustellen.
  • Page 73 Für die von diesem Gerät ausgegebenen Meldungen siehe MIDI-Zuweisungskarte Wenn die Taste [LFO FORM (WAKE UP)] gedrückt wird und eine Einstellung von auf Seite 21. [1/7 ] – [7/7 ] gewählt ist, kann die MIDI-Meldung für die Tasten und Regler unten gesendet werden, auch wenn der MIDI-Modus ausgeschaltet ist. 1 Verbinden Sie die Buchse [USB] dieses Geräts mit dem —...
  • Page 74: Typen Von Effekten

    Typen von Effekten Eingabeton ausgeschaltet Typen von SOUND COLOR FX-Effekten Fade-out Effekt-Name Beschreibungen [COLOR] Regler Gegen den Uhrzeigersinn drehen: Zeit Legt einen Nachhalleffekt auf die 1 Beat Legt einen Nachhalleffekt auf den Mitten- und Tiefenbereiche an. SPACE Verwenden Sie diese, um eine Zeitverzögerung von 1/8 – 16/1 Originalsound an.
  • Page 75 Dies stellt die Weise ein, in der der aufgezeichnete Sound X-PAD (Parameter 4) abgespielt wird. Frequenz SLIP ROLL Verwenden Sie diese, um den Zyklus zum Verschieben der -Tasten (Parameter 1) Schwellenfrequenz als eine Zeit von 1/4 – 64/1 im Hinblick auf BEAT Der an der Stelle wo [ON/OFF] gedrückt wird eingegeben wird, wird aufgezeichnet, die Zeit eines Beats von BPM einzustellen.
  • Page 76 SEND RETURN TALK Effektor OVER DJM-900SRT Serato DJ Edition -Tasten (Parameter 1) — BEAT TIME-Regler (Parameter 2) — LEVEL/DEPTH-Regler Dies stellt die Soundpegeleingabe zur Buchse [RETURN] ein. (Parameter 3) X-PAD (Parameter 4) — MIDI LFO Die MIDI-Signal (0 – 127) Wellenform wird entsprechend dem Tempo des Tracks geändert.
  • Page 77: Midi-Zuweisungskarte

    MIDI-Zuweisungskarte MIDI-Zuweisungskarte “CC” ist die Abkürzung von “control change”. Eine Steueränderung ist ein Typ von MIDI-Signal, das zum Übertragen verschiedener Arten von Steuerinformationen, wie Timbre, Lautstärke usw. verwendet wird. Bei diesem Gerät werden Werte von 0 bis 127 hauptsächlich als CC ausgegeben, wenn Regler und Fader bedient werden. CC werden auch ausgegeben, wenn bestimmte Tasten betätigt werden.
  • Page 78 Taste/Regler/Schalter Kategorie MIDI-Zuweisung Trigger/Toggle Übertragene Daten Name Schalter CC 034 OFF=0, ON=127 Schalter CC 035 OFF=0, ON=127 Schalter CC 036 OFF=0, ON=127 Schalter CC 037 OFF=0, ON=127 CH SELECT Schalter CC 038 OFF=0, ON=127 Schalter CC 039 OFF=0, ON=127 CF.A Schalter CC 040 OFF=0, ON=127...
  • Page 79: Ändern Der Einstellungen

    Die Einstellung-Dienstsoftware kann verwendet werden, um die unten aufgeführten Bei Windows Prüfungen und Einstellungen auszuführen. Klicken Sie auf das [Start]-Menü > [Alle Programme] > [Pioneer] > [DJM- — Prüfen des Status der Eingangswahl-Schalter dieses Geräts 900SRT] > [DJM-900SRT Einstellung-Dienstprogramm]. — Einstellung der Audiodaten-Ausgabe von diesem Gerät zum Computer —...
  • Page 80: Prüfen Der Neuesten Informationen Über Die Treibersoftware

    Für Mac OS X 3 Klicken Sie das Pulldown-Menü [USB Output Level]. Klicken Sie auf das [Macintosh HD]-Icon > [Application] > [Pioneer] > [DJM- Stellen Sie die Lautstärke der Audiodaten-Ausgabe von diesem Gerät ein. 900SRT] > [DJM-900SRT Einstellung-Dienstprogramm]. Die Einstellung [USB Output Level] wird gleich auf alle Audiodaten angelegt.
  • Page 81: Zusätzliche Informationen

    überprüfen Sie bitte die folgenden Punkte. Manchmal wird eine Störung auch durch ein externes Gerät verursacht. Überprüfen Sie die anderen verwendeten Komponenten und elektrischen Geräte. Wenn Sie die Störung nicht beheben können, wenden Sie sich an die nächste Pioneer-Kundendienststelle oder an Ihren Händler.
  • Page 82: Blockdiagramm

    Blockdiagramm MIC1 MIC1 LEVEL I/Fμ com ETHER SW IC MIC2 LEVEL Ether MIC2 DIGITAL MASTER CD/LINE TRIM PHONO PHONES Digital MASTER Control Tone DIGITAL MASTER 1 PHONES CD/LINE TRIM CH1_Analog MASTER PHONO MUTE MASTER 2 CH2_Analog Control Tone BOOTH DIGITAL MUTE BOOTH CH3_Analog...
  • Page 83: Übernehmen Der Anleitung

    (PDF-Datei)] und klicken dann auf [Start]. 3 „Eine Internet-Umgebung ist zum Zugriff auf die Site erforderlich. Internetverbindung vorhanden?“ wird angezeigt. Klicken Sie auf [Ja]. Der Webbrowser wird gestartet, und die globale Pioneer DJ-Support-Website wird angezeigt. http://pioneerdj.com/support/ 4 Auf der Pioneer DJ-Support-Website klicken Sie auf „Manuals“...
  • Page 84: Technische Daten

    Weitere Informationen finden Sie auf der Pioneer DJ-Support-Website Technische Daten (http://pioneerdj.com/support/). — CONTROL VINYL Wenden Sie sich an ein Fachgeschäft, das Serato DJ-Produkte vertreibt, Allgemeine oder an einen Online-Shop wie den von Serato (http://serato.com/). Stromanforderungen ......110 V bis 240 V Wechselspannung, 50 Hz/60 Hz ©...
  • Page 86: Condizioni Ambientali Di Funzionamento

    Vi ringraziamo per avere acquistato questo prodotto Pioneer. Vi preghiamo di leggere queste queste istruzioni per l’uso in modo da sapere usare correttamente il proprio modello. Dopo aver letto queste istruzioni, riporle in un luogo sicuro per poterle consultare di nuovo al momento del bisogno.
  • Page 87 L’ultima versione delle istruzioni per l’uso (questo manuale) e la “Guida di avvio veloce – Edizione Serato DJ” sono disponibili presso il sito di supporto Pioneer. Per dettagli, vedere Download della versione più recente delle istruzioni per l’uso e della Guida di avvio veloce – Edizione Serato DJ (p.27).
  • Page 88: Prima Di Cominciare

    Inoltre, questa funzione possiede tutte le funzioni principali, la qualità e le presta- zioni del Pioneer DJM-900nexus, un modello standard in club di tutto il mondo che offre un supporto versatile per le performance di tutti i DJ professionisti attivi nel mondo dei club.
  • Page 89: Installazione Del Software

    L’utente concorda che qualsiasi violazione delle restrizioni specificate nel Contratto Il presente Contratto di licenza d’uso del software (d’ora in avanti semplicemente arrecherebbe a Pioneer un danno irreparabile per il quale il solo rimborso in chiamato “Contratto”) è stipulato tra l’utente finale (sia esso la persona fisica che denaro risulterebbe inadeguato.
  • Page 90: Installazione Del Software Serato Dj

    ® Windows 8/Windows 8 Pro su [Si]. Versione a Il Web browser si apre ed il sito di supporto DJ Pioneer appare. 64 bit Versione a 5 Fare clic su [Software Download] in [DJM-900SRT] del sito 32 bit ® Windows 7 Home Premium/Professional/Ultimate di supporto DJ Pioneer.
  • Page 91 [Si]. Se altri programmi sono avviati nel computer, chiuderli. Il Web browser si apre ed il sito di supporto DJ Pioneer appare. 1 Inserire il CD-ROM nell’unità CD del computer. 4 Fare clic su [Software Info] in [DJM-900SRT] del sito di Viene visualizzato il menu del CD-ROM.
  • Page 92 11 Leggere attentamente i termini dell’accordo di licenza e, se li si accettano, fare clic su [Agree]. Se non si è d’accordo con l’accordo di licenza d’uso, fare clic su [Disagree] e fermare l’installazione. 12 Se apparisse la seguente schermata, trascinare l’icona [Serato DJ] e farla cadere sull’icona della cartella [Applications].
  • Page 93: Pannello Posteriore

    Emette i segnali audio del canale principale. b Terminale LINK(pagina 10) Vanno collegati al terminali LINK di lettori DJ Pioneer o alle porte LAN di compu- ter su cui è installato rekordbox (PRO DJ LINK). Per collegare vari dispositivi, usare un hub con selettore (da acquistarsi separatamente).
  • Page 94: Collegamento Dei Terminali Di Ingresso

    3 COLD Hub con selettore PRO DJ LINK rekordbox Computer Lettori DJ Pioneer 2 Lettori DJ Pioneer 2 Ad una presa di corrente 1 Per dettagli su PRO DJ LINK, vedere Informazioni su PRO DJ LINK a pagina 14. 2 Per usare la funzione fader start con PRO DJ LINK, collegare un cavo LAN (pagina 15).
  • Page 95: Collegamento Ad Un Pannello Di Controllo

    Collegamento ad un pannello di controllo Collegamento di questa unità al computer Per quanto riguarda l’uso insieme a Serato DJ, vedere la “Guida di avvio veloce – Per i collegamenti, usare solo Computer Edizione Serato DJ”. Per dettagli, vedere Download della versione più recente delle il cavo USB accluso.
  • Page 96: Pannello Di Controllo

    Impiego Pannello di controllo POWER MASTER MIDI START ON/ OFF LFO FORM / STOP MIC1 CD/ LINE PHONO CD/ LINE PHONO CD/ LINE PHONO CD/ LINE PHONO LEVEL DIGITAL DIGITAL DIGITAL DIGITAL DECK DECK DECK DECK UTILITY WAKE UP BEAT EFFECTS TRIM TRIM TRIM...
  • Page 97: Uso Di Base

    g Controllo COLOR (pagina 15) Non tirare le manopole del fader dei canali e del crossfader con forza eccessiva. Modifica i parametri di SOUND COLOR FX dei vari canali. Le manopole sono costruite in modo da non poter venir tolte facilmente. Tirandole con forza le si possono quindi danneggiare.
  • Page 98: Uso Avanzato

    Uso di un microfono Informazioni su PRO DJ LINK Se un lettore DJ Pioneer che supporta PRO DJ LINK (ad es. CDJ-2000nexus, CDJ- 1 Collegare un microfono al terminale [MIC1] o [MIC2]. 2000, CDJ-900), un computer su cui rekordbox sia installato e questa unità sono 2 Portare il selettore [OFF, ON, TALK OVER] su [ON] o collegati via cavi LAN, le funzioni PRO DJ LINK che seguono possono venire usate.
  • Page 99 Collegare questa unità ad un computer su cui Serato DJ sia già in funzione. cancellato. Analogamente, se si è collegata questa unità ad un lettore DJ Pioneer via cavo LAN, La stessa operazione vista in Monitoraggio audio in cuffia (fasi da 3 a 5) può...
  • Page 100: Uso Di Unità Effetti Esterne

    Visualizza i parametri scelti per un particolare effetto. Uso di [X-PAD] Se viene premuto il pulsante [BEAT ], la frazione di battuta Sezione di display corrispondente viene visualizzata per 1 secondo. dei parametri Procedura Stato del pulsante [ON/OFF] di Specificando un valore di parametro fuori gamma con il pulsante Effetto X-PAD [BEAT...
  • Page 101 Il messaggio MIDI del pulsante [ON/OFF] di [BEAT EFFECTS] quando [SND/RTN 4 Premere [ON/OFF] della sezione [MIDI]. (MIDI LFO)] è scelto viene mandato solo quando viene fatta la procedura La trasmissione di segnali MIDI inizia. seguente. 4 Premere il pulsante [LFO FORM (WAKE UP)]. Apprendere il messaggio MIDI del pulsante [LFO FORM (WAKE UP)] sul lato di ricezione del segnale MIDI.
  • Page 102: Tipi Di Effetto

    Tipi di effetto Pulsanti BEAT (parame- Usare questi controlli per impostare un tempo di ritardo di 1/8 Tipi di effetto SOUND COLOR FX tro 1) – 16/1 rispetto al tempo di una battuta del valore BPM. Usare questo per impostare il tempo di ritardo. Controllo TIME (parametro 2) Nome dell’effetto Descrizioni...
  • Page 103 Il suono ricevuto nel punto in cui [ON/OFF] viene premuto viene registrato, e tale suono registrato viene emesso varie volte in accordo con la frazione di battuta impo- stata con i pulsanti [BEAT Quando il tempo dell’effetto cambia, il suono in ingresso viene riregistrato. DJM-900SRT Serato DJ Edition...
  • Page 104 Pulsanti BEAT (parame- — tro 1) Controllo TIME (parametro 2) — Controllo LEVEL/DEPTH (para- Regola il livello dell’audio che arriva al terminale [RETURN]. metro 3) X-PAD (parametro 4) — MIDI LFO La forma d’onda del segnale MIDI (0 – 127) viene cambiata a seconda del tempo del brano.
  • Page 105: Mappa Di Assegnazione Midi

    Mappa di assegnazione MIDI Mappa di assegnazione MIDI “CC” è l’abbreviazione di “control change”. Un cambio comando è un tipo di segnale MIDI usato per trasmettere vari tipi di informazione di comando, ad esempio timbro, volume, ecc. In questa unità, i valori da 0 a 127 vengono emessi come CC principalmente quando comandi e fader sono usati. I CC vengono emessi anche quando certi pulsanti ven- gono usati.
  • Page 106 Pulsante/controllo/interruttore Categoria Assegnazione MIDI Trigger/Toggle Dati trasmessi Nome Tipo Interruttore CC 034 OFF=0, ON=127 Interruttore CC 035 OFF=0, ON=127 Interruttore CC 036 OFF=0, ON=127 Interruttore CC 037 OFF=0, ON=127 CH SELECT Interruttore CC 038 OFF=0, ON=127 Interruttore CC 039 OFF=0, ON=127 CF.A Interruttore CC 040...
  • Page 107: Modifica Delle Impostazioni

    L’utility di impostazione è utilizzabile per fare i controlli e le impostazioni descritti di In Windows seguito. Fare clic sul menu [Start] > [Tutti i programmi] > [Pioneer] > [DJM-900SRT] > — Controllo dello stato dei selettori di ingresso di questa unità [Utility di impostazione del DJM-900SRT].
  • Page 108: Controllo Dell'ultima Versione Del Driver

    L’impostazione [USB Output Level] viene applicata in misura uguale a tutti i Controllo dello stato dei selettori di ingresso di dati audio. Tuttavia, quando 1 della tabella 2 viene scelto, i dati audio vengono questa unità emessi col volume che avevano al momento di ingresso in questa unità. Se la regolazione del software DJ da sola non ha volume sufficiente, cambiare Visualizzazione dell’utility di impostazione.
  • Page 109: Informazioni Aggiuntive

    Controllare tutti i componenti ed apparecchi elettronici usati. Se il problema non può venire eliminato neppure dopo aver fatto i controlli suggeriti, chiedere assistenza tecnica al più vicino centro assistenza o rivenditore autorizzato Pioneer.
  • Page 110: Diagramma A Blocchi

    Diagramma a blocchi MIC1 MIC1 LEVEL I/Fμ com ETHER SW IC MIC2 LEVEL Ether MIC2 DIGITAL MASTER CD/LINE TRIM PHONO PHONES Digital MASTER Control Tone DIGITAL MASTER 1 PHONES CD/LINE TRIM CH1_Analog MASTER PHONO MUTE MASTER 2 CH2_Analog Control Tone BOOTH DIGITAL MUTE...
  • Page 111: Acquisizione Del Manuale

    3 Viene visualizzato “L’accesso al sito richiede una connessione a Internet. Siete collegati a Internet?”. Fare clic su [Si]. Il Web browser si apre ed il sito di supporto DJ Pioneer appare. http://pioneerdj.com/support/ 4 Nel sito di supporto DJ Pioneer, fare clic su “Manuals” in “DJM-900SRT”.
  • Page 112: Dati Tecnici

    Vedere le informazioni sul sito di supporto DJ Pioneer (http://pioneerdj.com/ Dati tecnici support/). — CONTROL VINYL Servirsi di un negozio che vende prodotti Serato DJ o un negozio online che Generale vende prodotti Serato (http://serato.com/). Requisiti di alimentazione ...........CA da 110 V a 240 V, 50 Hz/60 Hz ©...
  • Page 114 Hartelijk dank voor uw aankoop van dit Pioneer product. Lees deze gebruiksaanwijzing aandachtig door om bekend te raken met de juiste bediening van uw apparaat. Na het doorlezen van de gebruiksaanwijzing dient u deze te bewaren op een veilige plaats, voor latere naslag.
  • Page 115 CONTROL CD of CONTROL VINYL zoals meegeleverd met dit toestel te kunnen gebruiken om Serato DJ te kunnen bedie- nen. U kunt de “Snelstartgids - Serato DJ Editie” downloaden van de Pioneer DJ-ondersteuningssite (http://pioneerdj.com/support/). Zie voor instructies voor het downloaden Downloaden van de nieuwste versies van de handleiding en de Snelstartgids - Serato DJ Editie in deze handleiding (blz.
  • Page 116: Alvorens Te Beginnen

    Pioneer model (DJM-800). STANDAARD LAYOUT Dit toestel heeft de layout van het bedieningspaneel van de Pioneer DJM-serie, de wereldstandaard in DJ-mengpanelen, overgenomen. De eenvoudige en duidelijke layout van het paneel maakt niet alleen DJ-performances gemakkelijker, maar zorgt er ook voor dat DJ’s die dit toestel voor...
  • Page 117: Installeren Van De Software

    In geen geval zal de aansprakelijkheid van Om één kopie te maken van het Programma uitsluitend als reservekopie, Pioneer voor geleden schade het bedrag dat u aan Pioneer of één van haar met dien verstande dat alle titels en handelsmerken, meldingen met dochtermaatschappijen voor het Programma heeft betaald overschrijden.
  • Page 118: Installeren Van De Serato Dj-Software

    Serato DJ te kunnen bedie- 7 Dubbelklik op het bestand dat u gedownload heeft. nen. U kunt de “Snelstartgids - Serato DJ Editie” downloaden van de Pioneer Het installatiescherm voor het stuurprogramma verschijnt.
  • Page 119 3 “Er is een werkende internetomgeving vereist om toegang te kunnen krijgen tot de site. Heeft u verbinding met het internet?” verschijnt. Klik op [Ja]. De webbrowser wordt opgestart en de Pioneer DJ-ondersteuningssite zal worden geopend. 4 Klik op [Software Info] onder [DJM-900SRT] op de Pioneer DJ-ondersteuningssite.
  • Page 120 5 Klik op [Software Info] onder [DJM-900SRT] op de Pioneer DJ-ondersteuningssite. [Serato DJ Support Information] verschijnt. 6 Klik op de koppeling naar de downloadpagina voor Serato De downloadpagina voor [Serato DJ] verschijnt. 7 Meld uzelf aan op uw gebruikersaccount voor “Serato.
  • Page 121: Achterpaneel

    Voor uitsturen van de hoofdkanaal-audiosignalen. b LINK aansluiting (bladzijde 10) Verbind deze met de LINK-aansluiting van Pioneer DJ-spelers of de LAN- aansluiting van een computer waarop rekordbox is geinstalleerd (PRO DJ LINK). Om meerdere apparaten aan te kunnen sluiten, kunt u gebruik maken van een zelfschakelende verdeelstekker (los verkrijgbaar).
  • Page 122: Aansluiten Van Ingangsaansluitingen

    PRO DJ LINK rekordbox Computers Pioneer DJ-spelers 2 Pioneer DJ-spelers 2 Naar stopcontact 1 Nadere informatie over PRO DJ LINK vindt u op Omtrent PRO DJ LINK op bladzijde 14. 2 Voor het gebruik van de fader-startfunctie met PRO DJ LINK moet u een LAN-kabel aansluiten (bladzijde 15).
  • Page 123: Aansluiten Op Het Bedieningspaneel

    Aansluiten op het bedieningspaneel Verbinding maken tussen dit toestel en een computer U moet de meegeleverde USB-kabel Computers gebruiken voor de aansluiting. Voor instructies over gebruik in combinatie met Serato DJ verwijzen we u naar de “Snelstartgids – Serato DJ Editie”. Zie Downloaden van de nieuwste versies van de handleiding en de Snelstartgids - Serato DJ Editie (blz.28) voor details.
  • Page 124: Regelpaneel

    Bediening Regelpaneel POWER MASTER MIDI START ON/ OFF LFO FORM / STOP MIC1 CD/ LINE PHONO CD/ LINE PHONO CD/ LINE PHONO CD/ LINE PHONO LEVEL DIGITAL DIGITAL DIGITAL DIGITAL DECK DECK DECK DECK UTILITY WAKE UP BEAT EFFECTS TRIM TRIM TRIM TRIM...
  • Page 125: Basisbediening

    e EQ/ISO (HI, MID, LOW) instellingen (bladzijde 13) C Effectkanaal-keuzeschakelaar (bladzijde 16) Deze regelen de toonweergave van de diverse kanalen. Schakelt het kanaal om waarop het BEAT EFFECT zal worden toegepast. f Kanaalniveau-aanduiding (bladzijde 13) D TIME instelling (bladzijde 16) Toont het geluidsniveau van de diverse kanalen voor ze door de kanaalfaders Regelt de tijdparameter van het BEAT EFFECT.
  • Page 126: Geavanceerde Bedieningsfuncties

    23. De talk-over stand kan worden ingesteld op normaal of geavanceerd. Nadere Wanneer een Pioneer DJ-speler die PRO DJ LINK ondersteunt (bijv. CDJ-2000nexus, aanwijzingen voor het wijzigen hiervan vindt u onder Instellingen aanpassen op CDJ-2000, CDJ-900), een computer waarop rekordbox is geïnstalleerd-programma bladzijde 23.
  • Page 127: Status Information

    Om de QUANTIZE-functie te kunnen gebruiken met PRO DJ LINK, moet u van tevo- — [Fader Start 2]-toets: Selecteert [DECK 1]. ren dit toestel en een PRO DJ LINK-compatibele Pioneer DJ-speler op elkaar aan- — [Fader Start 3]-toets: Selecteert [DECK 2].
  • Page 128 5 Druk op de [ON/OFF] toets voor [BEAT EFFECTS]. Gebruik van de BEAT EFFECT-functie Het effect wordt toegepast op het geluid. De tijdparameter van het effect is instelbaar door te draaien aan de Met deze functie kunt u onmiddellijk diverse effecten instellen volgens het tempo [TIME]-instelling.
  • Page 129 Aanwijzingen voor het instellen van de MIDI-kanalen vindt u op Instellingen 4 Druk op [ON/OFF] of [BEAT EFFECTS], of raak het [X-PAD] aanpassen op bladzijde 23. aan. Zie voor de berichten die dit toestel doorgeeft MIDI-toewijzingstabel op bladzijde De MIDI-melding voor het inschakelen van het effect wordt verstuurd. Wanneer de [LFO FORM (WAKE UP)]-toets wordt ingedrukt en een instelling van [1/7 ] –...
  • Page 130: Soorten Effecten

    Soorten effecten Inkomend geluid Soorten SOUND COLOR FX effecten weggedraaid Uitfaden Effectnaam Beschrijving [COLOR] instelling Tegen de klok in draaien: Voegt het Tijd nagalmeffect toe aan de midden- 1 beat Voegt een nagalmeffect toe aan en lage tonen. SPACE Gebruik deze om een vertraging in te stellen van 1/8 – 16/1 in het oorspronkelijke geluid.
  • Page 131 SLIP ROLL Het geluid dat wordt ingevoerd op het punt waar er op [ON/OFF] wordt gedrukt Frequentie wordt opgenomen en het opgenomen geluid wordt herhaaldelijk gereproduceerd overeenkomstig de beatfractie die is ingesteld met de [BEAT ] toetsen. Gebruik deze om de cyclus in te stellen voor het verplaatsen Wanneer de effecttijd verandert, wordt het inkomend geluid opnieuw opgenomen.
  • Page 132 SND/RTN Hierop kunt u een externe effectgenerator, enz. aansluiten. SEND RETURN TALK OVER Effectgenerator DJM-900SRT Serato DJ Edition toetsen (parameter 1) — BEAT TIME instelling (parameter 2) — LEVEL/DEPTH instelling (para- Regelt het niveau van de geluidssignalen die binnenkomen via meter 3) de [RETURN]-aansluiting.
  • Page 133: Midi-Toewijzingstabel

    MIDI-toewijzingstabel MIDI-toewijzingstabel “CC” is de afkorting voor “control change”. Een control change is een type MIDI-signaal voor het verzenden van diverse soorten bedieningsinformatie, zoals timbre, volume enz. Op dit toestel worden waarden van 0 t/m 127 voornamelijk geproduceerd als CC wanneer instellingen en faders worden gebruikt. CC-signalen worden ook geproduceerd wanneer bepaalde toetsen worden gebruikt.
  • Page 134 Toets/instelling/schakelaar Categorie MIDI-toewijzing Trigger/Alterneren Overgebrachte gegevens Naam Type Schakelaar CC 034 OFF=0, ON=127 Schakelaar CC 035 OFF=0, ON=127 Schakelaar CC 036 OFF=0, ON=127 Schakelaar CC 037 OFF=0, ON=127 CH SELECT Schakelaar CC 038 OFF=0, ON=127 Schakelaar CC 039 OFF=0, ON=127 CF.A Schakelaar CC 040...
  • Page 135: Instellingen Aanpassen

    Instellingen aanpassen Omtrent de automatische 1 Houd [ON/OFF (UTILITY)] tenminste 1 seconde ingedrukt. Het [USER SETUP]-instelscherm verschijnt. ruststandfunctie Om het [CLUB SETUP]-instelscherm te openen, moet u dit toestel eerst uitscha- kelen, waarna u [POWER] weer indrukt terwijl u [ON/OFF (UTILITY)] ingedrukt Wanneer [Auto Standby] staat ingesteld op [ON], wordt het toestel automatisch uit houdt.
  • Page 136 Cross Fader B Cross Fader B Cross Fader B Cross Fader B Voor Windows Klik op het [Starten]-menu > [Alle programma's] > [Pioneer] > [DJM-900SRT] > MIX (REC OUT) MIX (REC OUT) MIX (REC OUT) MIX (REC OUT) [DJM-900SRT Instelfunctie].
  • Page 137: Controleren Van De Meest Recente Informatie Over Het Stuurprogramma

    Klik op de [About] tab. Controleren van de meest recente informatie over het stuurprogramma Bezoek onze webiste, hieronder vermeld, voor de meest recente informatie over het stuurprogramma voor exclusief gebruik met dit apparaat. http://pioneerdj.com/support/ De werking kan niet worden gegarandeerd wanneer er meerdere van deze meng- panelen zijn aangesloten op een enkele computer.
  • Page 138: Aanvullende Informatie

    Soms ligt de oorzaak van het probleem bij een ander apparaat. Controleer daarom ook de andere componenten en elektrische apparatuur die gebruikt wordt. Als u het probleem aan de hand van de onderstaande controlepunten niet kunt verhelpen, verzoekt u dan uw dichtstbijzijnde officiële Pioneer onderhouds- dienst of uw vakhandelaar om het apparaat te laten repareren.
  • Page 139: Blokschema

    Blokschema MIC1 MIC1 LEVEL I/Fμ com ETHER SW IC MIC2 LEVEL Ether MIC2 DIGITAL MASTER CD/LINE TRIM PHONO PHONES Digital MASTER Control Tone DIGITAL MASTER 1 PHONES CD/LINE TRIM CH1_Analog MASTER PHONO MUTE MASTER 2 CH2_Analog Control Tone BOOTH DIGITAL MUTE BOOTH CH3_Analog...
  • Page 140: Verkrijgen Van De Handleiding

    3 “Er is een werkende internetomgeving vereist om toegang te kunnen krijgen tot de site. Heeft u verbinding met het internet?” verschijnt. Klik op [Ja]. De webbrowser wordt opgestart en de Pioneer DJ-ondersteuningssite zal worden geopend. http://pioneerdj.com/support/ 4 Klik op de Pioneer DJ-ondersteuningssite op “Manuals”...
  • Page 141: Specificaties

    Zie de informatie op de Pioneer DJ-ondersteuningssite (http://pioneerdj. Specificaties com/support/). — CONTROL VINYL Maak gebruik van een winkel die Serato DJ-producten voert, of een online- Algemene winkel zoals die van Serato zelf (http://serato.com/). Stroomvereisten ..........110 V tot 240 V wisselstroom, 50 Hz/60 Hz ©...
  • Page 142: Entorno De Funcionamiento

    Le damos las gracias por la adquisición de este producto Pioneer. Lea a fondo estas instrucciones de utilización para que aprenda a utilizar correctamente su modelo. Después de haber terminado de leer estas instrucciones, guárdelas en un lugar seguro para, en caso de ser necesario, consultarlas en el futuro.
  • Page 143 – Edición Serato DJ” se pueden descargar del sitio de asis- tencia Pioneer. Para detalles, vea Descarga de las versiones más recientes de los manuales de instrucciones y de la Guía de inicio rápido - Edición Serato DJ (pág.27).
  • Page 144: Antes De Empezar A Usar La Unidad

    Pioneer anterior (DJM-800). DISPOSICIÓN ESTÁNDAR Esta unidad emplea la disposición del panel de control de la serie DJM de Pioneer, la norma mundial en mezcladores DJ. La disposición del panel de control sencilla y directa no sólo facilita las actuaciones de los DJ, sino que también permite que hasta los DJ que usan esta unidad por pri-...
  • Page 145: Instalación Del Software

    (tanto la persona que instala el Programa como cualquier entidad 5 INDEMNIZACIONES Y RECURSOS ANTE INCUMPLIMIENTO legal para la cual actúe dicha persona) (en lo sucesivo “Usted” o “Su”) y PIONEER CORPORATION (en lo sucesivo “Pioneer”). CONTRACTUAL LA REALIZACIÓN DE CUALQUIER PASO PARA CONFIGURAR O INSTALAR EL...
  • Page 146: Instalación Del Software Serato Dj

    [Si]. bits ® Windows Vista Home Basic/Home Premium/Business/Ultimate El navegador Web se inicia y se visualiza el sitio de asistencia Pioneer DJ. versión de 64 bits 5 Haga clic en [Software Download] bajo [DJM-900SRT] en el versión de 32 ®...
  • Page 147 Procedimiento de instalación (Mac OS X) ¿Conectado a internet?” se visualiza. Haga clic en [Si]. El navegador Web se inicia y se visualiza el sitio de asistencia Pioneer DJ. No conecte esta unidad y el ordenador hasta completar la instalación.
  • Page 148 Si no ha completado el registro de su cuenta de usuario, hágalo siguiendo el procedimiento de abajo. — Siguiendo las instrucciones de la pantalla, introduzca su dirección de correo electrónico y contraseña que quiera establecer y luego seleccione la región donde vive. —...
  • Page 149: Panel Trasero

    Da salida a las señales de audio del canal maestro. b Terminal LINK (página 10) Conecte estos a los terminales LINK de los reproductores DJ de Pioneer o a los puertos LAN de los ordenador que tienen instalado rekordbox (PRO DJ LINK).
  • Page 150: Conexión De Terminales De Entrada

    PRO DJ LINK rekordbox Ordenadores Reproductores DJ de Pioneer 2 Reproductores DJ de Pioneer 2 A una toma de corriente 1 Para conocer detalles de PRO DJ LINK, vea Acerca de PRO DJ LINK en la página 14. 2 Para usar la función de inicio de fader con PRO DJ LINK, conecte un cable LAN (pág. 15).
  • Page 151: Conexión Al Panel De Control

    Conexión al panel de control Conexión de esta unidad y un ordenador Para instrucciones de la operación en combinación con Serato DJ, vea la “Guía Asegúrese de conectar usando Ordenadores de inicio rápido – Edición Serato DJ”. Para detalles, vea Descarga de las versiones el cable USB incluido.
  • Page 152: Panel De Control

    Operación Panel de control POWER MASTER MIDI START ON/ OFF LFO FORM / STOP MIC1 CD/ LINE PHONO CD/ LINE PHONO CD/ LINE PHONO CD/ LINE PHONO LEVEL DIGITAL DIGITAL DIGITAL DIGITAL DECK DECK DECK DECK UTILITY WAKE UP BEAT EFFECTS TRIM TRIM TRIM...
  • Page 153: Funcionamiento Básico

    g Control COLOR (página 15) No tire del fader de canales ni de los controles crossfader con una fuerza excesiva. Éste cambia los parámetros del SOUND COLOR FX de los diferentes canales. Los controles tienen una estructura que no permite extraerlos fácilmente. Tirar con fuerza de los controles podría dañar la unidad.
  • Page 154: Operaciones Avanzadas

    Para usar la función QUANTIZE con PRO DJ LINK, conecte de antemano esta uni- puede ajustar. dad y un reproductor DJ de Pioneer compatible con PRO DJ LINK. Para conocer Para ajustar la salida de sonido de los terminales [USB], seleccione [MIX (REC instrucciones de conexión, consulte Conexión de terminales de entrada en la página...
  • Page 155 Conecte de antemano esta unidad y un ordenador en el que se ejecuta el Serato DJ. Cuando se pulsa de nuevo el botón [CUE], el monitoreo se cancela. De igual forma, cuando se conecta esta unidad y un reproductor DJ de Pioneer Se puede realizar la misma operación que en Monitoreo de sonido con auricula- mediante cable LAN, las operaciones tales como el inicio de reproducción en el...
  • Page 156: Procedimiento De Operación

    Uso del efector externo [AUTO] se enciende cuando el modo de medición de BPM se pone AUTO (TAP) en el modo automático. [TAP] se enciende en el modo de entrada manual. 1 Conecte esta unidad y un efector externo. En el modo automático, esto visualiza el valor de BPM detectado Para conocer instrucciones de conexión, vea Conexión de terminales de salida en la automáticamente.
  • Page 157 Preparativos para usar la función MIDI LFO Utilización de un secuenciador MIDI externo El software, los aparatos, etc. compatibles con MIDI (“lado de recepción de señales Esta unidad envía la información de operación de los botones y controles en el MIDI”...
  • Page 158: Tipos De Efectos

    Tipos de efectos Botones BEAT (paráme- Use éstos para establecer un tiempo de retardo de 1/8 – 16/1 Tipos de los efectos SOUND COLOR FX tro 1) con respecto al tiempo de un tiempo de compás de las BPM. Use esto para establecer el tiempo de retardo. Control TIME (parámetro 2) Nombre de efecto Descripciones...
  • Page 159 Cuando el tiempo del efecto cambia, el sonido de entrada se vuelve a grabar. Use éstos para establecer el ciclo para mover la frecuencia de Botones BEAT (paráme- corte como un tiempo de 1/4 – 64/1 con respecto al tiempo de tro 1) Original un tiempo de compás de las BPM.
  • Page 160 MIDI se pueden controlar usando señales MIDI. SND/RTN Conecte aquí un efector externo, etc. SEND RETURN Efector TALK OVER DJM-900SRT Serato DJ Edition Botones BEAT (paráme- — tro 1) Control TIME (parámetro 2) — Control LEVEL/DEPTH (pará- Ajusta la entrada de nivel de sonido al terminal [RETURN].
  • Page 161: Mapa De Asignación Midi

    Mapa de asignación MIDI Mapa de asignación MIDI “CC” es la abreviatura de “control change”. Un cambio de control es un tipo de señal MIDI usada para transmitir varios tipos de información de control, tal como timbre, volumen, etc. En esta unidad, los valores de 0 a 127 salen como CC principalmente cuando se utilizan los controles y los faders. CC también salen cuando se utilizan ciertos botones. “Note”...
  • Page 162 Botón/Control/Conmutador Categoría Asignación MIDI Disparador/Conmutador Datos transmitidos Nombre Tipo Conmutador CC 034 OFF=0, ON=127 Conmutador CC 035 OFF=0, ON=127 Conmutador CC 036 OFF=0, ON=127 Conmutador CC 037 OFF=0, ON=127 CH SELECT Conmutador CC 038 OFF=0, ON=127 Conmutador CC 039 OFF=0, ON=127 CF.A Conmutador CC 040...
  • Page 163: Cambio De Los Ajustes

    La utilidad de ajustes se puede usar para hacer las verificaciones y ajustes descritos Para Windows más abajo. Haga clic en el menú [Iniciar] > [Todos los programas] > [Pioneer] > [DJM- — Verificación del estado de los conmutadores selectores de entrada de esta 900SRT] > [Utilidad de configuración del DJM-900SRT].
  • Page 164: Verificación De La Información Más Reciente En El Software Controlador

    El ajuste [USB Output Level] se aplica igualmente a todos los datos de audio. Verificación del estado de los conmutadores Sin embargo, cuando se selecciona 1 en la tabla del paso 2, los datos de audio selectores de entrada de esta unidad salen con el mismo volumen con el que entran en esta unidad.
  • Page 165: Información Adicional

    Algunas veces, el problema puede estar en otro componente. Inspeccione los otros componentes y los aparatos eléctricos que esté utilizando. Si no se puede corregir el problema después de comprobar los elementos de abajo, pida al servicio de Pioneer autorizado más cercano o a su concesionario que realice el trabajo de reparación.
  • Page 166: Diagrama En Bloques

    Diagrama en bloques MIC1 MIC1 LEVEL I/Fμ com ETHER SW IC MIC2 LEVEL Ether MIC2 DIGITAL MASTER CD/LINE TRIM PHONO PHONES Digital MASTER Control Tone DIGITAL MASTER 1 PHONES CD/LINE TRIM CH1_Analog MASTER PHONO MUTE MASTER 2 CH2_Analog Control Tone BOOTH DIGITAL MUTE...
  • Page 167: Adquisición Del Manual

    3 “Para acceder al sitio se requiere un entorno de internet. ¿Conectado a internet?” se visualiza. Haga clic en [Si]. El navegador Web se inicia y se visualiza el sitio de asistencia Pioneer DJ. http://pioneerdj.com/support/ 4 En el sitio de asistencia Pioneer DJ, haga clic en “Manuals”...
  • Page 168: Especificaciones

    Generales — CONTROL CD Requisitos de potencia .............CA 110 V a 240 V, 50 Hz/60 Hz Vea la información del sitio de asistencia Pioneer DJ (http://pioneerdj.com/ Consumo de energía....................41 W support/). Consumo de energía (modo de espera) ..............0,4 W —...
  • Page 170 поразить Вас электрическим током. Время от D3-4-2-1-7b*_A1_Ru времени проверяйте сетевой шнур. В случае ПРЕДУПРЕЖДЕНИЕ обнаружения повреждения обратитесь за заменой в ближайший официальный сервисный центр Храните небольшие детали вне доступа детей. При фирмы PIONEER или к Вашему дилеру. случайном заглатывании, немедленно S002*_A1_Ru обращайтесь к врачу. D41-6-4_A1_Ru...
  • Page 171 MASTER ON OFF File...
  • Page 174 ® ® CD_menu.app ® ® ® ® English DJM-900SRT_AudioDriver.pkg...
  • Page 175 DJM-900SRT — — E-mail me Serato newsletters — ® ™ ® ™ ® ™ ® ™ I agree to the license terms and conditions Install DJM-900SRT Close CD_menu.exe...
  • Page 176: Applications

    Close Agree Disagree Serato DJ Applications CD_menu.app DJM-900SRT — — E-mail me Serato newsletters —...
  • Page 177 CH 4 CH 3 CH 2 CH 1 PHONO CD/ LINE PHONO CD/ LINE PHONO CD/ LINE PHONO CD/ LINE RETURN MIC2 MIDI OUT (MONO) POWER SIGNAL GND SIGNAL GND BOOTH MASTER1 MASTER2 REC OUT DIGITAL SEND (MONO) MASTER LINK AC IN 1 GND 2 HOT...
  • Page 178 LINK AC IN 1 GND 2 HOT 3 COLD Концентратор- коммутатор PRO DJ LINK rekordbox Компьютеры DJ проигрыватели Pioneer 2 DJ проигрыватели Pioneer 2 К розетке CH 4 CH 3 CH 2 CH 1 PHONO CD/ LINE PHONO CD/ LINE...
  • Page 179 Для подключения используйте Компьютеры поставляемый USB кабель. USB DECK 3 Микрофоны DECK 1 USB DECK 2 USB DECK 4 CD/ LINE PHO MIC1 DIGITAL USB DECK 3 TRIM OVER MIC 1 LEVEL MIC 2 POWER MIXING — MASTER LEVEL THRU —...
  • Page 180 POWER MASTER MIDI START ON/ OFF LFO FORM / STOP MIC1 CD/ LINE PHONO CD/ LINE PHONO CD/ LINE PHONO CD/ LINE PHONO LEVEL DIGITAL DIGITAL DIGITAL DIGITAL DECK DECK DECK DECK UTILITY WAKE UP BEAT EFFECTS TRIM TRIM TRIM TRIM OVER OVER...
  • Page 181 TIME LEVEL/DEPTH COLOR ON/OFF CROSS FADER ASSIGN A THRU B CROSS FADER MASTER LEVEL MASTER1 MASTER2 POWER MASTER1 MASTER2 BALANCE — DIGITAL MASTER1 DIGITAL — PHONO MONO STEREO PHONO — CD/LINE MASTER1 CD/LINE BOOTH MONITOR — USB BOOTH TRIM EQ CURVE ISOLATOR EQ EQ/ISO HI MID LOW CH FADER CROSS FADER...
  • Page 182 MONO SPLIT STEREO — MONO SPLIT MASTER MASTER1 MASTER2 BOOTH REC OUT PHONES DIGITAL — STEREO MASTER OUT MIX (REC OUT) Mixer Audio Output MIXING MONO MASTER STEREO LEVEL HEADPHONES — MONO — STEREO MASTER1 MASTER2 BOOTH REC OUT PHONES DIGITAL MASTER OUT MIX (REC OUT)
  • Page 183 ON/OFF BEAT CROSS FADER ASSIGN A THRU B THRU EFFECTS X-PAD FADER START 1 2 3 4 — Fader Start 1 DECK 3 — Fader Start 2 DECK 1 — Fader Start 3 DECK 2 — Fader Start 4 DECK 4 CROSS FADER ASSIGN A THRU B FADER START 1 2 3 4 —...
  • Page 184: Sound Color Fx

    MIDI LFO COLOR — 1 — MIC — CF.A CF.B — MASTER MASTER SOUND COLOR FX MIDI LFO BEAT ON/OFF BEAT EFFECTS TIME LEVEL DEPTH ON/OFF CH SELECT ON/OFF PARAMETER AUTO GRID TIME AUTO AUTO/TAP TIME AUTO TAP GRID SND/RTN MIDI LFO BEAT BEAT ON/OFF...
  • Page 185 X-PAD X-PAD SND/RTN MIDI LFO SND/RTN LFO FORM WAKE UP LFO FORM WAKE UP [SND/RTN] [1/7 [2/7 [3/7 [7/7 [6/7 [5/7 [4/7 BEAT ON/OFF BEAT EFFECTS X-PAD LFO FORM WAKE UP — X-PAD — BEAT EFFECTS — — LEVEL DEPTH ON/OFF UTILITY —...
  • Page 186 ECHO COLOR BEAT SPACE Входное звучание отключено Постепенное исчезновение Время 1 удар DUB ECHO BEAT 16/1 TIME 4000 LEVEL/DEPTH X-PAD GATE/COMP SPIRAL Входное звучание отключено Постепенное исчезновение NOISE TRIM Время 1 удар BEAT EQ/ISO HI MID 16/1 TIME 4000 LEVEL/DEPTH CRUSH X-PAD REVERB...
  • Page 187 LEVEL/DEPTH BEAT X-PAD TIME LEVEL/DEPTH FILTER X-PAD BEAT SLIP ROLL ON/OFF Частота BEAT BEAT 64/1 Исходное TIME звучание 32000 LEVEL/DEPTH Переключен с Эффект включен 1/2 на 1/1 X-PAD Прокрутка Повтор 1/2 Повтор 1/1 FLANGER BEAT 1/16 16/1 BEAT TIME 4000 Короткая...
  • Page 188 SND/RTN MIDI LFO LFO FORM WAKE UP SND/RTN SEND RETURN TALK Эффектор OVER DJM-900SRT Serato DJ Edition BEAT — — TIME LEVEL/DEPTH RETURN — X-PAD MIDI LFO LFO FORM WAKE UP BEAT 64/1 TIME LEVEL/DEPTH — X-PAD MIDI LFO RETURN CF.A...
  • Page 189 DIGITAL CD/LINE PHONO USB DECK 3 — TRIM — — — — COLOR — — CROSS FADER ASSIGN DIGITAL CD/LINE PHONO USB DECK 1 — TRIM — — — — COLOR — — CROSS FADER ASSIGN DIGITAL CD/LINE PHONO USB DECK 2 —...
  • Page 190 CH SELECT CF.A CF.B MASTER — MIDI LFO — QUANTIZE — — TIME FLANGER PHASER FILTER TIME — BEAT EFFECTS — LEVEL DEPTH — X-PAD X-PAD ON OFF X-PAD SND/RTN MIDI ON OFF X-PAD SND/RTN MIDI LFO — — NOISE SPACE GATE/COMP SOUND COLOR FX...
  • Page 191 Mic Output To Booth MIC BTH ON OFF BOOTH Monitor PC UTILITY PC UTLY ON OFF* Peak Limiter PKLIMIT ON OFF Factory Reset INITIAL YES NO* Pioneer DJM-900SRT — DJM-900SRT — — — Macintosh HD Application Pioneer DJM-900SRT DJM-900SRT 23 23...
  • Page 192 USB Output Level USB Output Level MIXER INPUT USB Output Level ASIO MIXER OUTPUT About Mixer Audio Output CH1 Control Tone CH2 Control Tone CH3 Control Tone CH4 Control Tone PHONO PHONO PHONO PHONO CH1 Control Tone CH2 Control Tone CH3 Control Tone CH4 Control Tone CD/LINE...
  • Page 193 MASTER ATT. –6 dB USER SETUP MASTER ATT. CLUB SETUP Digital Master Out Sampling Rate MASTER LEVEL MASTER 0 dB MASTER ATT. –3 dB –6 dB TRIM 0 dB CROSS FADER ASSIGN A THRU B CROSS FADER ASSIGN A THRU B FADER START USER SETUP FADER START...
  • Page 194 MIC1 MIC1 LEVEL I/Fμ com ETHER SW IC MIC2 LEVEL Ether MIC2 DIGITAL MASTER TRIM CD/LINE PHONO PHONES Digital MASTER Control Tone DIGITAL MASTER 1 PHONES TRIM CD/LINE CH1_Analog MASTER PHONO MUTE MASTER 2 CH2_Analog Control Tone BOOTH DIGITAL MUTE BOOTH CH3_Analog D S P...
  • Page 195 ® ® CD_menu.exe CD_menu.app DJM-900SRT CD_menu.exe CD_menu.app DJM-900SRT More Downloads Serato DJ x.x User Manual 27 27...
  • Page 196 © CD LINE PHONO CD/LINE MIC1 MIC2 CD/LINE MASTER1 PHONO CD LINE MIC1 MIC2 RETURN MASTER1 MASTER2 REC OUT BOOTH SEND PHONES MASTER1 MASTER2 LINE PHONO CD LINE MIC1 Ø MIC2 Ø RETURN Ø DIGITAL IN MASTER BOOTH Ø REC OUT SEND Ø...
  • Page 197 29 29...
  • Page 198 30 30...
  • Page 199: Серийный Номер

    Дату изготовления оборудования можно определить по серийному номеру, который содержит информацию о месяце и годе производства. Серийный номер 12 цифр 2 цифры 10 цифр Дата изготовления оборудования P1 - Год изготовления Год 2001 2002 2003 2004 2005 2006 2007 2008 2009 2010 Символ...
  • Page 200 Примечание: В соответствии со статьей 5 Закона Российской Федерации “О защите прав потребителя” и Указанием Правительства Российской Федерации № 720 от 16 июня 1997 года корпорация Pioneer Europe NV устанавливает условие на следующую продолжительность срока службы официально поставляемых на Российский рынок товаров.

Table des Matières