Chapitres
Table des Matières

Manuels Connexes pour THORENS TD 103 A


Sommaire des Matières pour THORENS TD 103 A
- Page 1 TD 103 A BEDIENUNGSANLEITUNG USER GUIDE MANUEL D’UTILISATION Thorens GmbH Lustheide 85 · 51427 Bergisch Gladbach · Deutschland www.thorens.com · info@thorens.com www.thorens.com...
-
Page 2: Table Des Matières
Inhalt Seite Inhalt Sehr geehrter Thorens-Kunde Garantie Sicherheitshinweise Technische Daten Geräteübersicht Auspacken und Montage Tonarm und Systemeinstellungen Grundlegende Bedienung INHALT... -
Page 3: Sehr Geehrter Thorens-Kunde
Sehr geehrter Thorens-Kunde, herzlichen Dank für Ihr Vertrauen in unser Produkt, den Plattenspieler TD 103 A. Mit dem Kauf dieses Plattenspielers haben Sie ein Präzisionsinstrument zur Wiedergabe von Schallplatten erworben, das, um seiner Aufgabe gerecht zu werden, mit Sorgfalt behandelt und aufgestellt werden muss. -
Page 4: Garantie
Gerät bitte nach Rücksprache in der Originalverpackung an Thorens ein. Sollte keine Originalverpackung mehr vorhanden sein, können Sie diese von Thorens gegen Gebühr erhalten. Die Einsendung hat frei Haus zu erfolgen. Unfrei eingesandte Waren werden nicht angenommen. Der Rückversand erfolgt frei Haus. Verschi- cken Sie den TD 103A niemals ohne die Transportsicherungsschrauben. -
Page 5: Sicherheitshinweise
Sicherheitshinweise ACHTUNG! Um Brandgefahr oder elektrischen Schäden vorzubeugen, darf das Gerät nicht Feuchtigkeit oder Regen aus- gesetzt werden. Bitte öffnen Sie das Gerät nicht! Halten Sie das Verpackungsmaterial, wie z.B. Folien von Kindern fern. Bei Missbrauch könnte Erstickungsge- fahr bestehen. Entsorgung von Elektrogeräten durch Verbraucher in privaten Haushalten innerhalb der EU. -
Page 6: Technische Daten
Technische Daten Antrieb Riemenantrieb Netzspannung 230V/50Hz 115V/60Hz 50/60Hz Netzfrequenz 1,5W Leistungsaufnahme 33,3, 45, 78 Plattenteller-Drehzahlen (U/min) +/- 0,06 / 0,035 % DIN/WRMS Gleichlaufschwankungen 51 dB Störspannungsabstand (DIN 45500) 63 dB Rumpel-Fremdspannungsabstand Rumpel-Geräuschspannungsabstand Effektive Tonarmlänge 211mm Kröpfungswinkel 26° Überhang 19,5mm Tangentialer Spurfehlwinkel 0,15°/cm Rad. -
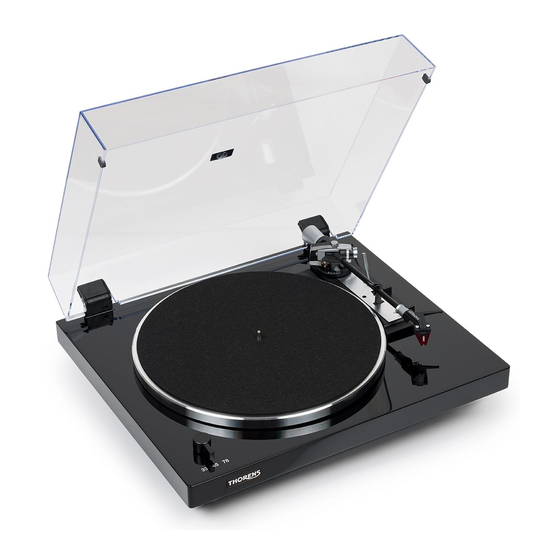
Page 7: Geräteübersicht
Geräteübersicht 1: Staubschutzhaube 2: Scharnier 3: Gegengewicht 4: Auflagekraft 5: Lifthebel 6: Größe wählen (Single oder LP) 7: Tonarmstütze 8: Drehzahlauswahl 9: Kontermutter Headshell 10: Start/Stop Schalter 11: Schrauben Tonabnehmer 12: Tonabnehmer 33 45 78 33 45 78 13: Justage Aufsetzpunkt 14: Antiskating 15: Transportsicherung 16: Audioausgang... -
Page 8: Auspacken Und Montage
60°) bis zum Anschlag in diese ein. In die- ser Stellung lässt sich die Haube auch jederzeit wieder abnehmen. Durch die Auswahl eines entsprechenden THORENS-Netztransformators kann der Plattenspieler an allen vorkommenden Netz- wechselspannungen betrieben werden. Der Fig. 3 Niederspannungsstecker am Kabel des Ste- ckernetztransformators wird in die Buchse (18) an der Geräterückseite gesteckt. - Page 9 Das Stereo-Verbindungskabel besitzt zwei Phonostecker (von manchen Herstellern auch Cinch-Stecker oder RCA-Stecker genannt). Sie sind entweder mit L für den linken Kanal und R für den rechten Kanal bezeichnet. Fehlen diese Buchstaben, so ist der rechte Kanal mit rot und der linke Kanal mit weiß gekennzeichnet. Die Cinch-Stecker werden in die Phono-Buch- sen am Verstärker oder Receiver gesteckt (16).
-
Page 10: Tonarm Und Systemeinstellungen
Tonarm und Systemeinstellungen Stellen Sie den Regler für die Auflagekraft (4) Beachten sie die nachstehende Tabelle: auf 0 und drehen Sie die Antiskating- Auflagekraft Antiskating-Einstellung 14 Einrichtung (14) entgegen dem Uhrzeigersinn Auflagekraft-Einstellung 4 bis an den Anschlag. 1 = 10 mN Nun drehen Sie das Tonarm-Gegengewicht (3) 1,25 = 12,5 mN 1.25... - Page 11 ERSETZEN DER ABTASTNADEL • Verriegeln Sie den Tonarm in der Stütze. • Entfernen Sie den Nadelschutz. • Umfassen Sie den Nadeleinschub und ziehen ihn vorsichtig nach vorne. • Setzen Sie einen neuen Nadeleinschub in umgekehrter Reihenfolge ein. • Setzen Sie den Nadelschutz wieder auf. ENTFERNEN DES TONABNEHMERS •...
- Page 12 EINBAU EINES NEUEN TONABNEHMERS • Evtl. sind die folgenden Schritte einfacher durchzuführen, wenn vorher das Headshell vom Tonarm abgenommen wird. • Verbinden Sie die vier Kabel des Headshells mit den Pins an der Rückseite des Tonabnehmers. Berücksichtigen Sie die korrekte Zuordnung der farbigen Kabel zu den passenden Pins. •...
-
Page 13: Grundlegende Bedienung
Grundlegende Bedienung DREHZAHLWAHL Mit dem linken Schaltknopf (8) lassen sich die Geschwindigkeiten 33, 45 und 78 einstellen. PLATTENDURCHMESSERWAHL Mit dem Schalter (6) rechts neben dem Tonarm kann der Plattendurchmesser auf 17 cm (Single) und 30 cm (LP) eingestellt werden. Dies ist nur bei automatischem Start notwendig. AUTOMATISCHER START Ziehen Sie den durchsichtigen Nadelschutz nach vorne ab. - Page 14 TD 103 A BEDIENUNGSANLEITUNG USER GUIDE MANUEL D’UTILISATION...
- Page 15 Contents Page Contents Dear THORENS customer WARRANTY Safety instructions Technical specifications Device overview Unpacking and setup Electrical Connections Adjusting tone arm and pick-up cartridge 15 CONTENTS...
-
Page 16: Dear Thorens Customer
Dear THORENS customer, Thank you very much for your confidence in our product, the record player TD 103 A. With the purchase of this device you have acquired a precision instrument for the purpose of playing back analogue re- cords. This appliance however requires your attention with respect to set-up, placement and handling in order to achieve a flawless operation. -
Page 17: Warranty
THORENS representative in your country. If the original shipping box is no longer in your possession your THORENS representative will be in the position to supply a new one for a small charge. Shipping costs to THORENS or to an authorized service center must be prepaid because otherwise the parcel will be reject- ed upon arrival. -
Page 18: Safety Instructions
Safety precautions CAUTION! To prevent the risk of fire or electrical damage, do not expose the device to moisture or rain. Please do not open the device! Keep the packaging material, such as plastic foils, away from children. Danger of asphyxiation by misuse. Disposal of electrical appliances by consumers in private households within the EU. -
Page 19: Technical Specifications
Technical data Drive Belt Drive Main voltage 230V/50Hz 115V/60Hz 50/60Hz Line frequency 1,5W Power requirement 33,3, 45, 78 Platter speeds (rpm) +/- 0,06 / 0,035 % DIN/WRMS Wow and flutter 51 dB Signal-to-noise ratio (DIN 45500) 63 dB Rumpel unweighted signal-to-noise Rumpel weighted signal-to-noise Effective tonearm length 211mm... -
Page 20: Device Overview
Device overview 1: Dustcover 2: Hinge 3: Tonearm counterweight 4: Scale for setting tonearm tracking force 5: Lift lever 6: Switch for size (Single or LP) 7: Tonearm support with tone arm lock 8: Speedselector 9: Head-shell locking nut 10: Start/Stop switch 11: Securing screw for cartridge 33 45 78... -
Page 21: Unpacking And Setup
UNPACKING AND SETUP Take the record player and all accessories out of the carton. Remove the two transpor- tation locks (15) by applying lateral pressure. The locks are located underneath the platter at front left and at the rear right. Put the platter onto the sub-platter and press down the two safety springs until they set into the Fig. -
Page 22: Electrical Connections
ELECTRICAL CONNECTIONS By choosing the appropriate THORENS mains transformer this record player can be operated from nearly all existing public mains supplies. The low voltage plug on the cable that is coming from the mains transformer unit is to be inserted into jack (18) at the rear side of the record player. -
Page 23: Adjusting Tone Arm And Pick-Up Cartridge
Adjusting tone arm and pick-up cartridge As for the required anti-skatingforce refer to the table below: Turn the tracking force adjuster (4) to „0“ and the anti-skating knob (14) counter-clockwise Tracking force Antiskating setting 14 Tracking force scale 4 until it stops. 1 = 10 mN Screw the tonearm counter weight (3) onto 1,25 = 12,5 mN... - Page 24 TO REPLACE THE STYLUS • Put the rest clip on the pick-up arm. • Remove the protective cap from the stylus. • Pull the stylus to the lower front and remove it. • Put in the new stylus following the reverse procedure. •...
-
Page 25: Important Recommendations
IMPORTANT RECOMMENDATIONS We advise you to clean your records using a rag impregnate with an antistatic product for maximum enjoy- ment of your records and also to make them last. We would also point out that for the same reason your stylus should be replaced periodically (approximately every 300 to 500 hours). -
Page 26: Automatic Start
AUTOMATIC START Remove the transparent stylus guard by carefully pulling it towards you. The lift lever (5) must be in position Move the knob (10) into position Start and the tonearm will be automatically lowered onto the record. MANUEL START Bring the lift-lever (5) into position Unlock the tone arm from its rest and move it above the lead-in groove of the record. - Page 27 TD 103 A BEDIENUNGSANLEITUNG USER GUIDE MANUEL D’UTILISATION...
- Page 28 Table des matières Table des matières Cher client THORENS Garantie Précautions de sécurité Caractéristiques techniques Aperçu de l’appareil Déballage et assemblage Branchements Réglages du bras de lecture et du système TABLE DES MATIÈRES...
-
Page 29: Cher Client Thorens
Cher client THORENS, merci d’accorder votre confiance à notre produit, la platine TD 103 A. Avec l’acquisition de cette pla-tine, vous disposez d’un instrument de précision pour la reproduction de disques, qui doit être mani-pulé et installé avec soin, pour qu’il puisse répondre à vos attentes. La fabrication et l’assemblage de cette platine TD 103A sont entièrement réalisés en Allemagne –... -
Page 30: Garantie
être réparé par l’envoi et le remplacement de la pièce détachée correspondante, retour- nez l’appareil à Thorens, après accord préalable, dans son emballage d’origine. Si vous ne disposez plus de l’emballage d’origine, vous pouvez en obtenir un de Thorens contre paiement. L’expédition en retour doit se faire en port payé. -
Page 31: Précautions De Sécurité
Précautions de sécurité ATTENTION! Pour empêcher tout risque d’incendie ou de dommage électrique, n’exposez pas l’appareil à l’humidité ou la pluie. Veuillez ne pas ouvrir l’appareil ! Gardez le matériel d’emballage, tel que les feuilles en plastique, éloignez des enfants. Danger d’étouffement. Mise au rebut des appareils électriques par les consommateurs dans les déchets privés dans l’UE. -
Page 32: Caractéristiques Techniques
Caractéristiques techniques Entraînment à courrole Entraînment à courrole Tensions secteur 230V/50Hz 115V/60Hz 50/60Hz Fréquence secteur 1,5W Concommation 33,3, 45, 78 Vitesses du plateau (tr/mn) +/- 0,06 / 0,035 % DIN/WRMS Tolérance de vitesses 51 dB Rapport signal/bruit (DIN 45500) 63 dB Signal/tension extérieure de ronflement Signal/tension perturbatrice de ronflement Longueur efficiace du bras... -
Page 33: Aperçu De L'appareil
Aperçu de l‘appareil 7: Support et verrouillage du bras de lecture 8: Réglage de la vitesse 9: Ecrou de fixation de la tête de lecture 10: Start/Stop 11: Vis de fixation de la tête de lecture 12: Cellule de lecture 13: Réglage du point de descente du bras de lecture 14: Réglage anti-patinage... -
Page 34: Déballage Et Assemblage
Déballage et assemblage Retirez l’appareil ainsi que toutes les pièces accessoires du carton d’emballage. Enlevez les deux butées de transport (15) en les poussant latéralement. Elles se trouvent à l’avant gauche et à l’arrière droit sous le pla- teau du tourne-disque. Posez maintenant le plateau sur la plaque support du moteur et poussez les deux res- sorts d’arrêt vers l’arrière jusqu’à... -
Page 35: Branchements
Branchements L’utilisation d’un transformateur d’alimentation THORENS correspondant vous permet de connecter le tourne-disque à toutes les ten- sions alternatives existantes. La fiche basse tension du câble transformateur d’alimentation doit être enfoncée dans la prise (18) à l’arrière de l’appareil. Le cordon de raccordement stéréo possède deux fiches phono (aussi appelées fiches... -
Page 36: Réglages Du Bras De Lecture Et Du Système
Réglages du bras de lecture et du système Veuillez tenir compte du tableau suivant: Amenez le bouton de réglage de la force d’ap- pui (4) sur 0 et tournez le bouton de réglage Force d‘appui 4 Anti-patinage 14 de l’anti-skating (14) dans le sens inverse des 1 = 10 mN aiguilles d’une montre jusqu’au blocage com- plet. -
Page 37: Remplacement Du Diamant
REMPLACEMENT DU DIAMANT : • Fixez le bras sur son support • Enlevez le capuchon de protection du diamant • Abaissez le diamant le plus bas en avant pour le retirer. • Mettre le nouveau diamant en refaisant la procédure à l’inverse. •... -
Page 38: Recommandations Importantes
RECOMMANDATIONS IMPORTANTES : Nous vous conseillons de nettoyer vos disques avec un chiffon adéquat imprégné d’un produit antistatique approprié de manière à obtenir un maximum de plaisir et aussi les préserver. Nous aimerions également attirer votre attention sur le fait d’entretenir et de changer votre diamant pour ces mêmes raisons régulièrement (environ : Toutes les 300 - 500 heures) . - Page 39 Mise en marche automatique Enlevez le protège pointe transparent, en le tirant vers l’avant. Le levier du lève-bras (5) doit être actionné. Placez le levier de commande en position START (10) afin que le bras de lecture se positionne automatique- ment sur le disque.
- Page 40 Thorens GmbH Lustheide 85 · 51427 Bergisch Gladbach · Deutschland www.thorens.com · info@thorens.com www.thorens.com...