
Manuels Connexes pour AYA ATI4B


Sommaire des Matières pour AYA ATI4B
- Page 1 ATI4B à Table d e Cui s s o n I n d uctio n I n d uctio n Hob INSTRUCTIONS D’UTILISATION INSTRUCTIONS FOR USE...
-
Page 2: Table Des Matières
TABLE DES MATIERES CONSIGNES DE SECURITE IMPORTANTES……………………………………..2 . DESCRIPTION DE L’APPAREIL……………………………………………………..1 0 INSTRUCTIONS D’INSTALLATION………………………………………………..1 . 1 A PROPOS DE LA CUISSON PAR INDUCTION…………………………………...1 5 UTILISATION DE L’APPAREIL……………………………………………………… .1 7 CONSEILS DE CUISSON…………………………………………………………… ..2 3 ENTRETIEN ET NETTOYAGE……………………………………………………… .2 5 DEPANNAGE…………………………………………………………………………...2 6 SPECIFICATIONS TECHNIQUES………………………………………………….. -
Page 3: Consignes De Securite Importantes
CET APPAREIL EST DESTINE A UN USAGE DOMESTIQUE UNIQUEMENT! Veuillez lire attentivement toutes les instructions avant la premiè re utilisation et conservez-les pour une référence ultérieure. CONSIGNES IMPORTANTES DE SECURITE Dans l’intérêt de VOTRE SECURITE et pour assurer le BON FONCTIONNEMENT de votre appareil, lisez soigneusement les instructions suivantes avant d’installer ou d’utiliser votre appareil. - Page 4 Risque de coupure a) Soyez prudent! Les rebords du panneau sont tranchants. b) Une utilisation sans soin peut conduire à des blessures ou des coupures. Précautions de sécurité a) Lisez attentivement ces instructions avant d'installer ou d'utiliser cet appareil. b) Aucuns matériaux ou produits combustibles doivent être placés sur cet appareil à...
-
Page 5: Utilisation Et Maintenance
2. UTILISATION ET MAINTENANCE Risque de choc électrique a) N’utilisez pas une table de cuisson cassée ou fissurée. Si la surface de la table de cuisson est fissurée ou endommagée, éteignez-la immédiatement de la source de courant (commutateur mural) et contactez un technicien qualifié. -
Page 6: Danger De Surface Chaude
Danger de surface chaude a) Pendant l'utilisation, les parties accessibles de l'appareil pourront devenir assez chaudes pour causer des brûlures. b) Ne laissez pas votre corps, des vêtements ou tout autre élément autre qu’un ustensile approprié entrer en contact avec la vitre à induction jusqu'à... -
Page 7: Précautions De Sécurité A) Ne Laissez Jamais L'appareil Sans Surveillance
Précautions de sécurité a) Ne laissez jamais l'appareil sans surveillance lors de l’utilisation. Une cuisson excessive peut causer des fumées et des résidus graisseux qui pourraient s'enflammer. b) N’utilisez pas votre appareil comme un espace de stockage ou une surface de travail. c) Ne placez jamais d’objets ou d’ustensiles au-dessus de l'appareil. - Page 8 g) Après l’utilisation, éteignez toujours les zones de cuisson et la table de cuisson comme décrit dans ce manuel (en utilisant les touches sensitives) .Ne comptez pas sur la fonction de détection de la casserole pour éteindre les zones de cuisson lorsque vous retirez les casseroles.
- Page 9 p) N’utilisez pas de tampon à récurer ni de détergent abrasif pour nettoyer votre table de cuisson, car ils peuvent rayer le verre à induction. Si le cordon d'alimentation est endommagé, il doit être remplacé par le fabricant, son agent de service ou un technicien qualifié...
- Page 10 Cet appareil peut être utilisé par des enfants à partir de 8 ans et par des personnes ayant des capacités physiques, sensorielles ou mentales réduites ou un manque d’expérience et de connaissances à condition qu’elles aient été placées sous surveillance ou qu'elles aient reç...
-
Page 11: Description De L'appareil
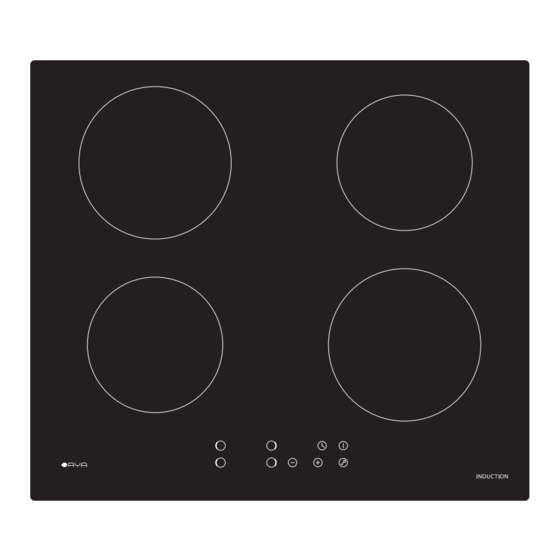
DESCRIPTION DE L’APPAREIL 1. Foyer 1400W max 2. Foyer 1800W max 3. Foyer 1400W max 4. Foyer 1800W max 5. Plaque en verre 6. Bandeau de commande 7. Touche « MARCHE/ARRÊT » BANDEAU DE COMMANDE 1. Touches de sélection de zone 2. -
Page 12: Instructions D'installation
INSTRUCTIONS D’INSTALLATION Sélection des équipements de l'installation Découpez la surface de travail selon les dimensions indiquées dans le schéma. Un espace minimum de 5 cm (50 mm) doit être laissé autour du trou pour l'installation et l'utilisation. Le plan de travail doit être d’une épaisseur d’au moins 3 cm (30 mm) et composé d’un maté... - Page 13 A(mm) B(mm) C(mm) mini 50 mini 20 Entrée d’air Sortie d’air 5mm Avant d’installer votre table de cuisson, assurez-vous que: La surface de travail est carrée et de niveau, et ne posez aucun d’obstacle autour de votre table de cuisson. ...
- Page 14 Avant de fixer les supports Cet appareil doit ê tre placé sur une surface stable et lisse (utilisez l’emballage).N’appuyez pas forcé ment sur les touches de commande. Réglage de la position du support Fixez la table de cuisson à induction au plan de travail en vissant les 2 supports situé s sous la table de cuisson (vois le schéma) après l’installation.
- Page 15 Branchement électrique Le branchement électrique de votre appareil ne doit être qu’effectué par un professionnel qualifié. La connexion au système de câblage de terre est essentielle et obligatoire. Avant le raccordement électrique, vérifiez que : L’installation électrique à votre domicile est suffisante pour alimenter votre table de cuisson de cette puissance.
-
Page 16: A Propos De La Cuisson Par Induction
A PROPOS DE LA CUISSON PAR INDUCTION Principe du fonctionnement de l’induction La cuisson par induction est une technique de cuisson sécuritaire, avancée, efficace et économique. En utilisant des vibrations électromagné tiques, Il génè re de la chaleur directement dans le moule, au lieu de chauffer indirectement par l'intermédiaire de la surface de verre. Le verre devient chaud seulement parce que le pan finalement le réchauffe. -
Page 17: Sélection De La Bonne Batterie De Cuisine
Sélection de la bonne batterie de cuisine N'utilisez que des ustensiles de cuisine adaptés pour l'induction. Vous pouvez vérifier le symboole d’induction sur les emballages ou sur le fond des ustensiles de cuisson. Vous pouvez aussi faire le test dit ‘de l’aimant’. Approchez un aimant sur la base du récipient, si l’aimant est attiré... -
Page 18: Utilisation De L'appareil
UTILISATION DE L’APPAREIL Départ de la cuisson 1. Appuyez sur la touche « MARCHE/ARRÊT» pendant trois secondes. Aprè s la mise sous tension, il retentit un « bip » , et « » ou « » va afficher sur – –... - Page 19 Si le signe « » clignote alternativement avec la puissance sur la zone d’affichage Cela signifie que: vous n’avez pas placé la casserole sur la bonne zone de cuisson ou, la casserole utilisée n’est pas adaptée à la cuisson par induction ou, ...
-
Page 20: Verrouillage Des Touches
Verrouillage des touches Cette table de cuisson à induction permet de bloquer l’utilisation des touches sensitives pour éviter des modifications involontaires. Par exemple, les enfants peuvent allumer l’appareil par hasard. Lorsque le verrouillage est enclenché, toutes les touches sont inopérantes, à l’exception ... -
Page 21: Utilisation De La Minuterie
Utilisation de la minuterie La minuterie peut ê tre utilisée de 2 manières différentes : Minuteur simple de rappel. Dans ce cas, à la fin du décompte, la minuterie émettra une sonnerie mais n’arrêtera pas le fonctionnement de la table de cuisson. Minuteur avec arrêt d’un foyer de cuisson. - Page 22 5. Lorsque la valeur est dé finie, le compte à rebours débute immédiatement. L’indicateur lumineux de la minuterie va clignoter pendant 5 secondes et le temps restant va afficher sur la zone d’affichage. 6. A la fin du décompte, la table de cuisson é met une alarme (bip) pendant 30 secondes, et «...
- Page 23 A tout moment, il est possible d’annuler la minuterie. Pour cela: il faut appuyer sur les touches simultané ment « » et « », et « 00 » va afficher sur la zone d’affichage. 5. Lorsque la valeur est dé finie, le compte à rebours débute immédiatement.
-
Page 24: Conseils De Cuisson
CONSEILS DE CUISSON AVERTISSEMENT : Soyez prudent lors de la friture, car l'huile et la graisse s’échauffent très rapidement. L'huile et la graisse peuvent s'enflammer spontané ment à une température extrê mement élevée, ce qui conduira à un risque d'incendie sérieux. Conseils utiles ... -
Page 25: Réglages Du Niveau De Puissance
Cuire les sautés 1. Choisissez une poêle à induction compatible avec une base plate ou une grande poêle à frire. 2. Préparez bien tous les ingrédients et les outils. Si vous faites cuire de grandes quantités, Il est mieux de les cuire en plusieurs petits lots. 3. -
Page 26: Entretien Et Nettoyage
ENTRETIEN ET NETTOYAGE Quoi Comment Important ! Les saletés Débranchez la table de cuisson Lorsque la table de cuisson est quotidiennes sur de l'alimentation électrique. éteinte, il n'y aura pas d'indication le verre (les Utilisez un nettoyeur de cuisson «surface chaude», mais la zone ... -
Page 27: Depannage
DEPANNAGE PROBLEMES CAUSES POSSIBLES SOLUTIONS La table de cuisson ne Pas d’alimentation. Assurez-vous que la table de s’allume pas. cuisson soit bien branché e et alimenté e. Vérifiez que l’alimentation électrique de votre logement est bien en fonctionnement. Si le problè... - Page 28 Un bruit de ventilation Un ventilateur est installé Ce bruit est normal et ne débranchez vient de la table de dans la table à induction pour pas la table de cuisson de la prise de cuisson à induction. évacuer la chaleur due aux courant lorsque le ventilateur est en champs magnétiques.
-
Page 29: Affichage D'erreur Et Inspection
Affichage d’erreur et inspection Si un problème se produit, la table de cuisson à induction se mettra automatiquement en mode protection et affichera l’un des codes : CODE ERREUR CAUSES POSSIBLES SOLUTIONS F3 - F8 Panne du capteur de température Contactez le service aprè... -
Page 30: Specifications Techniques
SPECIFICATIONS TECHNIQUES ATI4B Modèle : Zones de cuisson : 4 Zones Alimentation électrique : 220-240V~ 50/60Hz Puissance installée: 6400W Dimension du produit L×L×H (mm) 590X520X60 Dimension d’encastrement A×B (mm) 560X490 Remarque: Le poids et les dimensions sont approximatifs. Nous nous efforç ons continuellement d'améliorer nos produits, nous pouvons modifier les spécifications et... - Page 31 TABLE OF CONTENTS SAFETY WARNINGS………………………………………………………………..3 1 PRODUCT OVERVIEW……………………………………………………………….. .4 0 INSTALLATION………………………………………………………………………… ..4 1 A WORD ON INDUCTION COOKING………………………………………………. ..4 5 USING YOUR INDUCTION HOB…………………………………………………….. .4 7 COOKING GUIDELINES……………………………………………………………… ..5 3 CARE AND CLEANING……………………………………………………………….. .5 5 HINTS AND TIPS………………………………………………………………………. .5 6 TECHNICAL SPECIFICATION………………………………………………………...
-
Page 32: Safety Warnings
We recommend that you spend some time to read this Instruction /Installation Manual in order to fully understand how to install correctly and operate it. For installation, please read the installation section. Read all the safety instructions carefully before use and keep this Instruction / Installation Manual for future reference. - Page 33 Important safety instructions a) Read these instructions carefully before installing or using this appliance. b) No combustible material or products should be placed on this appliance at any time. c) Please make this information available to the person responsible for installing the appliance as it d) could reduce your installation costs.
- Page 34 2. Operation and maintenance Electrical Shock Hazard a) Do not cook on a broken or cracked cooktop. If the cooktop surface should break or crack, switch the appliance off immediately at the mains power supply (wall switch) and contact a qualified technician.
-
Page 35: Hot Surface Hazard
Hot Surface Hazard a) During use, accessible parts of this appliance will become hot enough to cause burns. b) Do not let your body, clothing or any item other than suitable cookware contact the Induction glass until the surface is cool. c) Never leave metal objects (such as kitchen utensils) or empty pans on the cooktop as they can become hot very... -
Page 36: Important Safety Instructions
Important safety instructions a) Never leave the appliance unattended when in use. Boilover causes smoking and greasy spillovers that may ignite. b) Never use your appliance as a work or storage surface. c) Never leave any objects or utensils on the appliance. - Page 37 f) Never use your appliance for warming or heating the room. g) After use, always turn off the cooking zones and the cooktop as described in this manual (i.e. by using the touch controls). Do not rely on the pan detection feature to turn off the cooking zones when you remove the pans.
- Page 38 l) Do not repair or replace any part of the appliance unless specifically recommended in the manual. All other servicing should be done by a qualified technician. m)Do not use a steam cleaner to clean your cooktop. n) Do not place or drop heavy objects on your cooktop.
- Page 39 staff kitchen areas in shops, offices ‐ environments; other working and farm houses, motels and other ‐ environments; type residential by clients in hotels; ‐ bed and breakfast type environments ‐ WARNING: The appliance and its accessible parts become hot during use. Care should be taken to avoid touching heating elements.
- Page 40 Keep the appliance and its cord out of reach of child less than 8 years. WARNING: Unattended cooking on a hob with fat or oil can be dangerous and may result in fire.NEVER try to extinguish a fire with water, but switch off the appliance and then cover flame e.g.
-
Page 41: Product Overview
Product Overview Top View 1. max. 1400 W zone 2. max. 1800 W zone 3. max. 1400 W zone 4. max. 1800 W zone 5. Glass plate 6. Control panel 7. ON/OFF control Control Panel 1. Heating zone selection controls 2. -
Page 42: Installation
Installation Selection of installation equipment Cut out the work surface according to the sizes shown in the drawing. For the purpose of installation and use, a minimum of 5 cm space shall be preserved around the hole. Be sure the thickness of the work surface is at least 30mm. Please select heat-resistant work surface material to avoid larger deformation caused by the heat radiation from the hotplate. - Page 43 A(mm) B(mm) C(mm) 50 mini 20 mini Air intake Air exit 5mm Before you install the hob, make sure that • The work surface is square and level, and no structural members interfere with space requirements. • The work surface is made of a heat-resistant material. •...
-
Page 44: Before Locating The Fixing Brackets
When you have installed the hob, make sure that • The power supply cable is not accessible through cupboard doors or drawers. •There is adequate flow of fresh air from outside the cabinetry to the base of the hob. • If the hob is installed above a drawer or cupboard space, a thermal protection barrier is installed below the base of the hob. -
Page 45: Connecting The Hob To The Mains Power Supply
Connecting the hob to the mains power supply This hob must be connected to the mains power supply only by a suitably qualified person. Connection to a good earth wiring system is essential and mandatory. Before connecting the hob to the mains power supply, check that: 1. -
Page 46: A Word On Induction Cooking
A Word on Induction Cooking Induction cooking is a safe, advanced, efficient, and economical cooking technology. It works by electromagnetic vibrations generating heat directly in the pan, rather than indirectly through heating the glass surface. The glass becomes hot only because the pan eventually warms it up. -
Page 47: Choosing The Right Cookware
Choosing the right Cookware • Only use cookware with a base suitable for induction cooking. Look for the induction symbol on the packaging or on the bottom of the pan. • You can check whether your cookware is suitable by carrying out a magnet test. -
Page 48: Using Your Induction Hob
Using your Induction Hob To start cooking 1. Touch the ON/OFF control for three seconds. After power on, the buzzer beeps once, all displays show “ – “ or “ – – “, indicating that the induction hob has entered the state of standby mode. 2. - Page 49 If the display flashes alternately with the heat setting This means that: • you have not placed a pan on the correct cooking zone or, • the pan you‟re using is not suitable for induction cooking or, • the pan is too small or not properly centered on the cooking zone. No heating takes place unless there is a suitable pan on the cooking zone.
-
Page 50: Locking The Controls
Locking the Controls • You can lock the controls to prevent unintended use (for example children accidentally turning the cooking zones on). • When the controls are locked, all the controls except the ON/OFF control are disabled. To lock the controls Touch the keylock control. -
Page 51: Using The Timer As A Minute Minder
Using the Timer You can use the timer in two different ways: • You can use it as a minute minder. In this case, the timer will not turn any cooking zone off when the set time is up. • You can set it to turn one cooking zone off after the set time is up. •... -
Page 52: Setting The Timer To Turn One Cooking Zone Off
5. When the time is set, it will begin to count down immediately. The display will show the remaining time and the timer indicator will flash for 5 seconds. 6. Buzzer will bips for 30 seconds and the timer indicator shows “- - “ when the setting time finished. - Page 53 4. Touching the together, the timer is cancelled, and the “00” will show in the minute display. 5. When the time is set, it will begin to count down immediately. The display will show the remaining time and the timer indicator flash for 5 seconds. NOTE: The red dot next to power level indicator will illuminate indicating that zone is selected.
-
Page 54: Cooking Guidelines
Cooking Guidelines Take care when frying as the oil and fat heat up very quickly. At extremely high termperatures oil and fat will ignite spontaneously and this presents a serious fire risk. Cooking Tips • When food comes to the boil, reduce the temperature setting. •... -
Page 55: Heat Settings
For stir-frying 1. Choose an induction compatible flat-based wok or a large frying pan. 2. Have all the ingredients and equipment ready. Stir-frying should be quick. If cooking large quantities, cook the food in several smaller batches. 3. Preheat the pan briefly and add two tablespoons of oil. 4. -
Page 56: Care And Cleaning
Care and Cleaning What? How? Important! Everyday soiling on 1. Switch the power to the cooktop • When the power to the cooktop is glass (fingerprints, off. switched off, there will be no „hot marks, stains left by 2. Apply a cooktop cleaner while surface‟... -
Page 57: Hints And Tips
Hints and Tips Problem Possible causes What to do The induction hob No power. Make sure the induction hob is cannot be turned connected to the power supply and that it is switched on. Check whether there is a power outage in your home or area. -
Page 58: Failure Display And Inspection
The induction hob Technical fault. Please note down the error or a cooking zone letters and numbers, switch has turned itself off the power to the induction hob unexpectedly, a off at the wall, and contact a tone sounds and an qualified technician. -
Page 59: Technical Specification
Technical Specification Cooking Hob ATI4B Cooking Zones 4 Zones Supply Voltage 220-240V~ 50/60Hz Installed Electric Power 6400W Product Size L×W×H(mm) 590X520X60 Building-in Dimensions A×B (mm) 560X490 Weight and Dimensions are approximate. Because we continually strive to improve our products we may change specifications and designs without prior notice.