Publicité

Les langues disponibles
  • FR

Les langues disponibles

  • FRANÇAIS, page 20

Liens rapides

F r a m e w o r K m a n a G e m e n t
_ Kurzanleitung Installation
_ Quickguide Installation
_ Guide d'installation rapide
_ Guida rapida di installazione
_ Instrucciones breves para
la instalación
_ Szybka instrukcja instalacji
_ Kratke upute za instalaciju

Publicité

Table des Matières
loading

Sommaire des Matières pour Amann Girrbach ceramill map

  • Page 1 F r a m e w o r K m a n a G e m e n t _ Kurzanleitung Installation _ Quickguide Installation _ Guide d’installation rapide _ Guida rapida di installazione _ Instrucciones breves para la instalación _ Szybka instrukcja instalacji _ Kratke upute za instalaciju...
  • Page 2 _Deutsch 04 - 11 _English 12 - 19 _Français 20 - 27 _Italiano 28 - 35 _Español 36 - 43 _Polski 44 - 51 _Hrvatski 52 - 59...
  • Page 3 PC typ t3500 Die Position der Anschlüsse kann bei neueren PC Modellen abweichen. GB The position of the connections may be different on the most recent PC models. La position des connexions peut varier avec les nouveaux modèles de PC. La posizione dei collegamenti può differire nel caso di nuovi modelli di PC. La posición de las conexiones puede diferir en los nuevos modelos de ordenador. PL W nowszych komputerach PC porty mogą być rozmieszczone inaczej. Hr Pozicija priključaka može odstupati kod novijih modela kompjutera.
  • Page 4: Installation Des Scanners

    K u r z a n L e I t u n G I n s ta L L at I o n ansCHLüsse unD zu vermeiden. sCHaLter _ Das Gerät sollte auf einem stabilen Arbeitstisch bzw. einer Werkbank aufgestellt werden (wichtig beim Ceramill Map 300 Eigenschwingungen).  _ Die Öffnung der Scankammer muss abgewandt Netzanschluss PC von Fenstern und starker künstlicher Beleuchtung USB Anschlüsse für Tastatur, Maus, sein (Ceramill Map 100). Scanner und Dongle Digitaler Anschluss Bildschirm Netzwerkanschluss Internet ansCHLIessen Des monItors Fire Wire Anschluss PC Netzwerkanschluss Motion...
  • Page 5: Software Installation

    K u r z a n L e I t u n G I n s ta L L at I o n 1. Die beiliegenden zwei USB Kabel an Scanner Für die Installation bitte mit folgenden und am PC anschließen. Benutzerdaten anmelden: Benutzername: Administrator Passwort: ceramill mall nach neustart wechselt der PC auf den Benutzer: cadcam Passwort kann je nach Wunsch erstellt werden. Werkseitig wird keines eingestellt sprachumstellung Das Ceramill Digital System wird werkseitig in Englisch ausgeliefert. Zur Einstellung der gewünschten Sprache, nach Inbetriebnahme des PCs, den „Manual Language Selector“ auf dem Desktop öffnen und den Anweisungen folgen.
  • Page 6 K u r z a n L e I t u n G I n s ta L L at I o n aCHsKaLIBrIerunG map300 1. Distanzplatte Nr. 2, Fixierplatte mit Klemme und Die Scanner Ceramill Map100 und 300 müssen Modellplatte (s. Bedienungsanleitung Ceramill nach dem Aufstellen und Anschluss an den PC Transferkit) einsetzen mithilfe des mitgelieferten Kalibrationsmodell kalibriert werden. map100 2. Kalibriermodell einsetzen 3. Legen Sie einen Patientenfall an und starten sie Ceramill Map in der Database. Brechen Sie die anschließende Eingabeaufforderung für den 1. Kalibriermodell auf den Noplast Objekt- 2D-Scan ab.
  • Page 7: Störungen Und Reparatur

    K u r z a n L e I t u n G I n s ta L L at I o n störunGen unD aCHsreFerenzIerunG BeIm reParatur CeramILL maP 100 Bitte beachten: Bei dem Scanner handelt es sich um ein empfindliches, optisches Gerät. Die Wartung und Reparatur darf daher nur von geschultem Die Rotations- und die Schwenkachse haben Fachpersonal ausgeführt werden. Positionsencoder mit deren Hilfe der Scanner die Bei Störungen, die sich durch einen Neustart des gegenwärtige Achsstellung ausliest. Dies kann Scanners und der Software nicht beheben lassen, erst geschehen, nachdem die Achsen mindestens bitte unsere M-Center Helpdesk Nummer wählen. einmal in „Null“-Position gebracht wurden (Referenzierung). Deswegen muss vor Bedienung Deutschland: +49 7231 957 100 des Scanners die Rotationsachse einmal komplett...
  • Page 8 K u r z a n L e I t u n G I n s ta L L at I o n 3. Anschließend die Formularfelder mit den Ceramill mind/match persönlichen Daten befüllen und alle Serien- Softwareschachtel nummern eingeben. Ceramill CaDCam PC PC Deckel Die Seriennummern sind zu finden: Ceramill map 100/300 und Ceramill motion 4. Nach Eingabe der Daten und Akzeptierung der Geräterückseite Nutzungsbedingungen den Button „Konto jetzt erstellen“ klicken. 5. Sie erhalten in Kürze eine E-Mail zur Bestäti- gung der Anmeldung.
  • Page 9: Auftragstracking M-Center

    K u r z a n L e I t u n G I n s ta L L at I o n auFtraGstraCKInG m-Center _ Nach Eingang der Konstruktionsdaten im M-Center wird eine Auftragsbestätigung per Mail versandt. _ Sie erhalten außerdem Informations-Emails, wenn ihre Arbeit in Produktion und in den Ver- sand geht. _ Eine detaillierte Auflistung aller Aufträge wird auf der M-center Homepage im Login-Bereich unter „Meine Aufträge“ dargestellt. Nach Ver- 7. Sie erhalten innerhalb der näch- sand des Auftrages wird hier für jeden Auftrag sten 24 h eine E-Mail mit einem eine Trackingnummer angegeben über die der UPLOAD weiteren Benutzernamen Auftrag nachverfolgt werden kann.
  • Page 10: Technische Daten

    K u r z a n L e I t u n G I n s ta L L at I o n teCHnIsCHe Daten Techische Spezifikationen können sich je nach Entwicklungsstand ändern. Empfohlener Aufstell- ort bodenfern, nicht an Wand. technische Daten Ceramill map 100 Art.Nr.: 179100 Gewicht: 33 kg Lieferumfang der Komplettsysteme Elektr. Anschlüsse: 230/1,25 V/A 179001, 179002, 179003, 179004 Leistung: 100 W Scanner 179100/179110, Ceramill Map CD, Netz- Zulässiger 18-30 C °...
  • Page 11 K u r z a n L e I t u n G I n s ta L L at I o n warn- unD sICHerHeItsHInweIse: Bei der Aufstellung, Inbetriebnahme und Benutzung des Scanners sind stets die folgenden Sicherheitshinweise zu befolgen: _ Das Gerät wurde nach den geltenden Sicher- heitsnormen und mit größtmöglicher Sorgfalt entwickelt und hergestellt. Trotzdem kann nicht mit letzter Sicherheit ausgeschlossen werden, dass aufgrund eines technischen Defekts einzelner Komponenten eine Gefährdung durch Stromschlag, Überhitzung oder Brand entsteht. _ Schalten Sie daher das Gerät aus, wenn Sie es nicht mehr benötigen oder das Gerät längere Zeit, z.B. über Nacht, unbeaufsichtigt ist. Dies kommt ferner der Umwelt zu Gute,...
  • Page 12: Installation Of The Scanner

    Q u I C K G u I D e I n s ta L L at I o n Ports anD swItCHes table or a work bench (important with Ceramill Map 300 natural movement).  _ The opening of the scan chamber has to be away from windows and strong artificial lighting. (Ceramill Map 100). Supply PC USB ports for keyboard, mouse, scanner and dongle InstruCtIon For tHe Digital ports screen ConneCtIon oF tHe monItor Switch port Internet Fire Wire port PC For the connection of the monitor to the digital Network connection Motion port please exchange the standard blue VGA Port scanner cable (analogue) with the white DVI cable (digital)!
  • Page 13 Q u I C K G u I D e I n s ta L L at I o n 1. Connect the two enclosed USB cables to the For Installation please login with: scanner and the PC. Username: Administrator Pass: ceramill mall After restart, the PC switches to user “cadcam” No password available, can be chosen indivdually Language selection The factory default language for the Ceramill Digital System is English. For selection of the desired language open, after starting the PC, the “Manual Language Selector” on the desktop and follow the instructions.
  • Page 14: Calibration Of Axes

    Q u I C K G u I D e I n s ta L L at I o n CaLIBratIon oF axes map300 1. Mount the distance piece no. 2, fixation plate Following their set-up and installation to the PC, with clamp and model plate (see instructions for the scanners Ceramill Map100 and 300 are to be use Ceramill Transfer kit) calibrated using the supplied calibration model. map100 2. Mount the calibration model 3. Create a patient case and start Ceramill Map in the database. Cancel the following input 1. Fix the calibration model onto the Noplast prompt for the 2D scan. object holder to position it in the focal point of the scanner. The model must be seen clearly through the scan software viewer with its height to be adjusted following the red LED line.
  • Page 15: Maintenance And Service

    Q u I C K G u I D e I n s ta L L at I o n DIsturBanCes anD axIs reFerenCInG wItH rePaIr CeramILL maP 100 Please note: The scanner is a sensitive optical device. It is therefore only to be serviced by trained technical staff. With faults which cannot The rotation and swing axis both have a position be cleared by re-starting the scanner and the encoder that enables the scanner to read the software, please contact the M-Center helpdesk actual axis position. This is only possible once number. the axes have been placed at least once into the starting position (referencing). For this reason, it Germany: +49 7231 957 100 is necessary to turn the rotation axis completely Austria : +43 5523 62333 390 around 360 ° and the swing axis at 90 ° before International: +43 5523 62333 399...
  • Page 16 Q u I C K G u I D e I n s ta L L at I o n Ceramill mind/match Software box Ceramill CaDCam PC PC lid The serial numbers are found: Ceramill map 100/300 and Ceramill motion Backside of the device 4. After the data have been entered and the terms of use have been accepted, click on the button “create account”. 5. You will receive an e-mail confirming your registration shortly. 6. Click on the link in the e-mail and you will enter a website which confirms your registra- examPLe tion. If you find you cannot click on the link, copy and paste the link in your web browser.
  • Page 17: Order Tracking M-Center

    Q u I C K G u I D e I n s ta L L at I o n orDer traCKInG m-Center _ After the construction data have been received in the M-Center, the order is confirmed by e-mail. _ In addition to this you will receive information via e-mail, to inform you when your object is in production and being dispatched. _ A detailed list of all orders will be displayed on the M-Center homepage in the login area under “my orders”. After the order has been dispatched, 7. Within the next 24h you will each order will be allocated a tracking number receive an e-mail with another so that it may be monitored. UPLOAD user name (6 digits) and pass- word. This will enable you to become connected to the data uploads in the M-Center. Please enter both into the construction software Ceramill Mind (window opens automatically when the upload button is clicked).
  • Page 18: Technical Data

    Q u I C K G u I D e I n s ta L L at I o n teCHnICaL Data Technical specifications may change according to development status Recommended set-up: away from floor, not on the wall. technical Data Ceramill map 100 Art.No.: 179100 Weight: 33 kg scope of delivery of the complete system Electr. connections: 230/1,25 V/A 179001, 179002, 179003, 179004 Performance: 50 W Scanner 179100/179110, Ceramill Map CD, net- Admissible 18-30 C ° work cable (3x), USB cable, PC 179170, monitor, temperature range: keyboard, mouse, mouse pad, headset; anti-virus Accuracy:...
  • Page 19 G u I D e D ’ I n s ta L L at I o n r a P I D e CautIon anD saFety note: With the set-up, operation and use of the scanner the following safety instructions are to be observed: _ The device was developed and manufactured with utmost care, according to the valid safety standards. Nevertheless it is not possible to entirely exclude the risk of technical defects which may occur with individual components in the wake of incidences, such as electrical shock, overheating or fire. _ Therefore, switch-off the device if it is no longer required, or in cases whereby the device is unattended for longer periods of time, e.g.
  • Page 20: Installation Du Scanner

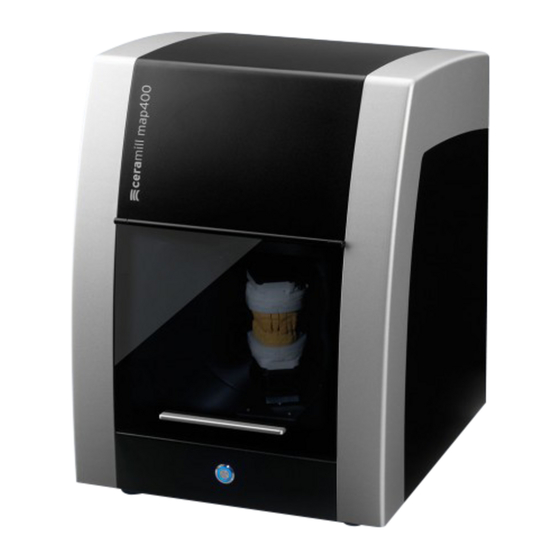
    G u I D e D ’ I n s ta L L at I o n r a P I D e ConnexIons et solide ou sur un établi (important pour les InterruPteurs oscillations propres au Ceramill Map 300). _ L’ouverture de la chambre du scanner ne doit pas être orientée vers des fenêtres ou vers une forte source de lumière artificielle. (Ceramill Prise secteur de l’ordinateur PC Map 100). Prises USB pour clavier, souris, scanner et filtre Prise numérique pour écran aVertIssement Pour Réseau Internet BranCHer L’éCran Prise Fire Wire pour l’ordinateur Branchement réseau Motion Veuillez remplacer le câble VGA bleu (analogue)
  • Page 21: Installations Sur Le Pc

    G u I D e D ’ I n s ta L L at I o n r a P I D e 1. Connecter les deux câbles USB livrés au Pour l’installation, prière d’utiliser les données scanner et au PC. d’utilisateur ci-après : Nom de l’utilisateur : Administrator Mot de passe : ceramill mall après le redémarrage, le PC passe à l’usager : cadcam Mot de passe à votre choix. Aucun n’a été assigné d’usine. Langue Le Ceramill Digital System est livré départ usine en anglais. Pour passer à une autre langue, démarrer le PC, ouvrir le manuel « Manual Language Selector » sur le bureau et suivre les instructions.
  • Page 22: Calibration Des Axes

    G u I D e D ’ I n s ta L L at I o n r a P I D e CaLIBratIon Des axes map300 1. Plaque d’écartement no. 2, posez la plaque de Les scanners Ceramill Map100 et 300 doivent fixation avec le coinceur et la plaque du modèle être calibrés après l’installation et le branchement (cf. Mode d’emploi Ceramill Transfer Kit). sur le PC à l’aide du modèle de calibration fourni avec le système. map100 2. Placez le modèle de calibration 3. Créez un cas patient et démarrez Ceramill Map dans la base de données. Annulez ensuite la demande de saisie pour le 2D-Scan.
  • Page 23: Informations Sur L'inscription Et Le Téléchargement

    G u I D e D ’ I n s ta L L at I o n r a P I D e PerturBatIons et réFérenCe Des axes De réParatIon CeramILL maP 100 Prière d’observer : le scanner est un appareil optique très sensible. Seul le personnel spécialisé et formé est habilité à effectuer la révision et la L’axe de rotation et celui de pivotement sont réparation de cet appareil. dotés de codeurs de positionnement par lesquels En cas de perturbations qui ne s’éliminent pas en le scanner lit la position actuelle des axes. Cette déclenchant un nouveau démarrage du scanner lecture n‘est possible que lorsque les axes ont et du logiciel, prière de contacter notre plateforme été amenés au moins une fois en position «zéro»...
  • Page 24 G u I D e D ’ I n s ta L L at I o n r a P I D e Ceramill mind/match Boîte de logiciel Ceramill CaDCam PC Couvercle PC Les numéros de série se trouvent au dos des appareils : Ceramill map 100/300 et Ceramill motion 4. Après avoir tapé vos coordonnées et accepté les conditions d’utilisation cliquez sur le bouton « ouvrir un compte maintenant ». 5. Vous recevrez dans un bref laps de temps un courriel de confirmation de votre enregistrement. 6. Cliquez sur le lien qu’il contient et qui vous moDÈLe amène à la page sur Web qui confirme votre...
  • Page 25: Informations Sur Les Téléchargements

    G u I D e D ’ I n s ta L L at I o n r a P I D e suIVI De L‘orDre au Centre m _ Dès que les données de construction seront arrivées au centre M vous recevrez un courriel de confirmation de la commande. _ Vous recevrez également des courriels d’infor- mation lorsque vos travaux seront en production et en voie d’expédition. _ Une liste détaillée de toutes vos commandes est affichée sur le portail M-Center dans la partie 7. Dans les 24h suivantes vous connexion sous « Mes commandes ». Après recevrez un courriel contenant envoi d’une commande, un numéro de suivi est UPLOAD un nom d’utilisateur (à 6 positi- affiché qui vous permettra de la retracer.
  • Page 26: Fiche Technique

    G u I D e D ’ I n s ta L L at I o n r a P I D e FICHe teCHnIQue Sous réserve de spécifications techniques en fonction des évolutions techniques. Emplacement recommandé : loin du sol, pas contre un mur. Fiche technique Ceramill map 100 Référence : 179100 Poids : 33 kg Fourniture du système intégral Branchement électrique : 230/1,25 V/A 179001, 179002, 179003, 179004 Puissance : 50 W Scanner 179100/179110, CD Ceramill Map, câble Fourchette de 18-30 C °...
  • Page 27 G u I D e D ’ I n s ta L L at I o n r a P I D e aVertIssements et ConseILs De séCurIté : Prière de toujours suivre les conseils de sécurité ci-après pour l’installation, la mise en service et l’emploi du scanner : _ L’appareil a été conçu et fabriqué avec le plus grand soin et en conformité aux normes de sécurité. Malgré tout il est pratiquement impossible d’exclure tout risque d’électrocution, de surchauffe ou de feu en raison d’un défaut technique de composants individuels. _ Veuillez donc éteindre l’appareil quand vous n’en avez plus besoin ou pendant une longue période sans surveillance comme la nuit.
  • Page 28: Installazione Dello Scanner

    G u I D a r a P I D a D I I n s ta L L a z I o n e CoLLeGamentI eD _ L‘apparecchio deve essere installato su un tavolo Interruttore ovvero banco di lavoro stabile (importante nel caso di Ceramill Map 300 vibrazioni proprie).  _ L‘apertura della camera di scansione non deve essere rivolta verso finestre o fonti di luce Collegamento di alimentazione per PC artificiale intensa (Ceramill Map 100). Collegamenti USB per tastiera, mouse, scanner e dongle Collegamento digitale per monitor aVVertenza Per IL...
  • Page 29: Installazione Del Software

    G u I D a r a P I D a D I I n s ta L L a z I o n e 1. Collegare i due cavi USB allo scanner e al PC. Per l‘installazione effettuare il login con i seguenti dati utente Nome utente: Administrator Password: ceramill mall al riavvio, il PC cambia utente: cadcam Può essere scelta una password a piacere. Alla produzione non viene preimpostata alcuna password. Cambiamento di lingua Il Sistema digitale Ceramill viene fornito all'origine in lingua inglese. Per impostare la lingua desiderata, dopo la messa in funzione del PC aprire sul desktop la pagina "Manual Language Selector" (Selezione manuale della lingua) e...
  • Page 30: Calibrazione Degli Assi

    G u I D a r a P I D a D I I n s ta L L a z I o n e CaLIBrazIone DeGLI assI map300 1. Inserire la piastra distanziatrice n. 2, la piastra di Dopo l‘installazione ed il collegamento al PC gli fissaggio con il dispositivo di bloccaggio e la pias- scanner Ceramill Map 100 e 300 devono essere tra modello (vedi istruzioni per l‘uso di Ceramill calibrati con l‘aiuto del modello di calibrazione Transfer Kit). fornito. map100 2. Inserire il modello di calibrazione 3. Aprire un caso di un paziente e avviare Cera- mill Map dal database. Annullare la successiva...
  • Page 31: Anomalie E Riparazioni

    G u I D a r a P I D a D I I n s ta L L a z I o n e anomaLIe e azzeramento DeGLI assI In rIParazIonI CeramILL maP 100 Da tenere presente: lo scanner è uno strumento ottico sensibile. Le operazioni di manutenzione e riparazione devono perciò essere eseguite da L‘asse di rotazione e quello di inclinazione tecnici specializzati. In caso di anomalie che non dispongono di encoder di posizione tramite i quali possono essere eliminate con il riavvio dello lo scanner rileva la loro rispettiva posizione. Ciò scanner e del software, rivolgersi telefonicamente è possibile solo dopo che gli assi sono stati portati all‘helpdesk del nostro M-Center.
  • Page 32 G u I D a r a P I D a D I I n s ta L L a z I o n e Ceramill CaDCam PC Copertura PC I numeri di serie si trovano sul lato: posteriore degli apparecchi Ceramill map 4. Dopo aver immesso i dati ed aver accettato le 100/300 e Ceramill motion condizioni di utilizzo cliccare il pulsante „Crea account“. 5. Entro breve tempo viene inviata un‘ e-mail di conferma della registrazione. 6. Cliccare sul link in essa contenuto per raggiun- gere il sito web che conferma la registrazione.
  • Page 33: Informazioni Per Il Download

    G u I D a r a P I D a D I I n s ta L L a z I o n e 7. Entro le successive 24 ore viene qui per ciascun ordine un numero di tracking inviata un‘E-Mail con un ulteriore per effettuarne il controllo. UPLOAD nome utente (di 6 caratteri) e password. Questi sono necessari per l‘attiva- zione dell‘upload di dati al M-Center. Immettere entrambi nel software di progettazione Ceramill Mind (la finestra si apre automaticamente cliccando sul pulsante Upload). InFormazIonI Per IL DownLoaD Ulteriori istruzioni per l'uso (videotutorial) del fresatore Ceramill Motion e del software Ceramill...
  • Page 34: Dati Tecnici

    G u I D a r a P I D a D I I n s ta L L a z I o n e DatI teCnICI Le specifiche tecniche possono essere soggette a variazioni in base allo sviluppo del prodotto. Luogo di installazione consigliato lontano dal Dati tecnici Ceramill map 100 pavimento e non alla parete. N. art.: 179100 Peso: 33 kg Coll. elettr: 230/1,25 V/A elementi forniti con i sistemi completi Potenza: 50 W...
  • Page 35 G u I D a r a P I D a D I I n s ta L L a z I o n e aVVertenze DI sICurezza e DI aVVertImento Per l‘installazione, la messa in esercizio e l‘uso dello scanner si devono sempre osservare le seguenti avvertenze di sicurezza _ L‘apparecchio è stato sviluppato e prodotto con la massima cura secondo le norme di sicurezza in vigore. Tuttavia non è possibile escludere in modo assoluto che per un difetto tecnico dei singoli componenti non ne derivino rischi di scosse elettriche, surriscaldamento o incendio.
  • Page 36: Instalación Del Escáner

    I n s t r u C C I o n e s B r e V e s Pa r a L a I n s ta L a C I ó n ConeCtores e pesada de trabajo o en un banco de taller (esto InterruPtores es importante por las vibraciones propias del Ceramill Map 300).
  • Page 37: Instalación Del Software

    I n s t r u C C I o n e s B r e V e s Pa r a L a I n s ta L a C I ó n 1. Conectar los dos cables USB adjuntos al Por favor, para la instalación utilice los escáner y al ordenador.
  • Page 38 I n s t r u C C I o n e s B r e V e s Pa r a L a I n s ta L a C I ó n CaLIBraCIón DeL eje map300 1. Coloque la placa distanciadora no. 2, la placa Una vez que los escáners Ceramill Map 100 y 300 de fijación con pinza y la placa para modelo (v.
  • Page 39: Conservación Y Mantenimiento

    I n s t r u C C I o n e s B r e V e s Pa r a L a I n s ta L a C I ó n reFerenCIaCIón DeL eje DeL tridimensional (que está en la parte superior del CeramILL maP 100 escáner), pues esto puede ser causa de daños.
  • Page 40 I n s t r u C C I o n e s B r e V e s Pa r a L a I n s ta L a C I ó n 2. En esta página, haga clic en el enlace Ceramill mind/match “registrarse”.
  • Page 41: Información Para Descarga

    I n s t r u C C I o n e s B r e V e s Pa r a L a I n s ta L a C I ó n rastreo De La órDen m-Center _ Una vez que los datos de construcción han llegado al M-Center es enviada una confirmación de la órden por correo electrónico.
  • Page 42: Datos Técnicos

    I n s t r u C C I o n e s B r e V e s Pa r a L a I n s ta L a C I ó n Datos téCnICos Las especificaciones técnicas pueden cambiar según el estado de desarrollo técnico. Se recomienda colocar el ordenador lejos del piso Datos técnicos de Ceramill map 100...
  • Page 43 I n s t r u C C I o n e s B r e V e s Pa r a L a I n s ta L a C I ó n aVIsos De PeLIGro Pre- CauCIones De seGurIDaD Al colocar, poner en funcionamiento y utilizar el escáner se deberán tener siempre en cuenta las siguientes advertencias de seguridad:...
  • Page 44 Ceramill Map 300 wahania).  _ Wejście do komory skanowania należy odsunąć od okien i źródeł sztucznego światła. (Ceramill Map 100) Zasilanie PC Porty USB przeznaczone dla klawiatury, myszki, INSTRUC JE DOT YCZ ĄCE PODŁ ĄCZENIA skanera oraz adapterów bezprzewodowych MONITOR A Cyfrowe złącza monitora...
  • Page 45 5. Złącze PC należy połączyć za pomocą kabla celu dołączone płyty kompaktowe (Ceramill Mind sieciowego z routerem/modemem Internetu. i Ceramill Map) należy założyć kolejno po sobie i 6. Za pomocą wyłącznika głównego należy postępować dalej zgodnie z instrukcją instalowania, włączyć skaner.
  • Page 46 (patrz: In-strukcja Kolejnym krokiem po rozmieszczeniu i instalacji na obsługi Ceramill Transferkit). komputerze PC, który należy wykonać, jest kalibracja skanerów Ceramill Map 100 oraz 300 z wykorzystaniem dostarczonego modelu kalibracyjnego. map100 2. Włożyć model kalibracyjny.
  • Page 47: Konserwac Ja Iserwisowanie

    S Z Y B K A I N S T R U K C J A I N S TA L A C J I REFERENC JONOWANIE OSI Z A NIE NALEŻY czyścić elementów optycznych sensora POMOC Ą CER AMILL MAP 100 3D (górna część...
  • Page 48 Ceramill CADCAM PC Pokrywa komputera Numery serii można znaleźć: Ceramill Map 100/300 i Ceramill Motion 4. Po wpisaniu danych i akceptacji warunków na tylnej stronie urządzenia użytkowania kliknąć przycisk „Załóż konto”. 5. W niedługim czasie otrzymają Państwo e-mail zwrotny w celu potwierdzenia zgłoszenia.
  • Page 49 S Z Y B K A I N S T R U K C J A I N S TA L A C J I ŚLEDZENIE Z AMÓWIENIA M-CENTER _ Po wejściu danych konstrukcyjnych do M-Center wysyłane jest pocztą elektroniczną potwierdzenie zamówienia.
  • Page 50: Dane Techniczne

    33 kg 179001, 179002, 179003, 179004 Złącze elektryczne: 230/1,25 V/A Moc: 100 W Skaner 179100/179110, płyta CD Ceramill Map, Dopuszczalny zakres 18-30 C ° kabel zasilający (3x), kabel USB, PC 179170, monitor, temperatury: klawiatura, myszka, podkładka pod mysz, zestaw Dokładność: <...
  • Page 51: Uwagi Dotyczące Bezpieczeństwa

    S Z Y B K A I N S T R U K C J A I N S TA L A C J I UWAGI DOTYCZĄCE BEZPIECZEŃSTWA: Podczas instalacji, działania i wykorzystywania skanera należy przestrzegać następujących wskazań bezpieczeństwa: _ Urządzenie zostało zaprojektowane i wyprodukowane z największą...
  • Page 52 K R AT K E U P U T E Z A I N S TA L A C I J U PRIKL JUČCI I PREKIDAČI klupu (važno za Ceramill Map 300 vlastita  vibracija). _ Otvor komore za skeniranje ne smije biti okrenut prema prozorima i jakoj umjetnoj rasvjeti (Ceramill Map 100).
  • Page 53 5. Priključak za Internet povezati s Internet kabelom umetnuti jedan za drugim isporučene CD-e (Ceramill i Internet ruterom/modemom Mind i Ceramill Map) i postupiti prema uputi za 6. Skener uključiti na glavnom prekidaču instalaciju koja se također nalazi na CD-ima. 7. Uključiti kompjuter.
  • Page 54 Kit). map100 2. Umetnuti model za kalibraciju. 3. Izradite pacijenta i pokrenite Ceramill Map u bazi 1. Pričvrstiti kalibracijski model na Noplast držač podataka. Poništite zahtjev za unos koji slijedi za objekta da bi ga pozicionirali u fokusnu točku 2D-Scan.
  • Page 55: Održ Avanje Iservisir Anje

    K R AT K E U P U T E Z A I N S TA L A C I J U KVAROVI REFERENCIR ANJE OSOVINA I POPR AVCI CER AMILL MAP 100 Molimo obratiti pozornost: Skener je osjetljiv optički uređaj.
  • Page 56 Kutija softvera Ceramill CADCAM PC Poklopac računala Serijski brojevi nalaze se: Ceramill Map 100/300 i Ceramill Motion na pozadini aparata 4. Nakon unosa podataka i prihvaćanja uvjeta korištenja pritisnuti na „Konto jetzt erstellen“. 5. Nakon kratkog vremena dobit ćete e-mail s potvrdom prijave.
  • Page 57 Ceramill Mind-a (prozor se otvara automatski pritiskom na dugme „upload“). INFORMACIJE O PREUZIMANJU DATOTEK A Daljnje upute za uporabu skenera Ceramill Map i softvera Ceramill Mind (video upute) nalaze se na DVD- u s uputama, a mogu se preuzeti i na stranici www.ceramill-m-center.com.
  • Page 58: Tehnički Podaci

    Ceramill Mind paket (179150) (Ceramill Sučelja: Fire Wire, USB Mind dongle, kratke upute za instalaciju, Ceramill Mind CD, Ceramill Map DVD s uputama za korištenje). Tehnički podaci za Ceramill Map 300 Broj artikla: 179110 Kod Map100: Nema držača za model Težina:...
  • Page 59 K R AT K E U P U T E Z A I N S TA L A C I J U UPOZORENJA I SIGURNOSNE UPUTE: Prilikom instaliranja, stavljanja u pogon i uporabe skenera potrebno je pridržavati se sljedećih sigur nosnih uputa: _ Proizvod je razvijen i izrađen prema važećim sigurnosnim standardima i s najvećom mogućom...
  • Page 62 scanner...
  • Page 64 Made in the European Union ISO 9001 Manufacturer | Hersteller Distribution | Vertrieb Distribution | Vertrieb D/A amann Girrbach aG amann Girrbach GmbH Herrschaftswiesen 1 Dürrenweg 40 austria@amanngirrbach.com 6842 Koblach | Austria 75177 Pforzheim | Germany germany@amanngirrbach.com Fon +43 5523 62333-0 Fon +49 7231 957-100 Fax +43 5523 55990 Fax +49 7231 957-159 www.amanngirrbach.com...

Table des Matières