JVC KD-X560BT Guide De Démarrage Rapide
Table des Matières
Les langues disponibles
Les langues disponibles
Liens rapides
• For detailed operations and information, refer to the INSTRUCTION MANUAL on the following website:
• Pour plus d'informations et de détails sur les opérations, reportez-vous au MODE D'EMPLOI sur le site Internet suivant :
• Para obtener información y detalles sobre las operaciones, consulte el MANUAL DE INSTRUCCIONES en el siguiente sitio
web:
© 2019 JVC KENWOOD Corporation
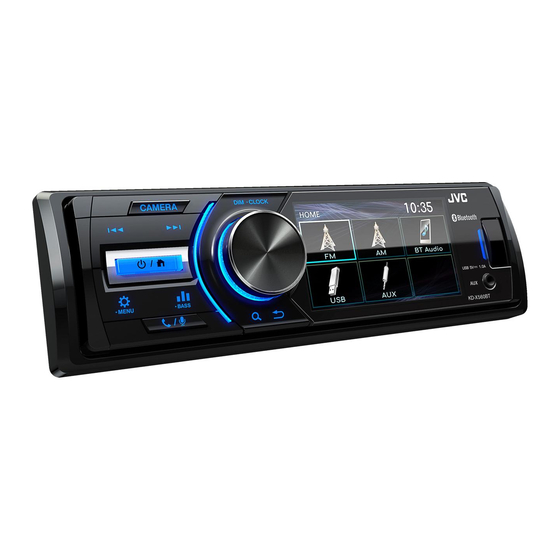
KD-X560BT
DIGITAL MEDIA RECEIVER
Quick Start Guide
RÉCEPTEUR MÉDIA NUMÉRIQUE
Guide de démarrage rapide
RECEPTOR DE MEDIOS DIGITALES
Guía de inicio rápido
<http://www.jvc.net/cs/car/>
B5K-0634-10 (K)
Chapitres
Table des Matières

Manuels Connexes pour JVC KD-X560BT


Sommaire des Matières pour JVC KD-X560BT
- Page 1 • Pour plus d’informations et de détails sur les opérations, reportez-vous au MODE D’EMPLOI sur le site Internet suivant : • Para obtener información y detalles sobre las operaciones, consulte el MANUAL DE INSTRUCCIONES en el siguiente sitio web: <http://www.jvc.net/cs/car/> © 2019 JVC KENWOOD Corporation B5K-0634-10 (K)
-
Page 16: Précautions
Smartphone Bluetooth® ...........22 • Lorsque vous achetez des accessoires en option, Enregistrer votre smartphone dans l'appareil ........ 22 vérifiez auprès de votre revendeur JVC qu'ils Réception d'un appel ..................22 fonctionneront avec votre modèle et dans votre Passer un appel ....................22 région. -
Page 17: Mise En Route
Mise en route Paramètres initiaux Paramètres de l'horloge Ñ Synchronisation de l’heure avec FM RDS Activer [RDS Clock Sync] (Synchronisation de l’heure RDS). Voir «Paramètres de la fonction tuner» (p.20). Ñ Ajuster l’horloge manuellement ✎ REMARQUE • Désactivez [RDS Clock Sync] avant de régler Tournez la clé... -
Page 18: Les Bases
Les bases Les bases Bouton du volume (tournez/appuyez) Capteur à distance Bouton de séparation Moniteur Opérations courantes Sélectionner une source Appuyez sur < > pour afficher l'écran Ñ Allumer le courant d'ACCUEIL. Appuyez sur < >. L'écran d'ACCUEIL apparaît. Ñ Éteindre le courant Tournez le bouton du volume pour sélectionner la source, puis appuyez sur le bouton. -
Page 19: Usb/Ipod
USB/iPod USB/iPod Préparation Options de lecture Pour Faire ceci Ñ Connexion d'un périphérique USB/iPod/ Lecture/pause Appuyez sur le bouton du volume. iPhone Sélectionner un Appuyez sur <E>/<F> à Ouvrez le cache du port sur la face avant. fichier plusieurs reprises. Branchez le périphérique USB avec le câble USB Retour rapide/ Appuyez et maintenez enfoncée la... -
Page 20: Tuner
Tuner Tuner Opérations de base du tuner Paramètres de la fonction tuner Appuyez sur < > pour afficher l'écran Appuyez sur < > pour afficher le menu des d'ACCUEIL. fonctions. Tournez le bouton du volume pour sélectionner Tournez le bouton du volume pour sélectionner [FM] ou [AM], puis appuyez sur le bouton. -
Page 21: Composants Externes
Composants Externes Caméra de recul Pour utiliser la caméra de recul, le câble de connexion INVERSE est requis. Pour connecter une caméra de recul. (p.26) Ñ Affiche l'image de la caméra de recul L'écran de vue arrière est affiché lorsque vous changez de vitesse pour la position de marche arrière (R). -
Page 22: Smartphone Bluetooth
Smartphone Bluetooth® Smartphone Bluetooth® Enregistrer votre smartphone dans Passer un appel l'appareil Appuyez sur < > pour passer en mode Vous pouvez utiliser votre smartphone Bluetooth lié Bluetooth. à cet appareil. • Vous pouvez coupler le périphérique et l'appareil utilisant SSP (Secure Simple Pairing) qui nécessitent seulement une confirmation. -
Page 23: Configuration
Configuration Configuration Paramètres Paramètres du son Appuyez et maintenez enfoncée la touche Appuyez sur < > pour afficher l'écran de < > pour afficher les paramètres. paramétrage du son. Appuyez sur <E>/<F> pour sélectionner Tournez le bouton du volume pour sélectionner la catégorie. -
Page 24: Installation
Installation Installation Avant l'installation • Fixez les fils à l'aide de colliers et enroulez le ruban de vinyle autour des fils qui entre en contact avec les Avant d'installer cet appareil, veuillez prendre les parties métalliques afin de protéger les fils et éviter mesures de précaution suivantes. -
Page 25: Ñ Procédure D'installation
Installation Ñ Procédure d'installation Ñ Plaque de garniture 1) Pour éviter les courts-circuits, retirez la clé de 1) Fixez l'accessoire 1 sur l'appareil. contact, puis débranchez la borne ¤ de la batterie. 2) Veillez à effectuer correctement les connexions des câbles d'entrée et de sortie pour chaque appareil. -
Page 26: Ñ Connexion Des Câbles Sur Les Contacts Électriques
Installation Ñ Retrait de la plaque de garniture Ñ Connexion des câbles sur les contacts électriques 1) Utilisez la clé d'extraction (accessoire 4) pour sortir les quatre languettes (deux sur la partie supérieure, deux sur la partie inférieure) en effectuant un 1 3 5 7 2 4 6 8 mouvement de levier. - Page 27 Installation Connexion au Vert clair (Câble du détecteur de stationnement) commutateur de détection du frein à Par mesure de sécurité, connectez le détecteur de main. stationnement. Violet/Blanc (Câble du détecteur de marche arrière) Connexion au faisceau du feu de marche arrière du véhicule lors de l'utilisation de la vue arrière de la caméra.
-
Page 28: À Propos De Cet Appareil
à Bluetooth SIG, Inc. et Si la façade de l'appareil est tachée, essuyez-la avec toute utilisation de ces marques par JVC KENWOOD un chiffon doux et sec, tel qu'un chiffon siliconé. Corporation est sous licence. Les autres marques Si la façade est très sale, essuyez-la avec un chiffon... - Page 29 À propos de cet appareil • libFLAC THIS SOFTWARE IS PROVIDED BY THE COPYRIGHT HOLDERS AND CONTRIBUTORS ``AS IS’’ AND ANY Copyright (C) 2000-2009 Josh Coalson EXPRESS OR IMPLIED WARRANTIES, INCLUDING, Copyright (C) 2011-2013 Xiph.Org Foundation – Redistribution and use in source and binary forms, BUT NOT LIMITED TO, THE IMPLIED WARRANTIES OF MERCHANTABILITY AND FITNESS FOR A PARTICULAR with or without modification, are permitted...