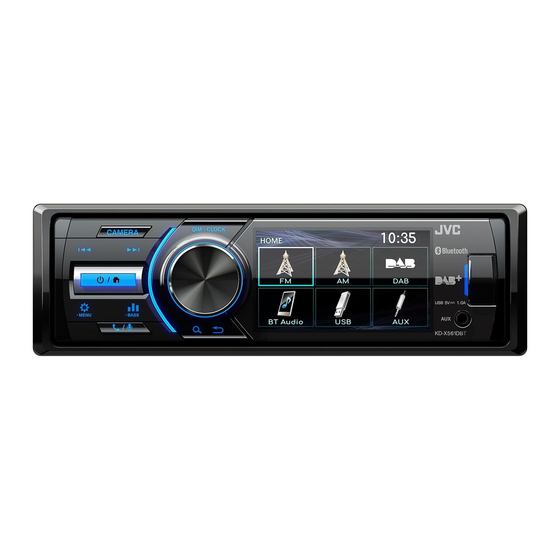
JVC KD-X561DBT Mode D'emploi
Masquer les pouces Voir aussi pour KD-X561DBT:
Table des Matières

Publicité

Les langues disponibles
  • FR

Les langues disponibles

  • FRANÇAIS, page 16

Liens rapides

• For detailed operations and information, refer to the INSTRUCTION MANUAL on the following website:
• Pour plus d'informations et de détails sur les opérations, reportez-vous au MODE D'EMPLOI sur le site Internet suivant :
• Detaillierte Informationen zu den Funktionen finden Sie in der BEDIENUNGSANLEITUNG auf der folgenden Webseite:
• Raadpleeg voor meer informatie de INSTRUCTIEHANDLEIDING op de volgende website:
• Per le operazioni e le informazioni dettagliate, fare riferimento al MANUALE DI ISTRUZIONI disponibile nel seguente sito web:
• Para obtener información y detalles sobre las operaciones, consulte el MANUAL DE INSTRUCCIONES en el siguiente sitio web:
• Para obter operações e informações detalhadas, consulte o MANUAL DE INSTRUÇÕES no seguinte website:
• Для получения подробной информации о работе обратитесь к РУКОВОДСТВУ ПО ЭКСПЛУАТАЦИИ на следующем
веб-сайте:
© 2019 JVC KENWOOD Corporation
KD-X561DBT
KD-X560BT
DIGITAL MEDIA RECEIVER
Quick Start Guide
RÉCEPTEUR MÉDIA NUMÉRIQUE
Guide de démarrage rapide
DIGITAL-MEDIA-RECEIVER
Quick-Start-Anleitung
DIGITALE MEDIA-ONTVANGER
Beknopte handleiding
RICEVITORE DIGITALE MULTIMEDIALE
Guida rapida
RECEPTOR DE MEDIOS DIGITALES
Guía de inicio rápido
RECEPTOR DE MÍDIA DIGITAL
Guia de iniciação rápida
ЦИФРОВОЙ МЕДИА-ПРИЕМНИК
Краткое руководство по началу работы
<http://www.jvc.net/cs/car/>
B5K-0634-21 (E)

Publicité

Table des Matières
loading

Sommaire des Matières pour JVC KD-X561DBT

  • Page 1 • Para obtener información y detalles sobre las operaciones, consulte el MANUAL DE INSTRUCCIONES en el siguiente sitio web: • Para obter operações e informações detalhadas, consulte o MANUAL DE INSTRUÇÕES no seguinte website: • Для получения подробной информации о работе обратитесь к РУКОВОДСТВУ ПО ЭКСПЛУАТАЦИИ на следующем веб-сайте: <http://www.jvc.net/cs/car/> © 2019 JVC KENWOOD Corporation B5K-0634-21 (E)
  • Page 2: Table Des Matières

    Tuner function settings ..................6 • When you purchase optional accessories, check DAB function settings ..................7 with your JVC dealer to make sure that they work External Components ............7 with your model and in your area. Rear view camera ....................7 •...
  • Page 3: Getting Started

    Getting Started Initial settings Clock settings Ñ Synchronizing the clock time with FM Activate [RDS Clock Sync]. See “Tuner function settings” (P.6). Ñ Adjusting the clock manually ✎ NOTE • Deactivate [RDS Clock Sync] before adjusting the Turn the ignition key of your car to ACC. clock.
  • Page 4: Basics

    Press and hold the <DIM> button. 3 Switches to the AM tuner broadcast. (P.6) 4 Switches to the DAB broadcast. (P.6) Ñ Select dimmer mode (KD-X561DBT only) Press the <DIM> button. 5 Plays a Bluetooth audio player. (P.8) Dimmer 1, Dimmer 2, Dimmer 3...
  • Page 5: Usb/Ipod

    USB/iPod USB/iPod Preparation Playback operations Do this Ñ Connecting a USB device/iPod/iPhone Play/pause Press the volume knob. Open the front port cover. Select a file Press <E>/<F> repeatedly. Connect the USB device with the USB cable Fast-backward/ Press and hold <E>/<F>. (sold separately).
  • Page 6: Tuner/Dab

    “ON”, “OFF” (Default) • To exit, press < >. Area EUROPE (Default): For Europe, AM/FM DAB basic operation (KD-X561DBT) intervals: 9 kHz/50 kHz. M.EAST: For Middle East, AM/FM intervals: Press < > to display the HOME screen. 9 kHz/50 kHz.
  • Page 7: Dab Function Settings

    External Components Tuner/DAB DAB function settings Rear view camera (KD-X561DBT) To use a rear view camera, the REVERSE lead connection is required. For connecting a rear view Press < > to display the function menu. camera. (P.13) Turn the volume knob to select the item to set Ñ...
  • Page 8: Bluetooth® Smartphone

    Bluetooth® smartphone Bluetooth® smartphone Register your smartphone to the Make a phone call unit Press < > to enter Bluetooth mode. You can use your Bluetooth smartphone when paired to this unit. • You can pair the device and the unit using SSP (Secure Simple Pairing) which only requires confirmation.
  • Page 9: Setup

    Setup Setup Settings Sound settings Press and hold < > to display the settings. Press < > to display the sound setting. Press <E>/<F> to select the category. Turn the volume knob to select an item (see the following table), then press the knob. Turn the volume knob to select an item (see the following table), then press the knob.
  • Page 10: Installation

    Installation Installation Before installation • Connect the speaker wires correctly to the terminals to which they correspond. The unit may be Before installation of this unit, please note the damaged or fail to work if you share the ¤ wires or following precautions.
  • Page 11: Installing The Unit

    Installation Ñ Installation procedure Ñ Trim plate 1) To prevent a short circuit, remove the key from 1) Attach accessory 1 to the unit. the ignition and disconnect the ¤ terminal of the battery. 2) Make the proper input and output wire connections for each unit.
  • Page 12 ISO connectors to the unit, check the following condition: • Make sure that the pin assignment of the connector matches with the JVC unit. • Take extra notice of the power wire. Ñ Removing the unit • In case battery wire and ignition wire are not 1) Remove the trim plate by referring to step 1 in corresponding then change them accordingly.
  • Page 13 FM/AM antenna input Fuse (15A) ISO Connector DAB antenna jack (SMB connector) Rear Audio Preout KD-X561DBT only (Left; White, Right; Red) When using a commercially available Front Audio Preout DAB antenna, the diameter of the SMB (Left; White, Right; Red) connector must be Φ6.5 mm or less.
  • Page 14: About This Unit

    Bluetooth SIG, Inc. the following disclaimer. and any use of such marks by JVC KENWOOD – Redistributions in binary form must reproduce the Corporation is under license. Other trademarks and above copyright notice, this list of conditions and trade names are those of their respective owners.
  • Page 15 About this Unit Ñ Information on Disposal of Old Electrical HOLDERS AND CONTRIBUTORS ``AS IS’’ AND ANY and Electronic Equipment and Batteries EXPRESS OR IMPLIED WARRANTIES, INCLUDING, (applicable for EU countries that have BUT NOT LIMITED TO, THE IMPLIED WARRANTIES OF adopted separate waste collection MERCHANTABILITY AND FITNESS FOR A PARTICULAR PURPOSE ARE DISCLAIMED.
  • Page 16: Précautions

    Composants Externes ............21 • Lorsque vous achetez des accessoires en option, Caméra de recul ....................21 vérifiez auprès de votre revendeur JVC qu'ils Smartphone Bluetooth® ...........22 fonctionneront avec votre modèle et dans votre Enregistrer votre smartphone dans l'appareil ........ 22 région.
  • Page 17: Mise En Route

    Mise en route Paramètres initiaux Paramètres de l'horloge Ñ Synchronisation de l'heure avec FM RDS Activer [RDS Clock Sync] (Synchronisation de l'heure RDS). Voir «Paramètres de la fonction tuner» (p.20). Ñ Ajuster l'horloge manuellement ✎ REMARQUE • Désactivez [RDS Clock Sync] avant de régler Tournez la clé...
  • Page 18: Les Bases

    Appuyez et maintenez enfoncé le bouton 3 Bascule vers la diffusion du tuner AM. (p.20) <DIM>. 4 Commute sur la réception DAB. (p.20) (KD-X561DBT uniquement) Ñ Sélectionner le mode gradateur 5 Lit depuis un lecteur audio Bluetooth. (p.22) Appuyez sur le bouton <DIM>.
  • Page 19: Usb/Ipod

    USB/iPod USB/iPod Préparation Options de lecture Pour Faire ceci Ñ Connexion d'un périphérique USB/iPod/ Lecture/pause Appuyez sur le bouton du volume. iPhone Sélectionner un Appuyez sur <E>/<F> à Ouvrez le cache du port sur la face avant. fichier plusieurs reprises. Branchez le périphérique USB avec le câble USB Retour rapide/ Appuyez et maintenez enfoncée la...
  • Page 20: Tuner/Dab

    Recherche et enregistre automatiquement Store les 15 stations avec les signaux les plus Utilisation de base de DAB puissants pour la bande sélectionnée. (KD-X561DBT) • « Auto Store » apparaît. Local Recherche uniquement les stations ayant Appuyez sur < > pour afficher l’écran Seek une intensité...
  • Page 21: Paramètres De La Fonction Dab

    Ñ Affiche l'image de la caméra de recul L'écran de vue arrière est affiché lorsque vous changez Paramètres de la fonction DAB de vitesse pour la position de marche arrière (R). (KD-X561DBT) Appuyez sur < > pour afficher le menu des fonctions.
  • Page 22: Smartphone Bluetooth

    Smartphone Bluetooth® Smartphone Bluetooth® Enregistrer votre smartphone dans Passer un appel l'appareil Appuyez sur < > pour passer en mode Vous pouvez utiliser votre smartphone Bluetooth lié Bluetooth. à cet appareil. • Vous pouvez coupler le périphérique et l'appareil utilisant SSP (Secure Simple Pairing) qui nécessitent seulement une confirmation.
  • Page 23: Configuration

    Configuration Configuration Paramètres Paramètres du son Appuyez et maintenez enfoncée la touche Appuyez sur < > pour afficher l'écran de < > pour afficher les paramètres. paramétrage du son. Appuyez sur <E>/<F> pour sélectionner Tournez le bouton du volume pour sélectionner la catégorie.
  • Page 24: Installation

    Installation Installation Avant l'installation • Fixez les fils à l'aide de colliers et enroulez le ruban de vinyle autour des fils qui entre en contact avec les Avant d'installer cet appareil, veuillez prendre les parties métalliques afin de protéger les fils et éviter mesures de précaution suivantes.
  • Page 25: Ñ Procédure D'installation

    Installation Ñ Procédure d'installation Ñ Plaque de garniture 1) Pour éviter les courts-circuits, retirez la clé de 1) Fixez l'accessoire 1 sur l'appareil. contact, puis débranchez la borne ¤ de la batterie. 2) Veillez à effectuer correctement les connexions des câbles d'entrée et de sortie pour chaque appareil.
  • Page 26: Ñ Retrait De L'appareil

    (disponibles dans le commerce) à l'unité, vérifier les conditions suivantes : • Veillez à ce que l'affectation des broches du connecteur corresponde à l'appareil JVC. Ñ Retrait de l'appareil • Prendre un avis supplémentaire pour le câble 1) Retirez la plaque de garniture en vous référant à l' d'alimentation.
  • Page 27: Ñ Connexion Des Câbles Sur Les Contacts Électriques

    Entrée de l'antenne FM/AM Fusible (15 A) Connecteur ISO Prise d'antenne DAB (connecteur SMB) Préamplification audio arrière KD-X561DBT uniquement (Gauche : blanc, Droite : rouge) Lors de l’utilisation d’une antenne de Préamplification audio avant radiodiffusion numérique disponible (Gauche : blanc, Droite : rouge) dans le commerce, le diamètre du...
  • Page 28: À Propos De Cet Appareil

    – Redistributions of source code must retain the déposées appartenant à Bluetooth SIG, Inc. et above copyright notice, this list of conditions and toute utilisation de ces marques par JVC KENWOOD the following disclaimer. Corporation est sous licence. Les autres marques –...
  • Page 29 À propos de cet appareil Ñ Informations sur l'élimination des endorse or promote products derived from this anciens équipements électriques et software without specific prior written permission. électroniques et piles électriques THIS SOFTWARE IS PROVIDED BY THE COPYRIGHT (applicables dans les pays européens HOLDERS AND CONTRIBUTORS ``AS IS’’...
  • Page 30: Vor Verwendung

    Wiedergabefunktionen ................. 33 Fahrt nicht für längere Zeit. Tuner/DAB ................34 • Falls bei der Installation Probleme auftreten, Tuner-Grundfunktionen ................34 nehmen Sie Kontakt mit Ihrem JVC-Händler auf. DAB-Grundfunktionen ................... 34 Tunerfunktionseinstellungen ..............34 Ñ Vorsichtsmaßnahmen bei der DAB-Funktionseinstellungen ..............35 Verwendung dieses Gerätes...
  • Page 31: Erste Schritte

    Erste Schritte Grundeinstellungen Uhreinstellungen Ñ Synchronisiert die Uhrzeit mit FM RDS Aktiviert [RDS Clock Sync] (RDS-Uhr synch.). Siehe „Tunerfunktionseinstellungen“ (S.34). Ñ Die Uhr manuell einstellen ✎ HINWEIS • Deaktivieren Sie [RDS Clock Sync], bevor Sie die Uhrzeit einstellen. Siehe Stellen Sie den Zündschlüssel Ihres Autos auf „Tunerfunktionseinstellungen“...
  • Page 32: Grundlagen

    2 Schaltet auf den UKW-Empfang. (S.34) Ñ Die Uhr anzeigen 3 Schaltet auf den MW-Empfang. (S.34) Halten Sie die <DIM>-Taste gedrückt. 4 Schaltet auf DAB um. (S.34) (nur KD-X561DBT) Ñ Den Dimmer-Modus auswählen 5 Spielt den Bluetooth-Audioplayer ab. (S.36) Drücken Sie die <DIM>-Taste. 6 [USB] Dimmer 1, Dimmer 2, Dimmer 3 Spielt Dateien auf einem USB-Gerät ab.
  • Page 33: Usb/Ipod

    USB/iPod USB/iPod Vorbereitung Wiedergabefunktionen Zweck Vorgang Ñ Anschluss eines USB-Geräts/iPods/ Wiedergabe/ Drücken Sie den Lautstärkeregler. iPhones Pause Öffnen Sie die Abdeckung des vorderen Eine Datei Drücken Sie <E>/<F> Anschlusses. auswählen mehrmals. Schnellrücklauf/ Schließen Sie das USB-Gerät mit dem USB- Halten Sie <E>/<F> Schnellvorlauf Kabel (separat erhältlich) an.
  • Page 34: Tuner/Dab

    Durchsucht das ausgewählte Band und • Drücken Sie zum Beenden < >. Store speichert die 15 Sender mit den stärksten Signalen automatisch. DAB-Grundfunktionen (KD-X561DBT) • „Auto Store“ erscheint. Local Stellt nur Sender mit ausreichender Drücken Sie < >, um den HOME- Seek Signalstärke ein.
  • Page 35: Dab-Funktionseinstellungen

    Anschluss einer Rückfahrkamera. (S.41) *2 Ist verfügbar, wenn [RDS] auf [ON] eingestellt ist. Ñ Anzeige des Bildes von der DAB-Funktionseinstellungen Rückfahrkamera (KD-X561DBT) Der Rückansichtsbildschirm wird angezeigt, wenn Sie in den Rückwärtsgang (R) schalten. Drücken Sie < >, um das Funktionsmenü...
  • Page 36: Bluetooth®-Smartphone

    Bluetooth®-Smartphone Bluetooth®-Smartphone Smartphone am Gerät anmelden Telefonanrufe tätigen Sie können Ihr Bluetooth-Smartphone verwenden, Drücken Sie < >, um zum Bluetooth- wenn es mit diesem Gerät verbunden ist. Modus zu gelangen. • Sie können das Gerät und die Einheit, die SSP (Secure Simple Pairing) nutzt, koppeln, was nur eine Bestätigung voraussetzt.
  • Page 37: Einrichtung

    Einrichtung Einrichtung Einstellungen Soundeinstellungen Halten Sie < > gedrückt, um die Drücken Sie < >, um die Soundeinstellung Einstellungen anzuzeigen. anzuzeigen. Drücken Sie <E>/<F>, um eine Kategorie Drehen Sie den Lautstärkeregler, um ein auszuwählen. Element auszuwählen (siehe die folgende Tabelle), und drücken Sie dann den Knopf. Drehen Sie den Lautstärkeregler, um ein Element auszuwählen (siehe die folgende Wiederholen Sie den Schritt 2, bis das...
  • Page 38: Installation

    Installation Installation Vor der Installation • Isolieren Sie nicht angeschlossene Kabel mit Vinylband oder ähnlichem Material. Entfernen Vor der Installation dieses Geräts beachten Sie bitte Sie nicht die Kappen von den Enden nicht die folgenden Vorsichtsmaßnahmen. angeschlossener Kabel und Anschlüsse, damit keine #WARNHINWEISE Kurzschlüsse entstehen.
  • Page 39: Installation Des Geräts

    Installation Ñ Installationsvorgang Ñ Ziertafel 1) Um einem Kurzschluss vorzubeugen, ziehen Sie 1) Bringen Sie das Zubehör 1 am Gerät an. bitte den Schlüssel aus dem Zündschloss und trennen Sie die ¤-Klemme der Batterie ab. 2) Schließen Sie die Eingangs- und Ausgangskabel jedes Gerätes richtig an.
  • Page 40 Sie die handelsüblichen ISO-Stecker an das Gerät anschließen: • Überprüfen Sie, ob die Stiftbelegung des Steckers mit dem JVC-Gerät übereinstimmt. Ñ Ausbau des Geräts • Achten Sie besonders auf das Stromkabel. 1) Entfernen Sie wie unter Schritt 1 von “Entfernen der •...
  • Page 41 1 3 5 7 2 4 6 8 UKW/MW-Antenneneingang Sicherung (15 A) ISO-Steckverbinder DAB-Antennenbuchse (SMB-Anschluss) Hinterer Audiovorverstärker Nur KD-X561DBT (Links; Weiß, Rechts; Rot) Bei Verwendung einer handelsüblichen Vorderer Audiovorverstärker DAB-Antenne darf der Durchmesser (Links; Weiß, Rechts; Rot) des SMB-Steckers höchstens Φ6,5 mm betragen.
  • Page 42: Wissenswertes Über Dieses Gerät

    – Redistributions of source code must retain the Bluetooth SIG, Inc. und jede Verwendung dieser above copyright notice, this list of conditions and Marken durch die JVC KENWOOD Corporation the following disclaimer. erfolgt unter Lizenz. Andere Warenzeichen und – Redistributions in binary form must reproduce the...
  • Page 43 Wissenswertes über dieses Gerät Neither the name of the Xiph.org Foundation SOFTWARE, EVEN IF ADVISED OF THE POSSIBILITY OF SUCH DAMAGE. nor the names of its contributors may be used to endorse or promote products derived from this software without specific prior written permission. THIS SOFTWARE IS PROVIDED BY THE COPYRIGHT HOLDERS AND CONTRIBUTORS ``AS IS’’...
  • Page 44: Voorzorgsmaatregelen

    • Kijk niet naar het scherm of richt uw ogen niet op Tuner/DAB ................48 het scherm als u langere tijd aan het rijden bent. Basisbediening van de tuner..............48 • Raadpleeg uw JVC-dealer als u tijdens de DAB Basisbediening ..................48 installatie problemen ondervindt. Functie-instellingen van de tuner ............48 DAB functie-instellingen ................
  • Page 45: Aan De Slag

    Aan de Slag Initiële instellingen Klokinstellingen Ñ Synchroniseren van de kloktijd met FM Activeer [RDS Clock Sync] (RDS Kloksynchronisatie). Zie “Functie-instellingen van de tuner” (P.48). Ñ De klok handmatig aanpassen ✎ OPMERKING Draai de contactsleutel van uw auto in de stand •...
  • Page 46: Basisinstellingen

    3 Schakelt naar de uitzending van de AM-tuner. Ñ Selecteer de dimmerstand (P.48) 4 Schakelt over naar de DAB-uitzending. (P.48) Druk op de <DIM>-knop. (alleen KD-X561DBT) Dimmer 1, Dimmer 2, Dimmer 3 5 Afspelen van een Bluetooth audiospeler. (P.50) Het bevestigen/losmaken van het 6 [USB] voorpaneel Speelt bestanden op een USB-apparaat af.
  • Page 47: Usb/Ipod

    USB/iPod USB/iPod Voorbereiding Weergaveopties Naar Doe dit Ñ Een USB-apparaat/iPod/iPhone Afspelen/ Druk op de volumeknop. aansluiten pauzeren Open het klepje. Selecteer een Druk herhaaldelijk op bestand Sluit het USB-apparaat via de USB-kabel aan <E>/<F>. Snel achteruit/ (afzonderlijk verkocht). Houd <E>/<F> ingedrukt. Snel vooruit •...
  • Page 48: Tuner/Dab

    • Om af te sluiten, drukt u op < >. Store het sterkste signaal voor de geselecteerde bandbreedte, en slaat deze op. DAB Basisbediening (KD-X561DBT) • „Auto Store” verschijnt. Local Stemt alleen af op de zenders met Druk op <...
  • Page 49: Dab Functie-Instellingen

    *2 Beschikbaar wanneer [RDS] is ingesteld op [ON]. Ñ Het beeld van de achteruitkijkcamera weergeven DAB functie-instellingen Het achteruitkijk-scherm wordt weergegeven (KD-X561DBT) wanneer u de versnelling schakelt naar de achteruit- positie (R). Druk op < > om het functiemenu weer te geven.
  • Page 50: Bluetooth®-Smartphone

    Bluetooth®-smartphone Bluetooth®-smartphone Registreer uw mobiele telefoon bij Voer een telefoongesprek uit het toestel Druk op < > om Bluetooth in te schakelen. U kunt uw Bluetooth-smartphone gebruiken als deze aan dit toestel is gekoppeld. • U kunt het apparaat en de eenheid koppelen met behulp van SSP (Secure Simple Pairing) wat alleen een bevestiging vereist.
  • Page 51: Setup

    Setup Setup Instellingen Geluidsinstellingen Houd < > om de instellingen weer te geven. Druk op < > om de geluidsinstelling weer te geven. Druk op <E>/<F> om de categorie te selecteren. Draai aan de volumeknop om een item te selecteren (zie de volgende tabel) en druk Draai aan de volumeknop om een item te vervolgens op de knop.
  • Page 52: Installatie

    Installatie Installatie Vóór de installatie • Zet de bedrading met behulp van de kabelklemmen en wikkel de vinyltape rond de draden die in contact Neem vóór de installatie van dit toestel de volgende komt met de metalen delen en om te voorkomen voorzorgsmaatregelen in acht.
  • Page 53: De Unit Installeren

    Installatie Ñ Installatieprocedure Ñ Sierplaat 1) Voorkom kortsluiting door de sleutel uit het 1) Bevestig de accessoire 1 aan het toestel. contactslot te verwijderen en de ¤ aansluiting van de accu los te koppelen. 2) Verbind de juiste in- en uitgangskabels van elk toestel.
  • Page 54 ISO-aansluitingen aansluit aan het apparaat: • Wees ervan verzekerd dat de pinbezetting van de aansluiting past op het JVC-apparaat. • Let extra op de stroomkabel. Ñ Verwijderen van het apparaat • In het geval dat de batterijkabel en de 1) Zie stap 1 in “Het inbouwframe verwijderen”...
  • Page 55 2 4 6 8 FM/AM antenne-ingang Zekering (15 A) ISO-aansluiting DAB-antenneaansluiting (SMB-connector) Audio-preout achter alleen KD-X561DBT (Links; wit, rechts; rood) Wanneer een in de handel verkrijgbare Audio-preout voor DAB-antenne wordt gebruikt, moet de (Links; wit, rechts; rood) diameter van de SMB-connector Φ6,5 mm of minder zijn.
  • Page 56: Informatie Over Dit Toestel

    – Redistributions of source code must retain the zijn het eigendom van Bluetooth SIG, Inc. en elk above copyright notice, this list of conditions and gebruik van dergelijke merken door JVC KENWOOD the following disclaimer. Corporation vindt plaats onder licentie. Andere –...
  • Page 57 Informatie over dit toestel Ñ Informatie over het weggooien nor the names of its contributors may be used to van gebruikte elektrische en endorse or promote products derived from this elektronische apparatuur en batterijen software without specific prior written permission. (voor EU-landen die gescheiden THIS SOFTWARE IS PROVIDED BY THE COPYRIGHT HOLDERS AND CONTRIBUTORS ``AS IS’’...
  • Page 58: Prima Dell'uso

    Impostazioni della funzione sintonizzatore ........62 • Quando si acquistano accessori opzionali, Impostazioni della funzione DAB ............63 verificare con il rivenditore JVC che siano Componenti esterni ............63 compatibili con il proprio modello e che siano Telecamera a retrovisione ................63 utilizzabili nel proprio Paese.
  • Page 59: Per Iniziare

    Per iniziare Impostazioni iniziali Impostazioni orologio Ñ Sincronizzazione dell’orologio con FM Attivare [RDS Clock Sync] (Sinc. orologio RDS). Vedere “Impostazioni della funzione sintonizzatore” (P.62). Ñ Regolazione manuale dell’orologio ✎ NOTA Ruotare la chiave di accensione dell'automobile • Disattivare [RDS Clock Sync] prima di regolare in posizione ACC.
  • Page 60: Di Base

    3 Passa alla trasmissione sintonizzatore AM. della luminosità (P.62) 4 Passa alla trasmissione DAB. (P.62) Premere il pulsante <DIM>. (Solo KD-X561DBT) Dimmer 1, Dimmer 2, Dimmer 3 5 Riproduce un lettore audio Bluetooth. (P.64) Come montare/staccare il frontalino 6 [USB] Riproduce i file contenuti in un dispositivo USB.
  • Page 61: Usb/Ipod

    USB/iPod USB/iPod Preparazione Operazioni di riproduzione Fare questo Ñ Collegamento di un dispositivo USB/ Riprodurre/ Premere la manopola del volume. iPod/iPhone mettere in Aprire il coperchio della porta anteriore. pausa Selezionare un Collegare il dispositivo USB con l’apposito cavo Premere <E>/<F> file ripetutamente.
  • Page 62: Sintonizzatore/Dab

    Cerca automaticamente e memorizza le 15 Store stazioni con i segnali più forti per la banda Funzionamento di base DAB selezionata. • Appare “Auto Store”. (KD-X561DBT) Local Si sintonizza solo sulle stazioni con segnale Seek Premere < > per visualizzare la sufficientemente forte.
  • Page 63: Impostazioni Della Funzione Dab

    *2 Disponibile quando [RDS] è impostato su [ON]. Ñ Visualizzazione dell’immagine dalla telecamera a retrovisione Impostazioni della funzione DAB La schermata a retrovisione viene visualizzata quando (KD-X561DBT) si innesta la retromarcia (R). Premere < > per visualizzare il menu delle funzioni.
  • Page 64: Smartphone Bluetooth

    Smartphone Bluetooth® Smartphone Bluetooth® Registrare il proprio smartphone Effettuare una telefonata sull’unità. Premere < > per entrare in modalità È possibile utilizzare il proprio smartphone Bluetooth. Bluetooth se è abbinato a quest’unità. • È possibile accoppiare il dispositivo e l’unità utilizzando SSP (Secure Simple Pairing) che necessita solo di conferma.
  • Page 65: Configurazione

    Configurazione Configurazione Impostazioni Impostazioni audio Premere e tenere premuto < > per Premere < > per visualizzare l’impostazione visualizzare le impostazioni. audio. Premere <E>/<F> per selezionare la Ruotare la manopola del volume per categoria. selezionare una voce (vedere la tabella seguente), quindi premere la manopola.
  • Page 66: Installazione

    Installazione Installazione Prima dell’installazione • Assicurare i cavi con dei morsetti e avvolgere del nastro vinilico attorno ai cavi che entrano in contatto Prima dell'installazione di quest'unità, osservare le con le parti in metallo per proteggerli e per evitare seguenti precauzioni. un corto circuito.
  • Page 67: Installazione Dell'unità

    Installazione Ñ Procedura di installazione Ñ Piastra di taglio 1) Per evitare cortocircuiti, estrarre la chiave 1) Fissare l'accessorio 1 all'unità. dall'accensione e scollegare il ¤ morsetto della batteria. 2) Effettuare le corrette connessioni dei cavi in ingresso e in uscita da ciascuna unità. 3) Collegare il cavo al cablaggio.
  • Page 68 1 in “Rimuovere la piastra di taglio”. • Assicurarsi che l’assegnazione del pin del connettore 2) Rimuovere il frontalino. corrisponda all’unità JVC. • Prestare molta attenzione al cavo di alimentazione. • Nel caso in cui il cavo della batteria e il cavo di accensione non corrispondano, cambiarli.
  • Page 69 Ingresso antenna FM/AM Fusibile (15 A) Connettore ISO Jack per antenna DAB (connettore SMB) Preuscita audio posteriore Solo KD-X561DBT (sinistra: bianco, destra: rosso) Se si desidera utilizzare antenne DAB Preuscita audio anteriore commerciali, il diametro del connettore (sinistra: bianco, destra: rosso) SMB deve essere pari o inferiore a Φ...
  • Page 70: Informazioni Su Questa Unità

    – Redistributions of source code must retain the fabbrica registrati di proprietà di Bluetooth SIG, above copyright notice, this list of conditions and Inc. L’uso di tali marchi da parte di JVC KENWOOD the following disclaimer. Corporation è soggetto a licenza. Gli altri marchi e –...
  • Page 71 Informazioni su questa unità Ñ Informazioni sullo smaltimento delle software without specific prior written permission. vecchie apparecchiature elettriche ed THIS SOFTWARE IS PROVIDED BY THE COPYRIGHT elettroniche e delle batterie (valide HOLDERS AND CONTRIBUTORS ``AS IS’’ AND ANY per i Paesi europei che hanno adottato EXPRESS OR IMPLIED WARRANTIES, INCLUDING, BUT NOT LIMITED TO, THE IMPLIED WARRANTIES OF sistemi di raccolta differenziata)
  • Page 72: Precauciones

    Ajustes de la función DAB ................77 • Cuando compre accesorios opcionales, pregunte Componentes externos ............77 a su distribuidor JVC si dichos accesorios son Cámara de visión trasera ................77 compatibles con su modelo y en su región. Teléfono inteligente con Bluetooth® ......78 •...
  • Page 73: Inicio

    Inicio Ajustes iniciales Ajustes del reloj Ñ Sincronización de la hora del reloj con FM RDS Activa [RDS Clock Sync] (Sinc. del reloj RDS]. Consulte “Ajustes de la función del sintonizador” (P.76). Ñ Ajuste del reloj manualmente ✎ NOTA Coloque la llave de encendido del coche en la •...
  • Page 74: Conceptos Básicos

    3 Cambia a la emisión del sintonizador de AM. Ñ Seleccionar el modo de atenuación (P.76) 4 Cambia a la emisión DAB. (P.76) Pulse el botón <DIM>. (KD-X561DBT solo) Atenuación 1, Atenuación 2, Atenuación 3 5 Reproduce un reproductor de audio Bluetooth. Cómo acoplar/desacoplar el panel (P.78)
  • Page 75: Usb/Ipod

    USB/iPod USB/iPod Preparativos Operaciones de reproducción Para Hacer esto Ñ Conexión de un dispositivo USB/iPod/ Reproducir/ Pulse el mando del volumen. iPhone pausar Abra la cubierta del puerto de la parte frontal. Seleccionar un Pulse <E>/<F> varias veces. archivo Conecte el dispositivo USB con el cable USB Retroceso (vendido por separado).
  • Page 76: Sintonizador/Dab

    >. Auto Busca y guarda automáticamente las 15 Funcionamiento básico de DAB Store emisoras con las señales más fuertes de la (KD-X561DBT) banda seleccionada. • Aparece “Auto Store”. Pulse < > para visualizar la pantalla Local Sintoniza solo las emisoras con una fuerza Seek HOME (inicio).
  • Page 77: Ajustes De La Función Dab

    *2 Disponible cuando [RDS] está ajustado en [ON]. atrás (R). Ajustes de la función DAB (KD-X561DBT) Pulse < > para visualizar el menú de funciones. Gire el mando del volumen para seleccionar el elemento que se va a ajustar (véase la tabla...
  • Page 78: Teléfono Inteligente Con Bluetooth

    Teléfono inteligente con Bluetooth® Teléfono inteligente con Bluetooth® Registre su teléfono inteligente en Realice una llamada telefónica la unidad Pulse < > para entrar en el modo Puede utilizar su teléfono inteligente Bluetooth Bluetooth. cuando esté emparejado con esta unidad. •...
  • Page 79: Configuración

    Configuración Configuración Ajustes Ajustes de sonido Mantenga < > pulsado para visualizar los Pulse < > para visualizar los ajustes de ajustes. sonido. Pulse <E>/<F> para seleccionar la Gire el mando del volumen para seleccionar categoría. un elemento (véase la tabla siguiente) y, a continuación, pulse el mando.
  • Page 80: Instalación

    Instalación Instalación Antes de la instalación • Asegure los cables con las abrazaderas de cable y envuelva cinta de vinilo alrededor de los cables que Antes de la instalación de esta unidad, tenga en entren en contacto con los elementos metálicos cuenta las precauciones siguientes.
  • Page 81: Instalación De La Unidad

    Instalación Ñ Procedimiento de instalación Ñ Placa 1) Para evitar cortocircuitos, retire la llave del 1) Conecte el accesorio 1 a la unidad. encendido y desconecte el terminal ¤ de la batería. 2) Realice de forma adecuada las conexiones de cables de entrada y salida para cada unidad.
  • Page 82 “Retirar el marco”. • Asegúrese de que la asignación de clavijas del 2) Retire el panel frontal. conector coincide con la unidad JVC. • Tome precauciones extra con el cable de alimentación. • In caso de que el cable de la batería y el cable de encendido no correspondan, entonces cámbielos...
  • Page 83 Fusible (15A) Conector ISO Conector de la antena DAB (conector SMB) Salida previa de audio trasera KD-X561DBT solo (izquierda: blanca, derecha: roja) Si se utiliza una antena DAB disponible en Salida previa de audio delantera el mercado, el diámetro del conector SMB (izquierda: blanca, derecha: roja) debe ser como máximo de Φ...
  • Page 84: Acerca De Esta Unidad

    – Redistributions of source code must retain the marcas registradas propiedad de Bluetooth SIG, Inc. above copyright notice, this list of conditions and y cualquier uso de dichas marcas por JVC KENWOOD the following disclaimer. Corporation está sujeto a los términos de licencia. El –...
  • Page 85 Acerca de esta unidad Ñ Información acerca de la eliminación nor the names of its contributors may be used to de equipos eléctricos, electrónicos y endorse or promote products derived from this baterías al final de su vida útil (aplicable software without specific prior written permission.
  • Page 86: Precauções

    Configurações da função do sintonizador ........90 • Quando comprar acessórios opcionais, confirme Configurações da função do DAB............91 junto do representante JVC que eles funcionam Componentes Externos ............91 com o seu modelo e na sua zona. Câmara de vista traseira ................91 •...
  • Page 87: Primeiros Passos

    Primeiros Passos Definições iniciais Definições do Relógio Ñ Sincronização da hora do relógio com o FM RDS Ative [RDS Clock Sync] (Sincronização do Relógio RDS). Veja “Configurações da função do sintonizador” (P.90). Ñ Ajustar o relógio manualmente ✎ NOTA Rode a chave de ignição do seu carro para ACC. •...
  • Page 88: Básicos

    Prima e mantenha premido o botão <DIM>. (P.90) Ñ Selecione o modo de atenuação da luz 4 Muda para a Transmissão DAB. (P.90) (Apenas KD-X561DBT) Prima o botão <DIM>. 5 Efetua a reprodução de um leitor de áudio Atenuador 1, Atenuador 2, Atenuador 3 Bluetooth.
  • Page 89: Usb/Ipod

    USB/iPod USB/iPod Preparativos Operações de reprodução Para Faça isto Ñ Ligar um dispositivo USB/iPod/iPhone Reproduzir/ Prima o botão do volume. Abra a tampa da porta frontal. pausar Ligue o dispositivo USB com o cabo USB Selecione um Prima <E>/<F> ficheiro (vendido separadamente).
  • Page 90: Sintonizador/Dab

    NOTA Store 15 estações com os sinais mais fortes para a • Para sair, prima < >. banda selecionada. Operação básica do DAB (KD-X561DBT) • É apresentado “Auto Store” (Armazenamento Automático). Local Prima < > para exibir o ecrã INICIAL.
  • Page 91: Configurações Da Função Do Dab

    *2 Disponível quando [RDS] é definido como [ON]. de vista traseira Configurações da função do DAB O ecrã de vista traseira é exibido quando for engatada (KD-X561DBT) a marcha-atrás (R). Prima o botão < > para exibir o menu de funções.
  • Page 92: Smartphone Com Bluetooth

    Smartphone com Bluetooth® Smartphone com Bluetooth® Registe o seu smartphone na Fazer uma chamada unidade Prima < > para entrar em modo Pode utilizar o seu smartphone com Bluetooth Bluetooth. quando estiver emparelhado com esta unidade. • Pode emparelhar o dispositivo e a unidade usando SSP (Secure Simple Pairing, Emparelhamento Simples Seguro), que apenas requer confirmação.
  • Page 93: Configuração

    Configuração Configuração Definições Definições de som Prima e mantenha premido < > para exibir as Prima < > para exibir a definição de som. definições. Rode o botão do volume para selecionar um Prima <E>/<F> para selecionar a item (consulte a tabela abaixo) e, em seguida, categoria.
  • Page 94: Instalação

    Instalação Instalação Antes da instalação • Fixe os fios com grampos de cabos e envolva uma fita de vinil em torno dos fios que entrem em Antes da instalação desta unidade, tenha em contacto com peças metálicas para proteger os fios consideração as seguintes precauções.
  • Page 95: Instalar A Unidade

    Instalação Ñ Método de instalação Ñ Moldura 1) Para prevenir um curto-circuito, remova a chave da 1) Anexar acessório 1 à unidade. ignição e desligue o terminal ¤ da bateria. 2) Faça as ligações apropriadas dos cabos de entrada e saída de cada unidade. 3) Ligue o fio à...
  • Page 96: Ñ Guia De Funcionamento Do Conector Da Cablagem Elétrica

    Ñ Retirar a unidade • Certifique-se de que a atribuição de pino do 1) Retire a moldura seguindo o passo 1 em “Retirar a conector corresponde à unidade JVC. moldura”. • Tenha precaução redobrada com o cabo de 2) Retire o painel frontal.
  • Page 97 Entrada da antena FM/AM Fusível (15 A) Conector ISO Tomada de antena DAB (conector SMB) Pré-saída de Áudio Traseira Apenas KD-X561DBT (Esquerda; Branco, Direita; Vermelho) Quando utilizar uma antena DAB Pré-Saída Áudio Frontal disponível no mercado, o diâmetro do (Esquerda; Branco, Direito; Vermelho) conector SMB deve ser igual ou inferior a Φ...
  • Page 98: Sobre Esta Unidade

    Bluetooth SIG, Inc. e qualquer utilização de tais the following disclaimer. marcas pela JVC KENWOOD Corporation está – Redistributions in binary form must reproduce the licenciada. Outras marcas registadas e nomes de above copyright notice, this list of conditions and marcas são dos respetivos proprietários.
  • Page 99 Sobre esta unidade Ñ Informações sobre a Eliminação de software without specific prior written permission. Baterias e de Equipamentos Elétricos e THIS SOFTWARE IS PROVIDED BY THE COPYRIGHT Eletrónicos Usados (aplicável nos países HOLDERS AND CONTRIBUTORS ``AS IS’’ AND ANY da UE que adotaram sistemas de recolha EXPRESS OR IMPLIED WARRANTIES, INCLUDING, BUT NOT LIMITED TO, THE IMPLIED WARRANTIES OF...
  • Page 100: Меры Предосторожности

    автомобилем продолжительное время. Настройки функций тюнера ..............104 • Если Вы столкнулись с проблемами во время Настройки функций DAB ................105 установки, свяжитесь со своим дилером JVC. Внешние устройства .............105 Камера заднего вида ...................105 Ñ Меры предосторожности при Смартфон с Bluetooth® ..........106 использовании...
  • Page 101: Приступая К Работе

    Приступая к работе Первоначальные настройки Настройки часов Ñ Синхронизация времени на часах с FM RDS Активируйте [RDS Clock Sync] (Синхронизация часов с RDS). См. «Настройки функций тюнера» (с.104). Ñ Подводка часов вручную ✎ ПРИМЕЧАНИЕ • Перед настройкой часов деактивируйте [RDS Clock Sync].
  • Page 102: Основы

    3 Переключение на вещание AM-тюнера. Нажмите и удерживайте кнопку <DIM>. (с.104) 4 Переключается на радиовещание DAB. (с.104) Ñ Выберите режим регулятора света (только KD-X561DBT) Нажмите кнопку <DIM>. 5 Воспроизводит аудио проигрыватель Bluetooth. Регулятор света 1, 2, 3 (с.106) 6 [USB] Как...
  • Page 103: Usb/Ipod

    USB/iPod USB/iPod Подготовка Операции воспроизведения Что следует Выполните Ñ Подключение устройства USB/iPod/ сделать iPhone Воспроизведение/ Нажмите ручку регулировки Откройте крышку переднего порта. приостановка громкости. Выберите файл Подключите устройство USB при помощи Нажмите <E>/<F> несколько раз. кабеля USB (продается отдельно). Быстрая Нажмите...
  • Page 104: Тюнер/Dab

    • Для выхода нажмите < >. для выбранного диапазона. • Появляется «Auto Store». Основные операции DAB Local Подключается только к станциям с (KD-X561DBT) Seek достаточно сильным сигналом. «ON», «OFF» (по умолчанию) Нажмите кнопку < >, чтобы отобразить главный экран. Area EUROPE (По...
  • Page 105: Настройки Функций Dab

    *1 Только FM *2 Доступно, когда для [RDS] установлено значение [ON]. Ñ Показ изображения с камеры заднего вида Настройки функций DAB Экран заднего вида отображается при (KD-X561DBT) переключении передачи в положение заднего хода (R). Нажмите кнопку < >, чтобы открыть меню функций.
  • Page 106: Смартфон С Bluetooth

    Смартфон с Bluetooth® Смартфон с Bluetooth® Зарегистрируйте Ваш мобильный Сделать звонок телефон в устройстве Нажмите кнопку < >, чтобы войти в Можно использовать смартфон с Bluetooth при режим Bluetooth. сопряжении с данным устройством. • Вы можете выполнить сопряжение устройств, используя SSP (Функция простого и безопасного парного...
  • Page 107: Настройка

    Настройка Настройка Настройки Настройки звука Нажмите и удерживайте кнопку < >, чтобы Нажмите кнопку < >, чтобы отобразить отобразить настройки. настройку звука. Нажмите <E>/<F>, чтобы выбрать Поверните ручку регулировки громкости, категорию. чтобы выбрать элемент (см. следующую таблицу), затем нажмите ручку. Поверните...
  • Page 108: Установка

    Установка Установка Перед установкой • Если сгорел предохранитель, прежде всего убедитесь в отсутствии короткого замыкания Перед установкой данного устройства имейте в проводов, а затем установите новый виду следующие меры предосторожности. предохранитель с такими же характеристиками. #ПРЕДУПРЕЖДЕНИЯ • Изолируйте неприсоединенные провода виниловой...
  • Page 109: Установка Устройства

    Установка Ñ Поставляемые дополнительные Ñ Отделочная панель принадлежности для установки 1) Подсоедините принадлежность 1 к устройству. (3 м) Ñ Блок микрофона 1) Проверьте положение установки микрофона Ñ Процедура установки (принадлежность 5). 2) Очистите поверхность установки. 1) Во избежание короткого замыкания выньте ключ 3) Удалите...
  • Page 110 в "Removing the trim plate" (Снятии отделочной следующее условие: панели). • Убедитесь, что назначение контактов разъема 2) Отсоедините лицевую панель. соответствует устройству JVC. • Уделите особое внимание проводу питания. • В случае если провод аккумулятора и провод зажигания не соответствуют назначению, тогда поменяйте их соответственно назначению.
  • Page 111 2 4 6 8 Вход антенны FM/AM Предохранитель (15 А) Разъем ISO Разъем антенны DAB (разъем SMB) Задний аудио предвыход Только KD-X561DBT (Слева; Белый, Справа; Красный) Если используется имеющаяся в Передний аудио предвыход продаже антенна DAB, диаметр (Слева; Белый, Справа; Красный) разъема...
  • Page 112: Информация Об Устройстве

    – Redistributions of source code must retain the и любое использование таких товарных above copyright notice, this list of conditions and знаков компанией JVC KENWOOD Corporation the following disclaimer. осуществляется по лицензии. Прочие товарные – Redistributions in binary form must reproduce the знаки...
  • Page 113 FOR ANY DIRECT, INDIRECT, INCIDENTAL, SPECIAL, затрагивает никаких других прав потребителя, EXEMPLARY, OR CONSEQUENTIAL DAMAGES в частности, гарантийного обслуживания JVC, (INCLUDING, BUT NOT LIMITED TO, PROCUREMENT которое он может получить в соответствии с OF SUBSTITUTE GOODS OR SERVICES; LOSS OF USE, законом...
  • Page 114 Declaration of Conformity with regard to the RoHS Dichiarazione di conformità relativa alla direttiva Directive 2011/65/EU RoHS 2011/65/UE Manufacturer: Produttore: JVC KENWOOD Corporation JVC KENWOOD Corporation 3-12, Moriyacho, Kanagawa-ku, Yokohama-shi, Kanagawa 3-12, Moriyacho, Kanagawa-ku, Yokohama-shi, Kanagawa 221-0022, JAPAN 221-0022, JAPAN...
  • Page 115 Español Latviešu Por la presente, JVC KENWOOD declara que el equipo de radio KD-X561DBT/ JVC KENWOOD ar šo deklarē, ka radio aparatūra KD-X561DBT/ KD-X560BT KD-X560BT cumple la Directiva 2014/53/EU. El texto completo de la atbilst direktīvas 2014/53/ES prasībām.

Ce manuel est également adapté pour:

Kd-x560bt

Table des Matières