Table des Matières

Publicité

Les langues disponibles
  • FR

Les langues disponibles

  • FRANÇAIS, page 53

Liens rapides

USER´S MANUAL
BEDIENUNGSANLEITUNG
MANUEL D´UTILISATION
MANUAL DE USUARIO
INSTRUKCJA OBSŁUGI
MANUALE D´USO
EVOS
W3
®
LED WASH-BEAM MOVING HEAD WITH SINGLE PIXEL CONTROL
CLEW3

Publicité

Table des Matières
loading

Sommaire des Matières pour Cameo EVOS W3

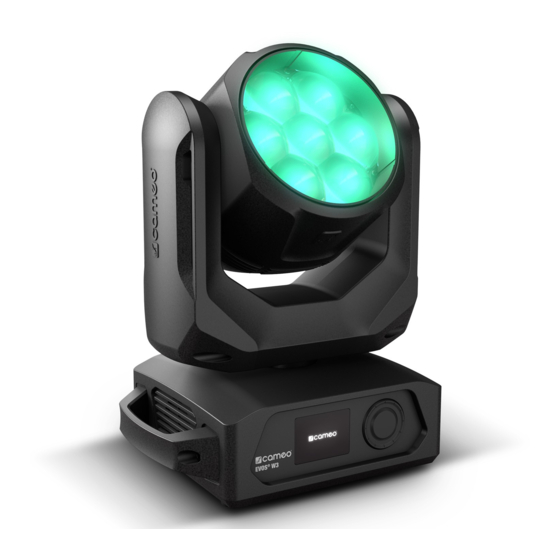
  • Page 1 USER´S MANUAL BEDIENUNGSANLEITUNG MANUEL D´UTILISATION MANUAL DE USUARIO INSTRUKCJA OBSŁUGI MANUALE D´USO EVOS ® LED WASH-BEAM MOVING HEAD WITH SINGLE PIXEL CONTROL CLEW3...
  • Page 2: Table Des Matières

    CONTENTS / INHALTSVERZEICHNIS / CONTENU / CONTENIDO / TREŚĆ / CONTENUTO ENGLISH ESPAÑOL SAFETY INFORMATION MEDIDAS DE SEGURIDAD INTRODUCTION INTRODUCCIÓN CONNECTIONS, CONTROL, AND DISPLAY ELEMENTS CONEXIONES, ELEMENTOS DE MANEJO Y ELEMENTOS OPERATION DE VISUALIZACIÓN W-DMX™ MANEJO W-DMX™ STATUS W-DMX™ CONTROL MENU (Control) ESTADO W-DMX™...
  • Page 3: English

    This device was developed and produced under the highest standards of quality in order to ensure smooth operation for many years. Please read these operating instructions carefully so that you can use your new Cameo Light product quickly and optimally. You can find more information on Cameo Light on our website WWW.CAMEOLIGHT.COM.
  • Page 4 36. The appliance is not to be used by persons (including children) with reduced physical, sensory or mental capabilities, or lack of experience and knowledge. 37. Children must be instructed not to play with the device. 38. If the power cord of the device is damaged, do not use the device. The power cord must be replaced by an adequate cable or assembly from an authorized service center.
  • Page 5: Introduction

    TRUE1 connector plug is included with product. POWER IN Neutrik powerCON TRUE1 power output connector to supply power to additional CAMEO spotlights. Ensure that the total power consumption of all connected devices does not exceed the ampere (A) value specified on the device.
  • Page 6 STATUS LEDS NET Yellow status LED lights up = network connection. Green status LED flashes = control signal is present. W-DMX™ ANTENNA The antenna for W-DMX™ control remains in its holder during operation (= operating position). LC DISPLAY The backlit LC display shows the currently active operating mode (main display), the menu items in the Options menu, and the numerical values or operating status for certain menu items.
  • Page 7: Operation

    030°C As soon as the spotlight is properly connected to the power supply, “Welcome to Cameo”, the model name, and then the software version are displayed one after the other on the display as part of the startup process. Once the process is complete, the spotlight is ready for use and resumes whichever mode was most recently activated.
  • Page 8: W-Dmx

    W-DMX™ To pair the W-DMX receiver with the W-DMX-compatible transmitter, execute the Reset command in the receiver menu (select Reset and confirm). The receiver is now ready to pair and waits for a transmitter to request pairing. Start pairing by selecting Link in the transmitter menu and then confirm your selection.
  • Page 9 (Scene x) (Scene x) Wireless Activates (select G3 or G4s) or deactivates (Disable) W-DMX trans-  mission, sets the W-DMX standard (G3/G4s), and establishes (Link) or Send Mode  disconnects (Unlink) a connection with another W-DMX device. 030°C 030°C 030°C 030°C 030°C Mode: Art-Net...
  • Page 10 sACN 192.168.000.150 192.168.000.150 Info Art-Net+DMX DMX Address: Main Address: sACN+DMX Service Kling-Net+DM Pixel Address: OPERATION VIA ART-NET Slave Starting from the main display, press the push-button rotary encoder to navigate to the main menu. Rotate the encoder to select the control Quick-Light menu Control and then press the encoder.
  • Page 11 43CH Slave (Scene x) The Art-Net control signal can User Universe  be transmitted in any universe (alternative to “Cur- Select Universe 000–254 from 000 to 254 (Select rent Universe“) 030°C 030°C 030°C 030°C 030°C Universe) to DMX OUT (Art-Net Sending Options ...
  • Page 12 Send to DMX The sACN control signal can  be transmitted in the defined Disable universe to DMX OUT (sACN to DMX), to W-DMX (sACN to Current Universe  W-DMX), or to both (sACN to (alternative to "User sACN to DMX DMX and W-DMX).
  • Page 13 Kling-Net+DMX Kling-Net+DMX Pixel Address: Slave Slave Scenes Scenes Control Control Main Menu Control Control W-DMX W-DMX W-DMX W-DMX Art-Net Art-Net Settings Art-Net Art-Net sACN sACN sACN sACN Info Art-Net+DMX Art-Net+DMX Art-Net+DMX Art-Net+DMX sACN+DMX sACN+DMX sACN+DMX sACN+DMX Service Kling-Net+DMX Kling-Net+DMX Kling-Net+DMX Kling-Net+DMX Slave Slave...
  • Page 14 Mode: Art-Net (sACN) 43CH Mode: Art-Net (sACN)+DMX Mode: Klin W-DMX W-DMX Universe: Universe: Main Address: Art-Net Art-Net sACN sACN 192.168.000.150 192.168.000.150 OPERATION VIA SACN AND DMX Art-Net+DMX Art-Net+DMX The sACN+DMX operating mode makes it possible to separately control the LEDs and move the heads with sACN and DMX. This lets you DMX Address: Main Address: select whether the LEDs are controlled with sACN and the heads moved with DMX, or vice versa When selecting this operating mode, there...
  • Page 15 Mode Settings Art-Net Art-Net 43CH sACN Slave sACN Info Art-Net+DMX Art-Net+DMX (Scene x) sACN+DMX sACN+DMX Service DMX Settings DMX control via XLR cable (XLR Only) or W-DMX (Wireless Only). If “XLR  Kling-Net+DMX Kling-Net+DMX First” is selected, W-DMX serves as a backup; if “Wireless First” is selected, Slave Slave Receive Mode...
  • Page 16 DMX Address: Main Address: W-DMX W-DMX Universe: Universe: Main Address: Art-Net Art-Net Pixel Address: sACN sACN 192.168.000.150 192.168.000.150 Art-Net+DMX Art-Net+DMX DMX Address: Main Address: SLAVE MODE (Slave) sACN+DMX sACN+DMX Starting from the main display, press the push-button rotary encoder to navigate to the main menu. Rotate the encoder to select the control Kling-Net+DMX Kling-Net+DMX Pixel Address:...
  • Page 17 Scenes  Rotate the encoder to select, press the encoder to confirm, rotate to change value or status, press to confirm. Return with  Run Scene Starts the scene  Scene 1–8 Record Scene Records the scene from an external controller ...
  • Page 18 Edit Scene  – 0% -> 100% Tilt – 0% -> 100% Dimmer – Master dimmer 0% -> 100% – 0% -> 100% Green – 0% -> 100% Blue – 0% -> 100% White – 0% -> 100% Zoom – Narrow ->...
  • Page 19: System Settings (Settings)

    SYSTEM SETTINGS (Settings) Starting from the main display, press the push-button rotary encoder to navigate to the main menu. Turn the encoder to access the menu for the system settings Settings and then press the encoder. Main Menu Settings Control Display Signal Fail Settings...
  • Page 20 Dimmer Selects dimmer  curve, dimming Curve  behavior, and PWM frequency Linear Light intensity increases linearly with DMX value Exponential Light intensity can be finely adjusted at lower DMX values and broadly adjusted at higher DMX values Logarithmic Light intensity can be broadly adjusted at lower DMX values and finely adjusted at higher DMX values S-curve...
  • Page 21: Device Information (Info)

    Main Menu Settings Auto Lock Automatically  Control Display locks the No Lock Automatically deactivates the lock push-button Signal Fail rotary encoder 60 seconds Automatically locks the push-button rotary encoder after 60 sec. of inactivity Settings Dimmer Lock: Press and hold the encoder for approx. 5 seconds Color Calibration Info Pan/Tilt Motors...
  • Page 22: Service Menu (Service)

    Temperature Settings Fan Speed Runtime Info RDM UID, MAC, NET SERVICE MENU (Service) DMX Values Service Error Info Starting from the main display, press the push-button rotary encoder to navigate to the main menu. Rotate the encoder to select the control Quick-Light DMX Tables menu Service and then press the encoder.
  • Page 23 Default Restores factory  settings / Saves Recall  and restores user preferences Factory Reset  Cancels restore factory settings Restores factory settings Default 1  Cancels restore user preferences 1 Restores user preferences 1 Default 2  Cancels restore user preferences 2 Restores user preferences 2 Default 3 ...
  • Page 24: Quick Light

    Test Settings Password Info QUICK LIGHT Service Use the Quick Light function to quickly and easily set a static scene. Starting from the main display, press the push-button rotary encoder Quick-Light to navigate to the main menu. Rotate the encoder to select the quick light menu Quick Light and then press the encoder. The Quick Light table below provides information on the submenu items in the Quick Light menu.
  • Page 25: Dmx Technology

    DMX TECHNOLOGY DMX-512 DMX (Digital Multiplex) is the designation for a universal transmission protocol for communications between corresponding devices and controllers. A DMX controller sends DMX data to the connected DMX device(s). The DMX data is always transmitted as a serial data stream that is forwarded from one connected device to the next via the "DMX IN"...
  • Page 26: Technical Specifications

    TECHNICAL SPECIFICATIONS Article number: CLEW3 Product type: LED wash light Type: Moving head LED color spectrum: RGB+Warm white Number of LEDs: LED type: 40 W 4in1 PWM frequency: 800 Hz; 1200 Hz; 2000 Hz; 3600 Hz; 12 kHz; 25 kHz Beam angle: 4.5°–34°...
  • Page 27: Manufacturer´s Declarations

    Housing cooling: Temperature-controlled fans Dimensions (W × H × D, without mounting 11.42 × 9.88 × 13.78 inches bracket): Weight: 17.64 lb Additional features: 3.28 ft power cable with powerCON TRUE1 plug and 2 omega mounting brackets included in package contents MANUFACTURER´S DECLARATIONS MANUFACTURER‘S WARRANTY &...
  • Page 28: Deutsch

    Dieses Gerät wurde unter hohen Qualitätsanforderungen entwickelt und gefertigt, um viele Jahre einen reibungslosen Betrieb zu gewähr- leisten. Bitte lesen Sie diese Bedienungsanleitung sorgfältig, damit Sie Ihr neues Produkt von Cameo Light schnell und optimal einsetzen können. Weitere Informationen über Cameo Light erhalten Sie auf unserer Website WWW.CAMEOLIGHT.COM.
  • Page 29 34. Der Abstand zu brennbaren Materialien muss mindestens 0,5 m betragen. 35. Netzleitungen zur Spannungsversorgung mehrerer Geräte müssen mindestens 1,5 mm² Aderquerschnitt aufweisen. In der EU müssen die Leitungen H05VV-F, oder gleichartig, entsprechen. Geeignete Leitungen werden von Adam Hall angeboten. Mit diesen Leitungen können Sie mehrere Geräte über den Power out Anschluss mit dem Power IN Anschluss eines weiteren Gerätes verbinden.
  • Page 30: Einführung

    TRUE1 Gerätestecker befindet sich im Lieferumfang. POWER IN Neutrik powerCON TRUE1 Netzausgangsbuchse für die Spannungsversorgung weiterer CAMEO Scheinwerfer. Achten Sie darauf, dass die gesamte Stromaufnahme aller angeschlossenen Geräte den auf dem Gerät in Ampere (A) angegebenen Wert nicht überschreitet. FUSE Sicherungshalter für 5 x 20 mm Feinsicherungen.
  • Page 31 STATUS-LEDS NET Gelbe Status-LED leuchtet = Netzwerkverbindung. Grüne Status-LED blinkt = Steuersignal liegt an. W-DMX™ ANTENNE Die Antenne für die Steuerung per W-DMX™ verbleibt während des Betriebs in der Halterung (= Betriebsposition). LC-DISPLAY Das beleuchtete LC-Display zeigt die aktuell aktivierte Betriebsart (Hauptanzeige), die Menüpunkte im Auswahl-Menü und den Zahlenwert bzw.
  • Page 32: Bedienung

    030°C 030°C Sobald der Scheinwerfer korrekt am Stromnetz angeschlossen ist, wird während des Startvorgangs nacheinander „Welcome to Cameo“, die Modellbezeichnung und die Softwareversion im Display angezeigt. Nach diesem Vorgang ist der Scheinwerfer betriebsbereit und startet in der Betriebsart, die zuvor aktiviert war.
  • Page 33: W-Dmx

    W-DMX™ Zum Koppeln eines W-DMX Receivers (Empfänger) mit einem W-DMX kompatiblen Transmitter (Sender) muss im Menü des Receivers unter Connect der Befehl Reset augeführt werden (Reset auswählen und bestätigen). Der Receiver befindet sich nun in Koppelbereitschaft und wartet auf die Kopplungsanfrage eines Transmitters. Starten Sie die Kopplung, indem Sie im Menü des Transmitters Link auswählen und bestätigen, die Kopplung erfolgt nun automatisch.
  • Page 34 43CH Slave Slave (Scene x) (Scene x) Wireless Weiterleiten des DMX-Signals via W-DMX aktivieren (auswählen von G3  bzw. G4s) bzw. deaktivieren (Disable), einstellen des W-DMX Standards Send Mode  (G3/G4s) und eine Verbindung mit einem weiteren W-DMX Gerät herstellen (Link) bzw. lösen (Unlink). 030°C 030°C 030°C...
  • Page 35 Universe: Universe: Main Address: Settings Art-Net sACN 192.168.000.150 192.168.000.150 Info Art-Net+DMX DMX Address: Main Address: sACN+DMX BETRIEB VIA ART-NET Service Kling-Net+DM Pixel Address: Ausgehend von der Hauptanzeige gelangen Sie durch Drücken auf den Dreh-Drück-Encoder in das Hauptmenü. Wählen Sie durch Drehen Slave des Encoders das Kontrollmenü...
  • Page 36 43CH Slave (Scene x) Das Art-Net Steuersignal kann User Universe  in einem beliebigen Universum (alternativ zu Select Universe 000 – 254 von 000 bis 254 (Select „Current Universe“) 030°C 030°C 030°C 030°C 030°C Universe) an DMX OUT (Art-Net Sending Options ...
  • Page 37 Send to DMX Das sACN Steuersignal kann im  definierten Universum an DMX Disable OUT (sACN to DMX), an W-DMX (sACN to W-DMX) oder an beides Current Universe  weitergeleitet werden (sACN to (alternativ zu sACN to DMX DMX and W-DMX). Die Funktion „User Universe“) wird mit „Disable"...
  • Page 38 Kling-Net+DMX Kling-Net+DMX Pixel Address: Slave Slave Scenes Scenes Control Control Main Menu Control Control W-DMX W-DMX W-DMX W-DMX Art-Net Art-Net Settings Art-Net Art-Net sACN sACN sACN sACN Info Art-Net+DMX Art-Net+DMX Art-Net+DMX Art-Net+DMX sACN+DMX sACN+DMX sACN+DMX sACN+DMX Service Kling-Net+DMX Kling-Net+DMX Kling-Net+DMX Kling-Net+DMX Slave Slave...
  • Page 39 Control 030°C 030°C 030°C Mode: Art-Net (sACN) 43CH Mode: Art-Net (sACN)+DMX Mode: Klin W-DMX W-DMX BETRIEB VIA SACN UND DMX Universe: Universe: Main Address: Die Betriebsart sACN+DMX bietet die Möglichkeit, die LEDs und die Kopfbewegung separat über sACN und DMX zu steuern. Hierbei kann Art-Net Art-Net ausgewählt werden, ob die Steuerung der LEDs über sACN und die Steuerung der Kopfbewegung über DMX geschieht, oder umgekehrt.
  • Page 40 W-DMX W-DMX Mode Settings Art-Net Art-Net 43CH sACN Slave sACN Info Art-Net+DMX Art-Net+DMX (Scene x) sACN+DMX sACN+DMX DMX Settings DMX-Ansteuerung über XLR-Kabel (XLR Only) oder W-DMX (Wireless Only).  Service Bei Auswahl „XLR First“ dient W-DMX als Backup, bei Auswahl „Wireless Kling-Net+DMX Kling-Net+DMX Receive Mode...
  • Page 41 Mode: Art-Net (sACN) 43CH Mode: Art-Net (sACN)+DMX Mode: Klin 192.168.000.150 W-DMX W-DMX Universe: Universe: Main Address: Art-Net Art-Net DMX Address: Main Address: sACN sACN 192.168.000.150 192.168.000.150 Pixel Address: Art-Net+DMX Art-Net+DMX SLAVE-BETRIEB (Slave) DMX Address: Main Address: Ausgehend von der Hauptanzeige gelangen Sie durch Drücken auf den Dreh-Drück-Encoder in das Hauptmenü. Wählen Sie durch Drehen sACN+DMX sACN+DMX des Encoders das Kontrollmenü...
  • Page 42 Scenes Auswahl durch Drehen des Encoders, bestätigen durch Drücken, Wert bzw. Status ändern durch Drehen, bestätigen durch Drücken.  Zurück mit  Run Scene Szene starten  Scene 1 – 8 Record Scene Szene von einem externen Controller aufnehmen  (DMX-, W-DMX, Art-Net, oder sACN-Betriebsart aktivieren, Scene 1 –...
  • Page 43 Edit Scene  0 % -> 100 % Tilt 0 % -> 100 % Dimmer Master dimmer 0 % -> 100 % 0 % -> 100 % Green 0 % -> 100 % Blue 0 % -> 100 % White 0 % ->...
  • Page 44: Systemeinstellungen (Settings)

    SYSTEMEINSTELLUNGEN (Settings) Ausgehend von der Hauptanzeige gelangen Sie durch Drücken auf den Dreh-Drück-Encoder in das Hauptmenü. Wählen Sie durch Drehen des Encoders das Menü für die Systemeinstellungen Settings aus und drücken auf den Encoder. Main Menu Settings Control Display Signal Fail Settings Dimmer Color Calibration...
  • Page 45 Dimmer Auswählen von  Dimmerkurve, Curve  Dimmverhalten und PWM-Fre- Linear Die Lichtintensität steigt linear mit dem DMX- quenz Wert an Exponential Die Lichtintensität lässt sich im unteren DMX-Wertbereich fein und im oberen DMX-Wert- bereich grob einstellen Logarithmic Die Lichtintensität lässt sich im unteren DMX-Wertbereich grob und im oberen DMX-Wertbereich fein einstellen S-Curve...
  • Page 46: Geräteinformationen (Info)

    Lüftersteuerung  Settings Automatic Die Lüfterdrehzahl wird der Temperatur im Gerätekopf automatisch angepasst Normal Reduzierte Maximaldrehzahl der Lüfter, dadurch leicht reduzierte Helligkeit, falls erforderlich Main Menu Silent Gleichbleibend niedrige Lüfterdrehzahl bei reduzierter Helligkeit, falls erfor- Settings derlich Auto Lock Automatische ...
  • Page 47: Servicemenü (Service)

    Temperature Settings Fan Speed Runtime Info RDM UID, MAC, NET SERVICEMENÜ (Service) DMX Values Service Ausgehend von der Hauptanzeige gelangen Sie durch Drücken auf den Dreh-Drück-Encoder in das Hauptmenü. Wählen Sie durch Drehen Error Info des Encoders das Servicemenü Service aus und drücken auf den Encoder. Wählen Sie den gewünschten Untermenüpunkt durch Drehen Quick-Light DMX Tables des Encoders aus und bestätigen durch Drücken auf den Encoder.
  • Page 48 Default Werkseinstellun-  gen wiederher- Recall  stellen / Benut- zereinstellungen Factory Reset  speichern und wiederherstellen Werkseinstellungen wiederherstellen abbrechen Werkseinstellungen wiederherstellen Default 1  Benutzereinstellungen 1 wiederher- stellen abbrechen Benutzereinstellungen 1 wiederher- stellen Default 2  Benutzereinstellungen 2 wiederher- stellen abbrechen Benutzereinstellungen 2 wiederher- stellen...
  • Page 49: Quick-Light

    Test Settings Password Info QUICK-LIGHT Service Um schnell und unkompliziert eine statische Szene einzustellen, nutzen Sie die Funktion Quick-Light. Ausgehend von der Hauptanzeige gelangen Sie durch Drücken auf den Dreh-Drück-Encoder in das Hauptmenü. Wählen Sie durch Drehen des Encoders das Quick Light-Menü Quick-Light Quick-Light aus und drücken abermals auf den Encoder.
  • Page 50: Dmx Technik

    DMX TECHNIK DMX-512 DMX (Digital Multiplex) ist die Bezeichnung für ein universelles Übertragungsprotokoll für die Kommunikation zwischen entsprechenden Geräten und Controllern. Ein DMX-Controller sendet DMX-Daten an das/die angeschlossene(n) DMX-Gerät(e). Die DMX-Datenübertragung erfolgt stets als serieller Datenstrom, der über die an jedem DMX-fähigen Gerät vorhandenen DMX IN- und DMX OUT-Anschlüsse (XLR-Steckverbinder) von einem angeschlossenen Gerät an das nächste weitergeleitet wird, wobei die maximale Anzahl der Geräte 32 nicht überschreiten darf.
  • Page 51: Technische Daten

    TECHNISCHE DATEN Artikelnummer: CLEW3 Produktart: LED Wash Light Typ: Moving Head Farbspektrum LED: RGB+Warmweiß LED Anzahl: LED Typ: 40W 4in1 PWM-Frequenz: 800 Hz; 1200 Hz; 2000 Hz; 3600 Hz; 12 kHz; 25 kHz Abstrahlwinkel: Beam Angle 4,5° - 34° / Field Angle 7° - 55° DMX-Eingang: 5-Pol XLR männlich Netzwerk...
  • Page 52: Herstellererklärungen

    Gehäusekühlung: temperaturgesteuerte Lüfter Abmessungen (B x H x T, ohne Montagebügel): 290mm x 251mm x 350mm Gewicht: Weitere Eigenschaften: 1m Netzkabel mit Neutrik powerCON TRUE1 Stecker und 2 x Omega-Montagebügel im Lieferumfang HERSTELLERERKLÄRUNGEN HERSTELLERGARANTIE & HAFTUNGSBESCHRÄNKUNG Unsere aktuellen Garantiebedingungen und Haftungsbeschränkung finden Sie unter: https://cdn-shop.adamhall.com/media/pdf/ MANUFACTURERS-DECLARATIONS_CAMEO.pdf.
  • Page 53: Francais

    Cet appareil a été développé et fabriqué en appliquant des exigences de qualité très élevées: il garantit des années de fonctionnement sans problème.Veuillez lire attentivement ce Manuel Utilisateur : vous apprendrez rapidement à utiliser votre appareil Cameo Light de façon optimale.
  • Page 54 34. Respectez une distance minimale de 0,5m par rapport à des matériaux inflammables. 35. Si vous désirez alimenter plusieurs projecteurs simultanément, les conducteurs du câble secteur doivent posséder une section minimale de 1,5 mm². Dans l’Union Européenne, les câbles électriques doivent être de type H05VV-F ou équivalent. Adam Hall propose des câbles secteur adaptés.
  • Page 55: Introduction

    Un connecteur TRUE1 est fourni. POWER IN (ENTRÉE D’ALIMENTATION) Prise de sortie Neutrik powerCON TRUE1 pour l’alimentation électrique d’autres projecteurs CAMEO. Assurez-vous que la consommation totale de tous les appareils connectés ne dépasse pas la valeur en ampères (A) indiquée sur l'appareil.
  • Page 56 LED D’ÉTAT NET La LED d’état jaune s’allume = connexion au réseau. La LED d’état verte clignote = présence d’un signal de pilotage. ANTENNE W-DMX™ L’antenne pour le pilotage par W-DMX™ reste sur son support pendant le fonctionnement (= position de fonctionnement). ÉCRAN LCD L’écran LCD rétroéclairé...
  • Page 57: Mode D'emploi

    030°C Dès que le projecteur est correctement raccordé à l’alimentation secteur, un message de bienvenue (« Welcome to Cameo »), la désignation du modèle et la version du logiciel s’affichent successivement à l’écran pendant la phase de démarrage. À l’issue de cette phase, le project- eur est opérationnel et passe au mode précédemment activé.
  • Page 58: W-Dmx

    W-DMX™ Pour coupler un récepteur W-DMX à un émetteur compatible W-DMX, il est nécessaire d’exécuter la commande Reset dans le menu du récepteur sous Connect (sélectionner Reset et valider). Le récepteur est maintenant prêt pour le couplage et attend la demande de couplage d’un émetteur.
  • Page 59 43CH Slave Slave (Scene x) (Scene x) Wireless Activer (sélection de G3 ou G4s) ou désactiver (Disable) le renvoi du  signal DMX via W-DMX, régler la norme W-DMX (G3 / G4s) et établir Send Mode  (Link) ou couper (Unlink) une liaison avec un autre appareil W-DMX. 030°C 030°C 030°C...
  • Page 60 Universe: Universe: Main Address: Settings Art-Net sACN 192.168.000.150 192.168.000.150 Info Art-Net+DMX DMX Address: Main Address: sACN+DMX FONCTIONNEMENT VIA ART-NET Service Kling-Net+DM Pixel Address: À partir de l’affichage principal, appuyer sur l’encodeur rotatif à bouton poussoir pour accéder au menu principal. Tourner l’encodeur pour Slave sélectionner le panneau de commande Control, puis appuyer sur l’encodeur.
  • Page 61 43CH Slave (Scene x) Le signal de pilotage Art-Net User Universe  peut être renvoyé à DMX OUT (alternative à « Cur- Select Universe 000 – 254 (Art-Net to DMX), à W-DMX rent Universe ») 030°C 030°C 030°C 030°C 030°C (Art-Net to W-DMX) ou aux deux Sending Options ...
  • Page 62 Send to DMX Le signal de pilotage sACN peut  être renvoyé à DMX OUT (sACN Disable to DMX), à W-DMX (sACN to W-DMX) ou aux deux (sACN to Current Universe  DMX and W-DMX) dans l’univers (alternative à « User sACN to DMX défini.
  • Page 63 Kling-Net+DMX Kling-Net+DMX Pixel Address: Slave Slave Scenes Scenes Control Control Main Menu Control Control W-DMX W-DMX W-DMX W-DMX Art-Net Art-Net Settings Art-Net Art-Net sACN sACN sACN sACN Info Art-Net+DMX Art-Net+DMX Art-Net+DMX Art-Net+DMX sACN+DMX sACN+DMX sACN+DMX sACN+DMX Service Kling-Net+DMX Kling-Net+DMX Kling-Net+DMX Kling-Net+DMX Slave Slave...
  • Page 64 Control 030°C 030°C 030°C Mode: Art-Net (sACN) 43CH Mode: Art-Net (sACN)+DMX Mode: Klin W-DMX W-DMX FONCTIONNEMENT VIA SACN ET DMX Universe: Universe: Main Address: Le mode de fonctionnement sACN+DMX offre la possibilité de piloter séparément les LED et le mouvement de la tête via sACN et DMX. Il Art-Net Art-Net est alors possible de choisir de piloter les LED par sACN et le mouvement de la tête par DMX, ou inversement.
  • Page 65 W-DMX W-DMX Mode Settings Art-Net Art-Net 43CH sACN Slave sACN Info Art-Net+DMX Art-Net+DMX (Scene x) sACN+DMX sACN+DMX DMX Settings Pilotage DMX via un câble (XLR Only) ou W-DMX (Wireless Only). En cas de  Service sélection de « XLR First », W-DMX sert de solution de secours ; en cas de Kling-Net+DMX Kling-Net+DMX Receive Mode...
  • Page 66 Mode: Art-Net (sACN) 43CH Mode: Art-Net (sACN)+DMX Mode: Klin 192.168.000.150 W-DMX W-DMX Universe: Universe: Main Address: Art-Net Art-Net DMX Address: Main Address: sACN sACN 192.168.000.150 192.168.000.150 Pixel Address: MODE SLAVE (Slave) Art-Net+DMX Art-Net+DMX DMX Address: Main Address: À partir de l’affichage principal, appuyer sur l’encodeur rotatif à bouton poussoir pour accéder au menu principal. Tourner l’encodeur pour sACN+DMX sACN+DMX sélectionner le panneau de commande Control, puis appuyer sur l’encodeur.
  • Page 67 Scenes Tourner l’encodeur pour sélectionner, appuyer pour valider, tourner pour modifier la valeur ou l’état, appuyer pour valider. Revenir en  arrière avec  Run Scene Démarrer la scène  Scene 1 – 8 Record Scene Enregistrer la scène grâce à un contrôleur externe ...
  • Page 68 Edit Scene  0 % -> 100 % Tilt 0 % -> 100 % Dimmer Master dimmer 0 % -> 100 % 0 % -> 100 % Green 0 % -> 100 % Blue 0 % -> 100 % White 0 % ->...
  • Page 69: Paramètres Du Système (Settings)

    PARAMÈTRES DU SYSTÈME (Settings) À partir de l’affichage principal, appuyer sur l’encodeur rotatif à bouton poussoir pour accéder au menu principal. Tourner l’encodeur pour sélectionner le menu des paramètres du système Settings, puis appuyer sur l’encodeur. Main Menu Settings Control Display Signal Fail Settings...
  • Page 70 Dimmer Sélection de  la courbe de Curve  dimmer, du comportement Linear L’intensité lumineuse augmente de façon linéaire de variateur et de avec la valeur DMX la fréquence du Exponential L’intensité lumineuse peut être réglée de façon signal PWM précise dans la plage de valeurs DMX inférieure et de façon approximative dans la plage de valeurs DMX supérieure...
  • Page 71 Pan/Tilt Réglages de la  Motors tête de l’appareil Pan/Tilt Speed 000 – 255 ans Pan Reverse  Normal Pas d’inversion de la direction du mouvement de l’axe Pan Reversed Inversion de la direction du mouvement de l’axe Tilt Reverse ...
  • Page 72: Informations Sur L'appareil (Info)

    Signal Fail Settings Dimmer Color Calibration Info Pan/Tilt Motors INFORMATIONS SUR L’APPAREIL (Info) Fan Settings Service Auto Lock À partir de l’affichage principal, appuyer sur l’encodeur rotatif à bouton poussoir pour accéder au menu principal. Tourner l’encodeur pour Quick-Light Default sélectionner le menu des informations sur l’appareil Info, puis appuyer sur l’encodeur.
  • Page 73: Menu De Service (Service)

    Temperature Settings Fan Speed Runtime Info RDM UID, MAC, NET MENU DE SERVICE (Service) DMX Values Service À partir de l’affichage principal, appuyer sur l’encodeur rotatif à bouton poussoir pour accéder au menu principal. Tourner l’encodeur pour Error Info sélectionner le menu de service Service, puis appuyer sur l’encodeur. Sélectionner l’option de sous-menu souhaitée en tournant l’encodeur, Quick-Light DMX Tables puis appuyer sur l’encodeur pour valider.
  • Page 74 Default Restaurer les  réglages d’usine Recall  / enregistrer et restaurer Factory Reset  les réglages utilisateur Annuler la restauration des réglages d’usine Restaurer les réglages d’usine Default 1  Annuler la restauration des réglages utilisateur 1 Restaurer les réglages utilisateur 1 Default 2 ...
  • Page 75: Quick-Light

    Test Settings Password Info QUICK-LIGHT Service Pour régler une scène statique rapidement et facilement, utiliser la fonction Quick-Light. À partir de l’affichage principal, appuyer sur l’en- codeur rotatif à bouton poussoir pour accéder au menu principal. Tourner l’encodeur pour sélectionner le menu Quick Light Quick-Light, Quick-Light puis appuyer une nouvelle fois sur l’encodeur.
  • Page 76: Technique Dmx

    TECHNIQUE DMX DMX-512 Le terme DMX (Digital Multiplex) désigne un protocole de transport universel permettant la communication entre des appareils et des contrôleurs à ce format. Un contrôleur DMX envoie des données DMX aux appareils DMX qui lui sont connectés. Les données DMX sont transportées sous forme d'un flux série, renvoyé...
  • Page 77: Caractéristiques Techniques

    CARACTÉRISTIQUES TECHNIQUES Référence : CLEW3 Catégorie de produit : Projecteur wash à LED Type : Lyre Spectre de couleurs des LED : RGB+blanc chaud Nombre de LED : Type de LED : 40W 4-en-1 Fréquence du signal PWM : 800 Hz ; 1200 Hz ; 2000 Hz ; 3600 Hz ; 12 kHz ; 25 kHz Angle de dispersion : Beam Angle 4,5°...
  • Page 78: Declarations

    Refroidissement du boîtier : Ventilateurs thermorégulés Dimensions (L x H x P, sans étrier de 290mm x 251mm x 350mm montage) : Poids : Autres caractéristiques : Cordon d’alimentation de 1 m avec connecteur Neutrik powerCON TRUE1 et 2 omégas de fixation fournis DECLARATIONS GARANTIE FABRICANT & LIMITATION DE RESPONSABILITÉ Nos conditions actuelles de garantie et de limitation de responsabilité...
  • Page 79: Español

    Este equipo está diseñado y fabricado con los estándares de calidad más exigentes, para garantizar un correcto funcionamiento durante muchos años.Lea atentamente este manual de usuario para poder aprovechar rápidamente toda la funcionalidad de su nuevo producto de Cameo Light. Más información sobre Cameo Light en la web WWW.CAMEOLIGHT.COM. MEDIDAS DE SEGURIDAD 1.
  • Page 80 33. La acumulación de polvo y otras partículas en el interior del equipo puede causar daños. Dependiendo de las condiciones ambientales (polvo, nicotina, niebla, etc.), deberá realizarse periódicamente el mantenimiento o la limpieza del equipo por personal especializado, para evitar cualquier sobrecalentamiento o fallo de funcionamiento (mantenimiento y limpieza no cubiertos por la garantía). 34.
  • Page 81: Introducción

    POWER IN Toma de salida de alimentación Neutrik powerCON TRUE1 para la alimentación eléctrica de otros focos CAMEO. Procure que toda la entrada de corriente de todos los equipos conectados no sobrepase el valor indicado en amperios (A) en el equipo.
  • Page 82 LED DE ESTADO DE LA RED LED de estado amarillo iluminado = conexión a la red. LED de estado verde parpadeando = señal de control presente. ANTENA W-DMX™ La antena para el control por W-DMX™ permanece en el soporte durante el funcionamiento (= posición de funcionamiento). PANTALLA LCD La pantalla LCD retroiluminada muestra el modo operativo activado actualmente (pantalla principal), las opciones del menú...
  • Page 83: Manejo

    En cuanto el foco esté correctamente conectado a la red eléctrica, durante el proceso de arranque se mostrarán de forma consecutiva en pantalla el mensaje «Welcome to Cameo» (Bienvenidos a Cameo), así como la denominación de modelo y la versión del software. Tras este procedimiento, el foco estará...
  • Page 84: W-Dmx

    W-DMX™ Para emparejar un receptor W-DMX a un transmisor W-DMX compatible, es necesario ejecutar el comando Reset en la opción Connect del menú del receptor (seleccione "Reset" y confirme). Ahora el receptor está listo para el emparejamiento y a la espera de la solicitud de emparejamiento de un transmisor.
  • Page 85 43CH Slave Slave (Scene x) (Scene x) Wireless Activar la transmisión de la señal DMX a través de W-DMX (seleccionar  G3 o G4s) o desactivarla (Disable), ajustar el estándar W-DMX (G3/ Send Mode  G4s) y establecer (Link) o interrumpir (Unlink) una conexión con otro equipo W-DMX.
  • Page 86 Universe: Universe: Main Address: Settings Art-Net sACN 192.168.000.150 192.168.000.150 Info Art-Net+DMX DMX Address: Main Address: sACN+DMX FUNCIONAMIENTO MEDIANTE ART-NET Service Kling-Net+DM Pixel Address: Partiendo de la pantalla principal, si pulsa el mando giratorio y pulsable accederá al menú principal. Gire el mando giratorio para seleccionar el menú...
  • Page 87 43CH Slave (Scene x) La señal de control de Art-Net User Universe  se puede transmitir en el (alternativa a "Cur- Select Universe 000 - 254 universo deseado entre 000 y rent Universe") 030°C 030°C 030°C 030°C 030°C 254 (Select Universe) a DMX Sending Options ...
  • Page 88 Send to DMX La señal de control de sACN se  puede transmitir en el universo Disable definido a DMX OUT (sACN to DMX), a W-DMX (sACN to Current Universe  W-DMX) o a ambos (sACN to (alternativa a "User sACN to DMX DMX and W-DMX).
  • Page 89 Kling-Net+DMX Kling-Net+DMX Pixel Address: Slave Slave Scenes Scenes Control Control Main Menu Control Control W-DMX W-DMX W-DMX W-DMX Settings Art-Net Art-Net Art-Net Art-Net sACN sACN sACN sACN Info Art-Net+DMX Art-Net+DMX Art-Net+DMX Art-Net+DMX sACN+DMX sACN+DMX sACN+DMX sACN+DMX Service Kling-Net+DMX Kling-Net+DMX Kling-Net+DMX Kling-Net+DMX Slave Slave...
  • Page 90 Control 030°C 030°C 030°C Mode: Art-Net (sACN) 43CH Mode: Art-Net (sACN)+DMX Mode: Klin W-DMX W-DMX FUNCIONAMIENTO MEDIANTE SACN Y DMX Universe: Universe: Main Address: El modo operativo sACN+DMX ofrece la posibilidad de controlar los LED y el movimiento de la cabeza por separado a través de sACN y Art-Net Art-Net DMX.
  • Page 91 W-DMX W-DMX Mode Settings Art-Net Art-Net 43CH sACN Slave sACN Info Art-Net+DMX Art-Net+DMX (Scene x) sACN+DMX sACN+DMX DMX Settings Control DMX mediante cable XLR (XLR Only) o W-DMX (Wireless Only). Si se  Service selecciona "XLR First", se utiliza W-DMX como respaldo; si se selecciona Kling-Net+DMX Kling-Net+DMX Receive Mode...
  • Page 92 Mode: Art-Net (sACN) 43CH Mode: Art-Net (sACN)+DMX Mode: Klin 192.168.000.150 W-DMX W-DMX Universe: Universe: Main Address: Art-Net Art-Net DMX Address: Main Address: sACN sACN 192.168.000.150 192.168.000.150 MODO ESCLAVO (Slave) Pixel Address: Art-Net+DMX Art-Net+DMX Partiendo de la pantalla principal, si pulsa el mando giratorio y pulsable accederá al menú principal. Gire el mando giratorio para seleccionar DMX Address: Main Address: sACN+DMX...
  • Page 93 Scenes Girar el mando giratorio para seleccionar y pulsarlo para confirmar la selección. Girar este mando para cambiar valores o estados y  pulsarlo para confirmar los cambios. Volver con  Run Scene Iniciar escena  Scene 1 - 8 Record Scene Registrar escena desde un controlador externo ...
  • Page 94 Edit Scene  0% -> 100% Tilt 0% -> 100% Dimmer Master dimmer 0% -> 100% 0% -> 100% Green 0% -> 100% Blue 0% -> 100% White 0% -> 100% Zoom Narrow -> wide Pixel Pattern Pattern 1 Pattern 2 Pattern 3 Pattern 4 Pattern 5...
  • Page 95: Ajustes Del Sistema (Settings)

    AJUSTES DEL SISTEMA (Settings) Partiendo de la pantalla principal, si pulsa el mando giratorio y pulsable accederá al menú principal. Gire el mando giratorio para seleccionar el menú de ajustes del sistema Settings y pulse dicho mando para confirmar su selección. Main Menu Settings Control...
  • Page 96 Dimmer Selección de  la curva de Curve  atenuación, la respuesta de Linear La intensidad luminosa aumentará de forma atenuación y la lineal con el valor DMX frecuencia de Exponential La intensidad luminosa permite un ajuste fino modulación por en el rango inferior de valores DMX y un ajuste ancho de pulsos aproximado en el rango superior de valores DMX...
  • Page 97: Información Del Equipo (Info)

    Fan Set- Control de los  tings ventiladores Automatic La velocidad de los ventiladores se adapta automáticamente a la temperatura de la cabeza del equipo Normal Velocidad máxima reducida de los ventiladores, lo que reduce ligeramente el brillo, en caso necesario Silent Se mantiene una velocidad baja de los ventiladores cuando el brillo es reduci- do, en caso necesario...
  • Page 98: Menú De Servicio (Service)

    Control Firmware Temperature Settings Fan Speed Runtime Info MENÚ DE SERVICIO (Service) RDM UID, MAC, NET DMX Values Service Partiendo de la pantalla principal, si pulsa el mando giratorio y pulsable accederá al menú principal. Gire el mando giratorio para seleccionar Error Info el menú...
  • Page 99 Default Restablecer  ajustes de fábrica Recall  / Guardar y resta- blecer ajustes de Factory Reset  usuario Cancelar el restablecimiento de los ajustes de fábrica Restablecer los ajustes de fábrica Default 1  Cancelar el restablecimiento de los ajustes de usuario 1 Restablecer los ajustes de usuario 1 Default 2...
  • Page 100: Quick-Light

    Test Settings Password Info QUICK-LIGHT Service Utilice la función Quick-Light para ajustar una escena estática de forma fácil y rápida. Partiendo de la pantalla principal, si pulsa el mando giratorio y pulsable accederá al menú principal. Gire el mando giratorio para seleccionar el menú Quick-Light y confirme su selección pul- Quick-Light sando dicho mando.
  • Page 101: Tecnología Dmx

    TECNOLOGÍA DMX DMX512 DMX (Digital Multiplex) es el nombre de un protocolo universal utilizado como medio de comuni- cación entre dispositivos y controladores. El controlador DMX envía datos DMX a los equipos DMX conectados. Los datos DMX se envían como datos serie que se transmiten de equipo a equipo a través de los conectores XLR «DMX IN»...
  • Page 102: Datos Técnicos

    DATOS TÉCNICOS Número de artículo: CLEW3 Clase de producto: Washer LED Tipo: Cabeza móvil Espectro cromático del LED: RGB + blanco cálido Cantidad de LED: Tipo de LED: 40 W 4 en 1 Frecuencia PWM: 800 Hz / 1200 Hz / 2000 Hz / 3600 Hz / 12 kHz / 25 kHz Ángulo de dispersión: 4,5°...
  • Page 103: Declaración Del Fabricante

    Refrigeración de la carcasa: Ventiladores controlados por temperatura Dimensiones (anchura x altura x profundidad, 290 mm x 251 mm x 350 mm sin soporte de montaje): Peso: 8 kg Otras características: Cable de alimentación de 1 m con conector Neutrik powerCON TRUE1 y 2 soportes de montaje Omega incluidos en el volumen de suministro.
  • Page 104: Polski

    To urządzenie zostało zaprojektowane i wyprodukowane przy zastosowaniu najwyższych kryteriów jakościowych w celu zapewnienia wieloletniej bezawaryjnej eksploatacji. Proszę starannie przeczytać niniejszą instrukcję obsługi, aby móc jak najszybciej zacząć użytkować ten produkt marki Cameo Light. Więcej informacji na temat Cameo Light znajdą Państwo na naszej stronie internetowej pod adresem WWW.CAMEOLIGHT.COM.
  • Page 105 32. Instalacja urządzenia powinna odbywać się, gdy urządzenie nie jest podłączone do źródła zasilania (należy wyjąć wtyczkę z gniazda). 33. Kurz i inne osady wewnątrz urządzenia mogą je uszkodzić. W zależności od warunków otoczenia (kurz, nikotyna, opary itp.) urządzenie powinno być konserwowane lub czyszczone przez wykwalifikowanego specjalistę (usługa nieobjęta gwarancją), aby zapobiec przegrza- niu i nieprawidłowemu działaniu.
  • Page 106: Wprowadzenie

    TRUE 1. POWER IN Sieciowe gniazdo wyjściowe Neutrik powerCON TRUE1 do zasilania innych reflektorów CAMEO. Należy się upewnić, że całkowity pobór prądu wszystkich podłączonych urządzeń nie może przekroczyć wartości w amperach (A) podanej na urządzeniu. FUSE Oprawa na czułe bezpieczniki 5 x 20 mm.
  • Page 107 DIODY STANU NET Żółta dioda stanu świeci = jest połączenie z siecią. Zielona dioda stanu miga = jest sygnał sterujący. ANTENA W-DMX™ Antena do sterowania za pośrednictwem W-DMX™ pozostaje w uchwycie (= pozycja robocza) podczas pracy. WYŚWIETLACZ LCD Podświetlany wyświetlacz LCD pokazuje bieżący tryb pracy (widok główny), pozycje z menu wyboru oraz wartość liczbową lub tryb pracy w poszczególnych pozycjach menu.
  • Page 108: Obsługa

    030°C Po prawidłowym podłączeniu reflektora do sieci zasilania podczas procesu uruchamiania jest wyświetlana następująca sekwencja komu- nikatów: „Welcome to Cameo”, nazwa modelu oraz wersja oprogramowania. Następnie reflektor jest gotowy do pracy i przełącza się na ostatnio wybrany tryb. WIDOK GŁÓWNY WYŚWIETLACZA 43CH Na głównym widoku wyświetlacza są...
  • Page 109: W-Dmx

    W-DMX™ Aby sparować odbiornik W-DMX z nadajnikiem zgodnym ze standardem W-DMX, należy w menu odbiornika w polu Connect wykonać polecenie Reset (wybrać opcję resetowania i potwierdzić). Odbiornik jest teraz w stanie gotowości do sparowania i czeka na żądanie z transmitera. Rozpocząć parowanie, wybierając łącze w menu nadajnika, i potwierdzić. Parowanie nastąpi teraz automatycznie. W ten sam sposób można sparować...
  • Page 110 43CH Slave Slave (Scene x) (Scene x) Wireless Aktywowanie (wybór G3 lub G4s) lub dezaktywowanie (Disable) prze-  kierowania sygnału DMX przez W-DMX, ustawianie standardu W-DMX Send Mode  (G3/G4s) i nawiązywanie połączenia (Link) z innym urządzeniem W-DMX lub przerywanie go (Unlink). 030°C 030°C 030°C...
  • Page 111 Settings Art-Net sACN 192.168.000.150 192.168.000.150 Info Art-Net+DMX DMX Address: Main Address: sACN+DMX Service TRYB PRACY PRZEZ ART-NET Kling-Net+DM Pixel Address: Jeśli wyświetlany jest ekran główny i naciśnięte zostanie pokrętło enkodera, nastąpi przejście do menu głównego. Wybrać menu sterowania, Slave obracając pokrętło enkodera Control, i nacisnąć enkoder. Przez obrócenie enkodera wybrać pozycję menu Art-Net i potwierdzić, naciskając Quick-Light Scenes enkoder.
  • Page 112 (Scene x) Sygnał sterujący Art-Net User Universe  może być przekazywany w (jako alternatywa Select Universe 000 – 254 zdefiniowanym środowisku od „Current Universe”) 030°C 030°C 030°C 030°C 030°C 000 do 254 (Select Universe) Sending Options  do wyjścia DMX OUT (Art-Net Mode: Art-Net (sACN) 43CH...
  • Page 113 Send to DMX Sygnał sterujący sACN może być  przekazywany w zdefiniowanym Disable środowisku do wyjścia DMX OUT (sACN to DMX), do złącza Current Universe  W-DMX (sACN to W-DMX) lub do (jako alternatywa sACN to DMX obu (sACN to DMX and W-DMX). „User Universe”) Funkcję...
  • Page 114 Kling-Net+DMX Kling-Net+DMX Pixel Address: Slave Slave Scenes Scenes Control Control Main Menu Control Control W-DMX W-DMX W-DMX W-DMX Settings Art-Net Art-Net Art-Net Art-Net sACN sACN sACN sACN Info Art-Net+DMX Art-Net+DMX Art-Net+DMX Art-Net+DMX sACN+DMX sACN+DMX sACN+DMX sACN+DMX Service Kling-Net+DMX Kling-Net+DMX Kling-Net+DMX Kling-Net+DMX Slave Slave...
  • Page 115 Control 030°C 030°C 030°C Mode: Art-Net (sACN) 43CH Mode: Art-Net (sACN)+DMX Mode: Klin W-DMX W-DMX Universe: Universe: Main Address: TRYB PRACY PRZEZ SACN I DMX Art-Net Art-Net Tryb sACN+DMX oferuje możliwość sterowania diodami LED i ruchem głowicy oddzielnie przez sACN i DMX. Można wybrać, czy diody LED sACN sACN 192.168.000.150...
  • Page 116 W-DMX W-DMX Mode Settings Art-Net Art-Net 43CH sACN Slave sACN Info Art-Net+DMX Art-Net+DMX (Scene x) sACN+DMX sACN+DMX DMX Settings Sterowanie DMX przez kabel XLR (XLR Only) lub W-DMX (Wireless Only).  Service Jeśli wybrano opcję „XLR First”, W-DMX służy jako rezerwa; jeśli wybrano Kling-Net+DMX Kling-Net+DMX Receive Mode...
  • Page 117 Mode: Art-Net (sACN) 43CH Mode: Art-Net (sACN)+DMX Mode: Klin 192.168.000.150 W-DMX W-DMX Universe: Universe: Main Address: Art-Net Art-Net DMX Address: Main Address: sACN sACN 192.168.000.150 192.168.000.150 Pixel Address: Art-Net+DMX Art-Net+DMX TRYB SLAVE (Slave) DMX Address: Main Address: Jeśli wyświetlany jest ekran główny i naciśnięte zostanie pokrętło enkodera, nastąpi przejście do menu głównego. Wybrać menu sterowania, sACN+DMX sACN+DMX obracając pokrętło enkodera Control, i nacisnąć...
  • Page 118 Scenes Wybrać opcję przez obrócenie enkodera, potwierdzić przez naciśnięcie, zmienić wartość lub stan przez obrócenie oraz potwierdzić  przez naciśnięcie. Powrót za pomocą  Run Scene Uruchomienie sceny  Scene 1–8 Record Scene Zarejestruj scenę z zewnętrznego kontrolera  (aktywuj tryb DMX, W-DMX, Art-Net lub sACN, dokonaj Scene 1–8 żądanego ustawienia w odpowiednim kontrolerze, wybierz i potwierdź...
  • Page 119 Edit Scene  0% -> 100% Tilt 0% -> 100% Dimmer Master dimmer 0% -> 100% 0% -> 100% Green 0% -> 100% Blue 0% -> 100% White 0% -> 100% Zoom Narrow -> wide Pixel Pattern Pattern 1 Pattern 2 Pattern 3 Pattern 4 Pattern 5...
  • Page 120: Ustawienia Systemu (Settings)

    USTAWIENIA SYSTEMU (Settings) Jeśli wyświetlany jest ekran główny i naciśnięte zostanie pokrętło enkodera, nastąpi przejście do menu głównego. Obrócić pokrętło enkode- ra, aby wybrać menu ustawień systemowych Settings, a następnie nacisnąć pokrętło. Main Menu Settings Control Display Signal Fail Settings Dimmer Color Calibration Info Pan/Tilt Motors...
  • Page 121 Dimmer Wybór krzywej  ściemniania, Curve  symulacji ściemniania i Linear natężenie światła wzrasta liniowo wraz ze częstotliwości wzrostem wartości DMX modulacji PWM Exponential natężenie światła można ustawić precyzyjnie w dolnym zakresie wartości DMX oraz ogólnie w górnym zakresie wartości DMX Logarithmic natężenie światła można ustawić...
  • Page 122: Informacje O Urządzeniu (Info)

    Fan Set- Sterowanie  tings wentylatorem Automatic Prędkość obrotowa wentylatora jest automatycznie dostosowywana do tem- peratury w głowicy urządzenia Normal Zredukowana maksymalna prędkość obrotowa wentylatora, co w razie potrze- by nieznacznie zmniejsza jasność Silent Stała mała prędkość obrotowa wentylatora przy obniżonej jasności, w razie potrzeby Main Menu Settings...
  • Page 123: Menu Serwisowe (Service)

    Temperature Settings Fan Speed Runtime Info RDM UID, MAC, NET MENU SERWISOWE (Service) DMX Values Service Error Info Jeśli wyświetlany jest ekran główny i naciśnięte zostanie pokrętło enkodera, nastąpi przejście do menu głównego. Wybrać menu serwisowe, obracając pokrętło enkodera Service, i nacisnąć enkoder. Wybrać żądaną pozycję menu podrzędnego, obracając pokrętło enkodera, i Quick-Light DMX Tables potwierdzić, naciskając je.
  • Page 124 Default Przywracanie  ustawień Recall  fabrycznych / Zapisywanie i Factory Reset  przywracanie ustawień użyt- Anulowanie przywracania ustawień kownika fabrycznych Przywracanie ustawień fabrycznych Default 1  Anulowanie przywracania ustawień użytkownika 1 Przywracanie ustawień użytkownika 1 Default 2  Anulowanie przywracania ustawień użytkownika 2 Przywracanie ustawień...
  • Page 125: Quick-Light

    Test Settings Password Info QUICK-LIGHT Service Aby szybko i łatwo skonfigurować scenę statyczną, można korzystać z funkcji Quick-Light. Jeśli wyświetlany jest ekran główny i naciśnięte zostanie pokrętło enkodera, nastąpi przejście do menu głównego. Wybrać menu Quick Light, obracając pokrętło enkodera, i ponownie Quick-Light nacisnąć...
  • Page 126: Technika Dmx

    TECHNIKA DMX DMX-512 DMX (Digital Multiplex) to nazwa uniwersalnego protokołu transmisji do komunikacji między odpowiednimi urządzeniami a kontrolerami. Kontroler DMX wysyła dane DMX do podłączonych urządzeń DMX. Transmisja danych DMX następuje zawsze w formie szeregowego strumienia danych, który jest przekazywany z jednego urządzenia do następnego przez znajdujące się w każdym urządzeniu obsługującym standard DMX złącza „DMX IN”...
  • Page 127: Dane Techniczne

    DANE TECHNICZNE Numer artykułu: CLEW3 Rodzaj produktu: Naświetlacz LED Wash Light Typ: Moving Head Widmo kolorów LED: RGB+ciepła biel Liczba diod LED: Typ diod LED: 40W 4w1 Częstotliwość modulacji PWM: 800 Hz; 1200 Hz; 2000 Hz; 3600 Hz; 12 kHz; 25 kHz Kąt rozwarcia wiązki świetlnej: Beam Angle 4,5°–34°...
  • Page 128: Deklaracje Producenta

    Chłodzenie obudowy: wentylatory sterowane temperaturą Wymiary (szer. x wys. x gł., bez uchwytu 290 mm x 251 mm x 350 mm montażowego): Masa: 8 kg Pozostałe cechy: W zestawie kabel zasilania o dł. 1 m z wtyczką Neutrik powerCON TRUE1 i 2 uchwyty montażowe Omega DEKLARACJE PRODUCENTA GWARANCJA PRODUCENTA I OGRANICZENIE ODPOWIEDZIALNOŚCI...
  • Page 129: Italiano

    Questo dispositivo è stato sviluppato e prodotto in conformità con elevati standard qualitativi che ne garantiscono il regolare funzionamento per molti anni. Leggete attentamente questo manuale d‘uso per utilizzare al meglio il vostro nuovo prodotto Cameo Light. Per maggiori informazioni su Cameo Light consultare la nostra pagina Web WWW.CAMEOLIGHT.COM.
  • Page 130 34. La distanza dai materiali infiammabili deve essere di almeno 0,5 m. 35. I cavi di rete utilizzati per l’alimentazione elettrica di più dispositivi devono avere una sezione di almeno 1,5 mm². I cavi impiegati nell’Unione Europea devono essere di tipo H05VV-F o simile. Adam Hall offre cavi idonei. Tali cavi consentono di collegare più dispositivi dalla presa di uscita POWER OUT di un apparecchio alla presa POWER IN di un altro dispositivo.
  • Page 131: Introduzione

    TRUE1 in dotazione. POWER IN Presa di uscita Neutrik powerCON TRUE1 per l’alimentazione elettrica di altri proiettori CAMEO. Accertarsi che la potenza assorbita complessiva di tutti gli apparecchi collegati non superi il valore indicato in ampere (A). FUSE Portafusibili per microfusibili (5 x 20 mm). NOTA IMPORTANTE: sostituire il fusibile solo con un altro dello stesso tipo e con gli stessi valori.
  • Page 132 STATUS-LEDS NET LED di stato giallo accesso = collegamento di rete. LED di stato verde lampeggiante = presenza del segnale di controllo. ANTENNA W-DMX™ L'antenna per il controllo tramite W-DMX™ resta nel supporto durante il funzionamento (= posizione di funzionamento). SCHERMO A CRISTALLI LIQUIDI Il display LCD retroilluminato mostra la modalità...
  • Page 133: Utilizzo

    Non appena il proiettore è correttamente allacciato alla rete elettrica, durante il processo di avvio sul display appaiono in successione il messaggio "Welcome to Cameo", la denominazione del modello e la versione del software. Dopo questo processo il proiettore sarà pronto per l’uso e si avvierà...
  • Page 134: W-Dmx

    W-DMX™ Per accoppiare un ricevitore W-DMX (ricevitore) con un trasmettitore W-DMX compatibile (trasmettitore) richiamare il comando Reset (selezionare "Reset" e confermare) dal menu del ricevitore, alla voce "Connect". Il ricevitore è ora pronto per essere accoppiato e aspetta la relativa richiesta di un trasmettitore. Avviare l'accoppiamento selezionando e confermando Link dal menu del trasmettitore. L'accoppiamen- to verrà...
  • Page 135 43CH Slave Slave (Scene x) (Scene x) Wireless Attivazione (selezionare G3 o G4s) oppure disattivazione (Disable)  dell'inoltro del segnale DMX tramite W-DMX, impostazione dello stan- Send Mode  dard W-DMX (G3/G4s) e creazione o interruzione di un collegamento con un altro dispositivo W-DMX. 030°C 030°C 030°C...
  • Page 136 Universe: Universe: Main Address: Settings Art-Net sACN 192.168.000.150 192.168.000.150 Info Art-Net+DMX DMX Address: Main Address: sACN+DMX FUNZIONAMENTO TRAMITE ART-NET Service Kling-Net+DM Pixel Address: Premere il codificatore rotativo/a pressione per accedere al menu principale dalla schermata principale. Selezionare il menu di controllo Slave Control ruotando e successivamente premendo il codificatore.
  • Page 137 43CH Slave (Scene x) In un universo a piacere da User Universe  000 a 254 (Select Universe), (in alternativa a Select Universe 000 – 254 il segnale di controllo Art-Net "Current Universe") 030°C 030°C 030°C 030°C 030°C può essere inoltrato a DMX Sending Options ...
  • Page 138 Send to DMX Nell'universo definito, il segnale  di controllo sACN può essere Disable inoltrato a DMX OUT (sACN to DMX), a W-DMX (sACN to Current Universe  W-DMX) o a entrambi (sACN to (in alternativa a sACN to DMX DMX and W-DMX).
  • Page 139 Kling-Net+DMX Kling-Net+DMX Pixel Address: Slave Slave Scenes Scenes Control Control Main Menu Control Control W-DMX W-DMX W-DMX W-DMX Art-Net Art-Net Settings Art-Net Art-Net sACN sACN sACN sACN Info Art-Net+DMX Art-Net+DMX Art-Net+DMX Art-Net+DMX sACN+DMX sACN+DMX sACN+DMX sACN+DMX Service Kling-Net+DMX Kling-Net+DMX Kling-Net+DMX Kling-Net+DMX Slave Slave...
  • Page 140 Control 030°C 030°C 030°C Mode: Art-Net (sACN) 43CH Mode: Art-Net (sACN)+DMX Mode: Klin W-DMX W-DMX FUNZIONAMENTO TRAMITE SACN E DMX Universe: Universe: Main Address: La modalità di funzionamento sACN+DMX consente di controllare i LED e il movimento della testa separatamente, tramite sACN e DMX. Art-Net Art-Net È...
  • Page 141 W-DMX W-DMX Mode Settings Art-Net Art-Net 43CH sACN Slave sACN Info Art-Net+DMX Art-Net+DMX (Scene x) sACN+DMX sACN+DMX DMX Settings Comando DMX tramite cavo XLR (XLR Only) o tramite W-DMX (Wireless  Service Only). Selezionando "XLR First", W-DMX funge da backup, selezionando Kling-Net+DMX Kling-Net+DMX Receive Mode...
  • Page 142 Mode: Art-Net (sACN) 43CH Mode: Art-Net (sACN)+DMX Mode: Klin 192.168.000.150 W-DMX W-DMX Universe: Universe: Main Address: Art-Net Art-Net DMX Address: Main Address: sACN sACN 192.168.000.150 192.168.000.150 Pixel Address: Art-Net+DMX Art-Net+DMX MODALITÀ DI FUNZIONAMENTO SLAVE (Slave) DMX Address: Main Address: Premere il codificatore rotativo/a pressione per accedere al menu principale dalla schermata principale. Selezionare il menu di controllo sACN+DMX sACN+DMX Control ruotando e successivamente premendo il codificatore.
  • Page 143 Scenes Selezionare ruotando il codificatore, confermare premendo, modificare il valore o lo stato ruotando e confermare premendo. Tornare  indietro con  Run Scene Avvia scena  Scene 1 – 8 Record Scene Registrare una scena da un controller esterno ...
  • Page 144 Edit Scene  0 % -> 100 % Tilt 0 % -> 100 % Dimmer Master dimmer 0 % -> 100 % 0 % -> 100 % Green 0 % -> 100 % Blue 0 % -> 100 % White 0 % ->...
  • Page 145: Impostazioni Di Sistema (Settings)

    IMPOSTAZIONI DI SISTEMA (Settings) Premere il codificatore rotativo/a pressione per accedere al menu principale dalla schermata principale. Ruotando il codificatore selezionare il menu delle impostazioni di sistema Settings, quindi premere il codificatore. Main Menu Settings Control Display Signal Fail Settings Dimmer Color Calibration Info...
  • Page 146 Dimmer Selezione delle  curve dimmer, Curve  del comporta- mento dimmer e Linear L'intensità della luce cresce in maniera lineare della frequenza con il valore DMX Exponential L'intensità della luce può essere impostata in maniera più precisa nell'intervallo di valori DMX inferiore e grossolanamente in quello superiore Logarithmic L'intensità...
  • Page 147: Informazioni Sul Dispositivo (Info)

    Fan Set- Controllo ventola  tings Automatic La velocità della ventola viene regolata automaticamente in base alla tempera- tura della testa del dispositivo Normal Velocità massima della ventola ridotta, luminosità lievemente ridotta, se necessario Silent Velocità della ventola sempre bassa con luminosità ridotta, ove necessario Auto Lock Blocco automa- Main Menu...
  • Page 148: Menu Assistenza (Service)

    Temperature Settings Fan Speed Runtime Info RDM UID, MAC, NET MENU ASSISTENZA (Service) DMX Values Service Error Info Premere il codificatore rotativo/a pressione per accedere al menu principale dalla schermata principale. Selezionare il menu di assistenza Quick-Light DMX Tables Service ruotando il codificatore, quindi premere il codificatore. Selezionare la voce di menu desiderata ruotando il codificatore, quindi premere il codificatore.
  • Page 149 Default Ripristinare le  impostazioni di Recall  fabbrica / Salvare le impostazioni Factory Reset  utente e ripris- tinarle Interrompere il ripristino delle impostazioni di fabbrica Ripristinare le impostazioni di fabbrica Default 1  Interrompere il ripristino delle impostazioni utente 1 Ripristinare le impostazioni utente 1 Default 2 ...
  • Page 150: Quick-Light

    Test Settings Password Info QUICK-LIGHT Service Per impostare rapidamente e senza complicazioni una scena statica, utilizzare la funzione Quick-Light. Premere il codificatore rotativo/a pressione per accedere al menu principale dalla schermata principale. Ruotando il codificatore, selezionare il menu Quick Light Quick- Quick-Light Light quindi premere il codificatore.
  • Page 151: Tecnologia Dmx

    TECNOLOGIA DMX DMX512 DMX (Digital Multiplex) è la sigla di un protocollo di trasmissione universale per la comunicazione tra dispositivi e controller. Un controller DMX invia dati DMX ai dispositivi DMX collegati. I dati DMX vengono sempre trasmessi come flusso di dati seriale, che viene inoltrato da un dispositivo collegato al successivo attraverso le connessioni (connettori XLR) DMX IN e DMX OUT presenti per ogni dispositivo DMX compatibile, per un massimo di 32 dispositivi.
  • Page 152: Dati Tecnici

    DATI TECNICI Codice articolo: CLEW3 Tipologia di prodotto: Wash Light a LED Tipo: Testa mobile Spettro cromatico LED: RGB+bianco caldo Numero di LED: Tipo di LED: 40 W 4 in 1 Frequenza PWM: 800 Hz; 1200 Hz; 2000 Hz; 3600 Hz; 12 kHz; 25 kHz Angolo di emissione: Beam Angle 4,5°...
  • Page 153: Dichiarazioni Del Produttore

    Raffreddamento alloggiamento: Ventole termoregolate Ingombro (L x H x P, senza staffe di mon- 290 mm x 251 mm x 350 mm taggio): Peso: 8 kg Altre caratteristiche: Cavo di rete da 1 metro con spina TRUE1 powerCON e 2 staffe di montaggio a omega forniti in dotazione DICHIARAZIONI DEL PRODUTTORE MANUFACTURER’S WARRANTY &...
  • Page 154: Dmx

    DMX CONTROL / DMX STEUERUNG / PILOTAGE DMX / CONTROL DMX / STEROWANIE DMX / CONTROLLO DMX 16-CH Mode RGBW 0% to 100% Pan fine 0% to 100% Tilt 0% to 100% Tilt fine 0% to 100% Dimmer Master Dimmer 0-100% Dimmer fine Master Dimmer fine 0-100% 0% to 100%...
  • Page 155 no function Blackout while moving on (hold 3s) Blackout while moving off (hold 3s) Spare Invert Pan on (hold 3s) Invert Pan off (hold 5s) Invert Tilt on (hold 3s) Invert Tilt off (hold 5s) Spare Dimmer Response LED (hold 3s) Dimmer Response Halogen (hold 3s) Spare Silent Fan (hold 3s)
  • Page 156 18-CH Wash Light HSI Mode (Calibrated) 0% to 100% Pan fine 0% to 100% Tilt 0% to 100% Tilt fine 0% to 100% Dimmer Master Dimmer 0-100% Dimmer fine Master Dimmer fine 0-100% Strobe open Strobe closed Pulse random, slow -> fast Ramp up random, slow ->...
  • Page 157 89 Moss Green 139 Primary Green 124 Dark Green 323 Jade 354 Special Steel Blue 116 Medium Blue-Green 183 Moonlight Blue 132 Medium Blue 119 Dark Blue 716 Mikkel Blue 71 Tokyo Blue 181 Congo Blue 799 Special KH Lavender Color Macros CH13 (override HS)
  • Page 158 LED PWM frequency 12kHz (hold 3s) LED PWM frequency 25kHz (hold 3s) Spare Display on (hold 3s) Display off (hold 3s) Spare Dimmer Curve linear (hold 3s) Dimmer Curve exponential (hold 3s) Dimmer Curve logarithmic (hold 3s) Dimmer Curve s-curve (hold 3s) Spare Device settings CH18...
  • Page 159 Linear tint from magenta to neutral Tint CH17 Neutral (relates to Color Temperature) Linear tint from neutral to green no function 46 Dark Magenta 29 Plasa Red 26 Bright Red 127 Smokey Pink 36 Medium Pink 19 Fire 135 Deep Golden Amber 778 Millennium Gold 21 Gold Amber 157 Pink...
  • Page 160 0,1s - 10s (0,1s Steps) Color Macro Crossfade (Transition Time CH19 11s - 119s (1s Steps) between Color Macros) 2m - 4m50s (10s Steps) 5m - 15m (1m Steps) CH20 Zoom narrow -wide CH21 Zoom fine 0% to 100% CH22 Pan/Tilt Speed Head movement speed no function...
  • Page 161 33-CH Mode HSI Pattern Mode (Calibrated) 0% to 100% Pan fine 0% to 100% Tilt 0% to 100% Tilt fine 0% to 100% Dimmer Master Dimmer 0-100% Dimmer fine Master Dimmer fine 0-100% Strobe open Strobe closed Pulse random, slow -> fast Ramp up random, slow ->...
  • Page 162 89 Moss Green 139 Primary Green 124 Dark Green 323 Jade 354 Special Steel Blue 116 Medium Blue-Green 183 Moonlight Blue 132 Medium Blue 119 Dark Blue 716 Mikkel Blue 71 Tokyo Blue 181 Congo Blue 799 Special KH Lavender Color Macros CH13 (override HS)
  • Page 163 Off („washlight Mode“) CH18 Pattern 1 No. 1 - 50 CH18 Pattern 2 No. 51 - 100 … 25-49 Effect 1 (4 Dots CW ) Effect 2 (Circle 2Step in > out) Effect 3 (Circle 2Step Colour Change in > out) Effect 4 (Clock hand - CW) Effect 5 (Ventilator - CW) Effect 6 (Bow runs left >...
  • Page 164 Effect Pattern stop CH19 Pattern Speed Effect Pattern speed, slow > fast, forward Effect Pattern speed, fast > slow, backward Stop Pattern Transition CH20 (Transition between Pattern) 0.1s - 5s Running Effect Pattern CH21 Fade Effect Pattern 0-100% Fade/Wake Wake Effect Pattern 0-100% CH22 Background Dimmer Background Master Dimmer 0-100%...
  • Page 165 88 Lime Green 121 LEE Green 738 Jas Green 89 Moss Green 139 Primary Green 124 Dark Green 323 Jade 354 Special Steel Blue 116 Medium Blue-Green 183 Moonlight Blue 132 Medium Blue 119 Dark Blue 716 Mikkel Blue 71 Tokyo Blue Background Color Macro CH30 181 Congo Blue...
  • Page 166 LED PWM frequency 25kHz (hold 3s) Spare Display on (hold 3s) Display off (hold 3s) Spare Dimmer Curve linear (hold 3s) Dimmer Curve exponential (hold 3s) Dimmer Curve logarithmic (hold 3s) Dimmer Curve s-curve (hold 3s) LED arrangement normal (hold 3s) Spare LED arrangement 180°...
  • Page 167 no function Blackout while moving on (hold 3s) Blackout while moving off (hold 3s) Spare Invert Pan on (hold 3s) Invert Pan off (hold 5s) Invert Tilt on (hold 3s) Invert Tilt off (hold 5s) Spare Dimmer response LED (hold 3s) Dimmer response halogen (hold 3s) Spare Silent Fan (hold 3s)
  • Page 168 CH25 Green 4 0% to 100% CH26 Blue 4 0% to 100% CH27 White 4 0% to 100% CH28 Red 5 0% to 100% CH29 Green 5 0% to 100% CH30 Blue 5 0% to 100% CH31 White 5 0% to 100% CH32 Red 6 0% to 100%...
  • Page 169 no function 46 Dark Magenta 29 Plasa Red 26 Bright Red 127 Smokey Pink 36 Medium Pink 19 Fire 135 Deep Golden Amber 778 Millennium Gold 21 Gold Amber 157 Pink 110 Middle Rose 109 Light Salmon 35 Light Pink 134 Golden Amber 17 Surprise Peach 746 Brown...
  • Page 170 0,1s - 10s (0,1s Steps) Color Macro Crossfade (transition time CH19 11s - 119s (1s Steps) between Color Macros) 2m - 4m50s (10s Steps) 5m - 15m (1m Steps) CH20 Zoom narrow - wide CH21 Zoom Fine 0% to 100% off (background functions disabled) Pattern 1 (background functions enabled) CH22...
  • Page 171 Effect 1 Effect 2 Effect 3 Effect 4 Effect 5 Effect 6 Effect 7 Effect 8 Effect 9 CH23 Running Effect Pattern Effect 10 Effect 11 Effect 12 Effect 13 Effect 14 Effect 15 Effect 16 Effect 17 Effect 18 Effect 19 all effects All LEDs On Effect Pattern stop...
  • Page 172 Bulb white (2700K) Background Color Temperature Halogen white (3200K) (override Background RGBW and Back- CH38 Neutral white (4000K) ground Color Macros) Studio white (5600K) Daylight white (6500K) 1.800K - 7.500K Linear tint from magenta to neutral Background Tint CH39 (relates to Background Color Tempera- Neutral ture) Linear tint from neutral to green...
  • Page 173 345 Fuchsia Pink 795 Magical Magenta 128 Bright Pink Background Color Macros CH40 2 Rose Pink (override Background RGBW) Color Jumping stop Color Jumping speed slow -> fast Color Fading speed slow -> fast 0,1s - 10s (0,1s Steps) CH41 Background Color Macro Crossfade 11s - 119s (1s Steps) 2m - 4m50s (10s Steps)
  • Page 174 LED arrangement mirrored (hold 3s) Spare Raw (color calibration off) (hold 3s) Calibrated (color calibration on) (hold 3s) User color calibration on (hold 3s) Spare Device settings CH43 Reset Pan / Tilt (hold 3s) (please read remark 1*) Spare Reset Zoom (hold 3s) Spare Reset All Functions (hold 3s) Spare...
  • Page 175 Auto Fan (hold 3s) Main Address Main Address 001-xxx (DMX) Normal Fan (hold 3s) 001-xxx Spare LED PWM frequency 800Hz (hold 3s) LED PWM frequency 1200Hz (hold 3s) LED PWM frequency 2000Hz (hold 3s) LED PWM frequency 3600Hz (hold 3s) LED PWM frequency 12kHz (hold 3s) LED PWM frequency 25kHz (hold 3s) Spare...
  • Page 176 CH17 CH13 Red 5 0% to 100% Pixel Address Kling-Net CH18 CH14 Green 5 0% to 100% RGBW Pixel Mode CH19 CH15 Blue 5 0% to 100% 001-xxx CH20 White 5 0% to 100% CH21 CH16 Red 6 0% to 100% RGB Pixel Mode CH22 CH17...
  • Page 177 Pixel controlled by CH10 thru CH15 Main Address Main Address LED-Control 001-xxx (DMX) CH16 Linear crossfade to second input crossfade 001-xxx Pixel controlled by second protocol CH17 Pan/Tilt Speed Movement Speed fast -> slow no function Blackout while moving on (hold 3s) Blackout while moving off (hold 3s) Spare Invert Pan on (hold 3s)
  • Page 178 Pixel Mode RGBW Red 1 0% to 100% Pixel Address Kling-Net Green 1 0% to 100% RGBW Pixel Mode Blue 1 0% to 100% 001-xxx White 1 0% to 100% Red 2 0% to 100% RGB Pixel Mode Green 2 0% to 100% 001-xxx Blue 2...
  • Page 179 Pattern 1 - 100 (Pattern folder 1 + 2) 43CH Mode and 33CH Mode...
  • Page 180 CAMEOLIGHT.COM Adam Hall GmbH | Adam-Hall-Str. 1 | 61267 Neu-Anspach | Germany Phone: +49 6081 9419-0 | adamhall.com REV: 01...

Table des Matières