
Manuels Connexes pour Cameo OPUS W5


Sommaire des Matières pour Cameo OPUS W5
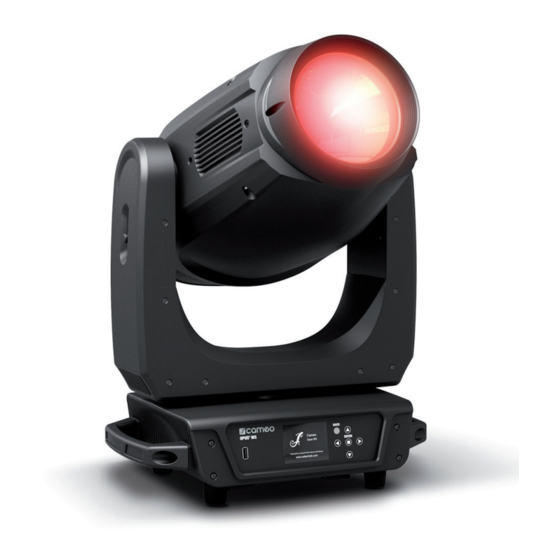
- Page 1 USER´S MANUAL BEDIENUNGSANLEITUNG MANUEL D´UTILISATION MANUAL DE USUARIO INSTRUKCJA OBSŁUGI MANUALE D´USO OPUS W5 WASH MOVING HEAD CLOW5...
-
Page 2: Table Des Matières
CONTENTS / INHALTSVERZEICHNIS / TABLE DES MATIÈRES / CONTENIDO / SPIS TREŚCI / CONTENUTO ENGLISH INFORMATION ON THIS USER MANUAL INTENDED USE DEFINITIONS AND SYMBOL EXPLANATIONS SAFETY INSTRUCTIONS NOTES FOR MOBILE INDOOR DEVICES INTRODUCTION CONNECTIONS, OPERATING AND DISPLAY ELEMENTS OPERATION SETUP AND INSTALLATION CARE, MAINTENANCE AND REPAIR DMX TECHNOLOGY... - Page 3 CONTENTS / INHALTSVERZEICHNIS / TABLE DES MATIÈRES / CONTENIDO / SPIS TREŚCI / CONTENUTO FRANÇAIS INFORMATIONS CONCERNANT CE MANUEL D’UTILISATION UTILISATION CONFORME EXPLICATIONS DES TERMES ET DES SYMBOLES CONSIGNES DE SÉCURITÉ REMARQUES CONCERNANT LES APPAREILS INTÉRIEURS MOBILES PRÉSENTATION RACCORDEMENTS, ÉLÉMENTS DE COMMANDE ET D’AFFICHAGE COMMANDE INSTALLATION ET MONTAGE ENTRETIEN, MAINTENANCE ET RÉPARATION...
- Page 4 CONTENTS / INHALTSVERZEICHNIS / TABLE DES MATIÈRES / CONTENIDO / SPIS TREŚCI / CONTENUTO POLSKI INFORMACJE DOTYCZĄCE NINIEJSZEJ INSTRUKCJI OBSŁUGI UŻYTKOWANIE ZGODNE Z PRZEZNACZENIEM OBJAŚNIENIA TERMINÓW I SYMBOLI ZASADY BEZPIECZEŃSTWA UWAGI DOTYCZĄCE PRZENOŚNEGO SPRZĘTU WEWNĘTRZNEGO WPROWADZENIE PRZYŁĄCZA, ELEMENTY OBSŁUGI I WSKAŹNIKI OBSŁUGA USTAWIANIE I MONTAŻ...
-
Page 5: English
This device has been developed and manufactured to the highest quality standards to ensure many years of problem-free operation. Please read this manual carefully to be able to use your new Cameo product quickly and optimally. Further information about Cameo Light is available on our website CAMEOLIGHT.com. -
Page 6: Safety Instructions
This symbol identifies hazards that can cause electric shock. This symbol identifies hazardous areas or hazardous situations. This symbol indicates hazards caused by hot surfaces. This symbol indicates hazards caused by intense light sources. This symbol indicates a device in which there are no user-replaceable parts. This symbol indicates additional information on the operation of the product. - Page 7 CAUTION: 1. Do not switch on the device if it has been exposed to extreme temperature fluctu- ations (for example, following transport). Moisture and condensation can damage the device. Switch on the device only when it has reached room temperature. 2.
- Page 8 CAUTION: 1. Moving components such as mounting brackets may become jammed. 2. In the case of devices with motor-driven components, there is a risk of injury due to the movement of the device. Sudden movement of the device can cause shock reactions.
-
Page 9: Notes For Mobile Indoor Devices
SIGNAL TRANSMISSION BY RADIO (E.G. W-DMX OR AUDIO RADIO SYSTEMS): The quality and performance of wireless signal transmissions generally depends on the ambient conditions. The following factors can impact range and signal stability, for example: Shielding (e.g. masonry, metal structures, water) High volume of radio traffic (e.g. -
Page 10: Introduction
INTRODUCTION MOVING HEAD OPUS SERIES CLOW5 CONTROL FUNCTIONS 29-channel and 46-channel DMX control Art-Net sACN W-DMX™ RDM-enabled Master / slave operation Standalone functions FEATURES • 380 W LED • CMY + CTO colour blending • Colour wheel 1 with 7 brilliant colours + open and split colours •... -
Page 11: Connections, Operating And Display Elements
TRUE1 TOP compatible plug is included. POWER OUT TRUE1 TOP compatible power output socket. Facilitates power supply to other CAMEO lights. Ensure that the total power consumption of all devices connected to the device does not exceed the given ampere (A) value. - Page 12 PRESSURE SENSITIVE LC DISPLAY WITH ILLUMINATION Thanks to the pressure-sensitive LC display, the device can be operated directly from the display (glove-compatible). The LCD display shows the currently activated mode (main display), the menu items in the selection menu and the numerical value or operating status in certain menu items. If there is no control signal to the device, the display starts flashing;...
-
Page 13: Operation
Display Bedienfeld Please Wait...” and the Cameo logo with information on the device model will display while the device starts up and the motor resets. The spotlight is ready after this process, and the operating mode that was selected will activate. - Page 14 Input signal display Display battery status DMX mode or operating mode Rotate display by 180° DMX start address or operating mode Information on device model Main menu Back to main display = press any- where on display or ENTER CONTROL MENU (Control) SETTING THE DMX START ADDRESS (DMX Address) Starting from the main display, press ENTER to go to the main menu.
- Page 15 NETWORK SETTINGS (Network) Starting from the main display, press ENTER to go to the main menu. Use the control keys to select the Control menu and press ENTER. Using the buttons, now select the “Network” menu option and confirm via ENTER. Network settings information can be found in the following table.
- Page 16 W-DMX SETTINGS (Wireless) Starting from the main display, press ENTER to go to the main menu. Use the control keys to select the Control menu and press ENTER. Using the buttons, now select the “Mode” menu option and confirm via ENTER. W-DMX settings information can be found in the following table.
- Page 17 STANDALONE STATIC MODE (Master and Alone) The Static mode allows PAN, Tilt, Dimmer, Strobe, Colour Wheel and Gobo Wheel etc. to be adjusted directly on the device with values between 000 to 255, similar to a DMX control unit. In this way, an individual scene can be created without an additional DMX controller. Here you can choose between the “Master”...
- Page 18 Magenta 000 - 255 0% to 100% Yellow 000 - 255 0% to 100% 000 - 255 0% to 100% 000 - 000 Color open 001 - 023 Open -> Deep red 024 - 024 Deep Red (1) 025 - 047 Deep Red -> Medium Blue 048 - 048 Medium Blue (2) 049 - 071 Medium Blue ->...
- Page 19 000 - 000 Color open 001 - 023 Open -> CTO 2600K 024 - 024 CTO 2600K (1) 025 - 047 CTO 2600K -> CTO 3200K 048 - 048 CTO 3200K (2) 049 - 071 CTO 3200K -> CTB 7500K 072 - 072 CTB 7500K (3) 073 - 095 CTB 7500K ->...
- Page 20 000 - 005 off 006 - 040 PAN "small > big" 041 - 075 TILT "small > big" 076 - 110 PAN / TILT "small > big" Pan/Tilt Macro 111 - 145 PAN / TILT (invers) "small > big" 146 - 180 Circle "small > big" 181 - 215 Circle (invers) "small >...
- Page 21 SYSTEM SETTINGS (Settings) Starting from the main display, press ENTER to go to the main menu. Use the control keys to select the System Settings menu and press ENTER. Display DMX Fail Dimmer Curve LED Frequency Motor Movement This will take you to the submenu for setting the submenu options, see table (select via and , confirm via ENTER, change status via and , confirm via ENTER):...
- Page 22 Motor Motor set- Pan Reverse OFF does not reverse pan direction tings in the Reverses pan direction device Tilt Reverse does not reverse tilt direction Reverses tilt direction Pan Angle Pan angle 630° Pan angle 540° Feedback automatic position correction is disabled automatic position correction is enabled Color1 Pos Stan-...
- Page 23 DIMMER CURVES Linear Exponential Logarithmic S-curve DMX value DMX value DMX value DMX value SERVICE MENU Starting from the main display, press ENTER to go to the main menu. Use the control keys to select the Service menu and press ENTER. Service Calibrate Test Manual...
- Page 24 Current Time Displays the current operating time Time PW Enter the password for resetting the current operating time (Time PW = 050) Clean Resets the current operating time Current Firm- Displays the Vx.x.x ware firmware of the device components Model Model name Opus W5 Info...
-
Page 25: Setup And Installation
SETUP AND INSTALLATION The integrated plastic feet allow the spotlight to be placed in a suitable position on a level surface. Install on a crossbeam using an Omega bracket that is attached to the middle of the device base (A). An Omega bracket is included in the scope of delivery; suitable crossbeam clamps are option- ally available. -
Page 26: Care, Maintenance And Repair
CARE, MAINTENANCE AND REPAIR In order to ensure the long-term, proper functioning of the device, it must be regularly cleaned and, if necessary, maintained. The maintenance requirement depends on the intensity of use and the environment in which it is used. We generally recommend a visual inspection before each operation. -
Page 27: Dmx Technology
PLEASE NOTE! For conversion or retrofit sets provided by the manufacturer, it is essential to observe the enclosed installation instructions. DMX TECHNOLOGY DMX-512 DMX (Digital Multiplex) is the designation for a universal transmis- sion protocol for communications between corresponding devices and controllers. - Page 28 PIN ASSIGNMENT DMX cable with 3-pin XLR connectors: DMX cable with 5-pin XLR connectors (pin 4 and 5 are not used): Shield Shield DMX TERMINATORS (TERMINATING RESISTORS) To prevent system errors, the last device in a DMX chain needs to be equipped with a terminating resistor (120 ohm, 1/4 Watt).
-
Page 29: Technical Data
TECHNICAL DATA PRODUCT NUMBER: CLOW5 Product type: LED moving light Type: Profile Washer Number of lamps: Type of lamp: 380 W LED Colour temperature of Cool white 6700 K lamp: LED PWM frequency: 650 Hz, 1530 Hz, 3600 Hz, 12 kHz, 18.9 kHz, 25 kHz (adjustable) Colour blend function: CMY + CTO Number of colours –... - Page 30 PRODUCT NUMBER: CLOW5 Maximum power 650 W consumption: Luminous flux: 15,400 lm Power supply TRUE1 TOP compatible input and output (output max. 10 A) connection: Electrical protection class: Fuse: T6.3AL / 250 V (5 x 20 mm) Ambient operating -10°C to 40°C temperature: Relative air humidity: <...
-
Page 31: Minimum Distance To Illuminated Surface
MINIMUM DISTANCE TO ILLUMINATED SURFACE This symbol with distance specification in metres (m) indicates the minimum distance between the light head and the illuminated surface. In this example the distance is 0.5 m. MINIMUM DISTANCE TO NORMALLY FLAMMABLE MATERIALS This symbol with distance specification in metres (m) indicates the minimum dis- tance between the light head and normally flammable materials. - Page 32 EC DECLARATION OF CONFORMITY Declarations of conformity for products subject to the LVD, EMC, RoHS Directive can be requested from info@adamhall.com. Declarations of conformity for products subject to RED can be downloaded from www.adamhall. com/compliance/. UKCA- CONFORMITY Hereby, Adam Hall Ltd. declares that this product meets the following guidelines (where applica- ble) Electrical Equipment (Safety) Regulations 2016 Electromagnetic Compatibility Regulations 2016 (SI 2016/1091)
-
Page 33: Deutsch
Dieses Gerät wurde unter hohen Qualitätsanforderungen entwickelt und gefertigt, um viele Jahre einen reibungslosen Betrieb zu gewährleisten. Bitte lesen Sie diese Bedienungsanleitung sorgfäl- tig, damit Sie Ihr neues Produkt von Cameo Light schnell und optimal einsetzen können. Weitere Informationen über Cameo Light erhalten Sie auf unserer Website CAMEOLIGHT.COM. -
Page 34: Sicherheitshinweise
Dieses Symbol kennzeichnet Gefahren, die einen elektrischen Schlag verursachen können. Dieses Symbol kennzeichnet Gefahrenstellen oder gefährliche Situationen. Dieses Symbol kennzeichnet Gefahren durch heiße Oberflächen. Dieses Symbol kennzeichnet Gefahren durch intensive Lichtquellen. Dieses Symbol kennzeichnet ein Gerät, in dem sich keine vom Benutzer austausch- baren Teile befinden. - Page 35 ACHTUNG: 1. Nehmen Sie das Gerät nicht in Betrieb, wenn es starken Temperaturschwankun- gen ausgesetzt war (beispielsweise nach dem Transport). Feuchtigkeit und Kondensat könnten das Gerät beschädigen. Schalten Sie das Gerät erst ein, wenn es Umgebungstemperatur erreicht hat. 2. Stellen Sie sicher, dass die Spannung und die Frequenz des Stromnetzes mit den auf dem Gerät angegebenen Werten übereinstimmen.
- Page 36 VORSICHT: 1. Bei beweglichen Bauteilen wie Montagebügeln, oder sonstigen beweglichen Bau- teilen besteht die Möglichkeit sich zu klemmen. 2. Bei Geräten mit motorisch angetriebenen Bauteilen besteht Verletzungsgefahr durch die Bewegung des Gerätes. Plötzliche Gerätebewegungen können zu Schreck reaktionen führen. 3. Die Gehäuseoberfläche des Geräts kann sich im regulären Betrieb stark erwär- men.
- Page 37 VORSICHT! WICHTIGE HINWEISE IN BEZUG AUF LICHT-PRODUKTE! 1. Blicken Sie niemals, auch nicht kurzzeitig, direkt in die Lichtquelle. 2. Blicken Sie niemals mit optischen Geräten wie Vergrößerungsgläsern in die Lichtquelle. 3. Stroboskopeffekte können bei empfindlichen Menschen epileptische Anfälle auslösen! 4. In dieser Leuchte ist ein fest installiertes Leuchtmittel verbaut, welches nicht durch den Benutzer zu tauschen ist.
-
Page 38: Hinweise Für Ortsveränderliche Indoor-Geräte
SIGNALÜBERTRAGUNG PER W-DMX WARNUNG: Generell darf Kabellose DMX-Übertragung nicht für Anwendungen mit sicherheitsrelevanten Faktoren genutzt werden, die im Falle eines Versagens Personen- oder Sachschäden zur Folge haben können. Dies gilt im Speziellen für bewegte Szenen- oder Traversenstrukturen, für DMX-gesteu- erte Motoren/Hebezeuge oder Hebevorrichtungen zum Betreiben von DMX-betriebenen Bühnenliften, Hydrauliksystemen oder vergleichbaren beweglichen Komponenten. -
Page 39: Einführung
EINFÜHRUNG MOVING HEAD OPUS SERIE CLOW5 STEUERUNGSFUNKTIONEN 29-Kanal und 46-Kanal DMX-Steuerung Art-Net sACN W-DMX™ RDM enabled Master / Slave Betrieb Standalone Funktionen EIGENSCHAFTEN • 380 W LED • CMY + CTO Farbmischung • Farbrad 1 mit 7 brillanten Farben + offen und Split-Farben •... -
Page 40: Anschlüsse, Bedien- Und Anzeigeelemente
Netzkabel mit TRUE1 TOP kompatiblem Gerätestecker befindet sich im Lieferumfang. POWER OUT TRUE1 TOP kompatible Netzausgangsbuchse. Dient der Netzversorgung weiterer CAMEO Schein- werfer. Achten Sie darauf, dass die gesamte Stromaufnahme aller angeschlossenen Geräte den auf dem Gerät in Ampere (A) angegebenen Wert nicht überschreitet. - Page 41 DRUCKEMPFINDLICHES LC-DISPLAY MIT BELEUCHTUNG Dank des druckempfindlichen LC-Displays kann die Bedienung des Geräts direkt am Display erfolgen (handschuhtauglich). Das Display zeigt die aktuell aktivierte Betriebsart an (Hauptanzei- ge), die Menüpunkte im Auswahl-Menü und den Zahlenwert bzw. Betriebszustand in bestimmten Menüpunkten. Liegt kein Steuersignal am Gerät an, fängt das Display an zu blinken, das Blinken stoppt, sobald ein Steuersignal anliegt (DMX- und Slave-Betrieb, ArtNet und sACN).
-
Page 42: Bedienung
Bedienfeld während des Startvorgangs und des Motoren-Resets nacheinander „Software Update Please Wait...“ und das Cameo Logo mit Informationen zum Gerätemo- dell im Display angezeigt. Nach diesem Vorgang ist der Scheinwerfer betriebs- bereit und die Betriebsart, die zuvor angewählt war, wird aktiviert. - Page 43 HAUPTANZEIGE In der oberen Zeile des Displays wird angezeigt, ob und welches Steuersignal am Gerät anliegt, in der Zeile darunter die aktuell aktivierte Betriebsart (DMX Standard / Extended, Static, Auto, Slave) und gut sichtbar in der Mitte die DMX-Startadresse oder die entsprechende Betriebsart (im Bei- spiel DMX-Startadresse 001).
- Page 44 DMX-MODUS EINSTELLEN (DMX Mode) Ausgehend von der Hauptanzeige gelangen Sie durch Drücken auf ENTER in das Hauptmenü. Wählen Sie mit Hilfe der Bedienfelder das Kontrollmenü Control aus und drücken auf ENTER. Mit Hilfe von wählen Sie nun den Menüpunkt „DMX Mode“ aus und bestätigen durch Drücken auf ENTER.
- Page 45 Address Universum 1 – 256, Universe 000 bis 255. Wert ändern mit IP-Adresse und Subnetzmaske 000 – 255 und , bestätigen mit ENTER. einstellen IP Address Block auswählen mit und , Wert ändern mit und , bestätigen mit ENTER. IP Subnet Block auswählen mit und , Mask...
- Page 46 STAND-ALONE-BETRIEBSARTEN (Stand Alone) Ausgehend von der Hauptanzeige gelangen Sie durch Drücken auf ENTER in das Hauptmenü. Wählen Sie mit Hilfe der Bedienfelder das Kontrollmenü Control aus und drücken auf ENTER. Mit Hilfe von wählen Sie nun den Menüpunkt „Stand Alone“ aus und bestätigen durch Drücken auf ENTER.
- Page 47 000 - 005 Strobe open 006 - 010 Strobe closed 011 - 022 Ramp up/down, slow -> fast 023 - 033 Ramp up/down random, slow->fast 034 - 045 Ramp up, slow -> fast 046 - 056 Ramp up random, slow -> fast Strobe 057 - 068 Ramp down, slow ->...
- Page 48 000 - 000 Color open 001 - 023 Open -> CTO 2600K 024 - 024 CTO 2600K (1) 025 - 047 CTO 2600K -> CTO 3200K 048 - 048 CTO 3200K (2) 049 - 071 CTO 3200K -> CTB 7500K 072 - 072 CTB 7500K (3) 073 - 095 CTB 7500K ->...
- Page 49 000 - 005 off 006 - 040 PAN "small > big" 041 - 075 TILT "small > big" 076 - 110 PAN / TILT "small > big" Pan/Tilt Macro 111 - 145 PAN / TILT (invers) "small > big" 146 - 180 Circle "small > big" 181 - 215 Circle (invers) "small >...
- Page 50 SYSTEMEINSTELLUNGEN (Settings) Ausgehend von der Hauptanzeige gelangen Sie durch Drücken auf ENTER in das Hauptmenü. Wählen Sie mit Hilfe der Bedienfelder das Menü für die Systemeinstellungen Settings aus und drücken auf ENTER. Display DMX Fail Dimmer Curve LED Frequency Motor Movement Daraufhin gelangen Sie in das Untermenü...
- Page 51 Motor Einstellungen Pan Reverse OFF keine Umkehrung der Pan Bewegungsrich- der Motoren tung im Gerät Umkehrung der Pan Bewegungsrichtung Tilt Reverse keine Umkehrung der Tilt Bewegungsrich- tung Umkehrung der Tilt Bewegungsrichtung Pan Angle Pan Winkel 630° Pan Winkel 540° Feedback automatische Positionskorrektur deaktiviert automatische Positionskorrektur aktiviert Stan-...
- Page 52 Dimmerkurven linear exponentiell logarithmisch S-Kurve DMX-Wert DMX-Wert DMX-Wert DMX-Wert SERVICEMENÜ Ausgehend von der Hauptanzeige gelangen Sie durch Drücken auf ENTER in das Hauptmenü. Wählen Sie mit Hilfe der Bedienfelder das Service-Menü Service aus und drücken auf ENTER. Service Calibrate Test Manual Reset Motor USB Update Factory Reset...
- Page 53 Current Time Anzeige der momentanen Betriebszeit Time PW Eingabe des Passworts zum Zurücksetzen der momentanen Betriebszeit (Time PW = 050) Clean Zurücksetzen der momentanen Betriebszeit Current Firm- Anzeige der Firm- Vx.x.x ware ware der Kompo- nenten Model Modellbezeichnung Opus W5 Info...
-
Page 54: Aufstellung Und Montage
AUFSTELLUNG UND MONTAGE Dank der integrierten Gummifüße kann der Scheinwerfer an einer geeigneten Stelle auf eine feste und ebene Fläche gestellt werden. Die Montage an einer Traverse erfolgt mit Hilfe zweier Omega- Bügel, die an der Gerätebasis befestigt werden (A). Zwei Omega-Bügel sind im Lieferumfang ent- halten, geeignete Traversenklemmen sind optional erhältlich. - Page 55 PFLEGE (vom Anwender durchführbar) WARNUNG! Vor jeglichen Pflegemaßnahmen müssen die Spannungsversorgung und sofern möglich sämtliche Geräteverbindungen getrennt werden. HINWEIS! Unsachgemäße Pflege kann zu Beeinträchtigung des Gerätes führen bis hin zur Zerstörung. 1. Gehäuseoberflächen müssen mit einem sauberen, feuchten Tuch gereinigt wer- den.
-
Page 56: Dmx Technik
DMX TECHNIK DMX-512 DMX (Digital Multiplex) ist die Bezeichnung für ein universelles Übertragungsprotokoll für die Kommunikation zwischen entsprechenden Geräten und Controllern. Ein DMX-Controller sendet DMX-Daten an das/die angeschlossene(n) DMX-Gerät(e). Die DMX-Datenübertragung erfolgt stets als serieller Datenstrom, der über die an jedem DMX-fähigen Gerät vorhandenen DMX IN- und DMX OUT-Anschlüsse (XLR-Steckverbinder) von einem angeschlossenen Gerät an das nächste weitergeleitet wird, wobei die maximale Anzahl der Geräte 32 nicht überschreiten darf. - Page 57 DMX-KABEL: Beachten Sie bei der Anfertigung eigener Kabel unbedingt die Abbildungen auf dieser Seite. Verbinden Sie auf keinen Fall die Abschirmung des Kabels mit dem Massekontakt des Steckers, und achten Sie darauf, dass die Abschirmung nicht mit dem XLR-Steckergehäuse in Kontakt kommt.
-
Page 58: Technische Daten
TECHNISCHE DATEN ARTIKELNUMMER: CLOW5 Produktart: LED Moving Light Typ: Profile Washer Anzahl Leuchtmittel: Typ Leuchtmittel: 380 W LED Farbtemperatur Kaltweiß 6700 K Leuchtmittel: LED PWM Frequenz: 650 Hz, 1530 Hz, 3600 Hz, 12 kHz, 18,9 kHz, 25 kHz (einstellbar) Farbmischfunktion: CMY + CTO Farbrad 1 Anzahl 7 + offen und Split-Farben... -
Page 59: Mindestabstand Zur Beleuchteten Fläche
Betriebsspannung: 100 – 240V AC / 50 – 60 Hz Maximale Leistungs- 650 W aufnahme: Lichtstrom: 15400 lm Stromversorgungs- TRUE1 TOP kompatibler Ein- und Ausgang (Ausgang max. 10 A) anschluss: Elektrische Schutz- klasse: Sicherung: T6.3AL / 250V (5 x 20 mm) Umgebungstemperatur -10°C –... -
Page 60: Entsorgung
ENTSORGUNG VERPACKUNG: 1. Verpackungen können über die üblichen Entsorgungswege dem Wertstoffkreislauf zugeführt werden. 2. Bitte trennen Sie die Verpackung entsprechend der Entsorgungsgesetze und Wertstoffverordnungen in Ihrem Land. GERÄT: 1. Dieses Gerät unterliegt der europäischen Richtlinie für Elektro- und Elektronik-Altgeräte in der jeweils geltenden aktuellen Fassung. WEEE-Richtlinie Waste Electrical and Electronical Equipment. -
Page 61: Français
Cet appareil a été conçu et produit suivant des exigences de qualité très strictes pour fonctionner pendant de nombreuses années. Veuillez lire attentivement ce manuel d’utilisation pour pouvoir utiliser rapidement et de manière optimale votre nouveau produit Cameo Light. Vous trouverez de plus amples informations sur Cameo Light sur notre site Web CAMEOLIGHT.COM. -
Page 62: Consignes De Sécurité
Ce symbole indique un danger susceptible de provoquer une décharge électrique. Ce symbole indique une zone ou une situation dangereuse. Ce symbole indique des dangers liés à des surfaces chaudes. Ce symbole signale des dangers liés à des sources lumineuses intenses. Ce symbole indique que l’appareil ne contient aucune pièce remplaçable par l’utili- sateur. - Page 63 ATTENTION : 1. Ne mettez pas immédiatement l’appareil en service s’il a été exposé à d’impor- tantes variations de température (par exemple après le transport). L’humidité et la condensation risquent d’endommager l’appareil. Ne mettez l’appareil en marche que lorsqu’il est à température ambiante. 2.
- Page 64 PRUDENCE : 1. Il existe un risque de pincement dans des pièces mobiles telles que des étriers de montage ou d’autres pièces mobiles. 2. Pour les appareils équipés de composants entraînés par moteur, il existe un risque de blessure dû aux mouvements de l’appareil. Des mouvements soudains de l’appareil peuvent provoquer des réactions brutales.
- Page 65 ATTENTION ! INFORMATIONS IMPORTANTES SUR LES PRODUITS D’ÉCLAIRAGE ! 1. Ne regarde jamais directement (même brièvement) la source lumineuse. 2. Ne regarde jamais la source lumineuse avec des appareils optiques (p. ex., une loupe). 3. Les effets stroboscopiques peuvent déclencher des crises d’épilepsie chez les sujets sensibles.
-
Page 66: Remarques Concernant Les Appareils Intérieurs Mobiles
TRANSMISSION DE SIGNAL PAR W-DMX AVERTISSEMENT : En règle générale, la transmission DMX sans fil ne doit pas être util- isée pour des applications présentant des facteurs de sécurité susceptibles d’entraîner des dommages corporels ou matériels en cas de défaillance. Ceci s’applique en particulier aux structures de scènes ou de traverses mobiles, aux moteurs/dispositifs de levage commandés par DMX ou aux dispositifs de levage des- tinés au fonctionnement de monte-plateaux, de systèmes hydrauliques ou de com- posants mobiles similaires fonctionnant en mode DMX. -
Page 67: Présentation
PRÉSENTATION SÉRIE DE LYRES OPUS CLOW5 FONCTIONS DE PILOTAGE Pilotage en mode DMX sur 29 canaux et 46 canaux Art-Net sACN W-DMX™ Compatible RDM Mode Master/Slave (maître/esclave) Fonctions Standalone (autonomes) CARACTÉRISTIQUES • LED de 380 W • Mélange de couleurs CMY + CTO •... -
Page 68: Raccordements, Éléments De Commande Et D'affichage
- 60 Hz. Un cordon d’alimentation approprié est fourni avec un connecteur compatible TRUE1 TOP. POWER OUT (SORTIE D’ALIMENTATION) Embase secteur de sortie compatible TRUE1 TOP. Permet d’alimenter d’autres projecteurs CAMEO. Veiller à ce que la consommation totale de tous les appareils connectés ne dépasse pas la valeur en ampères (A) indiquée sur l’appareil. - Page 69 ÉCRAN LCD TACTILE AVEC RÉTROÉCLAIRAGE L’écran LCD tactile permet de commander l’appareil directement sur l’écran (adapté aux gants). L’écran affiche le mode de fonctionnement actuellement activé (écran principal), les options du menu de sélection et la valeur numérique ou l’état de fonctionnement dans certaines options de menu.
-
Page 70: Commande
Si le projecteur est correctement branché sur le secteur, la mention « Software Display Bedienfeld Update Please Wait... » et le logo Cameo accompagné d’informations sur le modèle d’appareil s’affichent successivement à l’écran pendant la phase de démarrage et de réinitialisation du moteur. À l’issue de cette phase, le projec- teur est opérationnel et le mode de fonctionnement précédemment sélectionné... - Page 71 AFFICHAGE PRINCIPAL La ligne supérieure de l’écran indique si l’appareil reçoit un signal de commande, la ligne infé- rieure présente le mode de fonctionnement actuellement activé (DMX Standard / Extended, Static, Auto, Slave) et, bien visible au centre, l’adresse de départ DMX ou le mode de fonctionnement correspondant (sur l’exemple adresse de départ DMX 001).
- Page 72 RÉGLAGE DU MODE DMX (mode DMX) À partir de l’écran principal, appuyer sur ENTER pour accéder au menu principal. Utiliser les touches de commande pour sélectionner le panneau de commande Control et appuyer sur ENTER. Utiliser ensuite les touches pour sélectionner l’option de menu « DMX Mode »...
- Page 73 Plage 1 - 256, 000 à 255. Modification de la Address Universe Paramétrage de l’adresse IP et valeur avec et , confirmation 000 – 255 du masque de sous-réseau avec ENTER. Sélectionner le bloc à l’aide des IP Address touches et , modifier la valeur avec et , confirmer avec...
- Page 74 Receive Reset Ne pas interrompre la connexion avec un transmetteur Interrompre la connexion avec un transmetteur MODES DE FONCTIONNEMENT STANDALONE (Stand Alone) À partir de l’écran principal, appuyez sur ENTER pour accéder au menu principal. Utilisez les touches de commande pour sélectionner le panneau de commande Control et appuyez sur ENTER.
- Page 75 046 - 056 Ramp up random, slow -> fast 057 - 068 Ramp down, slow -> fast 069 - 079 Ramp down random, slow -> fast Strobe 080 - 102 Random Strobe effect, slow -> fast functions Strobe Break effect, 5s…..1s (short burst 103 - 127 with break) 128 - 250 Strobe slow ->...
- Page 76 000 - 000 Color open 001 - 023 Open -> CTO 2600K 024 - 024 CTO 2600K (1) 025 - 047 CTO 2600K -> CTO 3200K 048 - 048 CTO 3200K (2) 049 - 071 CTO 3200K -> CTB 7500K 072 - 072 CTB 7500K (3) 073 - 095 CTB 7500K ->...
- Page 77 000 - 005 off 006 - 040 PAN "small > big" 041 - 075 TILT "small > big" 076 - 110 PAN / TILT "small > big" Pan/Tilt Macro 111 - 145 PAN / TILT (invers) "small > big" 146 - 180 Circle "small > big" 181 - 215 Circle (invers) "small >...
- Page 78 PARAMÈTRES DU SYSTÈME (Settings) À partir de l’écran principal, appuyer sur ENTER pour accéder au menu principal. Utiliser les touches de commande pour sélectionner le menu de configuration système « Settings » puis appuyer sur ENTER. Display DMX Fail Dimmer Curve LED Frequency Motor Movement Vous accédez alors au sous-menu permettant de régler les options de sous-menu suivantes, cf.
- Page 79 Dimmer Sélection de Linear L’intensité lumineuse augmente de façon Curve la courbe de linéaire avec la valeur DMX dimmer Exponential L’intensité lumineuse peut être réglée de façon précise dans la plage de valeurs DMX inférieure et de façon approximative dans la plage de valeurs DMX supérieure Logarithmic L’intensité...
- Page 80 Motor Réglages des Pan Reverse OFF Pas d’inversion de la direction du mouve- moteurs de ment de l’axe Pan l’appareil Inversion de la direction du mouvement de l’axe Pan Tilt Reverse Pas d’inversion de la direction du mouve- ment de l’axe Tilt Inversion de la direction du mouvement de l’axe Tilt Pan Angle...
- Page 81 Courbes de gradateur Linear Exponential Logarithmic S-curve Valeur DMX Valeur DMX Valeur DMX Valeur DMX MENU DE SERVICE À partir de l’écran principal, appuyer sur ENTER pour accéder au menu principal. Utiliser les touches pour sélectionner le menu de service « Service » et appuyer sur ENTER. Service Calibrate Test Manual...
-
Page 82: Installation Et Montage
Model Désignation du Opus W5 Info modèle INSTALLATION ET MONTAGE Grâce aux pieds en caoutchouc intégrés, le projecteur peut être placé à un endroit approprié sur une surface solide et plane. Le montage sur traverse s’effectue à l’aide de deux omégas de fixation à... -
Page 83: Entretien, Maintenance Et Réparation
DANGER : Le montage au plafond nécessite une grande expérience, notamment pour calculer les valeurs limites de charge du matériel d’installation et vérifier régulièrement la sécurité de tous les matériaux d’installation et des projecteurs. Si tu ne possède pas ces qualifications, n’essaie pas d’effectuer l’installation toi-même, mais adresse-toi plutôt à... - Page 84 1. Les surfaces du boîtier doivent être nettoyées avec un chiffon propre et humide. Veillez à ce qu’aucune humidité ne pénètre dans l’appareil. 2. Les orifices d’entrée et de sortie d’air doivent être nettoyés régulièrement pour éliminer la poussière et les impuretés. En cas d’utilisation d’air comprimé, veillez à...
-
Page 85: Technique Dmx
TECHNIQUE DMX DMX-512 Le terme DMX (Digital Multiplex) désigne un protocole de transport universel permettant la communication entre des appareils et des contrôleurs à ce format. Un contrôleur DMX envoie des données DMX aux appareils DMX qui lui sont connectés. Les données DMX sont transportées sous forme d‘un flux série, renvoyé... - Page 86 ASSIGNATION DES CONTACTS Câble DMX avec connecteurs XLR 3 points : Câble DMX avec connecteurs XLR 5 points (les points 4 et 5 ne sont pas câblés): Shield Shield Pour éviter tout dysfonctionnement, le dernier appareil d‘une chaîne DMX doit être équipé d‘une résis- tance de terminaison (120 Ohms, 1/4 Watt).
-
Page 87: Caractéristiques Techniques
CARACTÉRISTIQUES TECHNIQUES RÉFÉRENCE : CLOW5 Catégorie de produit : Lyre à LED Type : Profile Washer Nombre de lampes : Type de lampe : LED de 380 W Température chroma- Blanc froid 6700 K tique de la lampe : Fréquence du signal 650 Hz ; 1530 Hz ; 3600 Hz ; 12 kHz ; 18,9 kHz ; 25 kHz (réglable) MLI de la LED : Fonction de mélange CMY + CTO... - Page 88 Éléments de Touches de commande tactiles BACK, ENTER, UP, DOWN, LEFT, RIGHT, commande : écran graphique couleur à cristaux liquides tactile (adapté aux gants) Éléments d’affichage : Écran graphique couleur à cristaux liquides rétroéclairé, alimentation par batterie pour un paramétrage du système indépendant du réseau électrique Tension de fonctionne- 100 –...
-
Page 89: Distance Minimale De La Surface Éclairée
DISTANCE MINIMALE DE LA SURFACE ÉCLAIRÉE Ce symbole indique la distance minimale en mètres (m) à respecter entre le corps lumineux et la surface éclairée. Dans cet exemple, la distance est de 0,5 m. DISTANCE MINIMALE AVEC DES MATÉRIAUX NORMALEMENT INFLAMMABLES Ce symbole, indique la distance minimale en mètres (m) à... - Page 90 CONFORMITÉ CE Par la présente, Adam Hall GmbH déclare que ce produit est conforme aux directives suivantes (si applicables) : Directive basse tension (2014/35/UE) Directive CEM (2014/30/UE) RoHS (2011/65/UE) RED (2014/53/UE) DÉCLARATION DE CONFORMITÉ UE Les déclarations de conformité pour les produits soumis aux directives LVD, EMC et RoHS peuvent être demandées à...
-
Page 91: Español
Lea atentamente el presente manual de in- strucciones con el fin de poder usar rápidamente y de forma óptima su nuevo producto de Cameo Light. Puede encontrar más información sobre Cameo Light en nuestro sitio web CAMEOLIGHT. -
Page 92: Instrucciones De Seguridad
Este símbolo indica peligros que pueden causar una descarga eléctrica. Este símbolo indica puntos de peligro o situaciones peligrosas. Este símbolo indica peligros por superficies calientes. Este símbolo indica peligros debido a fuentes de luz intensas. Este símbolo indica que en el equipo no hay piezas que pueda sustituir el usuario. Este símbolo identifica información complementaria sobre el uso del producto. - Page 93 ATENCIÓN: 1. No poner en marcha el equipo si ha estado sometido a fuertes fluctuaciones de temperatura (por ejemplo, tras su transporte). La humedad y el agua condensa- da pueden dañar el equipo. Encender el equipo únicamente después de que su temperatura haya alcanzado la temperatura ambiente.
- Page 94 PRECAUCIÓN: 1. Las piezas móviles, como los soportes de montaje u otras piezas, pueden que- darse atascadas. 2. En equipos con componentes motorizados, existe peligro de lesiones por el movimiento del equipo. Los movimientos repentinos del equipo pueden provocar una reacción brusca. 3.
- Page 95 ¡PRECAUCIÓN! INSTRUCCIONES IMPORTANTES EN RELACIÓN CON LOS PRODUC- TOS DE ILUMINACIÓN 1. Nunca mirar directamente, ni siquiera un instante, a la fuente de luz. 2. Nunca mirar la fuente de luz mediante equipos ópticos, como lentes de aumento. 3. ¡Los efectos de estrobo pueden provocar ataques epilépticos en personas sensibles! 4.
-
Page 96: Indicaciones Para Equipos Portátiles De Interior
TRANSMISIÓN DE LA SEÑAL POR W-DMX AVISO: En general, la transmisión DMX inalámbrica no se puede utilizar para aplicacio- nes con factores relevantes para la seguridad que puedan provocar daños personales o materiales en caso de fallo. Esto afecta especialmente a las estructuras móviles para escenarios o truss, a los mo- tores/elevadores controlados por DMX o a los dispositivos de elevación para el manejo de torres elevadoras, sistemas hidráulicos o componentes móviles similares accionados por DMX. -
Page 97: Conexiones, Elementos De Mando Y Elementos De Visualización
• Estrobo • Motores de giro horizontal y vertical con resolución de 16 bits • Pantalla alimentada con batería para poder efectuar ajustes independientemente de la red eléctrica • Corrección automática de la posición • Ventiladores controlados por temperatura • Conexiones DMX de 3 y 5 pines •... - Page 98 FUSE Portafusibles para fusibles sensibles de 5 x 20 mm. NOTA IMPORTANTE: Sustituya el fusible exclusivamente por otro del mismo tipo y con las mismas características (véase la información impresa en la carcasa). Si el fusible salta de forma recurrente, diríjase a un centro de servicio técnico autorizado.
- Page 99 BOTONES TÁCTILES BACK: pulsando BACK (varias veces) irá subiendo de nivel en la estructura del menú hasta llegar a la pantalla principal. y : selección de las opciones del menú principal (dirección DMX, modo operativo, etc.) y de los submenús. ENTER: partiendo de la pantalla principal, si pulsa ENTER accederá...
-
Page 100: Manejo
Bedienfeld proceso de arranque y reinicio de los motores aparecerán consecutivamente en pantalla el mensaje «Software Update Please Wait...» y el logotipo de CAMEO con información sobre el modelo del equipo. Tras este procedimiento, el foco estará listo para funcionar y se activará en el último modo operativo que se haya seleccionado. - Page 101 MENÚ DE CONTROL (Control) CONFIGURAR LA DIRECCIÓN INICIAL DMX (DMX Address) Partiendo de la pantalla principal, si pulsa ENTER accederá al menú principal. Seleccione el menú Control con los botones y pulse ENTER. Ahora, utilice los botones para seleccionar la opción «DMX Address» del menú y confirme la selección pulsando ENTER. Ahora puede ajustar la dirección inicial DMX que desee con los botones y .
- Page 102 CONFIGURACIÓN DE RED (Network) Partiendo de la pantalla principal, si pulsa ENTER accederá al menú principal. Seleccione el menú Control con los botones y pulse ENTER. Ahora, utilice los botones para seleccionar la opción «Network» del menú y confirme la selección pulsando ENTER. Consulte la siguiente ta- bla para ver información sobre la configuración de red.
- Page 103 CONFIGURACIÓN DE W-DMX (Wireless) Partiendo de la pantalla principal, si pulsa ENTER accederá al menú principal. Seleccione el menú Control con los botones y pulse ENTER. Ahora, utilice los botones para seleccionar la opción «Wireless» del menú y confirme la selección pulsando ENTER. Consulte la siguiente tabla para ver información sobre la configuración de W-DMX.
- Page 104 MODOS OPERATIVOS AUTÓNOMOS (Stand Alone) Partiendo de la pantalla principal, si pulsa ENTER accederá al menú principal. Con los botones , seleccione el menú Control y pulse ENTER. Ahora, utilice los botones para seleccionar la opción «Stand Alone» del menú y confirme la selección pulsando ENTER. Ahora, seleccione uno de los tres modos autónomos con los botones y confirme con ENTER.
- Page 105 000 - 005 Strobe open 006 - 010 Strobe closed 011 - 022 Ramp up/down, slow -> fast 023 - 033 Ramp up/down random, slow->fast 034 - 045 Ramp up, slow -> fast 046 - 056 Ramp up random, slow -> fast Strobe 057 - 068 Ramp down, slow ->...
- Page 106 000 - 000 Color open 001 - 023 Open -> CTO 2600K 024 - 024 CTO 2600K (1) 025 - 047 CTO 2600K -> CTO 3200K 048 - 048 CTO 3200K (2) 049 - 071 CTO 3200K -> CTB 7500K 072 - 072 CTB 7500K (3) 073 - 095 CTB 7500K ->...
- Page 107 Blade 1B 000 - 255 0% to 100% Blade 2A 000 - 255 0% to 100% Blade 2B 000 - 255 0% to 100% Blade 3A 000 - 255 0% to 100% Blade 3B 000 - 255 0% to 100% Blade 4A 000 - 255 0% to 100% Blade 4B...
- Page 108 MODO ESCLAVO (Slave) La selección del modo esclavo tiene lugar tal y como se explica anteriormente en el apartado «MODOS OPERATIVOS AUTÓNOMOS». Conecte las unidades esclava y maestra (del mismo modelo y misma versión de software) mediante un cable DMX (maestra = DMX OUT; esclava = DMX IN) y active en la unidad maestra uno de los modos autónomos Auto o Master.
- Page 109 DMX Fail Estado oper- Black Activa el Blackout ativo en caso Hold Se mantendrá el último comando de interrup- Auto Activa el modo operativo Auto ción de la señal DMX Dimmer Selección de Linear La intensidad luminosa aumenta de forma Curve la curva de lineal con el valor DMX...
- Page 110 Motor Ajustes de Pan Reverse OFF Sin inversión del sentido de giro horizontal los motores Inversión del sentido de giro horizontal en el equipo Tilt Reverse Sin inversión del sentido de giro vertical Inversión del sentido de giro vertical Pan Angle Ángulo de giro horizontal 630°...
- Page 111 CURVAS DE ATENUACIÓN Linear Exponential Logarithmic S-curve Valor DMX Valor DMX Valor DMX Valor DMX METNÚ DE SERVICIO Partiendo de la pantalla principal, si pulsa ENTER accederá al menú principal. Seleccione el menú de servicio Service con los botones y pulse ENTER. Service Calibrate Test Manual...
- Page 112 Introducción de la contraseña para restable- cer el tiempo de funcionamiento actual (Time PW = 050) Clean Restablecimiento del tiempo de funciona- Current miento actual Firm- Visualización del Vx.x.x ware firmware de los componentes Model Denominación de Opus W5 Info modelo...
-
Page 113: Instalación Y Montaje
INSTALACIÓN Y MONTAJE Gracias al cómodo soporte doble, el foco puede instalarse en un lugar adecuado sobre una super- ficie nivelada. El montaje en un travesaño se realiza con una abrazadera apta para travesaño. Esta abrazadera se fija en el soporte de montaje (A). Las abrazaderas para travesaño correspondientes se pueden pedir por separado. - Page 114 CUIDADOS (que puede realizar el usuario) ¡ADVERTENCIA! Antes de realizar cualquier tarea para mantener cuidado el equipo, desconectar la alimentación eléctrica y, si es posible, todas las conexiones del equipo. ¡AVISO! Un cuidado inadecuado puede provocar daños en el equipo e incluso su destrucción.
-
Page 115: Tecnología Dmx
TECNOLOGÍA DMX DMX512 DMX (Digital Multiplex) es el nombre de un protocolo universal utilizado como medio de comunicación entre dispositivos y contro- ladores. El controlador DMX envía datos DMX a los equipos DMX conectados. Los datos DMX se envían como datos serie que se transmiten de equipo a equipo a través de los conectores XLR «DMX IN»... - Page 116 ASIGNACIÓN DE PINES: Cable DMX con XLR de 3 pines: Cable DMX con XLR de 5 pines (los pines 4 y 5 no se utilizan): Shield Shield TERMINACIÓN DMX (TERMINADOR): Para evitar errores de sistema, debe conectarse una resistencia de terminación (120 ohmios, 1/4 W) en el último equipo de la cadena DMX.
-
Page 117: Datos Técnicos
DATOS TÉCNICOS NÚMERO DE ARTÍCULO: CLOW5 Clase de producto: Cabeza móvil LED Tipo: Washer de perfil Número de lámparas: Tipo de lámpara: LED de 380 W Temperatura de color de Blanco frío 6700 K la lámpara: Frecuencia de la mod- 650 Hz, 1530 Hz, 3600 Hz, 12 kHz, 18,9 kHz, 25 kHz (ajustable) ulación por ancho de pulsos (PWM) del LED: Función de mezcla de... - Page 118 Elementos de manejo: Botones táctiles BACK, ENTER, UP, DOWN, LEFT, RIGHT, pantalla LCD táctil, en color y con gráficos (se puede usar con guantes) Elementos de Pantalla LCD táctil retroiluminada, en color y con gráficos, ali- visualización: mentación a batería para efectuar ajustes del sistema independiente- mente de la red eléctrica Tensión operativa: 100-240 V CA / 50-60 Hz...
-
Page 119: Distancia Mínima A La Superficie Iluminada
DISTANCIA MÍNIMA A LA SUPERFICIE ILUMINADA Este símbolo con indicación de distancia en metros (m) indica la distancia mínima de la lámpara con respecto a la superficie iluminada. En este ejemplo, la distancia es de 0,5 m. DISTANCIA MÍNIMA A MATERIALES INFLAMABLES Este símbolo con indicación de distancia en metros (m) indica la distancia mínima del equipo con respecto a materiales inflamables. - Page 120 Directiva sobre baja tensión (LVD) (2014/35/UE) Directiva sobre compatibilidad electromagnética (CEM) (2014/30/UE) Directiva sobre restricciones a la utilización de determinadas sustancias peligrosas en aparatos eléctricos y electrónicos (RoHS) (2011/65/UE) Directiva sobre la comercialización de equipos radioeléctricos (RED) (2014/53/UE) DECLARACIÓN DE CONFORMIDAD DE LA UE Las declaraciones de conformidad para productos sujetos a las directivas LVD, CEM y RoHS pueden solicitarse a info@adamhall.com.
-
Page 121: Polski
Urządzenie to zostało zaprojektowane i wyprodukowane zgodnie z wysokimi standardami jakości, tak by działało bezawaryjnie przez wiele lat. Należy uważnie przeczytać niniejszą instrukcję obsłu- gi, aby móc jak najszybciej rozpocząć prawidłową eksploatację nowego urządzenia marki Cameo Light. Więcej informacji o marce Cameo Light można znaleźć na stronie CAMEOLIGHT.COM. -
Page 122: Zasady Bezpieczeństwa
Ten symbol oznacza zagrożenia, które mogą być przyczyną porażenia prądem elektrycznym. Ten symbol oznacza niebezpieczne miejsca lub sytuacje. Ten symbol oznacza niebezpieczeństwa związane z gorącymi powierzchniami. Ten symbol oznacza niebezpieczeństwa związane z intensywnym źródłem światła. Ten symbol oznacza urządzenie, w którym nie ma części wymienianych przez użytkownika. - Page 123 UWAGA: 1. Nie używać urządzenia, jeśli było ono narażone na duże wahania temperatury (np. po transporcie). Wilgoć i kondensat mogą uszkodzić urządzenie. Włączyć urządze- nie dopiero wtedy, gdy osiągnie temperaturę otoczenia. 2. Sprawdzić, czy napięcie i częstotliwość sieci elektrycznej są zgodne z parametra- mi podanymi na urządzeniu.
- Page 124 PRZESTROGA: 1. Ruchome elementy, takie jak wsporniki montażowe lub inne, mogą ulec zakleszc- zeniu. 2. W przypadku urządzeń z elementami napędzanymi mechanicznie istnieje niebez- pieczeństwo obrażeń w wyniku ruchów urządzenia. Nagłe ruchy urządzenia mogą wystraszyć użytkownika. 3. Podczas regularnej pracy powierzchnia obudowy urządzenia może się silnie nagrzewać.
- Page 125 OSTROŻNIE! WAŻNE WSKAZÓWKI DOTYCZĄCE PRODUKTÓW OŚWIETLENIOWYCH! 1. Nigdy nie patrzeć bezpośrednio w źródło światła, nawet przez krótką chwilę. 2. Nigdy nie należy patrzeć w źródło światła za pomocą przyrządów optycznych, takich jak lupy 3. Efekty stroboskopowe mogą wywoływać u podatnych osób ataki epileptyczne! 4.
-
Page 126: Uwagi Dotyczące Przenośnego Sprzętu Wewnętrznego
PRZESYŁANIE SYGNAŁÓW W-DMX OSTRZEŻENIE: Ogólnie rzecz biorąc, bezprzewodowa transmisja DMX nie może być stosowana, gdy występują czynniki wpływające na bezpieczeństwo, które w przypadku awarii mogą spowodować obrażenia osób lub szkody materialne. Dotyczy to w szczególności ruchomych konstrukcji scenicznych lub kratownic, silników/ podnośników sterowanych przez DMX lub urządzeń... -
Page 127: Wprowadzenie
WPROWADZENIE RUCHOMA GŁOWICA SERII OPUS CLOW5 FUNKCJE STEROWANIA Sterowanie DMX 29- i 46-kanałowe Art-Net sACN W-DMX™ Możliwość pracy w standardzie RDM Tryb pracy master / slave Funkcje standalone CHARAKTERYSTYKA • Dioda LED 380 W • Mieszanie kolorów CMY + CTO •... -
Page 128: Przyłącza, Elementy Obsługi I Wskaźniki
TRUE1 TOP. POWER OUT Gniazdo wyjściowe kompatybilne z TRUE1 TOP. Źródło zasilania dla dodatkowych reflektorów CAMEO. Całkowity pobór prądu wszystkich podłączonych urządzeń nie może przekroczyć wartości w amperach (A) podanej na urządzeniu. FUSE Oprawa na czułe bezpieczniki 5 x 20 mm. - Page 129 GRAFICZNY WYŚWIETLACZ LCD Z PODŚWIETLENIEM Dzięki dotykowemu wyświetlaczowi LCD urządzenie może być obsługiwane bezpośrednio na wyświetlaczu (również w rękawicach). Wyświetlacz pokazuje bieżący tryb pracy (widok główny), pozycje z menu wyboru oraz wartość liczbową lub stan pracy w poszczególnych pozycjach menu. W przypadku braku sygnału sterującego wyświetlacz miga.
-
Page 130: Obsługa
Display Bedienfeld urządzenia i resetowania silników na wyświetlaczu pojawi się komunikat: „Software Update Please Wait...” i logo marki CAMEO oraz informacje o modelu urządzenia. Następnie reflektor będzie gotowy do pracy w ostatnio wybranym trybie. Obsługa reflektora odbywa się za pomocą przycisków obok wyświetlacza, a wyświetlacz (odpowiedni do użycia w rękawicach) może być... - Page 131 wyświetlany komunikat „None” (brak sygnału). Jeśli sygnał sterujący zostanie ponownie włą- czony, na wyświetlaczu będzie znów wyświetlany główny ekran. Widok ekranu można obrócić o 180°, naciskając na panelu dotykowym przycisk . Jeśli widok ekranu jest już obrócony o 180°, na panelu dotykowym można nacisnąć , aby powrócić do standardowego wyświetlania. Widok ekranu można również...
- Page 132 USTAWIANIE TRYBU DMX (DMX Mode) Rozpoczynając od ekranu głównego, należy nacisnąć ENTER, aby wejść do menu głównego. Zgodnie z wcześniejszą instrukcją za pomocą przycisków w menu sterowania wybrać opcję Control i nacisnąć ENTER. Przyciskami wybrać pozycję menu „DMX Mode” i potwierdzić wybór przyciskiem ENTER.
- Page 133 Address Zakres 1–256, Zakres Od 000 do 255. Zmiana wartości ustaw adres IP i maskę podsieci 000–255 przyciskami i , potwierdzenie przyciskiem ENTER IP Address Wybór bloku przyciskami zmiana wartości za pomocą przycisków i , potwierdzenie przyciskiem ENTER. IP Subnet Wybór bloku przyciskami Mask zmiana wartości za pomocą...
- Page 134 Wireless W-DMX Dezaktywacja W-DMX Aktywacja W-DMX Operating Receiver Moduł W-DMX skonfigurowany jako odbiornik transmiter Moduł W-DMX skonfigurowany jako nadajnik Transmitting Standard transmisji G3 Standard transmisji G4S Link Link Skojarzenie z urządzeniami W-DMX. We wszystkich urządze- niach funkcja W-DMX musi być aktywowana, a skojarzenie z transmiterem anulowane (Receive Reset) UnLink Anulowanie skojarzeń...
- Page 135 TRYB PRACY STANDALONE: STATYCZNY (Master i Alone) Tryb statyczny, podobnie jak sterownik DMX, umożliwia skonfigurowanie ustawień PAN, TILT, ściemniacza, stroboskopu, koła barw i tarczy gobo bezpośrednio w urządzeniu w przedziale od 000 do 255. Dzięki temu można stworzyć indywidualną scenę bez dodatkowego kontrolera DMX. Można przy tym wybierać...
- Page 136 000 - 000 Color open 001 - 023 Open -> Deep red 024 - 024 Deep Red (1) 025 - 047 Deep Red -> Medium Blue 048 - 048 Medium Blue (2) 049 - 071 Medium Blue -> Deep Green 072 - 072 Deep Green (3) 073 - 095 Deep Green ->...
- Page 137 000 - 191 Open -> Close 192 - 200 Pulse, slow -> fast (with Dim) 201 - 209 Pulse, slow -> fast (without Dim) 210 - 218 Pulse Random, slow -> fast (without Dim) Iris 219 - 227 Ramp up, slow -> fast (with Dim) 228 - 236 Ramp up, slow ->...
- Page 138 AUTOMATYCZNE PROGRAMY W TRYBIE PRACY STAND-ALONE (Auto Prog) Każdy z 4 różnych programów automatycznych (programy od 1 do 4) zawiera zaprogramowane sekwencje ruchu głowicy, zmian koła kolorów itp. Prędkość ruchu można ustawiać oddzielnie. Jak poprzednio w punkcie „TRYBY PRACY STAND-ALONE” wybrać tryb automatyczny, potwierdzić klawiszem ENTER, wybrać...
- Page 139 Settings (pogrubiona czcionka = ustawienie fabryczne) Display Ustawienia Reverse obraz wyświetlacza nie jest obrócony wyświetlania Obrócenie obrazu wyświetlacza o 180° (np. przy montażu urządzenia „do góry nogami”) Backlight Wyłączenie po ok. 30 sekundach bezczyn- ności Stale włączone podświetlenie ekranu DMX Fail stan roboczy Black aktywuje wygaszenie reflektora...
- Page 140 Motor Ustawienia Pan Reverse OFF Zmiana kierunku obrotu w poziomie wyłąc- silników w zona urządzeniu Zmiana kierunku obrotu w poziomie włąc- zona Tilt Reverse Zmiana kierunku obrotu w pionie wyłączona Zmiana kierunku obrotu w pionie włączona Pan Angle Kąt obrotu w poziomie 630° Kąt obrotu w poziomie 540°...
- Page 141 KRZYWE ŚCIEMNIANIA Liniowa Wykładnicza Logarytmiczna S-curve Wartość DMX Wartość DMX Wartość DMX Wartość DMX MENU SERWISOWE Rozpoczynając od ekranu głównego, należy nacisnąć ENTER, aby wejść do menu głównego. Za wybrać menu serwisowe Service i nacisnąć ENTER. pomocą przycisków Service Calibrate Test Manual Reset Motor USB Update...
- Page 142 Current Time Wyświetlanie bieżącego czasu pracy Time PW Wprowadzić hasło, aby zresetować bieżący czas pracy (Time PW = 050) Clean Current Przywrócenie bieżącego czasu pracy Firm- Wyświetlenie Vx.x.x ware oprogramowania układowego kompo- nentów Infor- Oznaczenie modelu Opus W5 macje o modelu...
-
Page 143: Ustawianie I Montaż
USTAWIANIE I MONTAŻ Do ustawienia reflektora w odpowiednim miejscu na płaskiej powierzchni służy wygodny w użyciu podwójny pałąk. Aby zamontować urządzenie na kratownicy, konieczny jest specjalny zacisk do kratownic, przytwierdzany do uchwytu montażowego (A). Odpowiednie zaciski do trawersów są dostępne jako opcja. Należy zapewnić solidne mocowanie i zabezpieczyć reflektor odpowiednią liną... -
Page 144: Czyszczenie, Konserwacja I Naprawy
CZYSZCZENIE, KONSERWACJA I NAPRAWY Aby zapewnić bezawaryjne działanie urządzenia przez długi czas, należy je regularnie czyścić i w razie potrzeby serwisować. Konieczność czyszczenia lub konserwacji zależy od intensywn- ości użytkowania i rodzaju otoczenia. Generalnie zalecamy kontrolę wzrokową przed każdym uruchomieniem. Ponadto zalecamy przeprowadzanie wszystkich wymienionych poniżej i odpow- iednich czynności konserwacyjnych co 500 godzin pracy lub w przypadku mniejszej intensywn- ości użytkowania, najpóźniej po upływie jednego roku. -
Page 145: Technika Dmx
WSKAZÓWKA! Nieprawidłowo wykonane czynności konserwacyjne mogą spowodo- wać utratę gwarancji. WSKAZÓWKA! W przypadku zestawów do przebudowy lub doposażenia dostar- czonych przez producenta należy bezwzględnie przestrzegać dołączonej instrukcji montażu. TECHNIKA DMX DMX-512 DMX (Digital Multiplex) to nazwa uniwersalnego protokołu transmisji do komunikacji między odpowiednimi urządzeniami a kontrolerami. Kontroler DMX wysyła dane DMX do podłączonych urządzeń... - Page 146 KABEL DMX: W przypadku stosowania własnych kabli należy bezwzględnie przestrzegać informacji podanych na ilustracjach na tej stronie. W żadnym wypadku nie wolno łączyć osłony kabla z końcówką uziemiającą wtyczki. Należy także pamiętać, aby osłona nie miała kontaktu z obudową wtyczki XLR.
-
Page 147: Dane Techniczne
DANE TECHNICZNE NUMER ARTYKUŁU: CLOW5 Rodzaj produktu: Oświetlenie dynamiczne LED Typ: Profilowa belka oświetleniowa Liczba źródeł światła: Typ źródła światła: Dioda LED 380 W Temperatura barwowa: Zimna biel 6700 K Częstotliwość PWM 650 Hz, 1530 Hz, 3600 Hz, 12 kHz, 18,9 kHz, 25 kHz (regulowana) diody LED: Funkcja mieszania CMY + CTO... - Page 148 Kąt obrotu TILT: 270° Elementy obsługowe: Dotykowe BACK, ENTER, UP, DOWN, LEFT, RIGHT, graficzny kolorowy wyświetlacz LCD (może być obsługiwany w rękawicach) Wskaźniki: Podświetlany graficzny kolorowy wyświetlacz LCD, zasilanie baterią umożliwiające zmianę ustawień bez podłączenia do zasilania siecio- wego Napięcie robocze: 100–240 V AC / 50–60 Hz Maksymalny pobór 650 W...
-
Page 149: Minimalna Odległość Od Powierzchni Oświetlonej
MINIMALNA ODLEGŁOŚĆ OD POWIERZCHNI OŚWIETLONEJ Ten symbol z informacją o odległości w metrach (m) wskazuje minimalną odległość iluminatora od powierzchni oświetlanej. W tym przykładzie odległość wynosi 0,5 m. MINIMALNA ODLEGŁOŚĆ OD ZWYKŁYCH MATERIAŁÓW ŁATWOPALNYCH Ten symbol z informacją o odległości w metrach (m) wskazuje minimalną odległość... - Page 150 ZGODNOŚĆ CE Adam Hall GmbH oświadcza niniejszym, że produkt spełnia wymogi następujących dyrektyw (o ile dotyczy): Dyrektywa niskonapięciowa (2014/35/UE) Dyrektywa EMC (2014/30/UE) RoHS (2011/65/UE) RED (2014/53/UE) DEKLARACJA ZGODNOŚCI UE Deklaracje zgodności dla produktów podlegających dyrektywom LVD, EMC i RoHS można uzyskać pod adresem info@adamhall.com.
-
Page 151: Italiano
Questo dispositivo è stato sviluppato e prodotto secondo elevati standard qualitativi per garan- tirne il regolare funzionamento per molti anni. Leggere attentamente questo manuale d’uso per utilizzare al meglio il nuovo prodotto di Cameo Light. Per maggiori informazioni su Cameo Light, consultate il nostro sito web CAMEOLIGHT.COM. -
Page 152: Indicazioni Sulla Sicurezza
Questo simbolo indica pericoli che possono causare scosse elettriche. Questo simbolo indica punti di pericolo o situazioni pericolose. Questo simbolo indica pericoli dovuti a superfici calde. Questo simbolo indica pericoli dovuti a fonti di luce intense. Questo simbolo indica un dispositivo che non contiene parti sostituibili dall'utente. Questo simbolo indica informazioni complementari sull'utilizzo del prodotto. - Page 153 ATTENZIONE: 1. Non mettere in funzione il dispositivo, se sottoposto a forti sbalzi di temperatura (ad esempio dopo il trasporto). Umidità e condensa potrebbero danneggiare il dispositivo. Accendere il dispositivo solo quando ha raggiunto la temperatura ambiente. 2. Verificare che la tensione e la frequenza della rete elettrica corrispondano ai valori indicati sul dispositivo.
- Page 154 PRUDENZA: 1. In caso di componenti mobili, come staffe di montaggio, sussiste il rischio di schiacciamento. 2. Nei dispositivi con componenti azionati a motore sussiste il pericolo di lesioni a causa del movimento del dispositivo. Movimenti improvvisi del dispositivo posso- no causare reazioni impreviste.
- Page 155 ATTENZIONE! INDICAZIONI IMPORTANTI RELATIVE AI PRODOTTI PER L’ILLUMINAZIONE! 1. Non fissare mai direttamente il fascio di luce, nemmeno per brevi istanti. 2. Non guardare mai il fascio di luce con dispositivi ottici come le lenti d’ingrandimento. 3. In alcuni casi, in persone sensibili gli effetti stroboscopici possono causare attacchi epilettici.
-
Page 156: Avvertenze Per Dispositivi Industriali Portatili
TRASFERIMENTO DEL SEGNALE TRAMITE W-DMX AVVERTENZA: In generale, la trasmissione DMX senza fili non deve essere utilizzata per applicazioni con fattori di sicurezza che possono causare danni a persone o cose in caso di guasto. Ciò vale in particolare per scene mobili o traverse, per motori/sollevatori controllati da DMX o per il funzionamento di ascensori da palcoscenico azionati da DMX, sistemi idraulici o componenti mobili analoghi. -
Page 157: Introduzione
INTRODUZIONE TESTA MOBILE SERIE OPUS CLOW5 FUNZIONI DI CONTROLLO Controllo DMX a 29 e a 46 canali Art-Net sACN W-DMX™ Compatibile con RDM Funzionamento master/slave Funzioni stand-alone CARATTERISTICHE • LED da 380 W • Mix cromatico CMY + CTO. • Ruota colori con 7 colori brillanti + libero e divisione colori. •... -
Page 158: Connettori, Elementi Di Comando E Visualizzazione
Un cavo di alimentazione adatto con connettore TRUE1 TOP in dotazione. POWER OUT Presa di uscita compatibile con TRUE1 TOP. Serve per l’alimentazione di altri proiettori CAMEO. Assicurarsi che il totale della potenza assorbita di tutti i dispositivi collegati all’apparecchio non superi il valore indicato in ampere (A). - Page 159 DISPLAY LCD SENSIBILE ALLA PRESSIONE CON ILLUMINAZIONE Grazie al display LCD sensibile alla pressione il dispositivo può essere azionato direttamente sul display (anche indossando i guanti). Il display mostra la modalità di funzionamento attualmente attivata (schermata principale), le voci nel menu di selezione e il valore numerico o lo stato di fun- zionamento in alcune voci di menu.
-
Page 160: Utilizzo
Bedienfeld durante laprocedura di avvio e il reset dei motori sul display vengono visualiz- zati in successione “Software Update Please Wait” e il logo Cameo. Al termine della procedura il proiettore è pronto per l’uso e la modalità di funzionamento selezionata in precedenza si attiva. - Page 161 segnale di controllo è di nuovo presente, il display ritorna alla schermata principale. Il display può essere ruotato di 180° toccando il tasto tattile ; se il display è già ruotato di 180°, toccare il tasto per riportarlo alla schermata standard. La schermata del display può anche essere ruotata di 180° premendo l’icona a forma di tetto sul display sensibile alla pressione..
- Page 162 IMPOSTAZIONE DELLA MODALITÀ DMX (DMX Mode) Premere ENTER dalla schermata principale per accedere al menu principale. Con i tasti selezionare il menu Control e premere ENTER. Con i tasti selezionare la voce di menu “DMX Mode” e confermare premendo ENTER. Selezionare la modalità DMX desiderata premendo di nuovo e confermando con ENTER.
- Page 163 Address Valori da 1 a 256, Valori da Da 000 a 255. Modificare il impostare indirizzo IP e subnet 000 a 255 valore con e , confermare con mask ENTER. IP Address Selezionare il blocco con modificare il valore con confermare premendo ENTER.
- Page 164 MODALITÀ DI FUNZIONAMENTO STAND-ALONE (Stand Alone) Premere ENTER dalla schermata principale per accedere al menu principale. Con i tasti lezionare il menu Control e premere ENTER. Con i tasti selezionare la voce di menu “Stand Alone” e confermare premendo ENTER. Con i tasti selezionare una delle tre modalità...
- Page 165 000 - 005 Strobe open 006 - 010 Strobe closed 011 - 022 Ramp up/down, slow -> fast 023 - 033 Ramp up/down random, slow->fast 034 - 045 Ramp up, slow -> fast 046 - 056 Ramp up random, slow -> fast Strobe 057 - 068 Ramp down, slow ->...
- Page 166 000 - 000 Color open 001 - 023 Open -> CTO 2600K 024 - 024 CTO 2600K (1) 025 - 047 CTO 2600K -> CTO 3200K 048 - 048 CTO 3200K (2) 049 - 071 CTO 3200K -> CTB 7500K 072 - 072 CTB 7500K (3) 073 - 095 CTB 7500K ->...
- Page 167 Blade 1B 000 - 255 0% to 100% Blade 2A 000 - 255 0% to 100% Blade 2B 000 - 255 0% to 100% Blade 3A 000 - 255 0% to 100% Blade 3B 000 - 255 0% to 100% Blade 4A 000 - 255 0% to 100% Blade 4B...
- Page 168 Stand Alone Master Alone Auto Prog Slave IMPOSTAZIONI DI SISTEMA (Settings) Premere ENTER dalla schermata principale per accedere al menu principale. Con i tasti selezio- nare il menu Settings e premere ENTER. Display DMX Fail Dimmer Curve LED Frequency Motor Movement Si accede al sottomenu per l’impostazione delle seguenti sottovoci, vedere la tabella.
- Page 169 Dimmer Seleziona la Linear L'intensità della luce cresce in maniera lineare Curve curva dimmer con il valore DMX Exponen- L'intensità della luce può essere impostata tial in maniera precisa nell'intervallo di valori DMX inferiore e grossolanamente in quello superiore Logarith- L'intensità...
- Page 170 Motore Impostazioni Color- Scroll La ruota colori può girare in continuo dei motori wheel2 Snap Quando si raggiunge il valore corrispondente nell’apparec- la ruota colori passa direttamente al filtro chio colore desiderato Movement Blackout Nessun blackout con movimento della testa Blackout con movimento della testa Silent Velocità...
- Page 171 Inserimento della password per il reset del tempo di funzionamento momentaneo (Time PW = 050) Clean Cur- Ripristino del tempo di funzionamento rent momentaneo Firm- Visualizzazione Vx.x.x ware della versione del firmware dei componenti Model Nome del modello Opus W5 Info...
-
Page 172: Installazione E Montaggio
INSTALLAZIONE E MONTAGGIO Grazie alla comoda staffa doppia, è possibile sistemare il proiettore in una posizione idonea, su una superficie piana. Il montaggio su una traversa viene effettuato tramite un apposito morsetto per traverse, da fissare alla staffa di montaggio (A). Morsetti per traverse idonei sono disponibili come accessori. -
Page 173: Pulizia, Manutenzione E Riparazione
PULIZIA, MANUTENZIONE E RIPARAZIONE Per garantire il buon funzionamento del dispositivo nel tempo, è necessario sottoporlo a una pulizia regolare e, se necessario, a manutenzione. La necessità di pulizia e manutenzione dipende dall’intensità e dall’ambiente di utilizzo. In generale, si consiglia di effettuare un’ispezione visiva prima di ogni messa in servizio. -
Page 174: Tecnologia Dmx
NOTA! Gli interventi di manutenzione non eseguiti correttamente possono invalidare la garanzia. NOTA! Nel caso di set di conversione o retrofit forniti dal produttore, è essenziale seguire le istruzioni di installazione allegate. TECNOLOGIA DMX DMX512 DMX (Digital Multiplex) è la sigla di un protocollo di trasmissione uni- versale per la comunicazione tra dispositivi e controller. - Page 175 CAVO DMX: In caso di cavi di propria realizzazione, procedere secondo le figure di questa pagina. Non collegare mai la schermatura dei cavi con il contatto di massa del connettore e assicurarsi che la schermatura non entri in contatto con l’involucro del connettore XLR. Il contatto di massa della schermatura può...
-
Page 176: Dati Tecnici
DATI TECNICI CODICE ARTICOLO: CLOW5 Tipologia di prodotto: Testa mobile LED Tipo: Profile Washer Numero lampade: Tipo di lampada: LED da 380 W Temperatura del colore Bianco freddo 6700 K lampada: Frequenza LED PWM: 650 Hz, 1530 Hz, 3600 Hz, 12 kHz, 18,9 kHz, 25 kHz (regolabile) Funzione mix croma- CMY + CTO tico:... - Page 177 Elementi di Display grafico LCD a colori illuminato, alimentazione a batteria per visualizzazione: impostazioni di sistema non dipendenti dalla rete elettrica Tensione di esercizio: 100 – 240 V AC / 50 – 60 Hz Potenza massima 650 W assorbita: Flusso luminoso: 15400 lm Collegamento alimen- Ingresso e uscita TRUE1 TOP compatibili (uscita max.
-
Page 178: Distanza Minima Dalla Superficie Illuminata
DISTANZA MINIMA DALLA SUPERFICIE ILLUMINATA Questo simbolo, che indica la distanza in metri (m), indica la distanza minima tra il corpo luminoso e la superficie illuminata. In questo esempio la distanza è di 0,5 m. DISTANZA MINIMA DAI MATERIALI NORMALMENTE INFIAMMABILI Questo simbolo con la distanza in metri (m) indica la distanza minima tra il dispositivo e i materiali normalmente infiammabili. - Page 179 CONFORMITÀ CE Con la presente Adam Hall GmbH dichiara che questo prodotto soddisfa le seguenti direttive (ove pertinente): Direttiva bassa tensione (2014/35/CE) Direttiva CEM (2014/30/UE) RoHS (2011/65/UE) RED (2014/53/UE) DICHIARAZIONE DI CONFORMITÀ EU Le dichiarazioni di conformità per i prodotti soggetti alla direttiva LVD, EMC e RoHS possono esse- re richieste all'indirizzo info@adamhall.com.
-
Page 180: Dmx
DMX CONTROL / DMX STEUERUNG / COMMANDE DMX / CONTROL DMX / STEROWANIE DMX / CONTROLLO DMX CH Mode Stan- Function Values Sub-Group dard tended 255 0% to 100% Pan fine 255 0% to 100% Tilt 255 0% to 100% Tilt Tilt fine 255 0% to 100%... - Page 181 000 Color open 023 Open -> Red 024 Red (1) 047 Red -> Medium Blue 048 Medium Blue (2) 071 Medium Blue -> Deep Green 072 Deep Green (3) 095 Deep Green -> Deep Orange 096 Deep Orange (4) 119 Deep Orange -> Forest Green 120 Forest Green (5) Color Wheel 1 Color...
- Page 182 000 Color open 023 Open -> CTO 2600K 024 CTO 2600K (1) 047 CTO 2600K -> CTO 3200K 048 CTO 3200K (2) 071 CTO 3200K -> CTB 7500K 072 CTB 7500K (3) 095 CTB 7500K -> CTB 9000K 096 CTB 9000K (4) 119 CTB 9000K ->...
- Page 183 Blade 1A 255 0% to 100% Blade 1A fine 255 0% to 100% Blade 1B 255 0% to 100% Blade 1B fine 255 0% to 100% Blade 2A 255 0% to 100% Blade 2A fine 255 0% to 100% Blade 2B 255 0% to 100% Blade 2B fine 255 0% to 100%...
- Page 184 No function Blackout while moving on (hold 3s) Blackout while moving off (hold 3s) No function Blackout while Color moving on (hold Blackout while Color moving off (hold No function Invert Pan on (hold 3s) Invert Pan off (hold 3s) Invert Tilt on (hold 3s) Invert Tilt off (hold 3s) Pan Angle 540°...
- Page 185 EN: (1*) After the adjustments have been made, set the value to 000 to avoid disturbance by endless function call. DE: (1*) Nachdem die Einstellungen vorgenommen wurden, stellen Sie den Wert auf 000 ein, um Störungen durch endlosen Funktionsaufruf zu vermeiden. FR: (1*) Une fois les ajustements effectués, réglez la valeur sur 000 pour éviter les perturbati- ons par appel de fonction sans fin.
- Page 188 CAMEOLIGHT.COM Adam Hall GmbH Adam-Hall-Str. 1 | 61267 Neu-Anspach | Germany Phone: +49 6081 9419-0 | adamhall.com Adam Hall Ltd. | The Seedbed Business Centre | SS3 9QY Essex | United Kingdom REV: 01...