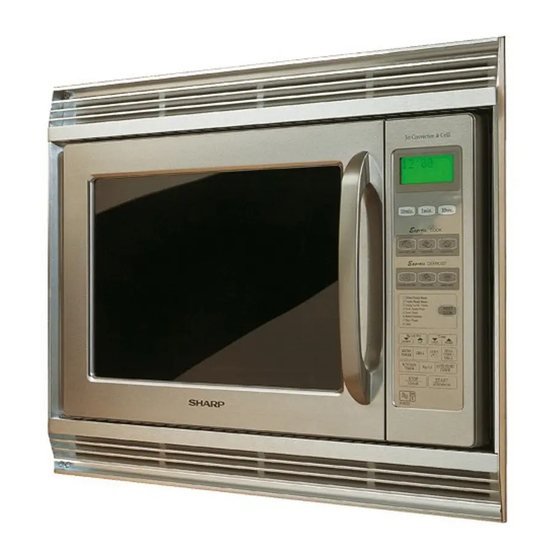
Sharp EBR-9900 Instructions
Les langues disponibles
Les langues disponibles
Liens rapides
Instruction for SHARP Built-in Kits EBR-99ST/EBR-9900 (W)/(SL)/(BK)/EBR-9910(SL)
Before installing a Sharp Microwave Oven, read and check the following points.
SAFETY INFORMATION
1.
Except U.K., for use in continental Europe only.
The oven must be connected to an electric circuit provided with a switch (contact gap no less than 3
mm) to disconnect the oven in case of danger. A safety-device like a fuse in the installation may be
used as a switch.
2.
Disconnect the oven from the power supply before installation.
3.
Surround
a. Make sure that the EBR-99ST/EBR-9900/EBR-9910 is the correct surround for your oven.
b. The Sharp Microwave Ovens are designed to either stand neatly on a kitchen counter top or to be built
into a fitted kitchen cabinet using the surround.
c. The EBR-99ST/EBR-9900/EBR-9910 surround will become hot during oven operations when using the
heater elements. Take care to prevent burns when you use the oven.
4.
Kitchen cabinet
Prepare the kitchen cabinet as follows;
a. The kitchen cabinet must be of the following dimensions as shown in Fig. 1.
WIDTH
HEIGHT
DEPTH
b. Make sure that the back wall of the cupboard D is always fitted to ensure the correct ventilation of
the oven and that the ventilation gap C is 45 mm as shown in Figs 1 and 2.
c. The shelf of the kitchen cabinet should be made to withstand the weight of the microwave oven to
be installed and the heaviest item likely to be cooked in the microwave oven. Refer to the operation
manual for microwave oven weight.
5.
Installation near to a conventional oven
a. When a microwave oven is to be installed next to a conventional oven, sufficient space between them
should be allowed to prevent overheating as the surround can warp with excessively high tempera-
tures.
Obviously, it is important to adhere strictly to the conventional oven manufacturer's
installation instructions.
b. A built-in microwave oven must not be installed above a conventional oven otherwise the microwave
oven's cooling system may be adversely affected by hot air produced by the conventional oven.
6.
Installation near a refrigerator or freezer
a. If the microwave oven is to be installed above a refrigerator or freezer requiring back ventilation, a
ventilation duct behind the microwave oven must be provided. It is essential that the refrigerator/
freezer manufacturer's installation procedures are followed.
b. Do not install the microwave oven above a refrigerator or freezer which are ventilated at the front.
7.
Fixing
To avoid any possibility of the kitchen cabinet moving when the microwave oven is installed, it is
essential that the kitchen cabinet is fixed to the back wall.
8.
Adjustment and repair
It is dangerous for your oven to be adjusted or repaired by anyone except properly qualified service
technicians trained by Sharp.
If the appliance is ever removed from the cabinet it should be re-installed in accordance with these
instructions, which should be kept in a safe place for future reference.
The manufacturer and/or the distributors of this product cannot be held liable for any damages to
the microwave oven and/or the built-in kit caused by improper installation or adjustment.
: 560 mm - 568 mm
: 468 mm
: 550 mm - 580 mm
1

Manuels Connexes pour Sharp EBR-9900


Sommaire des Matières pour Sharp EBR-9900
- Page 5 S'assurer que le lot EBR-99ST/EBR-9900/EBR-9910 est le cadre qui convient au four. b. Les fours à micro-ondes de marque SHARP sont conçus pour être installés soigneusement sur le haut d'une armoire de cuisine ou montés dans un placard de cuisine convenable avec utilisation du cadre.
- Page 6 INSTRUCTIONS POUR L'INSTALLATION 1. (Pour l'emploi au Royaume-Uni) Une petite découpe devra être prévue sur le côté du placard de cuisine pour pour la fiche du cordon d'alimentation. N.B.: La prise secteur doit être accessible après installation, ou encore un disjoncteur multipolaire doit être prévu, disjoncteur pour lequel la distance entre contacts est au moins de 3 mm.
- Page 13 EBR-99ST/EBR-9900(W)/(SL)/(BK)/EBR-9910(SL) Fig. 1 Fig. 3 Fig. 4 60mm 230V Front view of the kitchen cabinet Front view of the kitchen cabinet Vorderansicht des Einbauschrankes Vorderansicht des Einbauschrankes Vue de face du placard de cuisine Vue de face du placard de cuisine...
- Page 14 Fig. 7 Fig. 9 Fig. 8-a Fig. 10 596mm 552mm 22mm Fig. 8-b Fig. 11 Kitchen cabinet door Einbauschranktür Porte du placard de cuisine Deur van keukenkast Sportello armadietto da cucina 60mm Puerta del armario de cocina Kitchen cabinet door Einbauschranktür Porte du placard de cuisine Deur van keukenkast...
- Page 15 Legend Zeichenerklärung = Built-in frame (complete) = Einbaurahmen, komplett = Microwave oven = Mikrowellengerät = Ventilation gap = Belüftungsabstand = Back panel = Rückwärtige Wand = Fastening screw = Befestigungsschraube = Spacing bracket 2 pieces = Abstandhalter 2 Stck. = Exhaust duct 1 piece = Entlüftungskanal 1 Stck.
- Page 16 Recycled paper / Printed with soy ink Printed in Japan Recyclingpapier / Gedruckt mit Sojafarbe Gedruckt in Japan SHARP CORPORATION Osaka, Japan Papier recyclé / Imprimé avec de l'encre de soja Imprimé au Japon Kringlooppapier / Geprint met soja-inkt Gedrukt in Japan...