Table des Matières

Publicité

Les langues disponibles
  • FR

Les langues disponibles

Liens rapides

Mikro
_ Betriebsanleitung
_ User Manual
_ Mode d'emploi
_ Instruzioni d'uso
_ Modo de empleo
_ Deutsch
3 - 21
_ English
22 - 40
_ Français
41 - 59
_ Italiano
60 - 78
_ Español
79 - 97

Publicité

Table des Matières
loading

Sommaire des Matières pour IDC Mikro

  • Page 1 Mikro _ Betriebsanleitung _ User Manual _ Mode d‘emploi _ Instruzioni d‘uso _ Modo de empleo _ Deutsch 3 - 21 _ English 22 - 40 _ Français 41 - 59 _ Italiano 60 - 78 _ Español 79 - 97...
  • Page 3: Table Des Matières

    I N H A L T S V E R Z E I C H N I S – Original Betriebsanleitung – Bedienungsanleitungde Inhaltsverzeichnis Symbolerklärung ....4 Störungen, Reparaturen und Gewährleistung .
  • Page 4: Symbolerklärung

    S Y M B O L E R K L Ä R U N G Symbolerklärung Warnhinweise Weitere Symbole in der Anleitung Warnhinweise im Text werden mit einem Symbol Bedeutung farbig hinterlegten Warndreieck gekenn- ▷ Punkt einer Handlungsbeschreibung zeichnet und umrandet. Punkt einer Liste Bei Gefahren durch Strom wird das Ausru- ▪...
  • Page 5: Allgemeine Sicherheitshinweise

    A L L G E M E I N E S I C H E R H E I T S H I N W E I S E Allgemeine Sicherheits- Geeignetes Personal hinweise HINWEIS: Bei der Aufstellung, Inbetriebnahme und Benut- Das Gerät darf nur von geschultem Fachperso- zung des Geräts sind stets die folgenden Sicher- nal in Betrieb genommen und bedient werden.
  • Page 6: Angaben Zum Gerät

    A N G A B E N Z U M G E R Ä T Angaben zum Gerät ▪ ungesinterten Nicht-Edelmetallen (NEM) Lieferumfang ▪ Wachs _ Fräsmaschine ▪ Kunststoffen _ Netzkabel Bei Verwendung von nicht durch den Hersteller _ USB-Kabel (5 m) _ Netzwerkkabel (5 m) freigegebenen Rohlingen und Werkzeugen kann _ Steuerungskabel Absaugung...
  • Page 7: Bauteile Und Schnittstellen

    A N G A B E N Z U M G E R Ä T Bauteile und Schnittstellen Bild 1 Geräteübersicht Frontseite 1 Frässpindel 2 Werkzeughalter 3 Werkstückhalterung 4 Messvorrichtung Werkzeuglänge 5 Auffangblech/Absaugungskanal 6 Bedientaste 7 Servicetaste...
  • Page 8: Zubehör

    A N G A B E N Z U M G E R Ä T 100 /11 5/2 30V AC 230 V T3. 15A 110 /11 5V T6. 30A P= 6-8 bar Bild 2 Geräteübersicht Rückseite Zubehör 1 Steckplatz für SD-Speicherkarte 2 Ethernet-Schnittstelle Absaugung 3 USB-Schnittstelle...
  • Page 9: Installation

    I N S T A L L A T I O N ▷ Die Höhe der Gerätefüße durch Drehen so ein- Installation stellen, dass das Gerät waagerecht stabil auf Fräsmaschine allen vier Füßen steht. ▷ Den Absaugschlauch der verwendeten Absau- Länder mit 100-115 V Netzspannung gung am Anschluss ([10] in Bild 2 auf Seite 8) an Das Gerät ist voreingestellt für eine Netzspan-...
  • Page 10 I N S T A L L A T I O N 4 Wasserabscheider Anforderungen Luftreinheit Spindel 5 Druckluftanschluss Frässpindel Wenn eine andere als die mitgelieferte Wartungs- ▷ Die Wartungseinheit an der Geräterückseite mit einheit verwendet werden soll, muss diese fol- den Rändelschrauben [1] befestigen.
  • Page 11: Installation Von Cam-Software Und

    I N S T A L L A T I O N ▷ Das Netzkabel an den Netzanschluss [6] der Installation von CAM-Software und Fräsmaschine sowie an eine Netzsteckdose Fräsmaschine anschließen. ▷ Den Datenträger in das Laufwerk des PCs einle- ▷...
  • Page 12: Herstellen Der Netzwerk

    I N S T A L L A T I O N Herstellen der Netzwerkverbindung Inbetriebnahme der Fräsmaschine Zur Herstellung der Netzwerkverbindung Die drei Standardfräser auf den Werkzeug- müssen die Fräsmaschine und der PC plätzen 1-3 sind für den Betrieb zwingend zunächst noch über USB verbunden sein.
  • Page 13 I N S T A L L A T I O N ▷ Den gewünschten Rohling in die Aufnahme der ▷ Die Fräsmaschinen-Software starten. Fräsmaschine einsetzen. Die hohe/dicke Seite Beim Start der Software findet eine Maschinen- des Rohlings muss nach innen zeigen. initialisierung statt.
  • Page 14: Anwendung Und Bedienung

    A N W E N D U N G U N D B E D I E N U N G ▷ Die Befestigungsschraube [1] lösen. Anwendung und Bedienung ▷ Die Werkstückhalterung nach rechts abziehen. ▷ Die Aufnahmebohrung und -flächen reinigen. WARNUNG: ▷...
  • Page 15: Funktion Der Tasten

    A N W E N D U N G U N D B E D I E N U N G Funktion der Tasten Referenzfahrt Nach dem Einschalten müssen mit einer Referenz- fahrt die mechanischen Nullpunkte festgelegt werden. Bedientaste [A] blinkt. Um die Referenzfahrt zu starten: ▷...
  • Page 16: Kontrolle Des Werkstücks Während Eines Laufenden Programms

    A N W E N D U N G U N D B E D I E N U N G Um das Programm fortzusetzen: Fahrt leuchtet Bedientaste [A], nach Erreichen ▷ Bei geschlossener Tür Bedientaste [A] kurz drü- der Position blinkt sie. cken.
  • Page 17: Reinigung Und Wartung

    R E I N I G U N G U N D W A R T U N G Reinigung und Wartung Wartung 7.2.1 Wöchentliche Wartung Reinigung Die Fräsmaschine muss nach jedem Arbeitstag HINWEIS: gereinigt werden. Gefahr von Geräteschäden! ▷ Keine Pressluft, keinen Ultraschall und keinen HINWEIS: Dampfstrahl zum Reinigen verwenden! Zirkonstaub wirkt abrasiv!
  • Page 18 R E I N I G U N G U N D W A R T U N G ▷ Die Spannzange von innen mit der feinen Bürste Um die Spannzange zu entnehmen: ▷ Den Spindelschlüssel auf die Zange stecken. reinigen.
  • Page 19: Monatliche Wartung

    S T Ö R U N G E N , R E P A R A T U R E N U N D G E W Ä H R L E I S T U N G Störungen, Reparaturen Wartungseinheit und Gewährleistung ▷...
  • Page 20: Technische Daten Und Zubehöre/Ersatzteile

    T E C H N I S C H E D A T E N U N D Z U B E H Ö R E / E R S A T Z T E I L E Technische Daten und Zubehöre/Ersatzteile Änderungen vorbehalten. Technische Daten Fräsmaschine Einheit Wert – Art.Nr. 179300-IDC Abmaße (T × B × H) 588 × 516 × 755 Gewicht Elektrische Anschlüsse V/Hz 100-230/50-60 Leistung Sicherung (träge)
  • Page 21 T E C H N I S C H E D A T E N U N D Z U B E H Ö R E / E R S A T Z T E I L E Zubehöre/Ersatzteile Art.Nr. Bezeichnung 179210 Wartungseinheit...
  • Page 22 T A B L E O F C O N T E N T S – Translation of the original Instruction Manual – user manualen Table of Contents Explanation of Symbols ... . . 23 Malfunctions, Repairs and Warranty .
  • Page 23: E N

    E X P L A N A T I O N O F S Y M B O L S Explanation of Symbols Other symbols on the machine Warning indications Symbol Meaning USB port (socket type B) Warning indications in the text are marked with a colour-backed triangle and boxed.
  • Page 24: General Safety Instructions

    G E N E R A L S A F E T Y I N S T R U C T I O N S General Safety Instruc- Suitable Personnel tions NOTE: When installing, starting-up and operating the Starting-up and operation of the machine may machine, always observe the following safety only be carried out by trained specialised per- instructions:...
  • Page 25: Machine Specifications

    M A C H I N E S P E C I F I C A T I O N S Machine Specifications Delivery Scope Using blanks and tools not approved by the manu- facturer can damage the machine and make the _ Milling machine product unusable.
  • Page 26: Components And Interfaces

    M A C H I N E S P E C I F I C A T I O N S Components and Interfaces Fig. 1 Machine overview, front 1 Milling spindle 2 Tool holder 3 Blank holder 4 Measuring device, tool length 5 Collection tray/extraction duct 6 Operation button 7 Service button...
  • Page 27: Accessories

    M A C H I N E S P E C I F I C A T I O N S 100 /11 5/2 30V AC 230 V T3. 15A 110 /11 5V T6. 30A P= 6-8 bar Fig. 2 Machine overview, rear Accessories 1 Slot for SD memory card...
  • Page 28: Installation

    I N S T A L L A T I O N ▷ Insert the extraction hose of the extraction sys- Installation tem being used to the extraction-hose connec- Milling machine tion ([10] in fig. 2 on page 27) on the rear side of the milling machine.
  • Page 29 I N S T A L L A T I O N ▷ Mount the service unit on the rear side of the Requirements on air purity for the spindle machine using the knurled screws [1]. When another service unit than the one supplied is ▷...
  • Page 30: Installation Of The Cam Software And Milling Machine

    I N S T A L L A T I O N ▷ Connect the control cable to the control inter- Installation of the CAM software face for extraction [4] on the rear side of the and milling machine milling machine and to the interface on the rear ▷...
  • Page 31: Establishing The Network

    I N S T A L L A T I O N Establishing the Network Connec- Starting up the milling machine tion The three standard cutters in tool stations 1-3 are mandatory for operation. To establish the network connection, the milling machine and the PC must first be In addition to standard tools, sister tools can connected via USB.
  • Page 32 I N S T A L L A T I O N ▷ Insert the selected blank into the holder in the ▷ Start the milling machine software. milling machine. The high/thick side of the blank When the software is started, a machine initiali- must face the inward.
  • Page 33: Application And Operation

    A P P L I C A T I O N A N D O P E R A T I O N ▷ Pull off the blank holder toward the right. Application and Operation ▷ Clean the locating bore and surfaces. ▷...
  • Page 34: Function Of The Buttons

    A P P L I C A T I O N A N D O P E R A T I O N Function of the buttons Reference run After switching on, a reference run must be car- ried out to determine the mechanical zero points. Operation button [A] flashes.
  • Page 35: Checking The Workpiece During A Running Program

    A P P L I C A T I O N A N D O P E R A T I O N To continue the program: To exit the service position: ▷ With the door closed, briefly press operation ▷...
  • Page 36: Cleaning And Maintenance

    C L E A N I N G A N D M A I N T E N A N C E Cleaning and Maintenance Maintenance 7.2.1 Weekly maintenance Cleaning The milling machine must be cleaned after each NOTE: working day. Danger of damaging the machine! ▷...
  • Page 37 C L E A N I N G A N D M A I N T E N A N C E ▷ Clean the inside of the collet with the fine collet To remove the collet: ▷ Apply the spindle wrench to the collet. brush.
  • Page 38: Monthly Maintenance

    M A L F U N C T I O N S , R E P A I R S A N D W A R R A N T Y Malfunctions, Repairs and Once any of the listed impairments is given: ▷...
  • Page 39: Technical Data And Accessories/Spare

    T E C H N I C A L D A T A A N D A C C E S S O R I E S / S P A R E P A R T S Technical Data and Accessories/Spare Parts Subject to changes. Technical data - milling machine Unit Value – Art. No. 179300-IDC Dimensions (D × W × H) 588 × 516 × 755 Weight Electrical connections V/Hz 100-230/50-60 Power output Fuse (time-delayed) 3.15 / 6.3...
  • Page 40 T E C H N I C A L D A T A A N D A C C E S S O R I E S / S P A R E P A R T S Accessories/Spare parts Art.
  • Page 41 T A B L E D E S M A T I È R E S – Traduction de la notice originale – Mode d’emploifr Table des matières Explication des symboles ... 42 Dysfonctionnements, réparations et garantie .
  • Page 42: Explication Des Symboles

    E X P L I C A T I O N D E S S Y M B O L E S Explication des symboles Autres symboles dans le mode d’emploi Mises en garde Symboles Signification ▷ Point relatif à la description d’une Les mises en garde dans le texte sont indi- action quées dans un panneau d’avertissement...
  • Page 43: Consignes Générales De Sécurité

    C O N S I G N E S G É N É R A L E S D E S É C U R I T É Consignes générales de Personnel approprié sécurité AVERTISSEMENT : Respecter les consignes de sécurité suivantes lors Cet appareil ne doit être mis en service et utilisé...
  • Page 44: Données Relatives À L'appareil

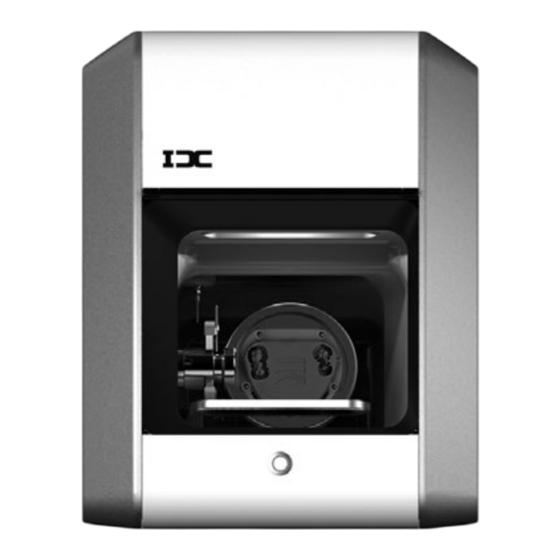
    D O N N É E S R E L A T I V E S À L ’ A P P A R E I L Données relatives à l’appareil Contenu de la livraison Utilisation conforme _ Fraiseuse La fraiseuse est une machine de meulage à com- _ Câble d’alimentation mande numérique par ordinateur pour la fabrica- _ Câble USB (5 m)
  • Page 45: Déclaration De Conformité Ce

    D O N N É E S R E L A T I V E S À L ’ A P P A R E I L Déclaration de conformité CE Directives européennes 2006/42/EG 2004/108/EG Ce produit est conforme dans sa construction et Normes harmonisées son comportement en service aux directives euro- DIN EN ISO 12100...
  • Page 46: Accessoires

    D O N N É E S R E L A T I V E S À L ’ A P P A R E I L 100 /11 5/2 30V AC 230 V T3. 15A 110 /11 5V T6. 30A P= 6-8 bar Fig.
  • Page 47: Installation

    I N S T A L L A T I O N ▷ Connecter le tuyau d’aspiration du système Installation employé au branchement ([10] dans la figure 2 Fraiseuse sur la page 46) à l’arrière de la fraiseuse. ▷ Connecter le tuyau d’air comprimé à l’arrière de Pays avec une tension de réseau de 100 à...
  • Page 48 I N S T A L L A T I O N ▷ Fixer l’unité d’entretien sur la face arrière de Exigences pureté de l’air broche l’appareil à l’aide des vis moletées [1]. Si une autre unité d’entretien que celle livrée ▷...
  • Page 49: Installation Du Logiciel Cam Et De La Fraiseuse

    I N S T A L L A T I O N ▷ Connecter le câble d’alimentation au branche- Installation du logiciel CAM et de la ment secteur [6] de la fraiseuse ainsi qu’à une fraiseuse prise secteur. ▷ Placer le support de données dans le lecteur du ▷...
  • Page 50: Connexion Au Réseau

    I N S T A L L A T I O N Connexion au réseau Mise en service de la fraiseuse Pour établir la connexion au réseau, la frai- Les trois fraiseuses standard sur les posi- seuse et le PC doivent être connectés via tions d’outils 1 à...
  • Page 51 I N S T A L L A T I O N ▷ Placer la pièce brute souhaitée dans le récep- ▷ Redémarrer le logiciel de la fraiseuse. teur de la fraiseuse. Le côté haut/épais de la La machine est initialisée au lancement du logi- pièce brute doit être orienté...
  • Page 52: Application Et Utilisation

    A P P L I C A T I O N E T U T I L I S A T I O N ▷ Desserrer la vis de fixation [1]. Application et utilisation ▷ Retirer le support vers la droite. ▷...
  • Page 53: Fonction Des Touches

    A P P L I C A T I O N E T U T I L I S A T I O N Fonction des touches Prise de référence Après la mise en marche de l’appareil, les points zéro mécaniques doivent être déterminés à l’aide d’une prise de référence.
  • Page 54: Contrôle De La Pièce À Travailler Pendant Un Programme En Cours

    A P P L I C A T I O N E T U T I L I S A T I O N ▷ Ouvrir la porte. Démarrage à partir d’une position Le programme est interrompu. La touche de d’entretien commande [A] clignote.
  • Page 55: Nettoyage Et Entretien

    N E T T O Y A G E E T E N T R E T I E N Nettoyage et entretien Entretien 7.2.1 Entretien hebdomadaire Nettoyage Nettoyer la fraiseuse au bout de chaque journée AVERTISSEMENT : de travail. Danger d’endommagement de l’appareil ! ▷...
  • Page 56 N E T T O Y A G E E T E N T R E T I E N ▷ Nettoyer le récepteur de la pince de serrage. Pour nettoyer la broche : ▷ Épousseter le capot et la broche à l’aide d’un Le récepteur de la pince de serrage doit être chiffon sec et propre.
  • Page 57: Entretien Mensuel

    D Y S F O N C T I O N N E M E N T S , R É P A R A T I O N S E T G A R A N T I E Dysfonctionnements, Si l’outil provient du porte-outil de la fraiseuse : ▷...
  • Page 58: Caractéristiques Techniques Et Accessoires / Pièces De Rechange

    Caractéristiques techniques et accessoires / pièces de rechange Sous réserve de modifications. Caractéristiques techniques fraiseuse Unité Valeur – N° d’article 179300-IDC Dimensions (P × L × H) 588 × 516 × 755 Poids Connexions électriques V/Hz 100-230/50-60 Puissance Fusible (lent) 3,15 / 6,3 –...
  • Page 59 CARACTÉRISTIQUES TECHNIQUES ET ACCESSOIRES / PIÈCES DE RECHANGE Accessoires / pièces de rechange N° d’article Désignation 179210 Unité d’entretien 179211 Set de vis support de la pièce 179216 Inserts de filetage du support de la pièce 179251 Couvercle du porte-outil 179257 Tuyau d’aspiration avec brosse 1156901...
  • Page 60 INDICE – Traduzione delle istruzioni per l'uso originali – Istruzioni d’usoit Indice Spiegazione dei simboli ... . . 61 Anomalie, riparazioni e garanzia ..76 Anomalie ..... . 76 Riparazioni .
  • Page 61: I T

    S P I E G A Z I O N E D E I S I M B O L I Spiegazione dei simboli Ulteriori simboli nelle istruzioni d'uso Indicazioni di avvertimento Simbolo Significato ▷ Punto della descrizione di una ope- Nel testo le indicazioni di avvertimento razione sono contrassegnate da un triangolo di...
  • Page 62: Indicazioni Generali Di Sicurezza

    I N D I C A Z I O N I G E N E R A L I D I S I C U R E Z Z A Indicazioni generali di Personale adatto sicurezza INDICAZIONE: Durante l'installazione, la messa in funzione e L'apparecchio deve essere messo in funzione ed l'uso dell'apparecchio devono sempre essere utilizzato esclusivamente da personale specializ-...
  • Page 63: Dati Relativi All'apparecchio

    D A T I R E L A T I V I A L L ' A P P A R E C C H I O Dati relativi all'apparecchio Volume di fornitura Uso conforme a destinazione _ Fresatrice La fresatrice è un apparecchio per fresare coman- _ Cavo di alimentazione dato da PC per la realizzazione di denti sostitutivi _ Cavo USB (5 m)
  • Page 64: Dichiarazione Di Conformità Ce

    D A T I R E L A T I V I A L L ' A P P A R E C C H I O Dichiarazione di conformità CE Direttive CE 2006/42/EG 2004/108/EG Questo prodotto corrisponde, per quanto riguarda Normative armonizzate la costruzione ed il comportamento funzionale, DIN EN ISO 12100...
  • Page 65: Accessori

    D A T I R E L A T I V I A L L ' A P P A R E C C H I O 100 /11 5/2 30V AC 230 V T3. 15A 110 /11 5V T6. 30A P= 6-8 bar Fig.
  • Page 66: Installazione

    I N S T A L L A Z I O N E ▷ Inserire il tubo di aspirazione dell'aspirazione Installazione impiegata nel collegamento ([10] nella figura 2 a Fresatrice pagina 65) sul retro della fresatrice. ▷ Collegare il tubo dell'aria compressa sul retro Paesi con tensione di rete 100-115 V della fresatrice.
  • Page 67 I N S T A L L A Z I O N E ▷ Con le viti a testa zigrinata [1] fissare il gruppo Requisiti purezza dell'aria per mandrino condizionatore sul retro dell'apparecchio. Qualora dovesse essere utilizzato un gruppo con- ▷...
  • Page 68: Installazione Di Software Cam E Fresatrice

    I N S T A L L A Z I O N E ▷ Collegare con il cavo di comando l'interfaccia di Installazione di software CAM e comando per aspirazione [4] sul retro della fre- fresatrice satrice e sul retro dell'aspirazione. ▷...
  • Page 69: Creazione Del Collegamento Alla

    I N S T A L L A Z I O N E Creazione del collegamento alla Messa in funzione della fresatrice rete I tre fresatori standard sui posti per uten- sili 1-3 sono assolutamente necessari per il Per la creazione del collegamento alla rete funzionamento.
  • Page 70 I N S T A L L A Z I O N E ▷ Inserire il grezzo desiderato nella sede della fre- ▷ Avviare il software fresatrice. satrice. Il lato alto/spesso del grezzo deve All'avvio del software avviene un'inizializza- essere rivolto verso l'interno. zione dell'apparecchio.
  • Page 71: Impiego Ed Uso

    I M P I E G O E D U S O ▷ Allentare la vite di fissaggio [1]. Impiego ed uso ▷ Rimuovere il supporto del pezzo in lavorazione ATTENZIONE: tirandolo verso destra. ▷ Pulire il foro e le superfici di supporto. Pericolo a causa di trucioli oppure frammenti di ▷...
  • Page 72: Funzione Dei Tasti

    I M P I E G O E D U S O Funzione dei tasti Funzionamento di riferimento Dopo l'inserimento con un funzionamento di rife- rimento devono essere determinati i punti zero meccanici. Tasto di comando [A] lampeggia. Per avviare il funzionamento di riferimento: ▷...
  • Page 73: Controllo Del Pezzo In Lavorazione Durante Un Programma In Corso

    I M P I E G O E D U S O ▷ Premere brevemente il tasto di servizio [B]. Per proseguire con il programma: ▷ Con porta chiusa premere brevemente il tasto di L'utensile attuale viene deposto ed il mandrino comando [A].
  • Page 74: Pulizia A Manutenzione

    P U L I Z I A A M A N U T E N Z I O N E Pulizia a manutenzione Manutenzione 7.2.1 Manutenzione settimanale Pulizia La fresatrice deve essere pulito dopo ogni giorno INDICAZIONE: di lavoro. Pericolo di danni all'apparecchio! ▷...
  • Page 75 P U L I Z I A A M A N U T E N Z I O N E ▷ Pulire l'interno della pinza di fissaggio con la Per togliere la pinza di fissaggio: ▷ Inserire la chiave per mandrino sulla pinza. spazzola sottile.
  • Page 76: Manutenzione Mensile

    A N O M A L I E , R I P A R A Z I O N I E G A R A N Z I A ▪ il colore dell'elemento del filtro diventa Riparazioni ambrato (indicazione per olio nell'aria com- Le riparazioni devono essere effettuate esclusiva- pressa) mente da personale specializzato espressamente...
  • Page 77: Dati Tecnici E Accessori/Parti Di Ricambio

    D A T I T E C N I C I E A C C E S S O R I / P A R T I D I R I C A M B I O Dati tecnici e accessori/parti di ricambio Con riserva di modifiche. Dati tecnici fresatrice Unità Valore – No. Art. 179300-IDC Dimensioni (p × l × h) 588 × 516 × 755 Peso Collegamenti elettrici V/Hz 100-230/50-60 Potenza...
  • Page 78 D A T I T E C N I C I E A C C E S S O R I / P A R T I D I R I C A M B I O Accessori/parti di ricambio No.
  • Page 79 Í N D I C E – Traducción de las instrucciones de uso originales – Modo de empleoes Índice Simbología empleada ....80 Fallos, reparaciones y garantía ..95 Fallos .
  • Page 80: Simbología Empleada

    S I M B O L O G Í A E M P L E A D A Simbología empleada Símbolos adicionales en el manual Advertencias de peligro Símbolo Significado ▷ Punto en el que se describe una Las advertencias de peligro se identifican acción con un triángulo de señalización sobre fondo de color con el texto encuadrado.
  • Page 81: Instrucciones De Seguridad Generales

    I N S T R U C C I O N E S D E S E G U R I D A D G E N E R A L E S Instrucciones de seguri- Aptitud del personal dad generales OBSERVACIÓN: Al instalar, poner en marcha, o utilizar el aparato, El aparato solamente lo deberá...
  • Page 82: Datos Sobre El Aparato

    D A T O S S O B R E E L A P A R A T O Datos sobre el aparato Volumen de entrega Utilización reglamentaria _ Fresadora La fresadora es una esmeriladora controlada por _ Cable de red PC prevista para la elaboración de prótesis, _ Cable USB (5 m) mediante:...
  • Page 83: Declaración De Conformidad Ce

    D A T O S S O B R E E L A P A R A T O Declaración de conformidad CE Directivas CE 2006/42/EG 2004/108/EG La construcción y funcionamiento de este pro- Normativas armonizada ducto se corresponden con las directivas euro- DIN EN ISO 12100 DIN EN 13128 peas así...
  • Page 84: Accesorios

    D A T O S S O B R E E L A P A R A T O 100 /11 5/2 30V AC 230 V T3. 15A 110 /11 5V T6. 30A P= 6-8 bar Fig. 2 Componentes dorsales del aparato Accesorios 1 Ranura de tarjeta de memoria SD 2 Puerto Ethernet...
  • Page 85: Instalación

    I N S T A L A C I Ó N ▷ Conectar la manguera del dispositivo de aspira- Instalación ción empleado al racor ([10] en figura 2, Fresadora página 84) situado al dorso de la fresadora. ▷ Conectar la manguera de aire comprimido al Países con una tensión de red de 100-115 V dorso de la fresadora.
  • Page 86 I N S T A L A C I Ó N ▷ Fijar la unidad de tratamiento a la parte poste- Grado de pureza del aire exigido para el husillo rior del aparato con los tornillos moleteados [1]. Si pretende usar una unidad de tratamiento dife- ▷...
  • Page 87: Instalación Del Software Cam Y Fresadora

    I N S T A L A C I Ó N ▷ Conectar el cable de red a la conexión de red [6] Instalación del software CAM y fre- de la fresadora y enchufarlo a la toma de sadora corriente. ▷...
  • Page 88: Conexión A La Red Informática

    I N S T A L A C I Ó N Conexión a la red informática Puesta en marcha de la fresadora Para establecer la conexión a la red infor- Para el funcionamiento es imprescindible mática deberán estar conectados la fresa- que las tres fresas estándar se encuentren dora y el PC vía USB.
  • Page 89 I N S T A L A C I Ó N ▷ Montar la pieza en bruto deseada en el aloja- ▷ Conectar el PC. ▷ Arrancar el software de la fresadora. miento de la fresadora. La cara alta/gruesa de la pieza en bruto deberá...
  • Page 90: Utilización Y Manejo

    U T I L I Z A C I Ó N Y M A N E J O ▷ Aflojar el tornillo de sujeción [1]. Utilización y manejo ▷ Sacar hacia la derecha el portapiezas. ▷ Limpiar el taladro y las superficies del aloja- ADVERTENCIA: miento.
  • Page 91: Función De Los Botones

    U T I L I Z A C I Ó N Y M A N E J O Función de los botones Referenciado Tras la conexión de la fresadora ésta deberá posi- cionarse en los respectivos puntos cero mecáni- cos que se tomarán como referencia. El botón de manejo [A] parpadea.
  • Page 92: Control De La Pieza De Trabajo Durante Un Programa En Curso

    U T I L I Z A C I Ó N Y M A N E J O Para proseguir la ejecución del programa: Acceso a la posición de servicio ▷ Teniendo cerrada la puerta, apretar breve- A la posición de servicio puede accederse desde la mente el botón de manejo [A].
  • Page 93: Limpieza Y Mantenimiento

    L I M P I E Z A Y M A N T E N I M I E N T O Mantenimiento Limpieza y mantenimiento 7.2.1 Mantenimiento semanal Limpieza La fresadora deberá limpiarse al final de cada jor- OBSERVACIÓN: nada.
  • Page 94 L I M P I E Z A Y M A N T E N I M I E N T O ▷ Limpiar el interior de la pinza de sujeción con el Para desmontar la pinza de sujeción: ▷ Insertar la llave del husillo en la pinza. cepillo fino.
  • Page 95: Mantenimiento Mensual

    F A L L O S , R E P A R A C I O N E S Y G A R A N T Í A Fallos, reparaciones y Unidad de tratamiento garantía ▷ Controlar visualmente en cuanto a: ▪...
  • Page 96: Datos Técnicos Y Accesorios/Piezas De Recambio

    D AT O S T ÉC N IC O S Y A C C E S O RIO S / P IE Z A S D E RE C AM B IO Datos técnicos y accesorios/piezas de recambio Salvo modificación. Datos técnicos de la fresadora Unidad Valor – Nº de art. 179300-IDC 588 × 516 × 755 Dimensiones (fondo × ancho × altura) Peso Tensión de alimentación V/Hz 100-230/50-60...
  • Page 97 D AT O S T É C N IC O S Y A C C E S O R IO S/ P I E Z A S D E RE C A M B IO Accesorios / piezas de recambio Nº...
  • Page 100 Made in the European Union ISO 9001 Manufacturer | Hersteller Distribution | Vertrieb Amann Girrbach AG Herrschaftswiesen 1 6842 Koblach | Austria Fon +43 5523 62333-105 Fax +43 5523 62333-5119 www.idc.dental...

Table des Matières