Table des Matières

Publicité

Les langues disponibles

Les langues disponibles

Liens rapides

COUNTING SCALE
ZÄHLWAAGE
BALANCE COMPTEUSE
BILANCIA CONTAPEZZI
ASC
USER MANUAL
BEDIENUNGSHANDBUCH
MODE D'EMPLOI OPERATEUR
MANUALE UTENTE

Publicité

Table des Matières
loading

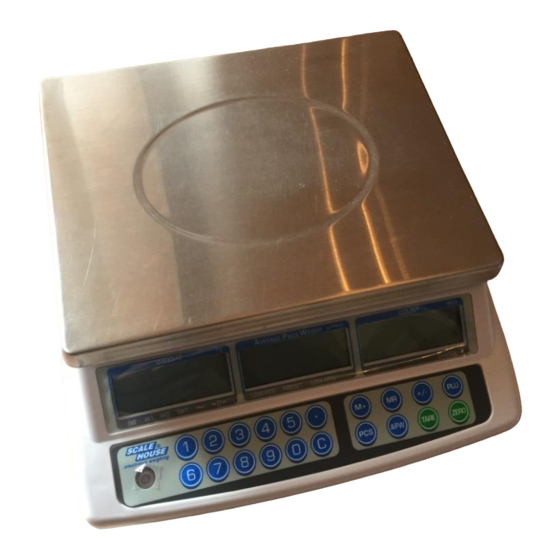
Sommaire des Matières pour Scale House ASC6

  • Page 1 COUNTING SCALE ZÄHLWAAGE BALANCE COMPTEUSE BILANCIA CONTAPEZZI USER MANUAL BEDIENUNGSHANDBUCH MODE D’EMPLOI OPERATEUR MANUALE UTENTE...
  • Page 2 LANGUAGES SPRACHEN LANGUES LINGUE ENGLISH ....................3 DEUTSCH ....................19 FRANÇAIS ....................35 ITALIANO ....................51...
  • Page 3: Table Des Matières

    ENGLISH INDEX ENGLISH ........................................3 1. INTRODUCTION ....................................4 2. MAIN TECHNICAL SPECIFICATIONS ..............................4 3. INSTALLATION ..................................... 4 3.1 POWER SUPPLY AND START-UP ..............................5 3.2 BATTERY POWERED ................................... 5 4. FRONT PANEL KEYS AND INDICATORS ............................6 4.1 FUNCTION OF THE KEYS ................................6 4.2 FUNCTION OF THE INDICATORS ...............................
  • Page 4: Introduction

    Model Plate Capacity Standard Internal Min. APW CE-M dimensions Division sensitivity recommended Division ASC6 230 x 300 0,02 ASC15 230 x 300 0,05 ASC30 230 x 300 5/10 Stabilisation Time 2 Seconds typical. Operative Temperature: 0°C - 40°C / 32°F - 104°F.
  • Page 5: Power Supply And Start-Up

    c) Level the platform by adjusting the adjustable feet until the bubble is in the centre of the level. The stability of the platform is very important. ALL THE CORNERS MUST REST IN A UNIFORM WAY. Carefully check that all feet fully rest on the ground and that the platform, loaded on the corner, is not unstable (if a corner is not resting on the ground its relative foot is easier to turn).
  • Page 6: Front Panel Keys And Indicators

    4. FRONT PANEL KEYS AND INDICATORS 4.1 FUNCTION OF THE KEYS - Clears the displayed gross weight if it’s within the + / - 2% of the total capacity. - A secondary function of "Escape" key when setting parameters or other functions.
  • Page 7: Function Of The Indicators

    4.2 FUNCTION OF THE INDICATORS INDICATOR FUNCTION CHARGE Indicates that the battery is going to recharge (see section 3.2). 5. DESCRIPTION OF THE LCD DISPLAYS WEIGHT DISPLAY The weight on the plate is shown in this display. DISPLAY VERAGE IECE EIGHT The entered or calculated average piece weight is shown in this display.
  • Page 8: Tare Function

    The scale has an automatic rezeroing function to account for minor drifting or accumulation of material on the platform (see “F5” step, section 7). However you may need to press the ZERO/ENTER key to rezero the scale if small amounts of weight are shown when the platform is empty.
  • Page 9: Optimisation Of The Apw

    LOAD THE AVERAGE PIECE WEIGHT If you want to use the A.P.W. stored in the scale, press PLU key, the scale will shows “LoAd PoS 00”, press numeric key 0~9 to select which memory location’s price you want to use, current A.P.W. will change to the value stored in the memory.
  • Page 10: Acoustic Alarm In Correspondence Of The Check

    Press +/- key: The “WEIGHT” display shows “Hi Cnt” while The “A.P.W.” display shows “000.000”. In this step one configures the upper threshold for pieces check. Use the numeric keys to enter the desired value Confirm the entered value with TARE or press ZERO to exit without confirming. The “WEIGHT”...
  • Page 11: Set-Up Environment

    05 5 minutes 15 15 minutes 30 30 minutes 7. SET-UP ENVIRONMENT The scale has various parameters that can be configured in the SET-UP environment. To enter in the SET-UP environment press during the start-up the TARE key during the countdown. One is asked to enter the password.
  • Page 12: F3" - Scale Capacity (*)

    15000 15000 30000 30000 60000 60000 “F3” - SCALE CAPACITY (*) By pressing TARE one selects the total capacity of the scale. Press APW key to select one of these capacities: 3, 6, 15, 30 kg. “F4” - A/D CONVERTER POINTS By pressing TARE the instrument shows the A/D converter points relative to the weight on the scale.
  • Page 13: F8" - Speed Setting Adc Converter Reading Speed

    “F8” - SPEED SETTING ADC CONVERTER READING SPEED By pressing TARE one sets the reading speed of the ADC converter; the set value corresponds to the number of readings made in a second. Press A.P.W. to select one of the suggested reading speeds: 7.5, 15, 30, 60. “F9”...
  • Page 14: Procedure With Free Sample Weight

    CALIBRATION WEIGHTS MODEL ASC6 ASC15 ASC30 1° weight 2 kg 5 kg 10 kg 2° weight 6 kg 15 kg 30 kg PROCEDURE WITH FREE SAMPLE WEIGHT - Enter in the setup environment by typing the password set in the SETUP (default:”0000”) then enter in the F1 CAL step.
  • Page 15: Printer Connection

    Progressive of totalisations Furthermore it’s possible execute the transmission upon request through the serial commands (see section 9.3) “P CONT” MODE In this transmission mode the instrument transmits continuously the following data format: GS for gross weight, NT for net weight ST,GS,XXX.XXXXkg<CR><LF>...
  • Page 16: Format Of The Serial Commands

    9.3 FORMAT OF THE SERIAL COMMANDS COMMAND FUNCTION T<CR><LF> Automatic tare, tares the weight on the scale. Z<CR><LF> Clears the gross weight. M+<CR><LF> Executes the totalisation with printing. MR<CR><LF> Executes the printing of the total MC<CR><LF> Clears the accumulated totals and the totalisation progressive. Uxxx.xxx<CR><LF>...
  • Page 17: Error Messages

    11. ERROR MESSAGES ERROR MESSAGES DESCRIPTION RESOLUTION - - oL - - Over range Remove weight from the scale. Err 4 Zero Setting Error Upon start-up or when the ZERO key is pressed, the weight on the scale exceeds the percentage programmed on the max. capacity. Remove the excess weight and retry.
  • Page 18: Declaration Of Conformity

    WARRANTY Scale House products are guaranteed for a period of twelve months from delivery, excluding the parts classified as expendable materials such as mechanical printing heads, batteries, electric motors and wheels. The warranty for these expendable materials is three months. The warranty refers to breakdowns resulting from any construction defect or material defect of the product supplied and covers the cost of labor and spare parts.
  • Page 19 DEUTSCH INHALTSVERZEICHNIS 1. EINLEITUNG ..................................20 2. TECHNISCHE HAUPTEIGENSCHAFTEN ........................20 3. INSTALLATION ................................. 20 3.1 STROMVERSORGUNG UND INBETRIEBNAHME ....................21 3.2 BATTERIEBETRIEB ..............................21 4. TASTEN UND ANZEIGEN AUF DEM FRONTPANEEL ....................22 4.1 TASTENFUNKTIONEN .............................. 22 4.2 FUNKTION DER KONTROLLEUCHTEN ........................23 5.
  • Page 20: Einleitung

    Version Schale Wägebereich Ziffernschritt Interne Mind. CE-M (Abmessungen Auflösung in empfohlenes Ziffernschritt M.S.G. in g ASC6 230 x 300 0,02 ASC15 230 x 300 0,05 ASC30 230 x 300 5/10 Stabilisierungszeit: 2 Sekunden. Umgebungstemperatur: 0°C - 40°C / 32°F - 104°F.
  • Page 21: Stromversorgung Und Inbetriebnahme

    c) Nivellieren Sie die Waage mittels der Stellfüße bis die Libelle im Zentrum ist. Ein stabiler Standort der Waage ist sehr wichtig. ALLE ECKEN MÜSSEN GLEICHMÄSSIG STEHEN. Überprüfen Sie gründlich, dass alle Füße auf dem Boden feststehen, und dass die Waage bei Ecklast nicht instabil ist (Die Waage darf nicht „kippeln“). 3.1 STROMVERSORGUNG UND INBETRIEBNAHME Die Waage kann mit dem Netzteil oder der internen Batterie betrieben werden.
  • Page 22: Tasten Und Anzeigen Auf Dem Frontpaneel

    GRÜN: der Akku ist vollständig geladen. GELB: der Akku wird gerade geladen. ROT: der Akku ist fast entladen. Die Kapazität des Akkus kann mit der Zeit abnehmen. Wenn die Betriebsdauer sehr stark abgenommen hat, setzen Sie sich bitte mit Ihrem Händler in Verbindung. 4.
  • Page 23: Funktion Der Kontrolleuchten

    - Numerische Tasten / Dezimalpunkt /Löschtaste. 4.2 FUNKTION DER KONTROLLEUCHTEN KONTROLLEUCHTEN FUNKTION CHARGE Wird angezeigt, wenn die Batterie zur Neige geht (Siehe Abschnitt 3.2). 5. SYMBOLE DER LCD ANZEIGE WEIGHT DISPLAY Zeigt das Gewicht auf der Waage an. DISPLAY VERAGE IECE EIGHT Hier wird das durchschnittliche Stückgewicht in [g] angezeigt.
  • Page 24: Nullstellung Der Waage

    6.2 NULLSTELLUNG DER WAAGE Falls die Waage im entleerten Zustand NICHT NULL anzeigt, drücken Sie die ZERO Taste (das “ZERO” Symbol erscheint). Falls der Anzeigewert größer als +/-2% des max. Wägebereichs ist, so hat dies keine Wirkung. Die Waage hat eine automatische Nach- NULLSTELLUNGSFUNKTION, um ein minimales Wegdriften oder Materialansammlung auf der Plattform auszugleichen (siehe Schritt F5, Kap.
  • Page 25: Datenspeicher (Plu = Product Look Up)

    6.5.3 DATENSPEICHER (PLU = Product Look up) Die Waage kann 10 Stückgewichte (A.P.W.) speichern. SPEICHERN DES PREISES PRO EINHEIT Das durchschnittliche Stückgewicht kann entweder durch Wägung ermittelt oder numerisch eingegeben werden. Halten Sie die Taste PLU für 3 Sekunden gedrückt. Es wird “SAVE PoS 00” angezeigt. Drücken Sie die numerischen Tasten 0~9, um den Speicherplatz auszuwählen.
  • Page 26: Kontrolle Des Gewichts Und Der Stückanzahl

    6.7 KONTROLLE DES GEWICHTS UND DER STÜCKANZAHL Die Waage verfügt über eine Quantitäts-Check-Funktion mit zwei Schwellwerten. Ein akustisches Signal und drei Symbole werden aufgrund der Schwellwerte und des Wägeresultates aktiviert. 6.7.1 EINSTELLEN DER GEWICHTS- UND STÜCKANZAHLKONTROLLE UND DER SCHWELLENWERTE Wenn in der Wägephase die Taste C länger gedrückt wird, verändert die Waage den Kontrolltyp. Das “A.P.W.” Display zeigt dann den ausgewählten Kontrolltyp unter all den verfügbaren Kontrolltypen in folgender Reihenfolge an: Kontrolle des Nettogewichts (nEt), Stückkontrolle (Cnt) oder Kontrolle deaktivieren.
  • Page 27: Automatische Abschaltung

    Die Funktion ist nicht gültig, wenn der untere Schwellwert größer als der obere ist. Das minimale Gewicht muss >= 20d sein. 6.8 AUTOMATISCHE ABSCHALTUNG Die Waage hat eine Funktion zur automatischen Abschaltung, die über einen Parameter eingestellt (siehe Schritt F9 , Kap.
  • Page 28: F1" - Kalibrierung (*)

    “F1” - KALIBRIERUNG (*) Siehe Abschnitt 8. “F2” - TEILUNGEN DER WAAGE (*) Mit Taste APW auswählen. Mit Taste TARE bestätigen. Wert Teilungen 3000 3000 6000 6000 dUAL 3000 + 3000 15000 15000 30000 30000 60000 60000 “F3” - WÄGEBEREICH (*) Mit Taste APW auswählen: 3, 6, 15, 30 kg.
  • Page 29: F7" - Passworteingabe

    Drücken Sie APW, um die Einstellung zu wechseln: 0.5d, 1d, 2d, 4d. “F7” - PASSWORTEINGABE TARE drücken, “Pin1” wird angezeigt. Mit den Zifferntasten den gewünschten Code eingeben und mit TARE bestätigen. “Pin2” wird angezeigt, eine Aufforderung, um die Passworteingabe zu wiederholen. Code erneut eingeben und mit TARE bestätigen.
  • Page 30: Verfahren Mit Definierten Mustergewichten

    - Das Display zeigt “LoAd X”, dabei ist X das 2° Mustergewicht, das auf die Waage gelegt werden soll. - Legen Sie das Gewicht auf die Waage, warten Sie bis die Gewichtsanzeige stabil ist und drücken dann TARE. - Die Gewichtsanzeige kehrt in den Wägemodus zurück. KALIBRIERUNGSGEWICHTE MODELL ASC6 ASC15 ASC30 1° Mustergewicht 2 kg...
  • Page 31: Druckerverbindung

    Schrittweise summieren Wenn die Summen aus dem Speicher wiederhergestellt werden, ist dies in folgendem Format zu sehen: Schrittweise summieren Außerdem ist es möglich auf Anfrage eine Übertragung durch die seriellen Befehle durchzuführen (siehe Abschnitt 9.3) “P CONT” MODE Bei diesem Übertragungsmodus sendet das Gerät abhängig vom Protokoll, das im Schritt F4, Abschnitt 7 ausgewählt wurde, kontinuierlich das Dateiformat: GS für Bruttogewicht, NT für Nettogewicht ST,GS,XXX.XXXXkg<CR><LF>...
  • Page 32: Format Der Seriellen Befehle

    TPR Spannungsversorgung STANDARD KABEL SPANNUNGSVERSORGUNG +VP und +VC Rot und Orange +V (5V / 5A) GND und GND Schwarz und Schwarz ANMERKUNGEN: - Einstellen der folgenden Parameter beim ASC (siehe Abschnitt 7): P ModE >> Print >> AU oFF oder AU on P baud >>...
  • Page 33: Zugriff Auf Die Waageneinstellungen Versiegeln

    10. ZUGRIFF AUF DIE WAAGENEINSTELLUNGEN VERSIEGELN Bei der Verwendung des Menü Lockout (Menüsicherung) kann die Waage versiegelt werden, um unbefugte Änderungen an den Waageneinstellungen zu verhindern bzw. feststellen zu können. Bei eichpflichtigen Anwendungen muss die Waage versiegelt sein, um den Zugriff auf metrologische Parameter zu verhindern. Zum Versiegeln der Waage drücken Sie den Sperrschalter auf der Rückseite der Waage, während die Meldung beim Einschalten der Waage erscheint (Schließlich zeigt es “...
  • Page 34: Konformitätserklärung

    KONFORMITÄTSERKLÄRUNG Dieses Gerät entspricht den Anforderungen und Normen der zuständigen EU Richtlinien. Die Konformitätserklärung befindet sich auf der Website www.scalehouse.it. GARANTIE Die Gewährleistung beläuft sich auf zwoelf Monate ab Lieferdatum, ausgenommen sind Verschleißteile wie: Druckköpfe, Batterien, Räder und elektrische Motoren. Für dieses Verbrauchsmaterial beträgt die Gewährleistungsdauer drei Monate.
  • Page 35 FRANÇAIS INDEX 1. INTRODUCTION ....................................36 2. CARACTERISTIQUES TECHNIQUES PRINCIPALES ........................36 3. INSTALLATION ....................................36 3.1 ALIMENTATION ET MISE EN MARCHE ............................. 37 3.2 ALIMENTATION PAR LA BATTERIE ............................37 4. TOUCHES ET AFFICHEURS DE LA FACE AVANT ........................... 38 4.1 FONCTION DES TOUCHES ...............................
  • Page 36: Introduction

    Division Résolution P.M.U. Echelon (Dimensions Standard interne minimum en g en mm) recommandé CE-M2 ASC6 230 x 300 0,02 ASC15 230 x 300 0,05 ASC30 230 x 300 5/10 Temps de stabilisation: 2 s. Conditions ambiantes au-torisées: 0° C à 40° C / 32°F à 104°F.
  • Page 37: Alimentation Et Mise En Marche

    c) Nivelez la plate-forme en tournant les pieds à vis jusqu'à ce que le niveau à bulle positionné sous le plateau soit au centre. La stabilité de la plate-forme est très importante. TOUS LES ANGLES DOIVENT REPOSER UNIFORMEMENT SUR LA BASE. Veillez à ce que tous les pieds opposent une résistance à...
  • Page 38: Touches Et Afficheurs De La Face Avant

    jaune: Il est recommandé de charger l’accumulateur pendant une durée prolongée (la nuit). Si la batterie est utilisée, elle pourrait ne pas se recharger complètement. Si la durée de vie de la batterie résulte inacceptable contacter le revendeur. 4. TOUCHES ET AFFICHEURS DE LA FACE AVANT 4.1 FONCTION DES TOUCHES - Met à...
  • Page 39: Fonction Des Indicateurs

    4.2 FONCTION DES INDICATEURS INDICATEUR FONCTION CHARGE Vous informe de l’état de chargement de l’accumulateur (voir paragraphe 3.2). 5. VUE D’ENSEMBLE DES AFFICHEURS AFFICHAGE POIDS Le poids de l’objet à peser en [kg] est affiché ici. AFFICHAGE DU POIDS MOYEN (A.P.W.) C’est ici que s’affiche le poids à...
  • Page 40: Zero Balance

    6.2 ZERO BALANCE Si aucun objet n'est sur la balance et si l'écran affiche un poids différent de 0, appuyez sur la touche ZERO pour mettre à zéro (l’indicateur “ZERO” s'allume). Si le poids est supérieur +/- 2% de la porté, le zérotage n'aura aucune conséquence.
  • Page 41: Optimisation Du Poids Unitaire

    Entrer le poids moyen unitaire, appuyer sur la touche PLU pendant environ 3 secondes, les afficheurs afficheront “SAVE PoS 00”; appuyer sur une touche entre 0 et 9 pour mémoriser dans la position souhaitée. SELECTION Appuyer un court instant sur la touche PLU, les afficheurs affichent “LoAd PoS 00” ; appuyer sur une touche entre 0 et 9, le poids moyen unitaire s'affichera sur l'afficheur.
  • Page 42: Controle Du Poids Ou Des Pieces

    6.7 CONTROLE DU POIDS OU DES PIECES La balance ayant la fonction de contrôle quantité à deux seuils. Un alarme acoustique s’active selon les seuils configurés et au résultat du pesage. Le contrôle peut être exécuté sur le poids ou sur les pieces. 6.7.1 PARAMETRAGE DU CONTROLE SUR LE POIDS / SUR LES PIECES &...
  • Page 43: Fonction D'arret Automatique

    6.8 FONCTION D'ARRET AUTOMATIQUE Il est possible d’activer l’arrêt automatique de l’indicateur ou le désactiver ; étant la balance déchargée, l’arrêt automatique se met en marche quand le poids n’est pas levé ou une touche n’est pas appuyée pendant le temps configure (voir paragraphe 7, step F9): (Désactivée) (Extinction automatique après 3 min)
  • Page 44: F2" - Divisions (*)

    “F2” - DIVISIONS (*) En appuyant sur la touche TARE le nombre de divisions de la balance est sélectionné. Appuyer sur la touche APW pour sélectionner une valeur parmi celles proposées : Valeur Divisions 3000 3000 6000 6000 dUAL 3000 + 3000 15000 15000 30000...
  • Page 45: F8" - Configuration De La Vitesse Du Convertisseur Adc

    “Pin2” s’affiche, resaisisser le mot de passe. Saisissez une nouvelle fois le code et validez sur TARE. Après la saisie correcte l’écran affiche “PASS”, après une saisie incorrecte l’écran affiche “FAiL”. Répétez dans ce cas la saisie du code. “F8” - CONFIGURATION DE LA VITESSE DU CONVERTISSEUR ADC En appuyant sur la touche TARE la vitesse de lecture du convertisseur ADC est configurée;...
  • Page 46: Procedure Avec Une Masse Non Predefinie

    - Les écrans affichent “LOAD X” où X est le 2° poids échantillon à mettre sur la balance; - Mettre le poids sur la balance, attendre la stabilité et appuyer sur TARE; - La balance retourne en mode pesage. POIDS DE CALIBRATION MODELE ASC6 ASC15 ASC30 1° poids 2 kg...
  • Page 47 Totalisation progressive Lorsque l’on rapelle la totalisation en mémoire le format du ticket est le suivant : Totalisation progressive Par ailleurs il est possible exécuter la transmission sur demande par le port série (voir section 9.3) MODE “P CONT” Dans ce mode de transmission de données la balance émet en continue le format suivant : GS pour le poids brut et NT pour le poids net.
  • Page 48: Connection De L'imprimante

    9.2 CONNECTION DE L’IMPRIMANTE CABLE STANDARD (connecteur 9 Pin) Noir Jaune Gris TRANSMISSION Alimentation imprimante TPR CABLE STANDARD ALIMENTATION +VP et +VC Rouge et and Orange +V (5V / 5A) GND et GND Noir et Noir NOTES : - Suivre les paramètres de l’ASC (Voir paragraphe 7): P ModE >>...
  • Page 49: Scellement Des Parametres De La Balance

    10. SCELLEMENT DES PARAMETRES DE LA BALANCE Pour les applications en usage réglementé, la balance doit être scellée afin d’interdire l’accès aux paramètres météorologiques. Pour permettre le scellement de la balance, appuyez sur le commutateur de verrouillage situé à l’arrière de la balance, pendant la mise sous tension (L’écran affiche “LEGAL”) et recouvrez l’orifice d’accès au commutateur de verrouillage.
  • Page 50: Déclaration De Conformité

    GARANTIE Les produits Scale House sont garantis pendant une durée de douze mois à compter de la date de livraison, exclus les consommables (par exemple têtes d’impression, batteries, roues et moteurs électriques) pour les quels la durée de la garantie est de trois mois.
  • Page 51 ITALIANO INDICE 1. INTRODUZIONE ....................................52 2. PRINCIPALI CARATTERISTICHE TECNICHE ..........................52 3. INSTALLAZIONE ....................................52 3.1 ALIMENTAZIONE E ACCENSIONE ............................53 3.2 ALIMENTAZIONE A BATTERIA ..............................53 4. TASTI E INDICATORI DEL PANNELLO FRONTALE......................... 54 4.1 FUNZIONE DEI TASTI ................................. 54 4.2 FUNZIONE INDICATORI ................................
  • Page 52: Introduzione

    Modello Dimensioni Portata Divisione Sensibilità PMU minimo Divisione piatto Standard interna raccomadato CE-M ASC6 230 x 300 0,02 ASC15 230 x 300 0,05 ASC30 230 x 300 5/10 Tempo di integrazione 2 sec tipici. Temperatura di funzionamento: 0°C - 40°C / 32°F - 104°F.
  • Page 53: Alimentazione E Accensione

    c) Livellare la piattaforma agendo sui piedini a vite fino a che la bolla di livello non è al suo centro. Riveste molta importanza la stabilità della piattaforma. TUTTI GLI ANGOLI DEVONO APPOGGIARE IN MODO UNIFORME. Controllare con cura che tutti i piedini oppongano resistenza al suolo e che la piattaforma, caricata in angolo, non sia instabile (se un angolo non appoggia il relativo piedino è...
  • Page 54: Tasti E Indicatori Del Pannello Frontale

    4. TASTI E INDICATORI DEL PANNELLO FRONTALE 4.1 FUNZIONE DEI TASTI - Azzera il peso lordo visualizzato, se esso rientra nel + / - 2% della portata totale. - Funzione secondaria di uscita da un parametro o dall’ambiente di SETUP. - Premuto un istante esegue la tara semiautomatica;...
  • Page 55: Funzione Indicatori

    4.2 FUNZIONE INDICATORI INDICATORE FUNZIONE CHARGE Indica che la batteria è in ricarica (vedere paragrafo 3.2). 5. DESCRIZIONE DEI DISPLAY DISPLAY WEIGHT Il peso presente sul piatto viene visualizzato in questo display. DISPLAY A VERAGE IECE EIGHT Il peso medio unitario introdotto o calcolato viene visualizzata in questo display. DISPLAY COUNT Il numero di pezzi corrente viene visualizzato in questo display.
  • Page 56: Zero Bilancia

    6.2 ZERO BILANCIA Se non ci sono oggetti sulla bilancia e il display mostra un peso diverso da 0, premere il tasto ZERO per azzerare (si accende l’indicatore “ZERO”). Se il peso è superiore al +/- 2% della portata, l’azzeramento non avrà effetto. La bilancia ha una funzione di inseguimento automatico dello zero per azzerare gli accumuli minori di materiale sulla piattaforma (vedere passo “F5”, paragrafo 7).
  • Page 57: Ottimizzazione Del Pmu

    SALVATAGGIO DEL PESO MEDIO UNITARIO IN MEMORIA Inserire il peso medio unitario, premere il tasto PLU per circa 3 secondi, i display visualizzano “SAVE PoS 00”; premere un tasto da 0 a 9 per memorizzare nella posizione desiderata. RICHIAMO DEL PESO MEDIO UNITARIO MEMORIZZATO Premere un istante il tasto PLU, i display visualizzano “LoAd PoS 00”;...
  • Page 58: Controllo Quantità Peso O Pezzi

    6.7 CONTROLLO QUANTITÀ PESO O PEZZI La bilancia è fornita della funzione di controllo quantità a due soglie. Un allarme acustico si attiva in base alle soglie impostate e al risultato della pesatura. 6.7.1 IMPOSTAZIONE CONTROLLO SUL PESO O SUI PEZZI E SETTAGGIO DELLE SOGLIE Ogni volta che il tasto C viene premuto a lungo in pesatura la bilancia cambia il modo di controllo.
  • Page 59: Funzione Di Autospegnimento

    6.8 FUNZIONE DI AUTOSPEGNIMENTO La bilancia è dotata di una funzione di autospegnimento programmabile, che permette il risparmio di energia in caso di temporaneo inutilizzo; l’autospegnimento entra in funzione a bilancia scarica ( peso lordo = 0) dopo il tempo (in minuti) programmato nel passo F9, vedere sezione 7.
  • Page 60: F1" - Calibrazione (*)

    “F1” - CALIBRAZIONE (*) Vedere paragrafo 8. “F2” - DIVISIONE MINIMA BILANCIA (*) Premendo il tasto APW si seleziona il numero massimo di divisioni della bilancia tra quelle proposte: Valore Divisioni 3000 3000 6000 6000 dUAL 3000 + 3000 15000 15000 30000 30000...
  • Page 61: F7" - Impostazione Password Setup

    “F7” - IMPOSTAZIONE PASSWORD SETUP Premendo il tasto TARE, il display “WEIGHT” visualizza “Pin1” e lo strumento si predispone per l’inserimento della password, composta da massimo 4 cifre; al termine dell’introduzione confermare con TARE. Il display “WEIGHT” visualizza “Pin2” reinserire la stessa password e confermare con TARE. Il display “A.P.W.”...
  • Page 62: Procedura Con Peso Campione Libero

    - Caricare sulla bilancia il secondo peso campione, definito nella tabella sotto, attendere la stabilità del peso e premere il tasto TARE quando l’indicatore di stabilità è acceso; - L’indicatore ritorna in pesatura. PESI DI CALIBRAZIONE MODELLO ASC6 ASC15 ASC30 1° peso 2 kg...
  • Page 63: Protocolli Di Trasmissione

    9.1 PROTOCOLLI DI TRASMISSIONE Il formato dei dati trasmessi varia a seconda del modo di trasmissione selezionato (vedere passo F5 paragrafo 7). MODO “AU ON” E “AU OFF” Nelle normali operazioni di pesatura quando si esegue l’accumulo del peso il formato dei dati è il seguente: Progressivo totalizzazioni Quando si richiamano i totali dalla memoria il formato dei dati è...
  • Page 64: Collegamento Stampante

    9.2 COLLEGAMENTO STAMPANTE CAVO STANDARD (connettore 9 Pin) Nero Giallo Grigio TRASMISSIONE Alimentazione stampante TPR STANDARD ALIMENTAZIONE CABLE +VP e +VC Rosso e Arancione +V (5V / 5A) GND e GND Nero e Nero NOTE: - Impostare i seguenti parametri nella ASC (vedere paragrafo 7): P ModE >>...
  • Page 65: Blocco Dell'accesso Alle Impostazioni Della Bilancia

    10. BLOCCO DELL’ACCESSO ALLE IMPOSTAZIONI DELLA BILANCIA Per le applicazioni per l'utilizzo in rapporto con terzi, la bilancia deve essere sigillata per evitare l’accesso ai parametri metrologici. Per sigillare la bilancia, premere l’interruttore di calibrazione sulla parte inferiore della bilancia, durante l’accensione bilancia visualizza “LEGAL”), e coprire il foro di accesso all’interruttore.
  • Page 66: Dichiarazione Di Conformita

    Internet www.scalehouse.it. GARANZIA I prodotti Scale House sono assistiti da garanzia per dodici mesi dalla data di acquisto, con esclusione delle parti classificate come materiale di consumo come testine di stampa, batterie, ruote e motori elettrici e materiale di consumo.

Ce manuel est également adapté pour:

Asc15Asc30

Table des Matières