
Sommaire des Matières pour Dunlop CARDIO 410
- Page 1 CARDIO 410 20084 Instrucciones de montaje - Assembly instruction - Notice de montage - Montage instructies - Istruzioni per il montaggio - Οδηγίες Συναρµολόγησης...
- Page 2 Dunlop dealer for a period of 6 months from purchase. If you wish to make a claim under the guarantee, Dunlop shall be entitled to repair or replace the defective unit or part at its discretion. The owner of the unit must pay for the transport costs and any dealer's workshop costs.
- Page 3 La presente garanzia copre qualsiasi difetto di fabbricazione per un periodo di 6 mesi, all’interno del quale i nostri rivenditori Dunlop autorizzati saranno in grado di risolvere qualsiasi problema e di rimettere in funzione il vostro apparecchio. Durante questi 6 mesi, tutti i pezzi di ricambio sono gratuiti; sono comunque escluse dalla garanzia l’usura ordinaria del prodotto ed ogni conseguenza derivante dall’uso a scopo professionale.
- Page 4 Dear Customer Table of Content: We want to thank you for having chosen a Warranty instructions P. 2 Dunlop product, and wish you a lot of fun and Safety instructions P. 5 success during training with your Dunlop Assembly instructions P.
-
Page 5: Instrucciones De Seguridad
Safety Instructions Before you start training on your Dunlop exerciser, please read the instructions carefully. Be sure to keep the instructions for information, in case of repair and for spare part delivery. This exerciser is made for home use only For all adjustable parts be aware of the and tested up to a max. - Page 6 Conseils de Sécurité Veuillez lire attentivement cette notice de conseils avant de débuter votre premier entraînement sur l’appareil. Conservez précieusement cette notice pour information, pour les travaux d’entretien ainsi que pour l’éventuelle commande de pièces de rechange. Suivre exactement la notice de montage Tenez compte, pour les parties réglables, de l’appareil.
-
Page 7: Οδηγίες Ασφάλειας
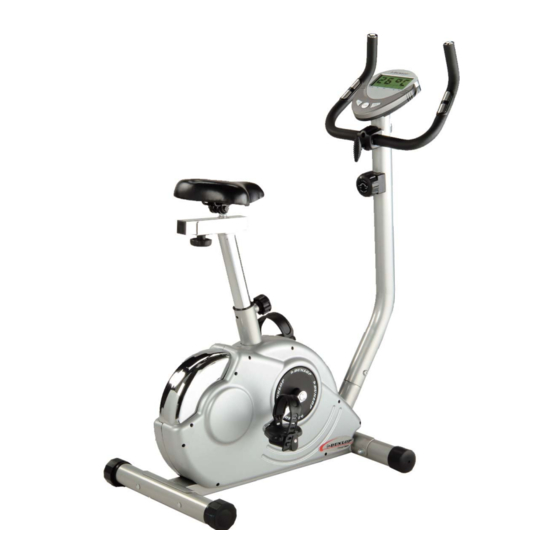
De leverancier kan niet verantwoordelijk gehouden worden voor eventuele fouten Οδηγίες Ασφάλειας Πριν ξεκινήσετε τη γυµναστική µε το ποδήλατο εξαρτήµατα Dunlop, παρακαλούµε διαβάστε τις οδηγίες προσεκτικά. Βεβαιωθείτε ότι φυλάξατε τις οδηγίες για µελλοντική αναφορά, σε περίπτωση επισκευή και για την προµήθεια ανταλλακτικών. - Page 8 Instrucciones de montaje- Assembly instructions - Notice de montage -Montage instructies - Istruzioni per il montaggio - Οδηγίες συναρµολόγησης Fase 1 Step 1 1. Fije el apoyo delantero y trasero al cuadro con 1. Fasten front and rear stabilizers each with 2 ayuda de los tornillos y anillos de cierre.Usted screws and washers to the base construction.
- Page 9 Phase 2 Step 2 Fije el pedal izquierdo al brazo del pedall izquierdo. En Screw pedals onto the crank. The pedals are marked los pedales se encuentra las letras L y R para with R and L at the screw. Tighten the left pedal anti- izquierda y derecha .Se determinan izquierda y clockwise, the right pedal clockwise.
- Page 10 Fase 3 Step 3 1. Ponga el sillin en el rail del seleccion, ponga el rail 1. Assemble the saddle to the selector rail, position de seleccion en la barra de eillin y fije con ayuda the rail onto the seat post and tighten using the del boton apoyo.
- Page 11 Fase 4 Step 4 1. Tomen el cable de tensión de la barra de 1. Pull the tension cable out of the handlebar post acoplamiento y tenga cuidado que el botón de and ensure the tension knob is at lightest position tensión se encuentra en la posición mas baja (minimum position ).
- Page 12 Fase 5 Step 5 1. Ponga la guía en la barra firme y ponga la funda 1. Place handlebar on the handlebar base, and en metal encima de la guía position the metal cover on the top of handlebar. 2. Monte todo con el tornillo , anillo de cierre de 2.
- Page 13 Fase 6 Step 6 1. Fije el ordenador encima de la guía con los 1. Mount the computer to the hold of the handlebar tornillos incluidos y une los cables. pole with the enclosed screws and connect the 2. Ponga el sujetapapeles en la abertura prevista al computer cables.
-
Page 14: Instrucciones De Entrenamiento
Manual para el ordenador el ordenador se pasara a una foncion Instrucciones de operación Ordenador estandar Baterias ♥ PULSE Fije los dos sensores en el Ponga 2 baterias AA 1.5 V guia ( Sece los manos y sensores con una toalla . Tenga cuidado : Una Operacion medicion estable siempre se hace Despues de haber instalado las baterias y /o despues... - Page 15 Gradualmente Usted puede aumentar vuestro latido de Estiramientos de Dunlop la ayuda a conseguir esa forma corazón hasta 85% de vuestro latido de corazón flexible y tonificada. Si nunca antes se ha dedicado a máximo hacer estiramientos, empiece haciendo estiramientos muy suaves y vaya incrementando la longitud y el Combustión de grasa...
- Page 16 Computer Instructions handgrip (please wipe sensors and Operating Instructions Computer hands before starting measuring your pulse). Your current heart rate will be Batteries: displayed within 30 seconds up to one Insert 2 batteries AA 1.5 V (!Batteries are not included) minute.
-
Page 17: Reference Description
Warm up for 8 to 10 minutes by walking or jogging lightly on the spot or use a Dunlop treadmill, bike or elliptical strider. Try to include some simular movements that make up your workout, include stretches to target your tighter muscles. - Page 18 Instructions d'utilisation de l'ordinateur Fonctions de l'ordinateur ♥ PULSE Mettre les paumes de la main sur les Batteries : sensors au guidon afin d’enrégistrer Inserez deux batteries Mignon 1.5 V (Pas fournies) votre fréquence cardiaque. Mise en marche: SCAN Chaque fonction apparaîtra Après insertion de ces piles appuyez sur n'importe successiment sur l’écran.
-
Page 19: Organisation De L'entraînement
Echauffez-vous pendant huit à dix minutes en marchant ou en courant sur place ou en Référence Désignation vous servant d’un tapis de jogging Dunlop, ou d’une 20054 Moniteur Poulse Eon 110 bicyclette ou d’une strider. Essayez d’inclure dans votre échauffement des mouvements similaires à... - Page 20 Computer Handleiding Werking computer CALORIES Calorie verbruik. Je kan een te verbranden kalorieverbruik instellen Batterijen : door de knop ‘SET’ in te drukken, en batterijen Mignon AA 1.5 V. Plaats 2 dit met intervals van 10 cal. Zodra de Let op, toestel wordt geleverd zonder batterijen ! ingestelde hoeveelheid is verstreken zal een alarm weerklinken gedurende 8 seconden, en schakelt de computer...
- Page 21 Wenst U zich een gehomologeerde leniger te worden. Met de uitgebreide artikelen die hartslagmonitor aan te schaffen contacteer dan worden aangeboden in het Dunlop gamma, zal u altijd Uw Dunlop verdeler, of raadpleeg onze website een produkt vinden dat voldoet aan uw eigen www.ds-designsport.com, of vraag meer...
- Page 22 Οδηγίες για τον υπολογιστή Οδηγίες λειτουργίας για τον υπολογιστή απόσταση στόχο πατώντας το Μπαταρίες: πλήκτρο ‘SET’, µε κάθε βήµα να Βάλτε 2 µπαταρίες Mignon AA 1.5 V. ισοδυναµεί µε 0.5 km. Όταν φτάσει η απόσταση Άνοιγµα: Αφού εισάγετε τις µπαταρίες και/ ή αφού πατήσετε στόχος...
- Page 23 Αυτό µπορεί να γίνει αυξάνοντας την αντίσταση των συσκευή οθόνης καρδιακού ρυθµού, µπορείτε να πεταλιών, χρησιµοποιώντας µεγαλύτερη συχνότητα έρθετε σε επαφή µε τον διαπραγµατευτή της πεταλιών ή µε µεγαλύτερη διάρκεια της άσκησης. Dunlop ή να επισκεφθείτε τη σελίδα µας στο δυαδίκτυο www.ds-designsport.coms, ή να Οργάνωση Άσκησης...
- Page 24 Dibujo de explosión- Explosion Drawing - Schéma de l’appareil – Schematisch Overzicht - Αναλυτικό ∆ιάγραµµα...
- Page 25 Lista de Piezas - Part List CT 410 Nr. No. Descripción Description Cantidad Quantity Ordenador Computer Protección en cauchou Foam grip Sensor de pulso Hand-pulse sensor 1 set Guia Handlebar Tornillo para ordenador Computer fixing bolt Bara de acoplamiento Handlebar post Anillo de cierre para bara de acoplamiento Washer for handlebar post Tornillo para bara de acoplamiento...
- Page 26 Soporte para rail de seleccion Socket for horizontal slider Correa Belt Polea Big pulley Protección en plástico para la barra del sillin Plastic insert for seatpost Sensor Sensor box Anillo para volante (1) Bushing for flywheel (1) Anillo de fijacion para volante (1) Bearing for flywheel (1) Volante Flywheel...
-
Page 27: Liste Des Pièces De Rechange - Reserve Onderdelenlijst Concept 410
Liste des pièces de rechange – Reserve onderdelenlijst Concept 410 Nr. No. Description Omschrijving Qté/Aantal Ordinateur Computer Revêtement guidon mousses Handgreep Sensor de pulsation Handgrip sensor 1 set Guidon Stuur Boulon de fixation/ordinateur Fixatiebout voor computer Potence Stuurstang Rondelle Sluitring Vis hexagonal de la potence Zeshoekige vijs voor stuurstang Cable de tension (1) - Page 28 Poulie Rollager Manche en plastic pour tige de selle Plastic inschuif voor zadelsteun Boîte sensor Sensordoosje Poulie pour volant Rollager voor vliegwiel Roulement pour volant d'inertie (1) Lager voor vliegwiel (1) Volant d'inertie Vliegwiel Axe volant As vliegwiel Roulement pour volant d'inertie (2) Lager voor vliegwiel (2) Poulie Rollager...
- Page 29 Entrenamiento del pulso - Training du poulse - Pulse Training - Hartslag training - Μέτρηση παλµού Max. Puls Pulse Pouls Pols ΠΑΛΜΌΣ Edad - Age - Age Leeftijd- Ηλικία El manual puede ser utilizado solamente para información No se pueden hacer responsable el suministrador de faltas eventuales o de cambios eventuales en las specificaciones técnicas.