Table des Matières

Publicité

Les langues disponibles

Les langues disponibles

Liens rapides

DE
BETRIEBSANLEITUNG
EN
USER'S MANUAL
FR
MODE D'EMPLOI
IT
ISTRUZIONI PER L'USO
TV-Wandhalter
TV wall mount
TV Support mural
Supporto per TV
51883
Goobay TV EasyFlex M (si)
51893
Goobay TV EasyFlex M (bl)

Publicité

Table des Matières
loading

Sommaire des Matières pour Goobay TV EasyFlex M

  • Page 1 BETRIEBSANLEITUNG USER‘S MANUAL MODE D‘EMPLOI ISTRUZIONI PER L‘USO TV-Wandhalter TV wall mount TV Support mural Supporto per TV 51883 Goobay TV EasyFlex M (si) 51893 Goobay TV EasyFlex M (bl)
  • Page 2: Table Des Matières

    Betriebsanleitung BETRIEBSANLEITUNG ..........2 USER’S MANUAL ............16 MODE D‘EMPLOI ............28 ISTRUZIONI PER L‘USO ..........42 BETRIEBSANLEITUNG Inhalt Sicherheitshinweise ..............3 Allgemeines ..............3 Benutzergruppen .............. 4 Warnstufen ............... 4 Beschreibung und Funktion ............5 Lieferumfang ..............5 benötigtes Werkzeug ............6 Bestimmungsgemäßer Gebrauch ..........
  • Page 3: Sicherheitshinweise

    Sicherheitshinweise Allgemeines • Lesen Sie die beiliegende Produktdokumentation vollständig und sorgfältig vor Benutzung. Diese ist Bestandteil des Produkts. • Beachten Sie die Sicherheitshinweise in Produktdo k umentation, auf Produkt und Zubehör, sowie auf der V erpackung. • Benutzen Sie Produkt, Produktteile und Zubehör nur in einwandfreiem Zustand. • Bewahren Sie die Produktdokumentation für andere potentielle Benutzer und zum Nachlesen auf. • Bei Fragen, Defekten, mechanischen Beschädigungen, Störungen und anderen nicht d urch die Begleit d okumentation behebbaren Problemen, wenden Sie sich an Ihren Händler. Lebensgefahr durch Ersticken Kinder können an verschluckten oder eingeatmeten K leinteilen und Dämmmate- rial ersticken.
  • Page 4: Benutzergruppen

    Betriebsanleitung Gefahr durch Selbsteingriffe und Zweckentfremdung Selbsteingriffe und Zweckentfremdungen bergen u nvorhersehbare Risiken und führen zum Erlöschen v on Gewährleistungs- und Garantieansprüchen. >> M odifizieren und ändern Sie weder Produkt, P roduktteile noch Zubehör! Sachschaden durch inkompatible Produktkombinationen Inkompatible Produktkombinationen erfüllen nicht die gewünschte Funktion, können Qualitätsverluste oder Sachschaden zur Folge haben. >> T echnische Daten aller verwendeter P rodukte vergleichen. Diese m üssen übereinstimmen oder im angegebenen B ereich liegen. Sachschaden durch ungeeignete Umgebungsbedingungen Falsche Umgebungsbedingungen können Sachen beschädigen.
  • Page 5: Beschreibung Und Funktion

    Warnung vor Gefahren, die bei Missachtung der Sicherheitshinweise zu Verletzungen führen können. Sachschäden Warnung vor Gefahren, die bei Missachtung der Hinweise zu führen können. Beschreibung und Funktion Ihr TV-Wandhalter dient der Montage Ihres Flachbildschirms an stabilen, verti- kalen Wänden. Die kompakte und flache Bauweise unterstützt ein individuelles, platzsparendes Anbringen. Er ist neigbar und schwenkbar. Lieferumfang Teil Abbildung Kürzel Anzahl Wandmontage TV-Wandhalter 51883 oder TV-Wandhalter 51893 Wandschraube 6.3x55 Betondübel Flachbildschirmmontage M4x14 M5x14 M6x14 M8x20 Unterlegscheibe D5 Unterlegscheibe D8 TV-Abstandhalter Tab. 2: Lieferumfang...
  • Page 6: Benötigtes Werkzeug

    Betriebsanleitung benötigtes Werkzeug Werkzeug Abbildung Leitungsprüfer Wasserwaage Stift Kreuzschlitz-Schraubendreher Bohrmaschine Beton-/Steinbohrer 8x60mm zweite Person Tab. 3: benötigtes Werkzeug Bestimmungsgemäßer Gebrauch Dieses Produkt dient dazu, Flachbildschirme mit spezifischen Bildschirmdiago- nalen, Gewichten und Befestigungspunkten, die in Kapitel „technische Daten“ zusammengefasst sind, an eine vertikale Wand zu montieren. Eine andere als in Kapitel „Beschreibung und Funktion“ beschriebene Verwendung ist nicht gestattet. Das Nichtbeachten und Nichteinhalten dieser Bestimmungen und der Sicherheitshinweise kann zu schweren Unfällen, Personen- und Sachschäden führen. Beachten Sie dazu auch das Kapitel „Gewährleistung und Haftung“. Nutzungsbeschränkungen Nur in trockenen Innenräumen verwenden. Montage...
  • Page 7: Vorbereitung

    Vorbereitung Vollständigkeit und Unversehrtheit prüfen >> Packungsinhalt mithilfe des Lieferumfangs auf Vollständigkeit und Unversehrtheit kontrollieren. Kompatibilität sicherstellen Gebot / Warnstufe Sicherheitshinweis Verbot Sachschaden durch inkompatible Pro- duktkombinationen >> Technische Daten aller verwendeter Produkte vergleichen. Diese müssen über- einstimmen oder im angegebenen Bereich liegen. Tab. 4: Kompatibilität sicherstellen Wandmontage Gebot / Warnstufe...
  • Page 8: Flachbildschirmmontage

    Betriebsanleitung Fig. 1: Wandmontage 1. P rüfen Sie vor dem Bohren, ob sich Gas-, Wasser-, oder Stromleitungen in der Wand befinden und beschädigen Sie diese nicht. 2. B enutzen Sie eine Wasserwaage, u m die Bohrlöcher zu markieren. 3. Benutzen Sie den TV-Wandhalter (A) als Schablone. 4. Bohren Sie die Löcher mit einem 10mm-Steinbohrer 60mm tief. 5. S tecken Sie jeweils einen Wanddübel (W-B) in die Bohrlöcher. 6. B ringen Sie den TV-Wandhalter (A) mit den Wandschrauben (W-A). Flachbildschirmmontage Gebot / Warnstufe Sicherheitshinweis Verbot Verletzungsgefahr durch Stolpern und Sturz...
  • Page 9: Flachbildschirme Mit Gewölbter Rückseite

    Fig. 2: Flachbildschirme mit flacher Rückseite 1. L ehnen Sie den Flachbildschirm vertikal gegen eine weiche, großflächige Unterlage oder eine Wand und sichern Sie ihn gegen Kratzer und Umkip- pen. 2. M ontieren Sie den TV-Wandhalter (A) mit den passenden Unterlegscheiben und den zu Ihrem Flachbildschirm passenden Schrauben wie abgebildet. Achten Sie darauf, dass Sie den TV-Wandhalter (A) mit den 3 Wandlöchern zur Flachbildschirmoberseite befestigen.
  • Page 10: Einhängen Und Sichern Des Flachbildschirms

    Betriebsanleitung 1. Gehen Sie bis auf folgenden Zwischenschritt vor wie in Kapitel 4.3.1 beschrieben. 2. Montieren Sie die zu Ihrem Gerät passenden TV A bstandhalter (M-G) einfach oder doppelt wie abgebildet jeweils zwischen TV-Wandhalter (A) und dem Flachbildschirm. Achten Sie darauf, dass Sie den TV-Wandhalter (A) mit den 3 Wandlöchern zur Flachbildschirmoberseite befestigen. Einhängen und Sichern des Flachbildschirms Gebot / Warnstufe Sicherheitshinweis...
  • Page 11: Einstellen Des Flachbildschirms

    1. Hängen Sie den vorbereiteten Flachbildschirm zusammen mit einer 2. Person mit dem TV-Wandhalter (A) auf die Wandschrauben (W-A) wie abgebildet. 2. Schrauben Sie alle Wandschrauben (W-A) fest. Ende der Montage. Zur Demontage gehen Sie in rückwärtiger Reihenfolge vor. Einstellen des Flachbildschirms Gebot / Warnstufe Sicherheitshinweis Verbot Verletzungsgefahr durch bewegliche Produktteile >> Gliedmaßen während des Gebrauchs nicht zwischen Scherteile halten.
  • Page 12: Pflege, Wartung, Lagerung Und Transport

    Betriebsanleitung • Falls ein Fehler oder Defekt an Ihrem Gerät festgestellt werden sollte, wenden Sie sich bitte an Ihren Fachhändler und zeigen Sie ggf. Ihre Quittung oder Rechnung als Kaufnachweis vor. Ihr Händler wird den Fehler entweder vor Ort beheben, oder das Produkt an den Hersteller weiterleiten. Sie erleichtern den Technikern ihre Arbeit sehr, wenn Sie eventuelle Fehler ausführlich beschreiben – nur dann haben Sie Gewähr, dass auch selten auftretende Fehler mit Sicherheit gefunden und beseitigt werden! • Der Hersteller haftet nicht für Personen- oder Sachschäden, die durch unsachgemäße Installation, Betrieb oder Wartung entstanden sind. • Ein anderer als in dieser Betriebsanleitung beschriebener Einsatz ist unzulässig und führt zu Gewährleistungsverlust, Garantieverlust und Haftungsaus schluss.
  • Page 13: Problembehebung

    Problembehebung Problem Hilfe Verkehrslasten für Wohnräume sind in diversen Europa- richtlinien festgelegt. Wie kann die Wandqualität >> Wandstärke und Material unter Putz / Tapeten getestet werden? prüfen. >> Fachpersonal zu Rate ziehen. Welche Löcher müssen gebohrt >> Kapitel 4.2 lesen. werden? andere Fragen >> Händler kontaktieren. Tab. 7: Problembehebung Technische Daten Größe Angabe Einheit TV Größe 17-42 “ / Zoll VESA max.
  • Page 14: Entsorgungshinweise

    Betriebsanleitung VESA Klasse Befestigungslochabstand von Flachbildschirmen MIS-D 75x75 / 100x100mm MIS-E 200x100 / 200x200mm MIS-F 400x200 / 400x400 / 600x200 / 600x400 / 800x400mm Tab. 9: Informationen zum VESA-Standard 11 Entsorgungshinweise Dieses Produkt gehört nicht in den Hausmüll. Bitte geben Sie Ihr Gerät am Ende seiner Lebensdauer an die dafür eingerichteten, öffentlichen Sammelstel- len oder an die Verkaufsstelle kostenlos zurück. Einzelheiten zur Entsorgung regelt das jeweilige Landesrecht. Wertstoffe werden dem Recyclingkreislauf zugeführt, um daraus neue Rohstoffe zu gewinnen. Folgende Wertstoffe werden in kommunalen Sammelstellen gesammelt: • Altglas, Kunststoffe, Altmetalle, Bleche uvm.
  • Page 16: User's Manual

    User‘s Manual BETRIEBSANLEITUNG ..........2 USER’S MANUAL ............16 MODE D‘EMPLOI ............28 ISTRUZIONI PER L‘USO ..........42 USER’S MANUAL Content Safety Instructions ............... 17 General Notes ..............17 User Groups ..............18 Warning Levels ..............18 Description and Function ............. 19 2.1 Scope of Delivery .............
  • Page 17: Safety Instructions

    Safety Instructions General Notes • Read the including product documentation completely and carefully before use. It is part of the product. • Attend to the safety instructions in product documentation, on product and accessories, such as on the p ackage. • Use product, product parts and accessories only in perfect condition. • Keep the product documentation for other potential users and for later requests. • For questions, defects, mechanical damage, disturbances and other not remediable problems, c onsult your dealer. Risk of life by suffocating Children can suffocate by swallowed or inhaled parts and insulation materials.
  • Page 18: User Groups

    User‘s Manual warranty. >> Do not modify or alter either the product or the a ccessories! Risk of material damage by inappropriate ambient conditions Incorrect ambient conditions can damage things. >> A void extreme conditions, such as extreme heat, coldness, humidity or d irect exposure to the sun, a s well as vibrations and mechanical pressu- >> Keep enough space around product and to the whole system to ensure proper ventilation and mobility.
  • Page 19: Description And Function

    2 Description and Function Your TV wall mount is made for mounting your flat screen at stable, vertical walls. The compact and slim design supports individual, space-saving mounting. It is tiltable and swivelable. Scope of Delivery Part Figure Symbol Amount Wall mounting TV wall mount 51883 TV wall mount 51893 Wall screw 6.3x55 Concrete anchor Flat screen mounting M4x14 M5x14 M6x14 M8x20 Washer D5 Washer D8 TV Spacer Tab. 11: Scope of Delivery Required tools Tool Figure...
  • Page 20: Intended Use

    User‘s Manual Line tester Spirit level Pencil Phillips screwdriver Drilling mashine Concrete drill 8x60mm Second person Tab. 12: Required tools Intended Use This product is made for mounting flat screens with specific screen sizes, weights and mounting points, which are summarized in chapter “Technical data“, on a vertical wall. Another use than described in chapter “Description and Function“ is not permitted. Neglegting and ignoring these regulations and safety instructions can cause serious accidents, personal injury and material damage. Also refer to chapter “Warranty and Liability“. Use restrictions Only use in dry interior rooms. Installing Preparing Checking the completeness and integrity >>...
  • Page 21: Wall Mounting

    Ensuring compatibility Bid / Warning level Safety instruction Risk of material damage by improper product combination >> The specifications of all used products must match or be within the specified range. Tab. 13: Ensuring compatibility Wall mounting Warning level Safety instruction Bid / Ban Risk of injury due to inappropriate ambient conditions >>...
  • Page 22: Mounting The Flat Screen

    User‘s Manual 2. Use a spirit level to mark the drill holes on the wall. 3. Use the TV wall mount (A) as template. 4. D rill the holes with a 10mm concrete drill 60mm deep. 5. Plug a concrete anchor (W-B) in each drilling hole. 6. M ount the TV wall mount (A) by using the wall screws (W-A). 4.3 Mounting the flat screen Warning level Safety instruction Bid / Ban Risk of injury by tripping and falling >>...
  • Page 23: Flat Screens With Arched Back

    Make sure, fixing the TV wall mount (A) with the 3 wall holes facing to the flat screens top. 4.3.2 Flat screens with arched back Fig. 10: Flat screens with arched back 1. Apart from the following working step - proceed like shown in chapter 4.3.1. 2. Mount the fitting TV spacers (M-G) single or double between TV wall mount (A) and flat screen like shown.
  • Page 24: Adjusting The Flat Screen

    User‘s Manual Fig. 11: Attaching and locking the flat screen 1. A ttach the prepared flat screen with TV wall mount (A) to the wall screws (W-A) t ogether with a second person as shown. 2. Fix all wall screws (W-A). End of installing. To remove, proceed in reversed order. 5 Adjusting the flat screen Warning level Safety instruction Bid/Ban Risk of injury by moving product parts >> Do not hold limbs between shear parts during use. >> Mind the mobility of the product during use. This may move away from the wall or towards it and swivel sideways.
  • Page 25: Warranty And Liability

    Warranty and Liability • T he producer grants a 2 years warranty to a new device. • As the manufacturer has no influence on installation, warranty only applies to the product itself. • If any fault or damage is detected on your device, please contact your dealer and provide your sales slip or invoice as evidence of the purchase, if necessary. Your dealer will repair the fault either on site, or send the device to the manufacturer. You make the work of our technicians considerably easier, describing possible faults in detail – only then you can be assured that faults, occurring only rarely, will be found and repaired with certainty! • The manufacturer is not liable for damages to persons or property caused by improper installation, operation or maintenance, not described in the manual. • Do not alter or modify the product or its accessories. • Any use other than described in this user`s manual is not permitted and causes loss of warranty, loss of guarantee, and non-liability.
  • Page 26: Troubleshooting

    User‘s Manual Troubleshooting Problem Help Loads for home use are regulated in various European standards. How to test wall >> Check wall thickness and material under plaster / wall quality? paper. >> Ask a specialist. Which drill holes >> Read chapter 4.2. must be drilled? Other questions >>...
  • Page 27: Disposal Instructions

    Disposal Instructions This product should not be disposed together with domestic waste. Please return your product free of charge at the end of its service life at the producer, the sales outlet, or a public collection point, established for this purpose. Details for disposal are regulated in the relevant federal state law. Potential recyclable materials are fed into the recycling cycle to obtain new raw materials from them. Following materials are collected a local collection points: • Waste glass, plastic, waste metal, metal sheet, and more. This type of recycling of waste contributes significantly to the protection of our environment.
  • Page 28: Mode D'emploi

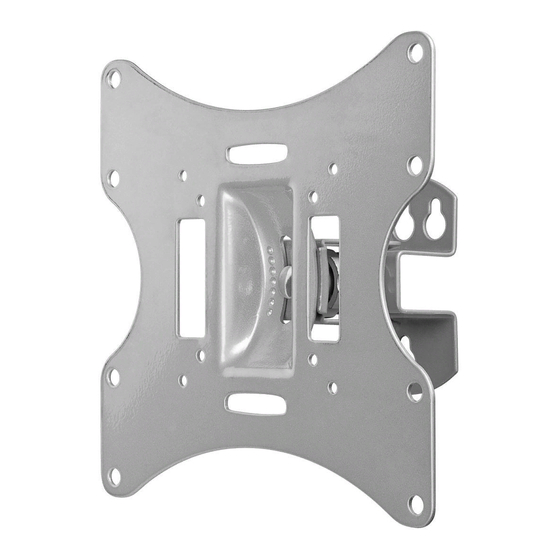
    Mode d‘emploi BETRIEBSANLEITUNG ..........2 USER’S MANUAL ............16 MODE D‘EMPLOI ............28 ISTRUZIONI PER L‘USO ..........42 MODE D‘EMPLOI Contenu 1 Consignes de sécurité ............... 29 Notes général ................. 29 1.2 Groupes de l‘utilisateur ............30 Niveaux de mises en garde ............ 30 2 D escription et fonction ...............
  • Page 29: Consignes De Sécurité

    Consignes de sécurité Notes général • Lisez attentivement toute la documentation du produit fournie avant utilisati- on. Elle fait partie du produit. • Consultez les consignes de sécurité de la documentation du produit, sur le produit et les accessoires, comme l‘emballage. • N‘utilisez le produit, les pièces du produit et les accessoires que s‘ils sont en parfait état. • Conservez la documentation du produit pour d‘autres utilisateurs potentiels et pour une utilisation ultérieure. • Pour des questions, des défauts, des dommages mécaniques, des perturba- tions et d‘autres problèmes qui ne semblent pas avoir de solution, consultez votre revendeur. Risque de mort par suffocation Il existe un risque de mort par suffocation pour les enfants s‘ils avalent ou inhalent les pièces et les matériaux d‘isolation.
  • Page 30: Risque D'intervention Personnelle Et De Mauvaise Utilisation

    Mode d‘emploi C ‘est peut-être de s‘éloigner du mur ou sur eux et déplacement latéral. Risque d‘intervention personnelle et de mauvaise utilisation Les interventions personnelles et les mauvaises utilisations cachent des risques difficiles à prévoir et peuvent entraîner une fin de garantie. >> Ne modifiez ni le produit ni les accessoires! Risque de dommage du matériau par combinaison inappropriée du produit La combinaison du produit incompatible ne répond pas aux fonctions requises, elle peut entraîner une perte de qualité ou un dommage matériel. >> Les spécifications de tous les produits utilisés doivent correspondre ou ê...
  • Page 31: Escription Et Fonction

    sérieuses ou la mort en cas de non respect. Mises en garde contre les dangers pouvant entraîner des blessures graves ou la mort en cas de non respect. Mises en garde contre les dangers pouvant entraîner des blessures en cas de non respect.
  • Page 32: Outils Requis

    Mode d‘emploi M8x20 Rondelle Rondelle Rondelle d‘espacement TV Tab. 22: Contenu de la livraison Outils requis Outil Figure Testeur de ligne Niveau à bulle Crayon Tournevis cruciforme Perceuse électrique Mèche à béton de 8 x 60 mm Seconde personne Tab. 23: Outils requis...
  • Page 33: Utilisation Prévue

    Utilisation prévue Ce produit est destiné au montage des écrans plats de tailles d‘écrans, de poids et de points de montage spécifiques sur un mur vertical, résumés dans le chapitre „Données techniques“. Une autre utilisation décrite dans le chapitre „Description et fonction“ n‘est pas autorisée. La négligence et l‘ignorance de ces règles et consignes de sécurité peuvent causer de graves accidents, des blessures et des dommages matériels. Reportez-vous aussi au chapitre „Garan- tie et responsabilité“. Restrictions d‘utilisation Utiliser uniquement dans des locaux secs. Installation Préparation Vérifiez l‘intégralité et l‘intégrité >> V érifiez le contenu de l‘emballage en le comparant à la livraison concer n ant l‘intégralité et l‘intégrité. Assurer la compatibilité Niveaux de Domaines Consignes de sécurité mises en garde / Ban Risque de dommage du matériau par combinaison inappropriée du produit >>...
  • Page 34: Montage De L'écran Plat

    Mode d‘emploi >> N‘installez pas le produit dans un endroit en contact direct avec la lumière du sol- eil ou à la lumière vive. Ceci contribue à la fatigue oculaire. Risque de dommage matériel par con- ditions ambiantes inappropriées >> Conservez un espace suffisant autour du produit et vers tout le système pour assurer une ventilation correcte et permettre la mobilité.
  • Page 35: Risque De Dommage Matériel Causé Par Une Procédure Inappropriée

    Risque de dommage matériel causé par une procédure inappropriée >> Serrez les vis modérément pour éviter d‘endommager le filetage. >> Ne positionnez JAMAIS l‘écran devant durant l‘installation! >> N‘endommagez pas l‘écran plat en utilisant des vis trop longues. Tab. 26: Montage de l‘écran plat 4.3.1 Ecrans plats avec face arrière plane Fig.
  • Page 36: Assembler Et Fixer L'écran Plat

    Mode d‘emploi Fig. 15: Ecrans plats avec face arrière courbée 1. Excepté pour l‘étape suivante - procédez comme indiqué dans le chapitre 4.3.1. 2. Montez les rondelles d‘espacement TV (M-G) simple ou double entre le sup- port mural TV (A) et l’écran plat tel qu’indiqué. Assurez-vous que le TV support mural (A) est fixer avec les 3 trous pour le supérieur de l’écran plat. 4.4 A ssembler et fixer l‘écran plat Niveaux de Domaines Consignes de sécurité...
  • Page 37: Juster L'ecran Plat

    Fig. 16: Assembler et fixer l‘écran plat 1. Fixer l’écran plat à l’aide des supports mural TV (A) au vis murale (W-A) en vous faisant aider par une seconde personne, comme illustré. 2. Visser toutes les vis murale (W-A). Fin de l‘assemblage. Procéder dans l‘ordre inverse du démontage. Ajuster l‘ecran plat Niveaux de Domaines Consignes de sécurité mises en garde / Ban Risque de blessure par des pièces mobiles du produit >>...
  • Page 38: Garantie Et Responsabilité

    Mode d‘emploi Garantie et responsabilité • Le fabricant accorde une garantie de 2 ans à un appareil neuf. • Comme le fabricant n‘a aucune influence sur l‘installation, la garantie s‘applique uniquement au produit lui-même. • Si vous détectez un défaut ou un dommage sur votre appareil, veuillez prendre contact avec votre détaillant et, si nécessaire, fournir le ticket de vente ou la facture comme preuve d‘achat. Votre revendeur réparera l‘appareil sur place, ou bien renverra l‘appareil au fabricant. Vous rendez le travail de nos techniciens considérablement plus facile en décrivant les défauts possibles en détail - alors seulement vous pourrez être assuré que les défauts qui ne se produisent que rarement, pourront être détectés et réparés à coup sûr! • Le fabricant n‘est pas responsable des dommages physiques ou matériels causés par une mauvaise installation ou maintenance, ou une opération non décrite dans le présent manuel.
  • Page 39: Épannage

    • Conservez l‘emballage d‘origine pour le transport et pour éviter des dom- mages. Dépannage Problème Aide Les charges domestiques sont réglementées dans les diverses normes européennes. Comment tester >> Vérifiez l‘épaisseur murale et celle du matériau sous le la qualité murale? plâtre / papier peint. >> Demandez à un spécialiste. Quels trous doi- vent être percés? >> Lisez le chapitre 4.2. Autres questions >> Contactez votre revendeur. Tab.
  • Page 40: Instructions Pour L'élimination

    Mode d‘emploi Chapitre Caractéristiques du present guide, vous êtes en mesure de définir les points de fixation possibles. Certains modèles permettent des fixations individu- elles variables à l‘infini. (par exemple 300 x 300 mm pour Sony TVs) Classe VESA Distance des trous pour la fixation des moniteurs MIS-D 75 x 75 / 100 x 100 mm MIS-E 200 x 100 / 200 x 100 mm MIS-F 400x200 / 400x400 / 600x200 / 600x400 / 800x400mm Tab. 31: Informations sur la norme VESA Instructions pour l’élimination Ce produit ne doit pas être mis au rebut avec les déchets ménagers. Veuillez déposez gratuitement votre appareil en fin de vie à un point de récupération des...
  • Page 42: Istruzioni Per L'uso

    Istruzioni per l‘uso BETRIEBSANLEITUNG ..........2 USER’S MANUAL ............16 MODE D‘EMPLOI ............28 ISTRUZIONI PER L‘USO ..........42 ISTRUZIONI PER L‘USO Contenuto 1 Istruzioni per la sicurezza ..............43 Note Generali ................. 43 Gruppi utente ................. 44 Livelli d’avviso ................ 44 2 D escrizione e Funzione ..............
  • Page 43: Istruzioni Per La Sicurezza

    Istruzioni per la sicurezza Note Generali • Leggere in modo completo ed accurato la documentazione del prodotto prima dell‘uso Fa parte del prodotto. • Osservare le istruzioni di sicurezza riportate nella documentazione del prodotto, sul prodotto e sugli accessori, come ad esempio sulla confezione. • Utilizzare il prodotto, le parti del prodotto e gli accessori solo se sono in perfette condizioni. • Conservare la documentazione del prodotto per altri potenziali utenti e per le richieste successive.
  • Page 44: Gruppi Utente

    Istruzioni per l‘uso Pericoli dovuti ad interventi autonomi ed uso improprio Gli interventi autonomi e l’uso improprio nascondono rischi imprevedibili e causano l’annullamento della garanzia. >> Non modificare o alterare né il prodotto né gli accessori! Rischio di danni materiali causati da combinazioni inappropriate di prodotti La combinazione di prodotti incompatibili non soddisfa le funzioni necessarie, può causare la perdita di qualità o danni materiali. >> Le specifiche di tutti i prodotti utilizzati devono corrispondere o essere c omprese nell‘intervallo specificato.
  • Page 45: Descrizione E Funzione

    Avvisi relativi a pericoli che possono tradursi in lesioni in caso di inosservanza. Avvisi relativi a pericoli che possono tradursi in danni materiali in caso di inosservanza. Descrizione e Funzione Il kit per installazione a parete serve per installare lo su pareti stabili e verticali. Il design compatto e sottile supporta l’installazione individuale ed in economia di spazio.
  • Page 46: Strumenti Necessari

    Istruzioni per l‘uso Rondella D8 Distanziatore TV Tab. 33: Scopo della consegna Strumenti necessari Strumento Figura Tester di linea Livella a bolla Matita Cacciavite a stella Trapano Trapano per cemento 8 x 60mm Seconda persona Tab. 34: Strumenti necessari Scopo d‘utilizzo Questo prodotto è realizzato per l’installazione su una parete verticale di schermi piatti con dimensioni, pesi e punti d’installazione specifici, che sono - riassunti nel capitolo „Dati tecnici“. Non è consentito l’uso diverso da quello descritto nel Capitolo „Descrizione e Funzioni“. La mancata osservanza e...
  • Page 47: Limitazioni D'uso

    Limitazioni d‘uso Utilizzare solo in ambienti asciutti. Installazione Preparazione Controllo della completezza e dell‘integrità >> Controllare il contenuto della confezione e confrontarlo con i Contenu- ti della confezione per quanto riguarda la completezza e l‘integrità. Garantire la compatibilità Rilancio Livelli d’avviso Nota di sicurezza / Vietata Rischio di danni materiali causati da combinazioni inappropriate di prodotti >>...
  • Page 48: Installazione Dello Schermo Piatto

    Istruzioni per l‘uso Fig. 18: Installazione su parete 1. Prima di perforare la parete, prestare attenzione ai cavi elettrici ed altri fili che si trovano dietro l’intonaco, e non danneggiarli! 2. Utilizzare una livella a bolla per segnare i punti dove forare la parete. 3. Utilizzare il supporto da parete TV (A) come modello. 4. Praticare i fori profondi 60mm con un trapano da cemento e punta da 10mm. 5. I nserire un tassello (W-B) in ogni foro.
  • Page 49: Schermi Piatti Con Fondo Piatto

    4.3.1 Schermi piatti con fondo piatto Fig. 19: Schermi piatti con fondo piatto 1. Appoggiare lo schermo piatto in verticale su una superficie morbida e di grandi dimensioni, oppure ad un muro, e proteggerlo da graffi e ribaltamento. 2. Montare il supporto da parete TV (A) con rondelle e viti di corrispondenza per a schermo piatto, come mostrato. Assicurarsi che si fissare la staffa a muro tv (A) con 3 fori a parete laterale superiore. 4.3.2 Schermi piatti con fondo curvo Fig.
  • Page 50: Fissare E Assicurare Dello Schermo Piatto

    Istruzioni per l‘uso capitolo 4.3.1. 2. Installare i distanziatori TV (M-G) singola o doppia tra la supporto per TV (A) e lo schermo piatto, come mostrato. Assicurarsi che si fissare la staffa a muro tv (A) con 3 fori a parete laterale superiore. Fissare e assicurare dello schermo piatto Rilancio Livelli d’avviso Nota di sicurezza / Vietata Pericolo di lesioni da incespicamento e caduta >>...
  • Page 51: Allineare Il Monitor A Schermo Piatto

    Fine del installazione. Procedere in ordine inverso rispetto sullo rimozione. Allineare il monitor a schermo piatto Rilancio Livelli d’avviso Nota di sicurezza / Vietata Pericolo di lesioni spostando parti del prodotto >> Non tenere membra tra le parti di taglio durante l‘uso.
  • Page 52: Anutenzione, Cura, Conservazione E Trasporto

    Istruzioni per l‘uso Manuale d’uso ed implica l’annullamento della garanzia e delle responsabilità. • Ci riserviamo il diritto di apportare modifiche al dispositivo, all’imballaggio ed al Manuale d’uso. 7 Manutenzione, Cura, conservazione e trasporto • Il prodotto deve essere mantenuto solo da officine specializzate. • Proteggere gli angoli da sporco e grasso regolarmente con olio leggero per macchine. • Usare un panno di stoffa asciutto per pulire il prodotto. Prestare attenzione per evitare di graffiare il prodotto. Usare un panno leggermente inumidito per pulire le macchie difficili. Prestare attenzione ai cavi di massa! Non usare alcun prodotto detergente.
  • Page 53: Pecifiche

    9 Specifiche Dimensione Specificazione Unità Dimensione TV 17-42 “ / Inch VESA max. 200x200 Caricare max. 30 Angolo di +/-20 ° inclinazione Angolo di +/-30 ° rotazione Distanza dalla parete 51883: argento Colore 51893: nero Dimensioni 220 x 220 x 90 Carico 0.800 Tab.
  • Page 54 Istruzioni per l‘uso poterne ricavare nuove materie prime. I seguenti materiali riciclabili sono raccolti presso i punti di raccolta locali: • Vetro di scarto, plastica, scarti metallici, lastre in metallo e altro ancora. Questo tipo di riciclaggio delle apparecchiature scartate contribuisce in modo significativo alla protezione del nostro ambiente.
  • Page 56 Istruzioni per l‘uso...
  • Page 58 MODE D‘EMPLOI ISTRUZIONI PER L‘USO TV-Wandhalter TV mount TV Support mural Supporto per TV 51883 51893 Revision 2014-01-28 Version 3 Goobay ® Pillmannstraße 12 38112 Braunschweig Germany Made in China. Hotline: +49 (0180) 5005882 E-Mail: info@goobay.de Web: www.goobay.de *(0,14 € pro Minute aus dem deutschen Festnetz. Maximal 0,42 € pro Minute aus dem Mobilfunknetz.) Revision 2013-03-14 Version 1...

Ce manuel est également adapté pour:

5188351893

Table des Matières