Publicité
Les langues disponibles
Les langues disponibles
Liens rapides
All manuals and user guides at all-guides.com
DE
Montageanleitung
EN
Installation instructions
FR
Instructions de montage
IT
Istruzioni per il montaggio
ES
Instrucciones de montaje
NL
Montagehandleiding
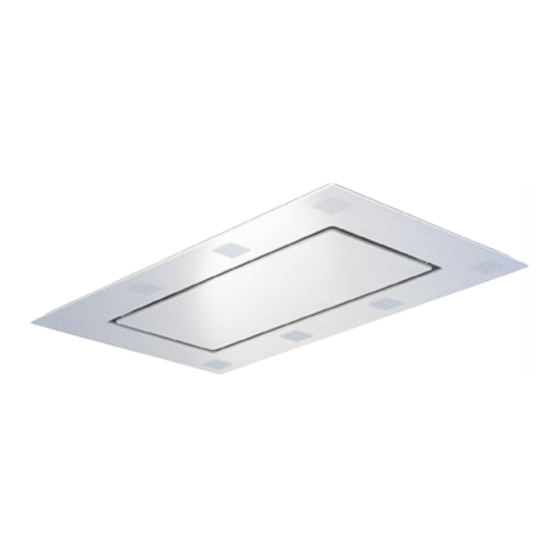
SOMBRA II
TYP 68/6801EM
Publicité

Manuels Connexes pour GUTMANN Sombra ll 68/6801EM


Sommaire des Matières pour GUTMANN Sombra ll 68/6801EM
- Page 1 All manuals and user guides at all-guides.com SOMBRA II TYP 68/6801EM Montageanleitung Installation instructions Instructions de montage Istruzioni per il montaggio Instrucciones de montaje Montagehandleiding...
- Page 2 Prüfungen. Es ist natürlich zu beachten, dass unsere Produkte einem natürlichen Verschleiß- und Alterungsprozess unterliegen. Alle Rechte liegen bei der GUTMANN GmbH, auch für den Fall von Schutzrechtsanmel- dungen. Jede Verfügungsbefugnis, wie Kopie- und Weitergaberecht, liegt bei uns. Auf der Titelseite ist eine Beispielkonfiguration abgebildet. Das ausgelieferte Produkt kann daher von der Abbildung abweichen.
- Page 3 All manuals and user guides at all-guides.com Schalter und Schütze. Vor den Arbeiten Sicherheitshinweise elektrischen Anschluss Dunstabzugshaube den Netzstromkreis/ Montage, Anschluss, Inbetriebnahme die Netzstromkreise abschalten. Vor und Reparatur dürfen nur von einer dem Bohren von Befestigungslöchern Fachkraft durchgeführt werden. Diese prüfen, dass keine...
- Page 4 All manuals and user guides at all-guides.com Einbauhinweise Gas- Gerätehersteller beachten. Über Gas- Kochstellen ist die Montage der Dunst- abzugshaube bei einem Mindestabstand von 650 mm nur zulässig, wenn folgen- de Nennwärmebelastungen (Hs) nicht überschritten werden: Gas-Herde Gas-Kochmulden Belastung einer Kochstelle max. 3,9 KW Belastung aller Kochstellen max.
- Page 5 All manuals and user guides at all-guides.com Montagekit * 1 Stück Gewindestange Art.Nr.: 41996000, M8 x 1000mm * Montagekit für Standardgeräte Montagehinweis ZWISCHENDECKE Auflage Zwischendecke SCHATTENFUGE Befestigungsschrauben...
- Page 6 All manuals and user guides at all-guides.com Montageanleitung Sombra Deckengerät Haubenkörper Filtereinsatz + Glasfront Unterseite Auflagerahmen Zwischendecke Stutzenplatte Blind Anschlusstutzen elektrischer Anschluss Aufhängepunkte PG Verschraubung Zuleitung Schattenfuge 1. bauseitige Voraussetzungen für die Montage der Haube schaffen, Küchen- geräte abdecken etc. 2.
- Page 7 All manuals and user guides at all-guides.com 4. Position für die Befestigungslöcher (G) an der Decke anzeichnen. Bei Son- deranfertigungen sind die Maße direkt vom Gerät abzunehmen! 8. die elektrische Steckerverbindung im Gerät trennen. 5. Vier Löcher (Ø10mm) bohren und Dübel einsetzen.
- Page 8 All manuals and user guides at all-guides.com 12. Den elektrischen Anschluss herstel- len. (Abluftbetrieb) Beim Einsatz eines externen Gebläsemotor‘s Anschlusska- bel verbinden. 13. Filtereinsatz in den Haubenkörper einführen und verschrauben. 10. Nun den Haubenkörper an Aufhän- gepunkten (G) gegen die Decke hän- gen und mittels U-Scheibe und Mutter fixieren.
- Page 9 All manuals and user guides at all-guides.com Montageanleitung Sombra...
- Page 10 All manuals and user guides at all-guides.com Flachkanalstutzen Absaugrichtung ändern (mit seitlichem Stutzen A-Version)
- Page 11 All manuals and user guides at all-guides.com Flachkanalstutzen Absaugrichtung ändern Ausblasrichtung ändern + Motor drehen (B-Version nur bei seitlichem Stutzen möglich...
- Page 12 Unterdruck im Wohnraum , welcher die Abgase ansaugt bzw. die Abgase ihrer Hausmitbewohner aus dem Kamin zurückholt. Die Steuerung Ihrer GUTMANN Dunstabzugshaube ist mit einer Fensterkontaktschal- tung ausgestattet. Wenn die Kontaktschleife der Steuerung unterbrochen ist, wird die Stromzufuhr zum Lüftungsmotor unterbrochen.
- Page 13 Ihre Gemeinde. Umwelthinweise Alle Modelle aus dem Hause GUTMANN sind entsprechend der europäischen Richtlinie 2002/96/EG über Elektro- und Elektronikgeräte (waste electrical and electronic equipment – WEEE) gekenn- zeichnet. Diese Richtlinie gibt die Rahmenbedingungen für eine EU-weit gültige Rück- nahme und Verwertung von Altgeräten vor. Bitte informieren Sie sich über aktuelle Entsorgungswege bei Ihrem Fachhändler.
- Page 14 GUTMANN extractor hood. Please carefully read the following information and explanations on the proper use of your new GUTMANN hood before using the appliance for the first time. Please also read our operating and installation instructions as well as the cleaning recommenda- tions to ensure that you enjoy many years of service from your appliance.
- Page 15 All manuals and user guides at all-guides.com Risk of electric shock Important Information The mains voltage must correspond General with the specifications on the rating plate. The rating plate is situated near These Installation instructions contain the filters inside the hood. Connect the important Information which must be extractor hood to a correctly installed observed in order that the extractor...
- Page 16 All manuals and user guides at all-guides.com Minimum distance from a gas cook- ing appliance Minimum distance between the lower edge of the extractor hood and hot- plates/ hobs is. min. 750 mm. If the manufacturer of the gas cooking appli- ance specifies a greater distance, this must be taken into consideration.
- Page 17 All manuals and user guides at all-guides.com Installation Instructions Sombra Ceiling Unit A Hood body B Filter insert + glass fronted underside C Support frame for false ceiling D Support plate, blank E Connection nozzle F Electrical connection G Suspension points H Stuffing boxes for supply line 1.
- Page 18 All manuals and user guides at all-guides.com 4. Mark the position for the mounting holes (G) on the ceiling. With special designs, the dimensions should be tak- en directly from the appliance. 8. Disconnect the electrical connection in the appliance. 5.
- Page 19 All manuals and user guides at all-guides.com body. 12. Make the electrical connection. (Extraction mode) If using an external blower motor, connect up the connecting cable. 13. Insert and screw the filter insert into 10. Now hang the hood body against the ceiling at the suspension points (G) and fix it in place with the washer and the hood body.
- Page 20 All manuals and user guides at all-guides.com Sombra Installation Instructions (with lateral support, with threaded rods)
- Page 21 All manuals and user guides at all-guides.com (with lateral support, version A)
- Page 22 Functional description: The control of your GUTMANN cooker hood is equipped with a window contact cir- cuit.If the contact loop of the controller is interrupted, the power supply to the fan mo- tor is interrupted.
- Page 23 All manuals and user guides at all-guides.com Connection to the control board of the cooker hood: As shown in the illustration, the connection cable is fixed to the unit surface with a label. For direct connection of a pressure switch or reed switch on the cooker hood must open when the window is closed.
- Page 24 L'information ne libère pas l'utilisateur de ses propres évaluations et tests. Il est à noter que nos produ- its sont soumis à un processus naturel d'usure et de vieillissement. Tous les droits sont réservés par GUTMANN GmbH, y compris pour les demandes de droits de propriété industrielle. Nous avons tous les pouvoirs de disposition, tels que le droit de copier et de transmettre.
- Page 25 All manuals and user guides at all-guides.com avant toute intervention électrique sur la Consignes de sécurité hotte. Avant de percer les fixations, as- surez-vous qu’aucun câble électrique ne Seul un personnel qualifié est autorisé à soit endommagé. Réalisez le branche- procéder au montage, aux branche- ment électrique de telle manière à...
- Page 26 All manuals and user guides at all-guides.com Appareils de cuisson electriques Distance minimum entre des foyers electriques et l’arete inferieure de la hotte aspirante: 650 mm. Appareils de cuisson au gaz Veuillez respecter les prescriptims et consignes de montage appiicables, publiees par les fabricants de ces appareils.
- Page 27 All manuals and user guides at all-guides.com Instructions de montage Hotte de plafond Sombra A Corps de hotte B Filtre + face inférieure de la vitre C Cadre d’appui, faux plafond D Plaque passe-câble aveugle E Raccords F Raccordement électrique G Points de suspension H Presse-étoupe PG pour l’alimentation 1.
- Page 28 All manuals and user guides at all-guides.com 4. Dessiner les positions des trous de fixation (G) sur le plafond. Pour les mo- dèles fabriqués sur mesure, prendre les mesures directement sur l’appareil ! 8. Débrancher les fiches électriques à l’intérieur de l’appareil. 5.
- Page 29 All manuals and user guides at all-guides.com 12. Effectuer le raccordement élec- trique. (En mode aspiration) En cas d’utilisation d’une soufflerie externe, connecter le câble de raccordement. 13. Insérer le filtre dans le corps de la hotte et le visser. 10.
- Page 30 All manuals and user guides at all-guides.com (version A avec raccords latéraux)
- Page 31 All manuals and user guides at all-guides.com Modifier le sens de l’évacuation + faire pivoter le moteur (version B possible uniquement en présence de raccords latéraux.)
- Page 32 Description fonctionnelle : La commande de votre hotte aspirante GUTMANN est équipée d'un circuit de contact de fenêtre. Si la boucle de contact du régulateur est interrompue, l'alimentation du moteur du ventilateur est interrompue. L'éclairage de la hotte aspirante GUTMANN continue de fonctionner.
- Page 33 All manuals and user guides at all-guides.com Raccordement au tableau de commande de la hotte aspirante : Comme indiqué sur l'illustration, le câble de raccordement est fixé à la surface de l'ap- pareil avec une étiquette. Pour le raccordement direct d'un pressostat ou L'interrupteur à...
- Page 34 Va naturalmente notato che i nostri prodotti sono soggetti ad un processo naturale di usura e invecchiamento. Tutti i diritti sono riservati a GUTMANN GmbH, anche nel caso di richieste di diritti di proprietà industriale. Abbiamo tutti i poteri di smaltimento, come il diritto di copiare e trasmettere.
- Page 35 All manuals and user guides at all-guides.com dere alla perforazione dei muri per crea- Per la vostra sicurezza re i buchi di fissaggio, accertarsi che nessuna linea elettrica possa essere Il montaggio, l’allacciamento alla rete, la danneggiata durante l’operazione. L’al- messa in funzione e le riparazioni devo- lacciamento alla rete elettrica deve con- no essere effettuate solamente da per-...
- Page 36 All manuals and user guides at all-guides.com produttore degü apparecchi a gas. So- pra a fomelli a gas l’installazione della cappa aspirante e consentita con una distanza minima di 750 mm. solo se non si superano i seguenti carichi termici nominali: Cucine a gas di cottura a gas...
- Page 37 All manuals and user guides at all-guides.com Istruzioni di montaggio A corpo della cappa B filtro + pannello in vetro lato inferiore C profilo del supporto controsoffitto D pannello di attacco cieco E attacco F collegamento elettrico G punti di sospensione H raccordo PG cavo di alimentazione 1.
- Page 38 All manuals and user guides at all-guides.com 4. Disegnare la posizione dei fori di fis- saggio (G) sul soffitto. Nei modelli spe- ciali, rilevare le dimensioni direttamente dall'apparecchio! 8. Staccare il connettore elettrico dall'ap- parecchio. 5. Eseguire quattro fori (Ø 10 mm) e inserirvi i tasselli.
- Page 39 All manuals and user guides at all-guides.com 12. Realizzare il collegamento elettrico. (Funzionamento con aria di scarico) Qualo- ra si utilizzasse un motore di ventilazione esterno, collegare il cavo d'allacciamento. 13. Inserire il filtro nel corpo della cappa e avvitarlo. 10.
- Page 40 All manuals and user guides at all-guides.com Istruzioni di montaggio Sombra...
- Page 41 All manuals and user guides at all-guides.com Cambiare la direzione di aspirazione dell'attacco del canale piano Cambiare la direzione di soffiaggio e far girare il motore (versione B possibile solo con attacco laterale...
- Page 42 Descrizione del funzionamento: Il comando della cappa GUTMANN è dotato di un circuito di contatto finestra. Se l'anello di contatto del regolatore viene interrotto, l'alimentazione del motore del ventilatore viene interrotta.
- Page 43 All manuals and user guides at all-guides.com Collegamento alla scheda di comando della cappa: Come mostrato nell'illustrazione, il cavo di collegamento è fissato alla superficie dell'unità con un'etichetta. Per il collegamento diretto di un pressostato oppure L'inter- ruttore Reed sulla cappa deve aprirsi quando il finestrino è chiuso. Solo interruttori a contatto finestra a potenziale zero...
- Page 44 GUTMANN GmbH se reserva todos los derechos, también en el caso de solicitudes de derechos de propiedad industrial. Tenemos todo el poder de disposición, como el de- recho a copiar y transmitir.
- Page 45 All manuals and user guides at all-guides.com Indicaciones de seguridad El montaje, la conexión, puesta en servicio y reparación deben realizarse solamente por un técnico, quien puede determinar la sujeción y la conducción apropiada del aire de salida de la campana extractora de humos. La sujeción tiene que ser adecuada para el peso de la campana extractora y la carga de la base.
- Page 46 All manuals and user guides at all-guides.com Distancia mínima con la cocina La potencia de aspiración óptima se logra cuando la campana se monta a una altura de 550mm desde el borde superior de la encimera. En caso de gas, la distancia normativa asciende a 650mm.
- Page 47 All manuals and user guides at all-guides.com A. Campana Cuerpo B. Base filtro + parte inferior frontal de cristal C. bastidor de soporte del techo suspendido D. Tapa de relleno E. Tubo de conexión F. Conexión eléctrica G. Anclaje H. Prensaestopas 1.
- Page 48 All manuals and user guides at all-guides.com 4. Marque la posición de los agujeros de fijación (G) en el techo. Para las dimensiones personalizadas sean eliminados directamente desde el dispositivo! 5. Taladre cuatro agujeros (10 mm de diámetro) y coloque tacos de inserción. 6.
- Page 49 All manuals and user guides at all-guides.com 8. separar el conjunto del conector eléctrico situado en la base. 9. Quite los tornillos de la placa (H) con la pieza de conexión (D) y retire la placa de embocadura. 10. Ahora suba el cuerpo de la campana a los puntos de suspensión (G) que cuelgan del techo y fíjelos con la arandela y la tuerca.
- Page 50 All manuals and user guides at all-guides.com 11. Conecte la placa de la embocadura y el conducto de escape y los tornillos cuerpo de la campana. 12. Haga la conexión eléctrica. (Modo de extracción) Si se utiliza un cable de conexión del motor del ventilador externo.
- Page 51 All manuals and user guides at all-guides.com Cambio salida de humos rectangular (con salida lateral A-Versión)
- Page 52 All manuals and user guides at all-guides.com Cambio salida de humos rectangular...
- Page 53 All manuals and user guides at all-guides.com...
- Page 54 Descrição funcional: O comando do exaustor GUTMANN está equipado com um circuito de contacto para janelas.Se o circuito de contacto do controlador for interrompido, a fonte de ali- entação do motor do ventilador é interrompida. A iluminação do exaustor GUTMANN continua a funcionar.
- Page 55 All manuals and user guides at all-guides.com Ligação à placa de comando do exaustor: Como mostrado na figura, o cabo de ligação é fixado à superfície da unidade com uma etiqueta. Para a conexão direta de um pressostato ou o interruptor ILS do exaustor deve abrir quando a janela estiver fechada.
- Page 56 De informatie ontslaat de gebruiker niet van zijn eigen beoordelingen en tests. Er moet natuurlijk worden opgemerkt dat onze producten onderhevig zijn aan een natuurlijk slijtage- en verouderingsproces. Alle rechten zijn voorbehouden aan GUTMANN GmbH, ook bij aanvragen voor industriële eigendomsrechten. Wij hebben alle beschikkingsbevoegdheid, zoals het recht om te ko- piëren en door te geven.
- Page 57 All manuals and user guides at all-guides.com Gevaar door een elektrische schok Veiligheidsinstructies De netspanning moet overeenkomen Algemeen met de gegevens op het typeplaatje. Deze montagehandleiding bevat Het typeplaatje bevindt zieh bij de filters belangrijke aanwijzingen die in acht aan de binnenzijde van de kap. Sluit de moeten worden genomen zodat de afzuigkap alleen aan op een volgens de afzuigkap zonder gevaar en storingsvrij...
- Page 58 All manuals and user guides at all-guides.com Fomuis voor vaste brandstoffen Boven fornuis voor vaste brandstoffen waarvan brandgevaar kan uitgaan (bijv. wegvliegende vonken) is de montage van de afzuigkap alleen toegestaan wanneer het fornuis een gesloten, niet verwijderbare afscherming heett. minimumafstand tussen onderkant van de afzuigkap en de...
- Page 59 All manuals and user guides at all-guides.com Montagekit* 1 tapstang Art.Nr.: 41996000, M8 x 1000mm * Montagekit voor standaard toestellen...
- Page 60 All manuals and user guides at all-guides.com Montagehandleiding Sombra plafondtoestel A Kaplichaam B Filterelement + glasfront onderkant C Oplegframe tussenplafond D Steunplaat blind E Aansluitingsbuis F Elektrische aansluiting G Ophangpunten H PG schroefverbinding toevoerleiding 1. Ter plaatse de voorwaarden voor de montage scheppen.
- Page 61 All manuals and user guides at all-guides.com 4. De positie voor de bevestigingsgaten (G) op het plafond tekenen. Bij speciale uitvoeringen moeten de afmetingen rechtstreeks van het toestel worden afgenomen! 8. De elektrische stekkerverbinding in het toestel ontkoppelen. 5. Vier gaten (Ø10mm) boren en plugs aanbrengen.
- Page 62 All manuals and user guides at all-guides.com 12. De elektrische aansluiting tot stand brengen. (Afvoerluchtbedrijf) Bij gebruik externe blazermotor aansluitingskabel verbinden. 13. Het filterelement in het kaplichaam voeren en vastschroeven. kaplichaam ophangpunten (G) tegen het plafond hangen en door middel van een U-schijf en moer bevestigen.
- Page 63 All manuals and user guides at all-guides.com Montagehandleiding Sombra (met zijdelingse buis, met tapstangen)
- Page 64 All manuals and user guides at all-guides.com Buis voor vlak kanaal afzuigrichting veranderen (met zijdelingse buis A-versie)
- Page 65 All manuals and user guides at all-guides.com Buis voor vlak kanaal afzuigrichting veranderen...
- Page 66 Functionele beschrijving: De bediening van uw GUTMANN dampkap is uitgerust met een raamcontactcircuit. Als de contactlus van de regelaar wordt onderbroken, wordt de stroomtoevoer naar de ventilatormotor onderbroken. De GUTMANN afzuigkapverlichting blijft functioneren.
- Page 67 All manuals and user guides at all-guides.com Aansluiting op het bedieningspaneel van de afzuigkap: Zoals op de afbeelding is te zien, is de aansluitkabel met een label aan het oppervlak van het apparaat bevestigd. Voor directe aansluiting van een drukschakelaar of de Reed-schakelaar op de afzuigkap moet opengaan wanneer het raam gesloten is.
- Page 68 All manuals and user guides at all-guides.com Exklusiv-Hauben GUTMANN GmbH Am Hohen Markstein 5 D-75177 Pforzheim Postfach 90 01 07 D-75090 Pforzheim Tel +49 (0)7231-7783-000 Fax +49 (0)7231-7783-009 info@gutmann-exklusiv.eu www.gutmann-exklusiv.eu HRB 705602 Amtsgericht Mannheim DE263391836 Index: 11/19 Artikel Nr.: 2638...