Atlas Copco RH 571 Manuel D'instructions
Table des Matières
Les langues disponibles
Les langues disponibles
RH
Safety and operating instructions
Rock drills
Prescriptions de sécurité et instructions pour
l'opérateur
Perforateur
Sicherheits- und Betriebsanleitung
Bohrhämmer
Instrucciones de seguridad y de funcionamiento
Perforadoras
Instruções de segurança e operação
Perfuradores de rocha
Istruzioni per la sicurezza e per l'uso
Perforatrici
Veiligheidsvoorschriften en bedieningshandleiding
Steenboren
Οδηγίες ασφάλειας και χειρισμού
Γεωτρύπανα
Turvallisuusohjeet ja käyttöohje
Kallioporat
Sikkerhedsinstruktioner og betjeningsvejledning
Bjergborehamre
Sikkerhetsinstrukser og bruksanvisning
Bergboremaskiner
Säkerhetsinstruktion och instruktionsbok
Bergborrmaskiner
© 2012 Atlas Copco Construction Tools AB | No. 9800 0970 90b | 2012-08-13
Original instructions
571, 572, 658
Chapitres
Table des Matières

Manuels Connexes pour Atlas Copco RH 571


Sommaire des Matières pour Atlas Copco RH 571
- Page 1 Veiligheidsvoorschriften en bedieningshandleiding Steenboren Οδηγίες ασφάλειας και χειρισμού Γεωτρύπανα Turvallisuusohjeet ja käyttöohje Kallioporat Sikkerhedsinstruktioner og betjeningsvejledning Bjergborehamre Sikkerhetsinstrukser og bruksanvisning Bergboremaskiner Säkerhetsinstruktion och instruktionsbok Bergborrmaskiner © 2012 Atlas Copco Construction Tools AB | No. 9800 0970 90b | 2012-08-13 Original instructions...
- Page 26 Lors des pauses..............43 © 2012 Atlas Copco Construction Tools AB | No. 9800 0970 90b | 2012-08-13...
- Page 27 Déclaration CE de conformité (Directive 2006/42/CE)......48 © 2012 Atlas Copco Construction Tools AB | No. 9800 0970 90b | 2012-08-13...
-
Page 29: Introduction
également des conseils et vous indiquent comment effectuer la maintenance de routine du marteau perforateur. Vous devez lire ces instructions attentivement et les comprendre avant d'utiliser le marteau perforateur pour la première fois. © 2012 Atlas Copco Construction Tools AB | No. 9800 0970 90b | 2012-08-13 Instructions d’origine... -
Page 30: Consignes De Sécurité
► Vérifiez que les raccords d'air comprimé sont correctement fixés. Ne jamais porter une machine pneumatique par ► le flexible d'air. © 2012 Atlas Copco Construction Tools AB | No. 9800 0970 90b | 2012-08-13 Instructions d’origine... -
Page 31: Fonctionnement, Précautions
Ne maltraitez jamais l'équipement. ► Examinez régulièrement l'usure de l'outil ► d'insertion et contrôlez la présence éventuelle de signes de détérioration ou de fissures visibles. © 2012 Atlas Copco Construction Tools AB | No. 9800 0970 90b | 2012-08-13 Instructions d’origine... - Page 32 être compatible avec le type de substance en cause (et le cas échéant, approuvé par l'autorité gouvernementale pertinente). Travailler dans une zone bien ventilée. ► © 2012 Atlas Copco Construction Tools AB | No. 9800 0970 90b | 2012-08-13 Instructions d’origine...
- Page 33 Les résidus de substances dangereuses sur la machine peuvent constituer un risque. Avant d'entreprendre toute opération de maintenance sur la machine, la nettoyer soigneusement. © 2012 Atlas Copco Construction Tools AB | No. 9800 0970 90b | 2012-08-13 Instructions d’origine...
- Page 34 (et celle de l'exposition aux vibrations) et peuvent induire ou contribuer à des niveaux plus élevés d'exposition aux vibrations. © 2012 Atlas Copco Construction Tools AB | No. 9800 0970 90b | 2012-08-13 Instructions d’origine...
- Page 35 Si vous pensez avoir touché un objet caché avec l'outil, arrêtez immédiatement la machine. ► Vérifiez que tout danger est écarté avant de continuer. © 2012 Atlas Copco Construction Tools AB | No. 9800 0970 90b | 2012-08-13 Instructions d’origine...
-
Page 36: Maintenance, Précautions
Stockage, précautions ♦ Conservez la machine et les outils bien verrouillés, dans un endroit sûr, hors de la portée des enfants. © 2012 Atlas Copco Construction Tools AB | No. 9800 0970 90b | 2012-08-13 Instructions d’origine... -
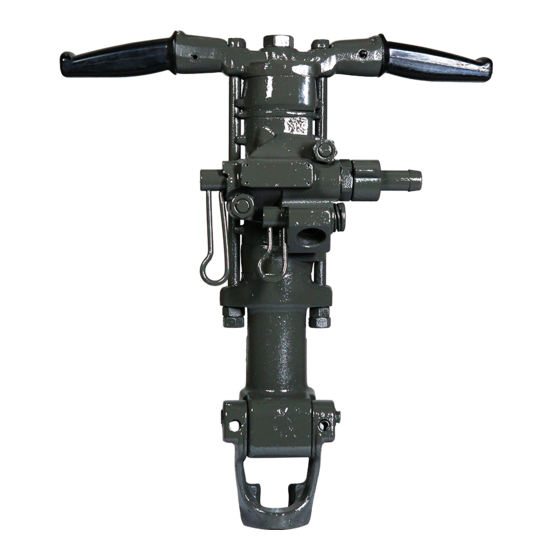
Page 37: Vue D'ensemble
Le piston transmet alors l'énergie par le fleuret vers le RH 571-5L/LS fond du trou. © 2012 Atlas Copco Construction Tools AB | No. 9800 0970 90b | 2012-08-13 Instructions d’origine... -
Page 38: Étiquettes
être faciles à lire. De nouvelles étiquettes porte-douille. peuvent être commandées en utilisant la liste des pièces détachées. © 2012 Atlas Copco Construction Tools AB | No. 9800 0970 90b | 2012-08-13 Instructions d’origine... -
Page 39: Assemblage
à l'eau de geler avant d'atteindre le séparateur d'eau. 3 m (10 ft) maximum de flexible d'air comprimé entre le graisseur et la machine. © 2012 Atlas Copco Construction Tools AB | No. 9800 0970 90b | 2012-08-13 Instructions d’origine... -
Page 40: Graissage
Ceci peut fragiliser l’outil et entraîner sa rupture prématurée. Fixation du fleuret Les instructions suivantes doivent être observées lors de chaque fixation du fleuret : © 2012 Atlas Copco Construction Tools AB | No. 9800 0970 90b | 2012-08-13 Instructions d’origine... -
Page 41: Retrait Du Fleuret
Apprenez à éteindre la machine en cas d'urgence. ► Arrêtez immédiatement la machine en cas de ► coupure d'énergie quelconque. © 2012 Atlas Copco Construction Tools AB | No. 9800 0970 90b | 2012-08-13 Instructions d’origine... -
Page 42: Opérations À Effectuer Avant La Mise En Service
Levier de commande à demi ouvert Levier de commande ouvert à fond Soupape de soufflage fermée (position arrêt) Soupape de soufflage ouverte à fond © 2012 Atlas Copco Construction Tools AB | No. 9800 0970 90b | 2012-08-13 Instructions d’origine... -
Page 43: Marche/Arrêt
♦ Après chaque service, vérifiez que le niveau de vibrations de la machine est normal. Sinon, contactez votre atelier agréé le plus proche. © 2012 Atlas Copco Construction Tools AB | No. 9800 0970 90b | 2012-08-13 Instructions d’origine... -
Page 44: Différences Entre Les Pièces D'origine Et Les Pièces Copiées
3. Vérifiez que le marteau-perforateur est et que le raccord décaleur n'est pas endommagé. correctement lubrifiés. Remplissez le lubrificateur si nécessaire. 4. Purgez le séparateur d'eau. © 2012 Atlas Copco Construction Tools AB | No. 9800 0970 90b | 2012-08-13 Instructions d’origine... -
Page 45: Maintenance Périodique
© 2012 Atlas Copco Construction Tools AB | No. 9800 0970 90b | 2012-08-13 Instructions d’origine... -
Page 46: Caractéristiques Techniques
Atlas Copco Construction Tools AB, ne peut être tenu pour responsable des conséquences d'une utilisation des valeurs déclarées à la place des valeurs correspondant à l'exposition réelle, dans le cadre d'une évaluation des risques sur un lieu de travail dont nous ne maîtrisons aucun élément. -
Page 47: Données Relatives Au Bruit Et Aux Vibrations
Lubrifiant AIR-OIL pour marteau perforateur 4 l (1 gal) 8099 0201 04 Lubrifiant AIR-OIL pour marteau perforateur 10 l (2,5 gal) 8099 0201 10 © 2012 Atlas Copco Construction Tools AB | No. 9800 0970 90b | 2012-08-13 Instructions d’origine... -
Page 48: Déclaration Ce De Conformité
Déclaration CE de conformité Déclaration CE de conformité (Directive 2006/42/CE) Nous, Atlas Copco Construction Tools AB, déclarons par la présente que les machines énumérées ci-dessous sont conformes aux dispositions de la directive européenne 2006/42/CE (directive « Machines »), et des normes harmonisées mentionnées ci-dessous.