
Manuels Connexes pour Renson Somfy LS40


Sommaire des Matières pour Renson Somfy LS40
- Page 1 Afregeling motoren Verticale screens Réglage des moteurs - stores verticaux Eichung der motoren - Vertikal Screens Calibration of the motors - Vertical screens...
-
Page 2: Table Des Matières
1.1.3 • In geval van niet intrekbare onderlat ......3 1.2 • Afgesteld onderste eindpunt ..........4 2 • Somfy mechanische motor ............4 ® 2.1 • Type LS40 & Renson motor ..........4 ® 2.1.1 • Aanpassen van de eindpunten ........4 2.2 • Type LT50 ................ 5 2.1.1 •... -
Page 3: Eindafstelling Van De Eindpunten Voor Verticale Zonwering Renson
Afregeling van de motoren - Verticale screens 1 • Eindafstelling van de eindpunten voor verticale zonwering Renson ® Afregeling volgens fabrieksinstelling Renson ® In geval van een mechanische motor (MSM of mechanische Renson motor) dient de ® voorkap of afdekkap (inbouw) open te zijn... -
Page 4: Afgesteld Onderste Eindpunt
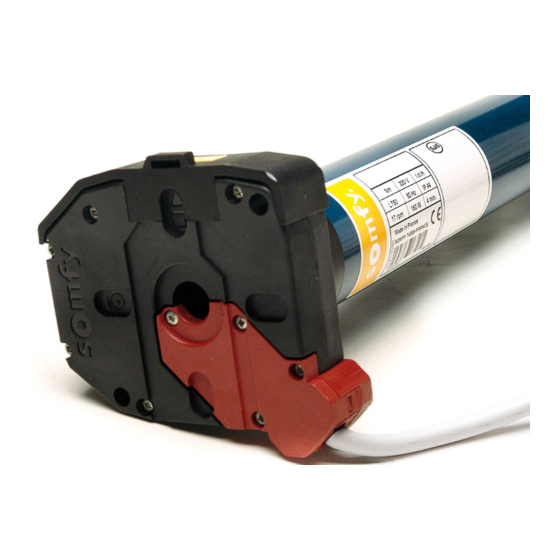
Renson motor. ® 2 • Somfy mechanische motor ® 2.1 • Type LS40 & Renson motor ® 2.1.1 • Aanpassen van de eindpunten Zet spanning op de motor en draairichting Gebruik de speciale insteltool of een inbus verifiëren. Duw op de onderste knop tot het en draai aan de instelvijs tot het gewenste gewenste onderste eindpunt. -
Page 5: Type Lt50
Afregeling van de motoren - Verticale screens 2.2 • Type: LT50 2.2.1 • Aanpassen onderste eindpunt Zet spanning op de motor om de draairichting te verifiëren. Duw de instelknop in tot het Duw op de onderste knop tot het gewenste onderste eindpunt. gewenste eindpunt bereikt wordt. -
Page 6: Somfy ® Radiogestuurde Motor
Afregeling van de motoren - Verticale screens 3 • Somfy radiogestuurde motor ® 3.1 • Toekennen van de motor aan de zender BRUIN BLAUW GEEL-GROEN Bij het opzetten maakt de motor een korte op/neer beweging. < < Achterkant Centralis Achterkant Telis Controle nemen over de motor door beide Confirmeer met de programmatie toets knoppen in te drukken. -
Page 7: Aanpassen Onderste Eindpunt
Afregeling van de motoren - Verticale screens 3.2 • Aanpassen onderste eindpunt 5 sec. Beweeg de screen naar het vooraf ingestelde Korte beweging voor 5 seconden op beide eindpunt. Screen stopt op ±400 mm. knoppen. De motor zal een korte op/neer beweging maken. -
Page 8: Aanpassen Bovenste Eindpunt
Afregeling van de motoren - Verticale screens 3.3 • Aanpassen bovenste eindpunt 5 sec. Korte beweging op bovenste knop. Korte beweging voor 5 seconden op beide knoppen. De motor zal een korte op/neer beweging maken. Pas aan. Blijven drukken op ‘My’ knop tot korte op/neer beweging van de motor. -
Page 9: Somfy ® Elektronische Wt Motor
Afregeling van de motoren - Verticale screens 4 • Somfy Elektronische WT motor ® 4.1 • Type: Orea WT (universele afstelkabel Somfy WT (G6002755)) ® 4.1.1 • Aanpassen bovenste eindpunt 7 sec. Sluit de universele Druk op de toets 1 om regelkabel aan op de de draairichting van de motor overeenkomstig het... -
Page 10: Aanpassen Onderste Eindpunt
13) Druk 3 sec. op knop 1 (pijl naar boven). 15) Ontkoppel de universele regelkabel van de motor en sluit de motor aan op de bediening. 5 • Somfy IO-home motor ® Raadpleeg de Somfy Handleiding op www.renson-customers.com ®... - Page 11 Afregeling van de motoren - Verticale screens...
- Page 12 Index 1 • Le réglage des fins de course supérieure et inférieure pour la protection solaire verticale de Renson ......13 ® 1.1 • Le réglage de la fin de course supérieure: ......13 1.1.1 •...
-
Page 13: Le Réglage Des Fins De Course Supérieure Et Inférieure Pour La Protection Solaire Verticale De Renson
Réglage des moteurs - stores verticaux 1 • Le réglage des fins de course supérieure et inférieure pour la protection solaire verticale de Renson ® Le réglage d’origine à l’usine Renson ® Pour un moteur mécanique Somfy (MSM) ou ®... -
Page 14: Réglage De La Fin De Course Inférieure
® 2 • Somfy moteur mécanique ® 2.1 • Type LS40 & Renson moteur ® 2.1.1 • Adaptation des fins de course Vérifier le sens de rotation. Pressez le bouton Utilisez l’outil spécial ou une clé Allen et inférieure jusqu’... -
Page 15: Type Lt50
Réglage des moteurs - stores verticaux 2.2 • Type: LT50 2.2.1 • Adaption fin de course inférieure Vérifier le sens de rotation. Pressez le bouton inférieure de la Pressez la bouton de commande jusqu’ au position préféré. réglage pour que la fin de course souhaitée soit atteinte. -
Page 16: Somfy ® Moteur Commande Radio
Réglage des moteurs - stores verticaux 3 • Somfy moteur commande radio ® 3.1 • L’affection du moteur à un récepteur BRUN BLEU JAUNE-VERT Lors du raccordement le moteur effectue un bref mouvement. < < Le côté arrière Centralis Le côté arrièreTelis Prenez le contôle du moteur en appuyant sur Confirmez à... -
Page 17: Adaptation Fin De Course Inférieure
Réglage des moteurs - stores verticaux 3.2 • Adaptation fin de course inférieure 5 sec. Bref mouvement sur le bouton inférieur. Bref mouvement de 5 secondes sur Le store arrête à une distance de ±400 mm. les 2 boutons. Le moteur fait un mouvement bref (en haut/en bas). -
Page 18: Adaptation Fin De Course Supérieure
Réglage des moteurs - stores verticaux 3.3 • Adaptation fin de course supérieure 5 sec. Bref mouvement sur le bouton supérieur. Bref mouvement de 5 secondes sur les 2 boutons. Le moteur fait un mouvement bref (en haut/en bas) Adapte. Pressez le bouton ‘My’... -
Page 19: Somfy ® Moteur Électronique Wt
Réglage des moteurs - stores verticaux 4 • Somfy moteur électronique WT ® 4.1 • Type: Orea WT (câble de réglage Somfy pour moteur WT (G6002755)) ® 4.1.1 • Adaptation fin de course supérieure 7 sec. Raccordez le câble de Appuyez sur la touche 1 réglage universel au pour vérifier la direction... -
Page 20: Adaption Des Fins De Course Inférieure
13) Appuyez 3 sec. sur le bouton 1 (flèche en haut). 15) Détachez le câble universel du moteur et reliez le moteur à la commande. 5 • Somfy IO-home moteur ® Voir la notice technique de Somfy sur www.renson-customers.com ®... - Page 21 Réglage des moteurs - stores verticaux...
- Page 22 Eichung der motoren - Senkrechtmarkisen Lesen Sie die Informationen zu der Endabschaltung der Motoren in Anhang nach. Die Garantie und Verantwortlichkeit von Renson entfällt wenn die Informationen nicht ® nachgefolgt werden. Renson ist nicht anspruchbar bei Änderungen bei Normen und ®...
-
Page 23: Endabschaltung Bei Renson ® Senkrechtmarkisen
Unterer Endpunkt EINE ENDABSCHALTUNG MUSS ABER VOM KUNDEN NOCH EINGESTELLT WERDEN! Die Endpunkte (oben und unten) wurden von Renson eingestellt (bis zu einer Höhe von 400 mm). Eine Endabschaltung muss aber vom Kunden noch eingestellt werden. Hierzu bitte zuerst die Markise montieren und unter Spannung bringen. Falls Sie einen Funkmotor oder IO Home Motor haben wird der Screen automatisch kurz in Bewegung gebracht. -
Page 24: Abschaltung Unterer Endpunkt
Motor ® ® Anleitungen. • Somfy mechanische Endabschaltung ® 2.1 • Typ LS40 & Renson Motor ® 2.1.1 • Endabschaltung Endpunkt Bringen Sie den Motor unter Spannung und Verwenden Sie hierzu das Spezialwerkzeug oder Drehrichtung prüfen. Die untere Taste muss Ein Innensechskantschlüssel und drehen bis der... -
Page 25: Typ Lt50
Eichung der motoren - Senkrechtmarkisen 2.2 • Typ: LT50 2.2.1 • Anpassung des unteren Endpunkt ODER ODER Bringen Sie den Motor unter Spannung und Drehrichtung Die Druckknopfe eindrucken prüfen. Die untere Taste der Wandsender muss eingedrückt bis der gewünschte Endpunkt bleiben bis dem unteren Endpunkt erreicht wurde. -
Page 26: Somfy ® Funk Endabschaltung
Eichung der motoren - Senkrechtmarkisen 3 • Somfy Funk Endabschaltung ® 3.1 • Programmierung der Sender BRAUNE LEITER BLAUE LEITER GELBE UND GRÜNE LEITER Bei Netzanschluss, mach der Motor ein kurze Bewegung (Höch/unter). ODER < < Rückseite Centralis Rückseite Telis Beide Drückknopfen eindrücken um die Drücken Sie die ProgrammationTaste Kontrolle des Motor zu übernehmen. -
Page 27: Einstellung Untere Endpunkt
Eichung der motoren - Senkrechtmarkisen 3.2 • Einstellung Untere Endpunkt 5 sec. Lassen Sie das Tuchmotor bis zum Beide Drückknopfe 5 Sekunden kurz eingestellten Endpunkt ±400 mm. eindrücken. Der motor wird eine kurze Danach fahren Sie das Tuch manuell unter. Bewegung nach oben/unten machen. -
Page 28: Einstellung Obere Endpunkt
Eichung der motoren - Senkrechtmarkisen 3.3 • Einstellung Obere Endpunkt Obere Drückknopfe eindrücken. Beide Drückknopfe 5 Sekunden kurz eindrücken. Der motor wird eine kurze Bewegung nach oben/unten machen. Anpassen. Knopf ‘My’ eingedrückt halten bis kurze Bewegung des Motors nach oben/unten. -
Page 29: Somfy ® Wt Elektronisch Endabschaltung
Eichung der motoren - Senkrechtmarkisen 4 • Somfy WT elektronisch Endabschaltung ® 4.1 • Typ: Orea WT (universale Einstellkabel WT Motor (G6002755)) 4.1.1 • Anpassung des Oberen Endpunk 7 sek. Der Universal Einstellkabel Schalter “1“ auf Position am Motor Anschließen, “WT”... -
Page 30: Anpassung Des Unteren Endpunkt
13) Druck 3 Sek. auf Knopf 1 (Pfeil nach Oben). 15) Lösen die Universal-Steuerkabel von der Motor und Schließe der Motor an die Vorhandene Bedienung an. 5 • Somfy IO-home motor ® Siehe Anlage zu den Somfy Motoren unter www.renson-customers.com ®... - Page 31 Eichung der motoren - Senkrechtmarkisen...
- Page 32 End point setting - Vertical screens Read carefully the enclosed instruction for the motor end adjustment. By not respecting these instructions the warranty and the responsibility of Renson expires. ® Renson is not responsible for changes in norms and standards that has been ®...
-
Page 33: Upper And Lower End Point Setting For Vertical Screens Renson
1 • Upper and lower end point setting for vertical screens Renson ® End point setting according to factory adjustment of Renson ® You have to be able to remove the front cover or cover plate in case of surface mounted installation... -
Page 34: Adjusted Lower End Point
® the lower end point. • Somfy mechanical motor ® 2.1 • Type LS40 & Renson motor ® 2.1.1 • Setting end limits Check the direction of rotation. Press the Using the special tool or Allen key, turn the lower button until the preferred position. -
Page 35: Type: Lt50
End point setting - Vertical screens 2.2 • Type: LT50 2.2.1 • Setting lower limit Check the direction of rotation. Press the lower button of the Press the setting button until control device until the preferred position. the desired end point is reached. -
Page 36: Somfy ® Radio-Controlled Motor
End point setting - Vertical screens 3 • Somfy radio-controlled motor ® 3.1 • Programmation with the transmitter BROWN BLUE YELLOW-GREEN Switch on the motor. The motor makes a short movement. < < Backside Centralis Backside Telis Take control over the motor by Confirm with the programmation button pressing both buttons. -
Page 37: Setting Lower Limit
End point setting - Vertical screens 3.2 • Setting lower limit Move the screen towards the lower limit. Short movement of 5 minutes on both buttons. Screens stops at ±400 mm. The motor makes a short up/down movement. Press the lower button until the preferred Adapt. -
Page 38: Setting Upper Limit
End point setting - Vertical screens 3.3 • Setting upper limit 5 sec. Short movement on the upper button. Short movement of 5 minutes on both buttons. The motor makes a short up/down movement. Adapt. Press the “My” button until short up/down movement of the motor. -
Page 39: Somfy ® Wt Electronic Motor
End point setting - Vertical screens 4 • Somfy WT electronic motor ® 4.1 • Type: Orea WT (Somfy WT setting cable (G6002755)) ® 4.1.1 • Setting upper limit 7 sec. Connect the universal Press button 1 to check setting cable to the the rotation direction of motor according to the the motor. -
Page 40: Setting Lower Limit
13) Press 3 sec. button 1 (arrow up). 15) Disconnect the motor and the universal setting tool and connect the motor to the switch. 5 • Somfy IO-home motor ® Use the motor installation document of Somfy on www.renson-customers.com ®... - Page 41 End point setting - Vertical screens...
- Page 44 ® Vous pouvez télécharger la version la plus récente de cette brochure sur w w w.renson.eu RENSON behält sich das Recht vor, technische Änderungen an den im Folgenden behandelten Produkten ®...