Table des Matières

Publicité

Les langues disponibles
  • FR

Les langues disponibles

Liens rapides

Technical Support
If you need any technical help, please visit our official support site and contact our support
EN/DE/FR/IT/ES
team before returning the products, https://support.reolink.com.
Technische Unterstützung
Wenn Sie Hilfe brauchen, kontaktieren Sie bitte Reolink Support Team zuerst, bevor Sie Ihre
Bestellung zurücksenden.Meiste Fragen oder Probleme können von unserem Online Support
Center beantwortet und gelöst werden: https://support.reolink.com.
Support technique
Si vous avez besoin d'aide, veuillez contacter Reolink avant de retourner votre produit. La
plupart des questions peuvent être répondues via notre centre de support en ligne à l'adresse
https://support.reolink.com.
Supporto Tecnico
Se avete bisogno di aiuto, le chiediamo gentilmente di contattare Reolink prima di restituire il
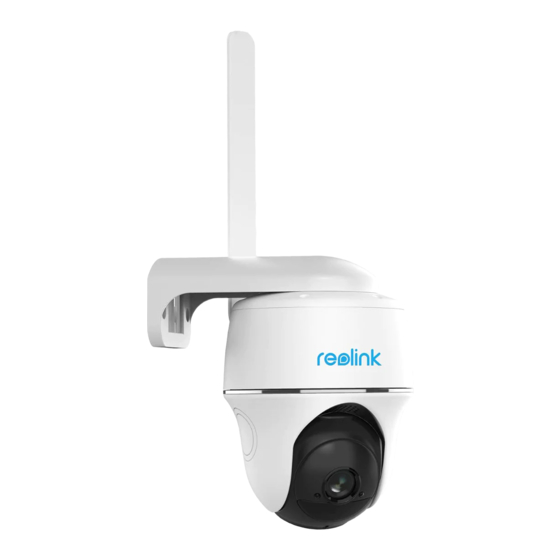
Reolink Go PT
prodotto.La maggior parte delle domande può essere risolta tramite il nostro centro di
assistenza online all'indirizzo https://support.reolink.com.
Operational Instruction
Soporte técnico
Si necesita ayuda, comuníquese con Reolink antes de devolver su producto. La mayoría de las
preguntas se pueden responder a través de nuestro centro de soporte en línea en
https://support.reolink.com.
SHENZHEN BAICHUAN SECURITY TECHNOLOGY CO., LTD.
2-4th Floor, Building 2, YuanLing Industrial Park, ShangWu, Shiyan Street, Bao'an District,
Shenzhen, China
https://reolink.com
https://support.reolink.com
REP
BellaCocool GmbH
A pr il , 20 20
tolomeoeu@gmail.com
QS G 1_A
Pettenkoferstraße 18,10247,Berlin,Germany

Publicité

Table des Matières
loading

Sommaire des Matières pour Reolink Go PT

  • Page 1 être répondues via notre centre de support en ligne à l'adresse https://support.reolink.com. Supporto Tecnico Se avete bisogno di aiuto, le chiediamo gentilmente di contattare Reolink prima di restituire il Reolink Go PT prodotto.La maggior parte delle domande può essere risolta tramite il nostro centro di assistenza online all'indirizzo https://support.reolink.com.
  • Page 2: Table Des Matières

    Status LED Insert the SIM Card and SD card IR LED Register on Network (Camera Initial Setup) Lens Set up Camera via Reolink App on Smartphone Daylight Sensor Notes on Camera Installation Built-in PIR Sensor Charge the Battery Mounting the Camera...
  • Page 3: Insert The Sim Card And Sd Card

    Nano-SIM /4FF need to manually import the APN settings. Please find instructions at https://support.reolink.com or contact Reolink support. NOTICE: Please make sure the SIM card can work for your smartphone. Register on Network (Camera Initial Setup) 1. Rotate the camera lens, and remove the rubber cover.
  • Page 4 NOTICE: You may also run into the following situations: Voice Prompt Camera Status Solutions 1. Check if the SIM card is facing the reverse direction. “SIM card cannot be Camera cannot 2. Check if the SIM card is not recognized” recognize this SIM card.
  • Page 5: Notes On Camera Installation

    Set up Camera on Reolink App (For Smartphone) Notes on Camera Installation Download and install the Reolink App on App Store (for iOS) and Google Play (for Android). In order to maximize the waterproof performance and the PIR motion sensor’s efficiency, you’d better install Reolink Go PT upside down only...
  • Page 6 Up to 10 meters (33ft) • Do not install the camera at places with strong wind. NOTICE: The path to adjust the PIR sensitivity on Reolink App: Device Settings-> PIR Settings-> • Do not face the camera towards any mirror.
  • Page 7: Charge The Battery

    7. Do not charge, use or store the battery near any ignition sources, such as fire or heaters. • The battery is a built-in one. Please do not remove it from the camera. • Please note that the solar panel is NOT included in the package. You can buy one on Reolink's official online store.
  • Page 8: Attach The Camera To A Tree

    Install the Security Mount Attach the Camera to a Tree Step 1 Drill holes in accordance with the mounting Step 1 hole template and screw the security mount Loosen the screw to the wall. If you are mounting the cam era on the security to a masonry or on any other hard surface, mount and...
  • Page 9: Troubleshooting

    Video the following solutions: • Tap on Reolink App and go to Device Settings • Make sure you’ve turned the power button This device complies with Part 15 of FCC Rules. Video resolution:1080p HD at 15 frames/sec ->...
  • Page 10: Lieferumfang

    Legen Sie die SIM-Karte und die SD-Karte ein Directive 2014/53/EU. Im Netzwerk registrieren (Erstkonfiguration der Kamera) End User License Agreement Einrichten der Kamera über die Reolink App auf dem Smartphone Correct Disposal of this product By using the Product Software that is Hinweise zur Kamerainstallation...
  • Page 11 Kamera-Einführung Legen Sie die SIM-Karte und die SD-Karte ein Status LED IR-LEDs Linse Tageslichtsensor PIR-Bewegungssensor Internes Mikrofon Nano-SIM-Kartensteckplatz Drehen Sie das Objektiv der Kamera, um Zugriff auf das Reset-Loch, den SIM-Kartensteckplatz und den SD-Kartensteckplatz zu erhalten. Reset-Loch Drücken Sie den Reset-Knopf mithilfe eines Stiftes, 1.
  • Page 12 Bitte lesen Sie die Anweisungen dazu unter https://support.reolink.com oder wenden Sie sich an den Reolink-Support. HINWEIS: Bitte achten Sie darauf, dass die SIM-Karte für Ihr Smartphone geeignet ist. Im Netzwerk registrieren (Erstkonfiguration der Kamera) 3. Die blaue LED blinkt einige Sekunden lang, leuchtet dann einige Momente und erlischt schließlich.
  • Page 13 „SIM-Karte kann nicht diese SIM-Karte 2. Prüfen Sie, ob die SIM-Karte Laden Sie die Reolink App im App Store (für iOS) oder Google Play (für Android) herunter und erkannt werden“ installieren Sie sie. nicht erkennen. unvollständig eingesetzt ist und setzen Sie sie gegebenenfalls erneut ein.
  • Page 14 Um die Wasserdichtigkeit und die Effizienz des PIR-Bewegungssensors zu Sie können den PIR-Erfassungsbereich auf Ihre spezifischen Bedürfnisse abstimmen. Sie können maximieren, sollten Sie die Reolink Go PT nur dann über Kopf installieren, der folgenden Tabelle entnehmen, wie sie in den Geräteeinstellungen der Reolink App wenn Sie sie im Freien montieren.
  • Page 15: Laden Des Akkus

    • Halten Sie die Kamera mindestens 1 Meter von allen drahtlosen Geräten fern, einschließlich WLAN-Routern und Telefonen, um Funkstörungen zu vermeiden. Die Reolink Go PT wird nicht für einen 24/7 Vollbetrieb oder einen Rund-um-die-Uhr-Livestream konzipiert. Sie wird zum Aufzeichnen von Bewegungsereignissen und für Live-Fernansicht bei Bedarf entwickelt.In diesem Beitrag lernen Sie einige praktische Wege zur Maximierung der...
  • Page 16: Montage Der Kamera

    Montage der Kamera auf. 2. Wenn Sie den Akku mit dem Solarpanel laden möchten, beachten Sie bitte, dass der Akku der Kamera NUR mit dem Reolink Solarpanel kompatibel ist. Der Akku lässt sich NICHT mit einem Schritt 1 Solarpanel anderer Hersteller laden.
  • Page 17 Sie die Baumhalterung. • Falls das Problem weiterhin besteht, wenden Fehlerbehebung Sie sich bitte an den Reolink-Support https://support.reolink.com. • Die Kamera schaltet sich Der PIR-Sensor löst keinen nicht ein Alarm aus Wenn Sie feststellen, dass sich Ihre Kamera...
  • Page 18: Technische Daten

    Sie sicher, dass sie korrekt eingestellt • Falls das Problem weiterhin besteht, wenden Betriebstemperatur: -10° bis 55° C (14° bis 131° F) ist. Sie sich bitte an den Reolink-Support Korrekte Entsorgung dieses Witterungsbeständigkeit: IP65-zertifiziert • Gehen Sie auf Geräteeinstellungen >PIR https://support.reolink.com.
  • Page 19: Contenu De La Boîte

    Insérez la carte SIM et la carte SD S'inscrire sur le Réseau (Configuration Initiale de la Caméra) Endbenutzer-Lizenzvereinbarung Configurez la Caméra via l'Application Reolink sur Smartphone Durch die Verwendung der in das Remarques sur l'Installation de la Camera Reolink-Produkt integrierten Produktsoftware...
  • Page 20: Présentation De La Caméra

    Présentation de la Caméra Insérez la carte SIM et la carte SD Voyant LED LED IR Lentille Capteur de lumière du jour Capteur de mouvement PIR intégré Micro intégré Fente pour carte SIM Nano Tournez l'objectif de la caméra pour trouver le trou de réinitialisation, la fente pour la carte SIM et la fente pour la carte SD.
  • Page 21: Conseils Pour Choisir La Carte Sim Appropriée

    Nano-SIM /4FF Puis elle s'éteindra. de l'APN. Vous trouverez des instructions à l'adresse https://support.reolink.com ou contactez le Reolink Support. NOTICE: Veuillez-vous assurer que la carte SIM peut fonctionner avec votre smartphone. S'inscrire sur le Réseau (Configuration initiale de la caméra) 3.
  • Page 22: Configurez La Caméra Via L'application Reolink Sur Smartphone

    « La carte SIM ne peut La caméra ne peut pas 2. Vérifiez si la carte SIM n'est Téléchargez et installez l'application Reolink sur l'App Store (pour iOS) pas être détectée » détecter cette carte SIM. pas complètement insérée et ou sur Google Play (pour Android) insérez-la à...
  • Page 23: Remarques Sur L'installation De La Camera

    • Portée de détection du capteur PIR Afin de maximiser la performance d'étanchéité et l'efficacité du capteur de mouvement PIR, il est préférable d'installer Reolink Go PT à l'envers La portée de détection PIR peut être modifiée pour répondre à vos besoins spécifiques. Vous uniquement lorsque vous le montez à...
  • Page 24: Remarques Importantes Pour La Réduction Des Émissions De Fausses Alarmes

    Wi-Fi et les téléphones afin d'éviter les interférences sans fil. Reolink Go PT n'est pas conçu pour fonctionner 24 heures sur 24, 7 jours sur 7 et 24 heures sur 24 streaming en direct. Il est conçu pour enregistrer des événements de mouvement et visualiser à...
  • Page 25: Montage De La Caméra

    2. Si vous voulez alimenter la batterie via le panneau solaire, faites attention que la batterie est UNIQUEMENT compatible avec le panneau solaire Reolink. Vous ne pouvez pas charger la batterie avec le panneu solaire de marque différent.
  • Page 26: Dépannage

    • Veuillez vérifier la sensibilité et vous assurer complètement chargée. • Si cela ne fonctionne toujours pas, veuillez qu'elle est réglée correctement. • Allez dans Paramètres de l'appareil -> contacter Reolink Support Paramètres PIR, et assurez-vous que l'action https://support.reolink.com. French French...
  • Page 27: Échec De La Réinitialisation De La Caméra

    Alerte audio: Alertes vocales enregistrables bouton de réinitialisation pendant environ 3 Reolink déclare que cet appareil est conforme acceptation des Conditions d'utilisation et de la personnalisées secondes. Après avoir entendu un son de Politique de confidentialité...
  • Page 28: Cosa C'è Nella Confezione

    Reolink, vous acceptez les termes du présent Cosa c’è nella Confezione contrat de licence utilisateur final ( CLUF ") Introduzione alla telecamera entre vous et Reolink. Pour en savoir plus: Inserire la SIM e la scheda SD https://reolink.com/eula/. Registrarsi sulla Rete (Setup iniziale della camera) Installare la camera tramite App Reolink su Smartphone Contrat de licence d'utilisateur final...
  • Page 29: Introduzione Alla Telecamera

    Introduzione alla telecamera Inserire la SIM e la scheda SD LED di Stato LED IR Lente Sensore Luce Diurna Sensore di Movimento PIR Incorporato Microfono incorporato Slot scheda nano SIM Ruotare l'obiettivo della camera per trovare il foro di reset, lo slot per scheda SIM e slot per scheda SD. Foro di reset Premere il pulsante di reset con uno spillo per ripristinare il dispositivo alle impostazioni di fabbrica.
  • Page 30 APN. Si prega di cercare le istruzioni a su https://support.reolink.com contattare il supporto Reolink. AVVISO: Si prega di assicurarsi che la scheda SIM può funzioni con il proprio smartphone. Registrati sulla Rete (Setup iniziale camera) 3.
  • Page 31 La camera non riesce a “La SIM non può 2.Verifica se la SIM non Scaricare e installare l'App Reolink su App Store (per iOS) o Google Play (per Android). riconoscere questa essere riconosciuta” è completamente scheda SIM.
  • Page 32: Note Sull'installazione Della Camera

    • Campo di rilevamento sensore PIR Al fine di massimizzare le prestazioni impermeabili e l'efficienza del sensore di movimento di PIR, è meglio installare la Reolink Go PT rivolta Il campo di rilevamento PIR può essere attivata per soddisfare le vostre specifiche esigenze. Si verso il basso solo quando la si installa all'aperto.
  • Page 33: Caricare La Batteria

    Wi-Fi e telefoni per evitare interferenze wireless. Reolink Go PT non è progettata per girare 24/7 a piena capacità o per lo streaming dal vivo tutta la giornata. È progettata per registrare gli eventi di movimento e visualizzare in remoto lo streaming solo quando necessario.
  • Page 34: Montaggio Della Telecamera

    9 V. 2. Se volete alimentare la batteria tramite il pannello solare, si prega di notare che la batteria è compatibile SOLO con il Pannello Solare Reolink. Non è possibile caricare la batteria con pannelli solari di altre marche.
  • Page 35: Fissare La Camera A Un Albero

    • Assicuratevi che il sensore PIR sia attivato o la fascetta • Se ancora non funziona, si prega di che la tabella temporale sia attiva e impostata adeguatamente. contattare Reolink Support • Si prega di controllare la sensibilità e https://support.reolink.com. assicurarsi che sia impostata correttamente. Italian...
  • Page 36: Specifiche

    Reolink, voi accettate i termini di rifiuti domestici attraverso l’UE. questo accordo di licenza per l’utente finale l’Assistenza Reolink Per prevenire possibili danni all’ambiente o alla https://support.reolink.com. (“EULA”) fra voi e Reolink. Scopri di più: salute umana da un incontrollato scarico di https://reolink.com/eula/. Italian Italian...
  • Page 37: Qué Hay En La Caja

    Registre en la red (Configuración inicial de la cámara) con una distanza minima di 20 cm fra Configure la cámara a través de la aplicación Reolink en el teléfono inteligente l’oggetto radiante e il vostro corpo. Notas sobre la instalación de la cámara Cargue la Batería...
  • Page 38: Introducción A La Cámara

    Introducción a la cámara Inserte la tarjeta SIM y la tarjeta SD LED de estado LEDs IR Lente Sensor de luz diurna Sensor de movimiento PIR incorporado Micrófono incorporado Ranura para tarjeta Nano SIM Gire la lente de la cámara para encontrar el orificio de reinicio, la ranura de la tarjeta SIM y la ranura de la tarjeta SD.
  • Page 39: Registre En La Red (Configuración Inicial De La Cámara)

    Reolink. NOTA: Asegúrese de que la tarjeta SIM pueda funcionar en su teléfono inteligente. Registre en la red (Configuración inicial de la cámara) 3. Un LED azul parpadeará durante unos segundos y luego se apagará...
  • Page 40: Configure La Cámara A Través De La Aplicación Reolink En El Teléfono Inteligente

    Soluciones 1. Compruebe si la tarjeta SIM Descargue e instale la aplicación Reolink en App Store (para iOS) o Google Play (para Android). está orientada en sentido inverso. La cámara no puede "No se puede reconocer 2.
  • Page 41: Notas Sobre La Instalación De La Cámara

    • Rango de detección del sensor PIR Para maximizar el rendimiento a prueba de agua y la eficiencia del sensor de movimiento PIR, es mejor que instale Reolink Go PT boca abajo solo El rango de detección PIR puede girarse para satisfacer sus necesidades específicas. Puede cuando lo monte en exteriores.
  • Page 42: Cargue La Batería

    • Man enga la cámara al menos 1 metro lejos de cualquier dispositivo inalámbrico, Reolink Go PT no está diseñado para capacidad total 24/7 durante todo el día o ejecución live incluyendo enrutadores Wi-Fi y los teléfonos para evitar interferencias streaming.
  • Page 43: Montaje De La Cámara

    1. Cargue la batería recargable con un cargador de batería DC 5V o 9V estándar y de alta calidad. 2. Si desea alimentar la batería a través del panel solar, tenga en cuenta que la batería SÓLO es compatible con el panel solar Reolink. No puede cargar la batería con otras marcas de paneles solares.
  • Page 44: Adjunte La Cámara A Un Árbol

    • Compruebe la sensibilidad y asegúrese de batería está completamente cargada. • Si aún no funciona, comuníquese con Soporte que esté correctamente ajustada. • Vaya a Configuración del dispositivo> de Reolink https://support.reolink.com. Configuración PIR y asegúrese de que la Spanish Spanish...
  • Page 45: Error Al Restablecer La Cámara

    UE simplificada botón de reinicio. • Si la cámara recién se inicia, espere unos 20 Términos y privacidad Reolink declara que este dispositivo cumple segundos. Después de ver un LED azul o rojo General parpadeante, use la aguja de reinicio para con los requisitos esenciales y otras El uso del producto está...
  • Page 46: Acuerdo De Licencia De Usuario Final

    Acuerdo de licencia de usuario final Al utilizar el Software del producto que está incorporado en el producto Reolink, usted acepta los términos de este Acuerdo de licencia de usuario final ("EULA") entre usted y Reolink. Obtenga más información: https://reolink.com/eula/.

Table des Matières