Télécharger Imprimer la page
Reolink E1 Outdoor Instructions
Masquer les pouces Voir aussi pour E1 Outdoor:

Publicité

Les langues disponibles
  • FR

Les langues disponibles

Liens rapides

Technical Support
If you need any technical help, please visit our official support site and contact our support
team before returning the products, https://support.reolink.com.
Technische Unterstützung
Wenn Sie Hilfe brauchen, kontaktieren Sie bitte Reolink Support Team zuerst, bevor Sie Ihre
Bestellung zurücksenden. Meiste Fragen oder Probleme können von unserem Online Support
Center beantwortet und gelöst werden: https://support.reolink.com.
Support technique
Si vous avez besoin d'aide, veuillez contacter Reolink avant de retourner votre produit. La
plupart des questions peuvent être répondues via notre centre de support en ligne à l'adresse
https://support.reolink.com.
Assistenza Tecnica
Se avete bisogno di aiuto, le chiediamo gentilmente di contattare Reolink prima di restituire il
prodotto. La maggior parte delle domande può essere risolta tramite il nostro centro di
assistenza online all'indirizzo https://support.reolink.com.
Soporte técnico
Si necesita ayuda, comuníquese con Reolink antes de devolver su producto. La mayoría de las
preguntas se pueden responder a través de nuestro centro de soporte en línea en
https://support.reolink.com.
REOLINK INNOVATION LIMITED
FLAT/RM 705 7/F FA YUEN COMMERCIAL BUILDING 75-77 FA YUEN STREET MONG KOK KL
HONG KONG
Product Ident GmbH
EU
REP
Hoferstasse 9B, 71636 Ludwigsburg, Germany
prodsg@libelleconsulting.com
APEX CE SPECIALISTS LIMITED
UK
REP
89 Princess Street, Manchester, M1 4HT, UK
info@apex-ce.com
Aug 2021
Q S G1 _ B
58.03.005.0009
E1 Outdoor
Operational Instruction
https://reolink.com
https://support.reolink.com
EN/DE/FR/IT/ES

Publicité

loading

Sommaire des Matières pour Reolink E1 Outdoor

  • Page 1 Assistenza Tecnica E1 Outdoor Se avete bisogno di aiuto, le chiediamo gentilmente di contattare Reolink prima di restituire il prodotto. La maggior parte delle domande può essere risolta tramite il nostro centro di Operational Instruction assistenza online all'indirizzo https://support.reolink.com.
  • Page 2: Table Des Matières

    Contents What’s in the Box What's in the Box Camera Introduction Set up the Camera Mount the Camera Troubleshooting Reolink E1 Outdoor Camera Bracket Power Adapter Reset Needle Pack of Screws Specifications Notification of Compliance 4.5m Power Mounting Quick Surveillance...
  • Page 3: Camera Introduction

    Step 1 Connect the camera to a LAN port on your router with an Ethernet cable. Daylight Sensor Step 2 Use the power adapter provided to power on the camera. Spotlight Infrared Lights Lens Reolink E1 Outdoor Status LED Your Smart Device Built-in Mic Speaker Network Cable...
  • Page 4 Step 3 Download and launch the Reolink App or Client software, and follow the onscreen instruc- tions to finish initial setup. If you set up Reolink E1 Outdoor without the Ethernet cable, you may follow the steps below. • On Smartphone Step 1 Use the power adapter provided to power on the camera.
  • Page 5 Install the E1 Outdoor Camera Mount the Camera to the Wall For outdoor use, E1 Outdoor must be installed upside down for better waterproof performance. Drill holes in accordance with the mounting Choose a proper direction of the camera and...
  • Page 6: Troubleshooting

    Camera is not Powering on • Set your password using only the characters on the keyboard. If your camera is not powering on, please try If these won't work, please contact Reolink the following solutions: Support https://support.reolink.com • Plug the camera into another outlet.
  • Page 7: Notification Of Compliance

    But if you are not satisfied with the may cause harmful interference to radio product and plan to return it, we strongly Reolink declares that this device is in For more specifications, visit communications. However, there is no suggest that you reset the camera to factory compliance with the essential requirements https://reolink.com/.
  • Page 8 Überblick minimum distance 20cm between the radiator & your body. Lieferumfang OPERATING FREQUENCY (the maximum transmitted power) Allgemeine Einführung 2412MHz---2472MHz (19dBm) Kamera-Einrichtung 5150MHz---5350MHz (18dBm) 5470MHz---5725MHz (18dBm) Kamera-Installation Fehlerbehebung Spezifikationen Konformitätserklärung English Deutsch...
  • Page 9: Lieferumfang

    Wiederherstellung der Werkeinstellungen. MicroSD-Kartenslot * Drehen Sie das Objektiv, um das Reset-Loch und den SD-Kartensteckplatz zu finden. Tageslichtsensor Reolink Kamerahalterung Netzadapter Nadel zum Päckchen Spotlight E1 Outdoor Zurücksetzen mit Schrauben Infrarot-Scheinwerfer Objektiv Status LED Eingebautes Mikrofon Lautsprecher Netzwerkkabel Stromverlänge- Netzwerkkabel...
  • Page 10: Reolink E1 Outdoor

    Kamera-Einrichtung Schritt 3 Laden Sie die Reolink App oder Client-Software herunter und starten Sie sie. Dann befolgen Sie die Anweisungen auf dem Bildschirm, um die Ersteinrichtung abzuschließen. Drahtgebundene Einrichtung • Smartphone Scannen zur Installation der Reolink App. Es wird empfohlen, die Ersteinrichtung mit dem Ethernet-Kabel abzuschließen. Sie können die folgenden Schritte ausführen, um Ihre Kamera einzurichten.
  • Page 11 Wenn Sie Reolink E1 Outdoor-Kamera ohne Ethernet-Kabel einrichten, dann können Sie die Installation an der Wand folgenden Schritte befolgen. Bei der Verwendung im Freien muss E1 Outdoor auf dem Kopf stehend installiert werden, um eine Schritt 1 Versorgen Sie die Kamera mit dem mitgelieferten Netzadapter mit Strom. bessere Wasserdichtigkeit zu erzielen.
  • Page 12 Installation an der Decke Ziehen Sie den Knopf der Sicherheitshalterung und lockern Sie die Montageplatte, um die beiden Teile zu trennen. Bohren Sie Löcher gemäß der Lochschablone Richten Sie die Montageplatte an der und schrauben Sie die Sicherheitshalterung an Sicherheitshalterung aus. Verriegeln Sie dann die Wand.
  • Page 13: Fehlerbehebung

    Steckdose anzuschließen. Falls dies nicht funktioniert, wenden Sie sich bestimmten Installation nicht auftreten. Sollte • Verwenden Sie bitte ein anderen Konformitätserklärung bitte an das Reolink Supportteam das Gerät Störungen im Rundfunk- und 12V-Netzadapter für die Stromversorgung. https://support.reolink.com Fernsehempfang verursachen, was durch Aus- und Einschalten des Gerätes festgestellt...
  • Page 14 CE Vereinfachte beschränkte Garantie, die nur gültig ist, wenn Weitere Informationen: https://reolink.com/eula/. EU-Konformitätserklärung es im offiziellen Reolink Store oder bei einem Erklärung zur Strahlenexposition nach ISED von Reolink autorisierten Händler gekauft Reolink erklärt, dass dieses Gerät den wurde. Weitere Informationen: grundlegenden Anforderungen und anderen Dieses Gerät entspricht den...
  • Page 15 Contenu de la boîte Introduction de la caméra Configurer la caméra Monter la caméra Dépannage Reolink Support Adaptateur Aiguille de Paquet de vis E1 Outdoor de caméra secteur réinitialisation Spécifications Avis de conformité Rallonge électrique Câble réseau Gabarit Guide de...
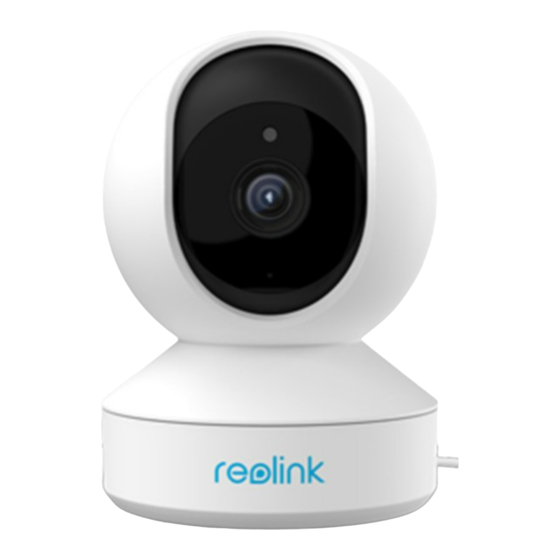
  • Page 16 Étape 1 Connectez la caméra à un port LAN de votre routeur à l'aide d'un câble Ethernet. Capteur de lumière du jour Étape 2 Utilisez l'adaptateur secteur fourni pour mettre la caméra sous tension. Projecteur Lumières infrarouges Objectif Reolink E1 Outdoor LED d’état Micro intégré Votre appareil intelligent Haut-parleur Câble réseau Câble d’alimentation...
  • Page 17 Configuration sans fil Étape 3 Téléchargez et lancez l'application Reolink ou le logiciel Client, et suivez les instructions à l'écran pour terminer l'installation initiale. Si vous installez Reolink E1 Outdoor sans le câble Ethernet, vous pouvez suivre les étapes • Sur Smartphone ci-dessous.
  • Page 18 Monter la E1 Outdoor Caméra Fixez la caméra au mur Pour l’utilisation en extérieur, E1 Outdoor doit être installé à l'envers pour une meilleure imperméabilité. Percez des trous conformément au gabarit de Choisissez une direction appropriée de la sommier et vissez le sommier de sécurité au caméra, puis alignez le support sur le...
  • Page 19 Reolink https://support.reolink.com pour mettre l'appareil sous tension. Si ces solutions ne fonctionnent pas, veuillez Spécifications contacter le support Reolink à l'adresse https://support.reolink.com Matériel Échec de la connexion WiFi lors de lnstallez le support au plafond. Alignez la camera avec le support et tournez l'unite de camera Résolution d'affichage: 5MP...
  • Page 20 2 ans qui n'est valable que s'il est acheté Poids: 380g installé et utilisé conformément aux CE Déclaration de dans le magasin officiel Reolink ou chez un instructions, il peut causer des interférences revendeur agréé Reolink. En savoir plus: conformité UE simplifiée Pour plus de spécifications, consultez...
  • Page 21 Cosa c’è nella Scatola produit Reolink, vous acceptez les termes du présent contrat de licence utilisateur final Presentazione della Telecamera (“CLUF”) entre vous et Reolink. Pour en savoir plus: https://reolink.com/eula/. Configurare la Telecamera ISED Déclaration d'exposition aux rayonnements Montare la Telecamera Cet équipement est conforme aux limites...
  • Page 22: Cosa C'è Nella Scatola

    * Rotare l’obiettivo per trovare il pulsante di ripristino e lo slot per la scheda SD. Sensore di Luce Diurna Reolink Braccio di Adattatore di Spillo di Confezione Faretto E1 Outdoor Telecamera Alimentazione Ripristino di Viti Luci a Infrarossi Obiettivo LED di Stato Mic Incorporato...
  • Page 23: Configurare La Telecamera

    Configurare la Telecamera Passaggio 3 Scaricare ed avviare l’App o Client Reolink, e poi seguire le istruzioni per finire la configurazione iniziale. Configurazione con Cavo • Sullo Smartphone Scansionare per scaricare l’App Reolink. Si consiglia di usare il cavo Ethernet per la configurazione iniziale. Seguire i passaggi seguenti per configurare la telecamera.
  • Page 24: Montare La Telecamera

    Montare la E1 Outdoor Telecamera Configurazione Wireless Se si desidera configurare E1 Outdoor Reolink senza il cavo Ethernet, seguire i passaggi seguenti. Installa la Telecamera a Parete Passaggio 1 Usare l’adattatore di alimentazione nella confezione per alimentare la telecamera. Per l’uso esterno, E1 Outdoor deve essere installata capovolto per una migliore impermeabilità.
  • Page 25 Montore la Telecamera al Soffitto Tirare il pulsante della staffa e svitareil braccio per separare le due parti. Praticare i fori secondo la dima per fori di Scegliere una direzione adatta della montaggio e avvitare la staffa alla parete. telecamera epoi allineare il braccio alla staffa, bloccare la telecamera in posizione ruotando in senso antiorario.
  • Page 26: Risoluzioni Dei Problemi

    Dichiarazione di Conformità FCC accendendo l'apparecchiatura, l'utente è Se non funziona ancora, bisogna contattare il incoraggiato a cercare di correggere gruppo di assistenza Reolink: Il dispositivo è conforme alla Parte 15 delle l'interferenza adottando una o più delle https://support.reolink.com Hardware regole FCC.
  • Page 27 Utilizzando il software prodotto incorporato al requisiti generali di esposizione alle radiofre- Garanzia Limitata prodotto Reolink, voi accettate i termini di questo quenze. Il dispositivo può essere utilizzato in accordo di licenza per l’utente finale (“EULA”) fra voi condizioni di esposizione portatile senza Questo prodotto viene fornito con una e Reolink.
  • Page 28 Contenido de la Caja Introducción de Cámara Instale la Cámara Monte la Cámara Soluciones de Problemas Reolink Soporte Adaptador Aguja Paquete E1 Outdoor de Cámara de Corriente de Reinicio de Tornillos Especificaciones Notificación de Cumplimiento Cable de Extensión de Cable de Plantilla Guía de...
  • Page 29 Paso 1 Conecte la cámara al puerto LAN en su rúter con un cable de Ethernet. Sensor de Luz Solar Paso 2 Utilice el adaptador de corriente proporcionado para alimentar la cámara. Foco Luces Infrarrojas Objetivo Reolink E1 Outdoor LED de Estado Micrófono Incorporado Su Dispositivo Inteligente Altavoz Cable de Red Cable de Ethernet Significado del LED de Estado:...
  • Page 30 Ruta de Descarga de Reolink Client: Vaya a https://reolink.com/es > Soporte > App & Client. NOTA: Si accede a la cámara a través de Reolink Client, puede hacer clic en el icono Agregar Dispositivo y elegir la opción UID para introducir el UID de su cámara. El UID está en el cuerpo de la cámara (justo debajo del código QR).
  • Page 31 Monte la E1 Outdoor Cámara Monte la Cámara a la Pared Para su uso en exteriores, E1 Outdoor debe instalarse boca abajo para un mejor rendimiento de impermeabilidad. Taladre los agujeros de acuerdo con la Elija una dirección adecuada de la cámara,...
  • Page 32 Si su cámara no puede ser alimentada, intente las siguientes soluciones: Si no funcionan, contacte al Soporte de Reolink https://support.reolink.com • Conecte la cámara a otra toma de corriente. • Utilice otro adaptador de corriente de 12 V Especificaciones para alimentar la cámara.
  • Page 33 CE Declaración de Conformidad limitada de 2 años que es válida solo si se energía de radiofrecuencia y, si no se instala y compra en la tienda oficial de Reolink o en un de la UE Simplificada Para más especificaciones, visite se utiliza de acuerdo con las instrucciones revendedor autorizado de Reolink.
  • Page 34 Contrato de Licencia de Usuario Final Al utilizar el Software del producto que está integrado en el producto Reolink, usted acepte los términos de este Contrato de Licencia de Usuario Final ("EULA") entre usted y Reolink. Obtenga más información: https://reolink.com/eula/.