Samsung DVD-R128 Mode D'emploi
Masquer les pouces Voir aussi pour DVD-R128:
Table des Matières

Publicité

Les langues disponibles

Les langues disponibles

Liens rapides

English
Nederlands
Français
Instruction Manual
DVD-R120/R121
DVD-R128, R129
DVD-R130, R131
www.samsung.com/be
AK68-01003C-00

Publicité

Table des Matières
loading

Sommaire des Matières pour Samsung DVD-R128

  • Page 1 Instruction Manual DVD-R120/R121 DVD-R128, R129 DVD-R130, R131 www.samsung.com/be English Français AK68-01003C-00 Nederlands...
  • Page 2: Warning

    MPORTANT NOTE Warning The mains lead on this equipment is supplied with a moulded plug incorporating a fuse. The value of the fuse is indicated on the pin face of the plug. If it requires replacing, a fuse approved to BS1362 of the same rating must be used.
  • Page 3: Precaution

    Exterior interference such as lightning and static ● Precaution electricity can affect normal operation of this DVD Recorder. If this occurs, turn the DVD Recorder off and on again with the STANDBY/ON button, or disconnect and then reconnect the AC power cord to the AC power outlet.
  • Page 4: Disc Storage

    ISO9660 or JOLIET format can be played back This DVD Recorder can play back DVD-R discs ● Only MP3 files with the ".mp3", ".MP3" extension can recorded and finalised with a Samsung DVD video ● recorder. It may not be able to play some DVD-R be used.
  • Page 5 If you want to record the disc in VR Mode and then ● Do not use the following discs! record in V Mode, be sure to execute Format. Be careful when executing Format because all the LD, CD-G, CD-I, Video-CD, CD-ROM and DVD-ROM ●...
  • Page 6: Table Des Matières

    Preparing the Remote Control.........11 Plug & Auto Setup ...........25 Setting the Remote Control ..........11 Setting the Clock............26 Description..............13 Presetting Channels with the Auto Setup Front Panel(DVD-R128) ..........13 function..............27 Front Panel(DVD-R129) ..........13 Presetting Channels with the Manual Setup Front Panel(DVD-R130) ..........14 function..............28 Front Panel(DVD-R131) ..........14...
  • Page 7 Display(Video) Options ............36 About ANYKEY ..............52 Setting up the Parental Control......37 Using the Repeat Function..........53 If you forgot your password..........37 Selecting the Subtitle ............55 About the Rating Level ............38 Selecting the Audio language..........55 About the Change Password ..........38 Changing the Camera Angle...........56 Zooming-In................56 Using Bookmarks.............57 Recording...
  • Page 8: General Features

    High quality progressive scan General Features Progressive scanning provides high resolution and flicker free video. The 10-bit 54-MHz DAC and 2D Y/C Separating Circuitry provides the highest image playback and recording quality. (See pages 21, 35) The DVD Recorder allows you to record and play high quality digital video on DVD-RW/DVD-R discs.
  • Page 9: Before Reading The User's Manual

    All rights reserved; No part or whole of this user’s reinitializing. It should be noted that manual may be reproduced or copied without the prior the disc's data will be lost when written permission of Samsung Electronics Co. changing formats. English -...
  • Page 10 Step 3 Step 6 Recording Finalising & Playing on other DVD components There are two different recording methods, Direct To play your DVD on other DVD components, Recording and Timer Recording. Timer recording is finalising may be necessary. First, finish all editing and classified as a Date : Once, Daily, MO-SA, MO-FR, recording operations, then finalise the disc.
  • Page 11: Unpacking

    Unpacking Accessories Setting the Remote Control Check for the supplied accessories below. You can control certain functions of another manufacturer’s TV with this remote control. Control function buttons involve: STANDBY/ON, PROG , VOL +/-, Direct Number buttons, TV MUTE, INPUT SEL. button. Video/Audio Cable RF Cable for TV Batteries for Remote...
  • Page 12 TELEAVA Controllable TV Codes TELEFUNKEN 67, 73, 75, 76 BRAND BUTTON THOMSON 72, 73, 75 SAMSUNG 01, 02, 03, 04, 05, 06, 07, 08, 09 THOMSON ASIA 80, 81 AIWA TOSHIBA 47, 48, 49, 50, 51, 52 ANAM 10, 11, 12, 13, 14, 15, 16, 17, 18 WEGA BANG &...
  • Page 13: Description

    Description Front Panel (DVD-R128) 1. STANDBY/ON 7. PLAY/PAUSE Turns the DVD Recorder on and off. Plays a disc or pauses playback/recording. 2. AV3 IN 8. P.SCAN Connect external equipment. Selects the progressive scan mode. 3. DISC TRAY 9. PROG ( Opens to accept a disc.
  • Page 14: Front Panel(Dvd-R130)

    Front Panel (DVD-R130) 1. STANDBY/ON 7. SEARCH/SKIP Turns the DVD Recorder on and off. Go to the next title/chapter/track or go back to the previous title/chapter/track. 2. AV3 IN Connect external equipment. 8. PLAY/PAUSE Plays a disc or pauses playback/recording. 3.
  • Page 15: Front Panel Display

    Front Panel Display 1. Lights when a disc is loaded. 4. Lights when a DVD-R/-RW disc is loaded. 2. Lights in the record mode. 5. Playing time/clock/current status indicator. 3. Lights to indicate the timer record mode. 6. Lights in the progressive scan mode. Rear Panel 7.
  • Page 16: Tour Of The Remote Control

    13. ANYKEY Button Tour of the Remote Control Use this to view the status of the disc that is being played. 14. REC Button Use to make a recording on DVD-RW/-R discs. 15. REC MODE Button This will display the recording status.(XP/SP/LP/EP) 16.
  • Page 17: Connecting & Setting Up

    Quick Overview Connecting A Quick Overview presented in this guide will give you enough information to start using the DVD Recorder. & Setting Up Connecting the DVD Recoder This section involves various methods of connecting the DVD Recorder to other external †...
  • Page 18: Connecting The Dvd Recorder

    Connecting the DVD Additional connections Recorder You can connect your DVD Recorder to the television You can connect your DVD Recorder to a satellite or using the SCART cable if the appropriate input is digital tuner. available on the television. 1.
  • Page 19: Other Type Of Connecting The Video Output Cable

    Antenna + DVD Recorder + Other type of connecting external decoder box + TV the Video output cable There are several ways to output video signal not using If you connect external decoder box to DVD recorder, scart cables. Select one of the following video you can record scrambled channels (CANAL+or connecting that best suits you below.
  • Page 20: Case 1 : Connecting To A Video (Composite)

    Case 1 : Connecting to a Video Case 2 : Connecting to an (Composite) output jack S-Video output jack 1. Connect a video(yellow) cable between the VIDEO 1. Connect an S-Video cable (not included) between the (yellow) OUT jack on DVD Recorder and VIDEO S-VIDEO OUT jack on DVD Recorder and S-VIDEO (yellow) INPUT jack on your TV (or AV amplifier).
  • Page 21: Case 3 : Component Video Output Jacks

    Case 3 : Component Video Other type of connecting output jacks the Audio output cable 1. Connect Component video cables(not supplied) between the COMPONENT OUT(Y,P ) jacks on DVD Recorder and COMPONENT IN(Y,P ) jacks on your TV. 2. Connect audio cables (white and red) between the There are several ways to output audio signal not using AUDIO OUT jacks on the DVD Recorder and AUDIO scart cables.
  • Page 22: Case 3: Connecting To An Av Amplifier With A Digital Output Jack

    Case 2 : Connecting to a stereo Case 3: Connecting to an AV amplifier with AV output jacks amplifier with a digital output jack If your stereo amplifier only has AUDIO INPUT jacks(L and R), use the AUDIO OUT jacks. If your AV amplifier has a Dolby Digital, MPEG2 or DTS decoder and a digital input jack, use this connection.
  • Page 23: Connecting To Av3 In, Dv Input Jack

    Case 2 : Connecting a Connecting to AV3 IN, DV Camcorder to the DV IN jack input jack (DVD-R130, (DVD-R130, R131 only) R131 only) If your digital camcorder has a DV output jack, connect it to the DV input jack of your DVD Recorder. This allows you to connect your DVD Recorder to other external devices and view or record their outputs.
  • Page 24: System Setup

    On-Screen Menu Navigation System Setup The on-screen menus allow you to enable or disable various functions on your DVD Recorder. Use the following buttons to open and navigate through the on-screen menus. DVD-Recorder Programme DVD-Recorder Title List No Disc DVD-RW(VR) Programme Title List Scheduled Record List...
  • Page 25: Plug & Auto Setup

    • Refer to following abbreviation table when selecting “Country”. Plug & Auto Setup A(Austria) NL(Netherlands) S(Sweden) PL(Poland) B(Belgium) I(Italy) CH(Swiss) CZ (Czech) DK(Denmark) N(Norway) TR(Turkey) Others FIN(Finland) P(Portugal) GR(Greece) D(Deutschland) E(Spain) HU(Hungary) Your DVD Recorder will automatically set itself up when •...
  • Page 26: Setting The Clock

    Press the …† buttons to select On for the Setting the Clock Auto Clock. DVD-Recorder Clock Set No Disc Programme Setup Date Time Auto Clock This menu is used to set the current time. 2006 You need to set the time to use timer recording. MOVE RETURN EXIT...
  • Page 27: Presetting Channels With The Auto Setup Function

    Press the …† buttons to select Auto Presetting Channels with Setup, then press the OK or √ button. The Country Seletion screen is displayed. the Auto Setup function DVD-Recorder Install No Disc Country Selection Programm Auto Setup √ √ Manual Setup √...
  • Page 28: Presetting Channels With The Manual Setup Function

    Press the …† buttons to select Manual Presetting Channels with Setup, then press the OK or √ button. the Manual Setup function Manual Setup PR CH Name Decoder System Edit ---- - / - √ √ ---- - / - √...
  • Page 29: Setting Up The Language Options

    Press the …† buttons to select the desired Setting up the Language language option, then press the OK or √ button. Options Audio : For the speaker sound. ● Subtitle : For the disc subtitles. ● Disc Menu : For the disc menu contained on the ●...
  • Page 30: Ep Mode Time Setting

    Press the …† buttons to select EP Mode EP Mode Time Setting Time, then press the OK or √ button. DVD-Recorder System No Disc Programme EP Mode Time : 6 Hours 6 Hours √ √ 8 Hours Setup Chapter Creator √...
  • Page 31: Automatic Chapter Creation

    Press the …† buttons to select On or Off, Automatic Chapter then press the OK or √ button. • Off: Select this option when you do not want Creation (Automatic Chapter Creation). • On: Select this option when you want (Automatic Chapter Creation).
  • Page 32: Quick Recording Setting

    Press the …† buttons to select On, then Quick Recording Setting press the OK or √ button. If this function is set to on, both the DVD Recorder and the TV will power on at the same time, which enables you to immediiatedly record a desired channel.
  • Page 33: Audio Options

    Press the …† buttons to select Audio, then press the OK or √ button. 1. Off : Doesn’t output DTS signal. Audio setup menu will be displayed. Select this when your AV receiver or AV amplifier does not have DTS decoder. DVD-Recorder Audio 2.
  • Page 34: Setting Up Video Output Options

    Press the …† buttons to select Video Setting up Video Output Output, then press the OK or √ button. Options DVD-Recorder Video No Disc Programme TV Aspect : 16:9 Wide √ √ Setup 3D Noise Reduction: Off √ √ Component Video Output : RGB √...
  • Page 35: Setting Up The Progressive Scan

    Setting up the Progressive Canceling the Progressive scan scan If the TV supports Progressive Scan, press the P.SCAN button on the front of the DVD Recorder to With the DVD Recorder in Stop mode, enjoy. press the P.SCAN button on the front of the DVD Recorder.
  • Page 36: Setting Up The Display(Video) Options

    Press the RETURN or œ button to return Setting up the ■ to the previous menu. Press the MENU NOTE Display(Video) Options button to exit the menu. Display(Video) Options This function allows you to setup the TV screen settings. This function depends on disc type. It may not work for some disc types.
  • Page 37: Setting Up The Parental Control

    Enter the 4-digit password using the 0 to 9 Setting up the Parental buttons on the remote control. The ‘Confirm the password’ message will be displayed. Control Enter your password again. DVD-Recorder Parental Control No Disc The Parental Control function works in conjunction with Programme Setup Confirm the password...
  • Page 38: About The Rating Level

    About the Rating Level About the Change Password Press the …† buttons to select Rating Press the …† buttons to select Change Level. Password. DVD-Recorder Parental Control DVD-Recorder Parental Control No Disc No Disc Programme Password : On Programme √ √ Password : On √...
  • Page 39: Before Recording

    This section shows various DVD recording This DVD Recorder can record on the following discs. methods. DVD-RW DVD-R DVD-RWs are rewritable. ● DVD-Rs are non-rewritable ● Compatibility between Samsung and Other Company’s Recorder Disc Types Recording Recording Finalising Additional Recording in format Device Samsung Recorder...
  • Page 40: Recording Formats

    Recording Formats Recording Times Mode Characteristic Data Rates Since available functions differ depending on the disc Select when the type, select a disc that best fits your preferences; Approx. 1 hour video quality is When you insert an unused disc, the following message (high quality mode) about 8 Mbps appears...
  • Page 41: About Info Button

    About INFO Button Recording the current TV programme you are watching Before you start The INFO function allows you to view the current status and progress of playback and recording. Depending on Check that the disc has enough available space for the the disc type and status, the displayed screen may be recording.
  • Page 42 Press the REC MODE button repeatedly, To stop recording (or press the REC MODE button, then Press the STOP button to stop a recording in progress. press the …† button) to select the When using DVD-RW/DVD-R discs, the message ● recording speed(quality).
  • Page 43: Recording From External Equipment You Are Watching

    Press the REC button. Recording from external equipment you are watching To pause recording Press the PLAY/PAUSE( ) button to pause a recording in progress. Press the PLAY/PAUSE( ) button again to resume ● recording. PROG Before you start You can switch channels by pressing the ●...
  • Page 44: (Dvd-R130, R131 Only)

    Press the OPEN/CLOSE button to close You can not change the recording mode and ■ the disc tray. input source while recording. NOTE Wait until “LOAD” disappears from the front panel Recording will stop automatically if there is ■ display. no free space left for recording.
  • Page 45: Making A Timer Recording

    To view the current status of the disc and progress Making a Timer Recording of recording : Press the INFO button, and information about the disc will appear. DVD-RW(VR) Disc Info Disc Name Total Title Total Playlist Recordable Time 02:12 SP Before you start Protection Not Protected...
  • Page 46: Flexible Recording (For Timer Recording Only)

    • Source : The video input source (“AV1”, “AV2”, Press the OK button. “AV3”) or the broadcasting channel you want to make a timer If the timer settings overlap The programmes are recorded in order of priority. recording from. If timer recording is set for the first programme •...
  • Page 47: Editing The Scheduled Record List

    Press the …† buttons to select Edit, then Editing the Scheduled press the OK or √ button. The Timer Record Input item is displayed. ● Record List Edit the items you want to modify. See the “Making a Timer Recording” section for more information on Timer Recording Input items.
  • Page 48: Recording The Standard Timer List

    Press the …† buttons to select the number Recording the Standard of the timer recording you want to delete, then press the OK or √ button. Timer List The Edit and Delete items are displayed. ● Scheduled Record List DVD-Recorder Current Time 12:27 DVD-RW(VR) When the start time in the Scheduled record list...
  • Page 49: Playback

    Before Playing Playback Read the following information before playing a disc. Region code (DVD-Video only) This section introduces basic functions of playback and playback by disc type. Both the DVD recorder and the discs are coded by region. These regional codes must match in order for the disc to play.
  • Page 50: Playing A Disc

    Place a disc gently into the tray with the Playback and/or recording may not work ■ disc’s label facing up. for some types of discs, or when specific NOTE operations, such as angle change and aspect ratio adjustment, are being performed.
  • Page 51: Using The Disc Menu & Title Menu

    Using the Disc Menu & Title Menu Using the Search Functions Some discs contain a dedicated menu system that allow you to select special functions for the title, such as chapters, audio tracks, subtitles, film previews, information on characters, etc. For DVD-VIDEO discs Press the DISC MENU button to enter the disc menu of the disc.
  • Page 52: Slow Motion Play

    About ANYKEY Skipping Chapters or Tracks During playback, you can search quickly ● through a chapter or track. During playback, press the SKIP ( button on the remote control. If you press the SKIP ( ) button, ● it moves to the beginning of the chapter or track or marker(DVD-RW(VR mode)).
  • Page 53: Using The Repeat Function

    If you want to move to a desired time to Using the Repeat Function ● help you find a scene. Press the ANYKEY button during playback. DVD-VIDEO Title 1/28 Chapter 00:00:01 Time Subtitle D 5.1CH Audio Repeat Angle Zoom MOVE CHANGE Playing Repeatedly(Repeat Playback) Press the …†...
  • Page 54 Playing a Certain section Repeatedly(A-B Repeat Playback) Using the ANYKEY button Using the ANYKEY button Press the ANYKEY button during playback. Using the ANYKEY button Using the ANYKEY button DVD-VIDEO Title 1/28 Chapter Press the ANYKEY button during 00:00:01 Time Subtitle playback.
  • Page 55: Selecting The Subtitle

    Selecting the Subtitle Selecting the Audio language Subtitle languages may not work depending on the disc Audio languages may not work depending on the disc type. This is only available during playback. type. This is only available during playback. Using the SUBTITLE button Using the AUDIO button Using the SUBTITLE button...
  • Page 56: Changing The Camera Angle

    Changing the Camera Angle Zooming-In When a DVD-VIDEO contains multiple angles of a particular scene, you can select the Angle function. This is only available during playback. Press the ANYKEY button during playback If the disc contains multiple angles, the ANGLE mark or pause.
  • Page 57: Using Bookmarks

    Using Bookmarks Playing back a bookmark This feature lets you bookmark sections of a DVD-VIDEO or DVD-R/-RW(V mode), so you can quickly find them. Press the MARKER button during playback. (V mode) Press the œ √ buttons to select a Press the MARKER button during bookmarked scene.
  • Page 58: Using Markers

    Using Markers Playing back a Marker (VR mode) Press the MARKER button during playback. Press the MARKER button during playback. Press the œ √ buttons to select a bookmarked scene. -- -- -- -- -- -- -- -- -- Marker N : 0 -- -- -- -- -- -- -- -- Marker...
  • Page 59: Playing An Audio Cd/Mp3

    Buttons on the Remote Control used for Audio CD(CD-DA) playback Playing an Audio CD/MP3 Playing an Audio CD (CD-DA)/MP3 Each disc has a variety of menu functions available. Playing an Audio CD(CD-DA) Insert an audio CD (CD-DA) into the disc tray.
  • Page 60: Playing An Mp3 Disc

    Playing an MP3 Disc MP3 Screen Elements Music List Insert an MP3 Disc into the disc tray. SONG01 01/13 Title ROOT SONG01 SONG02 DVD-Recorder Disc Navigation √ √ 0:00:15 SONG03 SONG01 SONG04 4.0MB Disc DivX √ √ Navigation SONG05 01/26/2006 Photo √...
  • Page 61 Buttons on the Remote Control used for MP3 playback Playing Repeatedly(Repeat Playback) Using the REPEA Using the REPEA T button T button Press the REPEAT button during playback. The Track repeat mode icon ( ) appears and the selected track is played repeatedly. Music List TRACK 1 01/15...
  • Page 62 Play Option Mode Using the Using the ANYKEY ANYKEY button button The Play Option can be used with an audio CD or MP3 in Stop mode. Press the ANYKEY button during playback. The PLAY MODE window appears. Press the ANYKEY button in Stop mode. Music List TRACK 1 01/15...
  • Page 63: Playing A Picture

    To Programme Tracks Playing a Picture You can register a maximum of 30 tracks in the playlist. Press the ANYKEY button in Stop mode. The PLAY MODE window appears. Insert a JPEG into the disc tray. Music List TRACK 1 01/15 Title Length...
  • Page 64: Playing A Mpeg4

    -1 If you press the PLAY button, the Slide Playing a MPEG4 Show Speed screen will appear. Press the œ √ buttons to set the slide show speed, then press the OK button. DVD-RW(VR) MPEG4 File is used to contain the audio and video data.
  • Page 65: Playing The Title List

    MPEG4 Function Description Playing the Title List Function Description Skip During playback, press the SKIP ( ) button, it moves forward or backward 5 minutes. During playback, press the SEARCH ( Search button and press again to search at a faster speed. (Fast 1, Fast 2, Fast 3) In pause or step mode, press the SEARCH ( Slow Motion...
  • Page 66 Press the …† buttons to select Title List, Press the INFO button once again. Then you can check the information about the title under playback. then press the OK or √ button twice. The Title List screen is displayed. DVD-RW(VR) Playing Info Name APR/21/200612:00 PR1...
  • Page 67 Title List Screen Elements DVD-RW(VR) DVD-RW(VR) Title List Title List APR/21/2006 APR/21/2006 Title Length Edit Title Length Edit 01 APR/19/2006 12:00 00:00:21 01 APR/19/2006 12:00 00:00:21 √ √ √ √ 02 APR/19/2006 12:30 00:00:03 02 APR/19/2006 12:30 00:00:03 √ √ √...
  • Page 68: Editing

    Editing This section introduces basic functions of DVD editing and explains both edit functions for the recording on a disc and edit functions for the entire disc. Title List ● A title is a section of recorded video and audio. Title List shows a list to help you select a title.
  • Page 69: Basic Editing (Title List)

    Press the …† œ √ buttons to select the Basic Editing (Title List) desired characters, then press the OK button. DVD-Recorder Rename DVD-RW(VR) Sports(A1) Renaming(Labeling) a Title Follow these instructions to rename a title list entry, i.e., Save to edit the title of a recorded programme. Back Space Space Delete...
  • Page 70: Locking(Protecting) A Title

    Locking(Protecting) a Title Press the œ √ buttons to select On, then press the OK button. The key icon on the Follow these instructions to lock an entry to protect it information window for the selected entry from accidental deletion. changes to the locked status.
  • Page 71: Deleting A Section Of A Title

    Press the …† buttons to select Delete, Deleting a Section of a Title then press the OK or √ button. Follow these instructions to delete a section of a Title List entry. DVD-RW(VR) Title List Sports (A1) Title Length Edit (VR mode) Drama 00:00:21...
  • Page 72 Press the OK button at the starting point. Press the OK button at the Delete. The message “Do you want to delete? The image and starting point time are displayed in the (Deleted part will not be restored.)” is displayed. section deletion starting point window.
  • Page 73: Advanced Editing (Playlist)

    Press the OK button at the end point. Advanced Editing (Playlist) DVD-Recorder Make Scene DVD-RW(VR) Scene No. 001 Start Title List : 1/6 00:00:10 00:10:00 Creating a Playlist 00:10:00 » » Start Make Return Follow these instructions to create a new playlist entry MOVE RETURN EXIT...
  • Page 74: Playing Entries In The Playlist

    Playing Entries in the Playlist Press the …† buttons to select Play, then press the OK button. Follow these instructions to play the playlist entries. √ √ Play (VR mode) With the DVD Recorder in Stop mode, press the PLAY LIST button. The Edit Playlist screen is displayed.
  • Page 75: Renaming A Playlist Entry

    Enter the desired characters using the Renaming a Playlist Entry …† œ √ buttons. Follow these instructions to rename a playlist entry, i.e. to edit the title of a playlist entry. DVD-Recorder Rename DVD-RW(VR) Dolphin (VR mode) With the DVD Recorder in Stop mode, Save press the PLAY LIST button.
  • Page 76: Editing A Scene For The Playlist

    Editing a Scene for the Playlist Playing a Selected Scene Follow these instructions to edit scenes for a playlist. Press the …† œ √ buttons to select the scene you want to play, then press the OK (VR mode) button. The playlist entry to be played is selected.
  • Page 77 Press the OK button at the end point of the Modifying a Scene (Replacing a Scene) scene. To setup, follow steps 1 to 3 in page 76. DVD-Recorder Modify Scene DVD-RW(VR) Press the …† œ √ buttons to select the Scene No.
  • Page 78 Moving a Scene (Changing the Position of a Scene) You cannot move the selected scene to the ■ position of the next scene, because the NOTE selected scene should be inserted before that position, which requires no action. To setup, follow steps 1 to 3 in page 76. Depending on the kind of disc, the displayed ■...
  • Page 79: Deleting A Scene

    Press the OK button at the end point of the Copying a Playlist Entry to the scene. Playlist DVD-Recorder Add Scene DVD-RW(VR) Scene No. 004 Start Using the PLA LIST button Using the PLA LIST button Title List : 4/6 00:00:15 00:00:35 00:00:35...
  • Page 80: Deleting A Playlist Entry From The Playlist

    Press the …† buttons to select Delete, You can create up to 999 scenes on one ■ then press the OK button. disc. In some cases, this may be different NOTE from the actual numbers. Press the MENU button after the ■...
  • Page 81: Disc Manager

    Enter the desired characters using the Disc Manager …† œ √ buttons. DVD-Recorder Rename DVD-RW(VR) Disc Editing the Disc Name Follow these instructions to give a name to a disc. Save Back Space Space Delete Clear MOVE RETURN EXIT This function is the same as the Rename ●...
  • Page 82: Disc Protection

    Disc Protection Formatting a Disc Disc Protection allows you to protect your discs from Use these instructions to format a disc. being formatted or deleted due to unintended The disc protect should also be cleared. operations. With the DVD Recorder in Stop mode, With the DVD Recorder in Stop mode, press the MENU button.
  • Page 83: Delete All Title Lists

    Press the œ √ buttons to select desired Press the …† buttons to select Disc Manager, then press the OK or √ button. mode, then press the OK button. You will be prompted again with the message ● “All data will be deleted. Do you want to DVD-Recorder Disc Manager continue?”.
  • Page 84: Finalising A Disc

    You will be prompted with the message “Do you want Finalising a disc to finalise disc?”. After you record titles onto a DVD-RW/DVD-R disc with your DVD recorder, it needs to be finalised before it can be played back on external devices. DVD-Recorder Disc Manager DVD-RW(VR)
  • Page 85: Unfinalising A Disc (V/Vr Mode)

    Unfinalising a disc (V/VR mode) Press the œ √ buttons to select Yes, then press the OK button. The disc is unfinalised. A DVD-RW can be finalised or unfinalised ■ With the DVD Recorder in Stop mode, in Video mode. press the MENU button.
  • Page 86: Additional Information

    Troubleshooting Additional If your DVD Recorder malfunctions, go through the checkpoints below before contacting a Samsung autho- Information rised service centre. Power The input is displayed for a while when the power is turned on. The DVD recorder requires some time...
  • Page 87 Playback Cannot play the disc. The angle operation does not work while playing a DVD disc. Check whether the disc is inserted Checkpoint 1 correctly with the label facing up. The angle operation is available only Checkpoint 1 when the disc contains images Check the regional code of the DVD Checkpoint 2 captured from different angles.
  • Page 88: Timer Recording

    Video Timer Recording The disc revolves, but no image or bad quality Timer lamp flickers. images are displayed. Check there is enough space in the Checkpoint 1 Be sure that the Video Setting is Checkpoint 1 disc for recording. properly set. (See pages 34-36) Check whether the current disc is Checkpoint 2 Check whether there is damage to or...
  • Page 89: Remote Control Unit

    Check whether the batteries are empty. Checkpoint 2 If the problem still persists, contact a Checkpoint 3 Check for the TV/DVD selection button. nearby Samsung service centre. Checkpoint 3 Other I forgot my password for parental supervision. Press and hold down the PROG (...
  • Page 90: Specifications

    Specifications Power requirements AC 220-240V, 50Hz Power consumption 21 Watts Weight 2,6 kg General Dimensions 430mm(W) x 240mm(D) x 49mm(H) Operating temp. +5°C to +35°C Other conditions Keep level when operating. Less than 75% operating humidity Composite Video : 1,0 V p-p at 75Ω load, sync negative Video Max.Audio Input Level : 2Vrms Audio...
  • Page 91: Warranty Conditions

    REPUBLIC OF UNITED KINGDOM IRELAND This Samsung product is warranted for the period of 4. This product is not considered to be defective in twelve (12) months from the original date of materials nor workmanship by reason that it purchase, against defective materials and requires adaptation in order to conform to national workmanship.
  • Page 92 Contact SAMSUNG WORLD WIDE If you have any questions or comments relating to Samsung products, please contact the SAMSUNG customer care centre. Contact Samsung wereldwijd Wanneer u suggesties of vragen heeft met betrekking tot Samsung producten, gelieve contact op te nemen met de consumenten dienst van Samsung.
  • Page 93 Correct Disposal of This Product (Waste Electrical & Electronic Equipment) (Applicable in the European Union and other European countries with separate collection systems) This marking shown on the product or its literature, indicates that it should not be disposed with other household wastes at the end of its working life.
  • Page 94 Gebruiksaanwijzing DVD-R128, R129 DVD-R120/R121 DVD-R130, R131 www.samsung.com/be Français English Nederlands AK68-01003C-00...
  • Page 95 Vervangende OVER AAN EEN DESKUNDIGE TECHNICUS. klepjes zijn verkrijgbaar bij uw Samsung dealer. Als de stekker van het apparaat niet geschikt is voor de stopcontacten in uw woning of als de kabel niet lang genoeg is, kunt u zonodig een veilig, goedgekeurd verlengsnoer gebruiken.
  • Page 96: Belangrijke Veiligheidsinstructies

    Externe storingen, zoals bliksem of statische Voorzorgsmaatregelen elektriciteit, kunnen de normale werking van de recorder beïnvloeden. Schakel in dat geval de speler uit en weer in met de STANDBY/ON toets , of haal de stekker uit het stopcontact en steek hem er vervolgens weer in. De recorder werkt daarna weer normaal.
  • Page 97 Dit apparaat kan DVD-R schijven weergeven die zijn (Variable Bit Rate) en een bitsnelheid van 32 Kbps - 320 opgenomen en afgesloten op een Samsung Kbps kan het geluid af en toe wegvallen. DVD-recorder. In sommige gevallen kan een DVD-R Weer te geven bitsnelheid 56Kbps - 320Kbps.
  • Page 98 voltooid, maar nadat de dvd is voltooid, kunt u niet meer De volgende schijven niet gebruiken opnemen, verwijderen of bewerken. Als u in VR-modus en vervolgens in V-modus op de LD, CD-G, CD-I, Video-CD, CD-ROM en DVD-ROM schijf wilt opnemen, moet u Format (Formatteren) schijven niet gebruiken in dit product.
  • Page 99 De afstandsbediening voorbereiden ......11 Inschakelen en automatisch instellen ....25 De afstandsbediening instellen ........11 De klok instellen ............26 Beschrijving .............13 Zenders automatisch instellen ......27 Voorpaneel (DVD-R128) ..........13 Zenders handmatig instellen ........28 Voorpaneel (DVD-R129) ..........13 De taalopties instellen ..........29 Voorpaneel (DVD-R130) ..........14 Tijdsinstelling EP-modus ........30 Voorpaneel (DVD-R131) ..........14...
  • Page 100 Opnemen Inzoomen .................56 Favorieten ................57 Voordat u gaat opnemen ........39 Markeringen ..............58 Geschikte schijven ............39 Audio-CD of MP3-CD afspelen ......59 Schijfindelingen en formatteren ........40 Audio-CD (CD-DA)/MP3 afspelen ........59 Opnamekwaliteit ..............40 Een foto weergeven ..........63 Kopieerbeveiliging ............40 Een MPEG4 afspelen ..........64 INFO toets ...............
  • Page 101: Overzicht Eigenschappen

    Progressief scannen met hoge kwaliteit Overzicht eigenschappen Met progressief scannen krijgt u flikkervrije video van hoge resolutie. Het 10 bit 54-MHz DAC en 2D Y/C scheidingscircuit biedt de hoogste kwaliteit beeldweergave en -opname. (zie pagina’s 21, 35) Met de DVD-recorder is het mogelijk digitale beelden van hoge kwaliteit op DVD-RW/DVD-R-schijven op te nemen Veel functies, comfortabele bediening en af te spelen.
  • Page 102: Voordat U De Gebruiksaanwijzing Leest

    Houd er mag niet (geheel of gedeeltelijk) worden gereproduceerd dan wel rekening mee dat de inhoud of gekopieerd zonder voorafgaande schriftelijke van de schijf verloren kan gaan toestemming van Samsung Electronics Co. wanneer u een ander formaat kiest. Nederlands -...
  • Page 103 Stap 3 Stap 6 Opnemen Sluiten en op andere DVD-onderdelen afspelen Er bestaan twee verschillende opnamemethoden, Wanneer u de DVD op andere DVD-onderdelen wilt afspelen, Directe opname en Timer-opname. Timer-opname is is het soms nodig deze te sluiten. Zorg dat u klaar bent geclassificeerd als een datum: Eenmaal, Dagelijks, met alle bewerkingen en opnamen en sluit de schijf.
  • Page 104: Uitpakken

    Uitpakken Accessoires De afstandsbediening instellen Controleer of de onderstaande accessoires zijn meegeleverd: U kunt met deze afstandsbediening bepaalde functies van van TV's van diverse fabrikanten bedienen. De volgende toetsen zijn hiervoor beschikbaar: STANDBY/ON, PROG / , VOL +/-, Cijfertoetsen, TV MUTE, toets INPUT SEL.
  • Page 105 SONY 35, 48 Instelbare TV-codes TELEAVA MERK TOETS TELEFUNKEN 67, 73, 75, 76 SAMSUNG 01, 02, 03, 04, 05, 06, 07, 08, 09 THOMSON 72, 73, 75 AIWA THOMSON ASIA 80, 81 ANAM 10, 11, 12, 13, 14, 15, 16, 17, 18...
  • Page 106: Beschrijving

    Beschrijving Voorpaneel (DVD-R128) 1. STANDBY/ON 7. AFSPELEN/PAUZE Hiermee zet u de recorder aan of uit. Hiermee speelt u een schijf af of onderbreekt u het afspelen/opnemen. 2. AV3 IN Hierop sluit u externe apparatuur aan. 8. P.SCAN Hiermee selecteert u de progressievescanmodus.
  • Page 107: Voorpaneel (Dvd-R130)

    Voorpaneel (DVD-R130) 1. STANDBY/ON 7. ZOEKEN/OVERSLAAN Hiermee zet u de recorder aan of uit. Hiermee gaat u naar de volgende/vorige titel, het volgende/vorige hoofdstuk of de volgende/vorige track. 2. AV3 IN Hierop sluit u externe apparatuur aan. 8. AFSPELEN/PAUZE Hiermee speelt u een schijf af of onderbreekt u 3.
  • Page 108: Display Voorpaneel

    Display voorpaneel 1. Gaat branden wanneer er een schijf wordt geladen. 4. Gaat branden wanneer er een DVD-R/-RW-schijf 2. Gaat branden in de opnamemodus. wordt geladen. 3. Gaat branden om de timer-opnamestand aan te 5. Afspeeltijd/klok/indicator huidige status. duiden. 6. Gaat branden in de progressieve-scanmodus. Achterpaneel 7.
  • Page 109: De Toetsen Van De Afstandsbediening

    De toetsen van de 10. De toets MENU Hiermee opent u het instellingenmenu van de afstandsbediening DVD-recorder. 11. De toetsen OK/DIRECTION ( 12. De toets TITLE LIST/DISC MENU Hiermee geeft u de lijst met opnamen/menu Schijf (View Recording list/Disc menu) weer. 13.
  • Page 110: Aansluiten En Instellen

    Overzicht Aansluiten Met het overzicht in deze handleiding hebt u voldoende informatie om de recorder te kunnen gebruiken. en instellen De DVD-recorder aansluiten Deze paragraaf beschrijft diverse methoden om de DVD- recorder aan te sluiten op andere externe onderdelen en de vereiste oorspronkelijke instellingsstanden.
  • Page 111: De Dvd-Recorder Aansluiten

    De DVD-Recorder Extra aansluitingen aansluiten Als de televisie over de juiste ingang beschikt, kunt u met U kunt de DVD-Recorder op een satellietontvanger of de scartkabel de DVD-Recorder op de televisie aansluiten. digitale tuner aansluiten. 1. Sluit de RF-kabel aan zoals is weergegeven. 2.
  • Page 112: Andere Manier Voor Het Aansluiten Van De Video Uitgangskabel

    Antenne + DVD-Recorder + Andere manier voor het externe decoderbox + TV aansluiten van de video uitgangskabel Er zijn verschillende manieren om videosignalen te Als u de externe decoderbox op de DVD-recorder verzenden zonder scartkabels te gebruiken. Selecteer aansluit, kunt u gecodeerde kanalen (uitzendingen van uit de onderstaande lijst met video-aansluitingen de CANAL+ of Premiere) opnemen die worden ontvangen aansluiting die voor u het meest geschikt is.
  • Page 113: Situatie 1 : Aansluiten Op Een (Composite)

    Situatie 1 : Aansluiten op een Situatie 2 : Aansluiten op een (Composite) Video-uitgang S-Video-uitgang 1. Gebruik een S-videokabel (niet bijgeleverd) om de 1. Gebruik een videokabel (geel) om de video-uitgang S-video- uitgang op de DVD-recorder aan te sluiten (geel) op de DVD-Recorder aan te sluiten op de op de S-video-ingang op de tv (of AV-versterker).
  • Page 114: Andere Manier Voor Het Aansluiten Van De Audio- Uitgangskabel

    Situatie 3 : Componentvideo Andere manier voor het uitgangen aansluiten van de audio- 1. Gebruik componentvideokabels (niet bijgeleverd) om de COMPONENT OUT-aansluitingen (Y,P ) op de uitgangskabel DVD-recorder te verbinden met de COMPONENT IN- aansluitingen (Y,P ) op de tv. 2.
  • Page 115: Situatie 3: Aansluiten Op Een Av-Versterker Met Een Digitale Uitgang

    Situatie 2 : Aansluiten op een Situatie 3: Aansluiten op een stereoversterker met AV-uitgangen AV-versterker met een digitale uitgang Gebruik de audio-uitgangen als uw stereoversterker alleen audio-ingangen (L en R) heeft. Gebruik deze aansluiting als uw versterker een Dolby Digital MPEG2 of DTS-decoder en een digitale ingang heeft.
  • Page 116: Aansluiten Op Av3 In- Of Dv-In-Aansluitingen

    Situatie 2 : Een camcorder op Aansluiten op AV3 IN- of de DV IN-aansluiting aansluiten DV-IN-aansluitingen (alleen DVD-R130, R131) (alleen DVD-R130, R131) Als uw digitale camcorder over een DV-uitgang beschikt, sluit deze dan aan op de DV-ingang van de DVD-recorder. Hiermee kunt u de DVD-recorder op andere externe apparaten aansluiten en hun uitvoer weergeven of opnemen.
  • Page 117: Instellingen

    Menunavigatie op het TV-scherm Instellingen Met de menu’s op het scherm kunt u diverse functies op de DVD-recorder in- of uitschakelen. Gebruik de volgende toetsen om de menu’s te openen en erdoorheen te bladeren. DVD-Recorder Programma DVD-Recorder Titellijst Geen schijf DVD-RW (VR) Programma Titellijst...
  • Page 118: Inschakelen En Automatisch Instellen

    • Zie de onderstaande tabel met afkortingen bij het selecteren Inschakelen en van “Land”. automatisch instellen A(Oostenrijk) NL(Nederland) S(Zweden) PL(Polen) B(België) I(Italië) CH(Zwitserland) CZ (Tsjechië) DK(Denemarken) N(Noorwegen) TR(Turkije) Ander FIN(Finland) P(Portugal) GR(Griekenland) De DVD-recorder wordt automatisch ingesteld als deze D(Duitsland) E(Spanje) HU(Hongarije) voor het eerst wordt ingeschakeld.
  • Page 119: De Klok Instellen

    Druk op toetsen ▲▼ om Aan De klok instellen te selecteren voor de automatische klokfunctie . DVD-Recorder Klok Instellen Geen schijf Programma Instellen Datum Tijd Klok automatisch Dit menu wordt gebruikt om de huidige tijd in te stellen. 2006 Om de timer-opname te gebruiken moet u de tijd instellen. Druk op de toets MENU met het apparaat VERPL.
  • Page 120: Zenders Automatisch Instellen

    Druk op de toetsen ▲▼ om Autom. Zenders automatisch instellen te selecteren en druk op OK of op de toets ►. instellen Het Landselectiescherm wordt weergegeven. DVD-Recorder Installeren Geen Landkeuze Met deze functie kunt u de DVD-recorder automatisch schijf Autom. setup ►...
  • Page 121: Zenders Handmatig Instellen

    Druk op de toetsen ▲▼ om Handmatige Zenders handmatig instellen te selecteren en druk op OK of op de toets ►. instellen Handmatig instellen PR CH Naam Decoder Systeem Bewerken ---- ► Het is mogelijk een kanaal toe te voegen dat de functie ---- ►...
  • Page 122: De Taalopties Instellen

    Druk op de toetsen ▲▼ om de gewenste De taalopties instellen taaloptie te selecteren en druk op OK of op de toets ►. Geluid : Voor het speakergeluid. Ondertiteling : Voor de ondertitels van de schijf. Schijftaal : Voor het menu op de schijf. Schermmenu : Voor het scherm van uw Indien u het geluid, de ondertiteling, het menu van de DVD-recorder...
  • Page 123: Tijdsinstelling Ep-Modus

    Druk op de toetsen ▲▼ om Tijd EP- Tijdsinstelling EP-modus modus te selecteren en druk op OK of op de toets ►. DVD-Recorder Systeem Geen schijf Programma Tijd EP-modus : 6 uur 6 uur ► 8 uur U kunt een van de vier opnamestanden selecteren door Instellen Hoofdstuk maken ►...
  • Page 124: Automatisch Hoofdstuk Maken

    Druk op de toetsen ▲▼ om Aan of Uit te Automatisch hoofdstuk selecteren en druk op OK of op de toets ►. • Uit : Selecteer deze optie wanneer u niet automatisch maken hoofdstukken wilt samenstellen. • Aan : Selecteer deze optie wanneer u wel automatisch hoofdstukken wilt samenstellen.
  • Page 125: Functie Voor Snel Opnemen

    Druk op de toetsen ▲▼ om Aan te Functie voor snel opnemen selecteren, en druk vervolgens op OK of op de toets ►. Als u deze functie heeft ingeschakeld, zullen de dvd-recorder en de televisie tegelijkertijd aan gaan, waardoor u direct van een gewenst kanaal kunt opnemen.
  • Page 126: Geluidsopties

    Druk op de toetsen ▲▼ om Geluid te selecteren en druk op OK of op de toets ►. Het menu met geluidsinstellingen verschijnt. 1. Uit : Verzendt geen DTS-signaal. Selecteer deze optie wanneer uw AV-ontvanger of AV-versterker niet voorzien is van een DTSdecoder. DVD-Recorder Geluid 2.
  • Page 127: De Opties Voor Video-Uitvoer Instellen

    Druk op de toetsen ▲▼ om Video uitvoer te De opties voor video selecteren en druk op OK of op de toets ►. uitvoer instellen DVD-Recorder Beeld Geen schijf Programma Breedte/hoogte TV : 16:9 Breed ► Instellen 3D-ruisonderdrukking : Uit ►...
  • Page 128: Progressief Scannen Instellen

    Progressief scannen Progressief scannen instellen annuleren Als de tv Progressieve scan ondersteunt, drukt u op de toets P.SCAN op de voorkant van de DVD- Druk op de toets P.SCAN op de voorkant recorder om hogere kwaliteit videobeelden te krijgen. van de DVD-recorder terwijl de eenheid in de stopstand staat.
  • Page 129: De Beeldopties Instellen

    Druk op de toets RETURN of op de toets De beeldopties instellen oe ◄ om naar het vorige menu terug te keren. Druk op de toets MENU om het menu af te sluiten. Beeldopties Met deze functie kunt u de tv-scherminstellingen invoeren. Deze functie hangt af van het schijftype.
  • Page 130: Kinderslot Instellen

    Geef de viercijferige toegangscode in met Kinderslot instellen de toetsen 0 t/m 9 op de afstandsbediening. Het bericht ‘Toegangscode bevestigen’ verschijnt. Geef de toegangscode nogmaals in. DVD-Recorder Kinderslot Geen schijf Programma De functie Kinderslot werkt bij DVD’s die voorzien zijn Instellen Toegangscode bevestigen van een classificatie.
  • Page 131: Het Classificatieniveau

    Het classificatieniveau De toegangscode Druk op de toetsen ▲▼ om Niveau te Druk op de toetsen ▲▼ om selecteren. Toegangscode wijzigen te selecteren. DVD-Recorder Kinderslot DVD-Recorder Kinderslot Geen schijf Geen schijf Programma Toegangscode : Aan Programma ► Toegangscode : Aan ►...
  • Page 132: Voordat U Gaat Opnemen

    In dit hoofdstuk vindt u verschillende methodes voor het opnemen van DVD’s. Deze recorder kan opnemen op de volgende schijftypes. DVD-RW DVD-R DVD-RW zijn herschrijfbaar (rewritable) DVD-R is niet herschrijfbaar Compatibiliteit tussen recorders van Samsung en andere merken Schijftypes Opname- Opgenomen Afsluiten Opname toevoegen...
  • Page 133: Schijfindelingen En Formatteren

    Schijfindelingen en formatteren Opnameduur Opnamekwaliteit Kenmerken en bitsnelheid Aangezien de beschikbare functies verschillen per schijftype, selecteert u een schijf die het beste aan uw Kies hiervoor wanneer circa 1 uur wensen voldoet. Wanneer u een lege schijf plaatst, de beeldkwaliteit (hoge kwaliteit) circa 8 Mbps verschijnt het volgende bericht...
  • Page 134: Info Toets

    INFO toets Tv-programma opnemen terwijl u er naar kijkt Voordat u begint Met de INFO functie ziet u de huidige status/voortgang van weergave en opname. Afhankelijk van type en status van Controleer of de schijf voldoende ruimte heeft voor de de schijf kan het scherm er in werkelijkheid anders uitzien.
  • Page 135 Druk enkele malen op de REC MODE Opname beëindigen toets (of druk op de REC MODE toets Druk op de toets STOP om een opname te beëindigen. en vervolgens op de ▲▼ toets) om de Bij DVD-RW/DVD-R schijven verschijnt nu de melding: opnamekwaliteit in te stellen.
  • Page 136: Van Een Camcorder Kopiëren

    Druk op de REC toets. Materiaal opnemen van externe apparatuur terwijl u er naar kijkt Opname pauzeren Druk op de toets PLAY/PAUSE( ) om een opname te onderbreken. Druk nogmaals op de toets PLAY/PAUSE( ) om het opnemen voort te zetten. Voordat u gaat opnemen Wanneer de opname is gepauzeerd, kunt u met de ( / )
  • Page 137: Opnameduur Met 1 Toets Instellen (Otr)

    Druk op de OPEN/CLOSE toets om de Wanneer de recorder aan het opnemen is, lade te sluiten. kunt u geen andere ingang of kwaliteit kiezen. Wacht tot de tekst “LOAD” uit het display verdwijnt. De opname stopt automatisch wanneer er Als u een lege DVD-RW schijf hebt geplaatst, wordt geen ruimte meer vrij is op de schijf.
  • Page 138: Een Timer-Opname Maken

    Als u de huidige status van de schijf en de voortgang Een timer-opname maken van de opname wilt bekijken, drukt u op de INFO toets. Eerst verschijnt de schijfinformatie: DVD-RW(VR) Schijfinfo Schijfnaam Aantal titels Aantal afspeellijsten 1 Voordat u gaat opnemen Opnametijd 02:12 SP Beveiliging...
  • Page 139: Automatische Keuze Opnamekwaliteit

    Druk op de OK toets. • Bron: De video-ingang (“AV1”, “AV2”, “AV3”), of de zender waarvoor u een timer-opname Als timer-opnamen elkaar overlappen wilt instellen. Als programma’s elkaar overlappen, krijgt het eerste • Dag : U kunt de opnametijd van een timer- programma voorrang.
  • Page 140: Timer-Opname Wijzigen

    Druk op de ▲▼ toetsen om Bewerken te Timer-opname wijzigen selecteren en druk vervolgens op de OK of de ► toets. Het ingavescherm voor een timer-opname wordt getoond. Wijzig de gewenste items. Zie het hoofdstuk “Timer-opname instellen” voor meer informatie over de invoeropties voor een Timer-opname.
  • Page 141: Timer-Opname Starten

    Druk op de ▲▼ toetsen om het Timer-opname starten volgnummer te selecteren van de timer- opname die u wilt erwijderen. Druk vervolgens op de OK of op de ► toets. De items Bewerken en Verwijder worden getoond. Als de begintijd in de lijst met geplande opnamen wordt DVD-Recorder bereikt terwijl het apparaat is uitgeschakeld, wordt dit Lijst van geplande opnamen...
  • Page 142: Weergeven

    Voordat u een schijf afspeelt Weergeven Lees de volgende informatie voordat u een schijf afspeelt. Regiocode (alleen DVD-Video) In dit hoofdstuk vindt u informatie over de basisfuncties voor opname en weergave op de Zowel de DVD-recorder als de schijven verschillende schijftypes. bevatten een regiocode.
  • Page 143: Schijf Afspelen

    Doe de schijf voorzichtig in de lade (etiket Weergave en/of opname van bepaalde boven). schijftypes is soms niet mogelijk, bijvoorbeeld wanneer gebruik wordt gemaakt van wijzigen van beeldhoek of beeldverhoudingen. Raadpleeg zo nodig de gedetailleerde Druk op de OPEN/CLOSE toets om de informatie op de doos van de schijf.
  • Page 144: Schijfmenu En Titelmenu

    Zoekfuncties Schijfmenu en titelmenu Sommige schijven bevatten een speciaal menusysteem waarmee u bijzondere functies voor de titel(s) kunt kiezen, zoals hoofdstukken, geluidstrack, ondertitels, filmtrailers, informatie over rollen, etc. Voor DVD-VIDEO schijven Druk op de DISC MENU toets om het menu van de schijf te openen. Hoofdstuk of track versneld weergeven Ga naar het menu met weergave-instellingen.
  • Page 145: Vertraagde Weergave

    ANYKEY functie Hoofdstukken of tracks overslaan Tijdens het afspelen kunt u snel een hoofdstuk of track doorzoeken. Druk tijdens het afspelen op de toets SKIP ) toets van de afstandsbediening. Als u op de SKIP ( ) toets drukt, gaat de weergave naar het begin van het volgende hoofdstuk, track of markering (DVD-RW in VR stand).
  • Page 146: Herhalen

    Herhalen Als u naar een bepaald tijdstip wilt om een scène te vinden. Druk tijdens weergave op de ANYKEY toets. DVD-VIDEO Titel 1/28 Hoofdstuk 00:00:01 Tijd Ondertitels Geluid D 5.1CH Herhalen Beeldhoek Zoom VERPL. WIJZIGEN Weergave herhalen Druk op de ▲▼ toetsen om de Tijd te Met de REPEAT toets selecteren .
  • Page 147 Gedeelte (A-B) herhalen Met de ANYKEY ANYKEY toets Druk tijdens weergave op de ANYKEY toets. DVD-VIDEO Met de ANYKEY toets Titel 1/28 Hoofdstuk 00:00:01 Tijd Ondertitels Geluid D 5.1CH Herhalen Druk tijdens weergave op de ANYKEY Beeldhoek Zoom toets. VERPL. WIJZIGEN DVD-VIDEO Titel...
  • Page 148: Taal Van Ondertitels Selecteren

    Taal van ondertitels selecteren Taal van geluidsspoor selecteren Ondertitels zijn niet altijd beschikbaar, afhankelijk van de De taalkeuze is niet altijd beschikbaar, afhankelijk van schijf. Ondertitels kunnen alleen tijdens weergave worden de schijf. De taal kan alleen tijdens weergave worden gekozen.
  • Page 149: Beeldhoek Kiezen

    Beeldhoek kiezen Inzoomen Als een Video-DVD meer beeldhoeken bevat van een bepaalde scène, kunt u gebruik maken van de Angle functie. Deze is alleen beschikbaar tijdens weergave. Als de schijf meerdere camerastandpunten bevat, wordt de Druk tijdens pauze of weergave op de indicatie HOEK (ANGLE) op het scherm weergegeven.
  • Page 150: Favorieten

    Favorieten Favoriet afspelen Met deze functie kunt u secties van een DVD-VIDEO of DVD-R/-RW(V-modus) markeren, zodat u ze later snel terug kunt vinden. Druk tijdens weergave op de MARKER toets. (V modus) Druk op de ◄ ► toetsen om een favoriete scène te selecteren.
  • Page 151: Markeringen

    Markeringen Gemarkeerde scène afspelen Druk tijdens weergave op de MARKER (VR modus) toets. Druk tijdens weergave op de MARKER toets. Ga met de ◄ ► toetsen naar een gemarkeerde scène. Markeren -- -- -- -- -- -- -- -- -- N : 0 -- -- -- -- -- -- -- -- Markeren...
  • Page 152: Audio-Cd Of Mp3-Cd Afspelen

    Knoppen op de afstandsbediening voor het afspelen van muziek-CD’s (CDDA) Audio-CD of MP3-CD afspelen Audio-CD (CD-DA)/MP3 afspelen Voor ieder type schijf zijn diverse menufuncties beschikbaar. Audio-cd afspelen (CD-DA) Doe een Audio-CD (CD-DA) in de lade. Het audio-cd menu verschijnt en de tracks (nummers) worden automatisch afgespeeld.
  • Page 153 MP3 schijf afspelen MP3 CD - indeling scherm Muzieklijst Doe een MP3 schijf in de lade. SONG01 01/13 Titel ROOT DVD-Recorder Schijfnavigatie SONG01 SONG02 0:00:15 ► DivX SONG03 Schijfnavigatie ► SONG01 Foto SONG04 ► 4.0MB Programma SONG05 01/26/2006 Muziek ► Instellen SONG06 PLAY MODE...
  • Page 154 Toetsen op de afstandsbediening voor het afspelen van MP3’s Herhaald afspelen Met de REPEAT toets Druk tijdens het afspelen op de REPEAT toets. Het pictogram Herhalen Track ( ) verschijnt, en de geselecteerde track wordt herhaaldelijk afgespeeld. Muzieklijst TRACK 1 01/15 Titel Lengte...
  • Page 155 Afspeeloptie Met de ANYKEY toets De functie Afspeeloptie kan worden gebruikt bij audio-CD’s en MP3-CD’s tijdens weergave of in de Stop stand. Druk tijdens het afspelen op de ANYKEY toets. Het scherm AFSPEELMODUS verschijnt. Druk in de stopstand op de ANYKEY toets. Muzieklijst 01/15 TRACK 1...
  • Page 156: Een Foto Weergeven

    Tracks programmeren (afspeellijst) Een foto weergeven U kunt tot 30 tracks opnemen in een afspeellijst. Druk in de stopstand op de ANYKEY toets. Het scherm AFSPEELMODUS verschijnt. Plaats een JPEG-schijf in de schijflade. Muzieklijst 01/15 TRACK 1 DVD-Recorder Schijfnavigatie Titel Lengte TRACK 1 00:03:50...
  • Page 157: Een Mpeg4 Afspelen

    -1 Wanneer u op de toets PLAY drukt, Een MPEG4 afspelen wordt het scherm Snelheid diavoorstelling weergegeven. Druk op de toetsen ◄ ► om de snelheid van de diavertoning in te stellen en druk op OK. MPEG4-bestanden bevatten beeld en geluid. MPEG4-bestanden met de volgende extensies kunnen worden afgespeeld.
  • Page 158: Titels Uit De Titellijst Afspelen

    MPEG4 Functiebeschrijving Titels uit de Titellijst Functie Beschrijving afspelen Skip Druk tijdens het afspelen op SKIP ( ) om 5 ( of ) minuten vooruit of terug te springen. Druk tijdens het afspelen op SEARCH ( Search en druk nogmaals voor een hogere zoeksnelheid. ( of ) Snel 1, Snel 2, Snel 3 Druk in de modus Pause of Step op de toets...
  • Page 159 Selecteer Titellijst met de ▲▼ toetsen en Druk nogmaals op de INFO toets. Nu kunt u de druk vervolgens twee keer op de OK of ► informatie bekijken van de titel die momenteel wordt toets. afgespeeld. Het Titellijst scherm wordt getoond. DVD-RW(VR) Afspeelinfo Naam...
  • Page 160 Titellijst - indeling scherm DVD-RW(VR) DVD-RW(VR) Titellijst Titellijst APR/21/2006 APR/21/2006 Titel Lengte Bewerken Titel Lengte Bewerken 01 APR/19/2006 12:00 00:00:21 01 APR/19/2006 12:00 00:00:21 ► ► 02 APR/19/2006 12:30 00:00:03 02 APR/19/2006 12:30 00:00:03 ► ► Afspelen 03 APR/20/2006 12:00 00:00:15 03 APR/20/2006 12:00 00:00:15 ►...
  • Page 161: Bewerken

    Bewerken In dit hoofdstuk maakt u kennis met de basisfuncties voor het bewerken van DVD’s, zowel voor afzonderlijke opnamen als de gehele schijf. Titellijst Een Titel is een opgenom0en video/audio stream. De Titellijst bevat een lijst van alle titels op de schijf, waaruit u een keuze kunt maken.
  • Page 162: Bewerken, Basisfuncties (Titellijst)

    Selecteer de gewenste tekens met de Bewerken, basisfuncties ▲▼◄ ► toetsen en druk op de OK toets. (Titellijst) DVD-Recorder Hernoemen DVD-RW(VR) Sports(A1) Naam van een titel wijzigen Opslaan Volg de onderstaande aanwijzingen op om de naam Backspace Spatie Verwijderen Wissen van een opgenomen programma te wijzigen.
  • Page 163: Titelbeveiliging (Vergrendelen)

    Titelbeveiliging (vergrendelen) Druk op de ◄ ► toetsen om Aan te selecteren en druk vervolgens op de OK Volg de onderstaande aanwijzingen op om een titel toets. Het slot (symbool bij de titel in het tegen from accidental deletion. informatievenster) is nu gesloten. ( Titellijst DVD-RW(VR) Sports (A1)
  • Page 164: Deel Van Een Titel Verwijderen

    Deel van een titel verwijderen Druk op de toetsen ▲▼ om Wissen te selecteren en druk op OK of ► toets. Volg de onderstaande aanwijzingen op om een gedeelte van een opname uit de Titellijst te verwijderen. DVD-RW(VR) Titellijst Sports (A1) Titel Lengte Bewerken Drama...
  • Page 165 Druk aan het begin van het te verwijderen Druk op OK bij Wissen. gedeelte op de OK toets. Het bericht “Wilt u dit echt verwijderen?(Verwijderd Het eerste beeld en de starttijd van het te verwijderen deel kan niet worden hersteld.)” wordt weergegeven. gedeelte worden getoond in het betreffende venster.
  • Page 166: Bewerken, Geavanceerd (Afspeellijst)

    Druk bij het gewenste eindpunt op de OK Bewerken, geavanceerd toets. (Afspeellijst) DVD-Recorder Scène maken DVD-RW (VR) Scènenr. 001 Begin Einde Afspeellijst maken Titellijst: 1/6 00:00:10 00:10:00 00:10:00 Begin Einde Maken Terug Volg de onderstaande aanwijzingen op om een nieuwe afspeellijst te maken op basis van een opgenomen titel.
  • Page 167: Scènes Uit De Afspeellijst Afspelen

    Scènes uit de Afspeellijst afspelen Druk op de ▲▼ toetsen om Afspelen te selecteren. Druk vervolgens op de OK Volg de onderstaande aanwijzingen op om de scènes toets. uit de afspeellijst af te spelen. ► Afspelen (VR modus) Druk in de stopstand op de toets PLAY LIST.
  • Page 168: Naam Van Afspeellijst Scène Wijzigen

    Naam van Afspeellijst scène wijzigen Geef de gewenste tekens in met de ▲▼◄► toetsen. Volg de onderstaande aanwijzingen op om de naam van een scène uit de playlist te wijzigen. DVD-Recorder Hernoemen DVD-RW (VR) Dolphin (VR modus) Druk in de stopstand op de toets PLAY Opslaan LIST.
  • Page 169: Afspeellijst Scène Opzoeken

    Afspeellijst scène opzoeken Geselecteerde scène afspelen Volg de onderstaande aanwijzingen op om een scène op te zoeken in de afspeellijst. Druk op de ▲▼◄ ► toetsen om de scène te selecteren die u wilt afspelen. (VR modus) Druk vervolgens op de OK toets. De af te spelen scène wordt geselecteerd.
  • Page 170 Druk bij het gewenste eindpunt van de Scène bewerken (vervangen) scène op de OK toets. U kunt de instellingen wijzigen door stap 1 t/m 3 op pagina 76 te volgen. DVD-Recorder Scène wijzigen DVD-RW(VR) Scènenr. 002 Begin Einde Druk op de ▲▼◄ ► pijltjestoetsen om de scène te selecteren die u wilt wijzigen.
  • Page 171 Scène verplaatsen binnen Afspeellijst U kunt de geselecteerde scène niet verplaatsen naar de positie van de volgende scène. De geselecteerde scène wordt namelijk direct voor de gekozen positie tussengevoegd - en in dit geval staat hij daar al. U kunt de instellingen wijzigen door stap 1 t/m 3 op pagina 76 te volgen.
  • Page 172: Scène Binnen De Afspeellijst Kopiëren

    Scène binnen de Afspeellijst kopiëren Druk bij het eindpunt van de scène op de OK toets. DVD-Recorder Scène toevoegen DVD-RW (VR) Scènenr. 004. Met de PLAY LIST toets Begin Einde Titellijst: 4/6 00:00:15 00:00:35 00:00:35 Druk in de stopstand op de toets PLAY Toev.
  • Page 173: Scène Uit De Afspeellijst Verwijderen

    Ga met de ▲▼ toetsen naar Verwijderen U kunt tot 999 scènes opnemen op één en druk vervolgens op de OK toets. schijf. In sommige gevallen wijkt dit af van het werkelijke aantal. Druk op de toets MENU nadat de bewerking Afspeellijst bewerken DVD-RW(VR) is voltooid.
  • Page 174: Schijfbeheer

    Voer de gewenste tekens in met de toetsen Schijfbeheer ▲▼◄ ►. DVD-Recorder Hernoemen DVD-RW (VR) Schijf Naam van de schijf wijzigen Volg de onderstaande aanwijzingen op om de schijf een Opslaan andere naam te geven. Backspace Spatie Verwijderen Wissen VERPL. TERUG EINDE Deze functie is dezelfde als de functie Hernoemen...
  • Page 175: Schijfbeveiliging

    Schijfbeveiliging Schijf formatteren Met de schijfbeveiliging kunt u de inhoud van uw Gebruik deze instructies om een schijf in te delen. schijven beveiligen tegen onbedoeld wissen of De schijfbeveiliging moet worden opgeheven. formatteren. Druk in de stopstand op de toets MENU. Druk in de stopstand op de toets MENU.
  • Page 176: Alle Titellijsten Verwijderen

    Druk op de ▲▼ toetsen om Schijfbeheer te Druk op de toetsen ◄ ► om de gewenste afspeelmodus te selecteren en druk selecteren. Druk vervolgens op de OK of ► toets. vervolgens op de toets OK. Het bevestigingsbericht “Alle gegevens DVD-Recorder Schijfbeheer worden verwijderd.
  • Page 177: Schijf Afsluiten

    Schijf afsluiten U krijgt nu de vraag: “Wilt u deze schijf afsluiten?” Nadat u met uw DVD-recorder titels op een DVD- RW/DVD-R schijf hebt opgenomen, moet de schijf nog DVD-Recorder Schijfbeheer DVD-RW (VR) worden afgesloten voordat hij in andere DVD-spelers Titellijst Schijfnaam : ►...
  • Page 178: Afsluiten Ongedaan Maken (Video Of Vr Modus)

    Afsluiten ongedaan maken Druk op de ◄ ► toetsen om Ja te selecteren en druk vervolgens op de OK (Video of VR modus) toets. Het afsluiten wordt ongedaan gemaakt. Druk in de stopstand op de toets MENU. Een DVD-RW kan worden afgesloten en de afsluiting kan ongedaan worden gemaakt in DVD-Recorder Titellijst...
  • Page 179: Aanvullende Informatie

    Aanvullende Als u een probleem hebt met dit product, neem dan de onderstaande checklist door voordat u contact opneemt Informatie met een geautoriseerd service center van Samsung. Apparaat inschakelen Het ingangssignaal wordt enige tijd weergegeven wanneer de recorder wordt aangezet.
  • Page 180 Afspelen Ik kan de schijf niet afspelen. Ik kan geen beeldhoeken kiezen wanneer ik een DVD afspeel. Controleer of de schijf goed in de lade zit Controle 1 (etiket boven). Er kunnen alleen andere beeldhoeken Controle 1 worden gekozen wanneer het Controle 2 Controleer de regiocode van de DVD- beeldmateriaal op de schijf is opgenomen...
  • Page 181: Timer-Opname

    Beeld Timer-opname De schijf draait, maar er is geen beeld of het beeld Timerlampje knippert. is van slechte kwaliteit. Controleer of de schijf voldoende vrije Controle 1 Zorg ervoor dat de beeldinstelling correct Controle 1 ruimte heeft. is ingesteld (zie pagina’s 34-36). Controleer of de huidige schijf Controle 2 Controleer of de schijf is beschadigd of...
  • Page 182 Controleer of de batterijen leeg zijn. Controle 2 Als het probleem blijft bestaan, neem dan Controle 3 Druk op de TV/DVD keuzetoets. contact op met een Samsung service Controle 3 center in de buurt. Overige Ik ben de toegangscode van het kinderslot vergeten.
  • Page 183: Specificaties

    Specificaties Aansluitwaarden 220-240 V AC, 50 Hz Energiegebruik 21 Watt Gewicht 2,6 kg Algemeen Afmetingen 430mm(B) x 240mm(D) x 49mm(H) Gebruikstemperatuur +5°C to +35°C Overige vereisten Waterpas opstellen tijdens gebruik. Luchtvochtigheid max. 75% Composiet video : 1,0 V p-p bij 75Ω belasting, sync negatief Beeld Max.
  • Page 184: Garantiecondities

    3. Reparaties onder garantie moeten door Samsung erkende service-centra worden uitgevoerd. Er zal geen vergoeding plaatsvinden voor reparaties uitgevoerd door niet erkende Samsung dealers of niet erkende servicecentra. Alle daaruit voortvloeiende schades vallen niet onder deze garantie.
  • Page 185: Conditions De Garantie

    LUXEMBOURG BELGIQUE Cet appareil Samsung est couvert par une garantie de douze (12) mois - à moins qu’une autre période de garantie ne soit fixée dans la législation ou réglementation nationale ou européenne - à partir de la date d’...
  • Page 186 Contact SAMSUNG WORLD WIDE If you have any questions or comments relating to Samsung products, please contact the SAMSUNG customer care centre. Contact Samsung wereldwijd Wanneer u suggesties of vragen heeft met betrekking tot Samsung producten, gelieve contact op te nemen met de consumenten dienst van Samsung.
  • Page 187 Correcte verwijdering van dit product (elektrische & elektronische afvalapparatuur) Dit merkteken op het product of het bijbehorende informatiemateriaal duidt erop dat het niet met ander huishoudelijk afval verwijderd mag worden aan het einde van zijn gebruiksduur. Om mogelijke schade aan het milieu of de menselijke gezondheid door ongecontroleerde afvalverwijdering te voorkomen, moet u dit product van andere soorten afval scheiden en op een verantwoorde manier recyclen, zodat het duurzame hergebruik van materiaalbronnen wordt bevorderd.
  • Page 188 Manuel de l’utilisateur DVD-R128, R129 DVD-R130, R131 www.samsung.com/be English Nederlands Français AK68-01003C-00...
  • Page 189 NOTE IMPORTANTE Avertissement La ligne d’alimentation de cet équipement contient une prise avec un fusible. La valeur de ce fusible est indiqué sur la fiche de la prise. Si celui-ci doit être remplacé, utilisez un fusible du même ampérage approuvé par le BS1362.
  • Page 190: Instructions Importantes Relatives À La Sécurité

    Des interférences extérieures (orage, électricité statique) Précautions peuvent affecter le fonctionnement normal de ce graveur. Dans ce cas, éteignez le graveur puis rallumez-le à l’aide du bouton STANDBY/ON ou débranchez puis rebranchez le cordon d’alimentation CA sur la prise murale CA. Le graveur devrait alors fonctionner normalement.
  • Page 191: Stockage Du Disque

    Cet appareil peut lire des disques DVD-R enregistrés variable, de 32 Kbps à 320 Kbps, le son peut être coupé et finalisés avec un graveur de DVD vidéo Samsung. Il La gamme de debits binaries pouvant être lus va de peut ne pas pouvoir lire certains disques DVD-R selon le 56Kbps à...
  • Page 192: Compatibilité Des Disques

    la commande Formater. Faites attention lorsque vous N’utilisez pas les disques suivants ! exécutez la commande Formater car toutes les données enregistrées risquent d’être perdues. Les disques laser, CD-G, CD interactifs, CD vidéo, Un disque DVD-RW vierge est initialisé en mode VR CD-ROM, DVD-ROM ne doivent pas être utilisés avec lorsqu’il est initialisé...
  • Page 193 Branchement et réglage automatique......25 Réglage de la télécommande .........11 Réglage de l’horloge ..........26 Description ..............13 Pré-réglage des canaux avec la fonction de réglage Façade (DVD-R128) ............13 automatique ...............27 Façade (DVD-R129) ............13 Pré-réglage des canaux avec la fonction de réglage Façade (DVD-R130) ............14 manuel ...............28...
  • Page 194 Si vous avez oublié votre code secret ......37 Sélection des sous-titres ..........55 A propos du niveau d’évaluation ........38 Sélection de la langue audio ..........55 A propos du Changement de mot de passe ....38 Changer l’angle de la caméra ........56 Zoom avant ..............56 Enregistrement Utilisation des signets .............57 Utilisation des marqueurs ..........58...
  • Page 195: Caractéristiques Générales

    Balayage progressif haute qualité Caractéristiques Le balayage progressif procure une vidéo haute résolution et sans scintillement. Les circuits de séparation 10 bits, 54 générales MHz DAC et 2D Y/C procurent la meilleure lecture d’image et la plus haute qualité d’enregistrement. (Voir pages 21, 35) L’enregistreur DVD vous permet d’enregistrer et de lire une vidéo numérique de haute qualité...
  • Page 196: Avant De Lire Le Manuel De L'utilisateur

    Copyright Vous pouvez changer le format DVD-RW ©2006 Samsung Electronics Co. Tous droits réservés. Ce pour un autre format par réinitialisation. manuel de l’utilisateur ne devra en aucune manière être Remarque : le changement de format reproduit ou copié, intégralement ou partiellement, sans...
  • Page 197: Edition D'un Disque Enregistré

    Enregistrement Finalisation et lecture sur d’autres composants DVD Étape 3 Étape 6 Une finalisation peut s'avérer nécessaire pour lire le Il existe deux méthodes d’enregistrement l’enregistrement direct DVD sur un autre lecteur. Terminez dans un premier et l’enregistrement programmé. L’enregistrement programmé temps les modifications et les enregistrements, puis est classé...
  • Page 198: Déballage

    Déballage Accessoires Réglage de la télécommande Vérifiez la présence des accessoires fournis ci-dessous. Vous pouvez commander certaines fonctions d’un téléviseur d’un autre fabricant grâce à cette télécommande. Les boutons de fonction de commande comprennent : les boutons STANDBY/ON, PROG / , VOL +/-, les touches numériques directes, les boutons TV MUTE, INPUT SEL.
  • Page 199 TELEAVA Codes TV contrôlables TELEFUNKEN 67, 73, 75, 76 MARQUE BUTTON THOMSON 72, 73, 75 SAMSUNG 01, 02, 03, 04, 05, 06, 07, 08, 09 THOMSON ASIA 80, 81 AIWA TOSHIBA 47, 48, 49, 50, 51, 52 ANAM 10, 11, 12, 13, 14, 15, 16, 17, 18 WEGA BANG &...
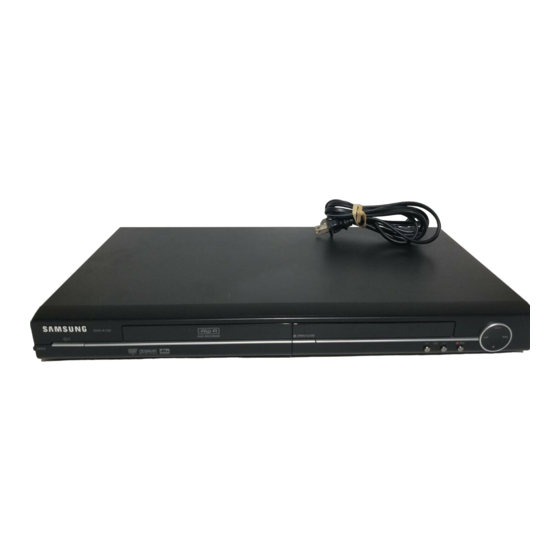
  • Page 200: Description

    Description Façade (DVD-R128) 1. STANDBY/ON 7. PLAY/PAUSE (LECTURE / PAUSE) Allume et éteint l’enregistreur. Permet de lire un disque ou de mettre en pause la lecture/l’enregistrement. 2. AV3 IN Permet de connecter un équipement externe. 8. P.SCAN Permet de sélectionner le mode de balayage progressif 3.
  • Page 201: Façade (Dvd-R130)

    Façade (DVD-R130) 1. STANDBY/ON 7. SEARCH/SKIP Allume et éteint l’enregistreur. Permet d’aller au titre/au chapitre/à la plage suivants ou de revenir au titre/au chapitre/à la plage précédents. 2. AV3 IN 8. PLAY/PAUSE (LECTURE / PAUSE) Permet de connecter un équipement externe. Permet de lire un disque ou de mettre en pause la 3.
  • Page 202: Affichage En Façade

    Affichage en façade 1. S’allume lorsqu’un disque est chargé. 4. S’allume lorsqu’un DVD-R/-RW est chargé 2. S’allume en mode d’enregistrement. 5. Temps de lecture/horloge/indicateur d’état actuel. 3. S’allume pour indiquer le mode d’enregistrement 6. S’allume en mode de balayage progressif. programmé.
  • Page 203: Aperçu De La Télécommande

    Aperçu de la télécommande 13. Bouton ANYKEY Permet de consulter l’état du disque en cours de lecture. 14. Bouton REC Permet d’enregistrer sur des DVD-RW/-R. 15. Bouton REC MODE Permet d’afficher l’état de l’enregistrement (XP/SP/LP/ 16. Bouton REPEAT Vous permet de répéter la lecture d’un titre, d’un chapitre, d’une plage ou d’un disque.
  • Page 204: Connexion & Configuration

    Présentation rapide Connexion & Une présentation rapide exposée dans ce guide vous Configuration apportera suffisamment d’informations pour commencer à utiliser l’enregistreur. Connexion de l’enregistreur DVD Cette section contient les différentes méthodes de connexion de l’enregistreur DVD à d’autres composants ▼ externes et les modes de réglage initiaux requis.
  • Page 205: Connexion De L'enregistreur Dvd

    Connexion de l’enregistreur Connexions supplémentaires Vous pouvez connecter votre enregistreur DVD à votre Vous pouvez connecter votre enregistreur DVD à un satellite ou à un syntoniseur numérique. téléviseur en utilisant le câble Péritel si le téléviseur est équipé de l’entrée appropriée. 1.
  • Page 206: Antenne + Enregistreur Dvd + Boîtier Du Décodeur Externe + Téléviseur

    Antenne + enregistreur DVD + Autre type de connexion du boîtier du décodeur externe + câble de sortie vidéo téléviseur Si vous connectez un boîtier décodeur externe à Il existe plusieurs manières pour émettre un signal votre enregistreur DVD, vous pouvez enregistrer des vidéo sans utiliser des câbles Péritel.
  • Page 207: Cas 1 : Connexion À Une Prise De Sortie Vidéo

    Cas 1 : Connexion à une prise de Cas 2 : Connexion à une prise de sortie vidéo (composite) sortie S-Vidéo 1. Connectez un câble vidéo (jaune) entre la prise VIDEO 1. Connectez un câble S-Video (non fourni) entre la OUT (jaune) (SORTIE VIDEO) de votre enregistreur prise de sortie S-VIDEO OUT de votre enregistreur DVD et la prise VIDEO INPUT (jaune) (ENTREE...
  • Page 208: Cas 3 : Prises De Sortie Vidéo Composant

    Cas 3 : Prises de sortie Vidéo Autre type de connexion composant du câble de sortie audio 1. Connectez les câbles Vidéo composant (non fournis) entre les prises COMPONENT OUT (SORTIE COMPOSANT) (Y,P ) de l’enregistreur DVD et les prises COMPONENT IN (ENTREE COMPOSANT) (Y,P ) de votre téléviseu Il existe plusieurs manières pour émettre un signal...
  • Page 209: Cas 2 : Connexion À Un Amplificateur Stéréo Au Moyen

    Cas 2 : Connexion à un Cas 3: Connexion à un amplificateur stéréo au moyen amplificateur AV au moyen d’une des prises de sortie AV. prise de sortie numérique Si votre amplificateur AV est équipé d’un décodeur Si votre amplificateur stéréo ne possède que des Dolby Digital, MPEG2 ou DTS et d’une prise d’entrée prises AUDIO INPUT (ENTREE AUDIO) (G et D), utilisez les prises AUDIO OUT (SORTIE AUDIO).
  • Page 210: Connexion À La Prise D'entrée Av3 In, Dv

    Cas 2 : Connexion d’un Connexion à la prise caméscope à la prise d’entrée d’entrée AV3 IN, DV (DVD- DV IN. (DVD-R130, R131 R130, R131 uniquement) uniquement) Si votre caméscope numérique possède une prise de sortie DV, connectez-la à la prise d’entrée DV de votre Cela vous permet de connecter votre enregistreur enregistreur DVD.
  • Page 211: Installation Du Système

    Navigation dans le menu à l’écran Installation du système Les menus à l’écran vous permettent d’activer ou de désactiver différentes fonctions de votre enregistreur DVD. Utilisez les boutons suivants pour ouvrir et parcourir les menus à l’écran. DVD-Recorder Programme DVD-Recorder Liste de Titres Pas de disque DVD-RW(VR)
  • Page 212: Branchement Et Réglage Automatique

    • Reportez-vous au tableau des abreviations suivant lorsque vous Branchement et réglage selectionnez “Pays”. automatique A (Autriche) NL (Pays-Bas) S (Suède) PL (Pologne) B (Belgique) I (Italie) CH (Suisse) CZ (Républ i q ue tchèque) DK (Danemark) N (Norvège) TR (Turquie) Autres FIN (Finlande) P (Portugal)
  • Page 213: Réglage De L'horloge

    Appuyez sur les boutons ▲▼ pour Réglage de l’horloge sélectionner Oui pour le réglage de la fonction de réglage automatique de l’horloge. DVD-Recorder Paramétrer Horloge Pas de disque Programme Ce menu est utilisé pour régler l’heure actuelle. Vous Paramétrer Date Temps Auto Horloge devez régler l’heure pour utiliser l’enregistrement...
  • Page 214: Pré-Réglage Des Canaux Avec La Fonction De Réglage Automatique

    Appuyez sur les boutons ▲▼ pour Pré-réglage des canaux sélectionner Installation Auto, puis appuyez sur le bouton ► ou OK. avec la fonction de réglage L’écran Sélection du pays s’affiche. automatique DVD-Recorder Installation Sélection pays No Disc Programme Auto Setup ►...
  • Page 215: Pré-Réglage Des Canaux Avec La Fonction De Réglage Manuel

    Appuyez sur les boutons ▲▼ pour sélectionner Pré-réglage des canaux avec Installation Manuelle, puis appuyez sur le bouton ► ou OK. la fonction de réglage manuel Installation Manuelle Nom Décodeur Système Éditer ---- ► Vous pouvez ajouter un canal pré-réglé que la ---- ►...
  • Page 216: Configuration Des Options De Langue

    Appuyez sur les boutons ▲▼ pour Configuration des options sélectionner l’option de la langue souhaitée, puis appuyez sur le bouton ► ou OK. de langue Audio : Pour le son du haut-parleur. Sous-Titre : Pour les sous-titres du disque. Menus du Disque : Pour le menu disque contenu sur le disque Si vous avez regle prealablement les options audio, Menus du l’écran : Concernant l’écran de votre...
  • Page 217: Réglage De L'heure En Mode Ep

    Appuyez sur les boutons ▲▼ pour Réglage de l’heure en mode sélectionner EP Mode Temps, puis appuyez sur le bouton ► ou OK. DVD-Recorder Système Pas de disque Programme EP Mode Temps : 6 Heures 6 Heures ► 8 Heures Paramétrer Créateur de chapitre : Non ►...
  • Page 218: Création Automatique De Chapitre

    Appuyez sur les boutons ▲▼ pour sélectionner Création automatique de Oui ou Non, puis appuyez sur le bouton ► ou chapitre • Non: Sélectionnez cette option lorsque vous ne souhaitez pas la création automatique de chapitres. • Oui: Sélectionnez cette option lorsque vous souhaitez la création automatique de chapitres.
  • Page 219: Configuration De L'enregistrement Rapide

    Appuyez sur les boutons ▲▼ pour Configuration de sélectionner Oui, puis sur le bouton OK ou ►. l’enregistrement rapide Si cette fonction est activée, l’enregistreur DVD et le Enregistrement DivX(R) téléviseur s’allument simultanément, ce qui vous permet d’enregistrer immédiatement la chaîne de votre choix. Appuyez sur le bouton MENU, appareil en Veuillez enregistrer votre enregistreur DVD au format Vidéo mode Arrêt/Pas de disque.
  • Page 220: Options Audio

    Appuyez sur les boutons ▲▼ pour sélectionner Audio, puis appuyez sur le bouton ►ou OK. 1. Non : Aucune sortie de signal DTS. Sélectionnez cette option si Le menu de réglage audio s’affiche. votre récepteur AV ou votre amplificateur AV ne dispose pas de décodeur DTS.
  • Page 221: Configuration Des Options Sortie Video

    Appuyez sur les boutons ▲▼ pour Configuration des options sélectionner Sortie vidéo, puis appuyez sur le bouton ► ou sur OK. Sortie Video DVD-Recorder Vidéo Pas de disque Programme Format écran : 16:9 Panoramique ► Réduction bruit 3D : Non Paramétrer ►...
  • Page 222: Pour Activer Le Réglage "Progressif

    Pour activer le réglage Pour annuler le réglage “Progressif” “Progressif” Si le téléviseur prend en charge le balayage progressif, appuyez sur le bouton P.SCAN en façade de l’enregistreur Appuyez sur le bouton P.SCAN en façade de DVD pour profiter d’une meilleure qualité vidéo. l’enregistreur DVD, appareil en mode Arrêt.
  • Page 223: Configuration Des Options D'affichage (Vidéo)

    Appuyez sur le bouton RETURN ou ◄ pour Configuration des options revenir au menu précédent. Appuyez sur le Remarque bouton MENU pour quitter le menu. d’affichage (Vidéo) Options d’affichage (Vidéo) Cette fonction vous permet de configurer les paramètres de l’écran du téléviseur. Cette fonction dépend du type de disque.
  • Page 224: Configuration Du Contrôle Parental

    Saisissez le code secret composé de 4 Configuration du contrôle chiffres à l’aide des boutons numérotés de 0 à 9 de la télécommande. parental Le message “Confirmer le mot de passe” s’affiche. Veuillez ressaisir votre code secret. DVD-Recorder Contrôle Parental La fonction Contrôle parental peut être utilisée avec des Pas de disque Programme...
  • Page 225: A Propos Du Niveau D'évaluation

    A propos du niveau d’évaluation A propos du Changement de mot de passe Appuyez sur les boutons ▲▼ pour Appuyez sur les boutons ▲▼ pour sélectionner Niveau de Contrôle. sélectionner Modif. Mot de passe. DVD-Recorder Contrôle Parental DVD-Recorder Contrôle Parental Pas de disque Pas de disque Programme...
  • Page 226: Avant L'enregistrement

    Ce graveur peut enregistrer sur les disques suivants. enregistrer un DVD. DVD-RW DVD-R Les DVD-RW et sont réinscriptibles. Les DVD-R ne sont pas réinscriptibles. Compatibilité entre le graveur Samsung et les graveurs des autres marques Types de Recording Appareil Finalisation Enregi s trementsuppl é...
  • Page 227: Formats D'enregistrement

    Formats d’enregistrement Durées d’enreg Caractéristique Mode istrement Les fonctions disponibles variant selon le type de Sélectionnez ce mode disque, sélectionnez un disque qui répond au mieux à Env. 1 heure lorsque la qualité vidéo vos besoins. Lorsque vous insérez un disque neuf, le à...
  • Page 228: A Propos Du Bouton Info

    A propos du bouton INFO Enregistrement du programme télévisé que vous regardez Avant de commencer La fonction INFO vous permet de voir le statut et la progression actuels de la lecture et de l’enregistrement. Vérifiez que le disque dispose de suffisamment d’e En fonction du type de disque et du statut, l’affichage sur space pour l’enregistrement.
  • Page 229: Appuyez Plusieurs Fois Sur La Touche Rec

    Appuyez plusieurs fois sur la touche REC Arrêter l’enregistrement MODE, (ou appuyez sur la touche REC Appuyez sur le bouton STOP pour arrêter un MODE puis sur la touche▲▼ ) pour choisir la enregistrement en cours. vitesse (qualité) d’enregistrement. Lorsque vous utilisez des DVD-RW/DVD-R, le message “Mise à...
  • Page 230: Enregistrement À Partir D'une Source Extérieure Que Vous Regardez

    Appuyez sur la touche REC. Enregistrement à partir d’une source extérieure que vous regardez Pour mettre l’enregistrement en pause Appuyez sur le bouton PLAY/PAUSE( ) pour interrompre l’enregistrement en cours. Appuyez de nouveau sur le bouton PLAY/PAUSE( pour reprendre l’enregistrement. Avant de commencer Vous pouvez passer d’une chaîne à...
  • Page 231: Enregistrement Avec Une Seule Touche (Otr)

    Appuyez sur la touche OPEN/CLOSE pour Vous ne pouvez pas changer de mode refermer le tiroir. d’enregistrement ni de chaîne en cours Remarque d’enregistrement. Patientez jusqu’à ce que “LOAD” disparaisse de l’affichage du panneau frontal. L’enregistrement s’arrêtera automatiquement Si un DVD-RW neuf est utilisé, il vous sera d’abord lorsqu’il n’y aura plus d’espace disque pour demandé...
  • Page 232: Réalisation D'un Enregistrement Programmé

    Pour voir l’état actuel du disque et la progression de Réalisation d’un enreg- l’enregistrement : Appuyez sur la touche INFO et istrement programmé l’information concernant le disque s’affichera. DVD-RW(VR) Info disque Nom du Disque Titre entier Liste lect. entière Durée enregistrable 02:12 SP Avant de commencer Protection Non protégé...
  • Page 233: Enregistrement Flexible (Pour L'enregistrement Par Minuterie Uniquement)

    Appuyez sur la touche OK. • Source : La source d’entrée vidéo (“AV1”,“AV2,“AV3”), ou le canal de diffusion à partir desquels vous souhaitez effectuer Si les réglages du programmateur se chevauchent un enregistrement par minuterie. Les programmes sont enregistrés par ordre de priorité.
  • Page 234: Editer Une Minuterie Standard

    Appuyez sur les touches ▲▼ pour Editer une Minuterie sélectionner Éditer, puis appuyez sur la touche OK. Standard L’écran de saisie des enregistrements programmés s’affiche. Voir la section “Effectuer une Minuterie Standard” pour plus d’informations concernant les éléments Entrée Enregistrement par Minuterie. DVD-Recorder Liste d’Enregistrements Programmée Suivez ces indications pour éditer une liste...
  • Page 235: Enregistrer La Liste Des Dossiers Programmés

    Appuyez sur les touches ▲▼pour Enregistrer la liste des sélectionner le nombre d’Enregistrements programmés que vous souhaitez supprimer, dossiers programmés puis appuyez sur la touche OK ou ►. Les éléments Éditer et Supprimer s’affichent. DVD-Recorder Liste d’Enregistrements Programmée Lorsqu’il est l’heure de démarrer l’enregistrement DVD-RW(VR) Heure actuelle 12:27 programmé...
  • Page 236: Avant La Lecture

    Avant la lecture Lecture Lisez les informations suivantes avant de lire un disque. Code de région (DVD-Video uniquement) Le graveur de DVD comme les disques Cette section présente les fonctions de base de la sont codés par région. Ces codes régionaux lecture par type de disque.
  • Page 237: Lecture D'un Disque

    Placez délicatement un disque sur le plateau, La lecture et/ou l’enregistrement peut être en veillant à ce que l’étiquette soit orientée impossible avec certains types de disques ou vers le haut. Remarque lorsque des opérations spécifiques, telles qu’un changement d’angle ou un réglage de l’aspect de ratio, sont effectuées.
  • Page 238: Utilisation Des Chapitres Ou Des Pistes

    Utilisation des fonctions de recherche Utilisation des chapitres ou des pistes Certains types de disques contiennent un système de menus spécifique qui vous permet de sélectionner des fonctions particulières pour le titre, telles que des chapitres, des pistes audio, des sous-titres, des bandes-annonces de films, des informations sur les personnages, etc.
  • Page 239: Ralenti

    À propos de la fonction ANYKEY Sauter des chapitres ou des pistes En cours de lecture, vous pouvez rechercher rapidement dans un chapitre ou une plage. En cours de lecture, appuyez sur le touche SKIP ( ) la télécommande. Si vous appuyez sur la touche SKIP( vous atteignez le début du chapitre, de la piste ou du marqueur (DVD-RW(mode VR)).
  • Page 240: Utilisation De La Fonction Repeat

    Utilisation de la fonction Repeat Atteindre un temps de lecture spécifique pour vous aider à retrouver une scène. Appuyez sur la touche ANYKEY en cours de lecture. DVD-VIDEO Titre 1/28 Chapitre 00:00:01 Temps Sous-titre Audio D 5.1CH Répétition Angle Zoom DÉPLA.
  • Page 241: Utilisation De La Touche Anykey

    Lire une section donnée de manière répétée(Lecture Repeat A-B) Utilisation de la touche ANYKEY Appuyez sur la touche ANYKEY en cours de lecture. Utilisation de la touche ANYKEY DVD-VIDEO Titre 1/28 Chapitre 00:00:01 Temps Sous-titre Appuyez sur la touche ANYKEY en cours Audio D 5.1CH Répétition...
  • Page 242: Sélection Des Sous-Titres

    Sélection des sous-titres Sélection de la langue audio Les langues de sous-titres peuvent ne pas fonctionner selon le Les langues audio peuvent ne pas fonctionner selon le disque. Cette fonction n’est disponible qu’en cours de lecture. disque. Cette fonction n’est disponible qu’en cours de lecture.
  • Page 243: Changer L'angle De La Caméra

    Changer l’angle de la caméra Zoom avant Lorsqu’un DVD-VIDEO contient plusieurs angles pour une scène spécifique, vous pouvez sélectionner la fonction Angle. Cette fonction n’est disponible qu’en cours de lecture. Si le Appuyez sur la touche ANYKEY en cours de disque contient plusieurs angles, l’indication ANGLE s’affiche à...
  • Page 244: Utilisation Des Signets

    Utilisation des signets Lire un signet Cette fonction vous permet de placer des signets sur les sections d’un DVD-VIDEO ou d’un DVD-R/-RW (mode V) afin de les retrouver rapidement. Appuyez sur la touche MARKER en cours de lecture. (mode V) Appuyez sur la touche MARKER en cours de Appuyez sur les touches ◄...
  • Page 245: Utilisation Des Marqueurs

    Utilisation des marqueurs Lire un marqueur (mode VR) Appuyez sur la touche MARKER en cours de lecture. Appuyez sur la touche MARKER en cours de lecture. Appuyez sur les touches ◄ ► pour sélectionner une scène mise en signet. -- -- -- -- -- -- -- -- -- Marqueur N : 0 -- -- -- -- -- -- -- --...
  • Page 246: Lecture D'un Cd Audio/Mp3

    Boutons de la télécommande utilisés pour la lecture de CD audio (CD-DA) Lecture d’un CD Audio/ MP3 Lecture d’un CD audio(CD-DA)/ MP3 Chaque disque donne accès à tout un ensemble de fonctions de menu. Lecture d’un CD audio (CD-DA) Insérez un CD audio (CD-DA) dans le plateau.
  • Page 247: Éléments De L'écran Mp3

    Lire un disque MP3 Éléments de l’écran MP3 Liste de musique Insérez un disque MP3 dans le plateau. SONG01 01/13 Title ROOT DVD-Recorder Navigation par Disque SONG01 SONG02 0:00:15 ► SONG03 Navigation SONG01 DivX ► par Disque SONG04 4.0MB Photo ►...
  • Page 248: Lecture Répétée (Répétition)

    Boutons de la télécommande utilisés pour la lecture de MP3 Lecture répétée (Répétition) Utilisation du bouton REPEAT Appuyez sur le bouton REPEAT en cours de lecture L’icône du mode de répétition Plage ( ) s’affiche et la plage sélectionnée est lue de manière répétée. Liste de musique TRACK 1 01/15...
  • Page 249: Utilisation Du Bouton Anykey

    Mode Options de lecture Utilisation du bouton ANYKEY Les Options de lecture peuvent être utilisées avec un CD Appuyez sur le bouton ANYKEY en cours audio ou MP3 en mode Lecture ou Stop. de lecture. La fenêtre du mode Play (Lecture) s’affiche. Appuyez sur le bouton ANYKEY en mode Liste de musique Arrêt.
  • Page 250: Programmer Des Pistes

    Programmer des pistes Lecture d’une image Vous pouvez enregistrer jusqu’à 30 pistes au maximum dans la liste de lecture. Appuyez sur le bouton ANYKEY en mode Arrêt. Insérez le disque au format JPEG dans le tiroir La fenêtre PLAY MODE s’affiche. disque.
  • Page 251: Lecture D'un Fichier Mpeg4

    -1 Si vous appuyez sur le bouton PLAY, Lecture d’un fichier l’écran Slide Show Speed (Vitesse diaporama) s’affiche. MPEG4 Appuyez sur les boutons ◄ ► pour sélectionner la vitesse du diaporama, puis appuyez sur le bouton OK. Les fichiers MPEG4 permettent de stocker les données DVD-RW(VR) audio et vidéo.
  • Page 252: Lecture De La Liste De Titres

    Description de la fonction MPEG4 Lecture de la liste de titres Fonction Description Sauter Pour avancer ou reculer de 5 minutes, appuyez sur le bouton SKIP( ) pendant la lecture. Appuyez sur le bouton SEARCH ( ) pendant Recherche la lecture, puis appuyez à nouveau pour accélérer la vitesse de recherche.
  • Page 253 Appuyez sur les boutons ▲▼ bpour Appuyez de nouveau sur la touche INFO Vous avez sélectionner Liste de Titres puis appuyez alors accès aux informations relatives au titre en deux fois sur le bouton OK ou►. cours de la lecture. L’écran Liste de titres s’affiche.
  • Page 254: Éléments De L'écran Liste De Titres

    Éléments de l’écran Liste de Titres DVD-RW(VR) DVD-RW(VR) Liste de Titres Liste de Titres APR/21/2006 APR/21/2006 Titre Longueur Éditer Titre Longueur Éditer 01 APR/19/2006 12:00 00:00:21 01 APR/19/2006 12:00 00:00:21 ► ► 02 APR/19/2006 12:30 00:00:03 02 APR/19/2006 12:30 00:00:03 ►...
  • Page 255 Édition Cette section présente les fonctions de base de l’édition de DVD et explique les fonctions d’édition relatives à l’enregitrement et les fonctions d’édition du disque entier. Liste de titres Titre fait référence à un flux audio ou vidéo enregistré. La Liste des titres ouvre une liste destinée à...
  • Page 256: Édition De Base (Liste De Titres)

    Sélectionnez les caractères désirés à l’aide Édition de base des flèches ▲▼◄ ► puis appuyez sur la touche OK. (Liste de titres) DVD-Recorder Renommer DVD-RW(VR) Sports(A1) Renommer (Étiqueter) un titre Suivez les instructions suivantes pour renommer une Enreg. entrée d’une liste de titres, c.-à-d. pour modifier le titre d’un Espace Espace Libre Suppr.
  • Page 257: Verrouiller (Protéger) Un Titre

    Appuyez sur les touches ◄ ► pour Verrouiller (Protéger) un titre sélectionner Oui, puis appuyez sur la touche OK. L’icône en forme de clé de la fenêtre Suivez les instructions suivantes pour verrouiller une entrée et ainsi la protéger d’une suppression accidentelle. d’information de l’entrée sélectionnée passe en statut verrouillé.
  • Page 258: Supprimer Une Section D'un Titre

    Supprimer une section d’un titre Appuyez sur les touches ▲▼ pour sélectionner Supprimer, puis appuyez sur Suivrez les instructions suivantes pour supprimer une la touche OK. section d’un entrée de la Liste de titres. DVD-RW(VR) Liste de Titres Sports (A1) Titre Longueur Éditer (mode VR)
  • Page 259 Appuyez sur la touche OK au point de Appuyez sur les touches Suppr. démarrage. Le message “Souhaitez-vous supprimer? (La partie supprimée ne sera pas restaurée).” s’affiche. L’image et l’heure du point de démarrage s’affichent dans la fenêtre Point de démarrage de la suppression de la section.
  • Page 260: Édition Avancée (Liste De Lecture)

    Appuyez sur la touche OK au point de fin. Édition avancée (Liste de lecture) DVD-Recorder Créer une Scène DVD-RW(VR) Scène No. 001 Démar. Liste de Titres : 1/6 00:00:10 00:10:00 Créer une Liste de lecture 00:10:00 Démar. Faire Termi. Suivez les instructions suivantes pour créer une nouvelle DÉPLA.
  • Page 261: Lire Les Entrées De La Liste De Lecture

    Lire les entrées de la Liste de lecture Appuyez sur les touches ▲▼ pour sélectionner Lecture, puis appuyez sur la Suivez les instructions suivantes pour lire les entrées de la touche OK. liste de lecture. ► Lecture (mode VR) Appuyez sur le bou PLAY LIST, appareil en mode Arrêt.
  • Page 262: Renommer Une Entrée Dans Une Liste De Lecture

    Renommer une entrée dans une Entrez les caractères désirés à l’aide des touches ▲▼◄ ►. liste de lecture Suivez les instructions suivantes pour renommer une entrée d’une liste de lecture, c.-à-d. pour modifier le titre d’une DVD-Recorder Renommer entrée d’une liste de lecture. DVD-RW(VR) Dolphin (mode VR)
  • Page 263: Éditer Une Scène Pour Une Liste De Lecture

    Éditer une scène pour une liste de lecture Lire une scène sélectionnée Suivez les instructions suivantes pour éditer des scènes pour une liste de lecture. Appuyez sur les touches▲▼◄ ► pour sélectionner la scène que vous souhaitez lire, puis appuyez sur la touche OK. (mode VR) L’entrée de liste de lecture à...
  • Page 264 Appuyez sur la touche OK au point de fin Modifier une scène (Remplacer une scène) de la scène. Pour la configuration, suivez les étapes 1 à 3 de la DVD-Recorder Modifier la Scène page 76. DVD-RW(VR) Scène No. 002 Démar. Appuyez sur les touches ▲▼◄...
  • Page 265: Ajouter Une Scène

    Vous ne pouvez pas déplacer la scène Déplacer une scène (Changer une scène de position) sélectionnée vers la position de la scène suivante, car la scène sélectionnée doit être Remarque insérée avant cette position, qui ne nécessite Pour la configuration, suivez les étapes 1 à 3 de la aucune action.
  • Page 266: Copier Une Entrée D'une Liste De Lecture Vers La Liste De Lecture

    Appuyez sur la touche OK au point de fin Copier une entrée d’une liste de de la scène. lecture vers la liste de lecture DVD-Recorder Ajouter la Scène DVD-RW(VR) Scène No. 004 Utilisation de la touche PLAY LIST Démar. Liste de Titres : 4/6 00:00:15 00:00:35 00:00:35...
  • Page 267: Supprimer Une Entrée De Liste De Lecture D'une Liste De Lecture

    Appuyez sur les touches▲▼ pour Vous pouvez créer jusqu’à 999 scènes sélectionner Supprimer, puis appuyez sur sur un seul disque. Dans certains cas, le la touche OK. Remarque nombre de scènes peut différer. Appuyez sur le bouton MENU à la fin de DVD-RW(VR) Éditer la Liste de Lecture cette opération.
  • Page 268: Gestionnaire De Disque

    Entrez les caractères souhaités en utilisant Gestionnaire de disque les touches ▲▼◄ ►. DVD-Recorder Renommer DVD-RW(VR) Disque Éditer le nom d’un disque Enreg. Suivez les instructions suivantes pour donner un nom à un Espace Libre Espace Suppr. Effacer disque. DÉPLA. REVENIR QUITTER Cette fonction est identique à...
  • Page 269: Protection Du Disque

    Protection du disque Formater un disque La Protection du disque vous permet de protéger vos Suivez les instructions suivantes pour formater un disque. disques d’un formatage ou d’une suppresion due à une La protection du disque doit également être effacée. mauvaise manipulation.
  • Page 270: Supprimer Toutes Les Listes De Titres

    Appuyez sur les boutons ◄ ► pour Appuyez sur les touches ▲▼ pour sélectionner le mode de votre choix, puis sélectionner Gestion. de Disque, puis appuyez sur le bouton OK. appuyez sur la touche OK ou ►. Le message de confirmation “Toutes les données vont étre suppriméss.
  • Page 271: Finaliser Un Disque

    Finaliser un disque Le message suivant s’affiche “Souhaitez-vous finaliser ce disque?”. Après avoir enregistré des titres sur un DVD-RW/DVD-R à l’aide de votre graveur de DVD, le disque doit être finalisé avant de pouvoir être lu par des appareils extérieurs. DVD-Recorder Gestionnaire de Disque DVD-RW(VR)
  • Page 272: Ne Pas Finaliser Un Dique (Mode V/Vr)

    Ne pas finaliser un dique Appuyez sur les touches◄ ► pour sélectionner Oui, puis appuyez sur la touche (mode V/VR) Le disque n’est pas finalisé. Appuyez sur le bouton MENU, appareil en mode Arrêt. Un DVD-RW peut être finalisé ou non finalisé en mode Vidéo.
  • Page 273: Informations Complémentaires

    Informations Si votre produit ne fonctionne pas correctement, exami- Complémentaires nez les points de vérification ci-dessous avant de con- tacter un centre de service agréé par Samsung. Alimentation L’entrée s’affiche pendant un petit moment lorsque l’appareil est allumé. Le graveur de DVD a besoin d’un peu Point à...
  • Page 274 Lecture La fonction Angle ne fonctionne pas pendant la lec- Impossible de lire le disque. ture d’un disque DVD. Vérifiez que le disque est inséré Point à vérifier 1 correctement, l’étiquette vers le haut. La fonction Angle n’est disponible que Point à...
  • Page 275: Enregitrement Par Minuterie

    Vidéo Enregitrement par minuterie Le disque tourne, mais aucune image ou seule une Le témoin lumineux de la minuterie clignote. image de mauvaise qualité n’apparaît. Vérifiez que le disque dispose de suffisam- Point à vérifier 1 Assurez-vous que les paramètres vidéo Point à...
  • Page 276: Télécommande

    Si le problème persiste, contactez le centre Vérifiez la position du bouton de sélec- Point à vérifier 3 Point à vérifier 3 de service Samsung le plus proche. tion TV/DVD. Autres J’ai oublié mon mot de passe pour le contrôle parental.
  • Page 277: Caractéristiques Techniques

    Caractéristiques techniques Alimentation 220-240V AC, 50Hz Consommation 21 Watts Poids 2,6 kg Généralesl Dimensions 430mm(W) x 240mm(D) x 49mm(H) Temp. de fonctionnement +5°C à +35°C Autres conditions L’appareil doit rester à plat pendant son fonctionnement. Moins de 75% d’humidité Vidéo composite : 1,0 V p-p à une charge de 75 Omega, sync. négative Vidéo Niveau d’entrée audio max.
  • Page 278: Samsung Service Consommateurs

    La date d’acquisition de ce produit. 2. SAMSUNG ELECTRONICS FRANCE se réserve le droit de refuser la garantie si tout ou partie de ces mentions a été enlevé ou modifié après l’acquisition du produit par le client chez le distributeur.
  • Page 279 Contact SAMSUNG WORLD WIDE If you have any questions or comments relating to Samsung products, please contact the SAMSUNG customer care centre. Contact Samsung wereldwijd Wanneer u suggesties of vragen heeft met betrekking tot Samsung producten, gelieve contact op te nemen met de consumenten dienst van Samsung.
  • Page 280 à votre disposition au : Vous pouvez également vous connecter à notre site Internet : http://www.samsung.com/fr Cet appareil est garanti un an pièces et main d’oeuvre pour la France (métropolitaine) La facture d’achat faisant office de bon de garantie.

Ce manuel est également adapté pour:

Dvd-r129Dvd-r130Dvd-r131

Table des Matières