Table des Matières
Publicité
Les langues disponibles
Les langues disponibles
Liens rapides
BORNHOLM
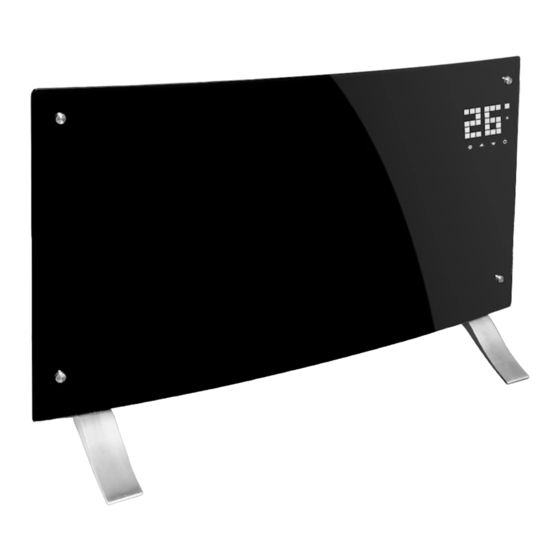
CURVED SMART
Heizung
Heater
Calefactor
Radiateur
Stufa
10035237 10035238
www.klarstein.com
Hinweis: Dieses Produkt ist nur für gut isolierte Räume
oder für den gelegentlichen Gebrauch geeignet.
Note: This product is only suitable for well insulated
spaces or occasional use.
Nota: Este producto está indicado únicamente en
lugares abrigados o para una utilización punctual.
Remarque : Ce produit ne peut être utilisé que dans
des locaux bien isolés ou de manière occasionnelle.
Advertencia: Questo prodotto è adatto solo per spazi
ben isolati o uso occasionale.
Publicité
Table des Matières

Manuels Connexes pour Klarstein BORNHOLM CURVED SMART


Sommaire des Matières pour Klarstein BORNHOLM CURVED SMART
- Page 1 Heater Calefactor Radiateur Stufa 10035237 10035238 www.klarstein.com Hinweis: Dieses Produkt ist nur für gut isolierte Räume oder für den gelegentlichen Gebrauch geeignet. Note: This product is only suitable for well insulated spaces or occasional use. Nota: Este producto está indicado únicamente en lugares abrigados o para una utilización punctual.
-
Page 3: Table Des Matières
Sehr geehrter Kunde, wir gratulieren Ihnen zum Erwerb Ihres Gerätes. Lesen Sie die folgenden Hinweise sorgfältig durch und befolgen Sie diese, um möglichen Schäden vorzubeugen. Für Schäden, die durch Missachtung der Hinweise und unsachgemäßen Gebrauch entstehen, übernehmen wir keine Haftung. Scannen Sie den folgenden QR-Code, um Zugriff auf die aktuellste Bedienungsanleitung und weitere Informationen rund um das Produkt zu erhalten. -
Page 4: Produktdatenblatt
PRODUKTDATENBLATT Modellkennung(en) 10035237, 10035238 Angabe Symbol Wert Einheit Angabe Einheit Wärmeleistung Nur bei elektrischen Speicher-Einzelraumheizgeräten: Art der Regelung der Wärmezufuhr Nennwärmeleistung Manuelle Regelung der Wärmezufuhr mit nein integriertem Thermostat Mindestwärmeleistung Manuelle Regelung der Wärmezufuhr nein (Richtwert) mit Rückmeldung der Raum- und/oder Außentemperatur Maximale kontinuierliche Elektronische Regelung der Wärmezufuhr... -
Page 5: Sicherheitshinweise
SICHERHEITSHINWEISE Lesen und befolgen Sie alle Anweisungen, Warnungen und Hinweise in dieser Anleitung, selbst wenn Sie sich mit dem Gerät vertraut fühlen. Bewahren Sie die Bedienungsanleitung zum künftigen Nachschlagen auf. Bei der Verwendung eines elektrischen Gerätes müssen die Sicherheitshinweise befolgt werden, einschließlich der folgenden: •... - Page 6 • Dieses Gerät ist nach IP24 gegen Spritzwasser geschützt und somit auch für die Aufstellung in Badezimmern/Feuchträumen geeignet. Verwenden Sie das Gerät aber nicht in der unmittelbaren Umgebung einer Badewanne, einer Dusche, eines Schwimmbeckens oder anderen Flüssigkeiten und stellen Sie sicher, dass keine stromführenden Teile mit Wasser in Kontakt treten können.
-
Page 7: Geräteübersicht
• Wenn das Netzkabel beschädigt ist, muss es von einer qualifi zierten Elektrofachkraft ersetzt werden, um Gefahren abzuwenden. • Verwenden Sie das Gerät nur zu dem vorbestimmten Zweck, wie in dieser Bedienungsanleitung beschrieben. Jeder andere Gebrauch wird nicht empfohlen und kann zu Brand, Stromschlag oder der Verletzung von Personen führen. •... -
Page 8: Montage
MONTAGE Maße Heizkörper 5 mm herunterziehen dann 10 mm nach links bewegen, um den Heizkörper abzusenken. Wandmontage Den Heizkörper von der Wand nehmen Decke Minimum 1000 mm Luftauslass Min. Min. 100 mm 100 mm Der Heizkörper muss zu allen Seiten hin mit diesen Mindestabständen Min. - Page 9 Freistehende Montage (Standfüße)
-
Page 10: Bedienfeld
BEDIENFELD POWER HIGH/LOW Week Timer Day Timer DOWN W/24H Timer Mode „Fenster offen“ Ein/Aus-Taste Wochentimer Wert verringern Tagestimer Wert erhöhen Timerperiode Einstellungen (Bedienfeld) Stunden Temperaturanzeige Wochentag Einstellungen (Fernbedienung) Minute ECO-Modus ein/aus Temperatureinheit Umschalttaste Tag/Woche Timer Umschalttaste Hohe/niedrige Heizstufe Hohe Heizstufe OK-Taste Niedrige Heizstufe Betriebsstatus Heizelement... -
Page 11: Bedienung
BEDIENUNG Inbetriebnahme 1. Nehmen Sie das Gerät vorsichtig aus dem Karton. Heben Sie den Karton für die Lagerung außerhalb der Heizsaison auf. 2. Achten Sie darauf, dass der Netzschalter ausgeschaltet ist, bevor Sie das Gerät anschließen. 3. Die Heizung muss nach der Montageanleitung vollständig zusammengebaut und montiert sein. - Page 12 Alternativ drücken Sie die Umschalttaste (21) auf der Fernbedienung für den Wechsel zwischen hoher und niedriger Heizstufe. Kindersicherung Halten Sie beide Pfeiltasten (14, 15) drei Sekunden lang gedrückt. Das Symbol für die Kindersicherung ([ ]) erscheint in der Anzeige. Das System ist gesperrt, es können keine Einstellungen vorgenommen werden.
-
Page 13: Reinigung Und Lagerung
• Tages-Timer: Bei dieser Einstellung erscheint in der Anzeige „Day Timer“. Drücken Sie zur Einstellung der Stunde auf die Einstellungen-Taste (16, oder 18 auf der Fernbedienung). Wählen Sie mit den Pfeiltasten (14, 15) eine Stunde aus. Durch Drücken der Einstellungen-Taste (16) wechseln Sie zur Einstellung der Minuten. Stellen Sie die Minuten mit den Pfeiltasten (14,15) ein. -
Page 14: Gerätesteuerung Per Smartphone
GERÄTESTEUERUNG PER SMARTPHONE Wenn Sie Ihr Klarstein-Gerät in Ihr heimisches WLAN einbinden, können Sie es ganz bequem über die dazugehörige Klarstein-App bedienen. Die App ermöglicht es Ihnen, nicht nur das Gerät über Ihr Smartphone fernzusteuern, sondern bietet Ihnen zudem Zugang zu Rezepten und weiterführenden Informationen. - Page 15 Fehlerbehebung bei Verbindungsproblemen Wenn Ihr Klarstein-Gerät im WLAN nicht gefunden werden kann, überprüfen Sie Folgendes: • Ist das Gerät eingesteckt? • Ist die WLAN-Funktion des Smartphones aktiviert? • Ist die WLAN-Funktion des Klarstein-Gerätes aktiviert? (Befolgen Sie die Anweisungen in der App.) •...
-
Page 16: Hinweise Zur Entsorgung
HINWEISE ZUR ENTSORGUNG Wenn es in Ihrem Land eine gesetzliche Regelung zur Entsorgung von elektrischen und elektronischen Geräten gibt, weist dieses Symbol auf dem Produkt oder auf der Verpackung darauf hin, dass dieses Produkt nicht im Hausmüll entsorgt werden darf. Stattdessen muss es zu einer Sammelstelle für das Recycling von elektrischen und elektronischen Geräten gebracht werden. - Page 17 Dear Customer, Congratulations on purchasing this device. Please read the following instructions carefully and follow them to prevent possible damages. We assume no liability for damage caused by disregard of the instructions and improper use. Scan the QR code to get access to the latest user manual and more product information.
-
Page 18: Product Data Sheet
PRODUCT DATA SHEET Model identifier(s): 10035237, 10035238 Item Symbol Value Unit Item Unit Heat output Type of heat input, for electric storage local space heaters only Nominal heat output manual heat charge control, with integrated thermostat Minimum heat output manual heat charge control with room and/or (indicative) outdoor temperature feedback Maximum continuous heat... -
Page 19: Safety Instructions
SAFETY INSTRUCTIONS Read and follow all the instructions in this manual even if you feel you are familiar with the product, and find a place to keep it handy for future reference. Read all instructions before using this appliance and keep them for future reference. When using any electrically powered product, basic safety precautions should always be followed, including the following: •... - Page 20 • This device is protected against splash water according to IP24, and therefore also suitable for installation in bathrooms / wet rooms. However, do not use the device in the immediate vicinity of a bathtub, shower, swimming pool or other fluids, and ensure that no live parts can come into contact with water.
-
Page 21: Product Overview
PRODUCT OVERVIEW Air outlet Control panel Power switch Feet... -
Page 22: Installation
INSTALLATION Specification Pull up the heater 5 mm , then move to left 10 m m to take down the heater. Wall mounted mode Take down the heater from wall Ceiling/Picture frame Minimum 1000 m m Air outlet Minimum Minimum 100 m m 100 m m This heater MUST be installed... - Page 23 Freestanding installation (feet installation and removal)
-
Page 24: Control Panel
CONTROL PANEL POWER HIGH/LOW Week Timer Day Timer DOWN W/24H Timer Mode “Open window” indicator ON/OFF button Week timer indicator Decrease button Day timer indicator Increase button Timer period indicator Setting button (in display) Hour indicator Temperature indicator Week indicator Setting button (remote control) Minute indicator ECO on/off switch... -
Page 25: Operation
OPERATION Starting 1. Take out the heater from the carton carefully. Please save the carton for off-season storage. 2. Make sure the power switch is in the OFF position before plugging it in. 3. Ensure the heater is fully assembled according to the mounting guide. 4. -
Page 26: Open-Window Detection
Child-lock setting Press and hold both arrow buttons (14, 15) for three seconds. The child lock indicator ([ ]) appears on the display. The system is locked and no settings can be made. After three seconds, the display shows the ambient temperature. Methods to unlock: Press and hold the two arrow buttons (14, 15) for 3 seconds. -
Page 27: Cleaning And Storage
• Week timer: The week timer can be set for four operating cycles a day and seven days a week. The display shows “Week Timer“. Press the setting button (16, or 18 on the remote control) to display a day: the weekday indicator (6) flashes. Use the arrow buttons (14, 15) to select the first operating cycle. -
Page 28: Device Control By Smartphone
Make sure your smartphone is connected to the same WiFi network that your Klarstein device is to be connected to. Open the Klarstein app. Sign in to your account. If you do not have an account, sign up in the Klarstein app. Follow the instructions from the app. App Download Use the scan function of your smartphone to scan the QR code and save the app on your smartphone. - Page 29 If your Klarstein device cannot be found in the WLAN, check the following: • Is the device plugged in? • Is the WiFi feature of my phone enabled? • Is the WiFi function of the Klarstein device activated? (Follow the instructions in the app) • Has the WLAN password been entered correctly? •...
-
Page 30: Disposal Considerations
DISPOSAL CONSIDERATIONS If there is a legal regulation for the disposal of electrical and electronic devices in your country, this symbol on the product or on the packaging indicates that this product must not be disposed of with household waste. Instead, it must be taken to a collection point for the recycling of electrical and electronic equipment. -
Page 31: Fiche Technique
Chère cliente, cher client, Toutes nos félicitations pour l’acquisition de ce nouvel appareil. Veuillez lire attentivement et respecter les instructions de ce mode d’emploi afin d’éviter d’éventuels dommages. Nous ne saurions être tenus pour responsables des dommages dus au non-respect des consignes et à... -
Page 32: Fiche De Données Produit
FICHE DE DONNÉES PRODUIT Référence (s) du produit 10035237, 10035238 Donnée Symbole Valeur Unité Donnée Unité Puissance calorifique Uniquement pour les radiateurs électriques à accumulation : Type de régulation de l'apport de chaleur Puissance calorifique Régulation manuelle de l'apport de chaleur nominale avec thermostat intégré... -
Page 33: Consignes De Sécurité
CONSIGNES DE SÉCURITÉ Lisez attentivement les consignes de sécurité et conservez-les pour vous y référer ultérieurement. Pour éviter les risques d‘incendie, d‘électrocution, de brûlures et autres blessures, il est important de respecter les mesures de base lors de l‘utilisation de l‘appareil, notamment : •... - Page 34 • Utilisez toujours l‘appareil en position verticale. • Éteignez et laissez refroidir l‘appareil avant de le déplacer. • Ne pas utiliser avec un câble spiralé, car la formation de chaleur est probable et serait suffisante pour présenter un danger. • L‘utilisation d‘une rallonge n‘est pas recommandée pour cet appareil. •...
-
Page 35: Aperçu Des Appareils
APERÇU DES APPAREILS Admission d‘air Panneau de commande Interrupteur Pieds... -
Page 36: Montage
MONTAGE Dimensions Maße Abaissez le radiateur de 5 mm Heizkörper 5 mm herunterziehen dann 10 mm nach links bewegen, puis déplacez-le de 10 mm um den Heizkörper abzusenken. vers la gauche pour abaisser le radiateur Montage mural Pour retirer le corps chauffant du mur Wandmontage Den Heizkörper von der Wand nehmen Plafond... - Page 37 Installation autonome (sur pied)
-
Page 38: Panneau De Commande
PANNEAU DE COMMANDE POWER HIGH/LOW Week Timer Day Timer DOWN W/24H Timer Mode Fenêtre ouverte Bouton d‘alimentation Programmateur hebdomadaire Réduire la valeur Programmateur quotidien Augmenter la valeur Période de minuterie Paramètres (panneau de commande) Heures Affichage de la température Semaine Paramètres (télécommande) Minute Mode ECO marche/arrêt... -
Page 39: Utilisation
UTILISATION Mise en marche 1. Retirez délicatement l‘appareil de la boîte. Conservez le carton pour le ranger en dehors de la saison de chauffage. 2. Assurez-vous que le bouton d‘alimentation est éteint avant de brancher l‘appareil. 3. Le radiateur doit être complètement assemblé et installé conformément aux instructions d‘installation. -
Page 40: Verrouillage Parental
Vous pouvez également appuyer sur la touche (21) pour basculer entre les réglages de chaleur élevée et basse. Verrouillage parental Maintenez les deux touches fléchées (14,15) pendant trois secondes. Le symbole du verrouillage parental ([]) apparaît à l‘écran. Le système est verrouillé, aucun réglage ne peut être effectué. -
Page 41: Nettoyage Et Conservation
• Programmateur quotidien : Avec ce réglage, «Day Timer» s’affiche à l’écran. Appuyez sur la touche des réglages (16, ou 18 sur la télécommande) pour régler l’heure. Utilisez les touches fléchées (14, 15) pour sélectionner une heure. Appuyez sur le bouton Paramètres (16) pour passer au réglage des minutes. Utilisez les touches fléchées (14, 15) pour régler les minutes. -
Page 42: Contrôle De L'appareil Par Smartphone
à distance l‘appareil via votre smartphone, mais vous donne également accès à des recettes et à des informations supplémentaires. Procédez comme suit pour connecter votre smartphone avec votre appareil Klarstein : Téléchargez d‘abord l‘application Klarstein en scannant le code QR avec votre smartphone (voir ci-dessous) ou téléchargez-le directement depuis l‘App Store ou... - Page 43 Dépannage des problèmes de connexion Si votre appareil Klarstein ne se trouve pas dans le WLAN, vérifiez les points suivants : • L‘appareil est-il branché ? • La fonction WiFi de mon téléphone est-elle activée ? • La fonction WiFi de l‘appareil Klarstein est-elle activée ? (Suivez les instructions dans l‘application)
-
Page 44: Informations Sur Le Recyclage
INFORMATIONS SUR LE RECYCLAGE S‘il existe une réglementation pour l‘élimination ou le recyclage des appareils électriques et électroniques dans votre pays, ce symbole sur le produit ou sur l‘emballage indique que cet appareil ne doit pas être jeté avec les ordures ménagères. -
Page 45: Datos Técnicos
Estimado cliente, Le felicitamos por la adquisición de este producto. Lea atentamente el siguiente manual y siga cuidadosamente las instrucciones de uso con el fin de evitar posibles daños. La empresa no se responsabiliza de los daños ocasionados por un uso indebido del producto o por haber desatendido las indicaciones de seguridad. -
Page 46: Hoja De Datos Del Producto
HOJA DE DATOS DEL PRODUCTO Denominación del modelo 10035237, 10035238 Dato Símbolo Valor Unidad Dato Unidad Potencia térmica Solo con disposítivos de acumulación de calor eléctricos para abastecimiento local: Tipo de regulación del abastecimiento de calor Potencia térmica nominal Pnom Regulación manual del abastecimiento de calor con termostato integrado: Potencia térmica mínima... -
Page 47: Indicaciones De Seguridad
INDICACIONES DE SEGURIDAD Lea y siga las siguientes instrucciones, indicaciones y observaciones, incluso cuando ya se haya familiarizado con el aparato. Conserve este manual para consultas posteriores. Cuando utilice dispositivos eléctricos, debe seguir las indicaciones de seguridad, incluidas las siguientes: •... - Page 48 • Antes de mover el aparato, apáguelo y deje que se enfríe por completo. • No lo ponga en marcha con el cable enrollado, pues es probable la acumulación de calor y eso representaría un riesgo. • No se recomienda utilizar un cable alargador con este aparato. •...
-
Page 49: Descripción Del Aparato
DESCRIPCIÓN DEL APARATO Salida de aire Panel de control Fuente de alimentación Patas... -
Page 50: Montaje
MONTAJE Dimensiones Maße Levante el radiador 5 mm y Heizkörper 5 mm herunterziehen dann 10 mm nach links bewegen, luego muévalo 10 mm a la izqui- um den Heizkörper abzusenken. erda para desmontar el radiador. Montaje en pared Desmontar el calefactor de la pared Wandmontage Den Heizkörper von der Wand nehmen Techo... - Page 51 Montaje independiente (con ruedas)
-
Page 52: Panel De Control
PANEL DE CONTROL POWER HIGH/LOW Week Timer Day Timer DOWN W/24H Timer Mode Ventana abierta Botón on/off Temporizador semanal Reducir valor Temporizador diario Aumentar valor Periodo del temporizador Ajustes (panel de control) Horas Indicador de temperatura Día de la semana Ajustes (Mando a distancia) Minutos Modo on/off... -
Page 53: Utilización
UTILIZACIÓN Puesta en marcha 1. Retire el aparato de la caja de cartón con cuidado. Guarde la caja para almacenar el aparato cuando no lo utilice. 2. Cerciórese de que el interruptor de red está desconectado antes de encender el aparato. - Page 54 Como alternativa, pulse el botón de cambio (21) en el mando a distancia para cambiar entre el nivel de calefacción alto y bajo. Bloqueo para niños Mantenga pulsados los botones de dirección (14, 15) durante tres segundos. El símbolo del bloqueo infantil ([X]) aparece en pantalla. El sistema está bloqueado y no se pueden realizar ajustes.
-
Page 55: Limpieza Y Almacenamiento
• Temporizador diario: Con este ajuste aparece en pantalla «Day Timer». Para configurar las horas, pulse el botón de ajustes (16 o 18 en el mando a distancia). Con los botones de dirección (14, 15) seleccione la hora. Pulsando el botón de ajustes (16) se pasa a la selección de los minutos. -
Page 56: Control Del Dispositivo Por Smartphone
Si conecta el aparato a su red WLAN doméstica, podrá controlarlo cómodamente mediante la App correspondiente de Klarstein. La App le permite no solo controlar el aparato mediante su smartphone, sino que también le ofrece acceso a recetas y otra información adicional. - Page 57 Solución de problemas de conexión Si su dispositivo Klarstein no se encuentra en la WLAN, compruebe lo siguiente: • ¿Está enchufado el dispositivo? • ¿Está activada la función WiFi de mi teléfono? • ¿Está activada la función WiFi del dispositivo Klarstein? (Sigue las instrucciones de la aplicación)
-
Page 58: Indicaciones Sobre La Retirada Del Aparato
INDICACIONES SOBRE LA RETIRADA DEL APARATO Si en su país existe una disposición legal relativa a la eliminación de aparatos eléctricos y electrónicos, este símbolo estampado en el producto o en el embalaje advierte que no debe eliminarse como residuo doméstico. En lugar de ello, debe depositarse en un punto de recogida de reciclaje de aparatos eléctricos y electrónicos. -
Page 59: Dati Tecnici
Gentile cliente, La ringraziamo per aver acquistato il nostro prodotto. La preghiamo di leggere attentamente le seguenti istruzioni e di seguirle per evitare eventuali danni. Si declina ogni responsabilità per danni derivati da una mancata osservazione delle istruzioni e da un uso improprio del dispositivo. Per accedere alla versione aggiornata del manuale di istruzioni e ottenere ulteriori informazioni sul prodotto, scannerizzare il seguente codice QR. -
Page 60: Scheda Informativa Del Prodotto
SCHEDA INFORMATIVA DEL PRODOTTO Identificazione del modello (i) 10035237, 10035238 Indicazione Simbolo Valore Unità Indicazione Unità Potenza termica Solo per gli apparecchi per il riscaldamento d'ambiente locale elettrici ad accumulo: Tipo di controllo dell´apporto termico Potenza termica nominale Pnom Controllo manuale del carico termico con termostato integrato Potenza termica minima Pmin... -
Page 61: Avvertenze Di Sicurezza
AVVERTENZE DI SICUREZZA Leggere e seguire le seguenti istruzioni di sicurezza anche se si conosce già il dispositivo e conservarle per poterle consultare in futuro. Quando si utilizza un dispositivo elettrico è necessario seguire le istruzioni di sicurezza, comprese le seguenti: •... - Page 62 • Staccare sempre la spina quando il dispositivo non è in uso. • Attenzione: il dispositivo non è adatto all’uso su tappeti a pelo lungo o Flokati. • Non lasciare che il cavo d’alimentazione entri in contatto con superfici calde durante il funzionamento.
-
Page 63: Panoramica Generale
PANORAMICA GENERALE Uscita aria Pannello di controllo Interruttore Piedi... -
Page 64: Montaggio
MONTAGGIO Dimensioni Maße Abbassare il termoconvettore di Heizkörper 5 mm herunterziehen dann 10 mm nach links bewegen, 5 mm, spostarlo di 10 mm verso um den Heizkörper abzusenken. sinistra per abbassarlo. Montaggio a parete Rimuovere il termoconvettore dalla parete Wandmontage Den Heizkörper von der Wand nehmen Tetto Decke... - Page 65 Montaggio free standing (piedi d’appoggio)
-
Page 66: Pannello Di Controllo
PANNELLO DI CONTROLLO POWER HIGH/LOW Week Timer Day Timer DOWN W/24H Timer Mode Finestra aperta Tasto on/off Timer settimanale Tasto freccia giù Timer quotidiano Tasto freccia su Periodo timer Impostazioni (pannello di controllo) Indicazione temperatura Giorno Impostazioni (telecomando) Minuti Modalità ECO on/off Unità... -
Page 67: Utilizzo
UTILIZZO Messa in funzione 1. Togliere con cura il dispositivo dal cartone. Conservare la confezione per riporre il dispositivo quando finisce la stagione del riscaldamento. 2. Assicurarsi che l’interruttore sia spento prima di collegare il dispositivo. 3. Montare il convettore seguendo il manuale di istruzioni. 4. - Page 68 In alternativa premere il tasto shift (21) sul telecomando per modificare il livello di riscaldamento da alto a basso e viceversa. Blocco bambini Tenere premuto per 3 secondi i due tasti freccia (14, 15). Sul display viene visualizzato il simbolo per il blocco bambini ([]). Il sistema è bloccato e non si possono effettuare impostazioni.
-
Page 69: Pulizia E Conservazione
• Timer quotidiano: con questa impostazione sul display appare “Day Timer”. Per impostare l’ora premere il tasto impostazioni (16, o 18 sul telecomando). Selezionare l’ora con i tasti freccia (14, 15). Premendo il tasto impostazioni (16) si passa ai minuti. Impostare i minuti con i tasti freccia (14, 15), confermare con il tasto OK e salvare le impostazioni eseguite. -
Page 70: Gestione Tramite Smartphone
Per collegare il telefono al dispositivo Klarstein, procedere come segue: Per prima cosa scaricare l‘app Klarstein scansionando il codice QR con lo smartphone (vedere sotto) o scaricarla direttamente dall‘App Store o da Google Play. - Page 71 • Il dispositivo è collegato? • La funzione WiFi del telefono è abilitata? • La funzione WiFi del dispositivo Klarstein è attivata? (Seguire le istruzioni nell‘app) • La password WLAN è stata immessa correttamente? • Il router, il dispositivo Klarstein e lo smartphone sono nelle immediate vicinanze durante il tentativo di connessione? (Idealmente a non più...
-
Page 72: Avviso Di Smaltimento
AVVISO DI SMALTIMENTO Se nel proprio paese si applicano le regolamentazioni inerenti lo smaltimento di dispositivi elettrici ed elettronici, questo simbolo sul prodotto o sulla confezione segnala che questi prodotti non possono essere smaltiti con i rifi uti normali e devono essere portati a un punto di raccolta di dispositivi elettrici ed elettronici.