Publicité

Les langues disponibles
  • FR

Les langues disponibles

  • FRANÇAIS, page 68

Liens rapides

Dell™ PowerConnect™ 35xx
Systems
Getting Started Guide
Začínáme
Guide de mise en route
Handbuch zum Einstieg
Οδηγός για γρήγορο ξεκίνημα
시작 안내서
Instrukcja uruchomienia
Guía de introducción
BaúODQJÕo .ÕODYX]X
w w w . d e l l . c o m | s u p p o r t . d e l l . c o m

Publicité

Table des Matières
loading

Sommaire des Matières pour Dell PowerConnect 35 Serie

  • Page 1 Dell™ PowerConnect™ 35xx Systems Getting Started Guide Začínáme Guide de mise en route Handbuch zum Einstieg Οδηγός για γρήγορο ξεκίνημα 시작 안내서 Instrukcja uruchomienia Guía de introducción BaúODQJÕo .ÕODYX]X w w w . d e l l . c o m | s u p p o r t . d e l l . c o m...
  • Page 3 Dell™ PowerConnect™ 35xx Systems Getting Started Guide w w w . d e l l . c o m | s u p p o r t . d e l l . c o m...
  • Page 4 Notes, Notices, and Cautions NOTE: A NOTE indicates important information that helps to make better use of the device. NOTICE: A NOTICE indicates either potential damage to hardware or loss of data and gives information how to avoid the problem. CAUTION: A CAUTION indicates a potential for property damage, personal injury, or death.
  • Page 5 Contents Installation Overview ........Site Preparation .
  • Page 6 Contents...
  • Page 7: Site Preparation

    This document provides basic information on installing and running the PowerConnect 3500 series switches. For more information, see the Dell™ PowerConnect™ 3500 Series User's Guide, which is available on your Documentation CD, or check the Dell Support website at support.dell.com for the latest updates on documentation and software.
  • Page 8: Mounting The Device

    Unpacking Package Contents While unpacking the device, ensure that the following items are included: • Device/Switch • AC power cable • RS-232 crossover cable • Self-adhesive rubber pads • Rack-mount kit for rack installation or wall mounting kit • Documentation CD •...
  • Page 9 Figure 1-1. Bracket Installation for Rack Mounting 2 Insert the supplied screws into the rack-mounting holes and tighten with a screwdriver. 3 Repeat the process for the rack-mounting bracket on the other side of the device. 4 Insert the unit into the 48.26-cm (19-inch) rack, ensuring that the rack-mounting holes on the device line up to the mounting holes on the rack.
  • Page 10 Installing on a Wall To mount the switch on a wall: 1 Ensure that the mounting location meets the following requirements: • The surface of the wall must be capable of supporting the switch. • Allow at least 5.1 cm (2 inches) space on the sides for proper ventilation and 12.7 cm (5 inches) at the back for power cable clearance.
  • Page 11 Connecting to a Terminal 1 Connect an RS-232 crossover cable to the ASCII terminal or the serial connector of a desktop system running terminal emulation software. 2 Connect the female DB-9 connector at the other end of the cable to the device serial port connector. NOTE: Do not connect the power cable to a grounded AC outlet at this time.
  • Page 12 Installation...
  • Page 13 Stacking Overview Each device can operate as a stand-alone device or can be a member in a stack. Up to eight devices are supported per stack. All stacks must have a Master unit, and may have a Master Backup unit, with any other devices connected to the stack as Members.
  • Page 14 Figure 2-1. Stacking Cable Diagram For more information on stacking, see the Dell PowerConnect 3500 Series User's Guide on the Documentation CD. You can perform the stack unit identification on the device front-panel using the Stack ID button. Stacking...
  • Page 15 Figure 2-2. Stacking Configuration and Identification Panel Stack ID Button Stacking LEDs Each stack device has a unique identifying unit ID that defines the unit’s position and function in the stack. If the device is a stand-alone unit, the Stack LED is not illuminated. The default setting is stand-alone. You can manually configure the unit ID using the Stack ID button.
  • Page 16 Unit ID Selection Process The unit ID selection process is as follows: 1 Power up the device — To power up the device perform the following tasks: Ensure that the stand-alone/Master device Console port is connected to a VT100 terminal device or VT100 terminal emulator via the RS-232 crossover cable.
  • Page 17 Starting and Configuring the Device After completing all external connections, connect a terminal to the device to configure the device. Performing the additional advanced functions are described in the Dell PowerConnect 3500 Series User's Guide on the Documentation CD. NOTE: Before proceeding further, read the release notes for this product.
  • Page 18 2 Ensure that the terminal emulation software is set as follows: Select the appropriate serial port (serial port 1 or serial port 2) to connect to the console. Set the data rate to 9600 baud. Set the data format to 8 data bits, 1 stop bit, and no parity. Set flow control to none.
  • Page 19: Initial Configuration

    The boot process runs approximately 90 seconds. Initial Configuration NOTE: Before proceeding, read the release notes for this product. You can download the release notes from the Dell Support website at support.dell.com. NOTE: The initial configuration uses the following assumptions: •...
  • Page 20 The wizard automatically assigns the highest access level [Privilege Level 15] to this account. You can use Dell Network Manager or other management interfaces to change this setting later, and to add additional management system later.
  • Page 21 To add a management station: Please enter the SNMP community string to be used:[MYSETUPWIZARD] >> Dell Network Manager Please enter the IP address of the Management System (A.B.C.D) or wildcard (0.0.0.0) to manage from any Management Station, for example 192.168.1.10. Press Enter.
  • Page 22 [Y/N] Enter [N] to skip to restart the wizard. Enter [Y] to complete the Set-up wizard. The following is displayed: Thank you for using Dell Easy Setup Wizard. You will now enter CLI mode. Wizard Step 6 The CLI prompt displays.
  • Page 23 Dell™ PowerConnect™ 35xx w w w . d e l l . c o m | s u p p o r t . d e l l . c o m...
  • Page 24 ____________________ © 2007 Dell Inc. Dell Inc. Dell Dell OpenManage PowerEdge DELL Inspiron Dell Precision Dimension OptiPlex Dell Inc. Microsoft PowerConnect PowerApp PowerVault Axim DellNet Latitude Microsoft Windows Corporation Dell Inc. 3524 3524P 3548 3548P 2007 P/N FG745...
  • Page 25 PowerConnect 3500...
  • Page 27 PowerConnect 3500 Dell™ PowerConnect™ 3500 Series User's Guide Dell™ PowerConnect™ 3500 Dell support.dell.com PowerConnect 3500 48.26 • (100-240 VAC, 50-60 Hz) • (RPS) (EPS) • • • • 45 ºC 32 113 ºF...
  • Page 28 • • • RS-232 • • • • PowerConnect 3500 (RPS) (EPS)
  • Page 29 1-1. 48.26 5.08 12.7...
  • Page 30 • • 12.7 • • • • • 1-2.
  • Page 31 RS-232 ASCII DB-9 1-3. PowerConnect 3524/3548 PowerConnect 3524P/3548P...
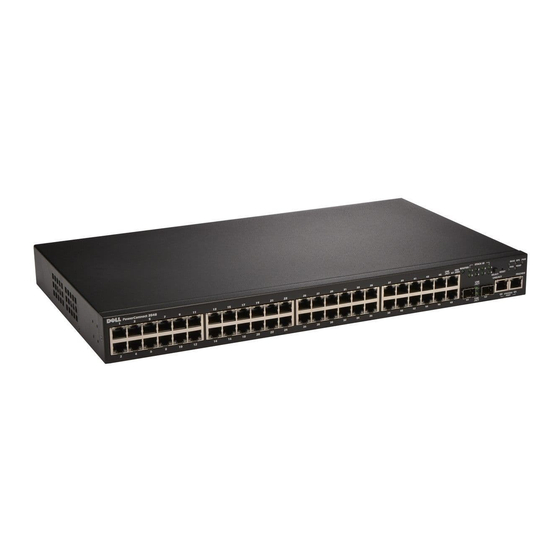
  • Page 33 PowerConnect 3500 PowerConnect 3500 PowerConnect 3500 RJ-45 • • •...
  • Page 34 2-1. Dell PowerConnect 3500 Series User's Guide Dell PowerConnect 3500 Stack ID...
  • Page 35 2-2. Stack ID Stack ID ID LED ID 1 ID 3...
  • Page 36 RS-232 VT100 VT100 Stack ID ID LED ID LED Stack ID LED 8 Stack ID Stack ID ID 1 Stack ID LED ID...
  • Page 37 Dell PowerConnect 3500 Series User's Guide Dell PowerConnect 3500 Dell support.dell.com Dell support.dell.com DB-9 (DTE) • VT100 VT100 • RS-232 DB-9 RS-232 VT100...
  • Page 38 9600 none Properties VT100 for Emulation VT100 Ctrl Windows ® ® HyperTerminal Microsoft Windows 2000 Windows XP Widows Vista Windows 2000 Service Pack 2 HyperTerminal VT100 Windows 2000 Windows XP Windows Vista www.microsoft.com RS-232 PowerConnect 3500 3-1. PowerConnect 3500 PowerConnect...
  • Page 39 (POST) POST POST POST Dell support.dell.com • PowerConnect • PowerConnect • VT100 • SNMP SNMP • • VLAN 1 VLAN 1 • • PowerConnect 3500 Series User's Guide PowerConnect 3500 • SNMP SNMP • • • •...
  • Page 40 Would you like to skip the setup wizard? [Y/N] N [Y/N] N [CNTRL+Z] The system is not setup for SNMP management by default. To manage the switch using SNMP (required for Dell Network Manager) you can: SNMP SNMP [Dell Open Network Manager •...
  • Page 41 The wizard automatically assigns the highest access level [Privilege Level 15] to this account. You can use Dell Network Manager or other management interfaces to change this setting later, and to add additional management system later.
  • Page 42 Finally, setup the default gateway. Please enter the IP address of the gateway from which this network is reachable(e.g. 192.168.1.1): 192.168.1.1] Enter This is the configuration information that has been collected: SNMP Interface = "Dell Network Manager"@192.168.1.10 SNMP = "Dell Network Manager"@192.168.1.10 User Account setup = admin = admin...
  • Page 43 If the information is incorrect, select (N) to discard configuration and restart the wizard: [Y/N] [Y/N] Thank you for using Dell Easy Setup Wizard. You will now enter CLI mode. Dell PowerConnect 3500 Series User's Guide PowerConnect 3500...
  • Page 45 Systémy Dell™ PowerConnect™ 35xx Začínáme w w w . d e l l . c o m | s u p p o r t . d e l l . c o m...
  • Page 46 V tomto dokumentu mohou být použity další ochranné známky a obchodní názvy buď s odkazem na právnické osoby a organizace, které uplatňují na dané ochranné známky a obchodní názvy nárok, nebo s odkazem na jejich výrobky. Společnost Dell Inc. se zříká jakýchkoli vlastnických zájmů...
  • Page 47 Obsah 1 Instalace ........Úvod Příprava instalačního místa .
  • Page 48 Obsah...
  • Page 49 Tento dokument obsahuje základní informace pro instalaci a provoz switchů typu PowerConnect 3500. Více informací viz Uživatelská příručka pro zařízení Dell™ PowerConnect™ 3500 Series, která se nachází na CD Documentation, nebo navštivte webové stránky Dell Support na adrese support.dell.com a hledejte nejnovější aktualizace dokumentace a programů.
  • Page 50: Montáž Zařízení

    Rozbalení Obsah balení Při rozbalování zařízení se ujistěte, že balení obsahuje následující položky: • Zařízení / Přepínač • Napájecí kabel • Redukční kabel RS-232 • Samolepící gumové podložky • Soupravu pro instalaci do stojanu nebo na zeď • CD s dokumentací •...
  • Page 51 Obr. 1-1. Instalace držáku při montáži do stojanu 2 Nasaďte přiložené šrouby do montážních otvorů a utáhněte je šroubovákem. 3 Tento postup opakujte u konzoly pro montáž do regálu na druhé straně zařízení. 4 Zasuňte jednotku do 48,26-cm stojanu a ujistěte se, že montážní otvory na zařízení jsou v zákrytu s montážními otvory ve stojanu.
  • Page 52 Instalace na zeď Při montáži na zeď zajistěte následující: 1 Zajistěte, aby místo instalace splňovalo následující požadavky: • Povrch zdi musí být schopen unést zařízení. • Na stranách je nutné ponechat nejméně 5,1 cm volného prostoru pro řádné větrání a vzadu 12,7 cm volného prostoru pro napájecí...
  • Page 53 Připojení k terminálu 1 Připojte přechodový kabel RS-232 k ASCII terminálu nebo k sériovému konektoru stolní stanice, na které běží software emulující terminál. 2 Připojte vnitřní konektor DB-9 na druhé straně kabelu ke konektoru sériového portu na zařízení. POZNÁMKA: V tomto okamžiku napájecí kabel nepřipojujte do uzemněné zásuvky střídavého elektrického proudu.
  • Page 54 Instalace...
  • Page 55 Stohování Úvod Každé zařízení může pracovat samostatně nebo jako součást stohu. Podporováno je až šest zařízení ve stohu. Všechny stohy musí mít jednotku Master, případně záložní jednotku Master Backup, ke které budou ve stohu připojovány jakákoli další zařízení jako Členové. Stohování...
  • Page 56 Obr. 2-1. Schéma stohovacích kabelů Více informací o stohování viz Uživatelská příručka pro zařízení Dell PowerConnect 3500 Series na CD Documentation. Identifikace jednotky stohu se provádí pomocí tlačítka Stack ID na čelním panelu zařízení. Stohování...
  • Page 57 Obr. 2-2. Panel pro konfiguraci a identifikaci stohování Tlačítko Stack ID Kontrolky stohování Každá stohovací jednotka má své jedinečné identifikační ID, které definuje pozici a funkci jednotky ve stohu. Pokud je zařízení samostatná jednotka, kontrolka Stack nesvítí. Standardní nastavení je „samostatný“. ID číslo se konfiguruje manuálně...
  • Page 58 Postup volby ID jednotky Při výběru ID jednotky se postupuje následovně: 1 Zapnutí zařízení — Před zapnutím zařízení proveďte následující úkony: Ujistìte se, že konzolový port samostatného/Master zaøízení je zapojen do terminálové zaøízení VT100 nebo k emulátoru terminálu VT100 pomocí pøechodového kabelu RS-232. Lokalizujte elektrickou zásuvku střídavého napětí.
  • Page 59 Spuštění a konfigurace zařízení Po dokončení všech vnějších propojení připojte k zařízení terminál, abyste zařízení mohli konfigurovat. Použití dalších pokročilých funkcí je popsáno v Uživatelské příručce pro zařízení Dell PowerConnect 3500 Series na CD Documentation. POZNÁMKA: Než budete pokračovat, přečtěte si informace k tomuto produktu. Informace lze stáhnout z webových stránek Dell Support na adrese support.dell.com.
  • Page 60 2 Ujistěte se, že software pro emulaci terminálu je nastaven následujícím způsobem: Zvolte pøíslušný sériový port (sériový port 1 nebo sériový port 2) pro pøipojení ke konzole. Rychlost přenosu dat nastavte na 9600 baudů. Formát dat nastavte na 8 datových bitů, 1 stop bit a žádnou paritu. Nastavte regulaci průtoku na žádná.
  • Page 61 Počáteční konfigurace POZNÁMKA: Předtím, než budete pokračovat, si prosím přečtěte informace k tomuto produktu. Informace lze stáhnout z webových stránek Dell Support na adrese support.dell.com. POZNÁMKA: Počáteční konfigurace vychází z následujících předpokladů: Zařízení PowerConnect nebylo nikdy předtím konfigurováno a je ve stejném stavu v jakém jste jej obdrželi.
  • Page 62 Průvodce - krok 1 Zobrazí se následující informace: The system is not setup for SNMP management by default. To manage the switch using SNMP (required for Dell Network Manager) you can: • Setup the initial SNMP version 2 account now.
  • Page 63 The wizard automatically assigns the highest access level [Privilege Level 15] to this account. You can use Dell Network Manager or other management interfaces to change this setting later, and to add additional management system later.
  • Page 64 Zadejte výchozí bránu. Stiskněte klávesu Enter. Zobrazí se následující informace (dle parametrů popsaného příkladu): This is the configuration information that has been collected: SNMP Interface = "Dell Network Manager"@192.168.1.10 User Account setup = admin Password = ********** Management IP address = 192.168.1.100 255.255.255.0 Default Gateway = 192.168.1.1...
  • Page 65 Zadáním (N) restartujte průvodce. Zadáním (Y) dokončete průvodce nastavením. Zobrazí se následující informace: Thank you for using Dell Easy Setup Wizard. You will now enter CLI mode. Průvodce - krok 6 Zobrazí se výzva CLI. Další informace naleznete v Uživatelské příručce pro zařízení PowerConnect 3500 Series.
  • Page 66 Spuštění a konfigurace zařízení...
  • Page 67: Guide De Mise En Route

    Systèmes Dell™ PowerConnect™35xx Guide de mise en route w w w . d e l l . c o m | s u p p o r t . d e l l . c o m...
  • Page 68: Remarques, Avis Et Précautions

    Remarques, avis et précautions REMARQUE : une REMARQUE indique une information importante destinée à vous aider à mieux utiliser le système. AVIS : un AVIS vous avertit d'un risque de dommage matériel ou de perte de données et vous indique comment éviter le problème.
  • Page 69 Sommaire Installation Présentation générale........... 69 Préparation du site .
  • Page 70 Sommaire...
  • Page 71: Présentation Générale

    Préparation du site Les unités Dell PowerConnect 3500 peuvent être montées dans un rack standard de 19 pouces (48,26 cm), posées sur une table ou fixées à un mur. Avant d'installer l'unité, vérifiez que l'emplacement choisi pour l'installation satisfait aux conditions suivantes : •...
  • Page 72: Déballage

    Déballage Contenu du carton Lors du déballage de l'unité, vérifiez que le carton contient les éléments suivants : • Unité/Commutateur • Cordon d'alimentation en CA • Câble inverseur RS-232 • Patins adhésifs en caoutchouc • Kit de montage pour l'installation en rack ou kit de fixation murale •...
  • Page 73: Montage En Rack

    Montage en rack PRÉCAUTION : prenez connaissance des consignes de sécurité se trouvant dans le Guide d'information sur le produit ou concernant toute autre unité en contact avec le commutateur. PRÉCAUTION : déconnectez tous les câbles avant de monter l'unité dans un rack ou une armoire. PRÉCAUTION : si vous installez plusieurs unités dans un rack, commencez par les emplacements du bas et procédez en remontant vers le haut du rack.
  • Page 74: Fixation Murale

    Installation sur une surface plane Installez l'unité sur une surface plane si elle n'est pas installée dans un rack. Cette surface doit être capable de supporter le poids du périphérique et de ses câbles. 1 Fixez les patins adhésifs en caoutchouc sur les emplacements indiqués en dessous du châssis. 2 Posez l'unité...
  • Page 75: Connexion À Un Terminal

    Figure 1-2. Installation des supports pour une fixation murale Connexion à un terminal 1 Connectez un câble inverseur RS-232 au terminal ASCII ou au connecteur série d'un système de bureau exécutant un logiciel d'émulation de terminal. 2 Branchez le connecteur DB-9 femelle (à l'autre extrémité du câble) sur le port série de l'unité. REMARQUE : à...
  • Page 76 Figure 1-3. Connecteur d'alimentation du panneau arrière Port de console Connecteur du bloc Connecteur d'alimentation redondant d'alimentation Vue arrière des PowerConnect 3524/3548 Port de console Connecteur Connecteur du bloc d'alimentation d'alimentation externe Vue arrière des PowerConnect 3524P/3548P Installation...
  • Page 77: Installation En Pile De Commutateurs Powerconnect 3500

    Empilage Présentation générale Chaque unité peut fonctionner en autonome ou en tant que membre d'une pile. Vous pouvez installer jusqu'à 8 unités par pile. Chaque pile contient une unité maître et des unités membres. Elle peut éventuellement compter une unité maître de secours. Installation en pile de commutateurs PowerConnect 3500 Chaque pile de commutateurs PowerConnect 3500 contient une seule unité...
  • Page 78 Figure 2-1. Diagramme de câblage de la pile Pour plus d'informations sur l'empilage, consultez le Guide d'utilisation Dell PowerConnect 3500. Ce manuel se trouve sur le CD de documentation. Pour identifier une unité dans une pile, utilisez le bouton Stack ID (ID de pile) se trouvant sur son panneau avant.
  • Page 79 Figure 2-2. Configuration de la pile et panneau d'identification Bouton Stack ID (ID de pile) Voyants d'empilage Chaque unité de la pile possède un identificateur unique définissant sa position dans la pile et sa fonction. Si l'unité fonctionne en autonome, le voyant de pile est éteint. Le fonctionnement en autonome est activé par défaut.
  • Page 80: Procédure De Sélection Des Id D'unité

    Procédure de sélection des ID d'unité La sélection des ID d'unité s'effectue comme suit : 1 Mise sous tension de l'unité : Assurez-vous que le port de console de l'unité maître ou autonome est relié à un terminal (ou à un émulateur de terminal) VT100 par un câble inverseur RS-232. Trouvez un module d'alimentation (prise de courant).
  • Page 81: Démarrage Et Configuration De L'unité

    Une fois toutes les connexions externes mises en place, connectez un terminal à l'unité pour configurer celle-ci. Les fonctions avancées supplémentaires disponibles sont décrites dans le Guide d'utilisation Dell PowerConnect 3500. Ce manuel se trouve sur le CD de documentation. REMARQUE : avant de continuer, lisez les notes d'édition concernant ce produit.
  • Page 82 2 Vérifiez que le logiciel d'émulation de terminal est bien paramétré de la manière suivante : Sélectionnez le port série approprié (1 ou 2) pour la connexion à la console. Réglez le débit de données sur 9600 bauds. Paramétrez le format de données sur 8 bits de données, 1 bit d'arrêt et aucune parité. Définissez le contrôle de flux sur aucun.
  • Page 83: Démarrage Du Commutateur

    Configuration initiale REMARQUE : avant de continuer, lisez les notes d'édition concernant ce produit. Vous pouvez les télécharger à partir du site d'assistance technique de Dell, support.dell.com. REMARQUE : la configuration initiale est basée sur les hypothèses suivantes : •...
  • Page 84 Assistant - Étape 1 Les informations suivantes s'affichent : The system is not setup for SNMP management by default. To manage the switch using SNMP (required for Dell Network Manager) you can: • Setup the initial SNMP version 2 account now.
  • Page 85 The wizard automatically assigns the highest access level [Privilege Level 15] to this account. You can use Dell Network Manager or other management interfaces to change this setting later, and to add additional management system later.
  • Page 86 Entrez la passerelle par défaut. Appuyez sur Entrée. Les informations suivantes s'affichent (selon les paramètres de l'exemple ci-dessus) : This is the configuration information that has been collected: SNMP Interface = "Dell Network Manager"@192.168.1.10 User Account setup = admin Password = ********** Management IP address = 192.168.1.100 255.255.255.0...
  • Page 87 Appuyez sur [N] pour redémarrer l'assistant. Appuyez sur [Y] pour terminer l'assistant. Le message suivant s'affiche : Thank you for using Dell Easy Setup Wizard. You will now enter CLI mode. Assistant - Étape 6 L'invite CLI s'affiche. Pour plus d'informations, consultez le Guide d'utilisation Dell PowerConnect 3500.
  • Page 88 Démarrage et configuration de l'unité...
  • Page 89 Dell™ PowerConnect™ 35xx-Systeme Handbuch zum Einstieg w w w . d e l l . c o m | s u p p o r t . d e l l . c o m...
  • Page 90 Anmerkungen, Hinweise und Vorsichtshinweise ANMERKUNG: Eine ANMERKUNG macht auf wichtige Informationen aufmerksam, mit deren Hilfe Sie das Gerät besser nutzen können. HINWEIS: Mit einem HINWEIS wird auf eine mögliche Beschädigung von Hardware oder den Verlust von Daten hingewiesen und erläutert, wie dieses Problem vermieden werden kann. VORSICHT: Hiermit werden Sie auf eine potentiell gefährliche Situation hingewiesen, die zu Sachschäden, Verletzungen oder zum Tod führen könnte.
  • Page 91 Inhalt Installation Übersicht ............. . 91 Standortvorbereitung .
  • Page 92 Inhalt...
  • Page 93 Dieses Dokument enthält grundlegende Informationen zur Installation und zum Betrieb von Switches der Reihe PowerConnect 3500. Weitere Informationen finden Sie im Dokument Dell™ PowerConnect™ 3500-Reihe – Benutzerhandbuch auf der Dokumentations-CD. Aktuelle Updates von Dokumentation und Software erhalten Sie auf der Dell Support-Website unter support.dell.com. Standortvorbereitung Geräte der Reihe PowerConnect 3500 lassen sich in einem 19-Zoll-Standard-Rack oder als Tisch-...
  • Page 94: Montage Des Geräts

    Auspacken Inhalt der Verpackung Die folgenden Komponenten sollten nach dem Auspacken des Geräts vorhanden sein: • Gerät/Switch • Netzstromkabel • Gekreuztes RS-232-Kabel • Selbsthaftende Gummiunterlagen • Rack-Montagekit zur Installation im Rack oder Wandmontagekit • Dokumentations-CD • Produktinformationshandbuch Auspacken des Geräts ANMERKUNG: Überprüfen Sie vor dem Auspacken des Geräts die Verpackung, und melden Sie etwaige Beschädigungen unverzüglich.
  • Page 95 Montage in einem Rack VORSICHT: Lesen Sie die Sicherheitshinweise im Produktinformationshandbuch und die Sicherheitshinweise für andere Geräte, die mit dem Switch verbunden werden oder diesen unterstützen. VORSICHT: Trennen Sie alle Kabel vom Gerät, bevor Sie den PowerConnect-Switch in einem Rack oder einem Schrank montieren.
  • Page 96: Wandmontage

    2 Führen Sie die mitgelieferten Schrauben in die Rackmontagebohrungen ein, und ziehen Sie sie mit einem Schraubendreher fest. 3 Wiederholen Sie die Schritte für die Rackmontagehalterung auf der anderen Seite des Geräts. 4 Setzen Sie die Einheit in das 19-Zoll-Rack ein, und stellen Sie sicher, dass die Montagebohrungen am Gerät mit den Montagebohrungen am Rack übereinstimmen.
  • Page 97 Abbildung 1-2. Halterungen für die Wandmontage anbringen Verbinden des Gerätes mit einem Terminal 1 Verbinden Sie ein gekreuztes RS-232-Kabel mit einem ASCII-Terminal oder mit dem seriellen Anschluss eines Desktop-Systems mit einer Terminal-Emulationssoftware. 2 Verbinden Sie den DB-9-Anschluss am anderen Ende des Kabels mit der seriellen Schnittstelle des Geräts.
  • Page 98 Abbildung 1-3. Stromanschluss an der Rückseite Stromanschluss Anschluss für Konsole RPS-Anschluss Rückansicht des PowerConnect 3524/3548 Anschluss für Konsole Stromanschluss EPS-Anschluss Rückansicht des PowerConnect 3524P/3548P Installation...
  • Page 99 Stacking Übersicht Jedes Gerät kann als Standalone-Gerät oder als Stack-Komponente verwendet werden. Pro Stack werden bis zu acht Geräte unterstützt. Für alle Stacks muss eine Mastereinheit und kann eine Mastersicherungseinheit vorhanden sein, und alle anderen mit dem Stack verbundenen Geräte sind abhängige Komponenten. Stacking von Switches der Reihe PowerConnect 3500 Jeder Stack aus Switches der PowerConnect 3500-Reihe enthält eine einzelne Mastereinheit und kann eine Mastersicherungseinheit enthalten, während die übrigen Einheiten als abhängige...
  • Page 100 Abbildung 2-1. Stacking-Verkabelungsschema Weitere Informationen zum Stacking finden Sie im Dokument Dell PowerConnect 3500-Reihe – Benutzerhandbuch auf der Dokumentations-CD. Die Identifizierung der Stack-Einheiten können Sie auf der Gerätevorderseite mit der Stack-ID-Taste vornehmen. Stacking...
  • Page 101 Abbildung 2-2. Stacking-Konfiguration und Anzeigen zur Identifizierung Taste „Stack ID“ Stacking-LEDs Jede Stack-Komponente verfügt über eine identifizierende Geräte-ID, von der die Position und Funktion der Einheit innerhalb des Stacks definiert wird. Wenn es sich um eine Standalone-Einheit handelt, leuchtet die Stack-LED nicht auf. Der Standard ist auf Standalone-Gerät eingestellt. Sie können die Geräte-ID mit der Stack-ID-Taste manuell konfigurieren.
  • Page 102 Auswählen der Geräte-ID Die Geräte-IDs werden wie folgt ausgewählt: 1 Gerät einschalten – gehen Sie dazu wie folgt vor: Stellen Sie sicher, dass das Standalone-Gerät bzw. die Mastereinheit über ein gekreuztes RS-232- Kabel mit einem VT100-Terminal oder einem VT100-Emulationsprogramm verbunden ist. Suchen Sie eine geeignete Netzstromquelle.
  • Page 103 Gerät starten und konfigurieren Nachdem Sie alle externen Verbindungen vorgenommen haben, schließen Sie das Gerät an ein Terminal an, um es zu konfigurieren. Informationen zu den zusätzlichen erweiterten Funktionen erhalten Sie im Dokument Dell PowerConnect 3500 – Benutzerhandbuch auf der Dokumen- tations-CD. ANMERKUNG: Lesen Sie vor dem Fortfahren die Versionshinweise für dieses Produkt.
  • Page 104 Führen Sie folgende Schritte aus, um ein Terminal an den Konsolenanschluss des Geräts anzuschließen: 1 Verbinden Sie das mitgelieferte, gekreuzte RS-232-Kabel mit dem Terminal, auf dem die VT100- Terminal-Emulationssoftware ausgeführt wird. 2 Vergewissern Sie sich, dass die Terminal-Emulationssoftware wie folgt eingerichtet ist: Wählen Sie eine geeignete serielle Schnittstelle (serielle Schnittstelle 1 oder 2) zur Verbindung mit der Konsole aus.
  • Page 105 Abbildung 3-1. Konsolenanschluss bei der PowerConnect 3500-Reihe verbinden Terminal PowerConnect-Rückseite ANMERKUNG: Sie können jeden Konsolenanschluss im Stack mit einer Konsole verbinden; der Stack wird jedoch nur über die Mastereinheit (Geräte-IDs 1 und 2) verwaltet. Starten des Switches Wenn das Gerät mit dem lokalen Terminal verbunden ist und der Strom eingeschaltet wird, durchläuft der Switch den Einschaltselbsttest (POST –...
  • Page 106 Erstkonfiguration ANMERKUNG: Lesen Sie die Versionshinweise für dieses Produkt, bevor Sie fortfahren. Sie können die Versions- hinweise von der Dell Support-Website unter support.dell.com herunterladen. ANMERKUNG: Die Erstkonfiguration setzt folgende Punkte voraus: • Das PowerConnect-Gerät wird zum ersten Mal konfiguriert und befindet sich in dem gleichen Zustand, in dem Sie es erhalten haben.
  • Page 107 Schritt 1 des Assistenten Die folgenden Informationen werden angezeigt: The system is not setup for SNMP management by default. To manage the switch using SNMP (required for Dell Network Manager) you can: • Setup the initial SNMP version 2 account now.
  • Page 108 The wizard automatically assigns the highest access level [Privilege Level 15] to this account. You can use Dell Network Manager or other management interfaces to change this setting later, and to add additional management system later.
  • Page 109 Geben Sie das Standard-Gateway ein. Drücken Sie die Eingabetaste. Folgendes wird angezeigt (mit den beschriebenen Beispielparametern): This is the configuration information that has been collected: SNMP Interface = "Dell Network Manager"@192.168.1.10 User Account setup = admin Password = ********** Management IP address = 192.168.1.100 255.255.255.0 Default Gateway = 192.168.1.1...
  • Page 110 Geben Sie [N] ein, um den Assistenten neu zu starten. Geben Sie [Y] ein, um den Setup-Assistenten abzuschließen. Folgendes wird angezeigt: Thank you for using Dell Easy Setup Wizard. You will now enter CLI mode. Schritt 6 des Assistenten Die CLI-Eingabeaufforderung wird angezeigt. Weitere Informationen erhalten Sie im Dokument PowerConnect 3500-Reihe –...
  • Page 111 Συστήματα PowerConnect™ 35xx της Dell™ Οδηγός για γρήγορο ξεκίνημα w w w . d e l l . c o m | s u p p o r t . d e l l . c o m...
  • Page 112 Στο παρόν έγγραφο ενδέχεται να χρησιμοποιούνται άλλα εμπορικά σήματα και εμπορικές ονομασίες για αναφορά στις οντότητες που διεκδικούν τα σήματα και τις ονομασίες ή για αναφορά στα προϊόντα τους. Η Dell Inc. αποποιείται οποιοδήποτε πιθανό συμφέρον ιδιοκτησίας από εμπορικά σήματα και εμπορικές ονομασίες εκτός από αυτά που έχει στην κατοχή της.
  • Page 113 Περιεχόµενα 1 Εγκατάσταση ......Επισκόπηση Προετοιμασία τοποθέτησης ..... Άνοιγμα...
  • Page 114 Περιεχόµενα...
  • Page 115: Εγκατάσταση

    Αυτό το έγγραφο παρέχει βασικές πληροφορίες για την εγκατάσταση και λειτουργία των διακοπτών της σειράς PowerConnect 3500. Για περισσότερες πληροφορίες, ανατρέξτε στον Οδηγό Χρήσης της σειράς Dell™ PowerConnect™ 3500, ο οποίος είναι διαθέσιμο στο CD τεκμηρίωσης, ή επισκεφθείτε την τοποθεσία υποστήριξης της Dell στο Web, στη διεύθυνση support.dell.com, για τις τελευταίες...
  • Page 116: Περιεχόμενα Συσκευασίας

    Άνοιγμα συσκευασίας Περιεχόμενα συσκευασίας Κατά το άνοιγμα της συσκευασίας της συσκευής, βεβαιωθείτε ότι περιλαμβάνονται τα ακόλουθα αντικείμενα: Συσκευή/ Διακόπτης Καλώδιο τροφοδοσίας AC Καλώδιο διασταύρωσης RS-232 Ελαστικά αυτοκόλλητα Σετ τοποθέτησης για εγκατάσταση σε ράφι ή σετ για τοποθέτηση σε τοίχο CD τεκμηρίωσης Οδηγός...
  • Page 117 Εγκατάσταση σε ράφι ΠΡΟΣΟΧΗ: Διαβάστε τις οδηγίες για την ασφάλεια στον Οδηγό Πληροφοριών Προϊόντος, καθώς και τις πληροφορίες για την ασφάλεια για άλλες συσκευές που συνδέονται στο διακόπτη ή υποστηρίζουν το διακόπτη. ΠΡΟΣΟΧΗ: Αποσυνδέστε όλα τα καλώδια από τη μονάδα πριν να τοποθετήσετε τη συσκευή σε...
  • Page 118 Τοποθετήστε τις παρεχόμενες βίδες στις οπές τοποθέτησης σε ράφι και σφίξτε με ένα κατσαβίδι. Επαναλάβετε τη διαδικασία για το στήριγμα τοποθέτησης σε ράφι στην άλλη πλευρά της συσκευής. Τοποθετήστε τη μονάδα στο ράφι των 48,26 εκ. (19 ιντσών), φροντίζοντας οι οπές τοποθέτησης της συσκευής...
  • Page 119 Εικόνα 1-2. Εγκατάσταση στηρίγματος για τοποθέτηση σε τοίχο Σύνδεση με τερματικό Συνδέστε ένα καλώδιο διασταύρωσης RS-232 στο τερματικό ASCII ή στο σειριακό συζευκτήρα ενός επιτραπέζιου συστήματος που εκτελεί λογισμικό εξομοίωσης τερματικού. Συνδέστε το θηλυκό συζευκτήρα DB-9 στην άλλη άκρη του καλωδίου με το συζευκτήρα σειριακής...
  • Page 120 Εικόνα 1-3. Συζευκτήρας τροφοδοσίας στο πίσω πλαίσιο Συζευκτήρας Θύρα κονσόλας Συζευκτήρας RPS τροφοδοσίας Πίσω όψη του PowerConnect 3524/3548 Συζευκτήρας Θύρα κονσόλας Συζευκτήρας ΕPS τροφοδοσίας Πίσω όψη του PowerConnect 3524P/3548P Εγκατάσταση...
  • Page 121 Τοποθέτηση σε στοίβα Επισκόπηση Κάθε συσκευή μπορεί να λειτουργήσει ως ανεξάρτητη συσκευή ή μπορεί να αποτελέσει μέλος μιας στοίβας. Μέχρι οκτώ συσκευές υποστηρίζονται ανά στοίβα. Όλες οι στοίβες πρέπει να διαθέτουν μια κύρια μονάδα και μπορούν να έχουν μια εφεδρική κύρια μονάδα, με...
  • Page 122 Εικόνα 2-1. Διάγραμμα καλωδίων στοίβας Για περισσότερες πληροφορίες σχετικά με την τοποθέτηση σε στοίβα, ανατρέξτε στον Οδηγό Χρήσης της σειράς Dell PowerConnect 3500 που βρίσκεται στο CD τεκμηρίωσης. Μπορείτε να προσδιορίσετε τη μονάδα στοίβας στον μπροστινό πίνακα της συσκευής, με τη χρήση του κουμπιού...
  • Page 123 Εικόνα 2-2. Πίνακας ρύθμισης παραμέτρων και αναγνωριστικών στοίβας Κουμπί αναγνωριστικού στοίβας Φωτεινές ενδείξεις LED στοίβας Κάθε συσκευή στοίβας διαθέτει ένα μοναδικό αναγνωριστικό μονάδας που προσδιορίζει τη θέση και τη λειτουργία της μονάδας στη στοίβα. Εάν η συσκευή είναι αυτόνομη μονάδα, δεν ανάβει η φωτεινή ένδειξη LED της στοίβας. Η...
  • Page 124 Διαδικασία επιλογής αναγνωριστικών μονάδων Η διαδικασία επιλογής αναγνωριστικών μονάδων έχει ως εξής: Τροφοδοτήστε με ρεύμα τη συσκευή — Για να τροφοδοτήσετε τη συσκευή με ρεύμα εκτελέστε τις ακόλουθες εργασίες: Βεβαιωθείτε ότι η θύρα κονσόλας της αυτόνομης κύριας συσκευής είναι συνδεδεμένη με συσκευή τερματικού...
  • Page 125 Αφού ολοκληρωθούν όλες οι εξωτερικές συνδέσεις, συνδέστε ένα τερματικό στη συσκευή για να ρυθμίσετε τις παραμέτρους της συσκευής. Η εκτέλεση των πρόσθετων προηγμένων λειτουργιών περιγράφεται στον Οδηγό Χρήσης της σειράς Dell PowerConnect 3500 του CD τεκμηρίωσης. ΣΗΜΕΙΩΣΗ: Πριν να συνεχίσετε, διαβάστε τις σημειώσεις έκδοσης για αυτό το προϊόν.
  • Page 126 Βεβαιωθείτε ότι το λογισμικό εξομοίωσης λογισμικού έχει ρυθμιστεί ως εξής: Επιλέξτε την κατάλληλη σειριακή θύρα (σειριακή θύρα 1 ή σειριακή θύρα 2) για να συνδεθείτε με την κονσόλα. Ορίστε την ταχύτητα μετάδοσης δεδομένων σε 9.600 baud. Ορίστε τη μορφή δεδομένων σε 8 data bits (8 δυαδικά ψηφία δεδομένων), 1 stop bit (1 δυαδικό ψηφίο τερματισμού) και...
  • Page 127 Αρχική ρύθμιση παραμέτρων ΣΗΜΕΙΩΣΗ: Πριν να συνεχίσετε, διαβάστε τις σημειώσεις έκδοσης για αυτό το προϊόν. Μπορείτε να κάνετε λήψη των σημειώσεων έκδοσης από την τοποθεσία υποστήριξης της Dell στο Web, στη διεύθυνση support.dell.com. ΣΗΜΕΙΩΣΗ: Για την αρχική ρύθμιση παραμέτρων θεωρείται ότι ισχύουν τα εξής: •...
  • Page 128 Διεύθυνση IP προεπιλεγμένης πύλης Ο οδηγός εγκατάστασης εμφανίζει τις ακόλουθες πληροφορίες: Welcome to Dell Easy Setup Wizard The Setup Wizard guides you through the initial switch configuration, and gets you up and running easily and quickly. You can also skip the setup wizard, and enter CLI mode to manually configure the switch if you prefer.
  • Page 129 The wizard automatically assigns the highest access level [Privilege Level 15] to this account. You can use Dell Network Manager or other management interfaces to change this setting later, and to add additional management system later.
  • Page 130 To setup a user account: Please enter the user name: Please enter the user password: Please reenter the user password: Πληκτρολογήστε τα ακόλουθα: Όνομα χρήστη, για παράδειγμα “admin” Κωδικό πρόσβασης και επιβεβαίωση κωδικού. ΣΗΜΕΙΩΣΗ: Το σύστημα εμφανίζει ένα μήνυμα, εάν η πρώτη και η δεύτερη καταχώρηση κωδικού πρόσβασης...
  • Page 131 Πληκτρολογήστε [N] (Όχι), για να γίνει επανεκκίνηση του οδηγού. Πληκτρολογήστε [Y] (Ναι), για να ολοκληρωθεί ο οδηγός εγκατάστασης. Εμφανίζονται τα ακόλουθα: Thank you for using Dell Easy Setup Wizard. You will now enter CLI mode. Βήμα 6 του οδηγού Εμφανίζεται η εντολή CLI. Συμβουλευτείτε τον Οδηγό Χρήσης των συστημάτων της σειράς PowerConnect 3500 για...
  • Page 132 Εκκίνηση και ρύθμιση παραμέτρων της συσκευής...
  • Page 133 Dell™ PowerConnect™ 35xx w w w . d e l l . c o m | s u p p o r t . d e l l . c o m...
  • Page 134 © 2007 Dell Inc. Dell Inc. Dell Dell OpenManage PowerEdge DELL Inspiron Dell Precision Dimension OptiPlex PowerConnect PowerApp PowerVault Axim DellNet Latitude Dell Inc. Microsoft Windows Microsoft Corporation Dell Inc. 3524 3524P 3548 3548P 2007 P/N FG745 Rev. A01...
  • Page 135 ............. . .
  • Page 137 PowerConnect 3500 Documentation CD Dell PowerConnect 3500 support.dell.com PowerConnect 3500 48.26 cm AC 100 240 V 50/60 Hz...
  • Page 138 RS-232 PowerConnect 3500...
  • Page 139 48.26 cm 5 cm 13 cm...
  • Page 140 • • 5 cm 13 cm • • 60 cm • • •...
  • Page 141 RS-232 ASCII DB-9 PowerConnect 3524/3548 PowerConnect 3524P/3548P...
  • Page 143 PowerConnect 3500 PowerConnect 3500 PowerConnect 3500 RJ-45...
  • Page 144 Documentation CD Dell PowerConnect 3500...
  • Page 145 ID LED ID 1 ID 3...
  • Page 146 RS-232 VT100 VT100 ID LED ID LED LED 8...
  • Page 147 Documentation CD Dell PowerConnect 3500 support.dell.com support.dell.com DB-9 VT100 VT100 DB-9 RS-232...
  • Page 148 RS-232 VT100 9600 none Properties VT100 for Emulation VT100 Function, Arrow, and Ctrl keys Ctrl Terminal keys Windows keys Windows Terminal keys ® ® Microsoft Windows 2000 Windows XP Widows Vista Windows 2000 Service Pack 2 VT100 Windows 2000 Windows XP Windows Vista www.microsoft.com RS-232...
  • Page 149 3-1 PowerConnect 3500 PowerConnect ID 1 POST POST POST POST...
  • Page 150 • PowerConnect • PowerConnect • VT100 • SNMP SNMP • • VLAN 1 VLAN 1 • • PowerConnect 3500 • SNMP SNMP • • • •...
  • Page 151 <Y> <N> <Ctrl + Z> The system is not setup for SNMP management by default. To manage the switch using SNMP (required for Dell Network Manager) you can: • Setup the initial SNMP version 2 account now. • Return later and setup the SNMP version account. (For more information on setting up a SNMP version 2 account, see the user documentation).
  • Page 152 The wizard automatically assigns the highest access level [Privilege Level 15] to this account. You can use Dell Network Manager or other management interfaces to change this setting later, and to add additional management system later.
  • Page 153 (e.g. 192.168.1.1): Enter This is the configuration information that has been collected: SNMP Interface = "Dell Network Manager"@192.168.1.10 User Account setup = admin Password = ********** Management IP address = 192.168.1.100 255.255.255.0...
  • Page 154 If the information is incorrect, select (N) to discard configuration and restart the wizard: [Y/N] <N> <Y> Thank you for using Dell Easy Setup Wizard. You will now enter CLI mode. PowerConnect 3500...
  • Page 155 Dell™ PowerConnect™ 35xx 시스템 시작 안내서 w w w . d e l l . c o m | s u p p o r t . d e l l . c o m...
  • Page 156 Corporation의 상표 또는 등록 상표입니다. 본 설명서에서 특정 회사의 표시나 제품 이름을 지칭하기 위해 기타 상표나 상호를 사용할 수도있습니다. Dell Inc. 는 자사가 소유 하고 있는 것 이외에 기타 모든 등록 상표 및 상표 이름에 대한 어떠한 소유권도 보유하지 않습니다.
  • Page 157 차례 설치 개요 ........설치 사이트 준비 .
  • Page 159 설치 개요 PowerConnect 3500 Dell™ PowerConnect™ 3500 시리즈 사용 설명서( Dell (support.dell.com) 설치 사이트 준비 PowerConnect 3500 48.26cm 전원 — • 100-240VAC, 50-60Hz 일반 — • RPS(Redundant Power Supply) LED(PoE EPS(Extended Power Supply) • LED(PoE 여유 공간 — • 케이블 —...
  • Page 160 포장 풀기 패키지 내용물 • • • RS-232 • • • • 장치 포장 풀기 주: 장치 탑재 PowerConnect 3500 . RPS(Redundant Power Supply) EPS(Extended Power Supply) . RPS 랙에 설치 주의: 제품 정보 안내의 안전 정보와 스위치에 연결되거나 스위치를 지원하는 다른 장치에 대한 안전 정보 를...
  • Page 161 그림 1-1. 랙 장착용 브래킷 설치 48.26cm(19 평평한 곳에 설치 5.08cm(2 12.7cm(5...
  • Page 162 벽에 설치 • • 5.1cm(2 12.7cm • • • • • 그림 1-2. 벽면 부착용 브래킷 설치...
  • Page 163 터미널에 연결 1 RS-232 ASCII DB-9 주: 그림 1-3. 후면 패널 전원 커넥터 PowerConnect 3524/3548 PowerConnect 3524P/3548P...
  • Page 165 스택형 배치 개요 PowerConnect 3500 시리즈 스위치를 스택형으로 배치 PowerConnect 3500 PowerConnect 3500 RJ-45 • • •...
  • Page 166 그림 2-1. 스택형 배치 케이블 연결도 Dell PowerConnect 3500 시리즈 사용 설명서...
  • Page 167 그림 2-2. 스택형 구성 및 식별 패널 ID LED ID 1 ID 3 ~ 8...
  • Page 168 장치 ID 선택 프로세스 1 장치 전원 켜기 — RS-232 VT100 VT100 ID LED 2 선택 프로세스 — ID LED . LED 8 3 선택 종료 프로세스 — 15 LED ID 주: " "...
  • Page 169 장치 시작 및 구성 Dell PowerConnect 3500 시리즈 사용 설명 서 주: . Dell (support.dell.com) 주: Dell (support.dell.com) 장치에 연결 터미널을 장치에 연결 DB-9 DTE(Data Terminal Equipment) • VT100 VT100 • DB-9 RS-232 1 VT100 RS-232...
  • Page 170 9600 없음 VT100 아님) Ctrl (Windows ® ® 주의사항: Microsoft Windows 2000, Windows XP Windows Vista . Windows 2000 VT100 . Windows 2000, Windows XP Windows Vista www.microsoft.com 3 RS-232 . PowerConnect 3500 그림 3-1. PowerConnect 3500 시리즈 콘솔 포트에 연결 PowerConnect 주: ID 1...
  • Page 171 스위치 부팅 POST(Power-In Self-Test) POST . POST . POST 초기 구성 주: . Dell (support.dell.com) 주: PowerConnect PowerConnect VT100 주: SNMP SNMP VLAN 1 VLAN 1 ) IP PowerConnect 3500 시리즈 사용 설명서...
  • Page 172 [CNTRL+Z] 주: 마법사 단계 1 The system is not setup for SNMP management by default. To manage the switch using SNMP (required for Dell Network Manager) you can: • Setup the initial SNMP version 2 account now. • Return later and setup the SNMP version account. (For more information on setting up a SNMP version 2 account, see the user documentation).
  • Page 173 The wizard automatically assigns the highest access level [Privilege Level 15] to this account. You can use Dell Network Manager or other management interfaces to change this setting later, and to add additional management system later.
  • Page 174 (e.g. 192.168.1.1): Enter This is the configuration information that has been collected: SNMP Interface = "Dell Network Manager"@192.168.1.10 User Account setup = admin Password = ********** Management IP address = 192.168.1.100 255.255.255.0...
  • Page 175 If the information is incorrect, select (N) to discard configuration and restart the wizard: [Y/N] Thank you for using Dell Easy Setup Wizard. You will now enter CLI mode. 마법사 단계 6 PowerConnect 3500 시리즈 사용 설명서...
  • Page 177 Systemy Dell™ PowerConnect™ 35xx Instrukcja uruchomienia w w w . d e l l . c o m | s u p p o r t . d e l l . c o m...
  • Page 178 W niniejszym dokumencie mogą zostać także użyte inne znaki towarowe i nazwy handlowe w odniesieniu do podmiotów posiadających prawa do znaków i nazw lub ich produktów. Firma Dell Inc. nie rości sobie praw własności do jakichkolwiek znaków towarowych i nazw handlowych, których nie jest właścicielem.
  • Page 179 Spis treści 1 Instalacja ....... . Przegląd Przygotowanie miejsca instalacji .
  • Page 180 Spis treści...
  • Page 181 Przegląd Niniejszy dokument zawiera podstawowe informacje o instalowaniu i użytkowaniu przełączników PowerConnect 3500 series. Więcej informacji znajduje się w Podręczniku użytkownika Dell™ PowerConnect™ 3500 dostępnym na dysku CD z dokumentacją. Na stronach witryny support.dell.com można znaleźć najnowsze dane o aktualizacjach dokumentacji i oprogramowania.
  • Page 182: Zawartość Opakowania

    Rozpakowanie Zawartość opakowania Po rozpakowaniu urządzenia należy upewnić się, że zestaw zawiera następujące elementy: • Urządzenie/Przełącznik • Kabel zasilający • Kabel krosowy RS-232 • Samoprzylepne gumowe nóżki • Zestaw do instalacji w szafie przemysłowej lub na ścianie • Dysk CD z dokumentacją •...
  • Page 183 Rysunek 1-1. Instalacja wspornika do zamontowania w stelażu 2 Wkręć dostarczone w zestawie wkręty do otworów montażowych i dokręć je śrubokrętem. 3 Powtórz procedurę ze wspornikiem po drugiej stronie urządzenia. 4 Wsuń urządzenie do stelażu o rozmiarze 48,26 cm (19 cali), upewniając się, że otwory montażowe w urządzeniu wypadają...
  • Page 184 Instalacja na ścianie Aby zamontować przełącznik na ścianie: 1 Upewnij się, że miejsce, w którym chcesz zamontować przełącznik spełnia następujące wymagania: • Ściana musi być wystarczająco mocna, aby utrzymać przełącznik. • Pozostaw co najmniej 5,1 cm (2 cale) po bokach, by zapewnić odpowiednią wentylację i 12,7 cm (5 cali) z tyłu na kable zasilające.
  • Page 185 Podłączanie do terminala 1 Podłącz kabel krosowy RS-232 do terminala ASCII lub do portu szeregowego komputera z emulatorem terminala. 2 Podłącz żeńskie złącze DB-9 na drugim końcu kabla do portu szeregowego urządzenia. UWAGA: Na razie nie podłączaj kabla zasilającego do gniazdka prądu zmiennego z uziemieniem. Urządzenie powinno zostać...
  • Page 186 Instalacja...
  • Page 187 Tworzenie stosu Przegląd Każde urządzenie może działać niezależnie lub należeć do stosu. Jeden stos może składać się z maksymalnie ośmiu urządzeń. Każdy stos musi zawierać urządzenie główne i może mieć główne urządzenie zapasowe. Pozostałe urządzenia są „elementami” stosu. Konfigurowanie stosów przełączników w PowerConnect 3500 series Każdy stos urządzeń...
  • Page 188 Rysunek 2-1. Schemat połączeń w stosie Więcej informacji na temat tworzenia stosu można znaleźć w Podręczniku użytkownika Dell PowerConnect 3500 na dysku CD z dokumentacją. Można wprowadzić identyfikację urządzenia w stosie, korzystając z przycisku Stack ID na przednim panelu. Tworzenie stosu...
  • Page 189 Rysunek 2-2. Konfiguracja stosu i panel identyfikacyjny Przycisk Stack ID Diody konfiguracji stosu Każde urządzenie w stosie ma przypisany unikalny identyfikator urządzenia, który definiuje jego pozycję i funkcję w stosie. Jeśli urządzenie działa autonomicznie, to diody stosu nie świecą. Jest to ustawienie domyślne. Identyfikator urządzenia może być...
  • Page 190 Proces wybierania identyfikatora urządzenia Wybór identyfikatora urządzenia przebiega następująco: 1 Włącz urządzenie – Aby włączyć urządzenie, wykonaj następujące czynności: Upewnij się, że port konsoli urządzenia autonomicznego/głównego jest podłączony do terminala VT100 lub do emulatora terminala VT100 za pośrednictwem kabla krosowego RS-232. Odszukaj gniazdo zasilania.
  • Page 191: Podłączanie Urządzenia

    Po wykonaniu połączeń zewnętrznych należy podłączyć do urządzenia terminal, aby je skonfigurować. Informacje na temat dodatkowych zaawansowanych funkcji zamieszczono w Podręczniku użytkownika Dell PowerConnect 3500 Series na dysku CD z dokumentacją. UWAGA: Przed podjęciem dalszych czynności należy zapoznać się z uwagami do wersji (ang.
  • Page 192 2 Upewnij się, że emulator terminala jest skonfigurowany w następujący sposób: Wybierz odpowiedni port szeregowy (port 1 albo 2) połączony z konsolą. Ustaw szybkość transmisji na 9600 bitów/s. Wybierz format danych: 8 bitów danych, 1 bit stopu, bez parzystości. Ustaw brak sterowania przepływem. W oknie Właściwości wybierz opcję...
  • Page 193: Konfiguracja Wstępna

    Konfiguracja wstępna UWAGA: Przed podjęciem dalszych czynności należy zapoznać się z uwagami do wersji (ang. release notes) tego produktu. Uwagi do wersji można pobrać z witryny pomocy technicznej firmy Dell pod adresem support.dell.com. UWAGA: W konfiguracji początkowej przyjęto następujące założenia: •...
  • Page 194 • Adres IP domyślnej bramki Kreator konfiguracji wyświetla następujące informacje: Welcome to Dell Easy Setup Wizard The Setup Wizard guides you through the initial switch configuration, and gets you up and running easily and quickly. You can also skip the setup wizard, and enter CLI mode to manually configure the switch if you prefer.
  • Page 195 The wizard automatically assigns the highest access level [Privilege Level 15] to this account. You can use Dell Network Manager or other management interfaces to change this setting later, and to add additional management system later.
  • Page 196 Naciśnij Enter Wyświetlana jest następująca informacja (zgodnie z opisanymi powyżej przykładowymi parametrami): This is the configuration information that has been collected: SNMP Interface = "Dell Network Manager"@192.168.1.10 User Account setup = admin Password = ********** Management IP address = 192.168.1.100 255.255.255.0 Default Gateway = 192.168.1.1...
  • Page 197 Naciśnij [N], aby uruchomić kreatora ponownie. Naciśnij [T], aby zakończyć pracę kreatora konfiguracji. Wyświetlane są następujące informacje: Thank you for using Dell Easy Setup Wizard. You will now enter CLI mode. Krok 6. kreatora Wyświetlane jest ponaglenie trybu CLI. Aby uzyskać dalsze informacje, zapoznaj się z Podręcznikiem użytkownika PowerConnect 3500 Series.
  • Page 198 Uruchamianie i konfigurowanie urządzenia...
  • Page 199 Sistemas Dell™ PowerConnect™ 35xx Guía de introducción w w w . d e l l . c o m | s u p p o r t . d e l l . c o m...
  • Page 200 Notas, avisos y precauciones NOTA: una NOTA proporciona información importante que le ayudará a utilizar mejor el dispositivo. AVISO: un AVISO indica la posibilidad de daños en el hardware o la pérdida de datos, y proporciona información sobre cómo evitar el problema. PRECAUCIÓN: un mensaje de PRECAUCIÓN indica el riesgo de daños materiales, lesiones o incluso la muerte.
  • Page 201 Contenido Instalación Información general ........... 201 Preparación del emplazamiento .
  • Page 202 Contenido...
  • Page 203: Información General

    En este documento se proporciona información básica para instalar y utilizar los conmutadores PowerConnect serie 3500. Para obtener más información, consulte la guía del usuario de Dell™ PowerConnect™ serie 3500, disponible en el CD de documentación, o consulte la página web de asistencia de Dell (support.dell.com) para conseguir las últimas actualizaciones de la...
  • Page 204: Montaje Del Dispositivo

    Desembalaje Contenido del paquete Cuando desembale el dispositivo, asegúrese de que se incluyen los elementos siguientes: • Dispositivo/conmutador • Cable de alimentación de CA • Cable cruzado RS-232 • Almohadillas de goma autoadhesivas • Kit de montaje en rack para la instalación en rack o kit para montaje en pared •...
  • Page 205 Instalación en un rack PRECAUCIÓN: lea la información de seguridad incluida en la Guía de información del producto y la información de seguridad de los otros dispositivos que están conectados o asociados al conmutador. PRECAUCIÓN: desconecte todos los cables de la unidad antes de montar el dispositivo en un rack o un armario. PRECAUCIÓN: cuando monte varios dispositivos en un rack, empiece desde abajo.
  • Page 206: Instalación En Una Superficie Plana

    Instalación en una superficie plana Si no se instala en un rack, instale el dispositivo en una superficie plana. La superficie debe poder aguantar el peso del dispositivo y los cables. 1 Fije las almohadillas de goma autoadhesivas en cada zona marcada de la parte inferior del chasis. 2 Coloque el dispositivo en una superficie plana y deje 5 cm de separación a cada lado y 12,7 cm en la parte posterior.
  • Page 207: Conexión A Un Terminal

    Ilustración 1-2. Instalación de los soportes para el montaje en pared Conexión a un terminal 1 Conecte un cable cruzado RS-232 al terminal ASCII o al conector serie de un sistema de escritorio que ejecute software de emulación de terminal. 2 Conecte el conector hembra DB-9 del otro extremo del cable al conector para puerto serie del dispositivo.
  • Page 208 Ilustración 1-3. Conector de alimentación del panel posterior Puerto de consola Conector RPS Conector de alimentación Vista posterior de PowerConnect 3524/3548 Puerto de consola Conector de Conector EPS alimentación Vista posterior de PowerConnect 3524P/3548P Instalación...
  • Page 209 Apilamiento Información general Cada dispositivo puede funcionar como un dispositivo independiente o puede ser miembro de una pila. Cada pila admite hasta ocho dispositivos. Todas las pilas deben tener una unidad maestra, y pueden tener una unidad de copia de seguridad maestra;...
  • Page 210 Ilustración 2-1. Diagrama de los cables del apilamiento Para obtener más información sobre el apilamiento, consulte la guía del usuario de Dell PowerConnect serie 3500 en el CD de documentación. Puede realizar la identificación de la unidad de pila en el panel frontal del dispositivo mediante el botón de ID de pila.
  • Page 211 Ilustración 2-2. Configuración de apilamiento y panel de identificación Botón de ID de pila LED de apilamiento Cada dispositivo de la pila tiene una ID de unidad exclusiva que define la posición de la unidad y su función en la pila. Si el dispositivo es una unidad independiente, el LED de pila no está encendido. La configuración predeterminada es como unidad independiente.
  • Page 212 Proceso de selección de ID de unidad El proceso de selección de la ID de unidad es el siguiente: 1 Encendido del dispositivo: realice los pasos siguientes: Asegúrese de que el puerto de consola del dispositivo independiente/maestro está conectado a un dispositivo terminal VT100 o a un emulador de terminal VT100 a través del cable cruzado RS-232.
  • Page 213: Inicio Y Configuración Del Dispositivo

    Inicio y configuración del dispositivo Una vez realizadas todas las conexiones externas, conecte un terminal al dispositivo para configurar el dispositivo. Las funciones avanzadas adicionales se describen en la guía del usuario de Dell PowerConnect serie 3500 incluida en el CD de documentación.
  • Page 214 2 Asegúrese de que el software de emulación de terminal se configura del modo siguiente: Seleccione el puerto serie apropiado (puerto serie 1 o puerto serie 2) para conectar a la consola. Establezca la velocidad de datos en 9 600 baudios. Establezca el formato de datos en 8 bits de datos, 1 bit de paro y sin paridad.
  • Page 215: Inicio Del Conmutador

    NOTA: antes de continuar, lea las notas de la versión de este producto. Puede descargar las notas de la versión de la página web de asistencia de Dell (support.dell.com). NOTA: en la configuración inicial se dan por sentado los supuestos siguientes: •...
  • Page 216 Paso 1 del asistente Se muestra la información siguiente: The system is not setup for SNMP management by default. To manage the switch using SNMP (required for Dell Network Manager) you can: • Setup the initial SNMP version 2 account now.
  • Page 217 The wizard automatically assigns the highest access level [Privilege Level 15] to this account. You can use Dell Network Manager or other management interfaces to change this setting later, and to add additional management system later.
  • Page 218 Introduzca la puerta de enlace predeterminada. Pulse Intro. Aparece el texto siguiente (en caso de utilizar los parámetros mencionados): This is the configuration information that has been collected: SNMP Interface = "Dell Network Manager"@192.168.1.10 User Account setup = admin Password = ********** Management IP address = 192.168.1.100 255.255.255.0...
  • Page 219 Pulse [N] para volver a iniciar el asistente. Pulse [Y] para completar el asistente para la instalación. Se muestra el texto siguiente: Thank you for using Dell Easy Setup Wizard. You will now enter CLI mode. Paso 6 del asistente Aparece el indicador de la CLI.
  • Page 220 Inicio y configuración del dispositivo...
  • Page 221 ‫הז‬ ‫המידע הבא מוצג‬ ‫כדי להשלי את פעולתו של אש ההתקנה‬ ] ‫כ‬ ‫הז‬ Thank you for using Dell Easy Setup Wizard. You will now enter CLI mode. ‫כעת תעבור למצב‬ Dell ‫תודה עבור השימוש באשף ההתקנה הקלה של‬ ‫של האשף‬...
  • Page 222 ‫הז את שער ברירת המחדל‬ Enter ‫מה המתוארי‬ ‫בהתא לפרמטרי הדוג‬ ‫המידע הבא מוצג‬ ‫הקש‬ This is the configuration information that has been collected: SNMP Interface = "Dell Network Manager" = 192.168.1.10 User Account setup = admin ‫הפעלה וקביעת תצורה של ההתקן‬...
  • Page 223 ‫עיין בתיעוד למשתמש‬ ‫ניהול‬ ‫כדי להוסיף תחנת ניהול‬ Dell Network << ‫שבה ייעשה שימוש‬ SNMP ‫הזן את מחרוזת הקהילה של‬ MYSETUPWIZARD Manager ‫לדוגמה‬ ‫לניהול מתו תחנת ניהול כלשהי‬ 0.0.0.0 ‫או תווי כלליי‬ A.B.C.D ‫של מערכת הניהול‬ ‫הז כתובת‬ ‫הקש‬ 192.168.1.10 ‫של...
  • Page 224 ‫של האשף‬ ‫צעד‬ ‫המידע הבא מוצג‬ The system is not setup for SNMP management by default. To manage the switch using SNMP (required for Dell Network Manager) you can: • Setup the initial SNMP version 2 account now. • Return later and setup the SNMP version account. (For more information on setting up a SNMP version 2 account, see the user documentation).
  • Page 225 ‫כתובת‬ • ‫אש ההתקנה מציג את הפרטי הבאי‬ Welcome to Dell Easy Setup Wizard The Setup Wizard guides you through the initial switch configuration, and gets you up and running easily and quickly. You can also skip the setup wizard, and enter CLI mode to manually configure the switch if you prefer.
  • Page 226 ‫הודעות‬ ‫תמונה תקפה של קוב הפעלה נטענת לזיכרו‬ ‫הבדיקה‬ ‫שניות‬ ‫תהלי האתחול נמש כ‬ ‫קביעת תצורה התחלתית‬ ‫הערה‬ Dell ‫תוכל להוריד את הערות המוצר מאתר התמיכה של‬ ‫קרא את הערות המוצר עבור מוצר זה‬ ‫לפני שתמשיך‬ ‫בכתובת‬ support.dell.com ‫הערה‬ ‫התצורה ההתחלתית מבוססת על ההנחות הבאות‬...
  • Page 227: Flow Control

    ‫ג‬ ‫ללא זוגיות‬ ‫סיבית עצירה אחת‬ ‫סיביות‬ ‫קבע את תבנית הנתוני ל‬ none ‫ד‬ ‫ללא‬ ( ‫כ‬ ‫בקרת זרימה‬ Flow Control ‫הגדר את‬ ‫ה‬ ‫עבור מצב ההדמיה‬ VT100 ‫בחר‬ ‫מאפייני‬ ‫תחת‬ ‫לא‬ ‫ו‬ ‫ודא שההגדרה חלה על מקשי המסו‬ Ctrl ‫מקשי‬...
  • Page 228 ‫הפעלה וקביעת תצורה של ההתקן‬ ‫אופ הביצוע של פונקציות‬ ‫חבר מסו להתק לקביעת תצורת ההתק‬ ‫לאחר השלמת כל החיבורי החיצוניי‬ Dell PowerConnect 3500 ‫מדרי למשתמש של סדרת‬ ‫בתקליטור התיעוד‬ ‫של‬ ‫ב‬ ‫מתקדמות נוספות מתואר‬ ‫הערה‬ ‫תוכל להוריד את הערות המוצר מאתר התמיכה‬...
  • Page 229 ‫זהה היחידה‬ ‫תהליך בחירת מ‬ ‫תהלי בחירת מזהה היחידה מתבצע כ‬ ‫הפעלת ההתק‬ ‫בצע את המשימות הבאות‬ ‫כדי להפעיל את ההתק‬ – ‫א‬ ‫או לתוכנת הדמיית מסו‬ VT100 ‫התק ראשי מחוברת להתק מסו‬ ‫ודא שיציאת המסו של התק עצמאי‬ RS-232 ‫באמצעות...
  • Page 230 ‫תצורת הערימה ולוח הזיהוי‬ ‫איור‬ ‫נורות הערימה‬ ‫מזהה ערימה‬ ‫לחצן‬ Stack ID ‫א ההתק הוא יחידה‬ ‫המגדיר את מיקו היחידה ואת תפקידה בערימה‬ ‫לכל התק בערימה יש מזהה יחידה ייחודי‬ ‫רירת המחדל היא יחידה עצמאית‬ ‫הגדרת ב‬ ‫נורת הערימה לא תאיר‬ ‫עצמאית‬...
  • Page 231 ‫תרשים כבלי הערימה‬ ‫איור‬ Dell PowerConnect 3500 ‫בתקליטור התיעוד‬ ‫של‬ ‫עיי במדרי למשתמש של סדרת‬ ‫למידע נוס אודות סידור בערימה‬ ‫מזהה ערימה‬ Stack ID ‫זיהוי היחידות בערימה בלוח הקדמי של ההתק באמצעות הלחצ‬ ‫תוכל לבצע את‬ ‫סידור בערימה‬...
  • Page 232 ‫סידור בערימה‬ ‫סקירה כללית‬ ‫כל ערימה יכולה להכיל עד שמונה התקני‬ ‫בערימה‬ ‫חבר‬ ‫כל התק יכול לפעול כהתק עצמאי או כ‬ ‫כאשר כל ההתקני האחרי‬ ‫ויכולה להיות לה יחידת גיבוי ראשית‬ ‫לכל הערימות צריכה להיות יחידה ראשית‬ ‫חברי‬ ‫' כ‬ ‫מחוברי...
  • Page 233 ‫התקנה‬...
  • Page 234 ‫חיבור למסוף‬ ‫י שבו פועלת תוכנה להדמיית מסו‬ ‫או למחבר טורי של מחשב שולחנ‬ ASCII ‫למסו‬ RS-232 ‫חבר כבל מוצלב‬ ‫שנמצא בקצה השני של הכבל למחבר היציאה הטורית של ההתק‬ DB-9 ‫חבר את מחבר הנקבה‬ ‫הערה‬ ‫עליך לחבר את ההתקן למקור מתח בשלבים המפורטים‬ ‫מוארק...
  • Page 235 ‫התקנה על קיר‬ ‫כדי להתקי את המתג על קיר‬ ‫ודא שהמיקו שבחרת להתקנה עונה על הדרישות הבאות‬ ‫הקפד שמשטח הקיר מסוגל לשאת את המתג‬ • ‫מאחור כדי‬ ‫אינ‬ ‫מ‬ ‫" ס‬ 12.7 ‫ולפחות‬ ‫בכל צד כדי להבטיח אוורור הול‬ ‫אינ‬ ‫מ‬...
  • Page 236 ‫התקנת זוויתנים להרכבה על מעמד‬ ‫איור‬ ‫הכנס את הברגי המסופקי לחורי המיועדי להרכבה על המעמד וחזק אות באמצעות מברג‬ ‫חזור על התהלי ע הזווית שבצידו האחר של ההתק‬ ‫ודא שהחורי בהתק מיושרי ע החורי במעמד‬ ' .( ‫אינ‬ ‫מ‬ ‫" ס‬ 48.26 ‫ה...
  • Page 237 RS-232 ‫כבל מוצלב‬ • ‫רפידות גומי להדבקה עצמית‬ • ‫או ערכת התקנה על הקיר‬ ‫ערכת הרכבה של המעמד להתקנת המעמד‬ • ‫תקליטור התיעוד‬ • ‫אודות המוצר‬ ‫מדרי מידע‬ • ‫הוצאת ההתקן מהאריזה‬ ‫הערה‬ ‫בדוק את תכולת האריזה ודווח באופן מיידי על כל עדות לנזק‬ ‫לפני...
  • Page 238 ‫התקנה‬ ‫סקירה כללית‬ ‫לקבלת מידע נוס‬ ‫והפעלת‬ PowerConnect 3500 ‫מסמ זה מספק מידע בסיסי על התקנת מתגי מסדרת‬ Dell™ PowerConnect™ 3500 ‫או בקר באתר‬ ‫בתקליטור התיעוד‬ ‫של‬ ‫תמש של סדרת‬ ‫עיי במדרי למש‬ ‫כדי לקבל את העדכוני האחרוני של התיעוד והתוכנה‬...
  • Page 239 ‫תוכן‬...
  • Page 240 ‫תוכן‬ ‫התקנה‬ ..................‫סקירה כללית‬ ................... ‫הכנת האתר‬ ............... ‫יחידה מן האריזה‬ ‫הוצאת ה‬ ................... ‫תכולת האריזה‬ ..............‫הוצאת ההתקן מהאריזה‬ ..................‫הרכבת ההתקן‬ ............... ‫התקנת היחידה במעמד‬ ..
  • Page 241 ‫פגיעה גופנית או מוות‬ ‫התראה מציינת אפשרות של נזק לרכוש‬ ‫המידע הכלול במסמ זה נתו לשינויי ללא הודעה מוקדמת‬ ‫כל הזכויות שמורות‬ © 2007 Dell Inc. Dell Inc. ‫ללא קבלת רשות בכתב מאת‬ ‫בכל דר שהיא‬ ‫איסור מוחלט על שעתוק מסמ זה‬...
  • Page 242 PowerConnect™ 35xx ‫מערכות‬ Dell™ ‫של‬ ‫מדריך תחילת העבודה‬...
  • Page 243 Dell™ PowerConnect™ 35xx Sistemleri Başlangıç Kılavuzu w w w . d e l l . c o m | s u p p o r t . d e l l . c o m...
  • Page 244 Belirli işaret ile adlar veya ürünlerin sahibi olan tüzel kişiliklere başvuru yapmak üzere bu belgede başka ticari markalar ve ticari adlar kullanılmış olabilir. Dell Inc. kendisi dışındaki ticari markalar ve ticari adlara ilişkin herhangi bir sahiplik iddiasında bulunmamaktadır. Modeller: 3524, 3524P, 3548, 3548P...
  • Page 245 İçindekiler 1 Yükleme ..............Genel Bakış...
  • Page 246 İçindekiler...
  • Page 247: Genel Bakış

    Genel Bakış Bu belgede, PowerConnect 3500 serisi anahtarları yükleme ve çalıştırmaya ilişkin temel bilgiler verilmektedir. Daha fazla bilgi için, Belgeler CD'nizde bulunan Dell™ PowerConnect™ 3500 Serisi Kullanıcı Kılavuzu'na bakın veya belge ve yazılımların en yeni güncellemeleri için support.dell.com adresindeki Dell Destek web sitesine bakın.
  • Page 248 • Kendinden yapışkanlı kauçuk yastıklar • Raf kurulumu için raf montaj seti veya duvar montaj seti • Belgeler CD'si • Ürün Bilgileri Kılavuzu Aygıtı Paketinden Çıkarma NOT: Aygıtı paketten çıkarmadan önce, paketi inceleyin ve hasar varsa hemen bildirin. Kutuyu temiz, düz bir yere koyun. Kutuyu açıp kapağını...
  • Page 249 Şekil 1-1. Raf Montajı için Köşebent Takma Verilen vidaları raf montaj deliklerine takıp bir tornavidayla sıkın. Aygıtın diğer yanındaki raf montaj köşebendi için de aynı işlemi yapın. Aygıttaki raf montaj deliklerini raftaki montaj delikleriyle hizalayarak birimi 48,26 cm (19 inç) rafa yerleştirin.
  • Page 250 Duvara Monte Etme Anahtarı bir duvara monte etmek için: Montaj yerinin aşağıdaki koşullara uygun olduğundan emin olun: • Duvarın yüzeyi anahtarı taşıyabilmelidir. • Gerektiği gibi havalandırma olabilmesi için yanlardan en az 5,1 cm (2 inç) ve güç kablosunun geçmesi için arkadan 12,7 cm (5 inç) boşluk bırakın. •...
  • Page 251 Terminale Bağlama ASCII terminaline veya terminal öykünme yazılımı çalıştıran bir masaüstü sisteminin seri konektörüne bir RS-232 aktarma kablosu takın. Kablonun diğer ucundaki DB-9 dişi konektörünü, aygıtın seri bağlantı noktası konektörüne takın. NOT: Bu noktada, güç kablosunu topraklanmış bir AC prize takmayın. Aygıtı Başlatma ve Yapılandırma bölümünde anlatılan adımlarda aygıtı...
  • Page 252 Başlangiç Kilavuzu...
  • Page 253 Kümelendirme Genel Bakış Her aygıt bağımsız bir aygıt olarak veya bir kümenin elemanı olarak çalışabilir. Kümelendirme en fazla sekiz aygıtı destekler. Tüm kümelerde bir Ana birim olmalıdır, ayrıca bir Ana Yedekleme birimi de olabilir; diğer aygıtlar ise kümeye Üye olarak bağlanır. PowerConnect 3500 Serisi Anahtarları...
  • Page 254 Şekil 2-4. Küme Kablo Bağlantısı Resmi Kümelendirme ile ilgili daha fazla bilgi için Belgeler CD'sindeki Dell PowerConnect 3500 Serisi Kullanıcı Kılavuzu'na bakın. Küme birimi tanımlamasını, Küme No düğmesini kullanarak aygıtın ön panelinden yapabilirsiniz. Baslangiç Kilavuzu...
  • Page 255 Şekil 2-5. Kümelendirme Yapılandırması ve Tanımlama Paneli Kümedeki her aygıtın, birimin konumunu ve kümedeki işlevini belirten benzersiz bir tanımlama birimi numarası vardır. Aygıt bağımsız bir birimse, Küme LED'i yanmaz. Varsayılan ayar bağımsız seçeneğidir. Küme kimliği düğmesini kullanarak birim kimliğini elle yapılandırabilirsiniz. Birim numarası, Küme No LED'leri ile belirtilir.
  • Page 256 AC prizini etkinleştirin. Ön paneldeki LED'lere bakarak aygıtın bağlı ve düzgün şekilde çalışıyor olduğunu doğrulayın. Aygıt açılırken, ayarlanmış LED numarası (daha önce kaydedilmiş olan birim no'suna karşılık gelir) yanıp sönmeye başlar. LED, 15 saniye süreyle yanıp söner. Bu süre içinde, ilgili Küme No LED'i yanana kadar Küme No düğmesine basarak belirli bir küme No'yu seçebilirsiniz.
  • Page 257 Aygıtı Çalıştırma ve Yapılandırma Tüm harici bağlantıları yaptıktan sonra, aygıtı yapılandırmak üzere aygıta bir terminal bağlayın. Ek gelişmiş işlevlerin nasıl kullanılacağı Belgeler CD'sindeki Dell PowerConnect 3500 Serisi Kullanıcı Kılavuzu'nda anlatılmıştır. NOT: Devam etmeden önce, bu ürünün sürüm notlarını okuyun. Sürüm notları support.dell.com adresindeki Dell Destek web sitesinden indirilebilir.
  • Page 258 Akış denetimini yok seçeneğine ayarlayın. Özellikler altında, Öykünme modu için VT100'ü seçin. İşlev, Ok ve Ctrl tuşları için Terminal tuşlarını seçin. Ayarın (Windows tuşları için değil) Terminal tuşları için olduğundan emin olun. BİLDİRİM: Microsoft® Windows® 2000, Windows XP veya Widows Vista ile HyperTerminali kullanırken, en yeni hizmet paketlerini yüklediğinizden emin olun.
  • Page 259 RAM'e geçerli bir yürütülebilir görüntü yüklenir. Terminalde POST iletileri görüntülenerek testin başarılı veya başarısız olduğunu belirtir. Başlatma işlemi yaklaşık 90 saniye çalışır. Başlangıç Yapılandırması NOT: Devam etmeden önce, bu ürünün sürüm notlarını okuyun. Sürüm notlarını support.dell.com adresindeki Dell Destek web sitesinden indirebilirsiniz. NOT: Başlangıç yapılandırması aşağıdaki varsayımlara göre yapılır: •...
  • Page 260 Sihirbaz Adımı 1 Aşağıdaki bilgiler görüntülenir: Varsayılan olarak, sistem SNMP yönetimi için ayarlanmamıştır. SNMP (Dell Ağ Yöneticisi için gerekir) kullanarak anahtarı yönetmek için şunları yapabilirsiniz: • Başlangıç SNMP sürümü 2 hesabı şimdi ayarlama. • Daha sonra tekrar dönerek SNMP sürümü hesabı ayarlama.
  • Page 261 Sihirbaz otomatik olarak bu hesaba en yüksek erişim düzeyini [Ayrıcalık Düzeyi 15] atar. Bu ayarı daha sonra değiştirmek ve yeni yönetim sistemi eklemek için Dell Ağ Yöneticisini veya diğer yönetim arayüzlerini kullanabilirsiniz. Yönetim sistemleri ekleme konusunda daha fazla bilgi için kullanıcı...
  • Page 262 (örneğin, 192.168.1.1): Varsayılan ağ geçidini girin. Enter tuşuna basın. Aşağıdakiler görüntülenir (açıklanan örnek parametrelere göre): Bu, toplanan yapılandırma bilgileridir: SNMP Arayüzü = "Dell Ağ Yöneticisi"@192.168.1.10 Kullanıcı Hesabı kurulumu = admin Parola = ********** Yönetim IP adresi = 192.168.1.100 255.255.255.0 Varsayılan Ağ Geçidi = 192.168.1.1...
  • Page 263 (H) harfini seçin: [E/H] Sihirbazı yeniden başlatmak için [H] harfini seçin. Kurulum sihirbazını tamamlamak için [E] harfini girin. Aşağıdakiler görüntülenir: Dell Kolay Kurulum Sihirbazını kullandığınız için teşekkür ederiz. Şimdi CLI moduna geçeceksiniz. Sihirbaz Adımı 6 CLI istemi görüntülenir. Daha fazla bilgi için PowerConnect 3500 Serisi Kullanıcı Kılavuzu'na bakın.
  • Page 264 Baslangiç Kilavuzu...
  • Page 266 Printed in China. Vytištěno v Číně. Imprimé en Chine. Gedruckt in China. Εκτυπώθηκε στην Κίνα. 중국에서 인쇄 U Wydrukowano w Chinach. Impreso en China. Çin'de EDVÕOPÕúWÕU Printed on recycled paper.

Table des Matières