Publicité

Les langues disponibles
  • FR

Les langues disponibles

  • FRANÇAIS, page 64

Liens rapides

Dell™ PowerConnect™
8024 and 8024F Switches
Getting Started Guide
使用入门指南
入門指南
Guide de mise en route
Handbuch zum Einstieg
Panduan Pengaktifan
はじめに
시작 안내서
Guía de introducción
Başlangıç Kılavuzu
‫מדריך תחילת עבודה‬
Model PC8024 and PC8024F
w w w . d e l l . c o m | s u p p o r t . d e l l . c o m

Publicité

Table des Matières
loading

Sommaire des Matières pour Dell PowerConnect 8024

  • Page 1 Dell™ PowerConnect™ 8024 and 8024F Switches Getting Started Guide 使用入门指南 入門指南 Guide de mise en route Handbuch zum Einstieg Panduan Pengaktifan はじめに 시작 안내서 Guía de introducción Başlangıç Kılavuzu ‫מדריך תחילת עבודה‬ Model PC8024 and PC8024F w w w . d e l l . c o m | s u p p o r t . d e l l . c o m...
  • Page 3 Dell™ PowerConnect™ 8024 and 8024F Switches Getting Started Guide Model PC8024 and PC8024F w w w . d e l l . c o m | s u p p o r t . d e l l . c o m...
  • Page 4 Reproduction in any manner whatsoever without the written permission of Dell Inc. is strictly forbidden. Trademarks used in this text: Dell, the DELL logo, and PowerConnect are trademarks of Dell Inc.; Microsoft and Windows are registered trademarks of Microsoft Corporation.
  • Page 5 Contents Installation Site Preparation ......Unpacking the Switch ......Package Contents .
  • Page 7: Site Preparation

    This document provides basic information to install, configure, and operate Dell™ PowerConnect™ 8024 and 8024F systems. For more information, see the User’s Guide, which is available on your User Documentation CD, or check the Dell Support web site at support.dell.com for the latest updates on documentation and firmware.
  • Page 8: Mounting The Switch

    Unpacking Steps NOTE: Before unpacking the switch, inspect the container and immediately report any evidence of damage. Place the container on a clean, flat surface and cut all straps securing the container. Open the container or remove the container top. Carefully remove the switch from the container and place it on a secure and clean surface.
  • Page 9: Installing As A Free-Standing Switch

    Insert the supplied bolts into the rack-mounting holes and tighten with a screwdriver. Repeat the process for the rack-mounting bracket on the other side of the switch. Insert the switch into the 48.26 cm (19 inch) rack, ensuring that the rack-mounting holes on the switch line up to the mounting holes in the rack.
  • Page 10 The PowerConnect 8024 and 8024F switches have two power supplies for redundant or load- sharing operation. Each power supply can support 300W. Figure 2 illustrates the location of the two power receptacles on the rear panel.
  • Page 11 Read the release notes for this product before proceeding. You can download the release notes from the Dell Support website at support.dell.com. NOTE: We recommend that you obtain the most recent version of the user documentation from the Dell Support website at support.dell.com. Connecting the Terminal to the Switch...
  • Page 12: Initial Configuration

    The PowerConnect switch booted successfully. • The console connection was established and the Dell Easy Setup Wizard prompt appears on the screen of a VT100 terminal or terminal equivalent. The initial switch configuration is performed through the console port. After the initial configuration, you can manage the switch either from the already-connected console port or remotely through an interface defined during the initial configuration.
  • Page 13: Initial Configuration Procedure

    OOB interface. Initial Configuration Procedure You can perform the initial configuration using the Dell Easy Setup Wizard, or by using the Command Line Interface (CLI). The Setup Wizard automatically starts when the switch configuration file is empty. You can exit the wizard at any point by entering [ctrl+z], but all configuration settings specified will be discarded (the switch will use the default values).
  • Page 14 For more information on CLI initial configuration see the User Guide. This Getting Started Guide shows how to use the Setup Wizard for initial switch configuration. The wizard sets up the following configuration on the switch: • Establishes the initial privileged user account with a valid password. The wizard configures one privileged user account during the setup.
  • Page 15 The following example contains the sequence of prompts and responses associated with running an example Dell Easy Setup Wizard session, using the input values listed above. After the switch completes the POST and is booted, the following dialog appears: Unit 1 - Waiting to select management unit)>...
  • Page 16 To add a management station: Please enter the SNMP community string to be used [public]:public NOTE: If it is configured, the default access level is set to the highest available access for the SNMP management interface. Initially only SNMPv1/2c will be activated. SNMPv3 is disabled until you return to configure security access for SNMPv3 (e.g.
  • Page 17: Advanced Configuration

    If the information is incorrect, select (N) to discard configuration and restart the wizard: [Y/N] y Thank you for using Dell Easy Set up Wizard. You will now enter CLI mode. Advanced Configuration This section provides summary information about such common tasks as: •...
  • Page 18 To verify the IP address, enter the show ip interface command at the system prompt as shown in the following example. console#show ip interface Management Interface: IP Address........10.240.4.125 Subnet Mask........255.255.255.0 Default Gateway........10.240.4.1 Burned In MAC Address......00:10:18:82:04:35 Network Configuration Protocol Current....DHCP Management VLAN ID..........
  • Page 19 Configuring Security Passwords The security passwords can be configured for the following services: • Console • Telnet • • HTTP • HTTPS NOTE: When creating a user name, the default priority is "1", which allows access but not configuration rights. A priority of "15" must be set to enable access and configuration rights to the switch. Configuring an Initial Console Password To configure an initial console password, enter the following commands: console(config)#aaa authentication login default line...
  • Page 20 Configuring an Initial HTTP Password To configure an initial HTTP password, enter the following commands: console(config)#ip http authentication local console(config)#username admin password user1234 level 15 Configuring an Initial HTTPS Password To configure an initial HTTPS password, enter the following commands: console(config)#ip https authentication local NOTE: You should generate a new crypto certificate each time you upgrade (install a new version of)
  • Page 21 CLI by using the console port. Passwords are both case sensitive and alpha-numeric. For information about recovering a lost password, see the User’s Guide. Click OK. The Dell OpenManage Switch Administrator home page displays. Understanding the Interface The home page contains the following views: •...
  • Page 22 Getting Started Guide...
  • Page 23 Dell™ PowerConnect™ 8024 和 8024F 交换机 使用入门指南 型号 PC8024 和 PC8024F w w w . d e l l . c o m | s u p p o r t . d e l l . c o m...
  • Page 24 “警告”表示可能会导致财产损失、人身伤害甚至死亡。 ____________________ 本说明文件中的信息如有更改,恕不另行通知。 © 2009 Dell Inc. 版权所有,翻印必究。 未经 Dell Inc. 书面许可,不得以任何方式进行复制。 本文中使用的商标: Dell 、 DELL 徽标和 PowerConnect 是 Dell Inc. 的商标; Microsoft 和 Windows 是 Microsoft Corporation 的注册 商标。 本说明文件中述及的其它商标和产品名称是指拥有相应商标和产品名称的公司或其制造的产品。 Dell Inc. 对本公司的商标和产品 名称之外的其它商标和产品名称不拥有任何专有权。 型号 PC8024 和 PC8024F 2009 年 11 月...
  • Page 25 目录 安装 现场准备 ....... . . 打开交换机包装 ......
  • Page 27 安装 Dell™ PowerConnect™ 8024 8024F 《用户指南》 User Documentation CD Dell support.dell.com 现场准备 PowerConnect 8024 8024F 48.26 电源 - • 100-250 VAC 50-60 Hz 空间要求 - • 布线要求 - • 周围环境 - • C 32 打开交换机包装 包装箱物品 • PowerConnect • •...
  • Page 28 打开包装步骤 注: 安装交换机 警告: 请阅读《产品信息指南》中的安全信息,以及连接到该交换机或支持该交换机的其它交 换机的安全信息。 在机架中安装 警告: 请勿使用机架固定套件将交换机悬挂在台面或桌面下,或固定在墙壁上。 警告: 断开交换机上的所有电缆,然后继续安装。 取出交换机底部的所有自粘垫 (如果已粘连)。 警告: 在将多台交换机安装到机架中时,请自底向上安装交换机。 图 1. 固定支架...
  • Page 29 48.26 注意: 警告: 确保附带的机架螺栓插入到机架中的预制螺纹孔中。 安装为自立式交换机 注意: 将交换机连接至终端 RJ-45 VT100 VT100 RJ-45 RJ-45...
  • Page 30 将交换机连接至电源设备 警告: 请阅读《产品信息指南》中的安全信息,以及连接到该交换机或支持该交换机的其它交 换机的安全信息。 PowerConnect 8024 8024F 300W 注: 图 2. 连接电源电缆...
  • Page 31 RJ-45 VT100 9600 none VT100 箭头 而不 Ctrl ® ® Microsoft Windows 注: Microsoft Windows 2000 Windows 2000 Service Pack 2 Windows 2000 Service Pack 2 VT100 Windows 2000 Service Pack www.microsoft.com 直 RJ-45 PowerConnect 8024 外 之 8024F RJ-45...
  • Page 32 图 3. 连接至控制台端口 RJ-45 引导交换机 RJ-45 VT100 VT100 2 找 5 启 (POST) POST POST POST POST 初始配置 注: • PowerConnect • PowerConnect • Dell VT100 注: 注: Telnet Telnet HTTP Web...
  • Page 33 PowerConnect 8024 和 8024F (OOB) Dell (CLI) DHCP DHCP 注: DHCP DHCP DHCP PowerConnect 8024 and 8024F CLI Reference Guide ( PowerConnect 8024 和 8024F CLI 参考指南) 初始配置过程 Dell (CLI) [ctrl+z] 注: 尝试 一个 IP 该 求 DHCP DHCP 看...
  • Page 34 Unit 1 - Waiting to select management unit )> Applying configuration, please wait ... Welcome to Dell Easy Setup Wizard Dell The Setup Wizard guides you through the initial switch configuration, and gets you up and running as quickly as possible.You can skip the setup wizard, and enter CLI mode to manually configure the switch.
  • Page 35 步骤 1 : The system is not setup for SNMP management by default. To manage the switch using SNMP (required for Dell Network Manager) you can SNMP SNMP [Dell Network Manager Set up the initial SNMP version 2 account now.
  • Page 36 步骤 2 : Now we need to setup your initial privilege (Level 15) user account. This account is used to login to the CLI and Web interface. You may setup other accounts and change privilege levels later. For more information on setting up user accounts and changing privilege levels, see the user documentation.
  • Page 37 If the information is incorrect, select (N) to discard configuration and restart the wizard:[Y/N] [Y/N] Thank you for using Dell Easy Set up Wizard. You will now enter CLI mode. Dell 高级配置...
  • Page 38 2 输 命令 来获 IP 地址 console#config console(config)#ip address dhcp 动获 IP 地址 证 IP 地址 符 输 show ip interface 命令 例 console#show ip interface Management Interface: IP Address ......10.240.4.125 Subnet Mask ......255.255.255.0 Default Gateway ......10.240.4.1 Burned In MAC Address ..00:10:18:82:04:35 Network Configuration Protocol Current...
  • Page 39 安全保护管理和密码配置 Boot 配置安全保护密码 • • Telnet • • HTTP • HTTPS 注: 创 优 允许 权限 允许 权限 优 "1" "15" 才 对 权限 权限 配置初始控制台密码 console(config)#aaa authentication login default line console(config)#aaa authentication enable default line console(config)#line console console(config-line)#login authentication default console(config-line)#enable authentication default console(config-line)#password secret123 会话首次登录...
  • Page 40 配置初始 Telnet 密码 Telnet console(config)#aaa authentication login default line console(config)#aaa authentication enable default line console(config)#line telnet console(config-line)#login authentication default console(config-line)#enable authentication default console(config-line)#password pass1234 Telnet 会话首次登录 时 密码 符 输 • pass1234 更改 启 时 输 • pass1234 配置初始 HTTP 密码 HTTP console(config)#ip http authentication local console(config)#username admin password user1234 level 15...
  • Page 41 Login 登录 窗 时 输 户名 密码 注: 对 而无 输 区分大小写 只 字母 字 恢复 参 《 》 4 单击 OK Dell OpenManage Switch Administrator 主页 了解接口 树视 - 树视 主页左 组 可展 视 • 视 视 主页右 视 信息...
  • Page 43 Dell™ PowerConnect™ 8024 與 8024F 交換機 入門指南 機型 PC8024 與 PC8024F w w w . d e l l . c o m | s u p p o r t . d e l l . c o m...
  • Page 44 警示 : 「警示」表示可能會導致財產損壞、人身受傷或生命危險。 ____________________ 對本文件中所含資訊之變更恕不另行通知。 © 2009 Dell Inc. 版權所有,翻印必究。 未經 Dell Inc. 之書面許可,不得以任何方式重製。 本文所用商標:Dell、DELL 標誌以及 PowerConnect 是 Dell Inc. 的商標;Microsoft 和 Windows 是 Microsoft Corporation 的註冊 商標。 本文件所述及之其他商標或品牌名稱,均各自分屬其商標或產品名稱之申請者或擁有者所擁有。Dell Inc. 對本公司之外的商標和 產品名稱不擁有任何專有權。 機型 PC8024 與 PC8024F 2009 年 11 月...
  • Page 45 目錄 安裝 現場準備 ....... . . 拆開交換機包裝 ......
  • Page 47 安裝 Dell™ PowerConnect™ 8024 8024F User Documentation CD 《使用者指南》 Dell support.dell.com 現場準備 PowerConnect 8024 8024F 48.26 電源 - • 100-250 VAC 50-60 Hz 空間 - • 纜線佈置 - • 周圍環境 - • C (32 拆開交換機包裝 包裝箱物品 • PowerConnect • •...
  • Page 48 拆開包裝的步驟 註: 安裝交換機 警示 : 閱讀 《產品資訊指南》中的安全資訊以及連接或支援本交換機的其他交換機之安全 資訊。 安裝機架 警示 : 切勿使用機架安裝套件將交換機懸掛在桌台下,或者固定至牆面。 警示 : 從交換機上拔下所有纜線,然後繼續。 從交換機底部取出所有自黏性橡膠墊 ( 如已黏連 )。 警示 : 在一個機架上安裝多台交換機時,請自下向上安裝交換機。 圖 1-1. 連接托架...
  • Page 49 48.26 注意: 警示 : 確保隨附的機架螺栓插入機架的預製螺紋孔。 安裝為獨立式交換機 注意: 將交換機連接至終端 RJ-45 VT100 VT100 RJ-45 RJ-45...
  • Page 50 將交換機連接至電源供應器 警示 : 閱讀 《產品資訊指南》中的安全資訊以及連接或支援本交換機的其他交換機之安全 資訊。 PowerConnect 8024 8024F 300W 註: 圖 1-2. 連接電源線...
  • Page 51 Function, Arrow, and Ctrl keys ( Ctrl ® 不 Terminal keys ( Microsoft ® Windows 註: Microsoft Windows 2000 Windows 2000 Service Pack 2 Windows 2000 Service Pack 2 VT100 www.microsoft.com Windows 2000 直 RJ-45 PowerConnect 8024 RJ-45 頻外 8024F...
  • Page 52 圖 1-3. 連接至主控台連接埠 RJ-45 啟動交換機 已透過 RJ-45 VT100 VT100 2 找到 閉 AC 5 啟動 AC (POST) POST POST POST POST 初始設定 註: • PowerConnect • PowerConnect • Dell VT100 註: 註: HTTP (Web...
  • Page 53 PowerConnect 8024 與 8024F 10-Gigabit Gigabit (OOB) Dell (CLI) DHCP DHCP 註: 兩個 DHCP DHCP 必須 停 它 然後 DHCP 《PowerConnect 8024 與 8024F CLI 參考指南》 初始設定程序 Dell (CLI) [ctrl+z] 註: 果 60 秒鐘內 執 回 果 第一次 是 路 嘗試 DHCP 果...
  • Page 54 Unit 1 - Waiting to select management unit ( )> Applying configuration, please wait ...( ...) Welcome to Dell Easy Setup Wizard ( Dell The Setup Wizard guides you through the initial switch configuration, and gets you up and running as quickly as possible.
  • Page 55 步驟 1: The system is not setup for SNMP management by default. To manage the switch using SNMP (required for Dell Network Manager) you can SNMP SNMP (Dell Network Manager Set up the initial SNMP version 2 account now. ( SNMP Return later and setup other SNMP accounts.
  • Page 56 步驟 2: Now we need to setup your initial privilege (Level 15) user account. This account is used to login to the CLI and Web interface. You may setup other accounts and change privilege levels later. For more information on setting up user accounts and changing privilege levels, see the user documentation.
  • Page 57 If the information is incorrect, select (N) to discard configuration and restart the wizard: [Y/N] ( [Y/N]) y Thank you for using Dell Easy Set up Wizard. You will now enter CLI mode. ( Dell 進階設定...
  • Page 58 2 輸 指令 來獲 址 console#config console(config)#ip address dhcp 介 動獲 址 3 要驗證 IP 址 系統 符 輸 show ip interface 指令 console#show ip interface Management Interface: ( IP Address (IP )......10.240.4.125 Subnet Mask ( )......255.255.255.0 Default Gateway ( )......
  • Page 59 安全管理和密碼設定 AAA ( Boot ( 設定安全密碼 • • Telnet • • HTTP • HTTPS 註: 優 順 "1" 允許存 權限 允許 權限 必須 優 順 "15" 才 存 權限 權限 設定初始主控台密碼 console(config)#aaa authentication login default line console(config)#aaa authentication enable default line console(config)#line console console(config-line)#login authentication default console(config-line)#enable authentication default...
  • Page 60 設定初始 Telnet 密碼 Telnet console(config)#aaa authentication login default line console(config)#aaa authentication enable default line console(config)#line telnet console(config-line)#login authentication default console(config-line)#enable authentication default console(config-line)#password pass1234 透過 Telnet 階段首次登 時 密碼 符 輸 • pass1234 變 啟 時 輸 • pass1234 設定初始 HTTP 密碼 HTTP console(config)#ip http authentication local console(config)#username admin password user1234 level 15...
  • Page 61 50 頁 「初始 」 Login ( 登 窗時 輸 名稱 密碼 註: 而無 輸 區分大小寫 只 英數字元 復原 參 《使用者指南》 OK ( 5 系統 Dell OpenManage Switch Administrator 首頁 瞭解介面 樹狀 - 樹狀 首頁左 可展 • 首頁右 區域 說 • 之...
  • Page 63: Guide De Mise En Route

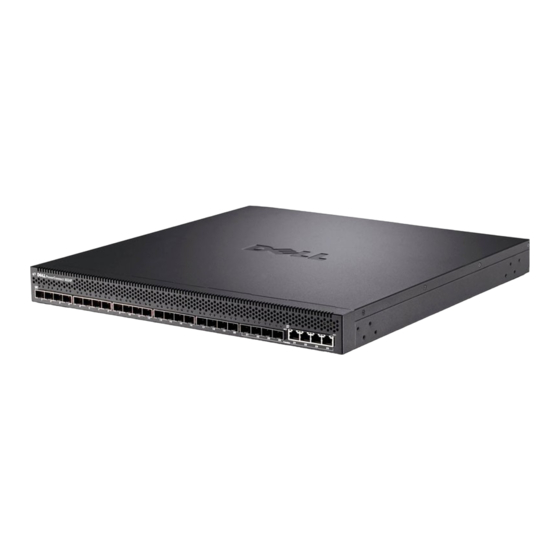
    Connecteurs Dell™ PowerConnect™ 8024 et 8024F Guide de mise en route Modèle PC8024 et PC8024F w w w . d e l l . c o m | s u p p o r t . d e l l . c o m...
  • Page 64: Remarques, Avis Et Précautions

    D'autres marques et noms de marques peuvent être utilisés dans ce document pour faire référence aux entités se réclamant de ces marques et de ces noms ou à leurs produits. Dell Inc. dénie tout intérêt propriétaire vis-à-vis des marques et des noms de marque autres que les siens.
  • Page 65 Table des matières Installation Préparation du site ......Déballage du commutateur ......Contenu du carton .
  • Page 67: Préparation Du Site

    Préparation du site Les commutateurs de la série PowerConnect 8024 et 8024F peuvent être montés dans un rack standard de 19 pouces (48,26 cm) ou posés sur une surface plane. Avant d'installer le ou les commutateurs, assurez-vous que l'endroit choisi pour l'installation répond aux conditions suivantes :...
  • Page 68: Déballage

    Déballage REMARQUE : Avant de déballer le commutateur, examinez le carton d'emballage et signalez immédiatement tout dommage apparent. Posez le carton sur une surface plane et propre et coupez toutes les sangles d'attache. Ouvrez le carton ou retirez le couvercle. Retirez avec précaution le commutateur de son carton et posez-le sur une surface propre et stable.
  • Page 69: Installation D'un Commutateur Autonome

    Placez le support de fixation du rack sur un côté du commutateur, en alignant les orifices de montage des deux éléments. La figure 1 indique l'emplacement approprié pour le montage des supports. Figure 1. Fixation des supports Insérez les boulons qui vous ont été fournis dans les orifices de montage, puis serrez-les à l'aide d'un tournevis.
  • Page 70: Connexion Du Commutateur À Un Terminal

    Information Guide (Guide d'informations sur le produit), ainsi que des informations similaires concernant les autres appareils connectés au commutateur. Les commutateurs du PowerConnect 8024 et 8024F possèdent deux blocs d'alimentation pour des opérations de redondance ou de partage des charges. Chaque bloc d'alimentation peut supporter 300 W.
  • Page 71: Démarrage Et Configuration Du Commutateur

    REMARQUE : Avant de continuer, lisez les notes d'édition concernant ce produit. Vous pouvez les télécharger à partir du site d'assistance technique de Dell, support.dell.com. REMARQUE : Nous vous recommandons de vous procurer la version la plus récente de la documentation utilisateur disponible sur le site support.dell.com.
  • Page 72: Démarrage Du Commutateur

    Enfichez le connecteurRJ-45 port de console . Le port de la console PowerConnect USB 8024 et 8024F est situé à panneau arrière, au-dessus du port hors bande RJ-45, comme indiqué dans figure 3. Figure 3. Connexion au port de console Port de console Le port RJ-45 situé...
  • Page 73: Configuration Initiale

    Le commutateur PowerConnect a démarré correctement. • La connexion à la console est établie et l'invite de l'assistant Dell Easy Setup est affichée sur l'écran d'un terminal VT100 ou équivalent. La configuration initiale du commutateur est effectuée via le port de console. Une fois cette première étape effectuée, le commutateur peut être géré...
  • Page 74: Procédure De Configuration Initiale

    Procédure de configuration initiale Vous pouvez effectuer la configuration initiale à l'aide de l'interface CLI ou de l'Assistant Dell Easy Setup. Cet assistant démarre automatiquement si le fichier de configuration du commutateur est vide. Vous pouvez quitter l'assistant à tout moment en tapant [ctrl+z]. Dans ce cas, tous les paramètres de configuration modifiés sont supprimés et le commutateur utilise les valeurs par...
  • Page 75 <Entrée> sans avoir défini d'options, la valeur par défaut est prise en compte. Le texte de l'aide est entre parenthèses. L'exemple suivant montre une suite d'invites et de réponses affichées dans l'assistant Dell Easy Setup. Les valeurs utilisées sont indiquées ci-dessus.
  • Page 76 Étape 1 : The system is not setup for SNMP management by default. To manage the switch using SNMP (required for Dell Network Manager) you can: Set up the initial SNMP version 2 account now. Return later and setup other SNMP accounts. (For more information on setting up an SNMP version 1 or 3 account, see the user documentation).
  • Page 77 If the information is incorrect, select (N) to discard configuration and restart the wizard: [Y/N] y Thank you for using Dell Easy Set up Wizard. You will now enter CLI mode. Guide de mise en route...
  • Page 78: Configuration Avancée

    Configuration avancée Cette section présente des informations récapitulatives sur des tâches courantes telles que les suivantes : • Obtention d'une adresse IP à partir d'un serveur DHCP • Gestion de la sécurité et configuration du mot de passe REMARQUE : Pour obtenir des informations détaillées sur les commandes CLI disponibles pour les commutateurs de la série M6348 8024 et 8024F, voir le document CLI Reference Guide (Guide de référence CLI).
  • Page 79 Routing Interfaces: Netdir Multi Interface Adresse IP Masque IP Bcast CastFwd ---------- --------------- --------------- -------- -------- vlan1 192.168.10.10 255.255.255.0 Disable Disable vlan2 0.0.0.0 0.0.0.0 Enable Disable loopback2 0.0.0.0 0.0.0.0 Disable Disable Gestion de la sécurité et configuration du mot de passe La sécurité...
  • Page 80 Configuration d'un mot de passe de console initial Pour configurer un mot de passe de console initial, entrez les commandes suivantes : console(config)#aaa authentication login default line console(config)#aaa authentication enable default line console(config)#line console console(config-line)#login authentication default console(config-line)#enable authentication default console(config-line)#password secret123 •...
  • Page 81 Configuration d'un mot de passe HTTPS initial Pour configurer un mot de passe HTTPS, entrez les commandes suivantes : console(config)#ip https authentication local REMARQUE : Vous devez générer un nouveau certificat de cryptographie à chaque fois que vous mettez à niveau le logiciel de contrôle du commutateur. Entrez les commandes ci-dessous une fois lorsque vous configurez l'utilisation d'une session HTTPS via une console, Telnet ou SSH.
  • Page 82: Gestion Du Commutateur

    Pour plus d'informations sur la récupération des mots de passe oubliés, consulter le document User’s Guide (Guide d'utilisation). Cliquez sur OK. La page d'accueil de Dell OpenManage Switch Administrator s'affiche. Présentation de l'interface La page d'accueil offre différents modes d'affichage : •...
  • Page 83 Dell™ PowerConnect™ 8024 und 8024F Switches Handbuch zum Einstieg Modelle PC8024 und PC8024F w w w . d e l l . c o m | s u p p o r t . d e l l . c o m...
  • Page 84 © 2009 Dell Inc. Alle Rechte vorbehalten. Nachdrucke jeglicher Art ohne die vorherige schriftliche Genehmigung von Dell Inc. sind strengstens untersagt. In diesem Text verwendete Marken: Dell, das DELL Logo und PowerConnect sind Marken von Dell Inc.; Microsoft und Windows sind eingetragene Marken von Microsoft Corporation.
  • Page 85 Inhalt Installation Standortvorbereitung ......Auspacken des Switches ......Inhalt der Verpackung .
  • Page 87 Updates von Dokumentation und Firmware erhalten Sie auf der Dell Support-Website unter support.dell.com. Standortvorbereitung Die Switches PowerConnect 8024 und 8024F können in einem 48,3-cm (19 Zoll)-Standardrack installiert oder freistehend auf einer flachen Oberfläche positioniert und eigenständig betrieben werden. Bevor Sie den Switch oder die Switches installieren, stellen Sie sicher, dass am Ort der Installation die folgenden Voraussetzungen erfüllt sind:...
  • Page 88: Montage Des Switches

    • Ein Satz von selbstklebenden Gummiunterlagen für die frei stehenden Installation (vier Stück) • User Documentation-CD (Benutzerdokumentation) • Handbuch zum Einstieg • Produktinformationshandbuch Auspacken ANMERKUNG: Überprüfen Sie vor dem Auspacken des Switches die Verpackung, und melden Sie etwaige Beschädigungen unverzüglich. Stellen Sie das Paket auf eine saubere, ebene Fläche, und zerschneiden Sie alle Befestigungsbänder.
  • Page 89 VORSICHT: Wenn Sie mehrere Switches in einem Rack installieren, sollten Sie die Geräte von unten nach oben einsetzen. Halten Sie einen der mitgelieferten Montagehalter auf eine Seite des Switches, wobei sich die Montagebohrungen am Switch mit den entsprechenden Bohrungen am Halter decken müssen.
  • Page 90 Sicherheitshinweise für andere Switches, die mit dem Switch verbunden werden oder diesen unterstützen. Die Switches PowerConnect 8024 und 8024F verfügen über zwei Netzteile. Dies ermöglicht den redundanten Betrieb oder Lastteilung. Jedes Netzteil ist für bis zu 300 W ausgelegt. Abbildung 2 zeigt die Position der beiden Netzteilanschlüsse auf der Rückseite.
  • Page 91 ANMERKUNG: Schließen Sie noch nicht das Stromkabel an eine geerdete Netzsteckdose an. Verbinden Sie den Switch mit einer Stromquelle, wie im Abschnitt „Starten und Konfigurieren des Switches“ beschrieben. Abbildung 2. Anschließen der Netzstromkabel Handbuch zum Einstieg...
  • Page 92 Lesen Sie die Versionshinweise für dieses Produkt, bevor Sie fortfahren. Sie können die Versionshinweise von der Dell Support-Website unter support.dell.com herunterladen. ANMERKUNG: Es wird empfohlen, die aktuelle Version der Benutzerdokumentation von der Dell Support-Website support.dell.com herunterzuladen. Verbinden des Terminals mit dem Switch Um den Switch über die serielle Konsole zu überwachen und zu konfigurieren, verbinden Sie den...
  • Page 93 Verbinden Sie den RJ-45-Stecker des Kabels direkt mit dem Konsolenanschluss des Switches. Der USB-Konsolenanschluss der PowerConnect 8024 und 8024F Switches befindet sich Rückseite über dem RJ-45-Anschluss für bandexterne Verwaltung (siehe Abbildung 3). Abbildung 3. Mit Konsolenanschluss verbinden Konsolen-Port Der RJ-45-Anschluss unter dem Konsolenanschluss dient zur bandexternen Verwaltung.
  • Page 94 • Der PowerConnect-Switch wurde erfolgreich gestartet. • Es besteht eine Konsolenverbindung, und die Befehlszeile des Dell Easy-Setup-Assistenten wird auf dem Bildschirm des VT100-Terminals bzw. des entsprechenden Systems angezeigt. Die Erstkonfiguration des Switches wird über den Konsolenanschluss vorgenommen. Nach der Erstkonfiguration können Sie den Switch entweder über die bereits bestehende Konsolenverbindung verwalten oder aus der Ferne über eine Schnittstelle, die bei der...
  • Page 95 Durchführen der Erstkonfiguration Sie können die Erstkonfiguration mit dem Dell Easy-Setup-Assistenten vornehmen oder über die Befehlszeilenschnittstelle (CLI) durchführen. Der Setup-Assistent wird automatisch gestartet, wenn die Switch-Konfigurationsdatei leer ist. Sie können den Assistenten jederzeit beenden, indem Sie [Strg+z] eingeben, doch gehen dabei alle festgelegten Konfigurationseinstellungen verloren (der Switch verwendet die Standardwerte).
  • Page 96 Standardwert. Hilfetexte sind in Klammern gesetzt. Das folgende Beispiel enthält eine Abfolge von Eingabeaufforderungen und Reaktionen im Rahmen einer beispielhaften Sitzung mit dem Dell Easy-Setup-Assistenten, wobei die oben genannten Eingabewerte verwendet werden. Nachdem der Switch den Einschaltselbsttest durchlaufen und den Startvorgang abgeschlossen hat, wird der folgende Dialog angezeigt: Unit 1 - Waiting to select management unit)>...
  • Page 97 Schritt 1: The system is not setup for SNMP management by default. To manage the switch using SNMP (required for Dell Network Manager) you can Set up the initial SNMP version 2 account now. Return later and setup other SNMP accounts. (For more information on setting up an SNMP version 1 or 3 account, see the user documentation).
  • Page 98 If the information is incorrect, select (N) to discard configuration and restart the wizard: [Y/N] y Thank you for using Dell Easy Set up Wizard. You will now enter CLI mode. Handbuch zum Einstieg...
  • Page 99 Fortgeschrittene Konfiguration Dieser Abschnitt enthält zusammenfassende Informationen über häufige Aufgaben, wie zum Beispiel: • Abrufen einer IP-Adresse von einem DHCP-Server • Sicherheitsverwaltung und Kennwortkonfiguration ANMERKUNG: Detaillierte Informationen über alle CLI-Befehle, die für Switches der Reihen 8024 und 8024F M6348 zur Verfügung stehen, finden Sie im CLI-Referenzhandbuch. Abrufen einer IP-Adresse von einem DHCP-Server Wenn eine IP-Adresse über das DHCP-Protokoll abgerufen wird, fungiert der Switch als DHCP- Client.
  • Page 100 Routing Interfaces: Netdir Multi Interface IP Address IP Mask Bcast CastFwd ---------- --------------- --------------- -------- -------- vlan1 192.168.10.10 255.255.255.0 Disable Disable vlan2 0.0.0.0 0.0.0.0 Enable Disable loopback2 0.0.0.0 0.0.0.0 Disable Disable Sicherheitsverwaltung und Kennwortkonfiguration Die Systemsicherheit wird über den so genannten AAA-Mechanismus (Authentifizierung, Autorisierung und Accounting) realisiert, der eine Verwaltung der benutzerspezifischen Zugriffsrechte, Privilegien und Management-Verfahren ermöglicht.
  • Page 101 Konfigurieren eines ersten Konsolenkennworts Zum Konfigurieren eines ersten Konsolenkennworts geben Sie die folgenden Befehle ein: console(config)#aaa authentication login default line console(config)#aaa authentication enable default line console(config)#line console console(config-line)#login authentication default console(config-line)#enable authentication default console(config-line)#password secret123 • Wenn Sie sich erstmalig über eine Konsolensitzung bei einem Switch anmelden, geben Sie an der Kennwort-Eingabeaufforderung secret123 ein.
  • Page 102 Konfigurieren eines ersten HTTPS-Kennworts Zum Konfigurieren eines ersten HTTPS-Kennworts geben Sie die folgenden Befehle ein: console(config)#ip https authentication local ANMERKUNG: Sie sollten bei jedem Upgrade (Installieren einer neuen Version) der Steuersoftware- Anwendung auf dem Switch ein neues „crypto certificate“ (Schlüsselzertifikat) erzeugen. Geben Sie die folgenden Befehle einmal ein, wenn Sie die Verwendung einer HTTPS-Sitzung über eine Konsolen-, Telnet- oder SSH-Sitzung konfigurieren.
  • Page 103 Kennwörter sind alphanumerisch, und es wird zwischen Groß- und Kleinschreibung unterschieden. Informationen zur Wiederbeschaffung eines verlorenen Kennworts finden Sie im Benutzerhandbuch. Klicken Sie auf OK. Die Startseite von Dell OpenManage Switch Administrator wird angezeigt. Aufbau der Benutzeroberfläche Die Startseite enthält folgende Felder: •...
  • Page 104 Handbuch zum Einstieg...
  • Page 105 Dell™ PowerConnect™ 8024 dan 8024F Panduan Pengaktifan Model PC8024 dan PC8024F w w w . d e l l . c o m | s u p p o r t . d e l l . c o m...
  • Page 106 Merek dagang dan nama dagang lain mungkin digunakan dalam dokumen ini untuk merujuk ke pihak lain yang memiliki hak kekayaan intelektual atas merek dan nama produk mereka. Dell Inc. tidak menyatakan kepentingan kepemilikan apa pun atas merek dagang dan nama dagang selain miliknya sendiri.
  • Page 107 Daftar Isi Instalasi Penyiapan Tempat ......Membuka Kemasan Switch ..... . . Isi Kemasan .
  • Page 109: Isi Kemasan

    Dukungan Dell di support.dell.com untuk update terbaru mengenai dokumentasi dan firmware. Penyiapan Tempat Switch PowerConnect 8024 dan 8024F dapat dipasang pada rak standar 48,26-cm (19-inci) atau berdiri sendiri (pada permukaan yang rata) dan berfungsi sebagai switch terpisah. Sebelum menginstal satu atau beberapa switch, pastikan bahwa lokasi penginstalan yang dipilih memenuhi persyaratan tempat berikut: •...
  • Page 110 Langkah Membuka Kemasan CATATAN: Sebelum membuka kemasan switch, periksa kontainer dan segera laporkan jika terlihat ada kerusakan. Letakkan kontainer di permukaan yang bersih, rata dan potong semua tali pengikatnya. Buka kontainer atau lepaskan tutup atas kontainer. Dengan hati-hati keluarkan switch dari kontainer dan letakkan di permukaan yang kokoh dan bersih.
  • Page 111 Gambar 1. Memasang Braket Masukkan baut yang disertakan ke lubang pemasangan rak lalu kencangkan dengan obeng. Ulangi proses ini untuk braket pemasangan rak di sisi switch lainnya. Masukkan switch ke dalam rak 48,26 cm (19 inci), pastikan bahwa lubang pemasangan rak pada switch tepat lurus dengan lubang pemasangan di rak.
  • Page 112 Bacalah informasi keselamatan dalam Panduan Informasi Produk serta informasi keselamatan untuk switch lain yang terhubung atau mendukung switch tersebut. Switch PowerConnect 8024 dan 8024F dilengkapi dua catu daya sebagai cadangan atau untuk operasi berbagi-beban. Setiap catu daya dapat mendukung 300W. Gambar 2 menggambarkan lokasi dua soket daya di panel belakang.
  • Page 113 CD Dokumentasi Pengguna Anda. CATATAN: Bacalah catatan rilis untuk produk ini sebelum melanjutkan. Anda dapat mendownload catatan rilis dari situs web Dukungan Dell di support.dell.com. CATATAN: Kami menyarankan Anda untuk mendapatkan dokumentasi pengguna versi terbaru dari situs web Dukungan Dell di support.dell.com.
  • Page 114 Hubungkan konektor RJ-45 pada kabel langsung ke port konsol pada switch. Port konsol PowerConnect 8024 dan 8024F terdapat di panel belakang, di atas port out-of-band RJ-45, seperti ditunjukkan pada Gambar 3. Gambar 3. Menghubungkan ke Port Konsol Port Konsol Port RJ-45 di bawah port Konsol adalah untuk pengelolaan out-of-band.
  • Page 115 • Switch PowerConnect berhasil dihidupkan. • Koneksi konsol akan dibuat dan prompt Wizard Penataan Mudah Dell ditampilkan pada layar terminal VT100 atau terminal yang serupa. Konfigurasi awal switch ditentukan melalui port konsol. Setelah konfigurasi awal, Anda dapat mengelola switch dari port konsol yang telah terhubung atau dari jarak jauh melalui antarmuka yang ditetapkan selama konfigurasi awal.
  • Page 116 Prosedur Konfigurasi Awal Anda dapat menetapkan konfigurasi awal menggunakan Wizard Penataan Mudah Dell, atau dengan menggunakan Antarmuka Baris Perintah (CLI). Wizard Penataan dijalankan secara otomatis apabila file konfigurasi switch kosong. Anda dapat keluar dari wizard sewaktu-waktu dengan menekan [ctrl+z], namun semua pengaturan yang ditetapkan akan dibuang (switch akan menggunakan nilai default).
  • Page 117 Teks bantuan tersedia dalam tanda kurung. Contoh berikut ini berisi urutan prompt dan tanggapan yang terkait dengan menjalankan sesi contoh Wizard Penataan Mudah Dell, dengan menggunakan nilai input yang terdaftar di atas. Setelah switch menyelesaikan POST dan dihidupkan, dialog berikut ini ditampilkan: Unit 1 - Waiting to select management unit)>...
  • Page 118 Langkah 1: The system is not setup for SNMP management by default. To manage the switch using SNMP (required for Dell Network Manager) you can Set up the initial SNMP version 2 account now. Return later and setup other SNMP accounts. (For more information on setting up an SNMP version 1 or 3 account, see the user documentation).
  • Page 119 If the information is incorrect, select (N) to discard configuration and restart the wizard: [Y/N] y Thank you for using Dell Easy Set up Wizard. You will now enter CLI mode. Panduan Pengaktifan...
  • Page 120: Konfigurasi Lanjutan

    Konfigurasi Lanjutan Bagian ini berisi ringkasan informasi tentang tugas umum seperti: • Mengambil Alamat IP Dari Server DCHP • Pengelolaan Keamanan dan Konfigurasi Kata Sandi CATATAN: Untuk informasi terperinci mengenai semua perintah CLI yang tersedia untuk switch 8024 dan 8024F M6348, lihat Panduan Referensi CLI. Mengambil Alamat IP Dari Server DCHP Apabila menggunakan protokol DHCP untuk mengambil alamat IP, switch akan bertindak sebagai klien DHCP.
  • Page 121 Routing Interfaces: Netdir Multi Interface IP Address IP Mask Bcast CastFwd ---------- --------------- --------------- -------- -------- vlan1 192.168.10.10 255.255.255.0 Disable Disable vlan2 0.0.0.0 0.0.0.0 Enable Disable loopback2 0.0.0.0 0.0.0.0 Disable Disable Pengelolaan Keamanan dan Konfigurasi Kata Sandi Keamanan sistem ditangani melalui mekanisme AAA (Autentikasi, Autorisasi, dan Akuntansi) yang mengelola hak akses, level akses, dan metode pengelolaan pengguna.
  • Page 122 Mengkonfigurasikan Kata Sandi Awal Konsol Untuk mengkonfigurasikan kata sandi awal konsol, masukkan perintah berikut: console(config)#aaa authentication login default line console(config)#aaa authentication enable default line console(config)#line console console(config-line)#login authentication default console(config-line)#enable authentication default console(config-line)#password secret123 • Pada saat login ke switch untuk pertama kalinya melalui sesi konsol, masukkan secret123 pada prompt kata sandi.
  • Page 123 Mengkonfigurasikan Kata Sandi Awal HTTPS Untuk mengkonfigurasikan kata sandi awal HTTPS, masukkan perintah berikut: console(config)#ip https authentication local CATATAN: Anda harus membuat sertifikat crypto baru setiap kali melakukan upgrade (menginstal versi baru) aplikasi perangkat lunak kontrol pada switch. Masukkan perintah berikut satu kali ketika mengkonfigurasikan untuk menggunakan sesi HTTPS melalui konsol, Telnet, atau sesi SSH.
  • Page 124 Kata sandi dapat terdiri dari huruf dan angka dan huruf kecil/besar harus tepat sama. Untuk informasi tentang cara memulihkan kata sandi yang hilang, lihat Panduan Pengguna. Klik OK. Homepage Dell OpenManage Switch Administrator ditampilkan. Memahami Antarmuka Homepage terdiri dari tampilan berikut: •...
  • Page 125 Dell™ PowerConnect™ 8024/8024F スイッチ はじめに モデル PC8024/PC8024F w w w . d e l l . c o m | s u p p o r t . d e l l . c o m...
  • Page 126 警告: 物的損害、けが、または死亡の原因となる可能性があることを示しています。 ____________________ 本書の内容は予告なく変更されることがあります。 © 2009 すべての著作権は Dell Inc. にあります。 Dell Inc. の書面による許可のない複製は、いかなる形態においても厳重に禁じられています。 本書に使用されている商標: Dell、DELL ロゴ、および PowerConnect は Dell Inc. の商標です。Microsoft および Windows は Microsoft Corporation の登録商標です。 商標または製品の権利を主張する事業体を表すためにその他の商標および社名が使用されていることがあります。 それらの商 標や会社名は、一切 Dell Inc. に帰属するものではありません。 モデル PC8024/PC8024F 2009 年 11 月 P/N X472K...
  • Page 127 目次 設置 設置場所の準備 ......スイッチの開梱 ......スイッチの設置...
  • Page 129 設置 Dell™ PowerConnect™ 8024/8024F User Documentation CD support.dell.com 設置場所の準備 PowerConnect 8024/8024F 48.26 cm • 電源 — AC 100 250 V 50/60 Hz • クリアランス — • ケーブル配線 — • 環境要件 — スイッチの開梱 パッケージの内容 • PowerConnect • • RJ-45-to-DB9 • •...
  • Page 130 開梱の手順 メモ: スイッチの設置 警告: 『製品情報ガイド』の安全情報、およびスイッチに接続する、またはスイッチをサ ポートするその他のスイッチに関する安全情報をお読みください。 ラックへの設置 警告: ラック取り付けキットを使用してスイッチをテーブルや机の下にぶら下げる状態で設 置したり、壁に取り付けたりしないでください。 警告: 次の手順に進む前に、すべてのケーブルをスイッチから取り外します。 スイッチの底 面に粘着パッドが取り付けられている場合は、すべて剥がします。 警告: ラックに複数のスイッチを設置する場合は、下から上の順に取り付けます。 図 1 ブラケットの取り付け...
  • Page 131 48.26 cm 注意: 警告: 付属のラックボルトがラックのネジ穴に合うことを確認します。 独立型のスイッチとしての設置 注意: 5 cm 13 cm ターミナルへの接続 RJ-45-to-DB9 VT100 VT100 RJ-45 RJ-45...
  • Page 132 電源への接続 警告: 『製品情報ガイド』の安全情報、およびスイッチに接続する、またはスイッチをサ ポートするその他のスイッチに関する安全情報をお読みください。 PowerConnect 8024/8024F 300W メモ: 図 2 電源ケーブルの接続...
  • Page 133 スイッチの起動と設定 能 User Documentation CD メモ: support.dell.com メモ: support.dell.com ターミナルとスイッチの接続 VT100 VT100 • VT100 VT100 • RJ-45 VT100 9600 VT100 Function, Arrow, and Ctrl keys Ctrl ® ® Terminal keys Microsoft Windows keys Terminal keys...
  • Page 134 メモ: Microsoft Windows 2000 Windows 2000 Service Pack 2 Windows 2000 Service Pack 2 VT100 Windows 2000 www.microsoft.com RJ-45 PowerConnect 8024/8024F RJ-45 図 3 コンソールポートへの接続 コンソールポート RJ-45 スイッチの起動 RJ-45-to-DB9 VT100 VT100 POST POST POST POST...
  • Page 135 初期設定 メモ: • PowerConnect • PowerConnect • VT100 Dell Easy Setup Wizard メモ: メモ: Telnet Telnet HTTP Web • VLAN • • VLAN 管理インタフェースと帯域外インタフェース PowerConnect 8024/8024F Dell Easy Setup Wizard DHCP DHCP メモ: DHCP DHCP DHCP...
  • Page 136 PowerConnect 8024 and 8024F CLI Reference Guide PowerConnect 8024/8024F CLI 初期設定の手順 Dell Easy Setup Wizard Ctrl+Z メモ: Easy Setup Wizard Easy Setup Wizard DHCP DHCP VLAN 192.168.2.1 enable EXEC show ip interface management • • HTTP • VLAN • SNMP...
  • Page 137 60 seconds)? [Y/N] y 手順 1: The system is not setup for SNMP management by default. To manage the switch using SNMP (required for Dell Network Manager) you can Set up the initial SNMP version 2 account now.
  • Page 138 The wizard automatically assigns the highest access level [Privilege Level 15] to this account. You can use Dell Network Manager or other management interfaces to change this setting and to add additional management systems later.
  • Page 139 If the information is correct, please select (Y) to save the configuration, and copy to the start-up configuration file. If the information is incorrect, select (N) to discard configuration and restart the wizard: [Y/N] y Thank you for using Dell Easy Set up Wizard. You will now enter CLI mode.
  • Page 140 詳細設定 • DHCP • メモ: 8024/8024F M6348 Reference Guide DHCP サーバーからの IP アドレスの読み出し DHCP DHCP DHCP DHCP DHCP メモ: DHCP console#config console(config)#ip address dhcp show ip interface console#show ip interface Management Interface: IP Address........10.240.4.125 Subnet Mask........255.255.255.0 Default Gateway........10.240.4.1 Burned In MAC Address......00:10:18:82:04:35 Network Configuration Protocol Current....
  • Page 141 Routing Interfaces: Netdir Multi Interface IP Address IP Mask Bcast CastFwd ---------- --------------- --------------- -------- -------- vlan1 192.168.10.10 255.255.255.0 Disable Disable vlan2 0.0.0.0 0.0.0.0 Enable Disable loopback2 0.0.0.0 0.0.0.0 Disable Disable セキュリティ管理とパスワードの設定 Boot 能 セキュリティパスワードの設定 • Console • Telnet • •...
  • Page 142 初期コンソールパスワードの設定 console(config)#aaa authentication login default line console(config)#aaa authentication enable default line console(config)#line console console(config-line)#login authentication default console(config-line)#enable authentication default console(config-line)#password secret123 • secret123 • secret123 初期 Telnet パスワードの設定 Telnet console(config)#aaa authentication login default line console(config)#aaa authentication enable default line console(config)#line telnet console(config-line)#login authentication default console(config-line)#enable authentication default console(config-line)#password pass1234...
  • Page 143 初期 HTTPS パスワードの設定 HTTPS console(config)#ip https authentication local メモ: 制御 グ び 暗号証 書 HTTPS Telnet メモ: ペ ツ SSL 2.0 console(config)#crypto certificate 1 generate console(config)#ip https server メモ: び Https Http 直...
  • Page 144 スイッチの管理 SNMP SNMP Telnet/SSH 能 Easy Setup Wizard Web ブラウザを使用したスイッチの管理 アプリケーションの起動 <Enter> Login メモ: 大文字 小文字 区別 英数文字 念 カ ズ Dell OpenManage Switch Administrator インタフェースの概要 • 能 — • —...
  • Page 145 Dell™ PowerConnect™ 8024 및 8024F 스위치 시작 안내서 PC8024 및 PC8024F 모델 w w w . d e l l . c o m | s u p p o r t . d e l l . c o m...
  • Page 146 본 설명서에 사용된 상표인 Dell, DELL 로고 및 PowerConnect는 Dell Inc.의 상표입니다. Microsoft 및 Windows는 Microsoft Corporation 의 등록 상표입니다. 본 설명서에서 특정 회사의 표시나 제품 이름을 지칭하기 위해 기타 상표나 상호를 사용할 수도 있습니다. Dell Inc.는 자사가 소유 하고 있는 것 이외에 기타 모든 등록 상표 및 상표 이름에 대한 어떠한 소유권도 보유하지 않습니다.
  • Page 147 차례 설치 설치 사이트 준비 ......스위치 포장 풀기 ......
  • Page 149 설 치 Dell™ PowerConnect™ 8024 8024F 사용 설명서(사용 설명서 CD Dell (support.dell.com) 설치 사이트 준비 PowerConnect 8024 8024F 48.26cm(19 전원 - • 100-250VAC, 50-60Hz 여유 공간 - • 케이블 연결 - • 주변 요구사항 - • ° ° 0 ~ 45 C (32 ~ 113 스위치...
  • Page 150 포장 풀기 단계 주: 스위치 장착 주의: 제품 정보 안내의 안전 정보와 스위치에 연결되거나 스위치를 지원하는 다른 스위치에 대한 안전 정보 를 읽으십시오. 랙에 설치 주의: 랙 장착 키트를 사용하여 테이블 또는 책상 아래에 스위치를 매달거나 벽에 부착하지 마십시오. 주의: 계속...
  • Page 151 48.26 cm (19 주의사항: 환풍구가 막히지 않도록 주의하십시오. 주의: 제공된 랙 볼트가 랙의 구멍에 맞는지 확인하십시오. 단독 설치 주의사항: 스위치를 랙에 장착할 것을 권장합니다. 5 cm (2 13 cm (5 스위치를 터미널에 연결 RJ-45 VT100 VT100 RJ-45 RJ-45...
  • Page 152 스위치를 전원 공급 장치에 연결 주의: 제품 정보 안내의 안전 정보와 스위치에 연결되거나 스위치를 지원하는 다른 스위치에 대한 안전 정보 를 읽으십시오. PowerConnect 8024 8024F . 그림 2에서는 후면 패널 300W 에 있는 두 개의 전원 소켓 위치를 보여줍니다. 주: .
  • Page 153 DTE(Data Terminal Equipment) • VT100 VT100 • RJ-45 VT100 9600 VT100 ® ® Ctrl . Microsoft Windows 주: Microsoft Windows 2000 , Windows 2000 Service Pack 2 . Windows 2000 VT100 . Windows 2000 www.microsoft.com RJ-45 . PowerConnect 8024 8024F RJ-45...
  • Page 154 그림 3. 콘솔 포트에 연결 RJ-45 스위치 부팅 RS-45 VT100 VT100 켓 찾 활 켓 켓 활 컬 태 켜 POST(Power-In Self-Test) 때마 팅 . POST 검 문 발견 . POST 램 효 . POST POST 메 테 알 팅 약...
  • Page 155 주: 주: HTTP( 초 네 얻 • VLAN 네 넷 마 • • VLAN 관리 인터페이스 및 대역외 인터페이스 PowerConnect 8024 및 8024F 픽 더 넷 페 더넷 (OOB) 페 네 Dell Easy Setup Wizard 페 CLI( 령줄 페 네...
  • Page 156 초기 구성 절차 초 Dell Easy Setup Wizard CLI(Command Line Interface) . Setup Wizard 언 눌 마법 종 만 [ctrl+z] 값 주: Easy Setup Wizard Easy Setup Wizard DHCP . DHCP 192.168.2.1 VLAN enable Privileged EXEC . OOB show ip interface management CLI 초...
  • Page 157 (0.0.0.0) IP 페 액 • VLAN(1) • 주: <Enter> 예 력 값 , Dell Easy Setup Wizard 예 것 롬 답 팅 텍 납 POST Unit 1 - Waiting to select management unit)> Applying configuration, please wait ... Welcome to Dell Easy Setup Wizard The Setup Wizard guides you through the initial switch configuration, and gets you up and running as quickly as possible.
  • Page 158 1 단계 : The system is not setup for SNMP management by default. To manage the switch using SNMP (required for Dell Network Manager) you can Set up the initial SNMP version 2 account now. Return later and setup other SNMP accounts. (For more information on setting up an SNMP version 1 or 3 account, see the user documentation).
  • Page 159 2 단계 : Now we need to setup your initial privilege (Level 15) user account. This account is used to login to the CLI and Web interface. You may setup other accounts and change privilege levels later. For more information on setting up user accounts and changing privilege levels, see the user documentation.
  • Page 160 If the information is incorrect, select (N) to discard configuration and restart the wizard: [Y/N] y Thank you for using Dell Easy Set up Wizard. You will now enter CLI mode. 고급 구성...
  • Page 161 예 것처럼 롬 show ip interface 령 력 console#show ip interface Management Interface: IP Address........... 10.240.4.125 Subnet Mask......... 255.255.255.0 Default Gateway........10.240.4.1 Burned In MAC Address......00:10:18:82:04:35 Network Configuration Protocol Current....... DHCP Management VLAN ID..........1 Routing Interfaces: Netdir Multi Interface IP Address IP Mask Bcast...
  • Page 162 보안 암호 구성 • • Telnet(텔넷) • • HTTP • HTTPS 주: "1" "15" 초기 콘솔 암호 구성 초 령 력 console(config)#aaa authentication login default line console(config)#aaa authentication enable default line console(config)#line console console(config-line)#login authentication default console(config-line)#enable authentication default console(config-line)#password secret123 처...
  • Page 163 텔넷 처 롬 • pass1234 력 력 • pass1234 초기 HTTP 암호 구성 초 령 력 HTTP console(config)#ip http authentication local console(config)#username admin password user1234 level 15 초기 HTTP 암호 구성 초 령 력 HTTPS console(config)#ip https authentication local 주: , 텔넷...
  • Page 164 응용프로그램 시작 저 엽 줄 력 누릅 (CLI ) <Enter> 방법 "초 " 153페 ) 창 력 Login( 주: 사용 설명서 클릭 OK ( Dell OpenManage 스위치 관리자 홈페 인터페이스 이해 홈페 - 홈페 왼 • - 홈페 영 • 침...
  • Page 165 Conmutadores Dell™ PowerConnect™ 8024 y 8024F Guía de introducción Modelo PC8024 y PC8024F w w w . d e l l . c o m | s u p p o r t . d e l l . c o m...
  • Page 166 Queda estrictamente prohibida la reproducción de este documento en cualquier forma sin la autorización por escrito de Dell Inc. Marcas comerciales utilizadas en este texto: Dell, el logotipo de DELL y PowerConnect son marcas comerciales de Dell Inc.; Microsoft y Windows son marcas comerciales registradas de Microsoft Corporation.
  • Page 167 Contenido Instalación Preparación del sitio ......Desembalaje del conmutador ..... . Contenido del paquete .
  • Page 169: Preparación Del Sitio

    Dell™ PowerConnect™ 8024 y 8024F. Para obtener más información, consulte el documento Guía del usuario incluido en el CD User Documentation (Documentación del usuario) o visite la página web de asistencia de Dell (support.dell.com) para ver las últimas actualizaciones de la documentación y del firmware.
  • Page 170 • Un conjunto de almohadillas de goma autoadhesivas para instalar el conmutador sin motarlo en un rack (se incluyen cuatro) • El CD User Documentation • Guía de introducción • Guía de información del producto Pasos del desembalaje NOTA: Antes de desembalar el conmutador, examine el contenedor e informe inmediatamente de cualquier daño.
  • Page 171: Instalación Como Conmutador Independiente

    Coloque el soporte de montaje en rack suministrado en un lateral del conmutador de modo que los orificios de montaje del conmutador coincidan con los del soporte de montaje en rack. En la ilustración 1 se muestra dónde deben montarse los soportes. Ilustración 1.
  • Page 172 Los conmutadores PowerConnect 8024 y 8024F cuentan con dos fuentes de alimentación para un funcionamiento redundante o con distribución de carga. Cada fuente de alimentación puede admitir 300 W.
  • Page 173 Ilustración 2. Conexión de los cables de alimentación Guía de introducción...
  • Page 174 NOTA: Antes de continuar, lea las notas de la versión de este producto. Puede descargar las notas de la versión desde la página web de asistencia de Dell (support.dell.com). NOTA: Se recomienda descargar la versión más reciente de la documentación del usuario desde la página web de asistencia de Dell (support.dell.com).
  • Page 175: Inicio Del Conmutador

    Conecte el conector RJ-45 del cable directamente al puerto de consola del conmutador. El puerto de consola PowerConnect 8024 y 8024F se encuentra en el panel trasero, debajo del puerto RJ-45 fuera de banda, como se muestra en la ilustración 3.
  • Page 176: Configuración Inicial

    Ethernet Gigabit para la administración fuera de banda (OOB). El puerto OOB se encuentra debajo del puerto de consola. Easy Setup Wizard de Dell configura la información de la red para la interfaz de administración en banda. Para utilizar la interfaz OOB para la administración, utilice la interfaz de línea de comandos (CLI) para configurar la información de la red.
  • Page 177: Procedimiento De Configuración Inicial

    Procedimiento de configuración inicial La configuración inicial se puede realizar con Easy Setup Wizard de Dell o con la interfaz de línea de comandos (CLI). El asistente para instalación se inicia automáticamente cuando el archivo de configuración del conmutador está vacío. Puede cerrar el asistente en cualquier momento tecleando [Ctrl+z], pero se descartarán todos los valores de configuración que haya especificado...
  • Page 178 El texto de ayuda se muestra entre paréntesis. En el ejemplo siguiente se muestra la secuencia de indicadores y respuestas asociados a la ejecución de un ejemplo de sesión de Easy Setup Wizard de Dell con los valores de entrada indicados anteriormente.
  • Page 179 Paso 1: The system is not setup for SNMP management by default. To manage the switch using SNMP (required for Dell Network Manager) you can Set up the initial SNMP version 2 account now. Return later and setup other SNMP accounts. (For more information on setting up an SNMP version 1 or 3 account, see the user documentation).
  • Page 180 If the information is incorrect, select (N) to discard configuration and restart the wizard: [Y/N] y Thank you for using Dell Easy Set up Wizard. You will now enter CLI mode. Guía de introducción...
  • Page 181: Configuración Avanzada

    Configuración avanzada En esta sección se proporciona información de resumen sobre las tareas comunes siguientes: • Recuperación de una dirección IP de un servidor DHCP • Gestión de la seguridad y configuración de contraseñas NOTA: Para obtener información detallada sobre todos los comandos de la CLI disponibles para los conmutadores 8024 y 8024F, consulte la Guía de referencia de la CLI.
  • Page 182 Routing Interfaces: Netdir Multi Interface IP Address IP Mask Bcast CastFwd ---------- --------------- --------------- -------- -------- vlan1 192.168.10.10 255.255.255.0 Disable Disable vlan2 0.0.0.0 0.0.0.0 Enable Disable loopback2 0.0.0.0 0.0.0.0 Disable Disable Gestión de la seguridad y configuración de contraseñas La seguridad del sistema se gestiona mediante el mecanismo AAA (autenticación, autorización y administración de cuentas), que administra los derechos de acceso, los privilegios y los métodos de administración de los usuarios.
  • Page 183 Configuración de una contraseña inicial de consola Para configurar una contraseña inicial de consola, escriba los comandos siguientes: console(config)#aaa authentication login default line console(config)#aaa authentication enable default line console(config)#line console console(config-line)#login authentication default console(config-line)#enable authentication default console(config-line)#password secret123 • Al iniciar sesión por primera vez en un conmutador a través de una sesión de consola, introduzca secret123 en el indicador de contraseña.
  • Page 184 Configuración de una contraseña inicial de HTTPS Para configurar una contraseña inicial de HTTPS, escriba los comandos siguientes: console(config)#ip https authentication local NOTA: Debe crear un certificado de cifrado nuevo cada vez que actualice la aplicación del software de control (o instale una nueva versión) en el conmutador. Escriba una vez los comandos siguientes durante la configuración del uso de una sesión HTTPS a través de una sesión SSH, Telnet o de consola.
  • Page 185 Guía del usuario. Haga clic en OK (Aceptar). Se abre la página de inicio de Dell OpenManage Switch Administrator. Descripción de la interfaz La página de inicio contiene las vistas siguientes: •...
  • Page 186 Guía de introducción...
  • Page 187 Dell™ PowerConnect™ 8024 ve 8024F Anahtarlar Başlangıç Kılavuzu Model PC8024 ve PC8024F w w w . d e l l . c o m | s u p p o r t . d e l l . c o m...
  • Page 188 Corporation'un tescilli ticari markalarıdır. Bu belgede, marka ve adların sahiplerine ya da ürünlerine atıfta bulunmak için başka ticari marka ve ticari adlar kullanılabilir. Dell Inc. kendine ait olanların dışındaki ticari markalar ve ticari isimlerle ilgili hiçbir mülkiyet hakkı olmadığını beyan eder.
  • Page 189 İçerik Montaj Saha Hazırlığı ......Anahtarı Paketinden Çıkarma .....
  • Page 191: Paket İçeriği

    Dell Support web sitesinden kontrol edin. Saha Hazırlığı PowerConnect 8024 ve 8024F anahtarlar standart bir 48,26 cm rafa monte edilebilir veya monte edilmeden bırakılabilir ve bağımsız anahtarlar olarak çalışır. Anahtarı veya anahtarları takmadan önce, seçtiğiniz montaj konumunun aşağıdaki saha gerekliliklerini karşıladığından emin olun:...
  • Page 192 Paketten Çıkarma Adımları NOT: Anahtarı paketinden çıkarmadan önce kabı kontrol edin ve herhangi bir hasar belirtisi görürseniz derhal bildirin. Kabı temiz, düz bir yüzeye yerleştirin ve kabı sabitleyen tüm şeritleri kesin. Kabı açın ve üstünü çıkarın. Anahtarı dikkatlice kaptan çıkarın ve güvenli, temiz bir yüzeye yerleştirin. Tüm paketleme malzemelerini çıkarın.
  • Page 193 Şekil 1. Destekleri Takma Aygıtla birlikte verilen cıvataları rafa montaj deliklerine takın ve bir tornavida ile sıkın. İşlemi anahtarın öbür tarafında bulunan rafa montaj desteği için tekrarlayın. Anahtarın üzerindeki rafa montaj deliklerinin rafın üzerindeki montaj delikleriyle aynı hizada olduğundan emin olarak anahtarı 48,26 cm (19 inç) rafa takın. Anahtarı...
  • Page 194 Ürün Bilgisi Kılavuzunda bulunan güvenlik bilgilerinin yanı sıra anahtarla bağlanan veya anahtarı destekleyen güvenlik bilgilerini okuyun. PowerConnect 8024 ve 8024F anahtarlarda yedekli ve yük paylaşımlı çalışma için iki adet güç kaynağı bulunur. Her güç kaynağı 300 W'ı destekleyebilir. Şekil 2 iki güç girişinin arka paneldeki konumunu göstermektedir.
  • Page 195 HyperTerminal'in VT100 benzetiminde düzgün çalışır. Windows 2000 servis paketleri hakkında daha fazla bilgi için www.microsoft.com adresine gidin. RJ-45 konnektörü (kablodaki) doğrudan anahtarın konsol bağlantı noktasına takın. PowerConnect 8024 ve 8024F konsol bağlantı noktası Şekil 3'de gösterildiği gibi, RJ-45 bant dışı bağlantı noktasının üzerinde arka panelin bulunur. Başlangıç Kılavuzu...
  • Page 196 Şekil 3. Konsol Bağlantı Noktasına Bağlama Konsol Bağlantı Noktası Konsol bağlantı noktasının altındaki RJ-45 bağlantı noktası bant dışı yönetim için kullanılır. Anahtarı Başlatma Anahtarın konsol bağlantı noktasının bir VT100 terminaline veya RJ-45 - DB 9 dişi kablosu üzerinden VT100 terminal benzeticisine bağlı olduğundan emin olun. İki AC güç...
  • Page 197 Yönetim VLAN'ının varsayılan ağ geçidinin IP adresi. Yönetim Arabirimi ve Bant Dışı Arabirimi PowerConnect 8024 ve 8024F anahtarların ön paneli veri trafiği için birden fazla 10 Gigabit Ethernet bağlantı noktası içerir. Ek olarak, ön paneldeki herhangi bir bağlantı noktasını bant-içi yönetim arabirimi olarak kullanabilirsiniz.
  • Page 198 Ön Yapılandırma Yordamı Ön yapılandırmayı Dell Kolay Kurulum Sihirbazını veya Komut Satırı Arabirimini (CLI) kullanarak yapabilirsiniz. Anahtar yapılandırma dosyası boşken Kurulum Sihirbazı otomatik olarak başlatılır. Herhangi bir noktada [ctrl+z] girerek sihirbazdan çıkabilirsiniz, ancak belirtilen tüm yapılandırma ayarları silinir (anahtar varsayılan değerleri kullanır).
  • Page 199 {} içerisinde sunulmuştur. Hiçbir seçenek tanımlamadan <Enter> tuşuna basarsanız varsayılan değer kabul edilir. Yardım metni parantez içindedir. Aşağıdaki örnek, yukarıda belirtilen giriş değerleri kullanılarak örnek bir Dell Kolay Kurulum Sihirbazı oturumu çalıştırmakla ilgili istemlerin ve yanıtların sırasını içermektedir.
  • Page 200 The wizard automatically assigns the highest access level [Privilege Level 15] to this account. You can use Dell Network Manager or other management interfaces to change this setting and to add additional management systems later.
  • Page 201 If the information is incorrect, select (N) to discard configuration and restart the wizard: [Y/N] y Thank you for using Dell Easy Set up Wizard. You will now enter CLI mode. Başlangıç Kılavuzu...
  • Page 202: Gelişmiş Yapılandırma

    Gelişmiş Yapılandırma Bu bölüm aşağıdaki ortak görevler hakkında özel bilgiler sunmaktadır: • Bir DHCP Sunucusundan IP Adresi Alma • Güç Yönetimi ve Parola Yapılandırması NOT: 8024 ve 8024F M6348 anahtarlar için mevcut tüm CLI komutları hakkında ayrıntılı bilgi için, bkz. CLI Referans Kılavuzu. Bir DHCP Sunucusundan IP Adresi Alma Bir IP adresi almak için DHCP protokolünü...
  • Page 203 Routing Interfaces: Netdir Multi Interface IP Address IP Mask Bcast CastFwd ---------- --------------- --------------- -------- -------- vlan1 192.168.10.10 255.255.255.0 Disable Disable vlan2 0.0.0.0 0.0.0.0 Enable Disable loopback2 0.0.0.0 0.0.0.0 Disable Disable Güç Yönetimi ve Parola Yapılandırması Sistem güvenliği kullanıcı erişim haklarını, ayrıcalıkları ve yönetim yöntemlerini yöneten AAA (Kimlik Doğrulama, Yetkilendirme ve Hesaplama) mekanizması...
  • Page 204 İlk Konsol Parolasını Ayarlama Bir ilk konsol parolası ayarlamak için aşağıdaki komutları girin: console(config)#aaa authentication login default line console(config)#aaa authentication enable default line console(config)#line console console(config-line)#login authentication default console(config-line)#enable authentication default console(config-line)#password secret123 • Başlangıçta bir konsol oturumu ile bir anahtarda oturum açarken parola penceresine secret123 girin.
  • Page 205 İlk HTTPS Parolasını Ayarlama Bir ilk HTTPS parolası ayarlamak için aşağıdaki komutları girin: console(config)#ip https authentication local NOT: Anahtardaki kontrol yazılımı uygulamasını her yükseltmenizde (yeni bir sürümünü kurmanızda) yeni bir şifreleme sertifikası oluşturmalısınız. Bir HTTPS oturumunu bir konsol, Telnet veya bir SSH oturumu üzerinde kullanmak üzere yapılandırırken aşağıdaki komutları...
  • Page 206 Parolalar hem büyük-küçük harf duyarlı hem de alfa sayısaldır. Kayıp bir parolayı yeniden alma hakkında bilgi için, bkz. Kullanıcı Kılavuzu. Tamam'ı tıklatın. Dell OpenManage Anahtar Yöneticisi ana sayfası görüntülenir. Arabirimi Anlama Ana sayfa, aşağıdaki görünümleri içerir: •...
  • Page 207 ‫תחילת עבודה‬ ‫מדריך‬...
  • Page 208 ‫למצוא‬ ‫תוכל‬ ‫שאבדה‬ ‫סיסמה‬ ‫של‬ ‫השחזור‬ ‫אופן‬ ‫על‬ ‫פרטים‬ ‫אישור‬ ‫על‬ ‫לחץ‬ ) OK ‫של‬ ‫הבית‬ ‫הדף‬ ‫יוצג‬ ‫כעת‬ .Dell OpenManage Switch Administrator ‫הממשק‬ ‫הבנת‬ ‫הבאות‬ ‫התצוגות‬ ‫את‬ ‫מכיל‬ ‫הבית‬ ‫דף‬ ‫להרחיב‬ ‫וניתן‬ ‫ורכיבים‬ ‫תכונות‬ ‫מכילה‬ ‫העץ‬ ‫תצוגת‬ ‫הבית‬ ‫דף‬...
  • Page 209 ‫סיסמה‬ ‫להזין‬ ‫ההנחיה‬ ‫כשתוצג‬ ‫הזן‬ ‫הפעלת‬ ‫דרך‬ ‫למתג‬ ‫ראשונה‬ ‫בכניסה‬ • Telnet , pass1234 ‫הזן‬ ‫ל‬ ‫המתג‬ ‫מצב‬ ‫את‬ ‫משנה‬ ‫אתה‬ ‫כאשר‬ .pass1234 -Enable , • ‫תית‬ ‫התחל‬ HTTP ‫סיסמת‬ ‫של‬ ‫הגדרה‬ ‫הבאות‬ ‫הפקודות‬ ‫את‬ ‫הזן‬ ‫התחלתית‬ ‫סיסמת‬ ‫להגדיר‬ ‫כדי‬ HTTP console(config)#ip http authentication local console(config)#username admin password user1234 level 15...
  • Page 210 ‫אבטחה‬ ‫סיסמאות‬ ‫של‬ ‫התצורה‬ ‫הגדרת‬ ‫הבאים‬ ‫לשירותים‬ ‫אבטחה‬ ‫סיסמאות‬ ‫להגדיר‬ ‫ניתן‬ ‫קונסולה‬ • Telnet • • HTTP • HTTPS • ‫הערה‬ ‫גישה‬ ‫מאפשרת‬ ‫הרשאה‬ ‫ה‬ ‫כלומר‬ ‫היא‬ ‫העדיפות‬ ‫של‬ ‫המחדל‬ ‫ברירת‬ ‫משתמש‬ ‫שם‬ ‫יצירת‬ ‫בעת‬ ‫עדיפות‬ ‫לקבוע‬ ‫יש‬ ‫במתג‬ ‫תצורה‬ ‫והרשאות‬...
  • Page 211 ‫ה‬ ‫כתובת‬ ‫את‬ ‫אוטומטית‬ ‫יקבל‬ ‫הממשק‬ .IP- ‫של‬ ‫הפקודה‬ ‫בשורת‬ ‫הפקודה‬ ‫את‬ ‫הזן‬ ‫ה‬ ‫כתובת‬ ‫את‬ ‫לאמת‬ ‫כדי‬ show ip interface -IP , ‫הבאה‬ ‫בדוגמה‬ ‫כמו‬ ‫המערכת‬ console#show ip interface Management Interface: IP Address........10.240.4.125 Subnet Mask........255.255.255.0 Default Gateway........10.240.4.1 Burned In MAC Address......00:10:18:82:04:35 Network Configuration Protocol Current....
  • Page 212 If the information is incorrect, select (N) to discard configuration and restart the wizard: [Y/N] y Thank you for using Dell Easy Set up Wizard. You will now enter CLI mode. ‫מתקדמת‬...
  • Page 213 ‫הערה‬ ‫ממשק‬ ‫עבור‬ ‫ביותר‬ ‫הגבוהה‬ ‫תהיה‬ ‫מחדל‬ ‫כברירת‬ ‫המוגדרת‬ ‫הגישה‬ ‫רמת‬ ‫מוגדרת‬ ‫זו‬ ‫מחרוזת‬ ‫אם‬ ‫התצורה‬ ‫את‬ ‫שתקבע‬ ‫עד‬ ‫מושבת‬ ‫יופעל‬ ‫רק‬ ‫התחלתי‬ ‫באופן‬ ‫של‬ ‫הניהול‬ .SNMPv3 SNMPv1/2c SNMP . ‫וכו‬ ‫תצוגה‬ ‫מנוע‬ ‫מזהה‬ ‫לדוגמה‬ ‫עבור‬ ‫האבטחה‬ ‫גישת‬ ‫של‬ ' .( SNMPv3) Please enter the IP address of the Management System (A.B.C.D) or wildcard (0.0.0.0) to manage from any Management Station...
  • Page 214 The wizard automatically assigns the highest access level [Privilege Level 15] to this account. You can use Dell Network Manager or other management interfaces to change this setting and to add additional management systems later.
  • Page 215 ‫כתובת‬ ‫של‬ ‫תצורה‬ ‫קובע‬ • ‫לדוגמה‬ ‫הפעלה‬ ‫בשימוש‬ ‫נמצאים‬ ‫הבאים‬ ‫הערכים‬ ‫של‬ ‫הקלה‬ ‫ההתקנה‬ ‫אשף‬ ‫של‬ ‫הפעלה‬ ‫מתאר‬ ‫זה‬ ‫סעיף‬ .Dell ‫לדוגמה‬ ‫בהפעלה‬ ‫היא‬ ‫בה‬ ‫להשתמש‬ ‫שיש‬ ‫של‬ ‫הקהילה‬ ‫מחרוזת‬ public SNMP • ‫היא‬ ‫שת‬ ‫הר‬ ‫ניהול‬ ‫מערכת‬ ‫של‬ ‫ה‬...
  • Page 216 ‫ה‬ ‫כתובת‬ -VLAN • ‫המשני‬ ‫הערוץ‬ ‫וממשק‬ ‫הניהול‬ ‫ממשק‬ ‫יציאות‬ ‫מספר‬ ‫מכיל‬ ‫- ו‬ ‫מתגי‬ ‫של‬ ‫הקדמי‬ ‫הלוח‬ 10-Gigabit 8024F PowerConnect 8024 ‫לניהול‬ ‫כממשק‬ ‫הקדמי‬ ‫בלוח‬ ‫יציאה‬ ‫בכל‬ ‫להשתמש‬ ‫ניתן‬ ‫בנוסף‬ ‫נתונים‬ ‫לתעבורת‬ Ethernet ‫תקשורת‬ ‫לניהול‬ ‫יציאת‬ ‫מכיל‬ ‫האחורי‬ ‫הלוח‬...
  • Page 217 • ‫בהצלחה‬ ‫בוצע‬ ‫המתג‬ ‫אתחול‬ PowerConnect • ‫של‬ ‫המסך‬ ‫על‬ ‫מופיעה‬ ‫ההתקנה‬ ‫אשף‬ ‫של‬ ‫הפקודה‬ ‫ושורת‬ ‫נוצר‬ ‫המסוף‬ ‫חיבור‬ Dell Easy Setup • ‫חלופי‬ ‫מסוף‬ ‫של‬ ‫או‬ ‫מסוף‬ VT100 ‫התצורה‬ ‫קביעת‬ ‫לאחר‬ ‫המסוף‬ ‫יציאת‬ ‫דרך‬ ‫מתבצעת‬ ‫המתג‬ ‫של‬ ‫ההתחלתית‬ ‫התצורה‬...
  • Page 218 ‫של‬ ‫ה‬ ‫יציאת‬ ‫אל‬ ‫ישירות‬ ‫- ה‬ ‫בכבל‬ ‫מחבר‬ ‫את‬ ‫חבר‬ -USB RJ-45 ‫ליציאת‬ ‫מעל‬ ‫האחורי‬ ‫הלוח‬ ‫של‬ ‫נמצאת‬ ‫- ו‬ ‫ב‬ ‫הקונסולה‬ 8024F -PowerConnect 8024 ‫איור‬ ‫- ב‬ ‫לראות‬ ‫שניתן‬ ‫כפי‬ ‫המשני‬ ‫התקשורת‬ ‫ערוץ‬ ‫של‬ RJ-45 ‫מדריך תחילת עבודה‬...
  • Page 219 ‫מתח‬ ‫לספק‬ ‫מתג‬ ‫חיבור‬ ‫התראה‬ ‫המופיע‬ ‫הבטיחותי‬ ‫המידע‬ ‫ואת‬ ‫המוצר‬ ‫של‬ ‫המידע‬ ‫במדריך‬ ‫הבטיחותי‬ ‫המידע‬ ‫את‬ ‫קרא‬ ‫בו‬ ‫תומכים‬ ‫או‬ ‫למתג‬ ‫המחוברים‬ ‫האחרים‬ ‫המתגים‬ ‫כל‬ ‫של‬ ‫בתיעוד‬ ‫עומסים‬ ‫חלוקת‬ ‫או‬ ‫יתירות‬ ‫לצורך‬ ‫כוח‬ ‫ספקי‬ ‫שני‬ ‫יש‬ ‫- ו‬ ‫מסוג‬ ‫במתגי‬ 8024F 8024 PoweConnect...
  • Page 220 ‫במברג‬ ‫אותם‬ ‫והדק‬ ‫המעמד‬ ‫להתקנת‬ ‫המיועדים‬ ‫לחורים‬ ‫שסופקו‬ ‫הברגים‬ ‫את‬ ‫הכנס‬ ‫המתג‬ ‫של‬ ‫השני‬ ‫בצידו‬ ‫הזוויתן‬ ‫עבור‬ ‫התהליך‬ ‫על‬ ‫חזור‬ ‫במעמד‬ ‫החורים‬ ‫עם‬ ‫מיושרים‬ ‫במתג‬ ‫שהחורים‬ ‫וודא‬ ‫, מ‬ ‫" ס‬ ‫דל‬ ‫בגו‬ ‫למעמד‬ ‫המתג‬ ‫את‬ ‫הכנס‬ 48.26 ‫בהתאם‬ ‫והדיסקיות‬ ‫האומים‬...
  • Page 221 ‫מהאריזה‬ ‫היחידה‬ ‫להוצאת‬ ‫שלבים‬ ‫הערה‬ ‫לנזק‬ ‫עדות‬ ‫כל‬ ‫על‬ ‫מידי‬ ‫באופן‬ ‫ודווח‬ ‫האריזה‬ ‫תכולת‬ ‫את‬ ‫בדוק‬ ‫מאריזתו‬ ‫המתג‬ ‫הוצאת‬ ‫לפני‬ ‫הקופסה‬ ‫לקשירת‬ ‫שות‬ ‫המשמ‬ ‫הרצועות‬ ‫כל‬ ‫את‬ ‫וגזור‬ ‫וישר‬ ‫פנוי‬ ‫משטח‬ ‫על‬ ‫הקופסה‬ ‫את‬ ‫הנח‬ ‫הקופסה‬ ‫מכסה‬ ‫את‬ ‫הסר‬ ‫או‬ ‫הקופסה‬...
  • Page 222 ‫התקנה‬ ‫על‬ ‫בסיסי‬ ‫מידע‬ ‫מכיל‬ ‫זה‬ ‫מסמך‬ ‫שנמצא‬ ‫למשתמש‬ ‫במדריך‬ ‫עיין‬ ‫נוספים‬ ‫לפרטים‬ ‫- ו‬ ‫דגמים‬ 8024F 8024 Dell™ PowerConnect™ , ‫כדי‬ ‫בכתובת‬ ‫של‬ ‫התמיכה‬ ‫באתר‬ ‫בדוק‬ ‫או‬ ‫למשתמש‬ ‫התיעוד‬ ‫בתקליטור‬ support.dell.com , Dell , ‫ובקושחה‬ ‫בתיעוד‬ ‫ים‬ ‫האחרונ‬ ‫העדכונים‬...
  • Page 224 ‫תוכן‬ ‫התקנה‬ ...................... ‫האתר‬ ‫הכנת‬ ..................‫מהאריזה‬ ‫המתג‬ ‫הוצאת‬ .................... ‫האריזה‬ ‫תכולת‬ ..............‫מהאריזה‬ ‫היחידה‬ ‫להוצאת‬ ‫שלבים‬ ....................‫המתג‬ ‫הרכבת‬ ................‫במעמד‬ ‫היחידה‬ ‫התקנת‬ ..................‫עצמאי‬ ‫מתג‬...
  • Page 225 ‫לנ‬ ‫אפשרות‬ ‫מציינת‬ ‫אזהרה‬ ____________________ ‫מוקדמת‬ ‫הודעה‬ ‫ללא‬ ‫לשינויים‬ ‫נתון‬ ‫זה‬ ‫במסמך‬ ‫הכלול‬ ‫המידע‬ ‫שמורות‬ ‫הזכויות‬ ‫כל‬ © 2009 Dell Inc. .Dell Inc. ‫מאת‬ ‫בכתב‬ ‫רשות‬ ‫קבלת‬ ‫ללא‬ ‫שהיא‬ ‫דרך‬ ‫בכל‬ ‫זה‬ ‫מסמך‬ ‫שעתוק‬ ‫על‬ ‫איסור‬ ‫חל‬ ;Dell Inc. ‫של‬...
  • Page 226 Dell™ PowerConnect™ ‫מתגי‬ 8024F ‫- ו‬ 8024 ‫מדריך תחילת עבודה‬ PC8024F- ‫ו‬ PC8024 ‫דגם‬ w w w . d e l l . c o m | s u p p o r t . d e l l . c o m...

Ce manuel est également adapté pour:

Powerconnect 8024f

Table des Matières