JVC KD-PDR61 Manuel D'instructions
Table des Matières
Les langues disponibles
Les langues disponibles
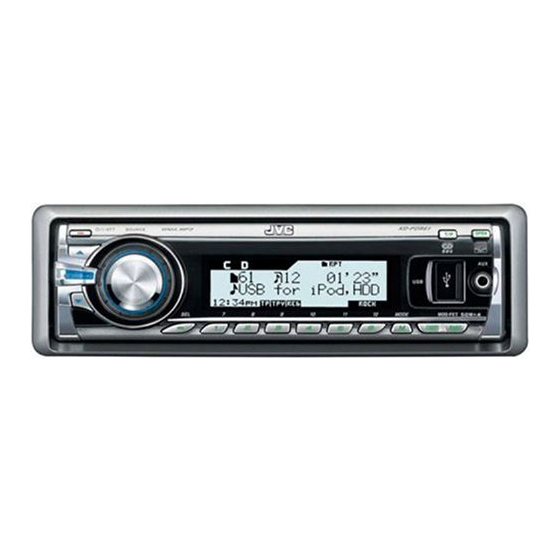
CD RECEIVER
RÉCEPTEUR CD
KD-PDR61
For canceling the display demonstration, see page 4.
Pour annuler la démonstration des affichages, référez-vous à la page 4.
For installation and connections, refer to the separate manual.
Pour l'installation et les raccordements, se référer au manuel séparé.
INSTRUCTIONS
MANUEL D'INSTRUCTIONS
GET0524-003A
[EX]
Chapitres
Table des Matières
Dépannage

Manuels Connexes pour JVC KD-PDR61


Sommaire des Matières pour JVC KD-PDR61
- Page 1 CD RECEIVER RÉCEPTEUR CD KD-PDR61 For canceling the display demonstration, see page 4. Pour annuler la démonstration des affichages, référez-vous à la page 4. For installation and connections, refer to the separate manual. Pour l’installation et les raccordements, se référer au manuel séparé.
-
Page 46: Comment Utiliser Les Touches M
Merci pour avoir acheté un produit JVC. Veuillez lire attentivement toutes les instructions avant d’utiliser l’appareil afin de bien comprendre son fonctionnement et d’obtenir les meilleures performances possibles. IMPORTANT POUR PRODUITS LASER 1. PRODUIT LASER CLASSE 1 2. ATTENTION: N’ouvrez pas le couvercle supérieur. Il n’y a aucune pièce réparable par l’utilisateur à l’intérieur de l’appareil;... - Page 47 TABLE DES MATIERES Comment réinitialiser votre appareil INTRODUCTIONS Préparation ..........4 FONCTIONNEMENT Opérations de base ........5 • Vous ajustements préréglés sont aussi effacés (sauf le • Utilisation du panneau de commande ..périphérique Bluetooth enregistré, voir pages 14 et 15). •...
-
Page 48: Préparation
Préparation Annulez la démonstration des affichages et réglez l’horloge • Voir aussi pages 28 et 29. Mise sous tension de l’appareil. Accédez aux réglages PSM. Annulez de la démonstration des affichages Choisissez “Demo”, puis “Off”. Réglez l’horloge Choisissez “Clock Hr” (heures), puis ajustez les heures. Choisissez “Clock Min”... -
Page 49: Fonctionnement
Opérations de base Utilisation du panneau de commande • DAB: Choisissez un service DAB • Réglage du volume [Tournez]. • Choisissez la source [Appuyez sur la touche] * • CD/USB/CD-CH: Sélection d’un dossier. DAB * CD * USB * • USB-iPod: Entrez dans le menu principal TUNER (ou USB- [Maintenez pressée]. -
Page 50: Utilisation De La Télécommande (Rm-Rk50)
Utilisation de la télécommande (RM-RK50) Mise en place de la pile-bouton au lithium (CR2025) • Appuyez brièvement sur cette touche pour mettre l’appareil sous tension ou atténuer le son si l’appareil est déjà sous tension. • Maintenez cette touche pressée pour mettre Avant d’utiliser la télécommande: l’appareil hors tension. -
Page 51: Écoute De La Radio
• Lors de l’écoute d’un iPod (en mode de sélection – Maintenez pressée la touche pour sauter 10 de menu): éléments en même temps. Connecté au KS-PD100: Connecté à la prise d’entrée USB: – Appuyez brièvement sur la touche pour choisir –... -
Page 52: Préréglage Manuel
Préréglage manuel Choisissez le numéro de préréglage sur lequel vous souhaitez mémoriser le programme. Ex.: Mémorisation de la station FM de fréquence 92,5 MHz sur le numéro de préréglage 4 de la bande FM1. Utilisation des touches numériques • Vous pouvez aller directement à une autre bande FM en appuyez répétitivement sur la touche numérique 5 ( ) ou 6 (... -
Page 53: Mémorisation De Vos Types De Programme Préférés
• Quand apparaît sur l’affichage, Choisissez “Memory”. vous pouvez passer sur d’autres listes en appuyant répétitivement sur la touche numérique 5 ou 6. Choisissez “Search”. Choisissez le numéro de préréglage (“Preset1” – “Preset6”) sur lequel vous souhaitez mémoriser le programme. Les trois codes PTY apparaissent sur l’affichage. -
Page 54: Poursuite Du Même Programme-Poursuite De Réception En Réseau
s’allume ou clignote sur l’affichage. • Quand un tuner DAB est connecté, l’attente de • Si s’allume, l’appareil commute temporairement réception TA/PTY recherche aussi les services. sur l’annonce d’informations routières (TA), s’il y en (Référez-vous aussi à la page 23). a une, à... -
Page 55: Opérations Des Disques
Opérations des disques Toutes les plages sont reproduites répétitivement jusqu’à Pour arrêter la lecture et éjecter le disque ce que vous changiez la source ou éjectiez le disque. Attention: • Appuyez sur SOURCE pour écouter une autre source Assurez-vous de détacher le périphérique USB avant de lecture. - Page 56 Sélection d’un dossier/plage sur la Passez à l’option choisie. Si la Liste des fichiers est choisie liste (uniquement pour les fichiers La liste disparaît et la lecture MP3/WMA) démarre. • Quand apparaît sur l’affichage, vous pouvez retourner à l’écran précédent en appuyant sur la touche numérique 3.
-
Page 57: Écoute Du Périphérique Usb
Écoute du périphérique USB Vous pouvez connecter un périphérique USB à mémoire de grande capacité tel qu’une mémoire USB, un lecteur audio numérique*, un disque dur portable, etc. à cet appareil. • Vous pouvez aussi connecter un iPod Apple à la prise d’entrée USB. Pour en savoir plus, référez-vous aux pages 20 et 21. -
Page 58: Utilisation D'appareil Bluetooth
Utilisation d’appareil Bluetooth® Pour les opérations Bluetooth, il faut connecter Enregistrement en utilisant “Open” l’adaptateur Bluetooth (KS-BTA200) à la prise de Préparation: Réglez l’appareil pour mettre en service changeur de CD à l’arrière de cet appareil. la fonction Bluetooth. • Référez-vous aussi aux instructions fournies avec Choisissez “BT-PHONE”... -
Page 59: Appareils Extérieurs
Choisissez un chiffre ou une espace. Choisissez le périphérique que vous souhaitez connecter. • Pour les périphériques disponibles... Répétez les étapes jusqu’à ce que le Entrez le code PIN spécifique de l’appareil code PIN soit entré complètement. extérieur sur cet appareil. Vérifiez l’entrée. -
Page 60: Utilisation D'un Téléphone Portable Bluetooth
• Choisissez “Delete”, puis validez votre choix. Appuyez sur la touche numérique 3 pour choisir “No” ou retournez à l’écran précédent. Vous régler l’appareil pour vous connecter automatiquement au périphérique Bluetooth quand l’autoradio est mis sous tension. (Référez-vous à “Auto Connect” à la page 33.) Utilisation d’un téléphone portable Bluetooth Choisissez “BT-PHONE”. -
Page 61: Pour Faire Un Appel
Pour faire un appel * Apparaît uniquement quand votre téléphone portable est muni de ces Vous pouvez faire un appel en utilisant une des options fonctions. du menu de composition. – S’il n’apparaît pas, essayez de transférer la • Quand apparaît sur l’affichage, vous pouvez mémoire du répertoire téléphone du téléphone retourner à... -
Page 62: Préréglage D'un Numéro De Téléphone
Démarre/met en pause la lecture. Informations sur le système Bluetooth: Affichez le menu de réglage (liste des Si vous souhaitez recevoir plus d’informations sur périphériques) le système Bluetooth, consultez le site web de JVC suivant: <http://www.jvc-victor.co.jp/english/car/>. -
Page 63: Écoute Du Changeur De Cd
Écoute du changeur de CD Il est recommandé d’utiliser un changeur de CD JVC compatible MP3 avec votre autoradio. Vous pouvez connecter un changeur de CD à la prise de changeur de CD à l’arrière de l’appareil. • Vous pouvez uniquement reproduire les CD ordinaire (y compris les CD Text) et les disques MP3. -
Page 64: Écoute De Ipod
Écoute de iPod Vous pouvez reproduire les morceaux se trouvant dans un iPod Apple en: – Connectant le iPod à la prise d’entrée USB sur le panneau avantl en utilisant le câble USB fourni. – Connectant l’adaptateur d’interface pour iPod, KS-PD100 (vendu séparément) à la prise du changeur de CD à l’arrière de l’appareil. -
Page 65: Sélection D'une Plage À Partir Du Menu
Sélection d’une plage à partir du menu Nº Opérations Dans le cas d’un iPod connecté via Dans le cas d’un iPod connecté à la le KS-PD100 prise d’entrée USB Entrez dans le menu principal. Choisissez le menu souhaité. Ô Ô Ô... -
Page 66: Écoute Du Tuner Dab
Écoute du tuner DAB Avant de commencer, connectez le le tuner DAB JVC, KT-DB1000 (vendu séparément) à la prise du changeur de CD à l’arrière de l’appareil. Préparation: Assurez-vous que “Changer” est choisi pour le réglage de l’entrée extérieure, voir page 30. -
Page 67: Écoute D'un Service Préréglé En Utilisant La Liste Des Services Préréglés
Utilisation des touches numériques Écoute d’un service préréglé en utilisant la liste des services préréglés Affichez la liste des services préréglés, puis Choisissez un ensemble (service primaire). choisissez le service DAB préréglé que vous souhaitez écouter. Passez au service DAB choisi. Le numéro de préréglag “P4”... -
Page 68: Poursuite Du Même Programme-Recherche De Fréquence Alternative (Dab Af)
Mise en service de l’attente de réception Types d’annonces d’annonce . Travel, Warning, News, Weather, Event, Special, Affichez le type d’annonce actuellement choisi. Rad Inf (Radio Information), Sports, Finance Poursuite du même programme— Recherche de fréquence Sélection d’un type d’annonce. alternative (DAB AF) Vous pouvez continuer d’écouter le même programme en mettant en service la recherche de fréquence... -
Page 69: Écoute D'un Autre Appareil Extérieur
Écoute d’un autre appareil extérieur Vous pouvez connecter un appareil extérieur à: • la prise de changeur de CD à l’arrière de cet appareil en utilisant les adaptateurs suivants: – Adaptateur d’entrée de ligne, KS-U57 – Adaptateur d’entrée auxiliaire, KS-U58 Préparation: Assurez-vous que “Ext Input”... -
Page 70: Sélection D'un Mode Sonore Préréglé
Sélection d’un mode sonore préréglé Vous pouvez sélectionner un mode sonore préréglé adapté à votre genre de musique (iEQ: égaliseur intelligent). Affichez le menu de réglage. Choisissez “EQ”. Choisissez un mode sonore. USER, ROCK, CLASSIC, POPS, HIP HOP, JAZZ Valeur préréglée pour chaque mode sonore Valeur préréglée Mode Graves... -
Page 71: Mémorisation De Vos Propres Modes Sonores
Subwoofer Choisissez un mode sonore. Appuyez sur la touche numérique 1 ) pour passer à l’affichage de l’ajustement “Subwoofer”. ¢ Utilisez pour choisir une fréquence de coupure pour le caisson de grave. Choisissez une plage de fréquences. • OFF: Tous les signaux sont envoyés au caisson de grave. -
Page 72: Réglages Généraux-Psm
Réglages généraux—PSM Vous pouvez changer les options PSM (mode des Ajustez le réglage PSM choisi. réglages préférés) du tableau ci-dessous et des pages 29 à 31. Accédez aux réglages PSM. Répétez les étapes 2 – 4 pour ajuster les autres options PSM si nécessaire. Choisissez une catégorie PSM. - Page 73 Catégorie Indication Élément Réglage, [page de référence] ( : Réglage initial) Clock Hr 0 – 23 : Réglage initial: 0 (0:00AM), [4]. Ajustement des (1 – 12AM/ heures 1 – 12PM) Clock Min 00 – 59 : Réglage initial: 00 (0:00AM), [4]. Ajustement des minutes 24H/12H...
- Page 74 : Annulation. alternative Ext Input * • Changer : Pour utiliser un changeur de CD JVC, [19], un tuner DAB JVC, Entrée extérieure [22] ou un iPod d’Apple, [20]. • Ext In : Pour utiliser n’importe quel autre appareil extérieur, [25].
-
Page 75: Réglage De La Minuterie Pour Le Gradateur
Catégorie Indication Élément Réglage, [page de référence] ( : Réglage initial) Amp Gain • High PWR : Volume 00 – Volume 50 Commande du gain de • Low PWR : Volume 00 – Volume 30 (Choisissez ce réglage si la l’amplificateur puissance maximum de chaque enceinte est inférieure à... -
Page 76: Création De Votre Propre Couleur-User Color
Création de votre propre couleur—User Color Vous pouvez créer vos propres couleurs— “Day Color” ou “NightColor”. Choisissez une source. Suivez les étapes 1 à 3 de la page 28. • À l’étape 2, choisissez “COLOR”. • À l’étape 3, choisissez “Color Set”. Ô... -
Page 77: Réglages Bluetooth
Réglages Bluetooth Vous pouvez changer les réglages de la colonne de Menu de réglage ( : Réglage initial) droite en fonctions de vos préférences. Auto Connect • Quand apparaît sur l’affichage, vous pouvez Quand l’appareil est sous tension, la connexion est retourner à... -
Page 78: Pour En Savoir Plus À Propos De Cet
Pour en savoir plus à propos de cet autoradio Utilisation du système FM RDS Opérations de base • La poursuite de réception en réseau nécessite Mise sous tension de l’appareil deux types de signaux RDS—PI (identification du • En appuyant sur SOURCE sur l’autoradio, vous pouvez programme) et AF (fréquence alternative) pour aussi mettre l’appareil sous tension. -
Page 79: Lecture D'un Disque Mp3/Wma
• Si le disque éjecté n’est pas retiré avant 15 secondes, • Cet autoradio peut afficher uniquement les caractères il est réinséré automatiquement dans la fente d’un octet. Les autres caractères ne peuvent pas être d’insertion pour le protéger de la poussière. La lecture affichés correctement. -
Page 80: Lecteur De Plages Mp3/Wma/Wav À Partir D'un Périphérique Usb
– Fichiers au format WMA protégés contre la copie WMA: avec DRM. – Débit binaire: 5 kbps à 320 kbps – Fichiers qui contiennent des données telles que – Fréquence d’échantillonnage: 8 kHz à 48 kHz AIFF, ATRAC3, etc. – Canal: 1 ca./2 ca. •... -
Page 81: Messages D'avertissement Pour Les Opérations Bluetooth
(ou réinitialisez • Vous pouvez commander iPod à partir de cet appareil l’appareil). quand “JVC” ou “ ” apparaît sur l’affichage de iPod • Reset 08 après la connexion. Vérifiez la connexion entre l’adaptateur et cet appareil. -
Page 82: Guide De Dépannage
Chiffres et symboles Lors de l’utilisation de iPod, certaines opérations peuvent ne pas être réalisées correctement ou comme prévues. Dans ce cas, consultez le site Web JVC suivant: <http://www.jvc.co.jp/english/car/ support/ks-pd100/index.html> Réglages généraux—PSM Codes PTY disponibles • Le réglage “Auto” pour “Dimmer” peut ne pas News, Affairs, Info, Sport, Educate, Drama, fonctionner correctement sur certains véhicules et... - Page 83 Symptôme Remèdes/Causes • Le préréglage automatique SSM ne Mémorises les stations manuellement. fonctionne pas. • Bruit statique pendant l’écoute de la radio. Connectez l’antenne solidement. • Le disque ne peut pas être reproduit. Insérez le disque correctement. • Le CD-R/CD-RW ne peut pas être reproduit. •...
- Page 84 Symptôme Remèdes/Causes • Du bruit est produit. • La page reproduite n’est pas dans un format compatible (MP3/WMA/WAV). Passez à un autre fichier. • N’ajoutez pas le code d’extension <.mp3>, <.wma> ou <.wav> à des plages non MP3/WMA/WAV. • Les plages ne sont pas reproduites comme L’ordre de lecture peut différer de celui utilisé...
- Page 85 Symptôme Remèdes/Causes • Le périphérique Bluetooth ne détecte pas Cet appareil peut être connecté à un téléphone portable l’appareil. Bluetooth et à un périphérique audio Bluetooth en même temps. Pendant la connexion à un périphérique, cet appareil ne peut pas être détecté par un autre périphérique. Déconnectez l’appareil actuellement connecté...
-
Page 86: Retrait Du Panneau De Commande
Symptôme Remèdes/Causes • “noSIGNAL” apparaît sur l’affichage. Déplacez-vous dans un endroit où les signaux sont plus forts. • “RESET 8” apparaît sur l’affichage. Connectez cet appareil et le tuner DAB correctement et réinitialisez l’appareil (voir page 3). • “ANTENANG” apparaît sur l’affichage. Vérifiez les cordons et les connexions. -
Page 87: Entretien
• La marque du mot et les logos Bluetooth sont la propriété de Bluetooth SIG, Inc. et toute utilisation de ces marques par Victor Company of Japan, Limited (JVC) est faite sous licence. Les autres marques et noms de commerce sont la propriété... -
Page 88: Spécifications
Spécifications Puissance de sortie Avant/Arrière: 50 W par canal maximum: Puissance de sortie en Avant/Arrière: 19 W par canal pour 4 Ω, 40 Hz à mode continu (RMS): 20 000 Hz avec moins de 0,8% de distorsion harmonique totale Impédance de charge: 4 Ω... - Page 89 Type: Lecteur de disque compact Système de détection du signal: Capteur optique sans contact (laser semi-conducteur) Nombre de canaux: 2 canaux (stéréo) Réponse en fréquence: 5 Hz à 20 000 Hz Plage dynamique: 96 dB Rapport signal sur bruit: 98 dB Pleurage et scintillement: Inférieur à...
-
Page 90: Référez-Vous À La Page Intitulée Comment Réinitialiser Votre Appareil
European representative of Victor Company of Japan, Limited Représentant européen de la société Victor Company of Japan, Limited: JVC Technology Centre Europe GmbH JVC Technology Centre Europe GmbH Company name changed in: Le nom de la compagnie a changé dans:...