Kohler SAN RAPHAEL POWER LITE K-3398 Instructions D'installation
Masquer les pouces
Voir aussi pour SAN RAPHAEL POWER LITE K-3398:
- Mode d'emploi (84 pages) ,
- Guide d'utilisation (25 pages)
Table des Matières
Les langues disponibles
Les langues disponibles
Liens rapides
BEFORE YOU BEGIN
HOW TO USE THESE INSTRUCTIONS
Please read these instructions carefully to familiarize
yourself with the required tools, materials, and installation
sequences. Follow the sections that pertain to your
particular installation. This will help you avoid costly
mistakes. In addition to proper installation, read all
operating and safety instructions.
ORDERING INFORMATION
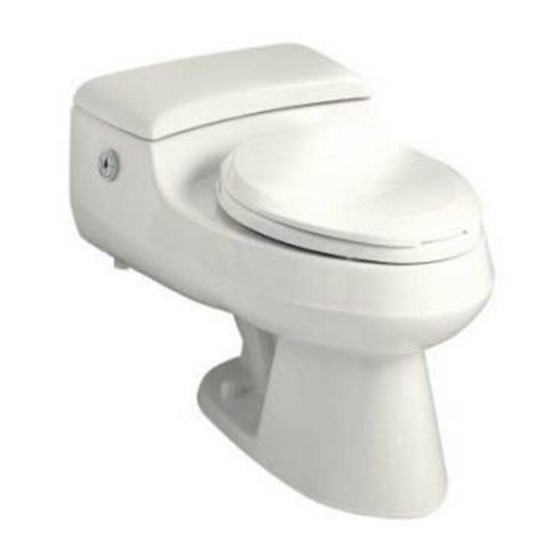
San Raphael Power Lite toilet
When specified:
3/8" supply
. . . . . . . . . . . . . . . . . . . . . . . . . . . .
Floor bolts (pair)
. . . . . . . . . . . . . . . . . . . . . . . .
NOTES
S
Observe all local plumbing and building codes.
S
Shut off the water supply.
S
Seat post holes are on 5-1/2" (14cm) centers.
S
2-1/8" (5.4cm) passageway.
S
Water depth from the rim is 5-7/8" (14.9cm).
S
Make sure the new toilet has the correct
roughing-in dimension. This toilet has a 12"
(30.5cm) roughing-in dimension. See Fig. #1.
S
Electrical service requirements: dedicated 120
VAC, 15 A, 60 Hz (circuit protected by a Class A
GFCI). The toilet pump has a 3' (91.4cm)
electrical cord. The heated seat has a 4'
(121.9cm) electrical cord.
TOOLS AND MATERIALS REQUIRED
S
10" adjustable wrench
S
12" pipe wrench
S
Metal file (file cut)
S
Tape measure
S
Tubing cutter
S
Level
S
Hacksaw
A
1013091-2-
R
. . . . . . . . . . . . . . .
K-3398
K-7638
21401
SAN RAPHAEL POWER LITE
VITREOUS CHINA TOILET
All information in these instructions is based upon the
latest product information available at the time of
publication. Kohler Co. reserves the right to make
changes in product characteristics, packaging, or
availability at any time without notice.
These instructions contain important care, cleaning, and
warranty information – please leave the instructions for
the consumer.
S
This toilet should be installed with a 3/8" shut-off
valve.
S
Be very careful when working with vitreous china
products. Vitreous china can break or chip if the
bolts and nuts are overtightened, or if the product
is handled carelessly.
S
Carefully inspect the new toilet for damage.
S
For new construction, refer to the dimensions in
Fig. #1 and Fig. #5 for locating the shut-off valve.
S
Fixture dimensions are nominal and conform to
tolerances established by ASME Standard
A112.19.2M.
DANGER:
Risk of electrical shock. Connect
only to a properly-grounded, grounding-type
receptacle which is protected by a ground-fault
circuit-interrupter (GFCI).
S
Putty knife
S
Screwdriver
S
Toilet gasket (wax seal)
S
Toilet T-bolts (2), 5/16" diameter
S
Toilet supply shut-off valve, 3/8" recommended
NOTICE: If the existing toilet does not have a supply
shut-off valve below the tank, install one before installing
the new toilet.
1 1
K-3398
E2001 Kohler Co.
Table des Matières

Manuels Connexes pour Kohler SAN RAPHAEL POWER LITE K-3398


Sommaire des Matières pour Kohler SAN RAPHAEL POWER LITE K-3398
-
Page 13: Avant De Commencer
Suivez les étapes qui s’appliquent les produits au moment d’aller sous presse. La société particulièrement à votre installation. Ceci vous évitera des Kohler se réserve le droit d’apporter des modifications erreures coûteuses. Outre les conseils d’installation aux caractéristiques, conditionnement et disponibilité des appropriée, lisez toutes les instructions d’utilisation et de... -
Page 14: Diagramme De Raccordement
à mastic. Retirer et jeter les boulons à T existants. AVIS : Si l’installation du nouveau W.-C. doit être retardée, recouvrir temporairement la bride du sol avec un chiffon. Bride de sol Fig. #2 1013091-2- Kohler Co., Kohler, WI U.S.A. -
Page 15: Branchement Électrique
(16,5cm) 2-5/8 po (6,7cm) L’axe du robinet d’arrêt doit s’étendre 3 po (7,6 cm) à partir 12 po du mur fini. Installer le robinet d’arrêt avec la sortie en (30,5cm) position verticale. Fig. #5 Kohler Co., Kohler, WI U.S.A. 1013091-2-... - Page 16 Si la projection des boulons à T par rapport au-dessus des Boulon à T écrous excède 1/4 po (6 mm), en couper et limer Fig. #7 l’excédent. Nettoyer tout résidue. Placer cache-boulons. 1013091-2- Kohler Co., Kohler, WI U.S.A.
-
Page 17: Raccorder Le Robinet D'arrêt
REMARQUE : Ne pas enlever les pinces du flexible de la pompe. Si la pompe change sa position pendant l’envoi ou l’installation, vérifier qu’elle ne touche pas les parois latérales ou postérieures du W.-C. Fig. #9 Kohler Co., Kohler, WI U.S.A. 1013091-2-... -
Page 18: Régler Le Niveau Repère
Vérifier le fonctionnement correcte des deux opérations. Chasse longue (1,6 gpf (6 Lpf)) Mettre en place le couvercle du réservoir. Chasse courte (1,1 gpf (4,2 Lpf)) Fig. #12 RÉPARER AU BESOIN Voir le Manuel du Propriétaire qui accompagne le produit. 1013091-2- Kohler Co., Kohler, WI U.S.A. -
Page 19: Responsabilités Du Consommateur
Si vous habitez une région où l’eau potable est dure, La société Kohler décline toute responsabilité quant à tout assurez-vous de garder les orifices du rebord de l’appareil endommagement de composants internes de réservoir propres pour garantir un fonctionnement approprié. - Page 20 1013091-2- Kohler Co., Kohler, WI U.S.A.