
Manuels Connexes pour Horizon Hobby Revolution ASCENT MTX


Sommaire des Matières pour Horizon Hobby Revolution ASCENT MTX
- Page 1 ASCENT ™ Instruction Manual • Bedienungsanleitung • Manuel d’utilisation • Manuale di Istruzioni...
-
Page 2: Meaning Of Special Language
Do not use with incompatible components or alter this product in any way outside of the instructions provided by Horizon Hobby, LLC. This manual contains instructions for safety, operation and maintenance. It is essential to read and follow all the instructions and warnings in the manual, prior to assembly, setup or use, in order to operate correctly and avoid damage or serious injury. -
Page 3: Flying Tips
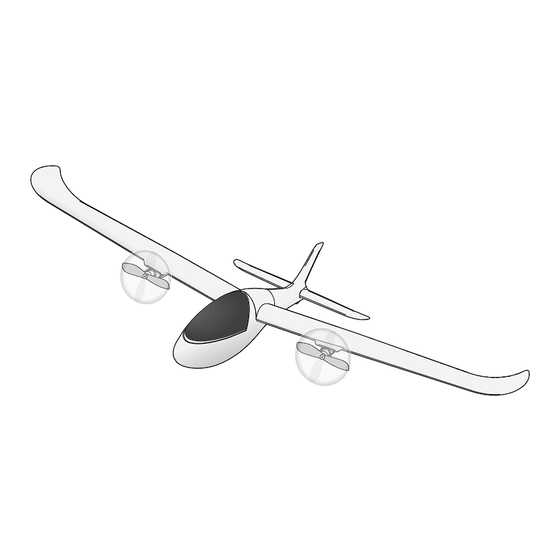
Included in the Box To register your product online, go to www.horizonhobby.com Transmitter AA Alkaline Ascent MTx 300 mAh 3.7V USB Charger Batteries (4) Li-Po Battery Specifications Preflight Checklist 483mm Find a safe and open area. Charge flight battery. Install flight battery in aircraft. - Page 4 Transmitter A: Throttle B: Handle C: Antenna D: Speaker E: LED F: Steering G: Steering Trim H: Power Switch Transmitter Batteries Installation Remove the battery cover, install the four included AA batteries (noting proper polarity) and reinstall the battery cover. CAUTION: If using rechargeable batteries, charge only rechargeable batteries.
-
Page 5: Charging Warnings
Charging Warnings The USB charger has been designed to safely • Always charge batteries away from flammable charge the included Li-Po battery. materials. • Always inspect the battery before charging. CAUTION: All instructions and warnings must • Always disconnect the battery after charging, and be followed exactly. -
Page 6: Installing The Flight Battery
Installing the Flight Battery CAUTION: Always disconnect the flight 1. Make sure the throttle is in the off position and turn on the transmitter. battery from the aircraft when not flying to avoid over-discharging the battery. Batteries 2. Open the battery hatch on the bottom of the discharged to a voltage lower than the lowest aircraft and plug in the flight battery. - Page 7 Flying Taking Off Get help to hand launch your aircraft so you can concentrate on flying. If you must hand launch the aircraft alone, hold the model in your dominant hand and the transmitter in your other hand. 1. Face into the wind and apply 1/2 (50%) throttle. 2.
- Page 8 Aircraft Trim Direction of Drift Button to Correct If the aircraft’s nose drifts left or right while the steering stick is at neutral (centered) press the steering trim buttons as shown in the chart to the right to correct the drift. The Ascent MTx can also be trimmed by carefully bending the control surfaces molded into the tail as shown below.
-
Page 9: Post Flight Checklist
Landing 1. Fly downwind and reduce the throttle to 25% to begin the descent. 2. Begin turning towards the runway, heading into the wind. 3. Reduce the throttle to 0% and glide onto the runway. • If you are going to land short of the runway, add a little throttle to extend the glide. • If you are going too fast to land, go around and try again. -
Page 10: Propeller Service
Repairs Repairs to the foam can be made using virtually any adhesive (hot glue, regular CA (cyanoacrylate adhesive), epoxy or tape). 1. For small tears, use CA to bond the break 2. When parts are not repairable, see the Replacement Parts List for ordering by item number. For a listing of all replacement and optional parts, refer to the list at the back of this manual. -
Page 11: Troubleshooting Guide
Troubleshooting guide Possible Cause Solution Problem Aircraft does not No connection Follow Binding Instructions. Follow respond to the “Installing the Flight Battery” instructions. transmitter Replace or recharge batteries Transmitter too near the aircraft or both Move to another location, with the trans- are too near large metal objects, wireless mitter more than 24 inches (60 cm) from sources or another transmitter during... - Page 12 Product, (iv) attempted process found on our website or call Horizon to obtain a service by anyone other than a Horizon Hobby authorized Return Merchandise Authorization (RMA) number. Pack the service center, (v) Product not purchased from an authorized Product securely using a shipping carton.
-
Page 13: Warranty And Service Contact Information
Warranty and Service Contact Information Country of Purchase horizon hobby Phone Number/Email Address Address Horizon Service Center servicecenter.horizonhobby. (Repairs and Repair Requests) com/RequestForm/ productsupport@horizon- 4105 Fieldstone Rd Horizon Product Support United States of hobby.com Champaign, Illinois, 61822 (Product Technical Assistance) -
Page 14: Signification De Certains Termes Spécifiques
Horizon Hobby, LLC. Ce manuel comporte des instructions relatives à la sécurité, au fonctionnement et à l’entretien. Il est capital de lire et de respecter la totalité des instructions et avertissements du manuel avant l’assemblage, le réglage et l’utilisation, ceci afin de manipuler correctement l’appareil et d’éviter... -
Page 15: Conseils De Vol
Inclus dans la boîte Pour enregistrer votre produit en ligne, rendez-vous sur www. horizonhobby.com Émetteur Piles alcalines Ascent MTx Batterie au lithium- Chargeur USB AA (4) polymère 300 mAh 3,7 V Specifications Checklist d’avant vol 483 mm Trouvez une zone sûre et bien dégagée. -
Page 16: Installation Des Piles De L'émetteur
Émetteur A : Gaz B : Poignée C : Antenne D : Haut-parleur E : DEL F : Direction G : Compensateur de direction H : Interrupteur Installation des piles de l’émetteur Retirez le couvercle des piles, installez les quatre piles AA incluses (en faisant attention à... -
Page 17: Avertissements Relatifs À La Batterie
Avertissements relatifs à la batterie L’émetteur livré avec le Duet a été développé afin de • Faites toujours l’inspection de la batterie avant la charger la batterie Li-Po de façon sûre. charge, et ne chargez jamais des batteries hors d’usage ou endommagées. ATTENTION: Toutes les instructions et mises en • Déconnectez toujours la batterie après la charge, garde doivent être scrupuleusement suivies. -
Page 18: Installation De La Batterie De Vol
Installation de la batterie de vol ATTENTION : Débranchez toujours la 1. Assurez-vous que la commande des gaz est en position éteinte et allumez l’émetteur. batterie de vol de l’aéronef lorsque vous ne le faites pas voler pour éviter toute décharge 2. -
Page 19: Durant Le Vol
Durant le vol Décollage Faites-vous aider pour lancer votre aéronef à la main afin que vous puissiez vous concentrer sur le pilotage. Si vous devez lancer l’aéronef à la main vous-même, tenez la maquette dans votre main forte et l’émetteur dans l’autre main. 1. -
Page 20: Compensateur De L'aéronef
Compensateur de l’aéronef Direction de la Bouton pour corriger dérive Si le nez de l’aéronef dérive à gauche ou à droite lorsque le levier de direction est en position neutre (centrée), appuyez sur les boutons du compensateur de direction comme indiqué dans le tableau vers la droite pour corriger la dérive. -
Page 21: Atterrissage
Atterrissage 1. Volez dans le sens du vent et réduisez le régime à 25 % pour commencer la descente. 2. Commencez à tourner vers la piste, en allant face au vent. 3. Réduisez le régime à 0 % et descendez sur la piste. • Si vous allez vous poser avant la piste, augmentez un peu le régime pour prolonger la descente. -
Page 22: Réparations
Réparations La mousse peut être réparée avec presque tous les produits adhésifs (colle chaude, colle de cyanoacrylate ordinaire, époxy ou ruban). 1. Pour les petites fissures, utilisez une colle de cyanoacrylate pour colmater le trou 2. Lorsque les pièces ne sont pas réparables, consultez la liste des références des pièces de rechange pour passer vos commandes. -
Page 23: Guide De Dépannage
Guide de dépannage Solution Problème Cause possible L'aéronef ne Pas de connexion Suivez les consignes d’affectation. Suivez répond pas à les consignes « Installation de la batterie l’émetteur de vol ». Remplacez ou rechargez la batte- rie et les piles L’émetteur est trop proche de l’aéronef Déplacez-vous, tout en maintenant ou les deux sont trop proches d’un grand l’émetteur à... -
Page 24: Garantie Limitée
Questions, assistance et services Horizon Hobby agréé, (v) les Produits non achetés chez un Votre revendeur spécialisé local et le point de vente ne peu- distributeur Horizon agréé, (vi) les Produits non conformes vent vous fournir un service de garantie ou une assistance. -
Page 25: Coordonnées De Service Et De Garantie
Produit en réparation, vous acceptez de payer ce 10/15 service sans recevoir de préavis. Un devis est disponible sur Coordonnées de service et de garantie Pays d’achat Horizon Hobby Coordonnées Adresse Horizon Service Center servicecenter.horizonhobby. (Repairs and Repair Requests) - Page 26 Replacement Parts • Pièces de rechange Part # Description Description ASCENT MICRO TWIN X RTF ASCENT MICRO TWIN X RTF RVOF1100 REPLACEMENT AIRFRAME: FUSELAGE DE RECHANGE : RVOF1101 ASCENT MTX ASCENT MTX PROPS (4 PCS): ASCENT MTX HÉLICES (4 PIÈCES) : ASCENT RVOF1102 300MAH 1S LI-PO: ASCENT MTX LITHIUM-POLYMÈRE 300 MAH 1S...
- Page 28 RVOF1100 © 2017 Horizon Hobby, LLC. Revolution, the Revolution logo, and Ascent are trademarks or registered trademarks of Horizon Hobby, LLC. Created 05/17 55183...