Klarstein MIDNIGHT SUN Mode D'emploi

Klarstein MIDNIGHT SUN Mode D'emploi

Radiateur de plafond et plafonnier
Table des Matières

Publicité

Les langues disponibles
  • FR

Les langues disponibles

Liens rapides

MIDNIGHT SUN
Decken-Heizung & Lampe
Ceiling Heater & Lamp
Radiador y lámpara de techo
Radiateur de plafond et plafonnier
Stufa a soffitto e lampada
10035321 10035322 10035323
www.klarstein.com
Hinweis: Dieses Produkt ist nur für gut isolierte Räume
oder für den gelegentlichen Gebrauch geeignet.
Note: This product is only suitable for well insulated
spaces or occasional use.
Advertencia: Este producto está indicado únicamente en
lugares abrigados o para una utilización punctual.
Remarque : Ce produit ne peut être utilisé que dans
des locaux bien isolés ou de manière occasionnelle.
Nota: Questo prodotto è adatto solo per spazi
ben isolati o uso occasionale.

Publicité

Table des Matières
loading

Sommaire des Matières pour Klarstein MIDNIGHT SUN

  • Page 1 MIDNIGHT SUN Decken-Heizung & Lampe Ceiling Heater & Lamp Radiador y lámpara de techo Radiateur de plafond et plafonnier Stufa a soffitto e lampada 10035321 10035322 10035323 www.klarstein.com Hinweis: Dieses Produkt ist nur für gut isolierte Räume oder für den gelegentlichen Gebrauch geeignet.
  • Page 3: Table Des Matières

    Sehr geehrter Kunde, wir gratulieren Ihnen zum Erwerb Ihres Gerätes. Lesen Sie die folgenden Hinweise sorgfältig durch und befolgen Sie diese, um möglichen Schäden vorzubeugen. Für Schäden, die durch Missachtung der Hinweise und unsachgemäßen Gebrauch entstehen, übernehmen wir keine Haftung. Scannen Sie den folgenden QR-Code, um Zugriff auf die aktuellste Bedienungsanleitung und weitere Informationen rund um das Produkt zu erhalten.
  • Page 4: Technische Daten

    TECHNISCHE DATEN Heizung Artikelnummer Abmessungen Leistung Stromversorgung 10035321 70.3*70.3*3.3 cm 350 W 10035322 1 10.3*70.3*3.3 cm 600 W 230 V ~ 50 Hz 10035323 130.3*70.3*3.3 cm 800 W Fernbedienung Stromversorgung DC 3 V (2 x 1,5 V AAA-Batterien, nicht im Lieferumfang enthalten) Einstellbarer Temperaturbereich 0-45 °C (Auflösung: 1 °C) Raumtemperaturbereich...
  • Page 5: Sicherheitshinweise

    SICHERHEITSHINWEISE • Prüfen Sie vor der Benutzung die Spannung auf der Geräteplakette und schließen Sie das Gerät nur an Steckdosen an, die der Spannung des Geräts entsprechen. • Falls das Netzkabel beschädigt ist, lassen Sie es von einer ausgebildeten Fachkraft ersetzen. •...
  • Page 6: Lieferumfang

    LIEFERUMFANG • 1x Heizgerät • 1x Steckdosenempfänger • 1x Fernbedienung • 4x Schrauben • 4x Dübel • 1x Handbuch • 1x Wasserdichtes Isolierband (30 cm) GERÄTEÜBERSICHT Vorderseite LED-Lichtstreifen Netzkabel LED-Stromversorgung Montagelöcher...
  • Page 7: Montage An Der Decke

    MONTAGE AN DER DECKE Hinweis: Die Montage und der Stromanschluss muss von einem qualifizierten Elektriker durchgeführt werden! 1. Markieren Sie die Montagelöcher an der Decke (dort wo der Stromkabel aus der Decke kommt) und bohren Sie an den markierten Stellen in die Decke. Stecken Sie dann die Dübel in die Decke.
  • Page 8: Bedienung Der Led-Lichtleiste

    3. Richten Sie die Montagelöcher an den Dübeln aus. Stecken Sie die Schrauben durch die Montagelöcher und ziehen Sie sie fest. Setzen Sie zum Schluss die Gummistopfen auf die Löcher. BEDIENUNG DER LED-LICHTLEISTE Nach der Installation und Verdrahtung der Heizung wird die LED durch den Lichtschalter an der Wand gesteuert.
  • Page 9: Steckdosenempfänger

    Das Display der Fernbedienung zeigt die eingestellte Temperatur, die gemessene Temperatur, Zeit, Datum, Modi und diverse andere Werte an. Mit der Fernbedienung kann man die Woche programmieren, den Auto-AUS-Timer einstellen und viele weitere Funktionen vornehmen. Hinweis: Die Fernbedienung wird mit zwei 1.5 V AA-Batterien betrieben. Bitte tauschen Sie die Batterien aus, sobald das Batteriesymbol blinkt, da die Fernbedienung sonst die Heizung nicht mehr steuern kann.
  • Page 10: Fernbedienung

    FERNBEDIENUNG Kindersicherung Senden-Symbol Heizung Batteriestand Raumtemperatur Eingestellte Temperatur Datum Modus-Anzeige Kindersicherung ein/aus Auswahl des Heizung ein/aus Anzeigeformats Runter Hoch Favorisierte Temperatur Einstellungen (FAV-Temperatur) Aktuelles Datum und Modus Uhrzeit einstellen...
  • Page 11: Bedienung Im Detail

    BEDIENUNG IM DETAIL Inbetriebnahme Wenn Sie die Heizung das erste Mal benutzen, müssen Sie zuerst die Fernbedienung und den Steckdosenempfänger verbinden. • Stecken Sie zuerst den Steckdosenempfänger in die Steckdose. • Halten Sie die EIN/AUS-Taste am Steckdosenempfänger 3 Sekunden lang gedrückt.
  • Page 12 Temperatur einstellen Drücken Sie die Taste HOCH oder RUNTER, um die Ziel-Temperatur einzustellen. Falls sie einen Wochentimer eingestellt haben, können Sie die Temperatur ebenfalls manuell nachverstellen. Diese wird allerdings beim Start der nächsten Heizperiode mit der einprogrammierten Ziel-Temperatur überschrieben. Heizmodus auswählen Halten Sie die Taste MODE 3 Sekunden lang gedrückt, um den SMART-Modus oder den Modus TIMER ON/OFF auszuwählen.
  • Page 13 Intelligente adaptive Startzeit Wenn Sie bei eingestelltem Wochentimer den SMART-Modus auswählen, wird die Heizung unabhängig vom voreingestellten Timer betrieben. Die Fernbedienung misst 3 Stunden vor der programmierten Startzeit die Temperaturdifferenz zwischen Raum und Ziel-Temperatur berechnet und entscheidet, um wie viel früher die Heizung eingeschaltet werden muss, damit die Ziel-Temperatur rechtzeitig erreicht wird.
  • Page 14: Reinigung Und Pflege

    Wichtige Hinweise zur Bedienung • Eine Fernbedienung kann mit mehreren Empfängern gleichzeitig verbunden werden und somit mehrere Heizungen bedienen. • Alle Einstellungen müssen nach einem Batteriewechsel oder einer Batterieentnahme neu vorgenommen werden. • Um den Wochentimer zu nutzen, stellen Sie sicher, dass die TIMER-Funktion durch langes Drücken der MODE-Taste auf ON geschaltet wurde.
  • Page 15: Hinweise Zur Entsorgung

    HINWEISE ZUR ENTSORGUNG Wenn es in Ihrem Land eine gesetzliche Regelung zur Entsorgung von elektrischen und elektronischen Geräten gibt, weist dieses Symbol auf dem Produkt oder auf der Verpackung darauf hin, dass dieses Produkt nicht im Hausmüll entsorgt werden darf. Stattdessen muss es zu einer Sammelstelle für das Recycling von elektrischen und elektronischen Geräten gebracht werden.
  • Page 16: Produktdatenblatt

    PRODUKTDATENBLATT Modellkennung(en) 10035321, 10035322, 10035323 Angabe Symbol Wert Einheit Angabe Einheit Wärmeleistung Nur bei elektrischen Speicher-Einzelraumheizgeräten: Art der Regelung der Wärmezufuhr Nennwärmeleistung Manuelle Regelung der Wärmezufuhr mit k.A. integriertem Thermostat Mindestwärmeleistung Manuelle Regelung der Wärmezufuhr k.A. (Richtwert) mit Rückmeldung der Raum- und/oder Außentemperatur Maximale kontinuierliche Elektronische Regelung der Wärmezufuhr...
  • Page 17 Dear Customer, Congratulations on purchasing this device. Please read the following instructions carefully and follow them to prevent possible damages. We assume no liability for damage caused by disregard of the instructions and improper use. Scan the QR code to get access to the latest user manual and more product information.
  • Page 18: Technical Data

    TECHNICAL DATA Heater Item number Dimensions Power Power supply 10035321 70.3*70.3*3.3 cm 350 W 10035322 1 10.3*70.3*3.3 cm 600 W 230 V ~ 50 Hz 10035323 130.3*70.3*3.3 cm 800 W Remote Control Power supply DC 3 V (2 x 1.5 V AAA batteries, not included) Adjustable temperature range 0-45 °C (resolution: 1 °C)
  • Page 19: Safety Instructions

    SAFETY INSTRUCTIONS • Check that the voltage indicates on the data plate corresponds with that of the local network before connecting the appliance to the mains power supply. • If the supply cord is damaged, it must be replaced by a qualifi ed engineer in order to avoid a hazard.
  • Page 20: Scope Of Delivery

    SCOPE OF DELIVERY • 1x Heater • 1x Socket receiver • 1x Remote control • 4x Screws • 4x Dowels • 1x Manual • 1x Waterproof insulating tape (30 cm) DEVICE OVERVIEW Front LED light strips Power cord LED Power Supply Mounting holes...
  • Page 21: Mounting On The Ceiling

    MOUNTING ON THE CEILING Note: Installation and power connection must be carried out by a qualified electrician! 1. Mark the mounting holes on the ceiling (where the power cable comes out of the ceiling) and drill into the ceiling at the marked points. Then insert the plugs into the ceiling.
  • Page 22: Operation Of The Led Light Strip

    3. Align the mounting holes with the dowels Insert the screws through the mounting holes and tighten them. Finally, place the rubber plugs on the holes. OPERATION OF THE LED LIGHT STRIP Once the heater is installed and wired, the LED is controlled by the light switch on the wall.
  • Page 23: Socket Receiver

    The display of the remote control shows the set temperature, the measured temperature, time, date, modes and various other values. With the remote control you can program the week, set the auto OFF timer and many other functions. Note: The remote control is powered by two 1.5 V AA batteries. Please replace the batteries as soon as the battery symbol flashes, otherwise the remote control will no longer be able to control the heater.
  • Page 24: Remote Control

    REMOTE CONTROL Child lock Transmit icon Heater Battery level Room temperature Set temperature Date Mode indicator Child lock on/off Selection of the display Heater on/off format Down Favorite temperature (FAV Settings temperature) Set current date and time Modes...
  • Page 25: Operation In Detail

    OPERATION IN DETAIL Commissioning When you use the heater for the first time, you must first connect the remote control and the socket receiver. • First plug the socket receiver into the socket. • Press and hold the ON/OFF button on the socket receiver for 3 seconds. •...
  • Page 26 Setting the temperature Press the UP or DOWN button to set the target temperature. If you have set a weekly timer, you can also adjust the temperature manually. However, this will be overwritten with the programmed target temperature when the next heating period starts. Select heating mode Press and hold the MODE button for 3 seconds to select SMART mode or TIMER ON/ OFF mode.
  • Page 27 Intelligent adaptive start time If you select the SMART mode with the weekly timer set, the heating is operated independently of the preset timer. The remote control measures the temperature difference between the room and the target temperature 3 hours before the programmed start time and calculates and decides by how much earlier the heating must be switched on to reach the target temperature on time.
  • Page 28: Important Notes On Operation

    IMPORTANT NOTES ON OPERATION • One remote control can be connected to several receivers at the same time and thus operate several heaters. • All settings must be reset after changing or removing the batteries. • To use the weekly timer, make sure that the TIMER function has been switched to ON by pressing the MODE button for a long time.
  • Page 29: Hints On Disposal

    DISPOSAL CONSIDERATIONS If there is a legal regulation for the disposal of electrical and electronic devices in your country, this symbol on the product or on the packaging indicates that this product must not be disposed of with household waste. Instead, it must be taken to a collection point for the recycling of electrical and electronic equipment.
  • Page 30: Product Data Sheet

    PRODUCT DATA SHEET Model identifier(s): 10035321, 10035322, 10035323 Item Symbol Value Unit Item Unit Heat output Type of heat input, for electric storage local space heaters only Nominal heat output manual heat charge control, with integrated thermostat Minimum heat output manual heat charge control with room and/or (indicative) outdoor temperature feedback...
  • Page 31 Estimado cliente: Le felicitamos por la adquisición de este producto. Lea atentamente el siguiente manual y siga cuidadosamente las instrucciones de uso con el fin de evitar posibles daños. La empresa no se responsabiliza de los daños ocasionados por un uso indebido del producto o por haber desatendido las indicaciones de seguridad.
  • Page 32: Datos Técnicos

    DATOS TÉCNICOS Calefactor Número de Dimensiones Potencia Suministro eléctrico artículo 10035321 70.3*70.3*3.3 cm 350 W 10035322 1 10.3*70.3*3.3 cm 600 W 230 V ~ 50 Hz 10035323 130.3*70.3*3.3 cm 800 W Mando a distancia Suministro eléctrico CC 3 V (2 pilas AA de 1,5 V, no incluidas) Rango de temperatura ajustable 0-45 °C (Resolución: 1 °C)
  • Page 33: Indicaciones De Seguridad

    INDICACIONES DE SEGURIDAD • Antes de utilizar el aparato, compruebe la tensión en la placa técnica del mismo y conecte el aparato solamente a tomas de corriente que se adecuen a dicha tensión. • Si el cable de alimentación está dañado, deberá ser sustituido por un servicio técnico. •...
  • Page 34: Partes Suministradas

    PARTES SUMINISTRADAS 1 calefactor 1 receptor de enchufe 1 mando a distancia 4 tornillos 4 tacos 1 manual de instrucciones 1 cinta aislante resistente al agua (30 cm) VISTA GENERAL DEL APARATO Parte delantera Tiras de luz LED Cable de alimentación Suministro eléctrico LED Orificios de montaje...
  • Page 35: Montaje En El Techo

    MONTAJE EN EL TECHO Advertencia: El montaje y la conexión eléctrica deben ser realizados por un electricista cualificado. 1. Marque los orificios de montaje en el techo (el punto donde debe salir el cable eléctrico del techo) y realice la perforación en el punto seleccionado. A continuación, introduzca el taco en el techo.
  • Page 36: Manejo De La Tira Led

    3. Oriente los orificios de montaje a los tacos. Encaje los tornillos en los orificios de montaje y apriételos. Para finalizar, coloque los tapones de goma sobre los orificios. MANEJO DE LA TIRA LED Tras la instalación y el cableado del calefactor, la luz LED se controlará a través del interruptor de la luz de la pared.
  • Page 37: Receptor De La Toma De Corriente

    La pantalla del mando a distancia muestra la temperatura seleccionada, la temperatura registrada, la hora, la fecha, los modos y otros valores. Con el mando a distancia se puede controlar el programador semanal, configurar el temporizador de apagado automático y realizar otras muchas funciones. Advertencia: El mando a distancia funciona con 2 pilas AA de 1,5 V.
  • Page 38: Mando A Distancia

    MANDO A DISTANCIA Protección infantil Símbolo de enviar Calefactor Estado de las pilas Temperatura ambiente Temperatura seleccionada Fecha Indicador de modo Protección infantil on/off Selección del formato de Calefacción on/off visualización Abajo Arriba Temperatura favorita Ajustes (Temperatura FAV) Configurar fecha y hora Modo actuales...
  • Page 39: Utilización En Detalle

    UTILIZACIÓN EN DETALLE Puesta en funcionamiento Cuando utilice el calefactor por primera vez, primero debe conectar el mando a distancia y el receptor de enchufe. • Conecte primero el receptor a la toma de corriente. • Mantenga la tecla on/off del receptor pulsada durante 3 segundos. •...
  • Page 40 Ajustar la temperatura Pulse la tecla ARRIBA y ABAJO para configurar la temperatura objetivo. Si ha programado un temporizador semanal, también puede reajustar la temperatura manualmente. No obstante, esta se sobrescribirá al comenzar el siguiente periodo de calefacción con la temperatura objetivo programada. Seleccionar modo de calefacción Mantenga presiona la tecla MODE durante 3 segundos para seleccionar el modo SMART o el modo TIMER ON/OFF.
  • Page 41 Hora de inicio adaptada Si selecciona el modo SMART con el temporizador semanal configurado, el calefactor se pone en funcionamiento independientemente del temporizador configurado. El mando a distancia registra 3 horas antes de la hora de inicio programada la diferencia de temperatura entre la ambiental y la objetivo y decide con cuánta antelación es necesario activar la calefacción para que se alcance la temperatura seleccionada a tiempo.
  • Page 42: Limpieza Y Cuidado

    Indicaciones de uso importantes • Un mando a distancia puede conectarse simultáneamente a varios receptores para controlar varios calefactores. • Todos los ajustes deben realizarse de nuevo cuando se sustituyan o se retiren las pilas. • Para utilizar el temporizador semanal, asegúrese de que la función del temporizador esté...
  • Page 43: Retirada Del Aparato

    INDICACIONES SOBRE LA RETIRADA DEL APARATO Si en su país existe una disposición legal relativa a la eliminación de aparatos eléctricos y electrónicos, este símbolo estampado en el producto o en el embalaje advierte que no debe eliminarse como residuo doméstico. En lugar de ello, debe depositarse en un punto de recogida de reciclaje de aparatos eléctricos y electrónicos.
  • Page 44: Hoja De Datos Del Producto

    HOJA DE DATOS DEL PRODUCTO Denominación del modelo 10035321, 10035322, 10035323 Dato Símbolo Valor Unidad Dato Unidad Potencia térmica Solo con disposítivos de acumulación de calor eléctricos para abastecimiento local: Tipo de regulación del abastecimiento de calor Potencia térmica nominal Regulación manual del abastecimiento de calor con termostato integrado: Potencia térmica mínima...
  • Page 45 Cher client, Toutes nos félicitations pour l’acquisition de ce nouvel appareil. Veuillez lire attentivement les instructions suivantes de branchement et d’utilisation afin d’éviter d’éventuels dommages. Le fabricant ne saurait être tenu pour responsable des dommages dus au non-respect des consignes de sécurité et à la mauvaise utilisation de l’appareil.
  • Page 46: Fiche Technique

    FICHE TECHNIQUE Radiateur Numéro Dimensions Puissance Alimentation d'article 10035321 70.3*70.3*3.3 cm 350 W 10035322 1 10.3*70.3*3.3 cm 600 W 230 V ~ 50 Hz 10035323 130.3*70.3*3.3 cm 800 W Télécommande Alimentation DC 3 V (2 x piles AAA 1,5 V, non fournies) Plage de températures réglables 0-45 °C (précision : 1 °C)
  • Page 47: Consignes De Sécurité

    CONSIGNES DE SÉCURITÉ • Avant utilisation, vérifi ez la tension sur l‘étiquette de l‘appareil et ne branchez l‘appareil que sur des prises correspondant à la tension de l‘appareil. • Si le câble d‘alimentation est endommagé, faites-le remplacer par un professionnel qualifi é.
  • Page 48: Contenu De L'emballage

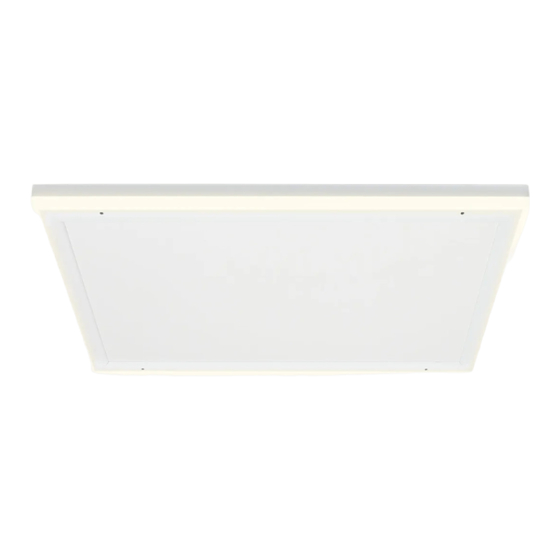
    CONTENU DE L‘EMBALLAGE • 1x radiateur • 1x prise récepteur • 1x télécommande • 4x vis • 4x chevilles • 1x manuel • 1 x ruban isolant étanche (30 cm) APERÇU DE L‘APPAREIL Face avant Bandes lumineuses LED Câble secteur Alimentation LED Trous de montage...
  • Page 49: Installation Au Plafond

    INSTALLATION AU PLAFOND Remarque : le montage et le branchement doivent être réalisés par un électricien professionnel ! 1. Marquez les trous de montage sur le plafond (là où le câble d‘alimentation sort du plafond) et percez le plafond aux emplacements marqués. Enfoncez ensuite les chevilles dans le plafond.
  • Page 50: Utilisation De La Bande Lumineuse Led

    3. Alignez les trous de montage avec les chevilles. Insérez les vis dans les trous de montage et serrez-les. Enfin, placez les bouchons en caoutchouc sur les trous. UTILISATION DE LA BANDE LUMINEUSE LED Après l‘installation et le câblage du radiateur, la LED est contrôlée par l‘interrupteur d‘éclairage sur le mur.
  • Page 51: Prise-Récepteur

    L‘écran de la télécommande indique la température réglée, la température mesurée, l‘heure, la date, les modes et diverses autres valeurs. Avec la télécommande, vous pouvez programmer la semaine, régler la minuterie d‘arrêt automatique et exécuter de nombreuses autres fonctions. Remarque : la télécommande fonctionne avec deux piles AAA 1.5. Veuillez remplacer les piles dès que l‘icône des piles clignote, car la télécommande ne peut plus contrôler le radiateur.
  • Page 52: Télécommande

    TÉLÉCOMMANDE Verrouillage parental Icône d‘émission Chauffage Niveau des piles Température ambiante Réglage de la température Date Affichage du mode Verrouillage parental activé / désactivé Sélection du format Chauffage marche / d‘affichage arrêt Haut Température préférée Paramètres (température FAV) Réglez la date et l‘heure Mode actuelles...
  • Page 53: Utilisation En Détail

    UTILISATION EN DÉTAIL Mise en marche Lors de la première utilisation du radiateur, vous devez d‘abord connecter la télécommande et la prise récepteur. • Branchez d‘abord la prise-récepteur dans une prise. • Appuyez et maintenez le bouton ON / OFF sur le récepteur de prise pendant 3 secondes.
  • Page 54 Réglage de la température Appuyez sur le bouton HAUT ou BAS pour régler la température cible. Si vous avez réglé une minuterie hebdomadaire, vous pouvez également régler la température manuellement. Cependant, celle-ci est remplacée par la température cible programmée au début de la période suivante de chauffage. Sélection du mode de chauffage Maintenez le bouton MODE pendant 3 secondes pour sélectionner le mode SMART ou le mode TIMER ON / OFF.
  • Page 55 Démarrage adaptatif Lorsque la minuterie hebdomadaire est activée et que vous choisissez le mode SMART, le radiateur fonctionne indépendamment de la température réglée. La télécommande mesure 3 heures avant l‘heure programmée de démarrage la différence entre la température ambiante et la température cible et décide si le radiateur doit être activé plus tôt afin que la température cible soit atteinte à...
  • Page 56: Nettoyage Et Entretien

    Remarques importantes pour l‘utilisation • Une télécommande peut être connectée à plusieurs récepteurs en même temps et ainsi faire fonctionner plusieurs radiateurs. • Tous les réglages doivent être effectués à nouveau après avoir changé ou retiré la pile. • Pour utiliser la minuterie hebdomadaire, assurez-vous que la fonction TIMER a été activée par un appui long sur le bouton MODE.
  • Page 57: Conseils Pour Le Recyclage

    INFORMATIONS SUR LE RECYCLAGE S‘il existe une réglementation pour l‘élimination ou le recyclage des appareils électriques et électroniques dans votre pays, ce symbole sur le produit ou sur l‘emballage indique que cet appareil ne doit pas être jeté avec les ordures ménagères.
  • Page 58: Fiche De Données Produit

    FICHE DE DONNÉES PRODUIT Référence (s) du produit 10035321, 10035322, 10035323 Donnée Symbole Valeur Unité Donnée Unité Puissance calorifique Uniquement pour les radiateurs électriques à accumulation : Type de régulation de l'apport de chaleur Puissance calorifique Régulation manuelle de l'apport de chaleur n.c.
  • Page 59 Gentile cliente, La ringraziamo per aver acquistato il dispositivo. La preghiamo di leggere attentamente le seguenti istruzioni per l’uso e di seguirle per evitare possibili danni tecnici. Non ci assumiamo alcuna responsabilità per danni scaturiti da una mancata osservazione delle avvertenze di sicurezza e da un uso improprio del dispositivo.
  • Page 60: Dati Tecnici

    DATI TECNICI Stufa Numero Dimensioni Potenza Alimentazione articolo 10035321 70.3*70.3*3.3 cm 350 W 10035322 1 10.3*70.3*3.3 cm 600 W 230 V ~ 50 Hz 10035323 130.3*70.3*3.3 cm 800 W Telecomando Alimentazione DC 3 V (2 batterie AAA da 1,5 V, non incluse in consegna) Intervallo di temperatura impostabile 0-45 °C (risoluzione: 1 °C)
  • Page 61: Avvertenze Di Sicurezza

    AVVERTENZE DI SICUREZZA • Prima dell‘uso, controllare la tensione sulla targhetta del dispositivo e collegare il dispositivo solo ad una presa che corrisponde alla tensione indicata. • Se il cavo di alimentazione è danneggiato, farlo sostituire da un tecnico qualifi cato. •...
  • Page 62: Volume Di Consegna

    VOLUME DI CONSEGNA • 1 x stufa • 1 x ricevitore da inserire nella presa elettrica • 1 x telecomando • 4 x viti • 4 x tasselli • 1 x manuale • 1 x nastro isolante impermeabile (30 cm) DESCRIZIONE DEL DISPOSITIVO Lato anteriore Barre luminose LED...
  • Page 63: Montaggio Sul Soffitto

    MONTAGGIO SUL SOFFITTO Nota: il montaggio e il collegamento alla rete elettrica devono essere realizzati da un elettricista qualificato! 1. Segnare i punti dei fori di montaggio sul soffitto (nel punto in cui il cavo della corrente esce dal soffitto) e realizzarli con un trapano. Inserire i tasselli nei fori. 2.
  • Page 64: Utilizzo Della Barra Luminosa Led

    3. Orientare i fori di montaggio sui tasselli. Far passare le viti nei fori di montaggio e stringere saldamente. Posizionare poi i tappi di gomma sui fori. UTILIZZO DELLA BARRA LUMINOSA LED Dopo installazione e cablaggio della stufa, il LED viene controllato dall’interruttore della luce sulla parete.
  • Page 65: Ricevitore

    Il display del telecomando mostra la temperatura impostata, quella misurata, l’ora, la data, la modalità e altri valori. Con il telecomando è possibile programmare la settimana, il timer di spegnimento automatico e molte altre funzioni. Nota: il telecomando è alimentato con due pile AA da 1,5 V. Sostituire le batterie non appena lampeggia il simbolo della batteria, altrimenti il telecomando non è...
  • Page 66: Telecomando

    TELECOMANDO Sicura per bambini Simbolo di trasmissione Riscaldamento Livello della batteria Temperatura ambiente Temperatura impostata Data Indicazione della modalità Sicura per bambini on/off Selezione del formato di Riscaldamento on/off indicazione temperatura Abbassare Aumentare Temperatura preferita Impostazioni (FAV) Impostare data e ora Modalità...
  • Page 67: Dettagli Sull'utilizzo

    DETTAGLI SULL’UTILIZZO Messa in funzione Quando si utilizza la stufa per la prima volta, è necessario per prima cosa collegare telecomando e ricevitore. • Inserire il ricevitore nella presa elettrica. • Tenere premuto ON/OFF sul ricevitore per 3 secondi. • Premere contemporaneamente i tasti °F/°C e MODE sul telecomando fino a quando si sente un segnale acustico e i due dispositivi sono collegati.
  • Page 68 Impostare la temperatura Utilizzare AUMENTARE e DIMINUIRE per impostare la temperatura desiderata. Se è stato impostato un timer settimanale, è possibile regolare la temperatura manualmente. Questa viene però poi sovrascritta alla temperatura originaria all’avvio del ciclo di riscaldamento successivo. Selezionare la modalità di riscaldamento Tenere premuto MODE per 3 secondi per selezionare la modalità...
  • Page 69 Ora di avvio intelligente adattiva Se si seleziona la modalità SMART con timer settimanale attivo, la stufa funziona indipendentemente dal timer preimpostato. Il telecomando calcola 3 ore prima dell’ora di avvio programmata la differenza tra temperatura della stanza e temperatura desiderata, in modo da attivare anticipatamente la stufa per raggiungere la temperatura impostata in perfetto orario.
  • Page 70: Pulizia E Manutenzione

    Note importanti sull’utilizzo: • Un telecomando può essere collegato con più ricevitori contemporaneamente per controllare diverse stufe. • Tutte le impostazioni devono essere inserite nuovamente dopo il cambio o la rimozione delle batterie. • Per utilizzare il timer settimanale, assicurarsi che la funzione TIMER sia stata attivata premendo a lungo del tasto MODE su ON.
  • Page 71: Smaltimento

    AVVISO DI SMALTIMENTO Se nel proprio paese si applicano le regolamentazioni inerenti lo smaltimento di dispositivi elettrici ed elettronici, questo simbolo sul prodotto o sulla confezione segnala che questi prodotti non possono essere smaltiti con i rifiuti normali e devono essere portati a un punto di raccolta di dispositivi elettrici ed elettronici.
  • Page 72: Scheda Informativa Del Prodotto

    SCHEDA INFORMATIVA DEL PRODOTTO Identificazione del modello (i) 10035321, 10035322, 10035323 Indicazione Simbolo Valore Unità Indicazione Unità Potenza termica Solo per gli apparecchi per il riscaldamento d'ambiente locale elettrici ad accumulo: Tipo di controllo dell´apporto termico Potenza termica nominale Controllo manuale del carico termico con n.d.

Ce manuel est également adapté pour:

100353211003532210035323

Table des Matières