Yamaha ISX-803 Mode D'emploi
Masquer les pouces Voir aussi pour ISX-803:
Table des Matières

Publicité

Les langues disponibles

Les langues disponibles

Liens rapides

ULV
INTEGRATED AUDIO SYSTEM
SYSTÈME AUDIO INTÉGRÉ
OWNER'S MANUAL
MODE D'EMPLOI
MANUAL DE INSTRUCCIONES

Publicité

Table des Matières
loading

Sommaire des Matières pour Yamaha ISX-803

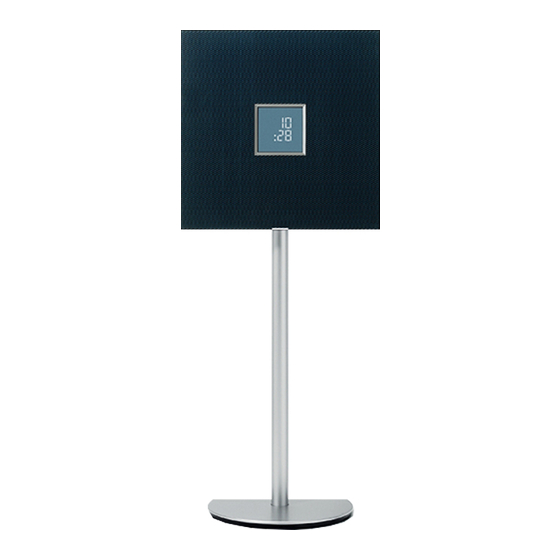
  • Page 1 INTEGRATED AUDIO SYSTEM SYSTÈME AUDIO INTÉGRÉ OWNER’S MANUAL MODE D’EMPLOI MANUAL DE INSTRUCCIONES...
  • Page 2: Important Safety Instructions

    We Want You Listening For A Lifetime Yamaha and the Electronic Industries Association’s Consumer Electronics Group want you to get the most out of your equipment by playing it at a safe level. One that lets the sound come through loud and clear without annoying blaring or distortion –...
  • Page 3 “OFF” and “ON”, requirements. Modifications not expressly approved by please try to eliminate the problem by using one of the Yamaha may void your authority, granted by the FCC, to following measures: use the product.
  • Page 4 TO REDUCE THE RISK OF FIRE OR ELECTRIC SHOCK, and may cause fire, damage to this unit, and/or personal DO NOT EXPOSE THIS UNIT TO RAIN OR MOISTURE. injury. Yamaha will not be held responsible for any damage resulting from use of this unit with a voltage CAUTION other than specified.
  • Page 5: Table Des Matières

    CONTENTS NAMES OF PARTS AND THEIR FUNCTIONS......2 USING THE ALARM FUNCTION ..........15 ADJUSTING THE CLOCK............5 USING THE SLEEP TIMER .............19 INSTALLING “DTA CONTROLLER” ........6 TONE CONTROL (REMOTE CONTROL ONLY) ....19 LISTENING TO CD AND USB DEVICES ........7 ADJUSTING BRIGHTNESS OF FRONT PANEL DISPLAY ...19 LISTENING TO MUSIC FROM YOUR Bluetooth DEVICE..10 TROUBLESHOOTING .............20 LISTENING TO FM STATIONS ..........13...
  • Page 6: Names Of Parts And Their Functions

    NAMES OF PARTS AND THEIR FUNCTIONS Top panel AUTO BEEP SOURCE + BEEP SOURCE DIMMER CLOCK ALARM TYPE LABEL SIDE VOLUME SOURCE ALARM SNOOZE SLEEP PRESET ALARM (Power) Turns the alarm on/off, and allows various alarm settings to be Press to turn on the system or enter standby mode. Time is adjusted (☞...
  • Page 7: Front Panel Display

    NAMES OF PARTS AND THEIR FUNCTIONS Front panel display Play/shuffle/repeat indicator Displays the playback mode (☞ P. 7, 9). Remote control signal receiver Clock indicator Shows the clock hour hand (☞ P. 5). Source indicator Shows selected source. Bluetooth indicator Turns on if this unit is connecting via Bluetooth (☞...
  • Page 8 NAMES OF PARTS AND THEIR FUNCTIONS Remote control Remote control signal transmitter (Power) Press to turn on the system or enter standby mode. ALARM Switches the alarm on/off. SNOOZE/SLEEP Set the sleep timer or switch the alarm to snooze mode (☞...
  • Page 9: Adjusting The Clock

    ADJUSTING THE CLOCK Setting the time Move the CLOCK switch on the rear panel to SET. Top panel Rear panel SOURCE + BEEP AUTO BEEP SOURCE DIMMER CLOCK ALARM TYPE LABEL SIDE VOLUME SOURCE ALARM SNOOZE SLEEP PRESET Set the time with Set time (flashing) Move the CLOCK switch on the rear panel to CLOCK1 or CLOCK2 to end the time setting.
  • Page 10: Installing "Dta Controller

    • Setting of the alarm function (IntelliAlarm) (☞ P. 18) • Playing back songs stored in an iPhone The mobile device needs to be connected with the unit via Bluetooth connection (☞ P. 10). Google Play https://play.google.com/store/apps/ http://itunes.com/app/dtacontroller details?id=com.yamaha.av. dtacontroller (For users in the U.S.A.) https://itunes.apple.com/us/app/dta- controller-us/id549333293?mt=8 Note...
  • Page 11: Listening To Cd And Usb Devices

    LISTENING TO CD AND USB DEVICES The unit will operate as follows when playing back tracks/files on CD/USB devices. • If the CD/USB device being played back is stopped, the track that was being played back will start playing from the beginning of the track the next time playback begins.
  • Page 12 LISTENING TO CD AND USB DEVICES Listening to a data CD Use the following buttons to control the unit while playing Top panel back tracks on data CDs. Button Function AUTO BEEP SOURCE + BEEP SOURCE CLOCK DIMMER ALARM TYPE Play/Pause Skip Search backward/forward...
  • Page 13: Listening To A Usb Device

    LISTENING TO CD AND USB DEVICES Listening to a USB device Use the following buttons to control the unit while playing Top panel back tracks on USB devices. SOURCE + BEEP AUTO BEEP Button Function SOURCE CLOCK ALARM TYPE DIMMER Play/Pause Skip Search backward/forward...
  • Page 14: Listening To Music From Your Bluetooth Device

    (This procedure or display may differ depending on the type of your iPod touch/iPhone/iPad.) From the Bluetooth connection list of the connecting device, choose this unit (ISX-803 Yamaha). When pairing has been completed, your iPod touch/iPhone/ iPad will indicate “Connected”.
  • Page 15: Listening To A Bluetooth Device

    Perform the pairing operation at the smartphone (for details, please read the owner’s manual of the smartphone). This unit is indicated as “ISX-803 Yamaha” on the smartphone. • If you are prompted for a passkey, enter the numerals “0000”. • If the connection fails, move the smartphone slowly on the NFC mark mark.
  • Page 16 In the Bluetooth settings of the connecting device, turn Bluetooth on. From the Bluetooth connection list of the connecting device, choose this unit (ISX-803 Yamaha). The Bluetooth connection will be established, and the Bluetooth indicator on the front panel display of this unit will light.
  • Page 17: Listening To Fm Stations

    LISTENING TO FM STATIONS Selecting the FM station Press SOURCE and set FM as the playback source. Top panel AUTO BEEP SOURCE + BEEP SOURCE DIMMER CLOCK ALARM TYPE Reception frequency LABEL SIDE VOLUME SOURCE ALARM SNOOZE SLEEP PRESET Using the remote control Press RADIO.
  • Page 18: Listening To External Sources

    LISTENING TO EXTERNAL SOURCES Selecting a preset FM station Press SOURCE and set FM as the playback source. Top panel SOURCE + BEEP Press PRESET repeatedly to select the preset FM AUTO BEEP SOURCE DIMMER CLOCK ALARM TYPE station. Using the remote control Press PRESET LABEL SIDE VOLUME...
  • Page 19: Using The Alarm Function

    USING THE ALARM FUNCTION The unit includes an alarm function (IntelliAlarm) that plays back music sources or set of beeps (built-in alarm) at the set time in a variety of different methods. The alarm function has following features. 3 types of alarms Select from 3 alarm types, combining music and beep sounds.
  • Page 20 USING THE ALARM FUNCTION Set the alarm time and alarm type (when alarm types other than BEEP are selected) Top panel Press SOURCE to select music source. SOURCE + BEEP AUTO BEEP SOURCE DIMMER CLOCK ALARM TYPE Sources other than AUX and Bluetooth can be selected. Using the remote control Press the USB, CD, or RADIO button to select the LABEL SIDE...
  • Page 21: Turning The Alarm Off

    USING THE ALARM FUNCTION Turning the alarm on/off Press ALARM. Top panel When the alarm is on, the alarm indicator ( ) is shown, AUTO BEEP and the alarm time is shown for a while. If you press ALARM DIMMER CLOCK ALAR again, the alarm indicator (...
  • Page 22 USING THE ALARM FUNCTION Setting Weekly Alarm With DTA CONTROLLER (☞ P. 6), you can use Weekly Alarm, which allows you to set alarm times respectively for each day of the week. First, make the Weekly Alarm settings on DTA CONTROLLER. Setting Weekly Alarm with DTA CONTROLLER (IntelliAlarm icon) in DTA CONTROLLER IntelliAlarm setting screen...
  • Page 23: Using The Sleep Timer

    USING THE SLEEP TIMER You can set the time until the system automatically enters standby mode. Press SNOOZE/SLEEP a number of times to set Top panel the time until the system enters standby mode. AUTO BEEP SOURCE + BEEP SOURCE DIMMER CLOCK ALARM TYPE...
  • Page 24: Troubleshooting

    If there is a problem with the unit, check the following list first. If you cannot resolve the problem with the suggested solutions or if the problem is not listed below, set the system to standby mode, unplug it, and consult the nearest authorized Yamaha dealer or service center.
  • Page 25: Usb Device Playback

    TROUBLESHOOTING USB device playback Problem Cause Solution MP3/WMA file on the USB device does The USB device is not recognized. Set the system to standby mode and disconnect the USB device. Then, turn the system on and not play. reconnect the USB device. Connect an AC adapter if supplied with the device.
  • Page 26: Remote Control

    TROUBLESHOOTING FM radio reception Problem Cause Solution Too much noise. The antenna may be connected improperly. Make sure the antenna is connected properly (☞ P. 3) or use a commercially available outdoor antenna. Too much noise during stereo broadcast. The radio station you selected may be far from your Try manual tuning to improve the signal quality area, or the radio wave reception is weak in your (☞...
  • Page 27: Notes On Discs And Usb Devices

    • Do not connect devices other than USB mass storage class devices (such as USB chargers or USB hubs), PCs, card readers, an external HDD, etc. • Yamaha will not be held responsible for any damage to or data loss on the USB device occurring while the device is connected to this unit.
  • Page 28: Specifications

    SPECIFICATIONS PLAYER TUNER • Tuning range • Media ...................CD, CD-R/RW U.S.A. and Canada models ........87.5 to 107.9 MHz • Audio format ............Audio CD, MP3, WMA Other models ............87.5 to 108.0 MHz Laser GENERAL • Type ............ Semiconductor laser GaAs/GaAlAs • Power Supply •...
  • Page 29 • Yamaha does not guarantee all wireless connections between this unit and devices compatible with Bluetooth function. LASER SAFETY This unit employs a laser.
  • Page 30: Précautions Concernant La Sécurité

    Comme les sons trop forts causent des lésions auditives qui ne peuvent être détectées qu’à long terme, lorsqu’il est trop tard, Yamaha et le Groupe des Entreprises Électroniques Grand Public de l’Association des Industries Électroniques vous déconseillent l’écoute prolongée à des volumes excessifs.
  • Page 31: Informations De La Fcc (Pour Les Clients Résidents Aux États-Unis)

    Si ce produit devait produire des installé selon les instructions du mode d’emploi. Toute interférences, ce qui peut être déterminé en modification non approuvée expressément par Yamaha « ÉTEIGNANT » et en « RALLUMANT » le produit, peut invalider l’autorisation, accordée par la FCC, d’utiliser l’utilisateur est invité...
  • Page 32 Alimenter l’appareil sous une tension plus élevée est APPAREIL À LA PLUIE OU À L’HUMIDITÉ. dangereux et peut être responsable d’incendie, de dommage à l’appareil ou de blessure corporelle. Yamaha ne saurait être ATTENTION tenue responsable des dommages résultant de l’alimentation Danger d’explosion si la pile n’est pas remplacée correctement.
  • Page 33: Accessoires Fournis

    TABLE DES MATIÈRES NOM DES COMMANDES ET FONCTIONS UTILISATION DE LA FONCTION D’ALARME .......15 CORRESPONDANTES..............2 UTILISATION DE LA MINUTERIE ..........19 RÉGLAGE DE L’HORLOGE .............5 RÉGLAGE DE LA TONALITÉ (TÉLÉCOMMANDE INSTALLATION DE L’APPLICATION « DTA CONTROLLER »..6 UNIQUEMENT) ................19 ÉCOUTE D’UN CD ET D’APPAREILS USB ......7 RÉGLAGE DE LA LUMINOSITÉ...
  • Page 34: Nom Des Commandes Et Fonctions Correspondantes

    NOM DES COMMANDES ET FONCTIONS CORRESPONDANTES Panneau supérieur AUTO BEEP SOURCE + BEEP SOURCE DIMMER CLOCK ALARM TYPE LABEL SIDE VOLUME SOURCE ALARM SNOOZE SLEEP PRESET ALARM (Alimentation) Active/désactive l’alarme et permet de régler plusieurs Appuyez sur cette touche pour mettre le système sous tension fonctions liées à...
  • Page 35: Afficheur

    NOM DES COMMANDES ET FONCTIONS CORRESPONDANTES Afficheur Indicateur de lecture/mode aléatoire/répétition Affiche le mode de lecture (☞ P. 7, 9). Capteur de télécommande Indicateur d’horloge Affiche l’aiguille des heures de l’horloge (☞ P. 5). Indicateur de source Indique la source sélectionnée. Indicateur Bluetooth S’allume lorsque vous connectez l’appareil via Bluetooth (☞...
  • Page 36 NOM DES COMMANDES ET FONCTIONS CORRESPONDANTES Télécommande Émetteur de télécommande (Alimentation) Appuyez sur cette touche pour mettre le système sous tension ou passer en mode veille. ALARM Active/désactive l’alarme. SNOOZE/SLEEP Règle la minuterie ou bascule l’alarme en mode snooze Bluetooth (☞...
  • Page 37: Réglage De L'horloge

    RÉGLAGE DE L’HORLOGE Réglage de l’heure Placez le sélecteur CLOCK du panneau arrière sur Panneau supérieur SET. SOURCE + BEEP AUTO BEEP SOURCE DIMMER CLOCK ALARM TYPE Panneau arrière LABEL SIDE VOLUME SOURCE ALARM SNOOZE SLEEP PRESET Réglez l’heure avec Réglage de l’heure (clignote) Placez le sélecteur CLOCK du panneau arrière sur...
  • Page 38: Installation De L'application « Dta Controller

    • Réglage de la fonction d’alarme (IntelliAlarm) (☞ P. 18) • Lecture des morceaux enregistrés sur un iPhone Le périphérique mobile doit être connecté à l’appareil via Bluetooth (☞ P. 10). Google Play https://play.google.com/store/apps/ http://itunes.com/app/dtacontroller details?id=com.yamaha.av. dtacontroller (Pour les utilisateurs aux États-Unis) https://itunes.apple.com/us/app/dta- controller-us/id549333293?mt=8 Remarque...
  • Page 39: Écoute D'un Cd Et D'appareils Usb

    ÉCOUTE D’UN CD ET D’APPAREILS USB Cette section décrit le fonctionnement de l’appareil pour la lecture de plages/fichiers sur CD/appareils USB. • Quand vous arrêtez puis relancez la lecture du CD/de l’appareil USB, cet appareil reprend la lecture de la dernière plage lue depuis le début.
  • Page 40: Écoute D'un Cd De Données

    ÉCOUTE D’UN CD ET D’APPAREILS USB Écoute d’un CD de données Les touches suivantes pilotent la lecture de plages sur CD de Panneau supérieur données. Touche Fonction AUTO BEEP SOURCE + BEEP SOURCE CLOCK DIMMER ALARM TYPE Lecture/pause Saut Recherche arrière/avant Panneau (maintenir enfoncé) LABEL SIDE...
  • Page 41: Écoute D'un Appareil Usb

    ÉCOUTE D’UN CD ET D’APPAREILS USB Écoute d’un appareil USB Les touches suivantes pilotent la lecture de plages sur Panneau supérieur appareils USB. SOURCE + BEEP AUTO BEEP Touche Fonction SOURCE CLOCK ALARM TYPE DIMMER Lecture/pause Saut Panneau Recherche arrière/avant LABEL SIDE supérieur (maintenir enfoncé)
  • Page 42: Écoute De Musique Avec Votre Périphérique Bluetooth

    (Cette procédure ou l’affichage peut varier selon votre type d’iPod touch/iPhone/iPad.) Dans la liste des connexions Bluetooth du périphérique de connexion, choisissez cet appareil (ISX-803 Yamaha). Une fois le jumelage terminé, votre iPod touch/iPhone/iPad indique « Connecté ». Indicateur Bluetooth L’indicateur Bluetooth de l’afficheur de cet appareil s’allume.
  • Page 43: Écoute D'un Périphérique Bluetooth

    (pour plus de détails, lisez le mode d’emploi du smartphone). Sur le smartphone, cet appareil est désigné comme suit : « ISX-803 Yamaha ». Repère • Si vous êtes invité à saisir un code, saisissez les chiffres « 0000 ».
  • Page 44 Dans les réglages Bluetooth du périphérique de connexion, activez la fonction Bluetooth. Dans la liste des connexions Bluetooth du périphérique de connexion, choisissez cet appareil (ISX-803 Yamaha). La connexion Bluetooth est établie et l’indicateur Bluetooth de l’afficheur de cet appareil s’allume.
  • Page 45: Écoute De Stations Fm

    ÉCOUTE DE STATIONS FM Sélection de la station FM Appuyez sur SOURCE et choisissez FM comme Panneau supérieur source de lecture. AUTO BEEP SOURCE + BEEP SOURCE DIMMER CLOCK ALARM TYPE Fréquence LABEL SIDE réception VOLUME SOURCE ALARM SNOOZE SLEEP PRESET Utilisation de la télécommande Appuyez sur RADIO.
  • Page 46: Rappel D'une Présélection Fm

    ÉCOUTE DE SOURCES EXTERNES Rappel d’une présélection FM Appuyez sur SOURCE et choisissez FM comme Panneau supérieur source de lecture. SOURCE + BEEP AUTO BEEP SOURCE DIMMER CLOCK ALARM TYPE Appuyez plusieurs fois sur PRESET pour choisir la présélection voulue. Utilisation de la télécommande LABEL SIDE Appuyez sur PRESET...
  • Page 47: Utilisation De La Fonction D'alarme

    UTILISATION DE LA FONCTION D’ALARME Cet appareil est doté d’une fonction d’alarme (IntelliAlarm) qui vous permet de lire les sources musicales souhaitées et/ou de déclencher une sonnerie (alarme intégrée) à l’heure prédéfinie. Voici les caractéristiques de la fonction d’alarme. 3 types d’alarmes Les 3 types d’alarmes permettent de combiner de la musique avec la sonnerie.
  • Page 48: Réglage De L'heure Du Réveil Et Du Type D'alarme

    UTILISATION DE LA FONCTION D’ALARME Réglage de l’heure du réveil et du type d’alarme (si vous avez choisi un type d’alarme autre que Panneau supérieur BEEP) Appuyez sur SOURCE pour sélectionner la SOURCE + BEEP AUTO BEEP SOURCE source musicale. DIMMER CLOCK ALARM TYPE...
  • Page 49: Activation/Désactivation De L'alarme

    UTILISATION DE LA FONCTION D’ALARME Activation/désactivation de l’alarme Appuyez sur ALARM. Panneau supérieur Quand l’alarme est activée, le témoin d’alarme ( AUTO BEEP s’allume et l’heure de l’alarme s’affiche quelques instants. Si DIMMER CLOCK ALAR vous appuyez à nouveau sur ALARM, l’indicateur d’alarme ) s’éteint et l’alarme est coupée.
  • Page 50: Réglage De La Fonction Weekly Alarm

    UTILISATION DE LA FONCTION D’ALARME Réglage de la fonction Weekly Alarm Grâce à l’application DTA CONTROLLER (☞ P. 6), vous pouvez utiliser la fonction Weekly Alarm, qui vous permet de régler des alarmes pour chaque jour de la semaine. Vous devez tout d’abord effectuer les réglages Weekly Alarm sur l’application DTA CONTROLLER. Réglage de Weekly Alarm avec DTA CONTROLLER Appuyez sur (icône IntelliAlarm) dans...
  • Page 51: Utilisation De La Minuterie

    UTILISATION DE LA MINUTERIE Vous pouvez définir le délai avant la mise en veille automatique du système. Appuyez plusieurs fois sur SNOOZE/SLEEP pour Panneau supérieur choisir le délai avant la mise en veille du système. AUTO BEEP SOURCE + BEEP SOURCE DIMMER CLOCK...
  • Page 52: Guide De Dépannage

    Si cet appareil ne semble pas fonctionner normalement, vérifiez les points de la liste suivante. Si l’anomalie constatée n’est pas mentionnée ou si les mesures suggérées sont sans effet, mettez le système en mode veille, débranchez le cordon d’alimentation et adressez-vous au revendeur ou service après-vente Yamaha le plus proche. Généralités...
  • Page 53: Lecture D'un Appareil Usb

    GUIDE DE DÉPANNAGE Lecture d’un appareil USB Anomalies Causes possibles Solution Un fichier MP3/WMA sur l’appareil USB L’appareil USB n’est pas détecté. Mettez le système en mode veille et déconnectez le dispositif USB. Mettez le système sous tension et ne peut pas être lu. rebranchez le dispositif USB.
  • Page 54: Réception De Stations Fm

    GUIDE DE DÉPANNAGE Réception de stations FM Anomalies Causes possibles Solution Trop de bruit. L’antenne n’est pas convenablement raccordée. Vérifiez que l’antenne est correctement raccordée (☞ P. 3) ou utilisez une antenne extérieure disponible dans le commerce. Trop de parasites pendant l’écoute d’une La station sélectionnée est trop éloignée, ou bien la Essayez d’effectuer la syntonisation manuellement réception des ondes est médiocre dans la région où...
  • Page 55: Remarques Sur Les Disques Et Appareils Usb

    à cet appareil. * CD-R/RW au format ISO 9660 • Yamaha décline toute responsabilité quant aux dommages ou pertes de données enregistrées sur le dispositif USB pouvant se produire lorsqu’un dispositif est relié à cet appareil.
  • Page 56: Caractéristiques Techniques

    CARACTÉRISTIQUES TECHNIQUES LECTEUR SYNTONISEUR • Plage de syntonisation • Supports................CD, CD-R/RW Modèles pour les États-Unis et le Canada....87,5 à 107,9 MHz • Format audio............CD audio, MP3, WMA Autres modèles............87,5 à 108,0 MHz Laser GÉNÉRALITÉS • Type ..........Laser semi-conducteur GaAs/GaAlAs •...
  • Page 57 • Yamaha ne garantit pas toutes les connexions sans fil entre cet appareil et les appareils compatibles avec la fonction Bluetooth. SÉCURITÉ LASER L’appareil utilise un laser.
  • Page 58: Precauciones De Seguridad Importantes

    Dado que a menudo el daño auditivo como resultado de sonidos a alto volumen no se puede detectar hasta que es demasiado tarde, Yamaha y el Grupo de Electrónica de Consumo de la Asociación de Industrias Electrónicas le recomendamos que evite la exposición...
  • Page 59 FCC. Las modificaciones no aprobadas apagando el aparato, intente por favor eliminar el expresamente por Yamaha podrían invalidar la autoridad problema empleando una de las siguientes medidas: del usuario, concedida por la FCC, para usar el producto.
  • Page 60 DESCARGA ELÉCTRICA, NO EXPONGA ESTE APARATO aparato y/o lesiones a las personas. Yamaha no se hará A LA LLUVIA NI A LA HUMEDAD. responsable de ningún daño debido al uso de este aparato con una tensión diferente de la especificada.
  • Page 61: Accesorios Incluidos

    CONTENIDO NOMBRES DE LAS PARTES Y SUS FUNCIONES ....2 USAR LA FUNCIÓN DE ALARMA..........15 AJUSTE DEL RELOJ ..............5 USAR EL TEMPORIZADOR PARA DORMIR ......19 INSTALACIÓN DE “DTA CONTROLLER” .......6 CONTROL DEL TONO (SOLO MANDO A DISTANCIA) ..19 ESCUCHAR UN CD Y UN DISPOSITIVO USB......7 AJUSTE DEL BRILLO DE LA PANTALLA DEL PANEL FRONTAL ................19 ESCUCHAR MÚSICA DESDE EL DISPOSITIVO Bluetooth ..10...
  • Page 62: Nombres De Las Partes Y Sus Funciones

    NOMBRES DE LAS PARTES Y SUS FUNCIONES Panel superior SOURCE + BEEP AUTO BEEP SOURCE DIMMER CLOCK ALARM TYPE LABEL SIDE VOLUME SOURCE ALARM SNOOZE SLEEP PRESET ALARM (Alimentación) Activa o desactiva la alarma y permite ajustar varias Pulse este botón para encender el sistema o ponerlo en modo de configuraciones de alarmas (☞...
  • Page 63: Pantalla Del Panel Delantero

    NOMBRES DE LAS PARTES Y SUS FUNCIONES Pantalla del panel delantero Indicador de reproducción/reproducción aleatoria/repetición Muestra el modo de reproducción (☞ P. 7, 9). Receptor de señales del mando a distancia Indicador de reloj Muestra la manecilla de hora del reloj (☞ P. 5). Indicador de fuente Muestra la fuente seleccionada.
  • Page 64 NOMBRES DE LAS PARTES Y SUS FUNCIONES Mando a distancia Transmisor de señales del mando a distancia (Alimentación) Pulse este botón para encender el sistema o ponerlo en modo de reposo. ALARM Activa o desactiva la alarma. SNOOZE/SLEEP Configure el temporizador para dormir o cambie la alarma al Bluetooth modo de repetición (☞...
  • Page 65: Ajuste Del Reloj

    AJUSTE DEL RELOJ Configuración de la hora Mueva el conmutador CLOCK del panel posterior Panel superior a SET. SOURCE + BEEP AUTO BEEP SOURCE DIMMER CLOCK ALARM TYPE Panel posterior LABEL SIDE VOLUME SOURCE ALARM SNOOZE SLEEP PRESET Programe la hora con Programar la hora (parpadeando) Mueva el conmutador CLOCK del panel posterior...
  • Page 66: Instalación De "Dta Controller

    • Ajuste de la función de alarma (IntelliAlarm) (☞ P. 18) • Reproducción de canciones guardadas en un iPhone El dispositivo móvil debe estar conectado a la unidad mediante conexión Bluetooth (☞ P. 10). Google Play https://play.google.com/store/apps/ http://itunes.com/app/dtacontroller details?id=com.yamaha.av. dtacontroller (Para los usuarios de EE. UU.) https://itunes.apple.com/us/app/dta- controller-us/id549333293?mt=8 Nota...
  • Page 67: Escuchar Un Cd Y Un Dispositivo Usb

    ESCUCHAR UN CD Y UN DISPOSITIVO USB La unidad funcionará del siguiente modo al reproducir pistas o archivos de CD/dispositivos de USB. • Si se detiene el CD/dispositivo de USB que se está reproduciendo, la pista que se estaba reproduciendo empezará a reproducirse desde el principio de la pista la próxima vez que empiece la reproducción.
  • Page 68 ESCUCHAR UN CD Y UN DISPOSITIVO USB Escuchar un CD de datos Use los siguientes botones para controlar la unidad mientras Panel superior reproduce pistas en CD de datos. Botón Función AUTO BEEP SOURCE + BEEP SOURCE CLOCK DIMMER ALARM TYPE Reproducir o poner en pausa Saltar...
  • Page 69: Escuchar Un Dispositivo Usb

    ESCUCHAR UN CD Y UN DISPOSITIVO USB Escuchar un dispositivo USB Use los siguientes botones para controlar la unidad mientras Panel superior reproduce pistas en dispositivos USB. SOURCE + BEEP AUTO BEEP Botón Función SOURCE CLOCK ALARM TYPE DIMMER Reproducir o poner en pausa Saltar LABEL SIDE...
  • Page 70: Escuchar Música Desde El Dispositivo Bluetooth

    (Este procedimiento o visualización puede variar en función del iPod touch/iPhone/iPad.) En la lista de conexiones Bluetooth del otro dispositivo de conexión, seleccione esta unidad (ISX-803 Yamaha). Cuando haya finalizado el proceso de vinculación, en la pantalla del iPod touch/iPhone/iPad aparecerá el mensaje Indicador de Bluetooth “Conectado”.
  • Page 71 Lleve a cabo el proceso de vinculación en el smartphone (para obtener más información, consulte el manual de instrucciones del smartphone). Esta unidad aparece como “ISX-803 Yamaha” en el smartphone. Marca • Si el sistema le pide una contraseña, introduzca los números “0000”.
  • Page 72 En los ajustes de Bluetooth del dispositivo de conexión, active Bluetooth. En la lista de conexiones Bluetooth del otro dispositivo de conexión, seleccione esta unidad (ISX-803 Yamaha). La conexión Bluetooth se establecerá y el indicador Bluetooth del visor del panel frontal de esta unidad se iluminará.
  • Page 73: Escuchar Emisoras Fm

    ESCUCHAR EMISORAS FM Selección de la emisora FM Pulse SOURCE y configure FM como la fuente de Panel superior reproducción. AUTO BEEP SOURCE + BEEP SOURCE DIMMER CLOCK ALARM TYPE Frecuencia LABEL SIDE recepción VOLUME SOURCE ALARM SNOOZE SLEEP PRESET En el mando a distancia Pulse RADIO.
  • Page 74: Panel Superior

    ESCUCHAR UNA FUENTE EXTERNA Selección de una emisora de FM presintonizada Pulse SOURCE y configure FM como la fuente de Panel superior reproducción. AUTO BEEP SOURCE + BEEP SOURCE DIMMER CLOCK ALARM TYPE Pulse PRESET varias veces para seleccionar la emisora FM presintonizada.
  • Page 75: Usar La Función De Alarma

    USAR LA FUNCIÓN DE ALARMA La unidad incluye una función de alarma (IntelliAlarm) que reproduce fuentes de música o conjunto de sonidos (alarma integrada) a la hora establecida con distintos métodos. La función de alarma incluye las siguientes prestaciones. 3 tipos de alarmas Seleccione entre 3 tipos de alarma, que combinan la música con el sonido de pitido.
  • Page 76 USAR LA FUNCIÓN DE ALARMA Ajuste de la hora y del tipo de alarma (cuando se seleccionan tipos de alarmas distintos de Panel superior BEEP) Pulse SOURCE para seleccionar la fuente SOURCE + BEEP AUTO BEEP SOURCE de música. DIMMER CLOCK ALARM TYPE Puede seleccionar cualquier fuente distinta de AUX y...
  • Page 77: Activación/Desactivación De La Alarma

    USAR LA FUNCIÓN DE ALARMA Activación/desactivación de la alarma Pulse ALARM. Panel superior Cuando la alarma está activada, el indicador de alarma ( AUTO BEEP se ilumina y la hora de alarma se muestra por un instante. Si DIMMER CLOCK ALAR pulsa ALARM de nuevo, se desactivarán el indicador de alarma (...
  • Page 78 USAR LA FUNCIÓN DE ALARMA Programación de Weekly Alarm Con DTA CONTROLLER (☞ P. 6), es posible usar la característica Weekly Alarm que permite programar la alarma a horas distintas cada día de la semana. En primer lugar, configure Weekly Alarm en DTA CONTROLLER. Programación de Weekly Alarm con DTA CONTROLLER Toque (icono IntelliAlarm) en DTA...
  • Page 79: Usar El Temporizador Para Dormir

    USAR EL TEMPORIZADOR PARA DORMIR Puede programar la hora hasta la que el sistema entra automáticamente en modo de reposo. Pulse SNOOZE/SLEEP varias veces para Panel superior programar el tiempo hasta que el sistema entra en AUTO BEEP SOURCE + BEEP SOURCE modo de reposo.
  • Page 80: Solución De Problemas

    Si tiene algún problema con la unidad, compruebe primero la siguiente lista. Si no puede solucionar su problema con las siguientes soluciones o si el problema no está en la lista, ponga el sistema en modo de reposo, desenchufe la unidad y, a continuación, consulte al concesionario o centro de servicio Yamaha autorizado más cercano. General...
  • Page 81: Reproducción De Un Dispositivo Usb

    SOLUCIÓN DE PROBLEMAS Reproducción de un dispositivo USB Problema Causa Solución No se reproduce un archivo MP3/WMA La unidad no reconoce el dispositivo USB. Ponga el sistema en modo de reposo y desconecte el dispositivo USB. Seguidamente, encienda el del dispositivo USB. sistema y vuelva a conectar el dispositivo USB.
  • Page 82: Mando A Distancia

    SOLUCIÓN DE PROBLEMAS Recepción de la radio FM Problema Causa Solución Hay demasiado ruido. Es posible que la antena esté conectada de forma Compruebe que la antena está conectada incorrecta. correctamente (☞ P. 3) o utilice una antena para exterior disponible en tiendas. Hay demasiado ruido durante la emisión Es posible que la emisora de radio que ha Intente sintonizar la emisora manualmente para...
  • Page 83: Notas Sobre Los Discos Y Los Dispositivos Usb

    * CD-R/RW formato ISO 9660 • Yamaha no se responsabilizará de los daños causados o las pérdidas de datos en el dispositivo USB que tengan lugar cuando el dispositivo esté conectado a esta unidad.
  • Page 84: Especificaciones

    ESPECIFICACIONES REPRODUCTOR TUNER • Margen de sintonía • Multimedia ................CD, CD-R/RW Modelos para EE.UU. y Canadá ......De 87,5 a 107,9 MHz • Formato de audio............Audio CD, MP3, WMA Otros modelos ............. De 87,5 a 108,0 MHz Láser GENERALIDADES • Tipo............Láser semiconductor GaAs/GaAlAs •...
  • Page 85 • Yamaha no garantiza todas las conexiones inalámbricas entre esta unidad y dispositivos compatibles con la función Bluetooth. SEGURIDAD CONTRA LA RADIACIÓN LÁSER Esta unidad utiliza rayos láser.
  • Page 88 Printed in China ZN79990 © 2014 Yamaha Corporation...

Table des Matières